
 Advanced Creators
Ferrari F8 Tributo
Alpha Model AM02-0032 · Build by breakwong
Chapter 1: Car Information
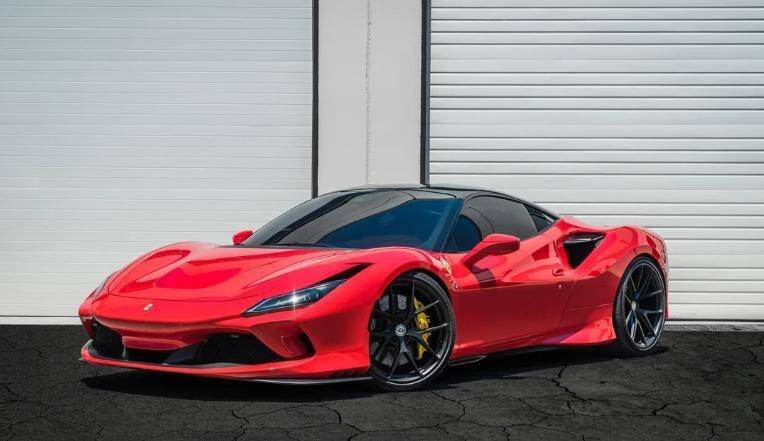
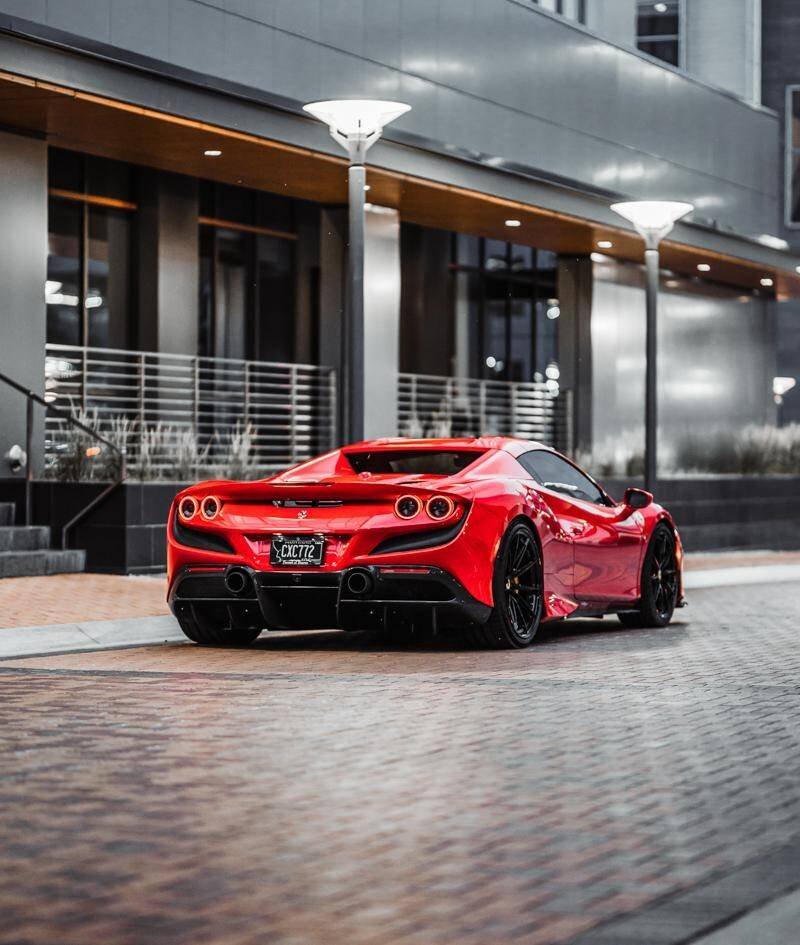
The F8 Tributo — the most powerful V8-powered Ferrari produced to date.
Engine & Powertrain
The F8 Tributo uses the same engine from the 488 Pista, a 3.9 L twin-turbocharged V8 engine with a power output of 530 kW; 710 hp (720 PS) at 8000 rpm and 770 N·m (568 lb·ft) of torque at 3250 rpm, making it the most powerful V8-powered Ferrari produced to date. The exhaust layout and the Inconel manifolds have been completely modified up to the terminals. The F8 Tributo utilizes rev sensors, originally developed for the 488 Challenge, to optimize turbocharger efficiency based on power demand from the pedal. It uses a 7-speed dual-clutch automatic transmission with enhanced gear ratios.
Technology & Aerodynamics
Several new software features are installed on the F8 which are controlled via the manettino dial on the steering wheel. The car is equipped with Ferrari's latest Side Slip Angle Control traction and stability-control program. Additionally, the Ferrari Dynamic Enhancer, an electronic program for managing drifts, can now be used in the Race drive mode. Ferrari also stated that the Tributo's downforce has been increased by 15 percent as compared to the 488 GTB.
| 0–100 km/h | Power Output | Torque | Top Speed |
|---|---|---|---|
| 2.9s | 710 hp | 770 N·m | 340 km/h |
Performance Figures
Claimed manufacturer performance for the F8 Tributo is 0–100 km/h (0–62 mph) in 2.9 seconds, 0–200 km/h (0–124 mph) in 7.6 seconds, with a top speed of 340 km/h (211 mph). Road & Track tested a US-spec Ferrari F8 Tributo model and achieved a 10.3-second quarter-mile time with a 132.8 mph (214 km/h) trap speed, which equates to 0–100 km/h in the mid-3 range and 0–200 km/h in the low-10 range.
Chapter 2: Unboxing & Preparation
Check for transport damage, inspect the etching sheet and decals, and prepare your tools for the build.
Step 1 — Check for Transport Damage
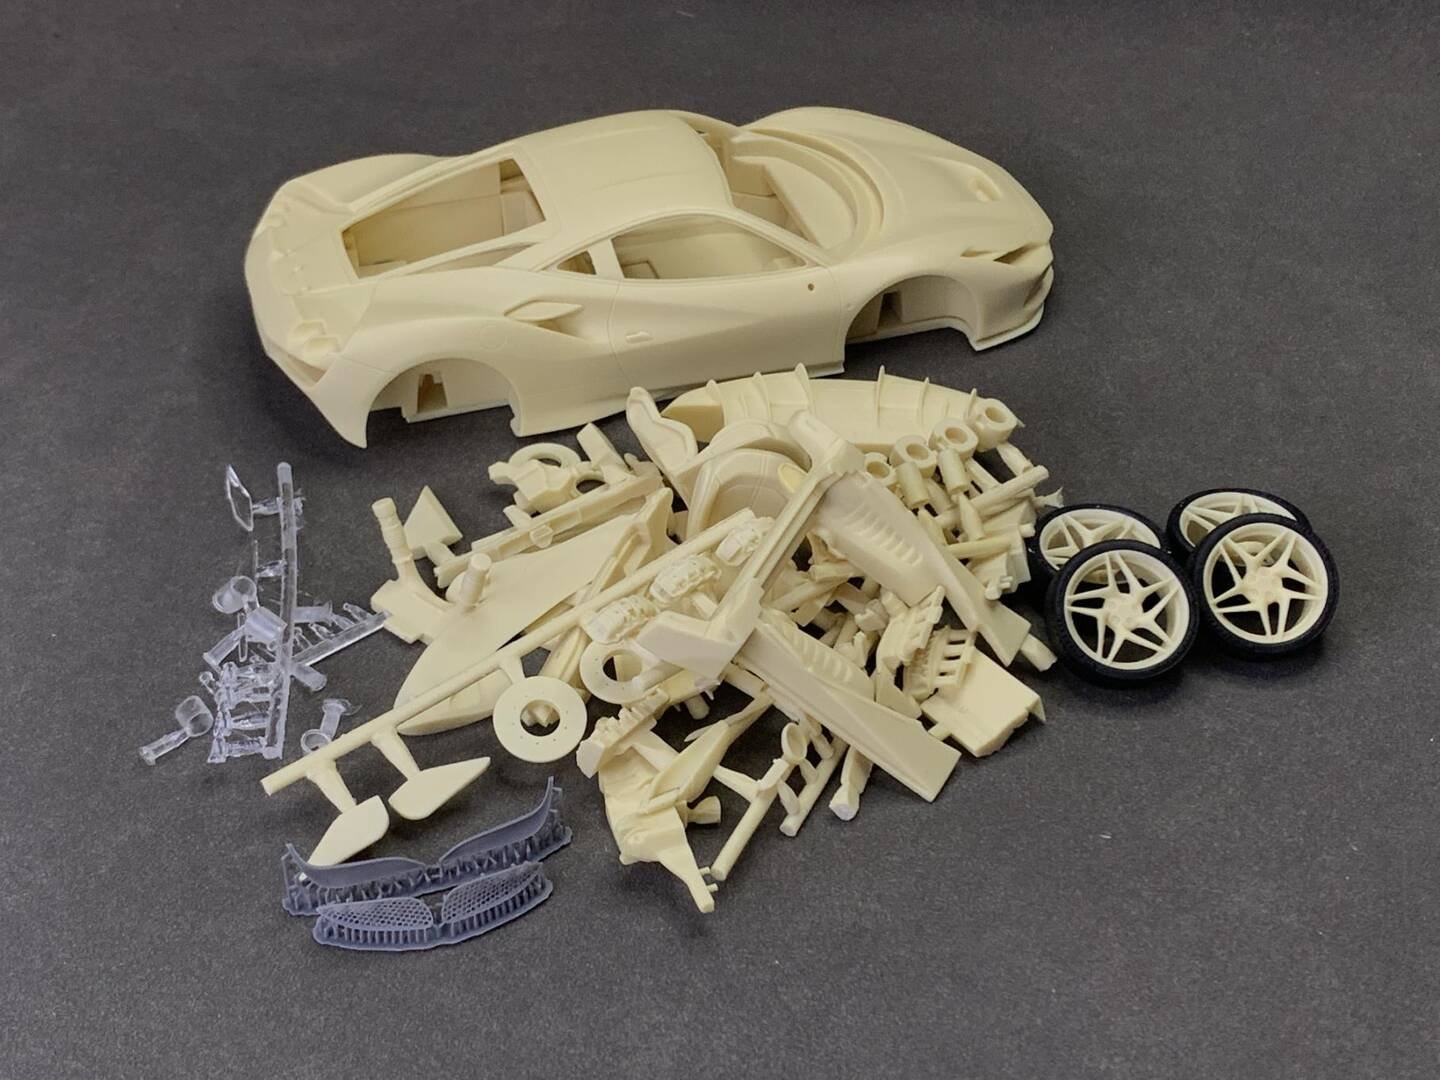
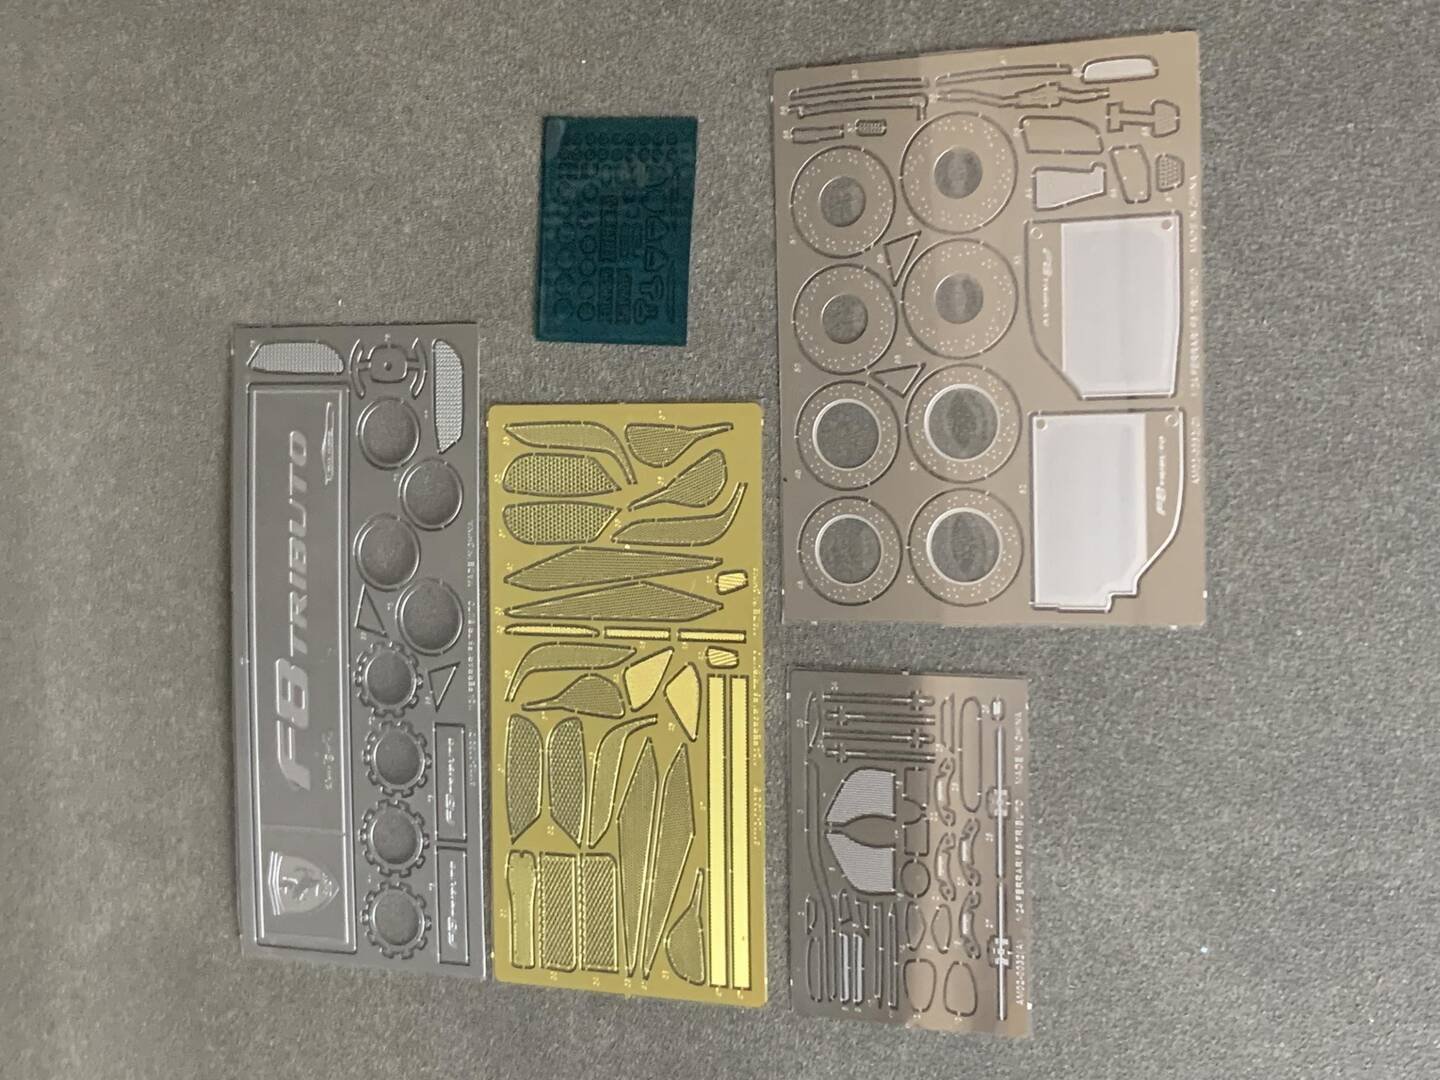
After opening the product package, take out all the parts bags and the car body. Because the product will be damaged in the transportation process through the logistics company, first of all, check whether the parts are damaged. The more easily damaged parts are the A-pillar of the car shell, brake calipers, rims and other small parts. After confirming that the parts are not damaged, please check whether the etching sheet is bent and damaged and whether the water slide decals are stained.
Step 2 — Etching Sheet Nameplate
Alpha Model will make a nameplate corresponding to the car model in the etching sheet of each set of products. Players can color the nameplate and put it in the display box with the finished car, which is very advanced.
Body Shell Precision
Alpha Model's products are precise in mold opening, especially in the production technology of the car shell, which is very mature. The shape of the car shell is precise, the surface is smooth without burrs and shrinking, the engraving is deep, and the edge is sharp. These characteristics greatly reduce the difficulty of production, which is very suitable for novices.
Tool Preparation
Each car has its own unique color matching and flower pulling. Before production, you can refer to the real car photos, mark the color of each part on the product manual, to facilitate the use of later coloring. In the production process of this product, we need to prepare some necessary tools in advance, such as: line drawing pen, paper sandpaper, sponge sandpaper, instant glue, tweezers, scribing knife, pen knife, etching sheet bending pliers, etc. With the tools in hand, the production feels good, which can help players to produce high-quality static models more simply.
Cleaning & Degreasing
Use detergent or other greasy detergent suitable for resin materials to clean all parts, because there is a layer of grease release agent on the surface of the workpiece. If it is not cleaned and sprayed directly, there will be problems such as fish eyes, paint fading due to lack of adhesion, etc. After cleaning, it can be dried.
Advanced Creators
Ferrari F8 Tributo
Alpha Model AM02-0032 · Build by breakwong
Chapter 3: Body Shell Work
Sanding the side skirts, deepening panel lines with a 0.15mm scribing knife, and mastering arc techniques.
Step 1 — Sanding the Side Skirts
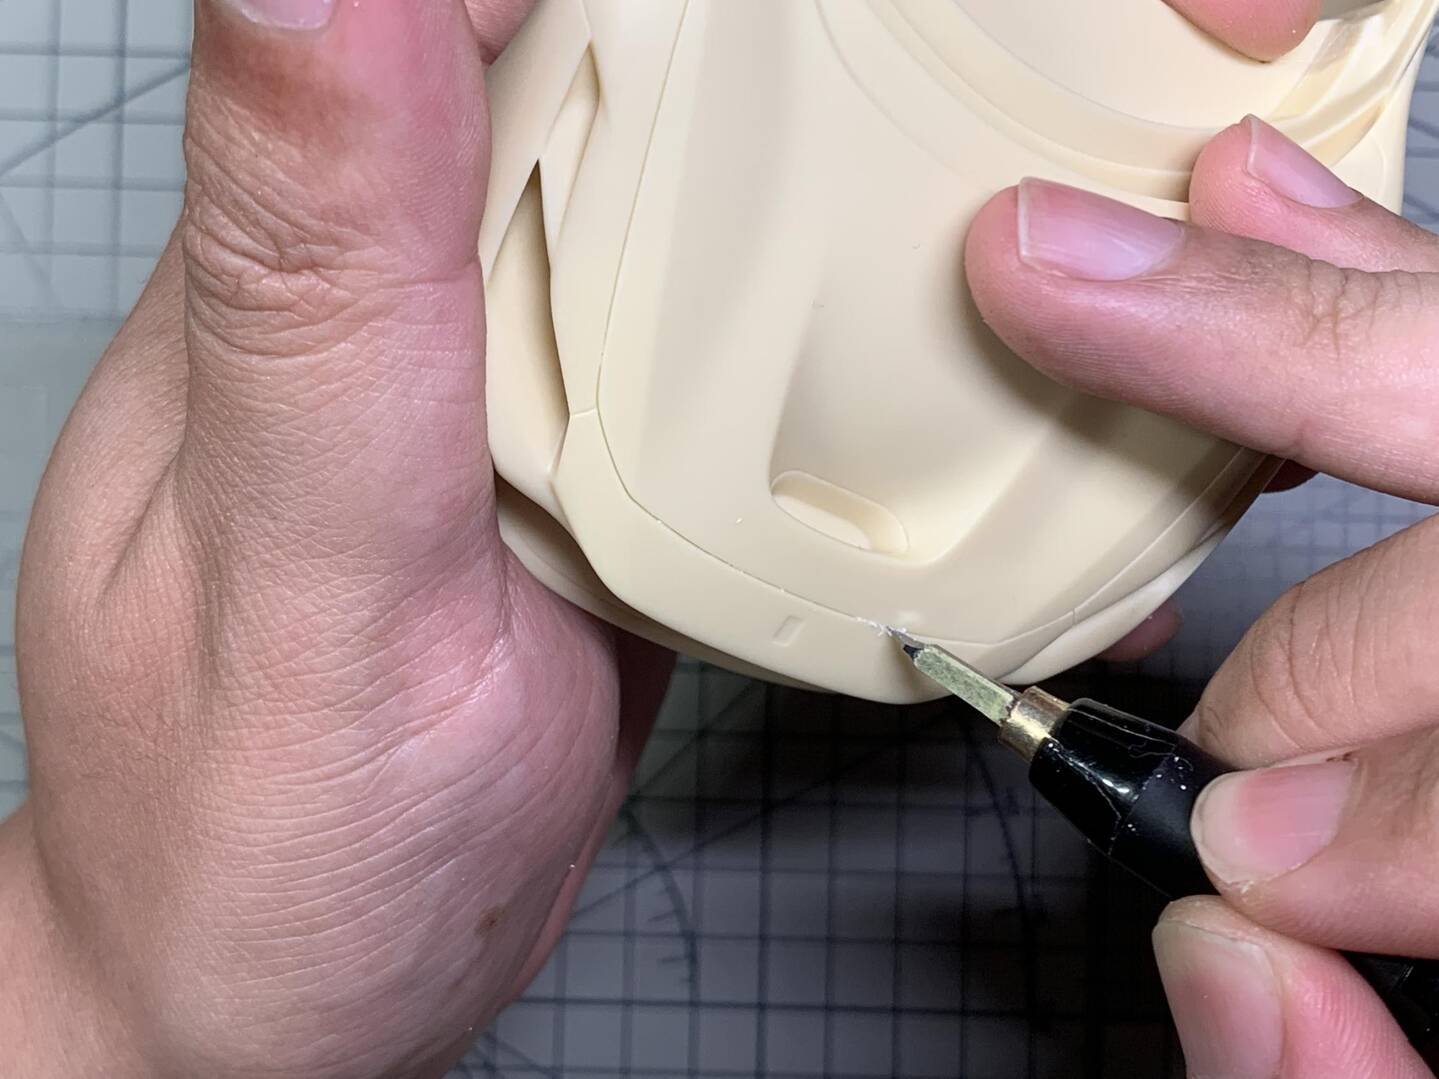
First of all, observe the various parts of the car shell. Generally, there will be some unevenness at the bottom of the side skirt. First, use sandpaper to polish and level it. After confirming that there is no lack of meat and other problems, use a 0.15 caliber scribing knife to deepen the scribing line.
Step 2 — Deepening the Panel Lines
Although the scribing line of the car shell itself is clearer, we need to deepen it manually again. This is to make it more three-dimensional after the completion of the production. You can also consider the impermeable line and use the natural shadow to show the texture of the reticle position.
During scribing, the force shall be from light to heavy. First, gently make a few cuts along the scribe line, and then slowly apply pressure. At the position of the arc, use the elbow scribing knife to deepen the scribe line.
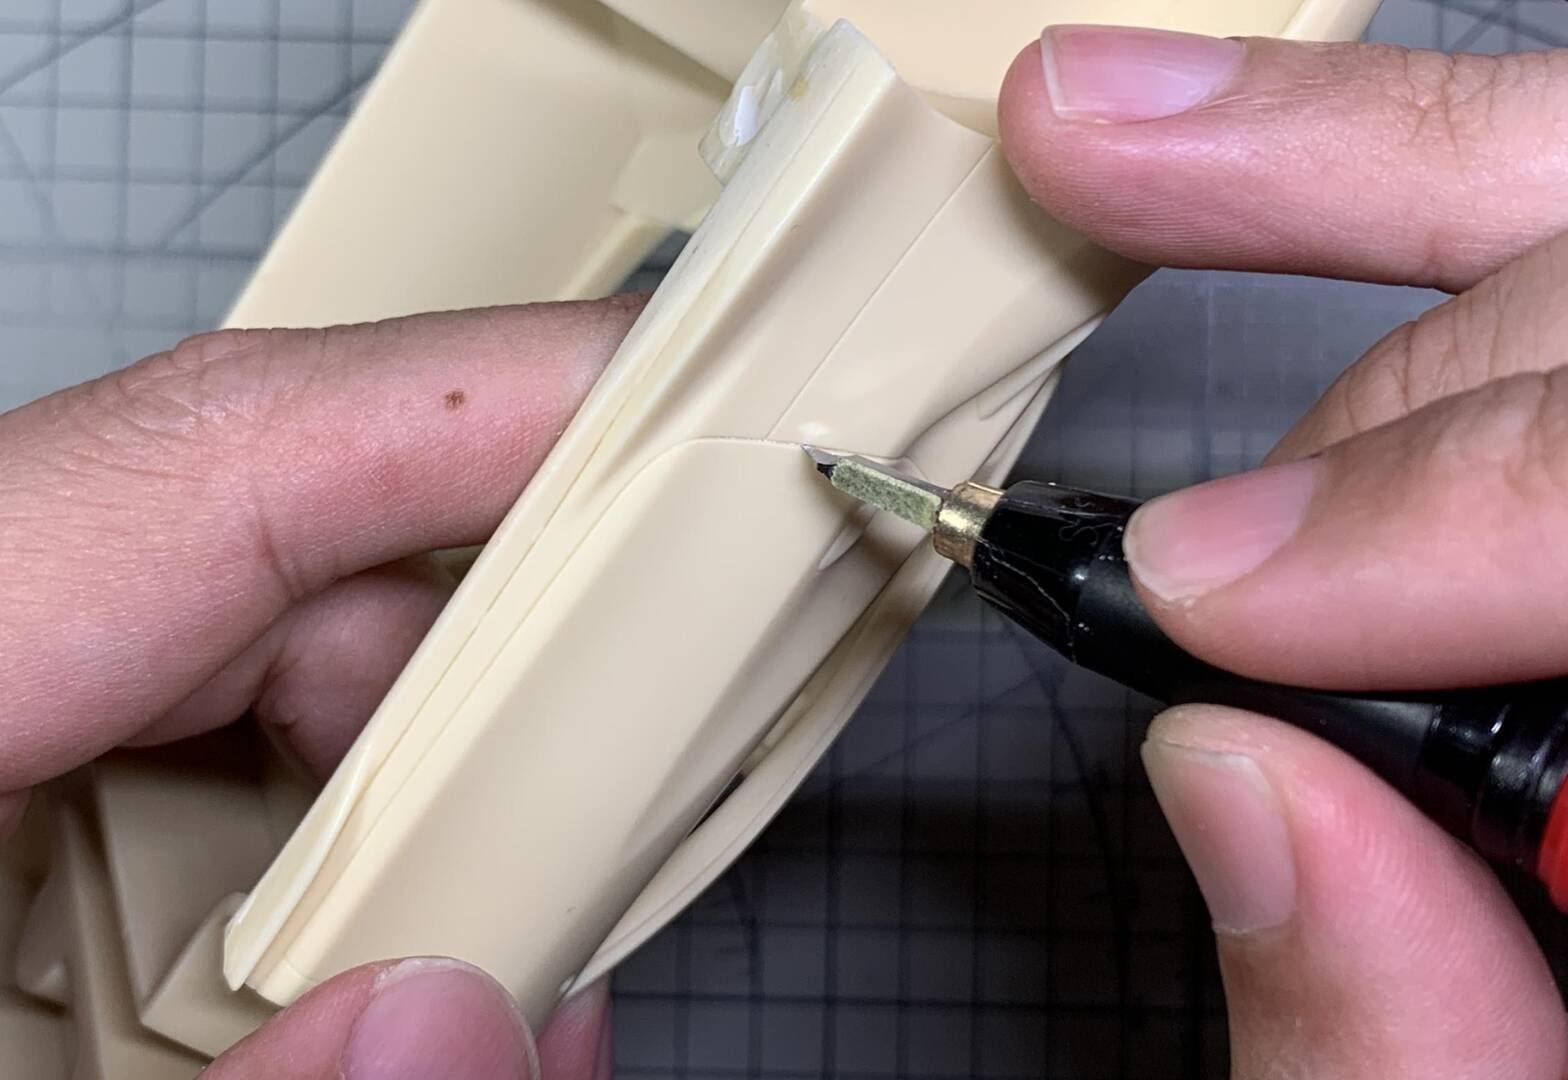
Arc Scribing Technique
If there is no elbow scribing knife, do not carve out of the boundary when using the straight scribing knife to deepen, so as to avoid more trouble. Pay attention to the angle of the knife head, and do not carve the scribe line with radian into a straight line.
Chapter 4: Filling Primer
Paper sandpaper, sponge sandpaper, spray filler to check defects, and expanding the side warning light hole to 1.5mm.
Step 1 — Paper & Sponge Sandpaper
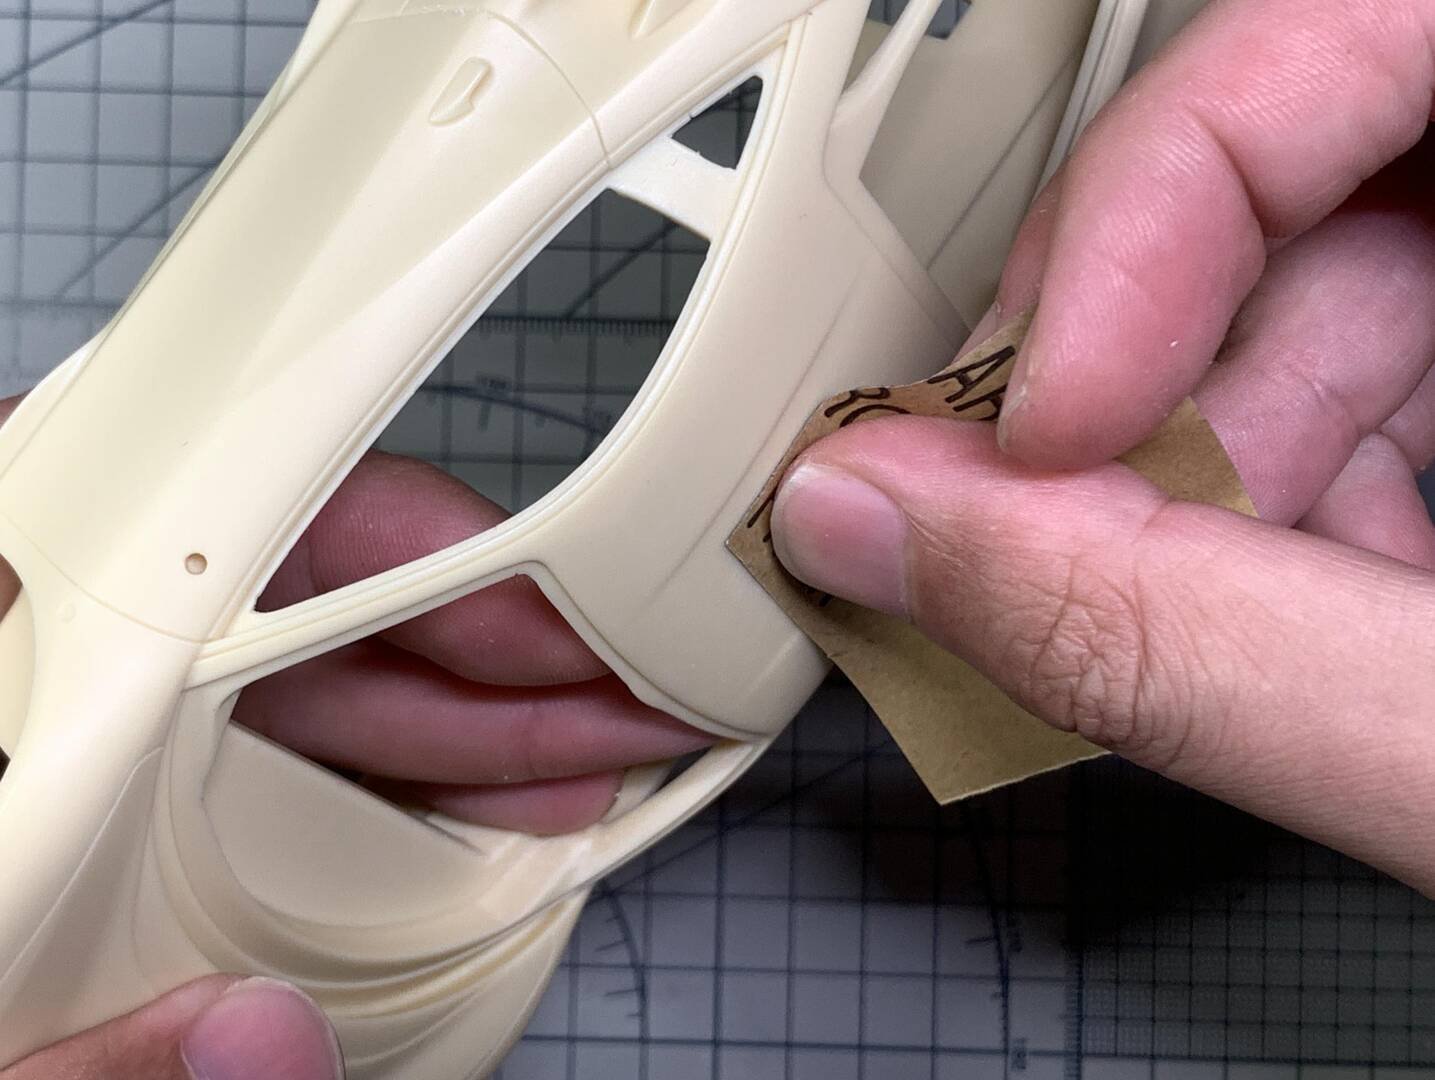
After polishing and leveling the whole body with paper sandpaper, it is necessary to use sponge sandpaper to remove the rough polishing marks. After polishing, a layer of filling soil can be sprayed to check the defects.
Step 2 — Expanding the Side Warning Light Hole
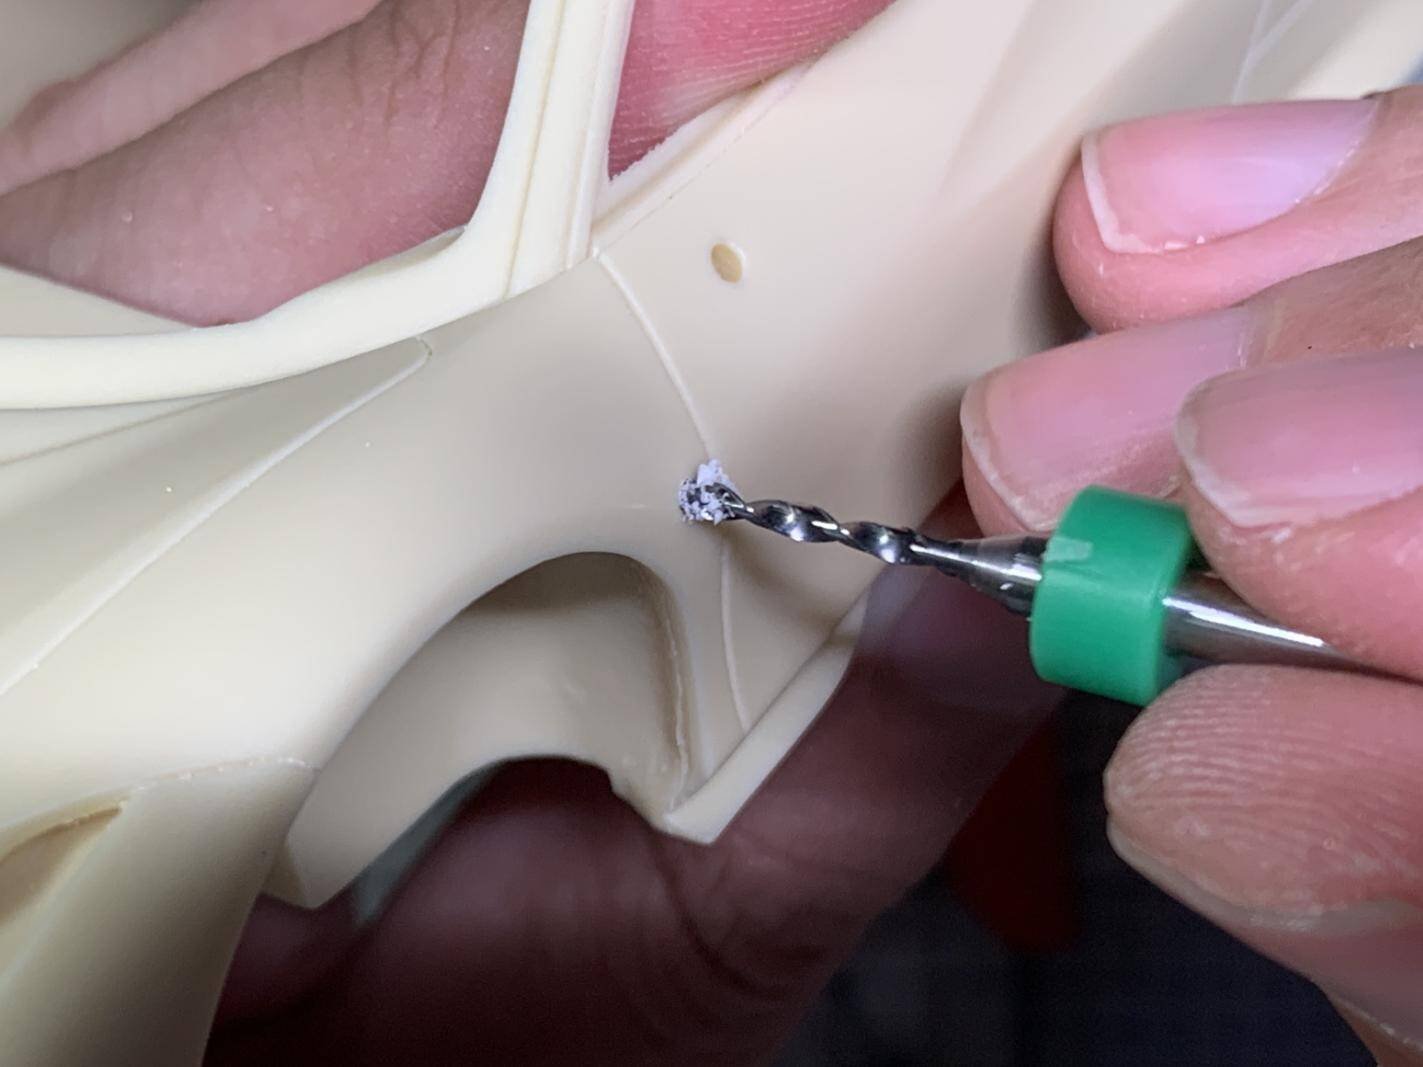
The position hole of the side warning light needs to be expanded again. Use a drill bit of 1.5 mm to drill a few times. Do not deepen the hole, otherwise the lamp bead will be too inward after installation.
Advanced Creators
Ferrari F8 Tributo
Alpha Model AM02-0032 · Build by breakwong
Chapter 5: Painting
MR. HOBBY C158 Super Italian Red — white primer, yellow base, and main color for a full, vibrant finish.
Step 1 — White Primer
Before spraying the main color, I need to spray white water to fill the soil to unify the background color.
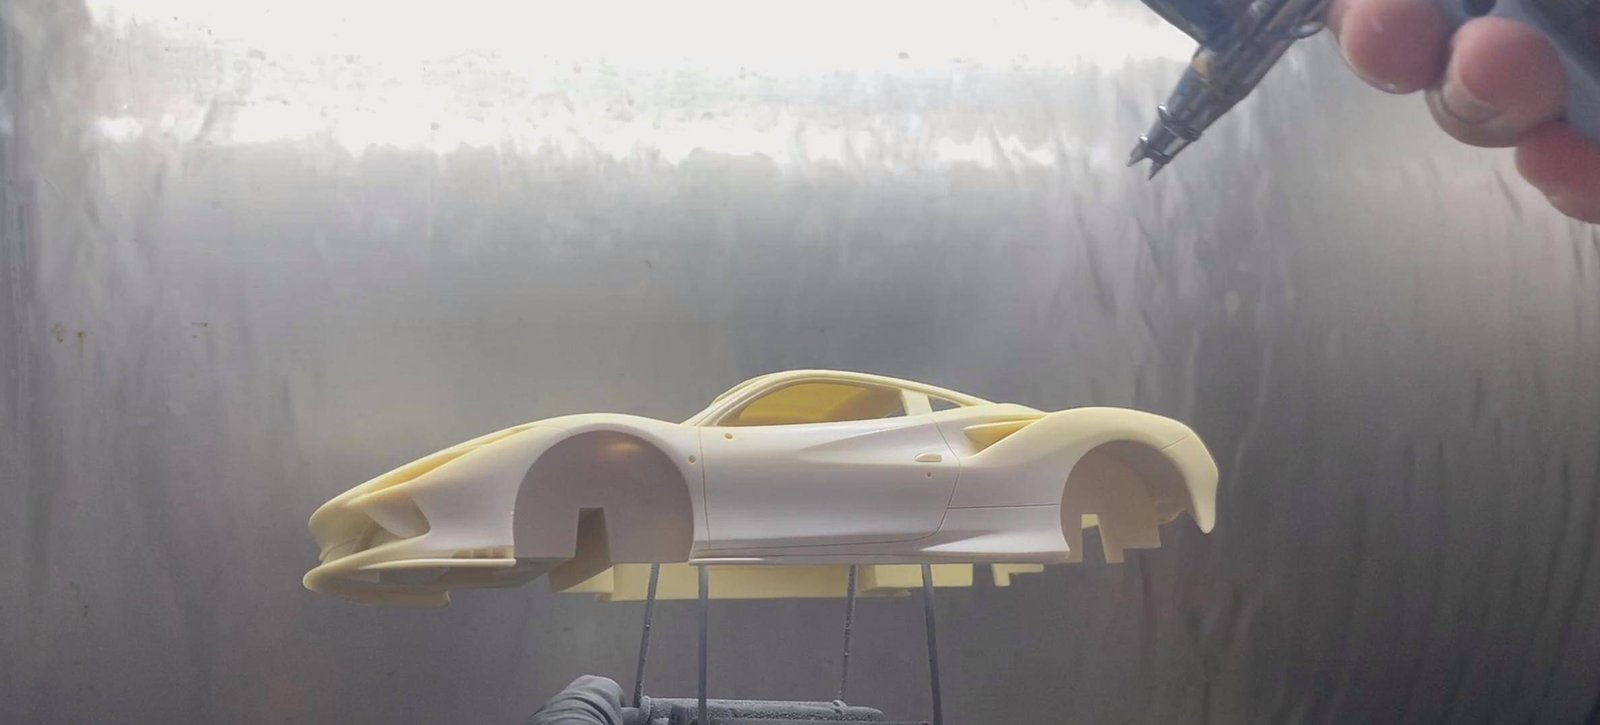
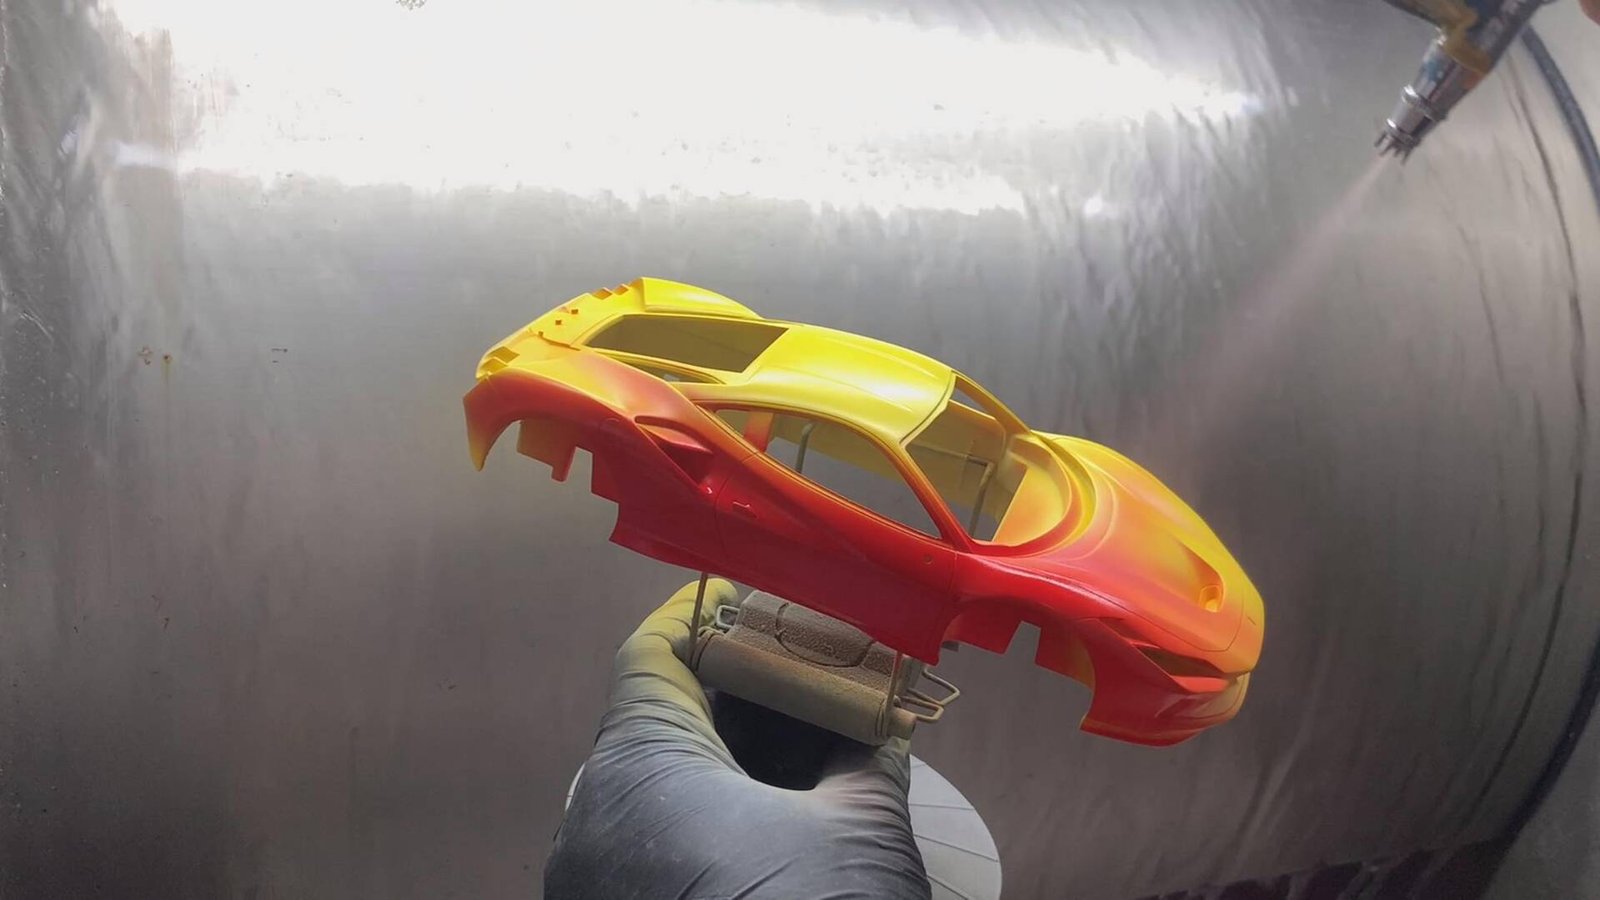
Step 2 — Yellow Base & Main Color
Then spray a layer of yellow evenly as the background color, and finally spray the main color. This can make the color of the car more full, and it can show orange after polarization under the natural light source, which is more bright.
Advanced Creators
Ferrari F8 Tributo
Alpha Model AM02-0032 · Build by breakwong
Chapter 6: Carbon Fibre Decals
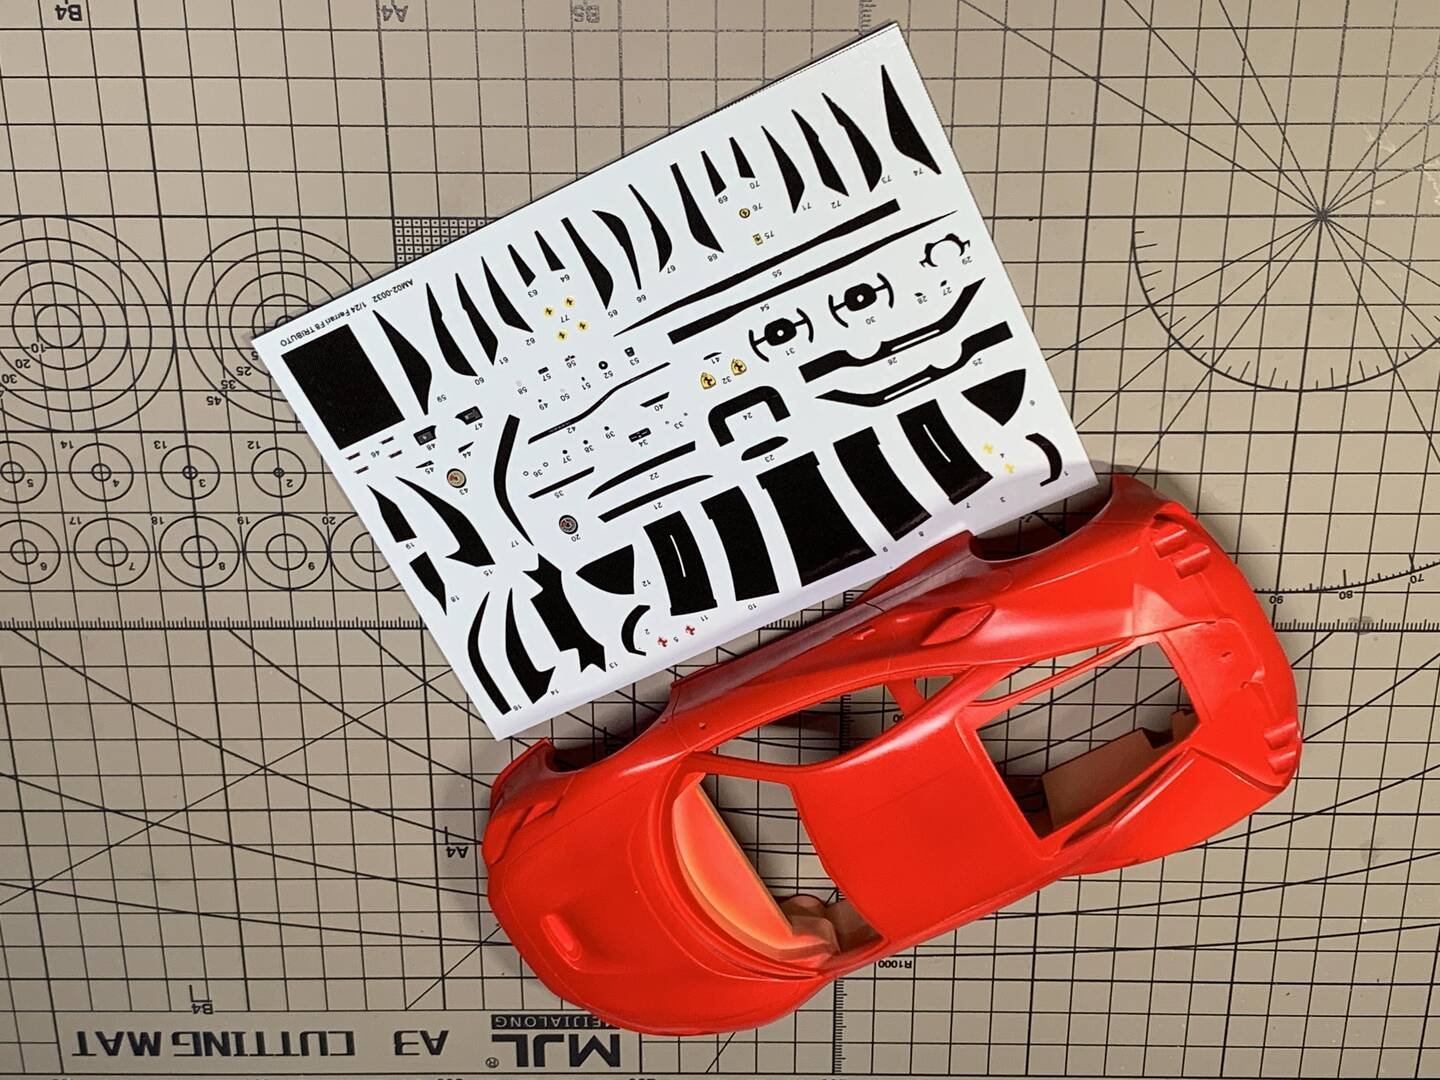
Applying carbon fiber water slide decals to four key positions: front grille, lower side, hood, and side skirt.
When the body paint is dry, you can paste the carbon fiber decals on the body. First, cut the decals that need to be pasted in the four positions of the front grille, the lower side, the hood and the side skirt, then soak them in water for about 20 seconds, use tweezers to gently clamp them and transfer them to the body, adjust the position, and then use them to gently squeeze out the excess water.
Finally, use a hot air gun to blow soft and compact with a cotton swab.
Chapter 7: Color Separation
Red and black two-tone — engine cover rear, A-pillar and cockpit in black, with expert masking techniques.
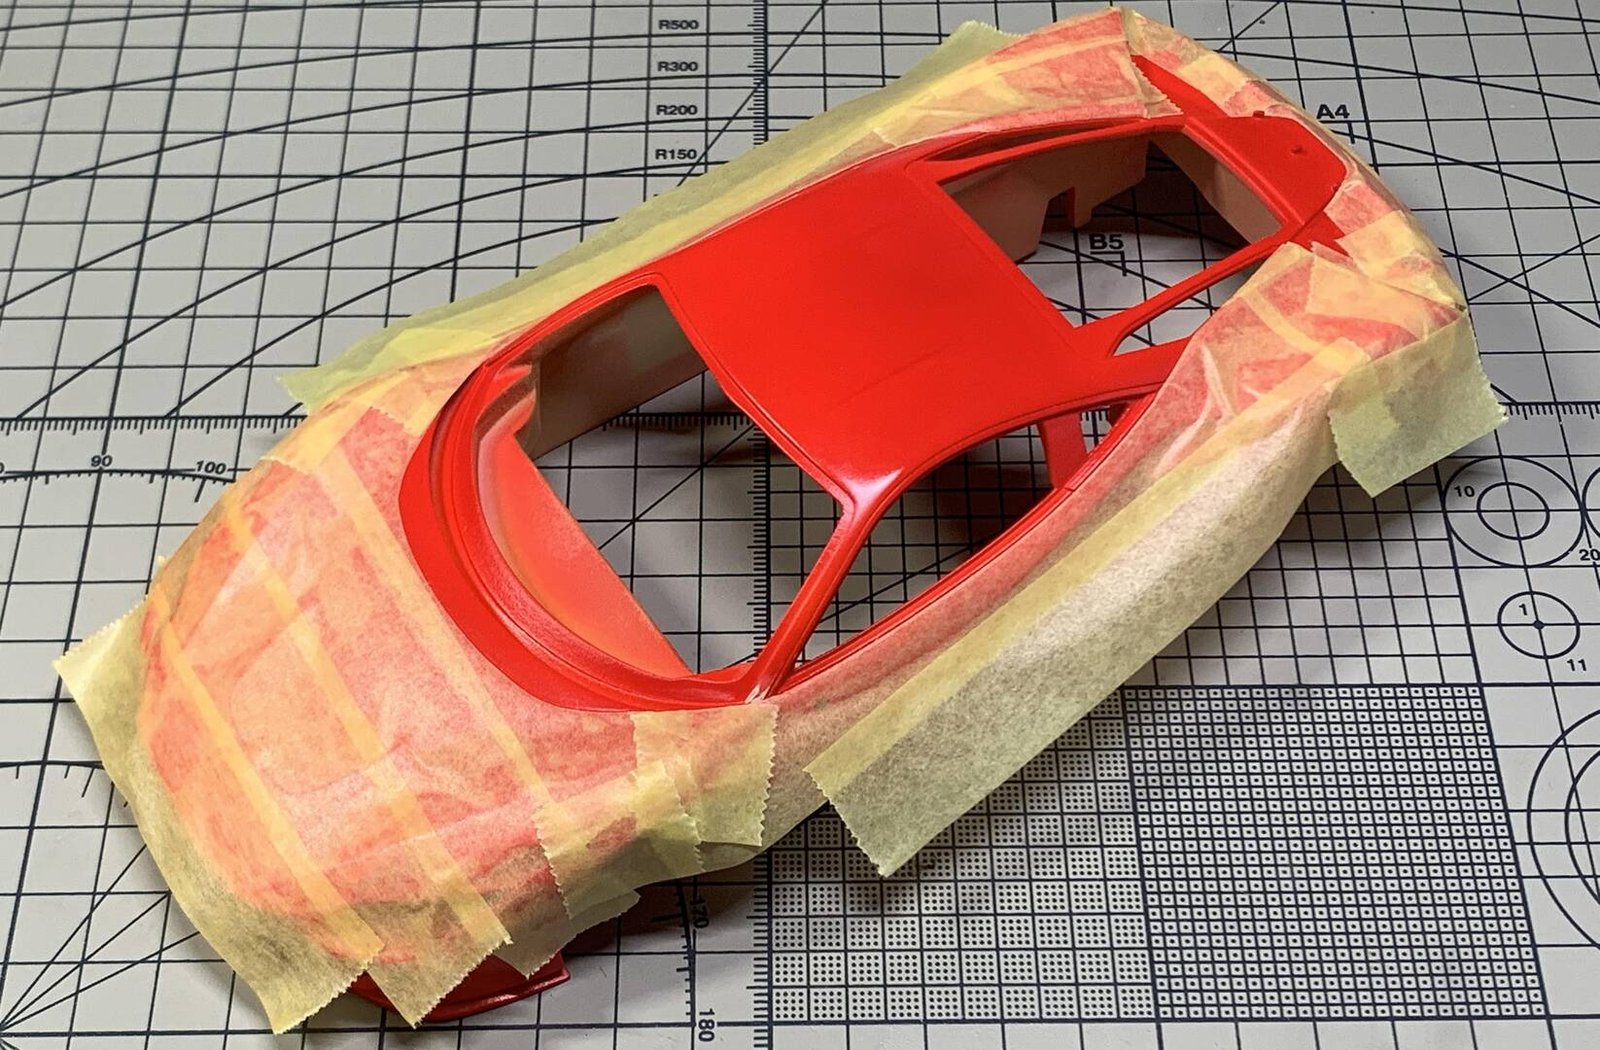
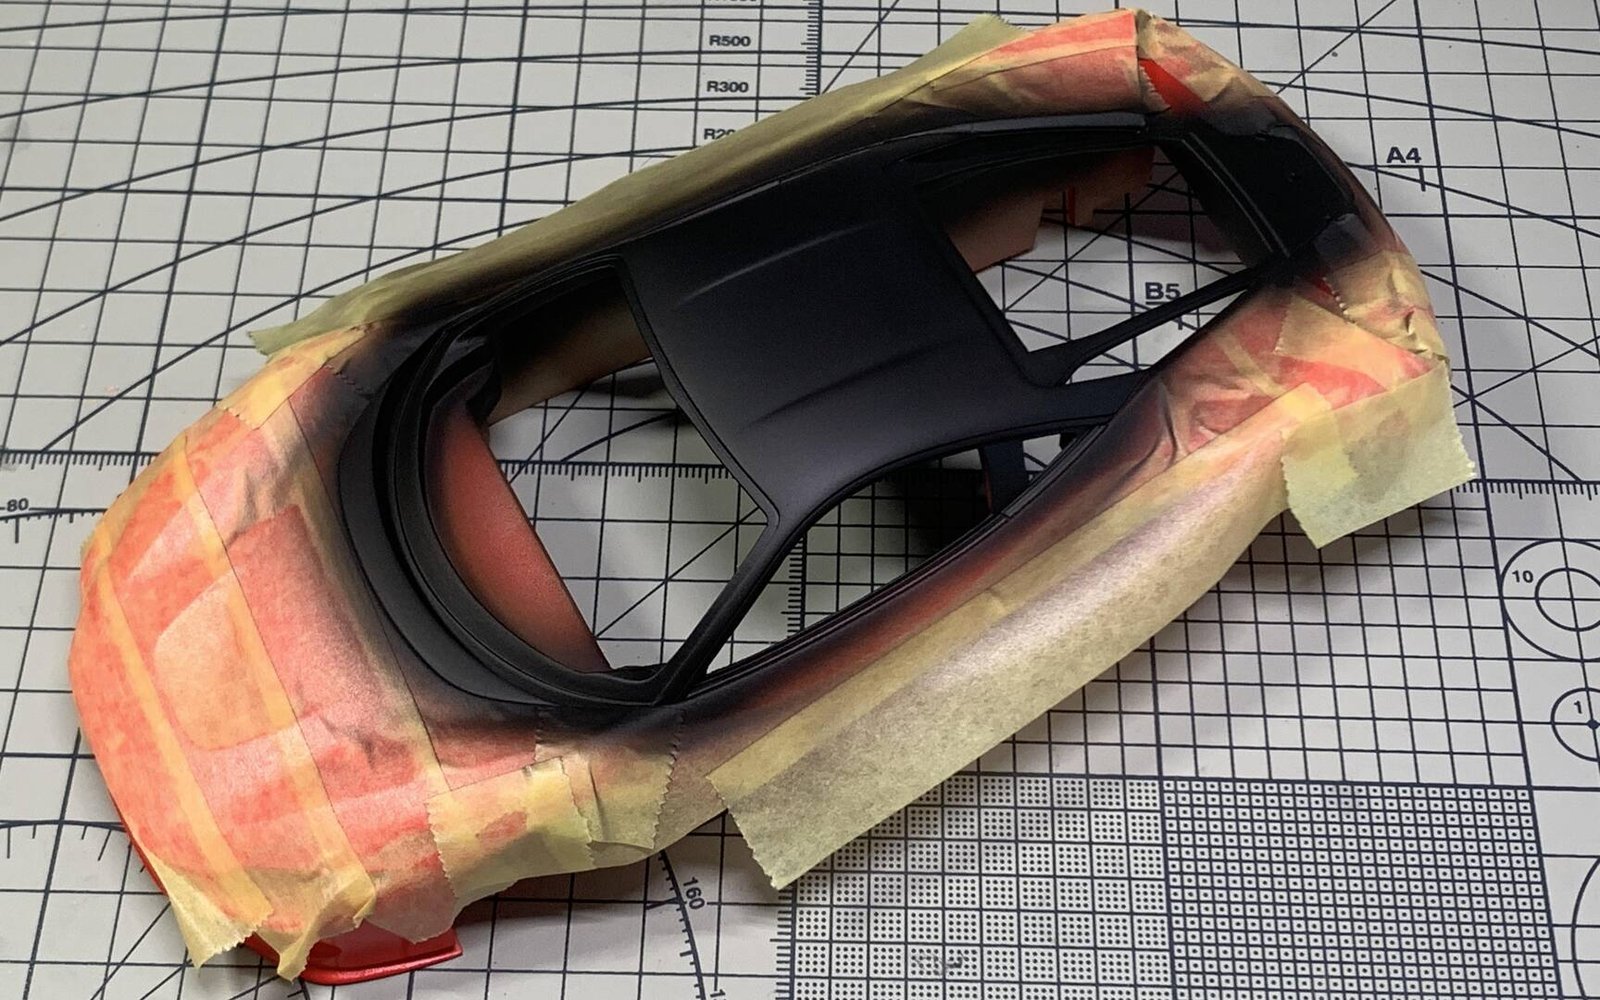
After sticking the water sticker, you can separate the body colors. I chose red and black for this car. The rear part of the front engine cover and the A-pillar are black, and the interior of the cockpit is also black.
Masking Tips
After covering the body, dust may fall on it. Here we recommend using Tamiya 74078 anti-static brush to clean up the dust. In addition, the covering paper must be cut with a penknife before use, otherwise the edge will be irregular, affecting the overall appearance. Before spraying the second color, all the edges of the covering paper should be compacted and confirmed before coloring, so as to avoid the edge paint leakage and increase the workload.
Advanced Creators
Ferrari F8 Tributo
Alpha Model AM02-0032 · Build by breakwong
Chapter 8: Diffuser Decals
Spraying black first, then applying carbon fiber decals with pointed cotton swabs and careful hot air gun temperature control.
Step 1 — Black Base & Carbon Decals
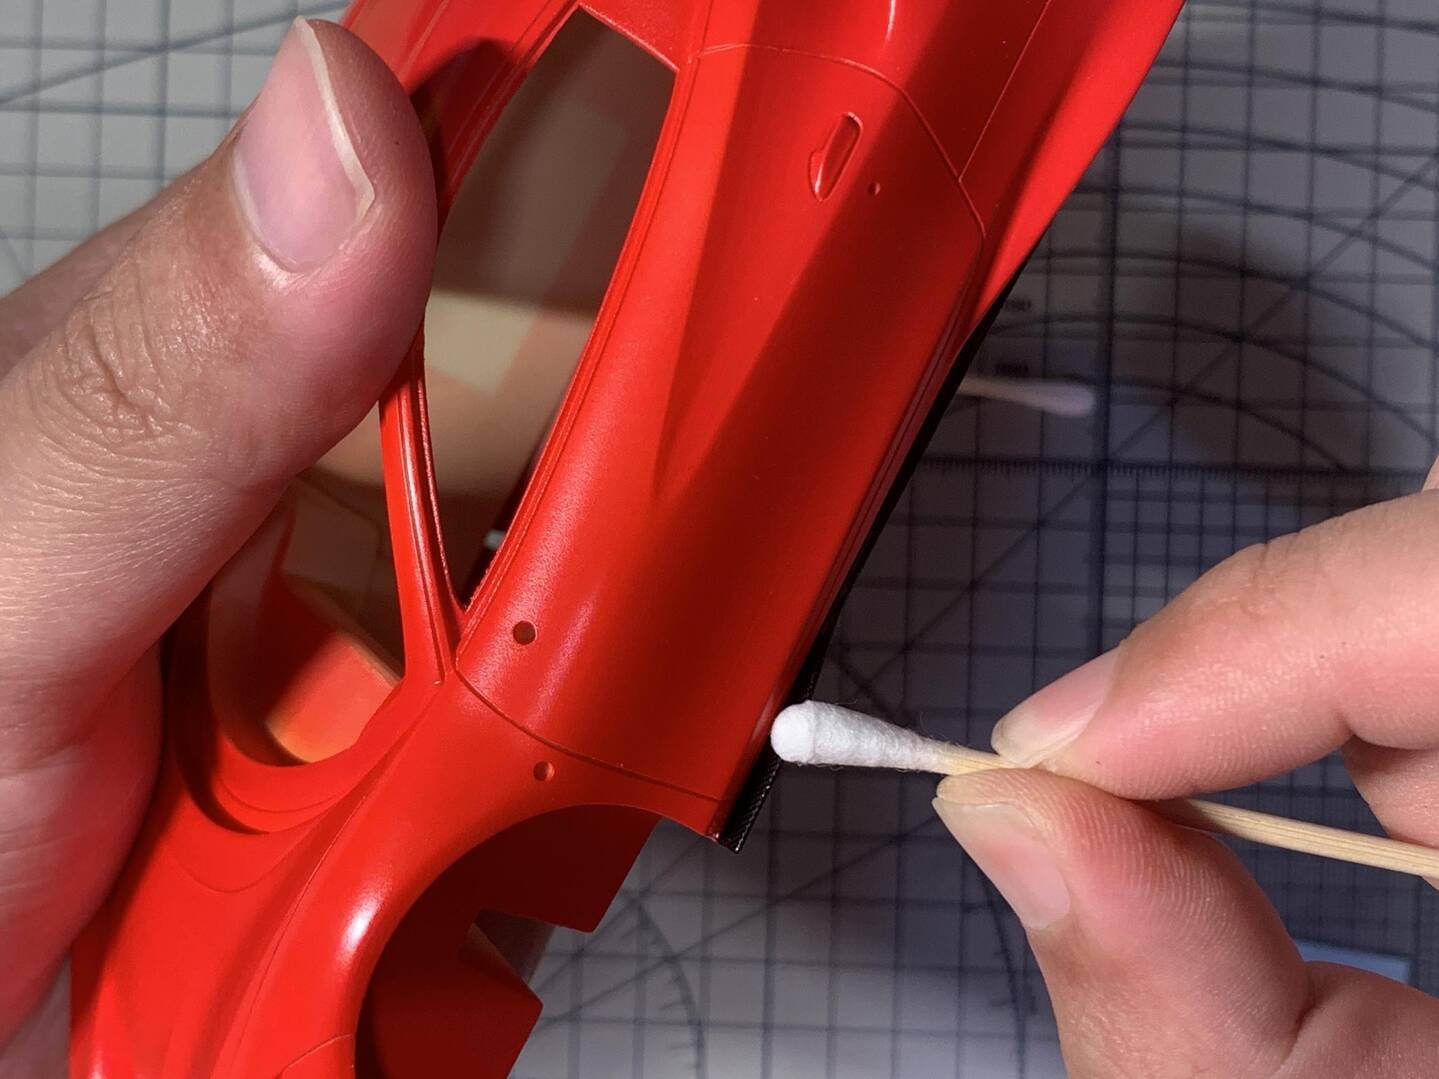
The diffuser at the tail needs to be sprayed black first, and then pasted with carbon fiber decals. Before pasting, be sure to read the instructions carefully and choose the appropriate decals according to the number. The area of each decal will be a little larger than the actual one. After pasting, use a pointed cotton swab to compact the gully and a round cotton swab to compact the edge.
Hot Air Gun Temperature Control
Hot air gun in the process of blowing decals should not be too long, otherwise the resin parts will be soft and deformed. You can use your fingers to feel the temperature in the process of blowing, when you feel hot, you can stop. Alpha Model's decals ductility and adhesive strength are very good, the difficulty of production is very small. With a little patience, every part can be done well.
Side Air Intake
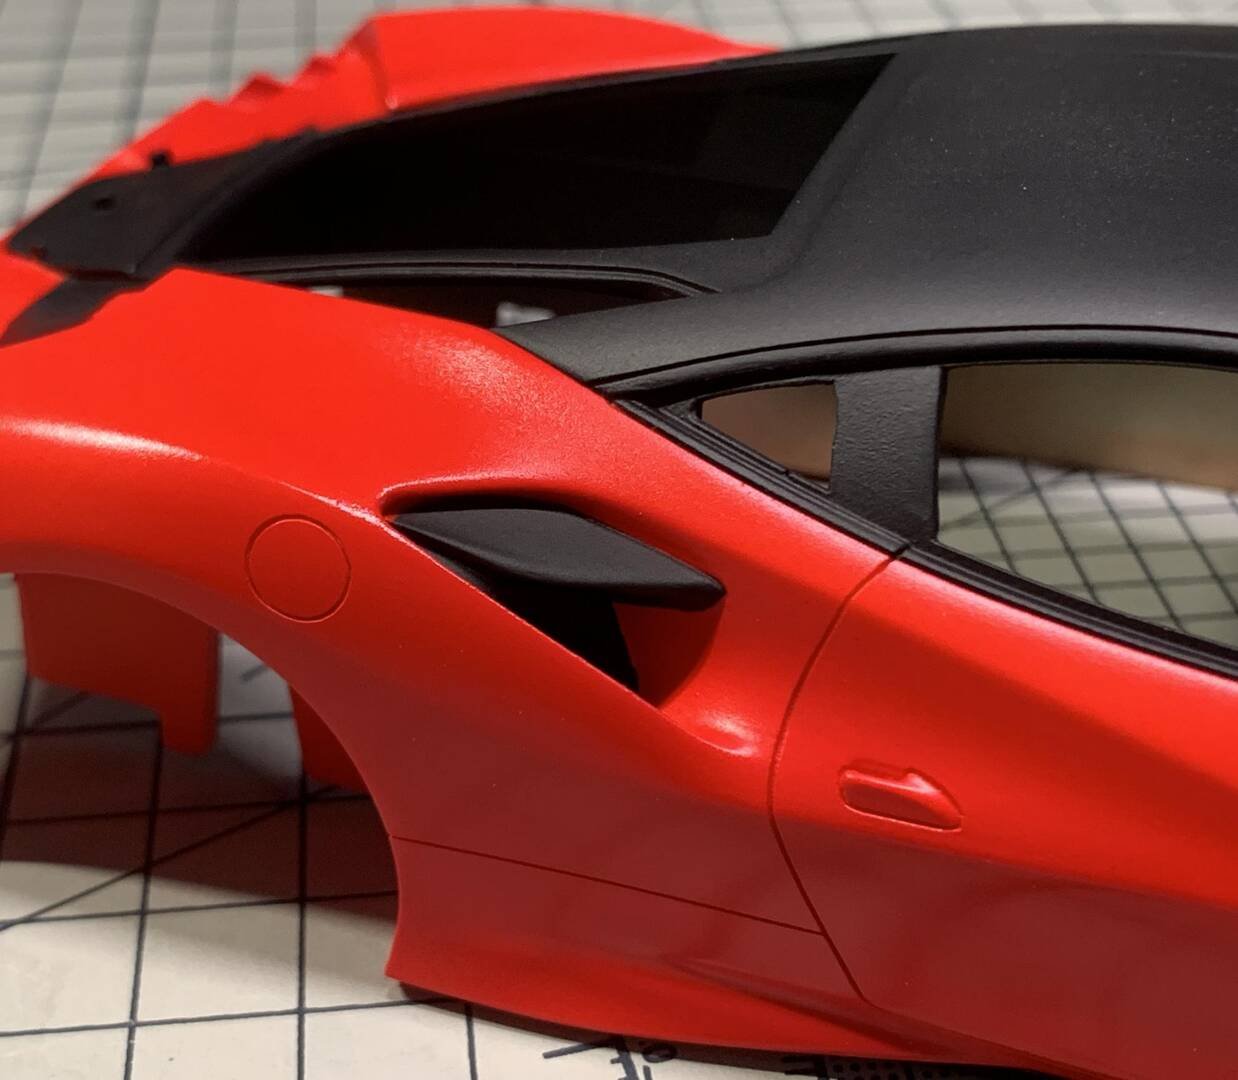
The position of the side air intake should also be painted black. It is a little troublesome to cover this position. You need to cut the covering paper into thin strips, and then stick it along the outline bit by bit. Finally, use a large piece of covering paper to cover the periphery. Be careful not to leak the color. It is difficult to deal with the warm color with black paint.
In addition, the rearview mirrors (R57, R58) and the rear wing (R20) on both sides should also be painted with the color of C158.
Chapter 9: Clear Coat
BASF 666 varnish in three layers, followed by 3–5 days of curing before polishing.
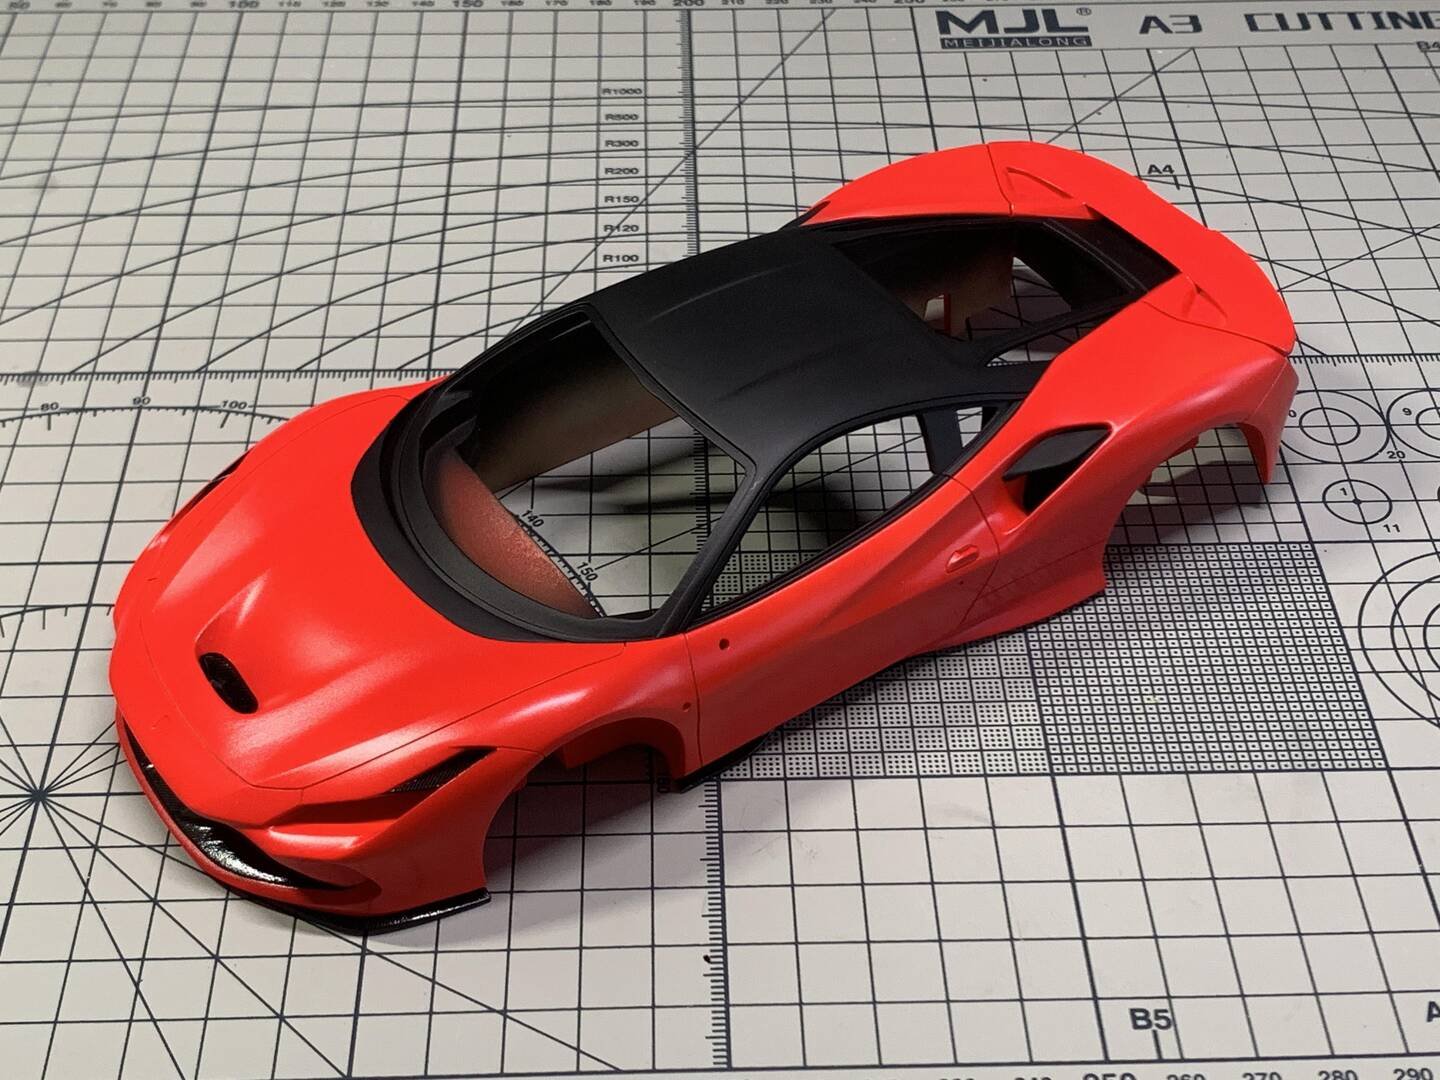
After color separation, you can spray the amino varnish. Here I choose Parrot (BASF) 666 varnish. You can stop spraying three layers of varnish, and then wait for 3-5 days to completely cure and polish. At this point, the main part of the car shell has been completed.
 Advanced Creators
Ferrari F8 Tributo
Alpha Model AM02-0032 · Build by breakwong
Chapter 10: PE Floor Mats
Making PE62 and PE63 cockpit floor mats — circular cutting, dual-color spraying, and panel wash.
Step 1 — Circular Cutting
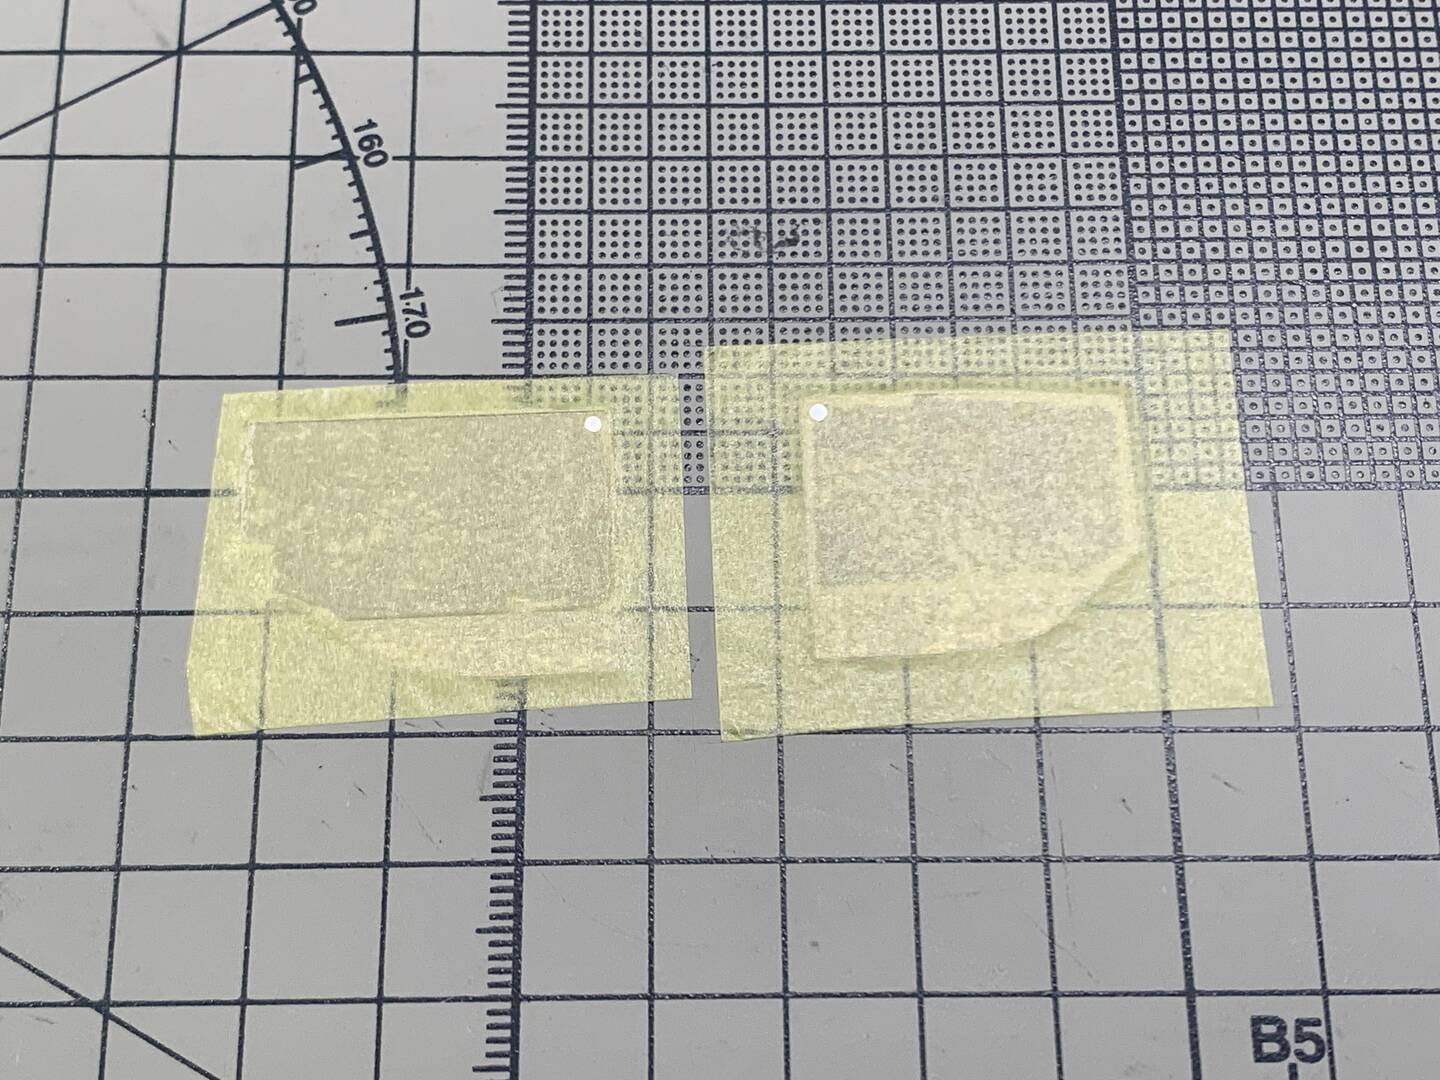
PE62 and PE63 are the cockpit floor mats. Prepare the circular cutter and covering paper before making them. First measure the diameter of the circle at this position, then cut the covering paper into a circle, stick the covering paper on the circle on the etching sheet, and finally cut the outline along the inside of the etching sheet of the foot pad.
Step 2 — Dual-Color Spraying
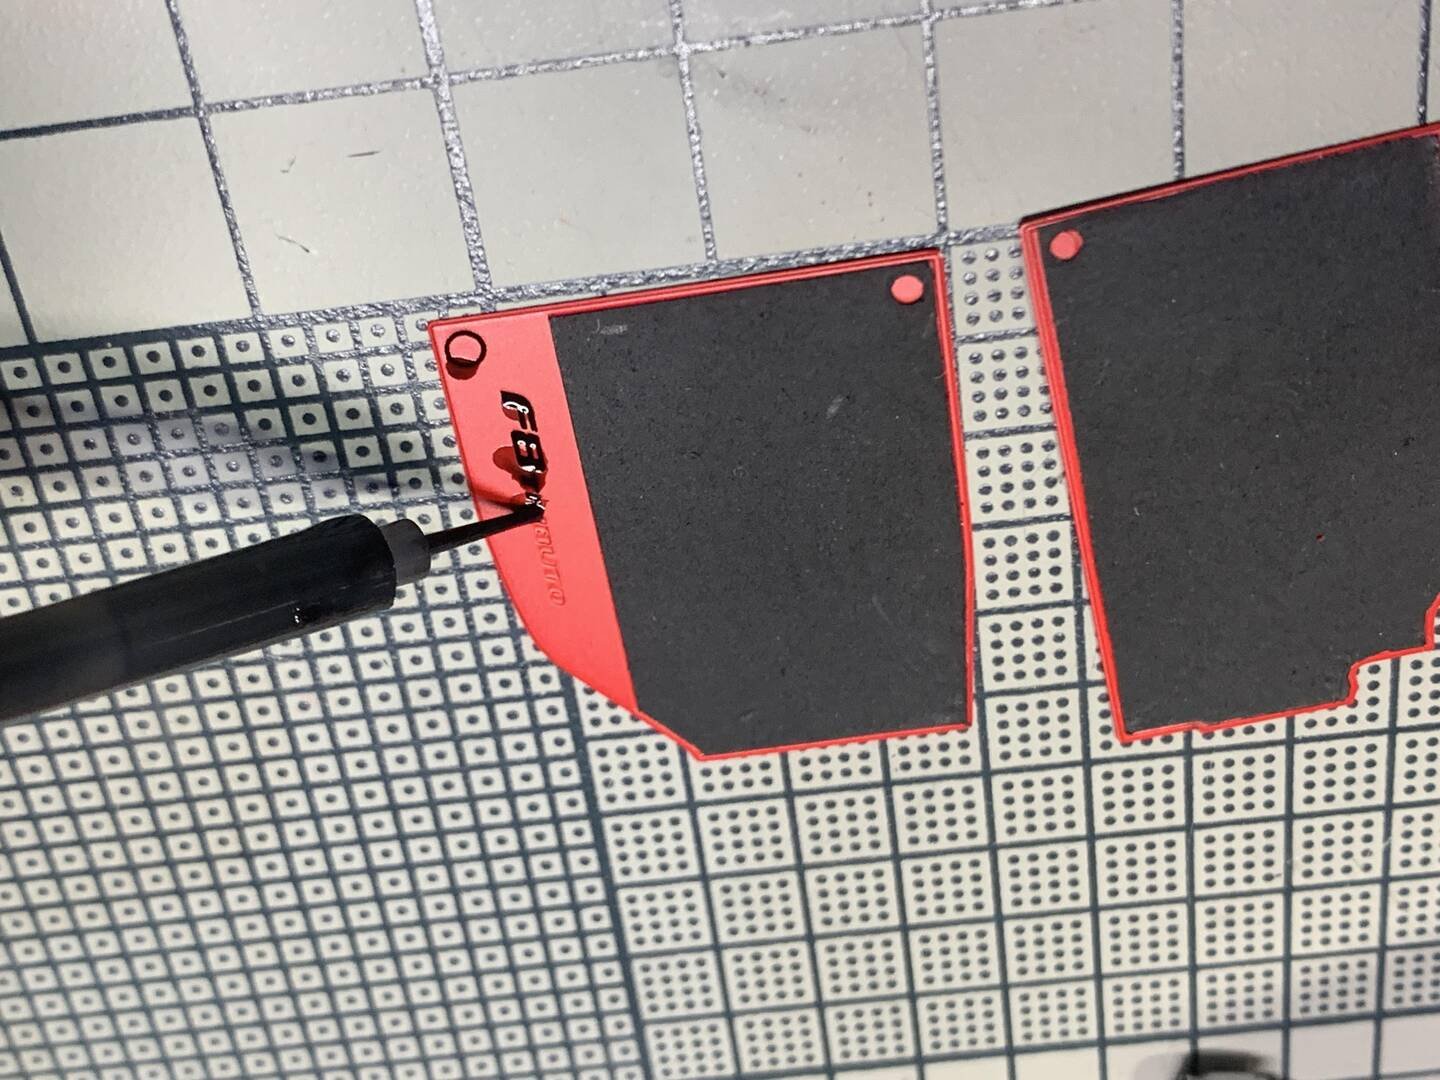
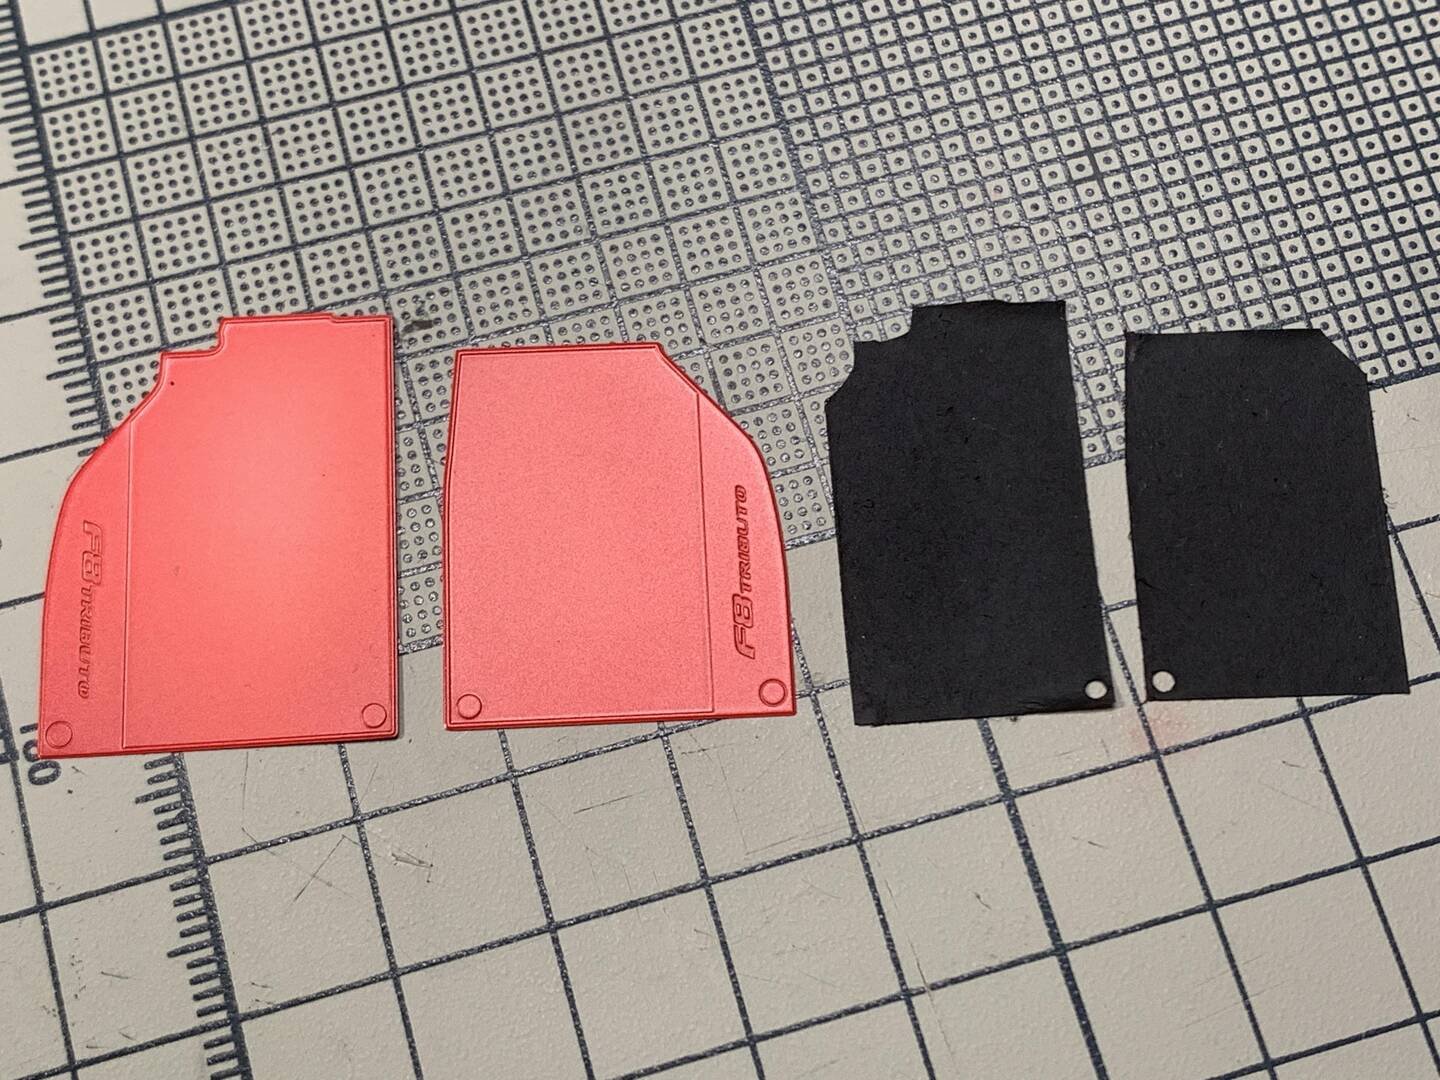
After cutting, the covering paper is torn off, and then the etching sheet and the covering paper are colored — the etching sheet is sprayed with red, and the covering paper is sprayed with dull black. Red should also be made matte, which can simulate the suede effect of the foot pad.
Step 3 — Panel Wash
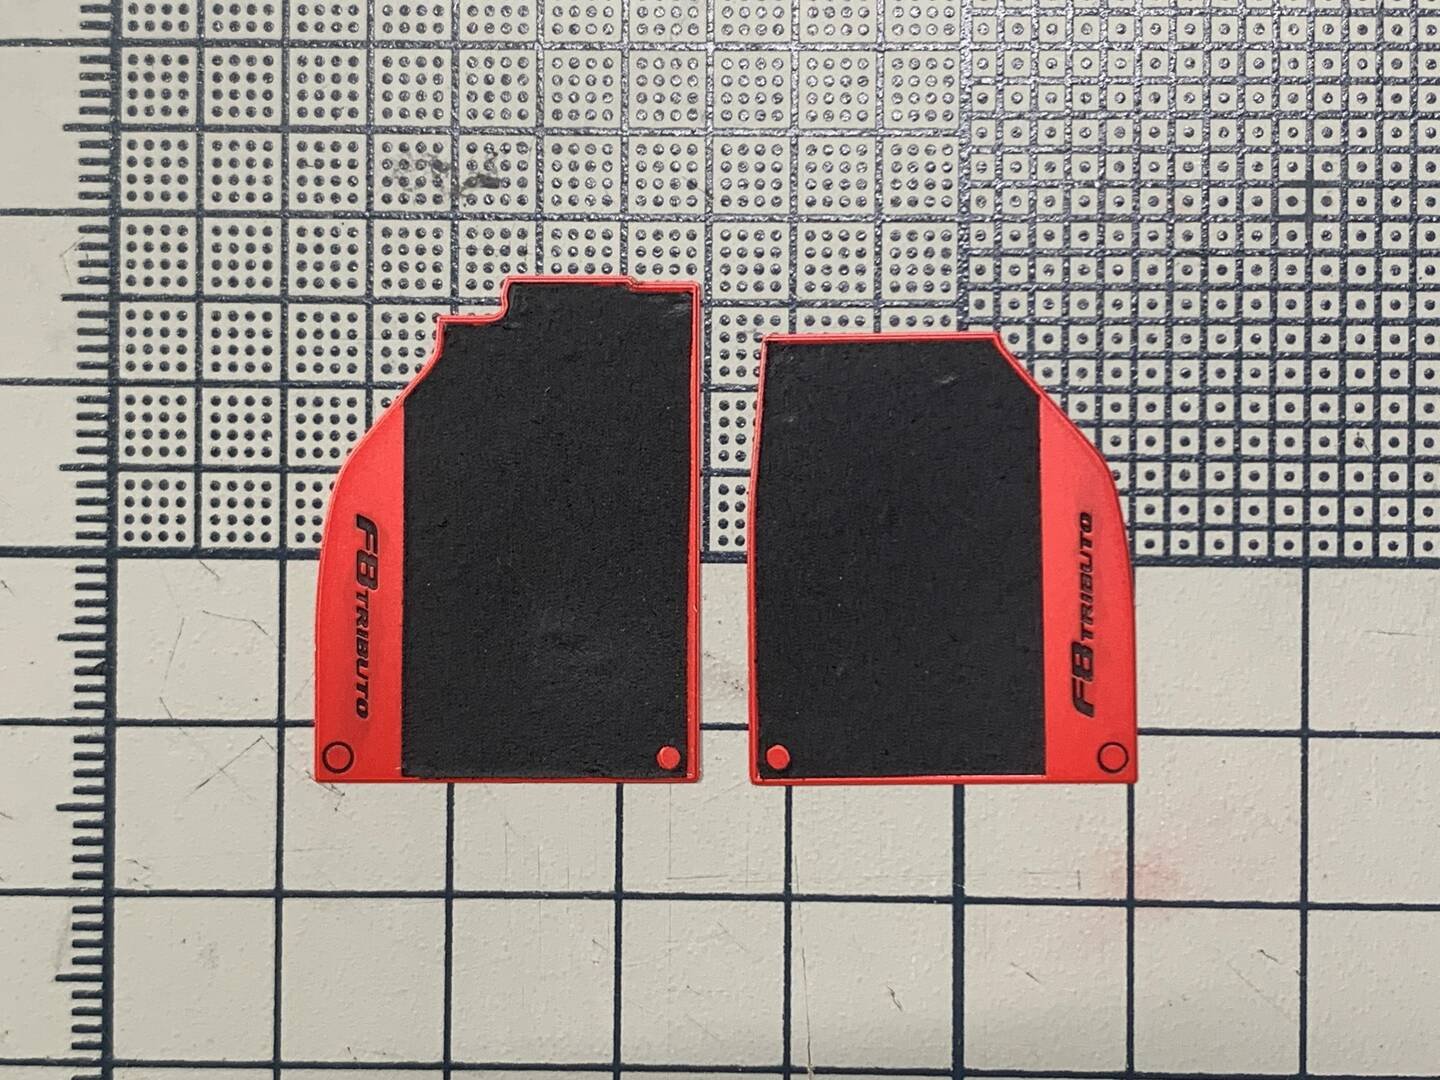
The covering paper is pasted on the etching sheet to complete the production of the foot pad, and then the sunken fonts and circles are seeped. After the isotonic solution is dried, a cotton swab is dipped in Tamiya X20 to wipe off.
Chapter 11: Color Table
Complete color reference for the Ferrari F8 Tributo build — all paint codes and their applications.
Paint Color Reference
Below is the complete color table used throughout this build. Each symbol corresponds to the markings on the instruction manual.
| Symbol | Code | Color Name | Symbol | Code | Color Name | |
|---|---|---|---|---|---|---|
| Ⓐ | C-1 | Glossy Black | Ⓕ | C-92 | Half Light Black | |
| Ⓑ | C-3 | Glossy Red | Ⓖ | C-182 | Extinction & Transparency | |
| Ⓒ | C-33 | Matte Black | Ⓗ | TS47 (TAMIYA) | Lustrous Yellow | |
| Ⓓ | C-47 | Glossy Transparent Red | Ⓙ | C-10 | Gun Metal | |
| Ⓔ | C-79 | Red | Ⓚ | — | Silver (broad sense) | |
| Ⓜ | C-33:10 + C-62:1 | Interior Color | ||||
Note on Silver (Ⓚ)
The Ⓚ here refers to silver in a broad sense, which includes electroplated silver, fine silver, C-8, etc. The specific silver color used for each part is chosen by the player.
Advanced Creators
Ferrari F8 Tributo
Alpha Model AM02-0032 · Build by breakwong
Chapter 12: Assembly Steps
Step-by-step PE parts assembly — from interior components to exterior details, following the instruction manual page by page.
Assembly Phase 1 — Interior & Dashboard Components (Pages 17–22)
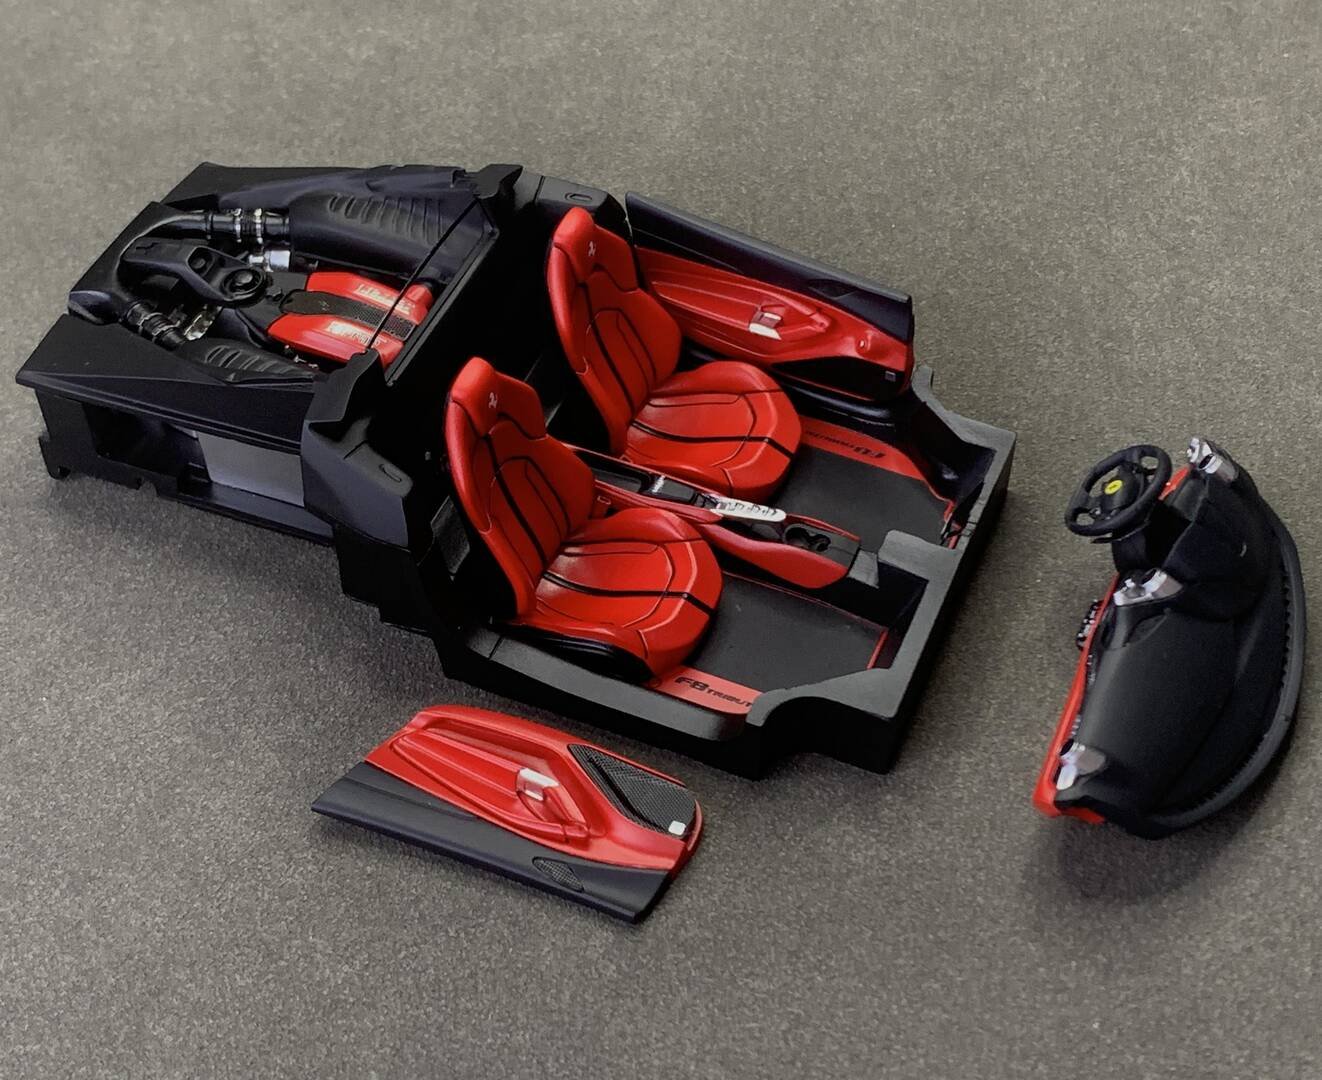
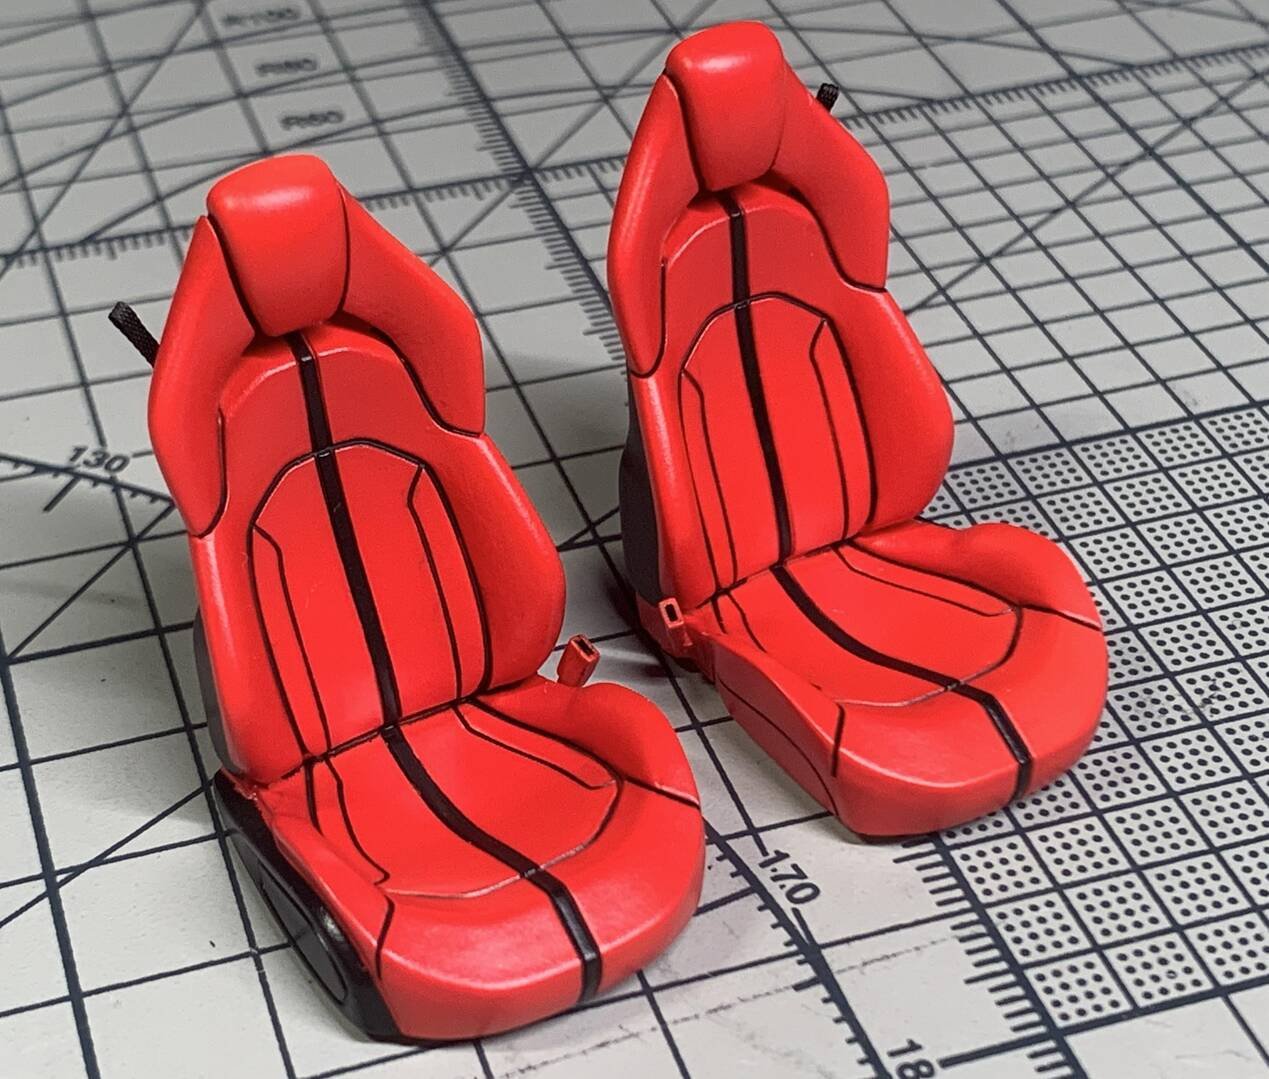
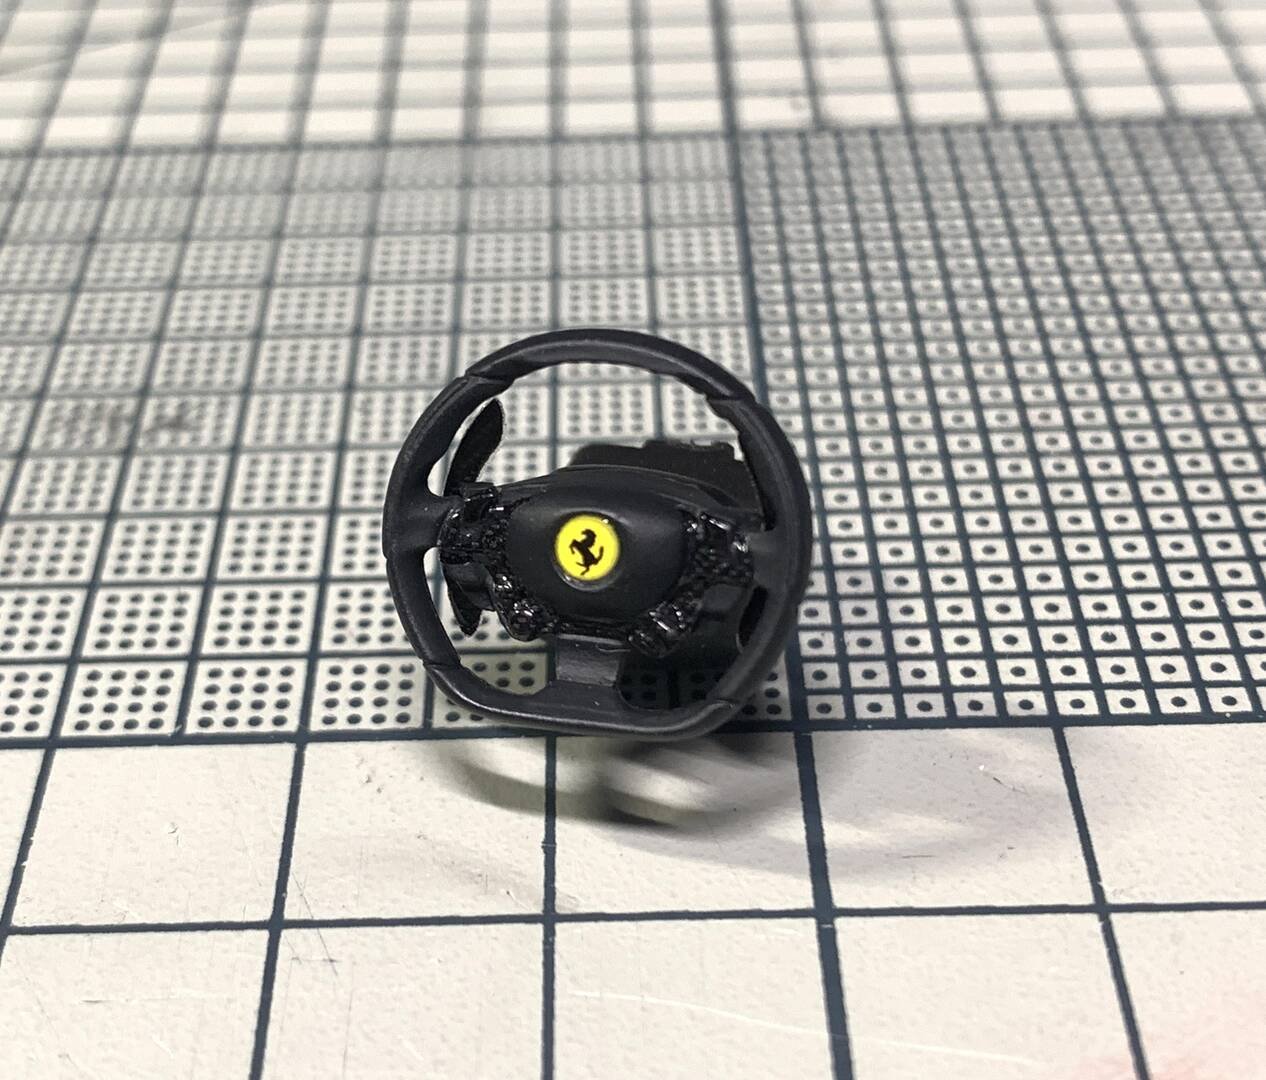
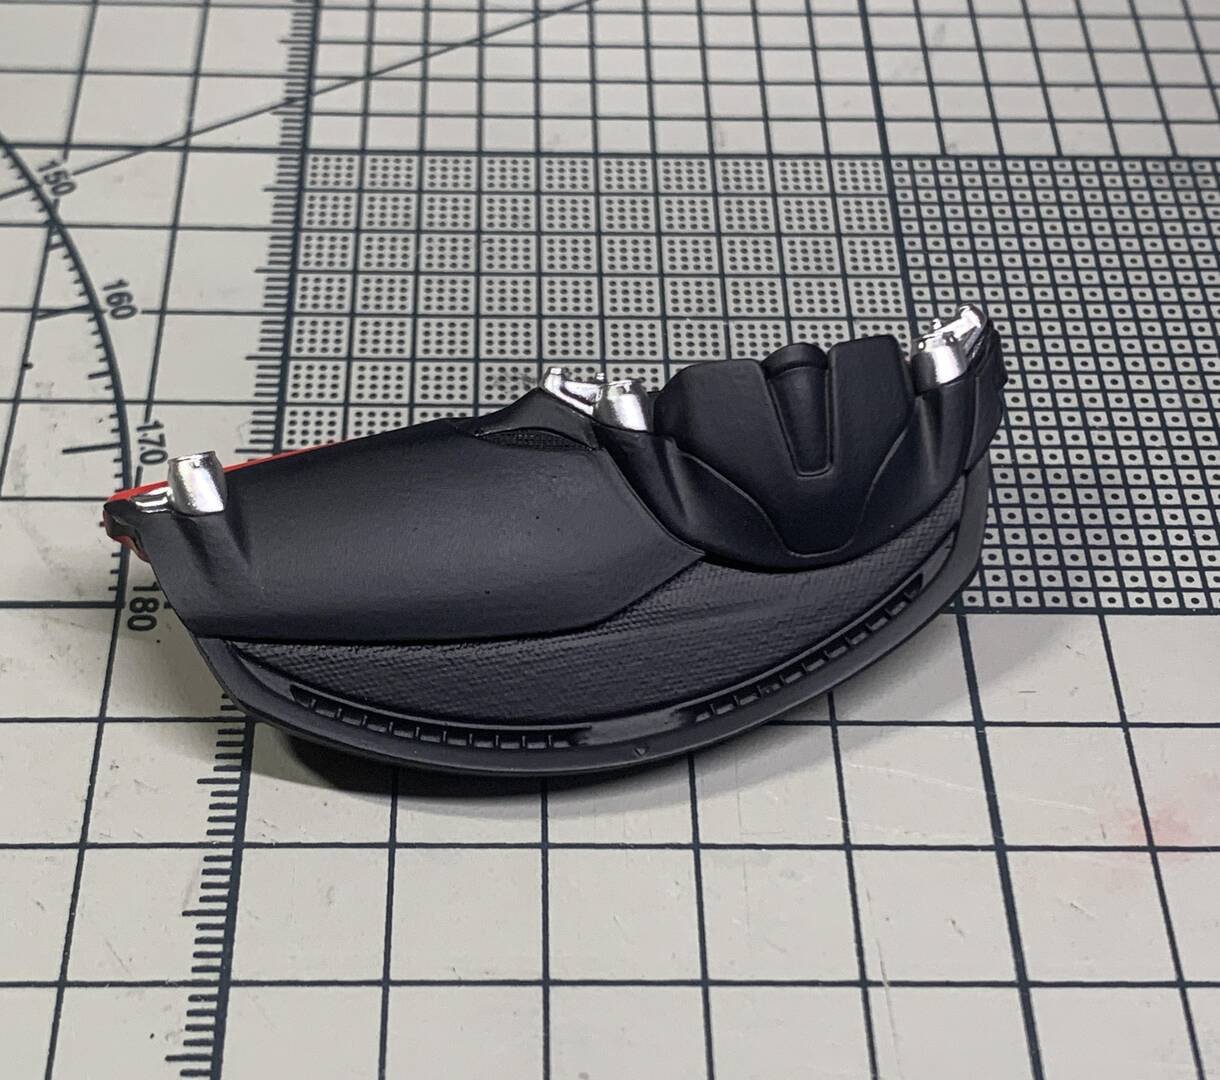
Assembly Phase 2 — Engine Bay & Mechanical Components (Pages 23–28)
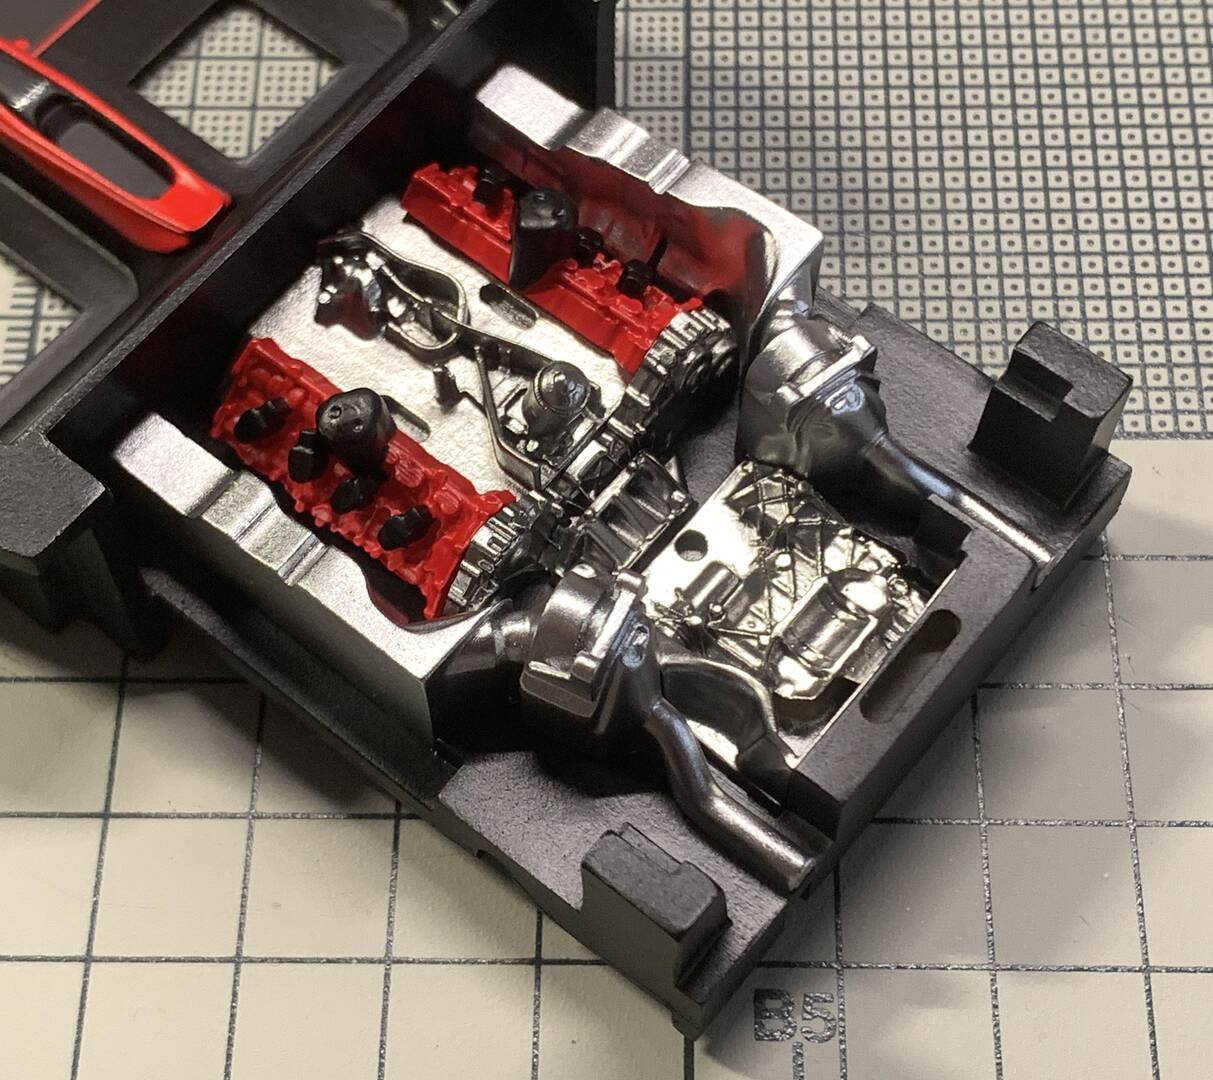
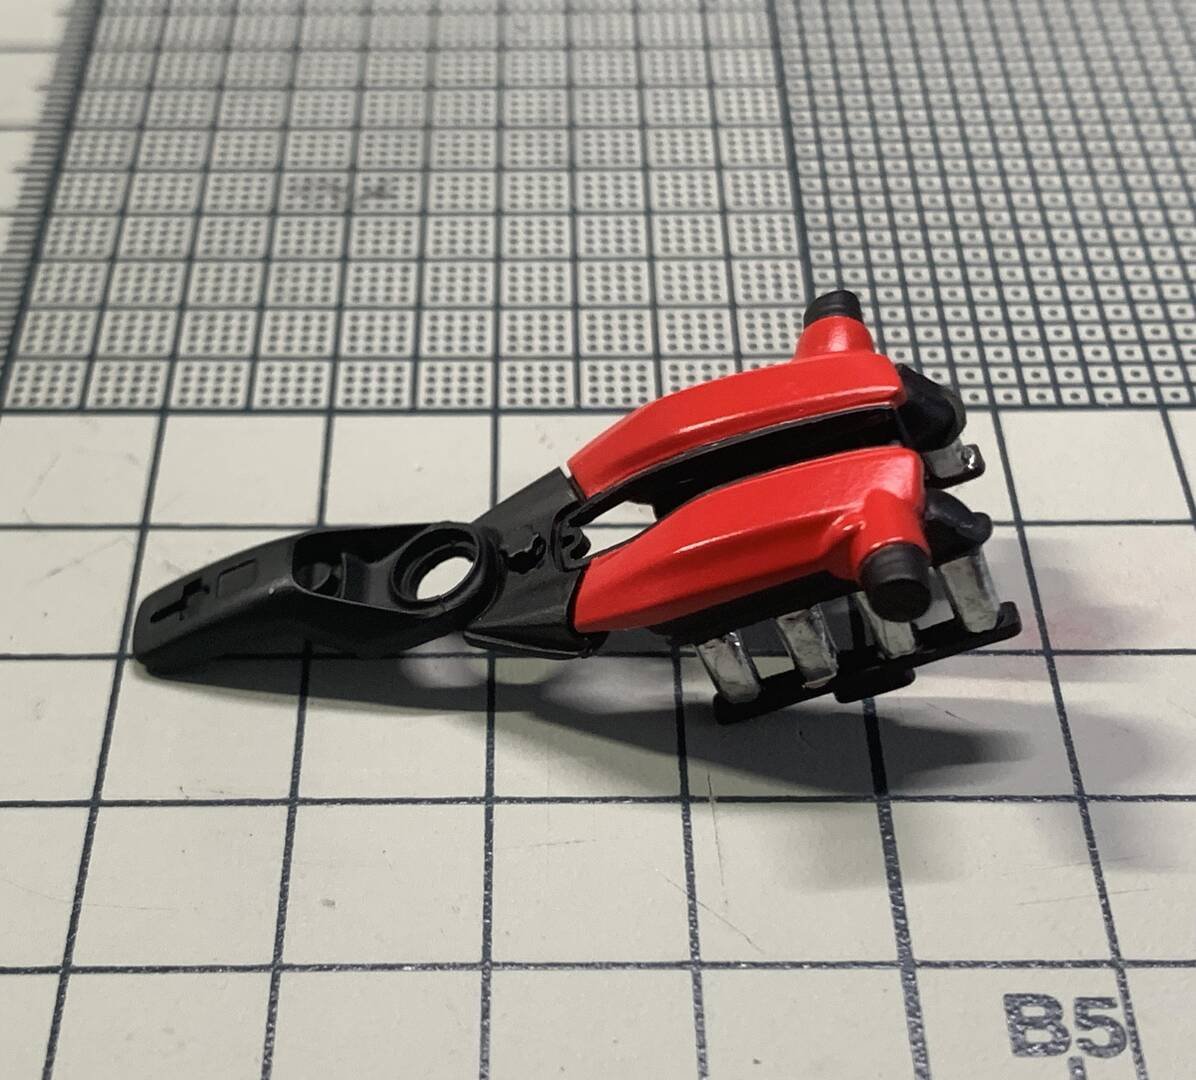
Assembly Phase 3 — Suspension, Wheels & Exhaust (Pages 29–34)
Advanced Creators
Ferrari F8 Tributo
Alpha Model AM02-0032 · Build by breakwong
Chapter 12: Assembly Steps(续)
Step-by-step PE parts assembly — continuing from Phase 4 to final completion.
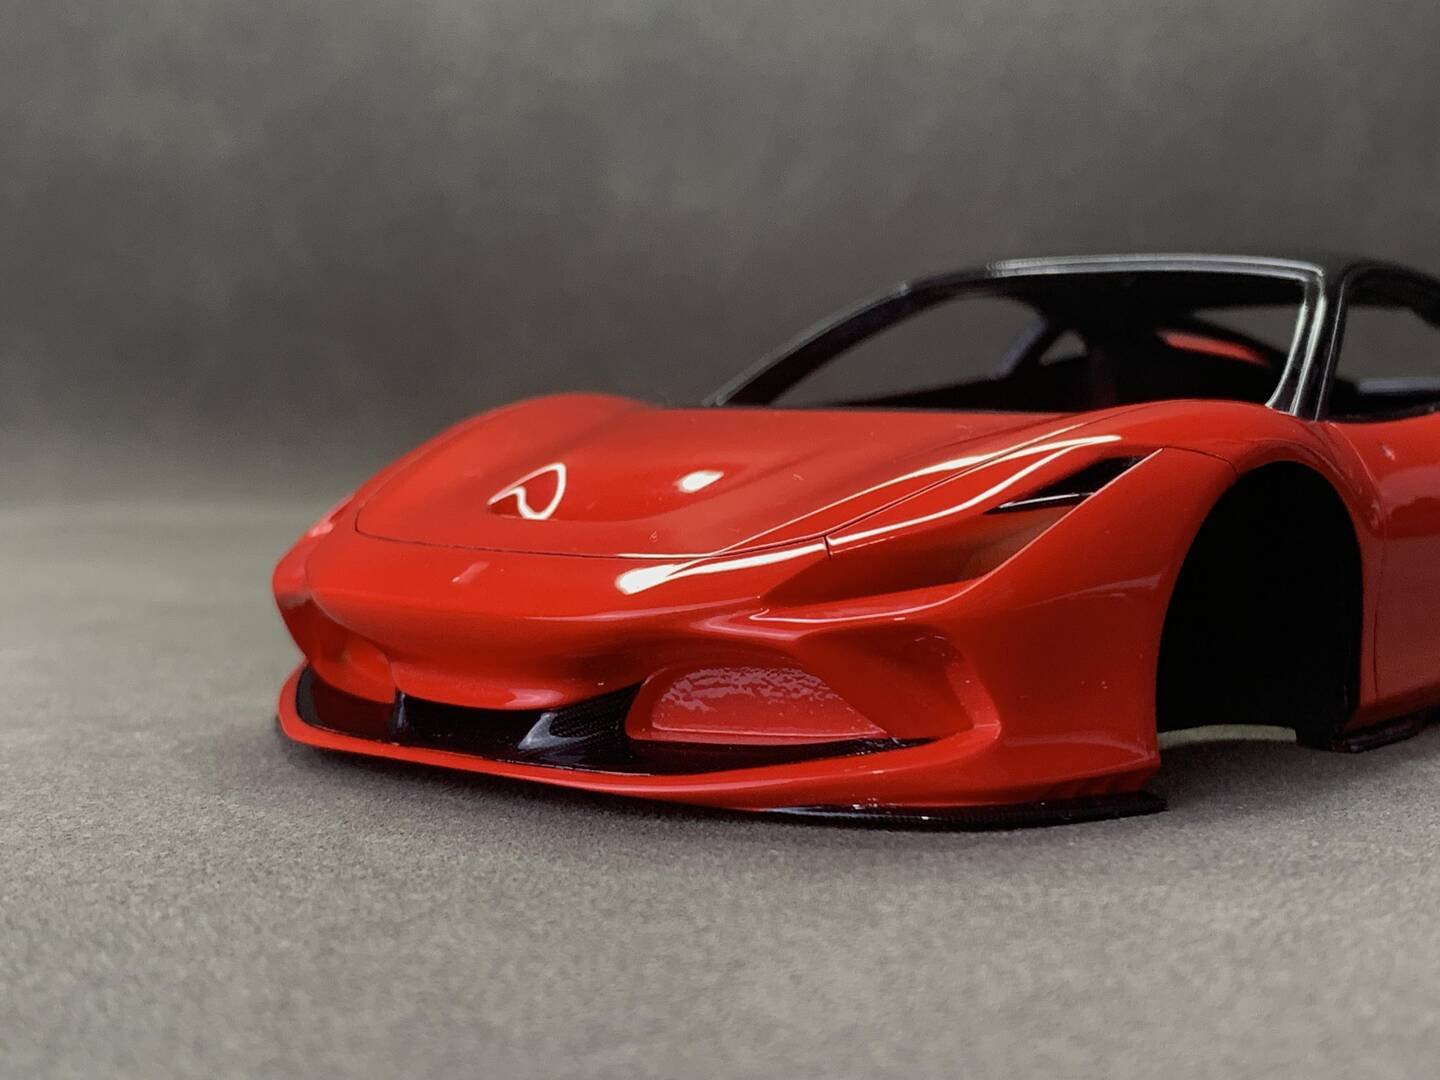
Assembly Phase 4 — Body Panels & Exterior Trim (Pages 35–40)
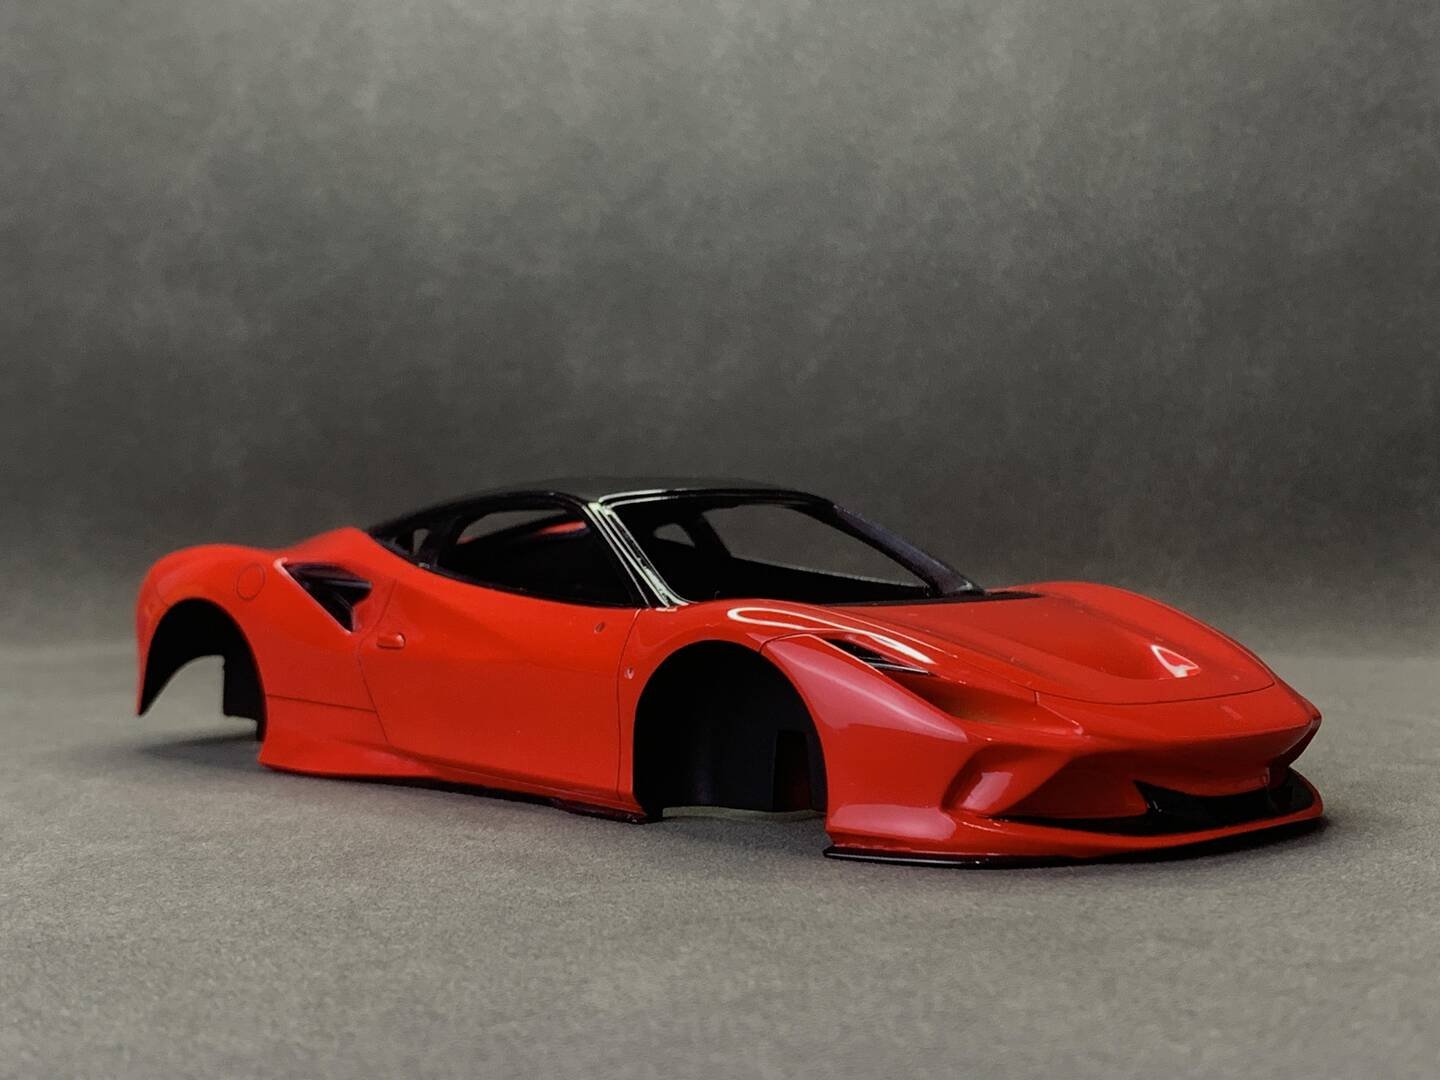
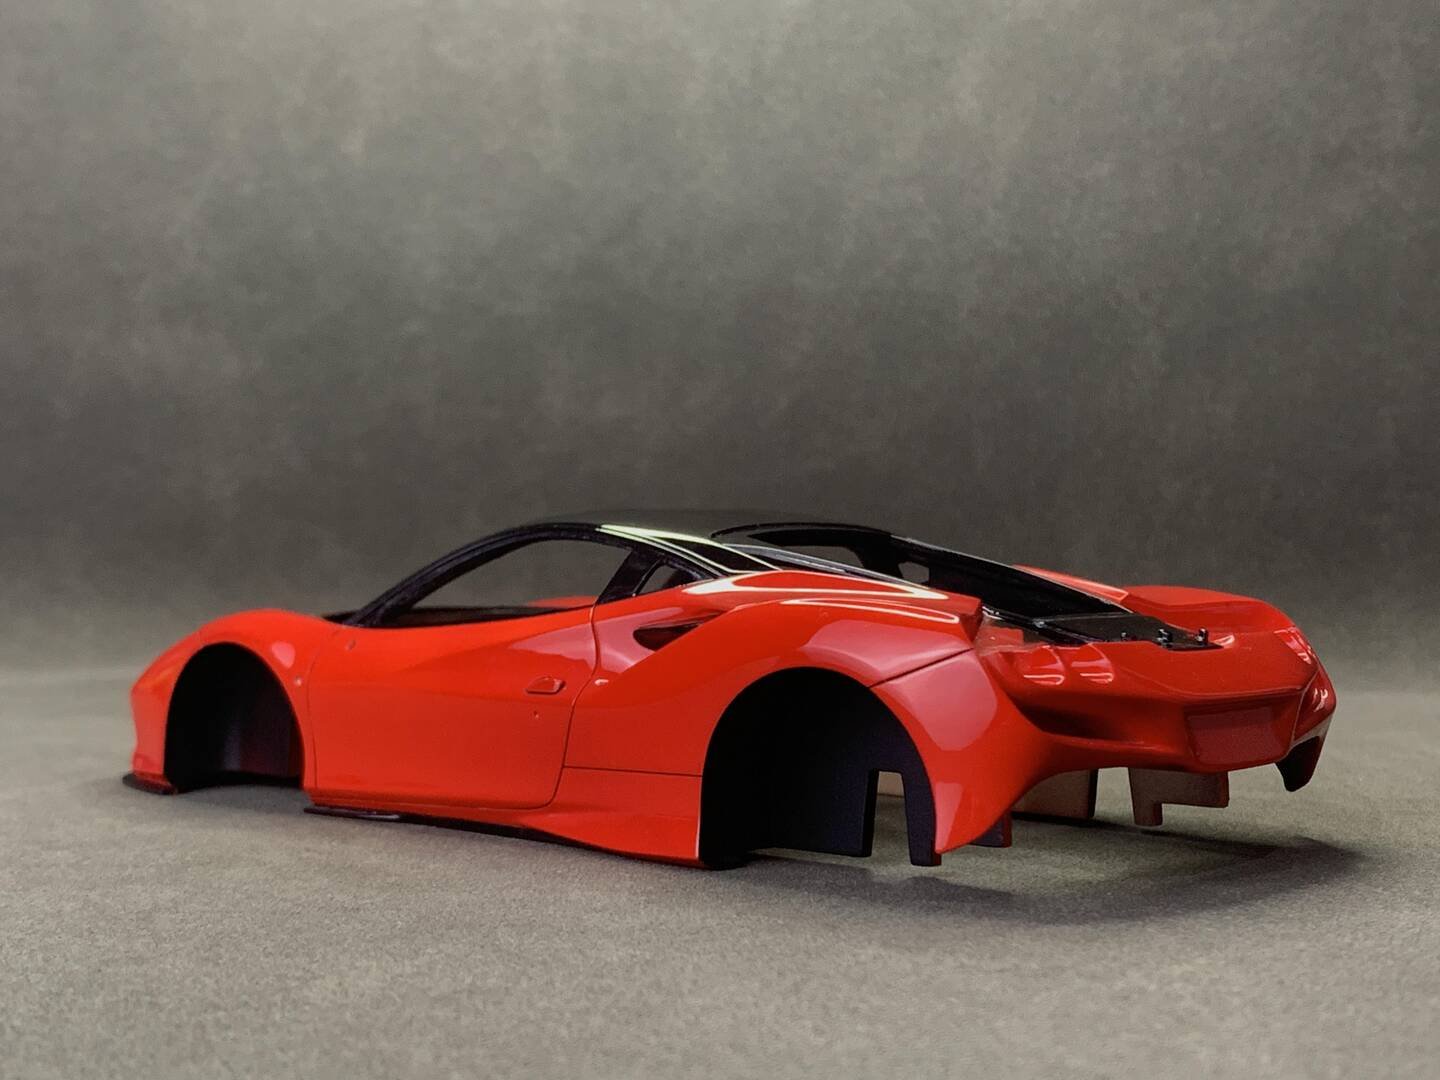
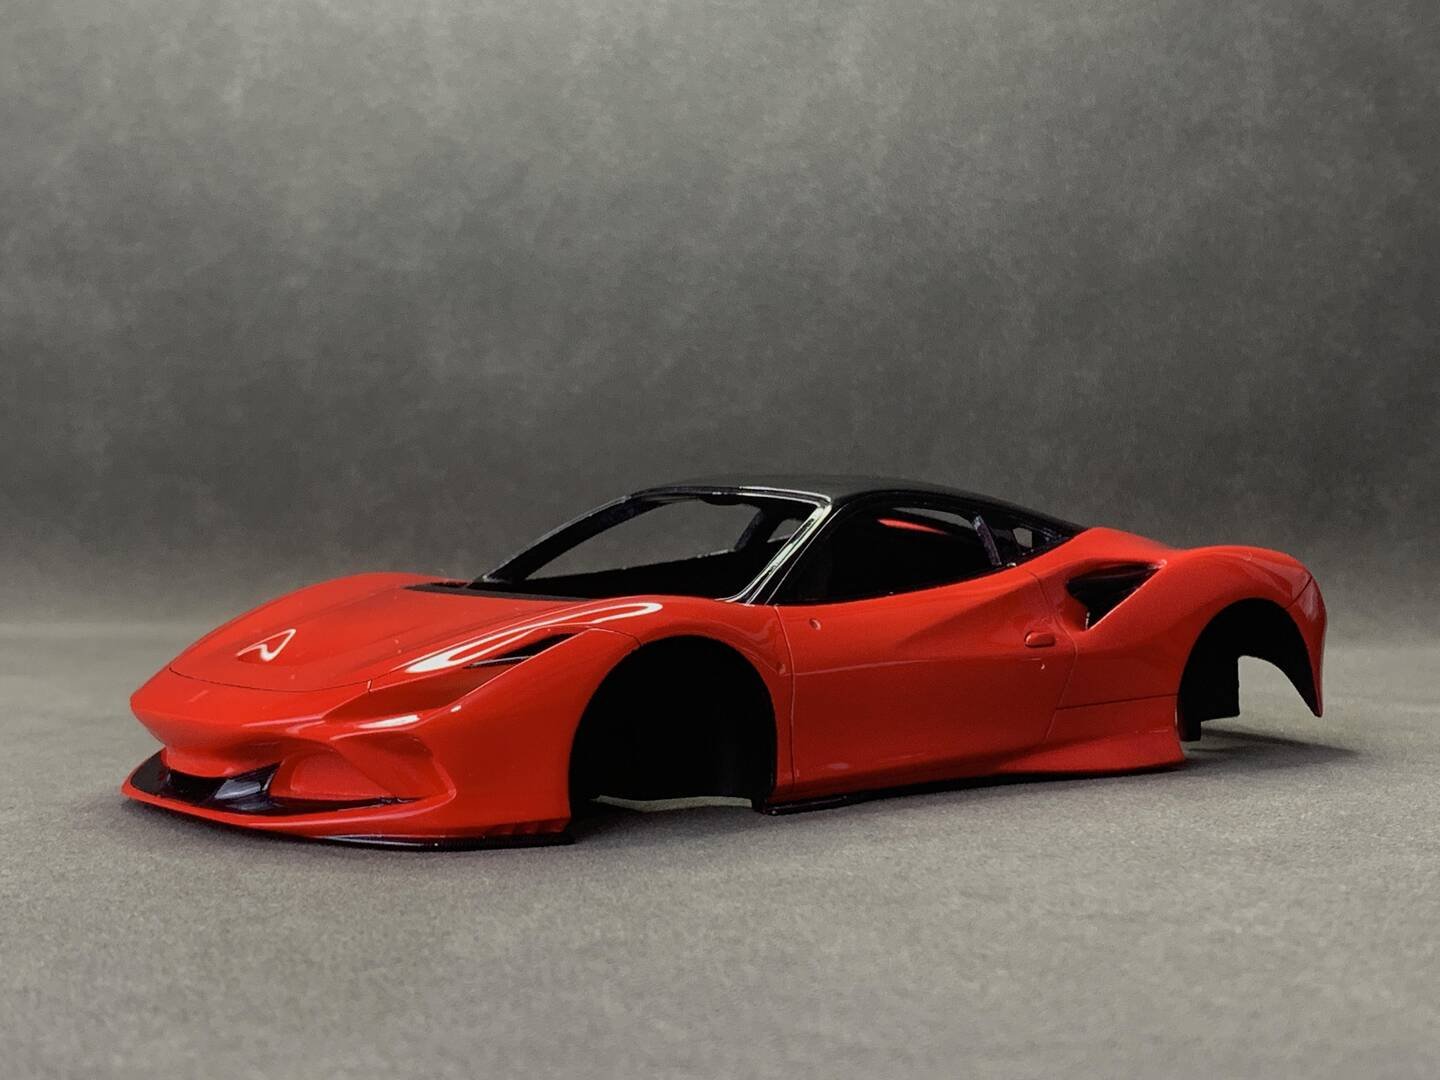
Assembly Phase 5 — Final Details & Completion (Pages 41–44)
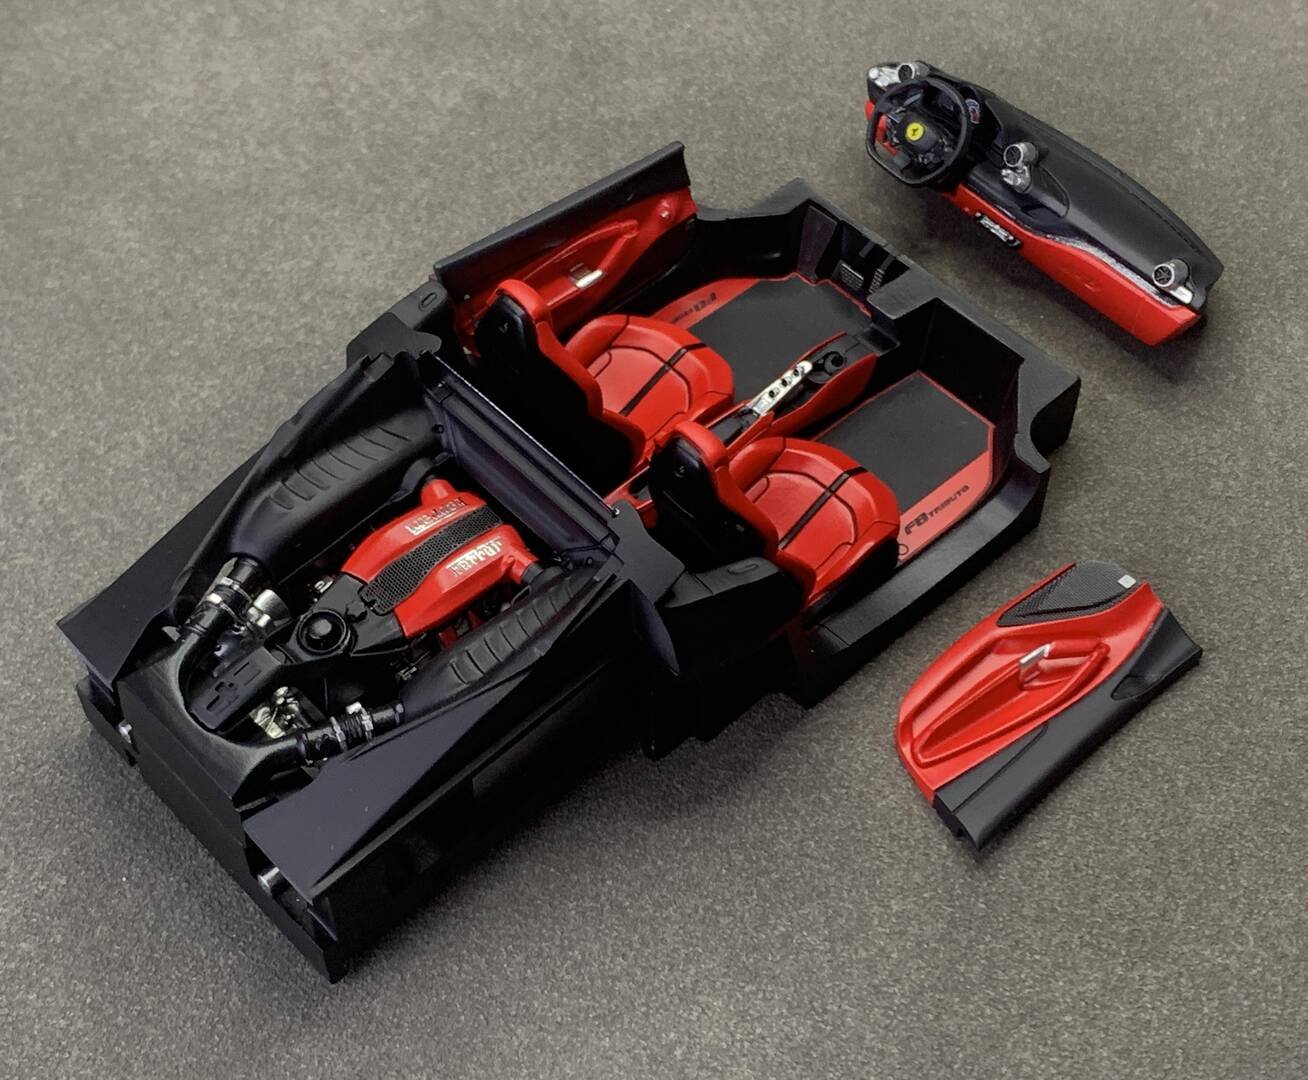
Follow the instruction manual page by page for each assembly step. The PE parts require careful handling with tweezers and instant glue. Take your time with each component to ensure proper fit and alignment.
Chapter 13: Showcase
The finished Ferrari F8 Tributo — Super Italian Red with carbon fiber details and red-black two-tone.
The Finished F8 Tributo
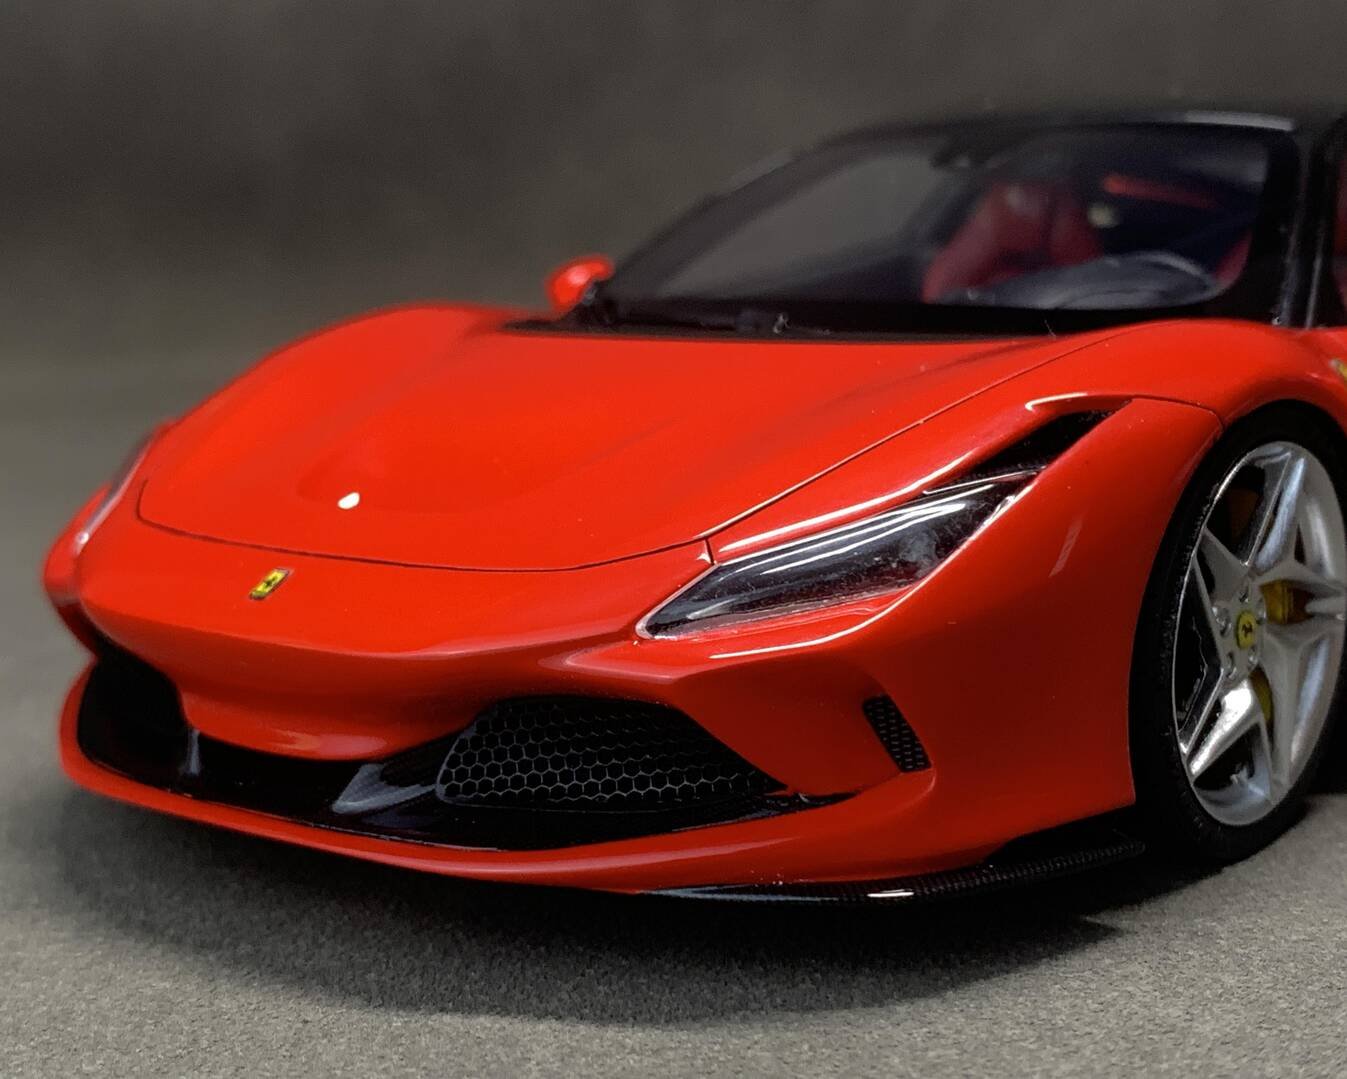
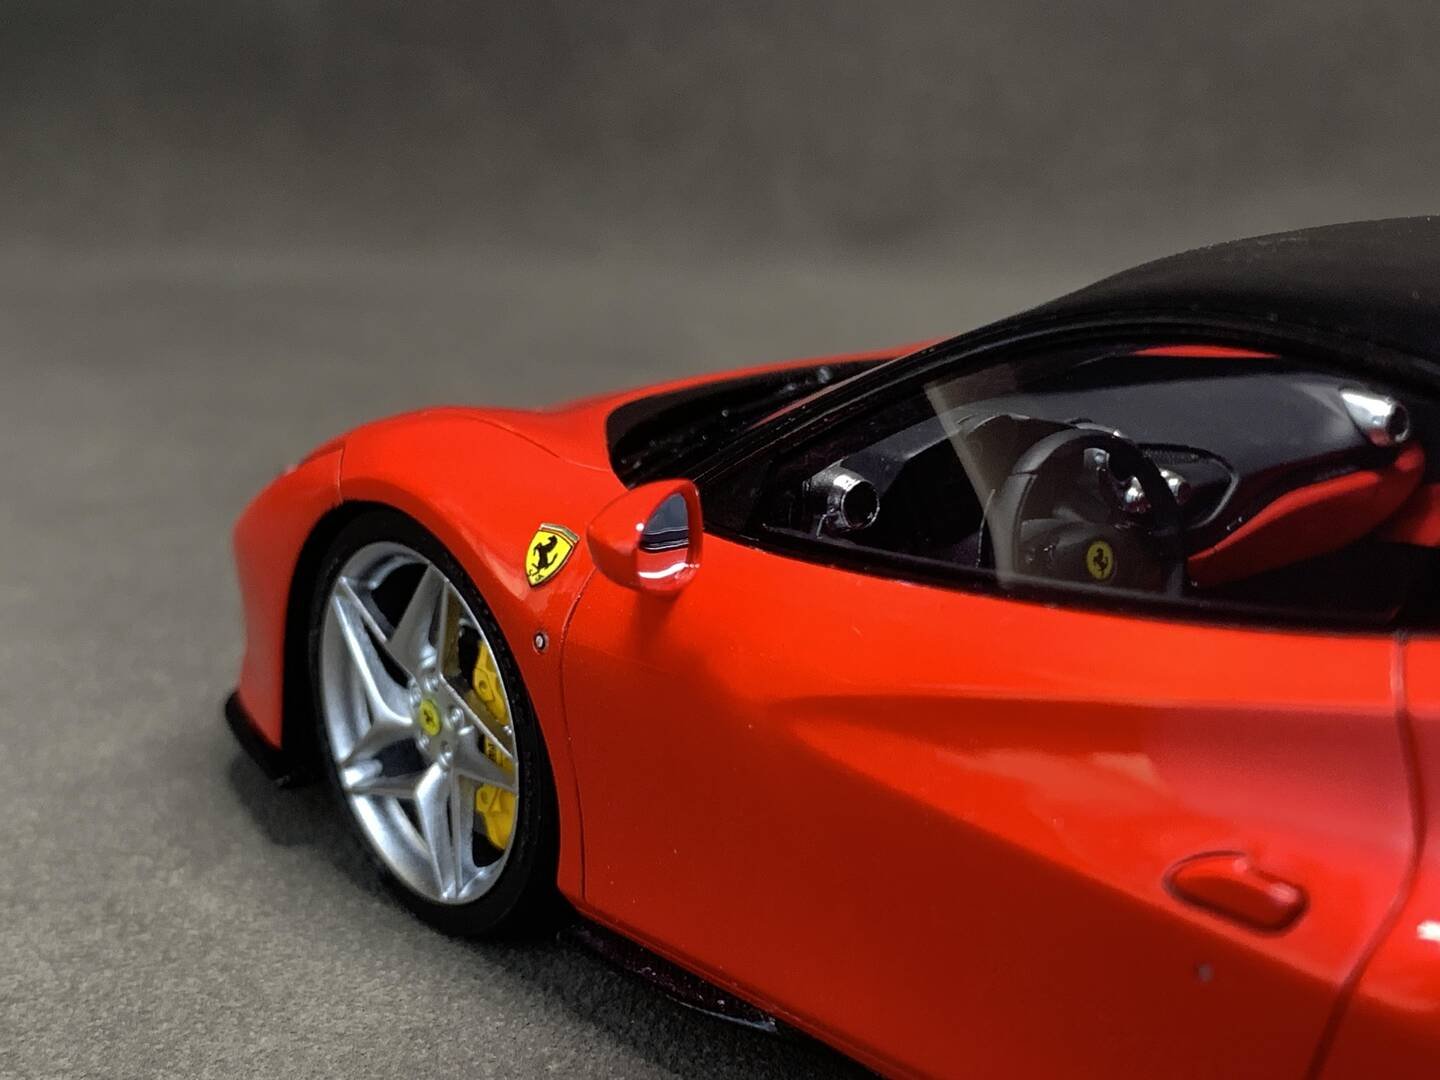
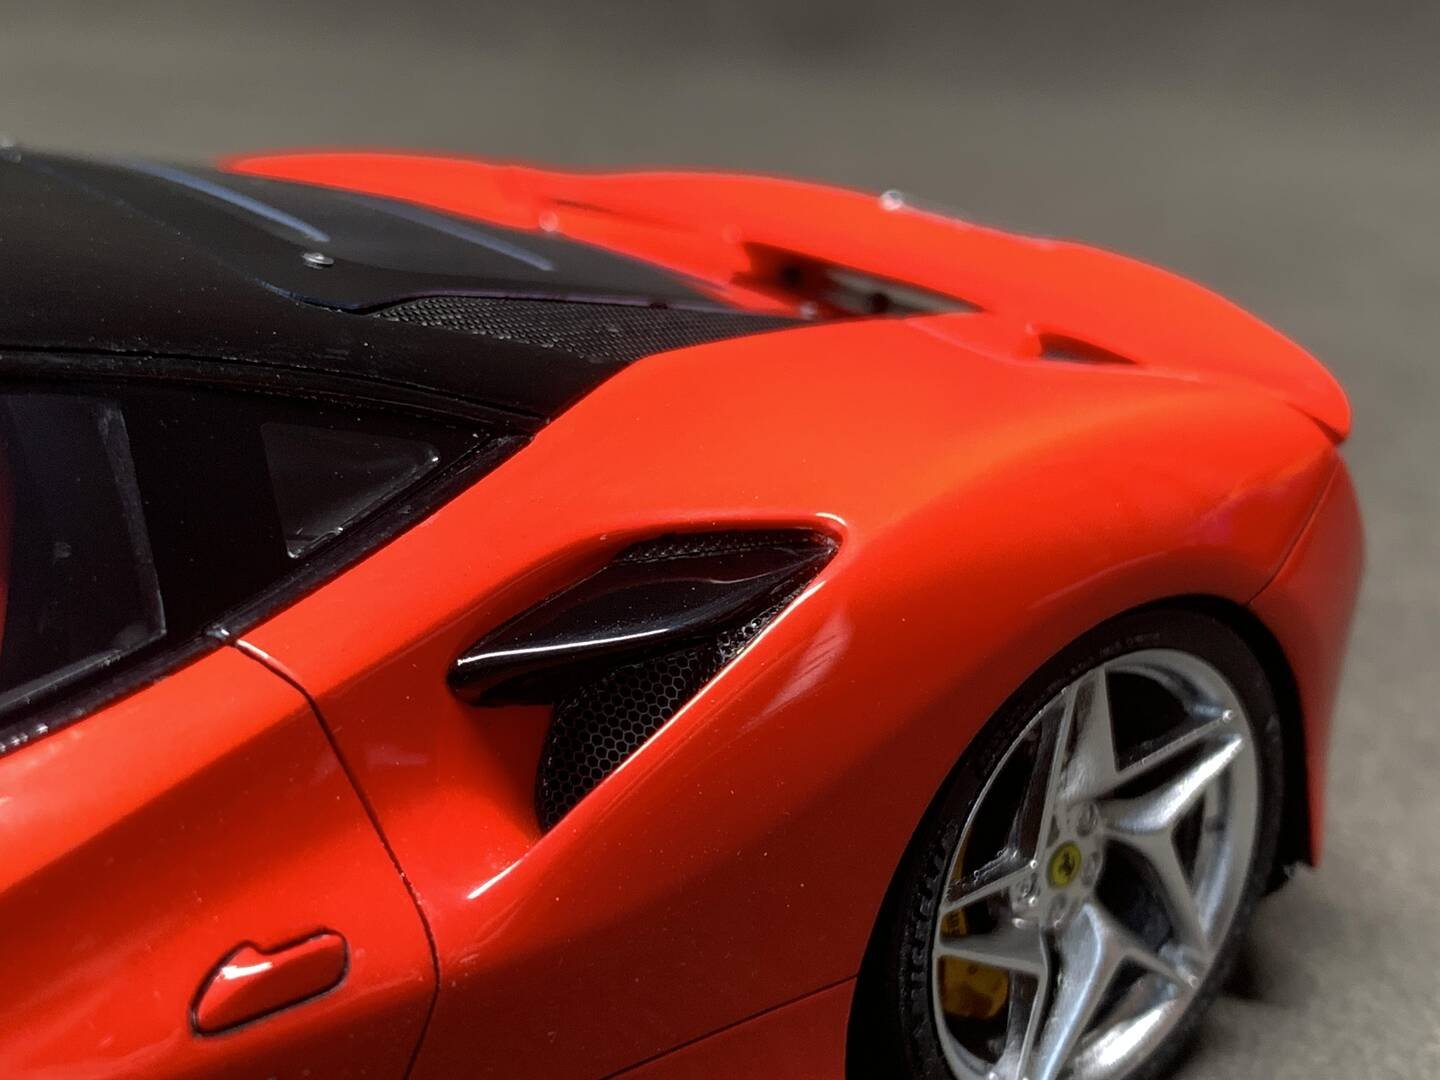
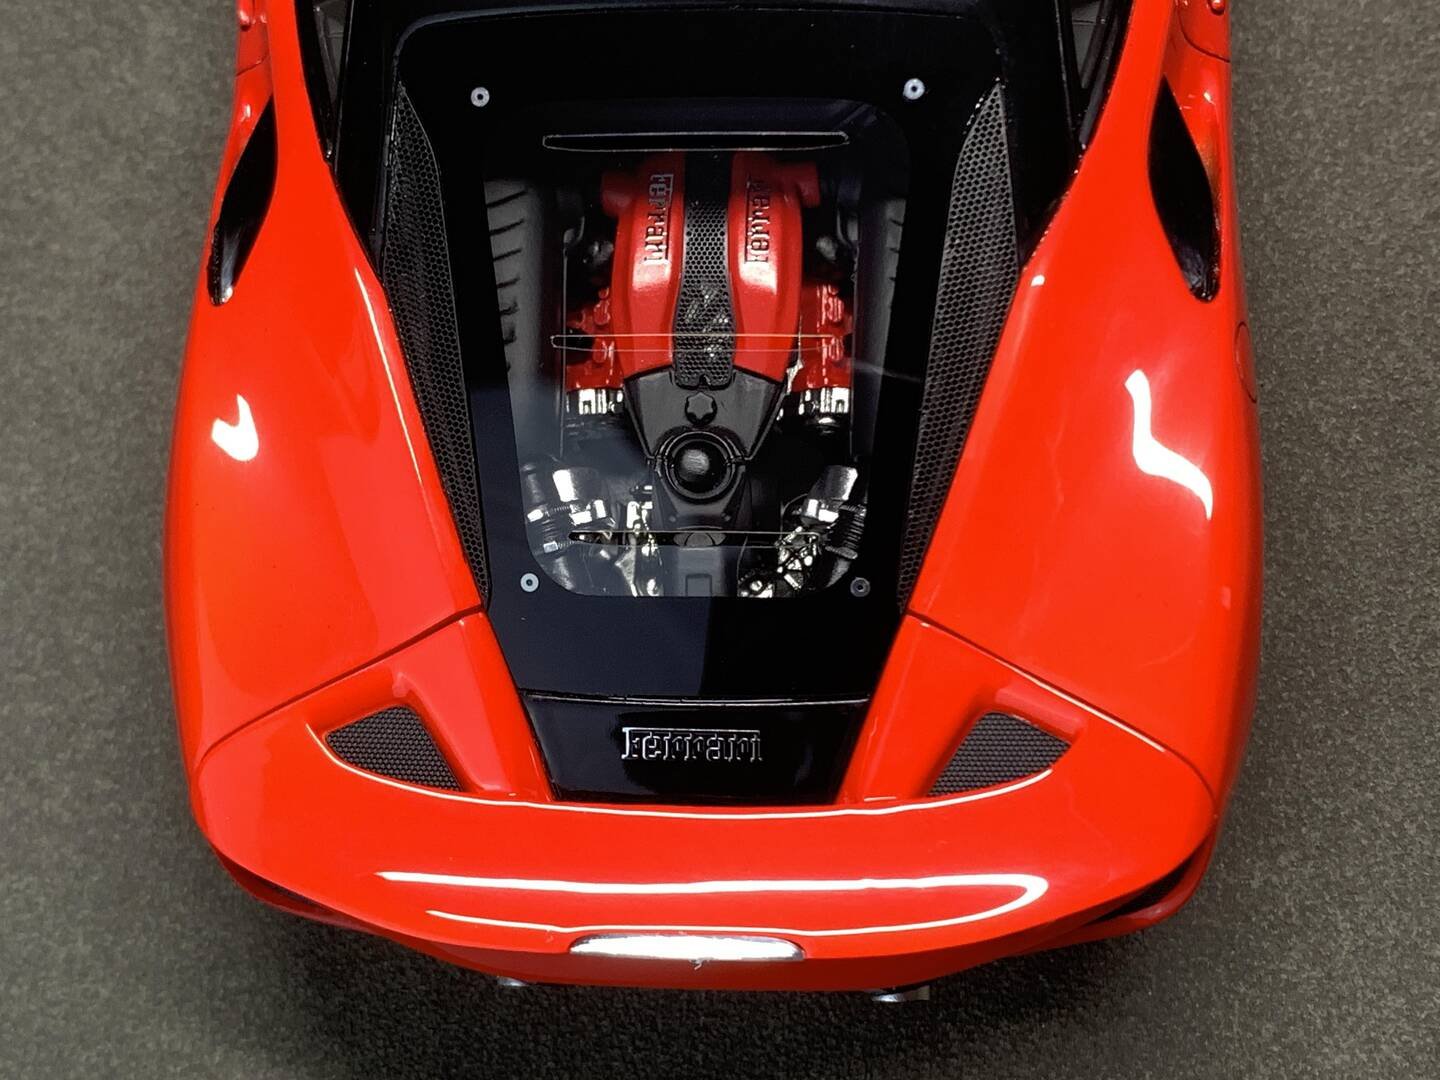
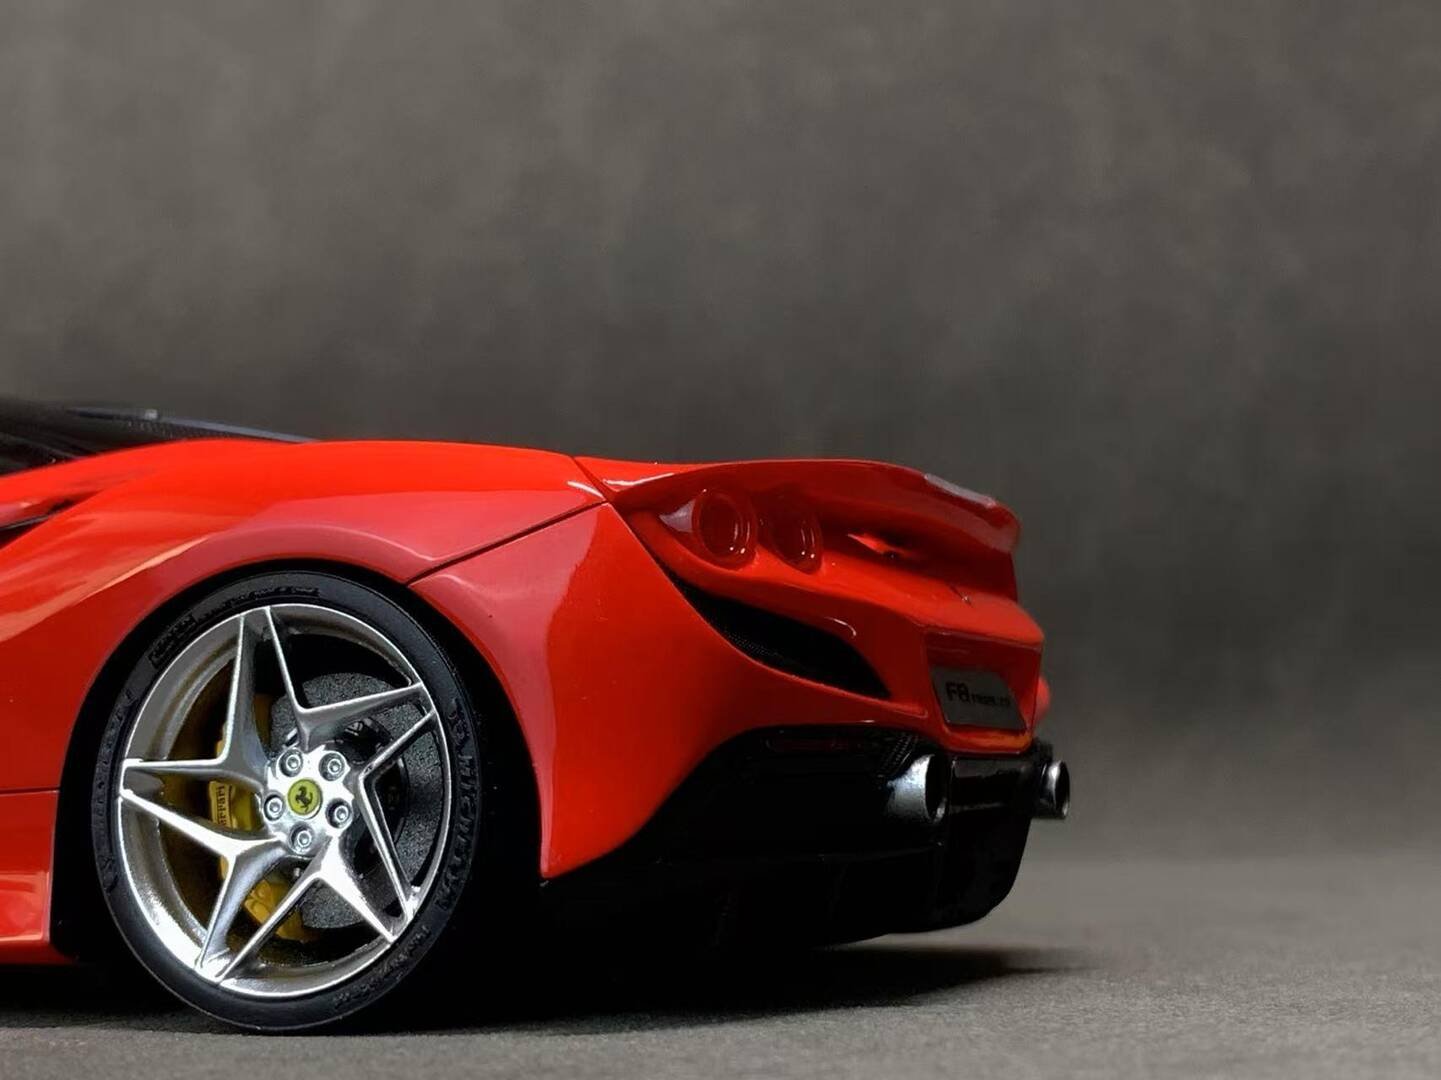
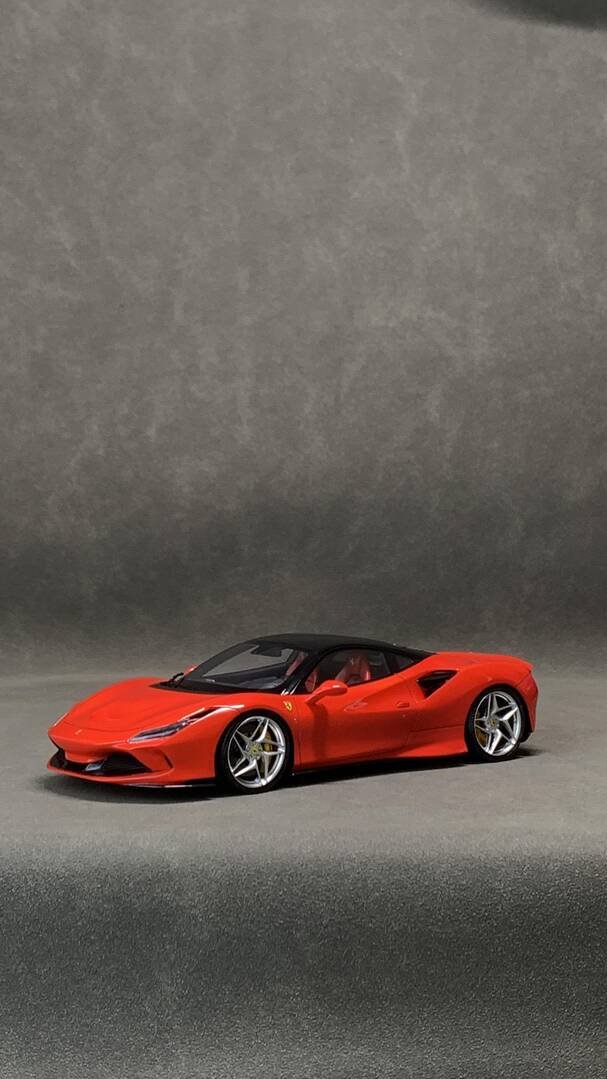
And that wraps up this 13-chapter build of the Alpha Model 1/24 Ferrari F8 Tributo! From a blue box to a fully detailed Super Italian Red masterpiece — it's been a journey. Thank you for following along!
Break Wong
Build Guide · Ferrari F8 Tributo · AM02-0032 · 1/24 Scale Full Detail Kit
Special Thanks: Alpha Model · MR. HOBBY · TAMIYA · BASF / Parrot