
 Advanced Creators
Ferrari F8 SpiderBuild Guide — Part 1: Background Information & Unboxing
Alpha Model AM02-0038 · Build by mG Car Scale Model Works
Background Information
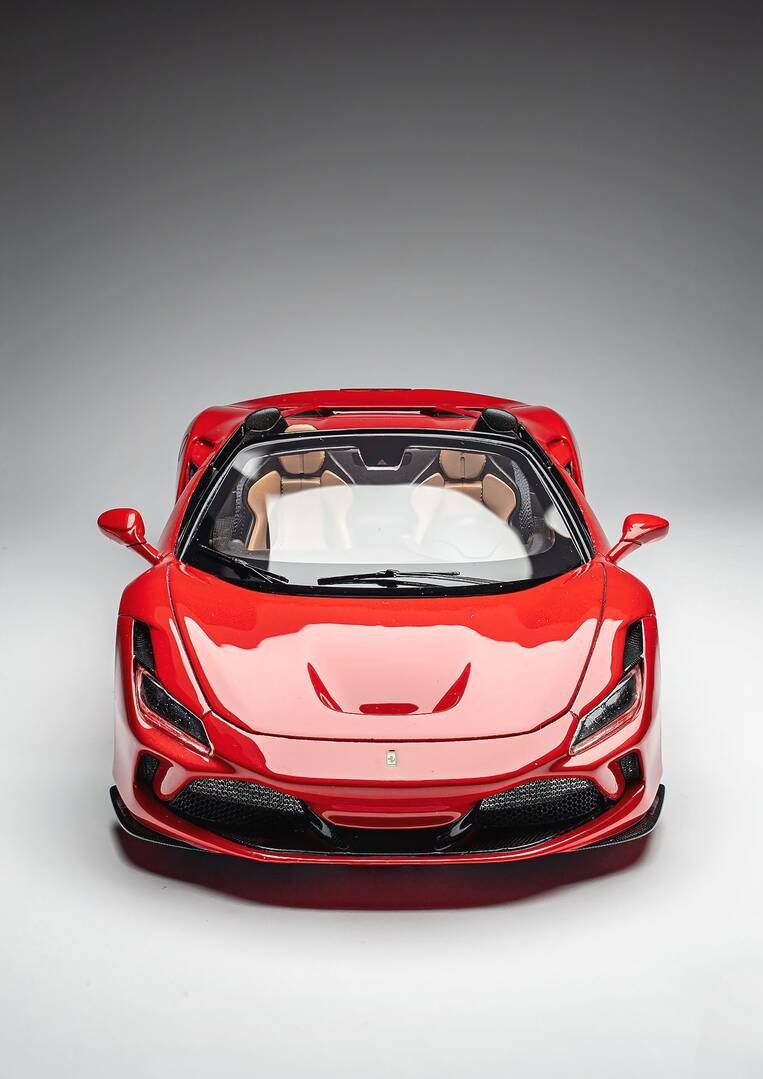
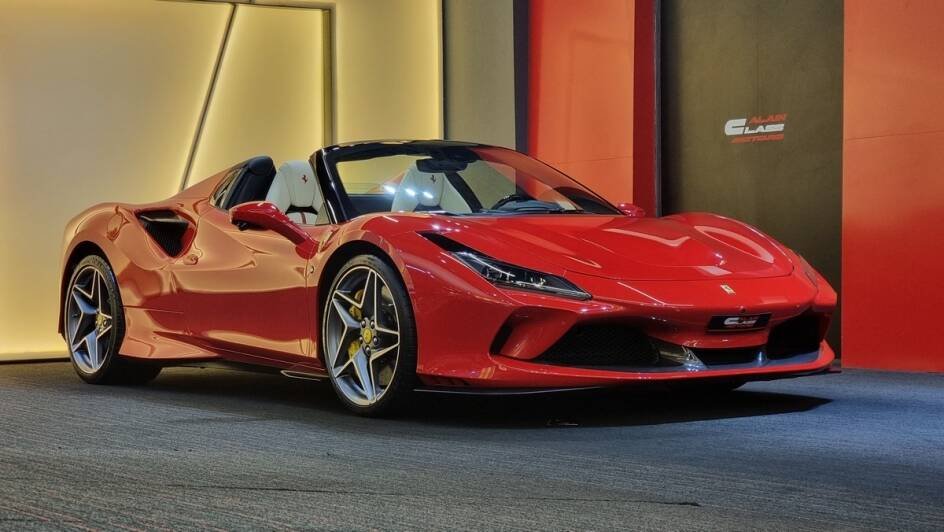
The Ferrari F8 (Type F142MFL) is a mid-engine sports car produced by the Italian automobile manufacturer Ferrari. The car is the successor to the Ferrari 488, with exterior and performance changes. It was unveiled at the 2019 Geneva Motor Show.
Technical Specifications
| Specification | Detail |
|---|---|
| Engine | 3,990 cc; F154 FA twin-turbocharged V8 |
| Power output | 710 PS (530 kW) |
| Transmission | 7-speed dual-clutch |
| Wheelbase | 2,650 mm |
| Length | 4,611 mm |
| Width | 1,979 mm |
| Height | 1,206 mm |
| Kerb weight | 1,435 kg (base, dry) |

Unboxing
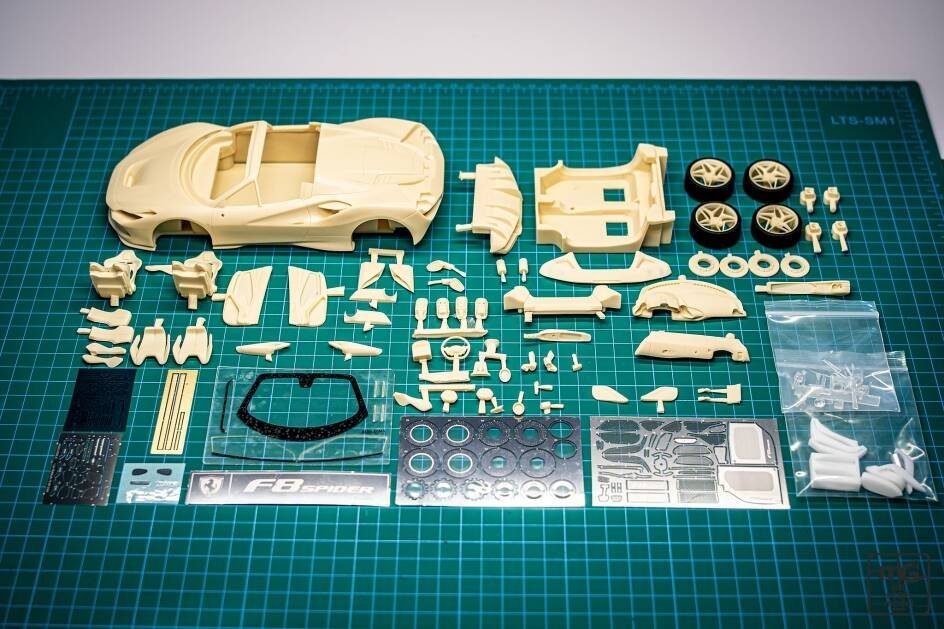
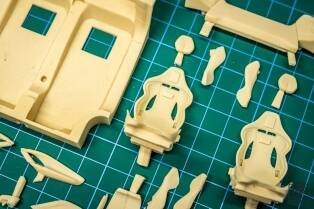
After a short break it's time for a new project. This time the chosen model is the ALPHA Model Ferrari F8 Spider. As usual with Alpha Model and Hobby Design the quality of the resin parts is amazing, there are absolutely no flaws on any of the parts, the details on the body and interior. All the intricate lines and edges of this Ferrari are made with high precision. This time included in the kit is one version of the rims and seats. In the kit there is as usual lots of PE parts and also a full interior and exterior set of carbon fiber details.
The model was kindly provided for a review and build article by ALPHA Model. All automotive refinishing material which will be used in this project was provided by Spekter Žalec.
All Alpha Model and Hobby Design kits seen on my media channels can be bought on Modellisto.at. All refinishing materials can be bought on www.kupibarve.si. Special modelling equipment for the build is provided by AMMO by Mig Jimenez and their Slovenian distributor miniatures.si.
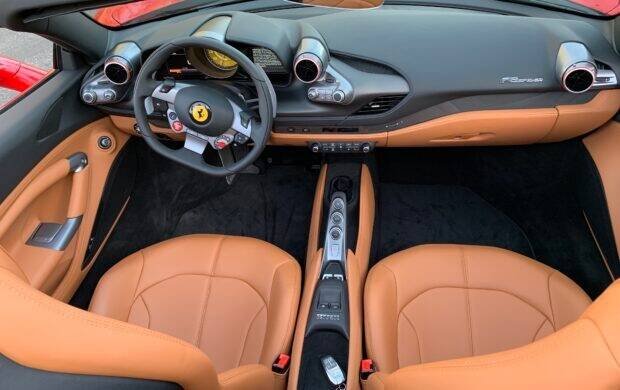
Next: Preparing Resin Parts
Advanced Creators
Ferrari F8 Spider Build Guide — Part 2: Preparing Resin Parts
Alpha Model AM02-0038 · Build by mG Car Scale Model Works
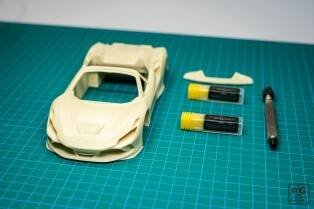
Cleaning Resin Parts
As was the custom with past model-making projects, we will also start with cleaning and preparing the resin parts of the model. After the inspection of all the components, which we did in the "Unboxing" contribution, we first start cleaning any residual silicone agents from the surfaces of our model. With this process, we not only ensure adequate adhesion of the primer to the substrate, but also reduce the chances of silicones appearing on painted surfaces.
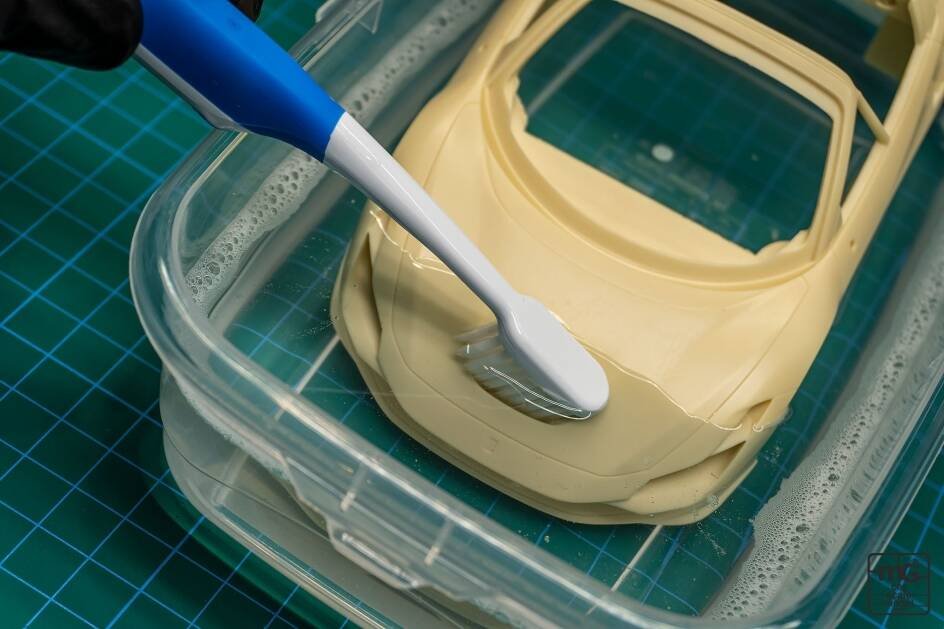
Clean the resin parts with warm water and dishwashing detergent. For this procedure, we need warm water, hand dishwashing liquid and various toothbrushes. Dip the resin pieces in the soapy water, scrub hard-to-reach places, quickly rinse everything and place it on a cloth to drain the excess soapy water. For an additional measure of caution, we wipe the body with a cloth soaked in Lesonal thinner for water-based paints, which is also a degreasing agent.
Deepening Panel Slots
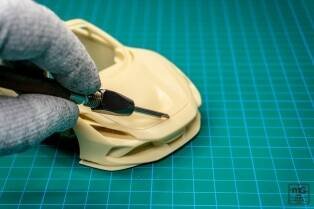
When all the resin parts have dried, we continue with the deepening of the panel slots. Even on the Ferrari F8 Spider mockup, the body lines are sharp and of varying thickness, but somewhat shallow for the further bodywork process.
Thus, we first deepen the slots of the "fixed" body parts using a special pin with a width of 0.1 mm.
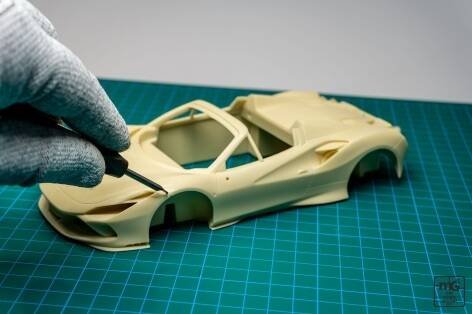
There are few narrower lines in the Spider version, where the roof of the vehicle is also movable, so we quickly replace the leg with a 0.2 mm thick one and continue deepening the slots on the doors, engine cover, front cover and movable roof.
Sanding the Bodywork
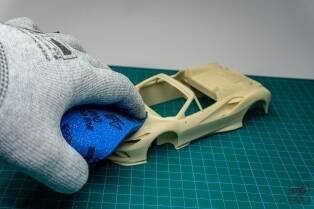
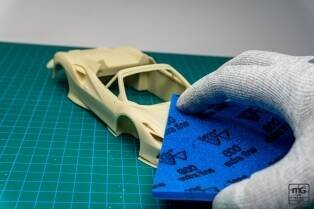
The last part of this contribution is the sanding of the bodywork. This time, too, for this purpose, we use an excellent sanding sponge with a coarseness of 800, which, like the previously mentioned Lesonal thinner, was provided by the company Spekter Žalec, and you can order their products at home in the online store kupibarve.si.
We sand the body with the aim of ensuring excellent adhesion of the materials that we will use in future contributions, as well as with the aim of eliminating minor irregularities that occurred during the resin casting process, as well as our clumsiness in the process of deepening the slots between individual body parts.
Next: Interior
Advanced Creators
Ferrari F8 Spider Build Guide — Part 3: Interior
Alpha Model AM02-0038 · Build by mG Car Scale Model Works
Interior Color Selection
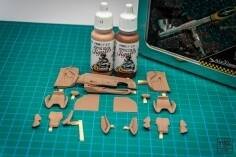
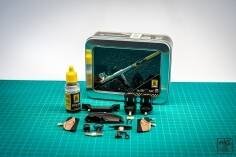
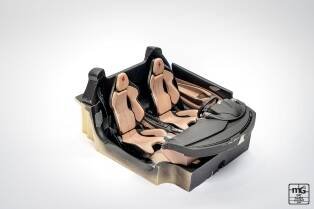
We start the manufacturing process by choosing the appropriate color for the interior, and since we couldn't find the right shade on the market, we created it ourselves. For the light brown interior, we chose the shades Sunny skintone and Red Brown from the range of AMMO water colors and mixed them in a ratio of approximately 1:1. With this obtained color, we painted all the interior components, where the primary color will be light brown. After the paint dried, some parts of the interior were masked and painted using AMMO semi-matt black paint, thus obtaining the corresponding colors of our contrasting two-tone interior.
Flocking Powder for Realism
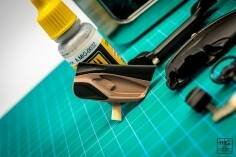
Since the interior will be quite visible this time, we provide an additional measure of realism by adding the so-called flocking powder with which we illustrate the carpet along the entire bottom of our model.
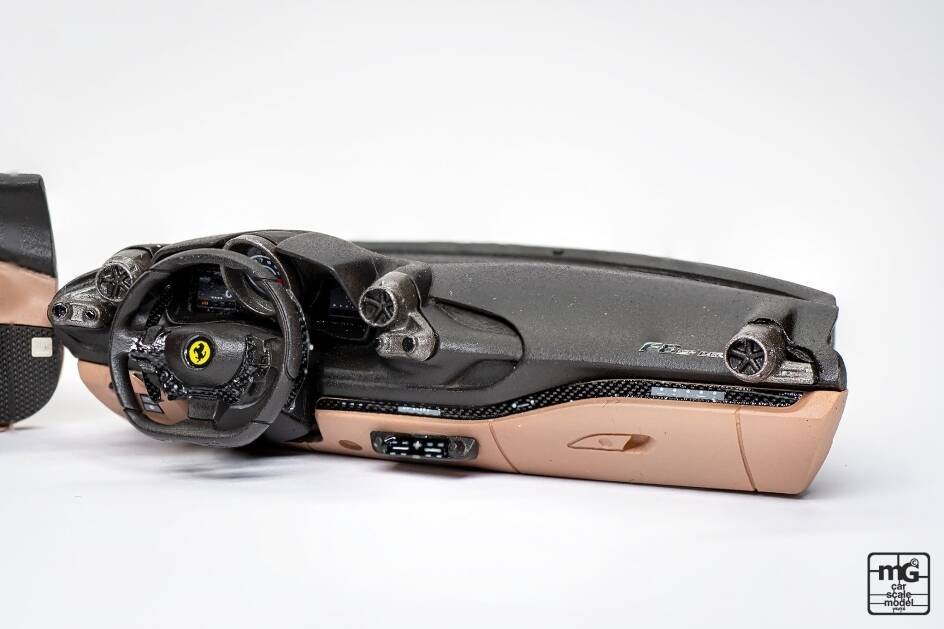
As a finishing touch, the iconic Ferrari logo was placed on the steering wheel.
Detailing
The next step is detailing. We start this by using the Gun metal shade and the brush. With this combination, we paint metal details in the interior, such as air vents, handles and gear buttons. After painting the metal details, we install the center console and the leather carpets for the driver and passenger, and start gluing the stickers. First, let's pay attention to the smaller details, such as the control buttons for the gearbox, air conditioning and auto system, counters and finally the carbon sticker and emblem on the steering wheel.
Carbon Decals on Seats and Dashboard
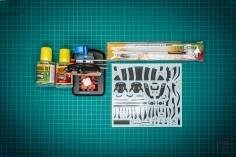
So let's prepare a few parts of the interior, such as the door panels and the dashboard, and focus on the seats. Also this time, Alpha Model included carbon stickers. These are not as extensive as our previous project, but still provide a convincing look for the seats and dashboard.
When applying all decals, especially the largest ones on the back of the seats, we use AMMO Decal Fix and Deca Set decal softening liquids and their special decal application and smoothing brush. All AMMO products were supplied to us by the company miniatures.si.
Final Interior Assembly
After all the stickers are installed and all the details are made, the final assembly of the interior follows. We start this by assembling the seats, specifically fitting the leather covers to the carbon seat shells. Finally, we install the seat in the interior, and just for the purposes of photography, we install the aforementioned already assembled assemblies as a whole.
Next: Wheels and Brakes
Advanced Creators
Ferrari F8 Spider Build Guide — Part 3: Interior
Alpha Model AM02-0038 · Build by mG Car Scale Model Works
Interior Color Selection
We start the manufacturing process by choosing the appropriate color for the interior, and since we couldn't find the right shade on the market, we created it ourselves. For the light brown interior, we chose the shades Sunny skintone and Red Brown from the range of AMMO water colors and mixed them in a ratio of approximately 1:1. With this obtained color, we painted all the interior components, where the primary color will be light brown. After the paint dried, some parts of the interior were masked and painted using AMMO semi-matt black paint, thus obtaining the corresponding colors of our contrasting two-tone interior.
Flocking Powder for Realism
Since the interior will be quite visible this time, we provide an additional measure of realism by adding the so-called flocking powder with which we illustrate the carpet along the entire bottom of our model.
As a finishing touch, the iconic Ferrari logo was placed on the steering wheel.
Detailing
The next step is detailing. We start this by using the Gun metal shade and the brush. With this combination, we paint metal details in the interior, such as air vents, handles and gear buttons. After painting the metal details, we install the center console and the leather carpets for the driver and passenger, and start gluing the stickers. First, let's pay attention to the smaller details, such as the control buttons for the gearbox, air conditioning and auto system, counters and finally the carbon sticker and emblem on the steering wheel.
Carbon Decals on Seats and Dashboard
So let's prepare a few parts of the interior, such as the door panels and the dashboard, and focus on the seats. Also this time, Alpha Model included carbon stickers. These are not as extensive as our previous project, but still provide a convincing look for the seats and dashboard.
When applying all decals, especially the largest ones on the back of the seats, we use AMMO Decal Fix and Deca Set decal softening liquids and their special decal application and smoothing brush. All AMMO products were supplied to us by the company miniatures.si.
Final Interior Assembly
After all the stickers are installed and all the details are made, the final assembly of the interior follows. We start this by assembling the seats, specifically fitting the leather covers to the carbon seat shells. Finally, we install the seat in the interior, and just for the purposes of photography, we install the aforementioned already assembled assemblies as a whole.
Next: Wheels and Brakes
Advanced Creators
Ferrari F8 Spider Build Guide — Part 4: Wheels and Brakes
Alpha Model AM02-0038 · Build by mG Car Scale Model Works
Painting Components
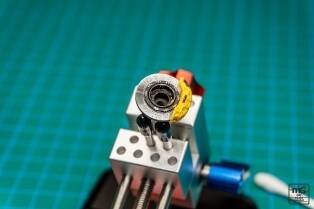
Due to the small number of components, this contribution will be short. But it starts as usual with coloring. This time, first of all, all the components, except for the rims and brake calipers, are painted with matt black paint from the manufacturer AMMO, the rims are given a Gun metal shade, and the brake calipers are covered in bright yellow paint from the manufacturer Tamiya.
Brake Disc Preparation
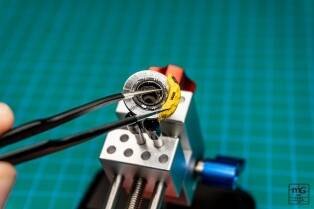
To ensure a realistic appearance of the brake discs, the metal parts of them are sanded using a rotary tool and a slightly coarser file. The brushed metal linings of the brake discs work very convincingly while the Ferrari logos are applied to the bright yellow brake calipers.
Brake Assembly
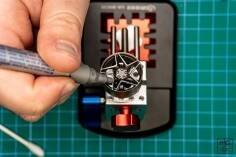
With brake discs processed in this way and other components painted, we continue with the production of brakes. We stick metal linings on the resin bases of the discs and put everything together on the squares that will be used to mount the wheels on the body. Brake calipers are also installed on the aforementioned blocks and Ferrari emblems are added to the calipers. The brakes and installation blocks are thus completed, the only thing missing is the installation of the rims until the "undercarriage" assembly is complete.
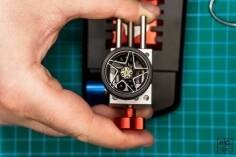
Rims and Tires
For this purpose, using a chrome marker, we first paint the individual spokes on the rims and thereby achieve the final look of the two-tone rims. We install the tires on the rims prepared in this way and add everything together to the previously completed blocks and brake system.
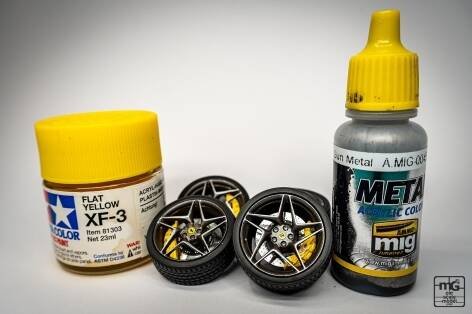
To complete this set, we place the Ferrari emblems in the center of the rims and carefully store everything until the final assembly step of our model.
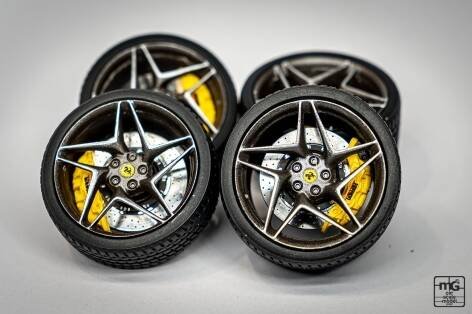
In all the contributions so far, we have thus produced everything except the largest assembly of our model — the body. We will focus on the bodywork in the next post.
Next: Car Body
Advanced Creators
Ferrari F8 Spider Build Guide — Part 5: Car Body
Alpha Model AM02-0038 · Build by mG Car Scale Model Works
Primer and Base Coat
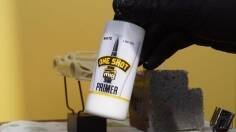
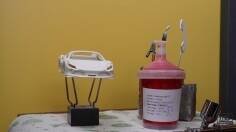
So this time we start painting right away. In order to ensure that the base is as even as possible, we first apply a primer to the bodywork. Because we decided to paint the F8 Spider in Rosso Corsa red, we were advised by the company Spekter Žalec, where they once again prepared a water-based paint according to the original recipe, that in order to achieve the correct shade, they advised the use of a white base. Using an airbrush, we apply a primer of white paint from the company AMMO by Mig.
Applying the Rosso Corsa Red
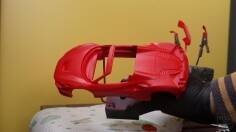
After the primer has dried, we continue with the application of paint, apply it in thin layers and wait a few minutes between layers. When the desired shade is reached, protect the paint with a two-component car gloss varnish. We leave the car body ready for further use for a few days, so that the varnish completely hardens.
Carbon Decals on the Body
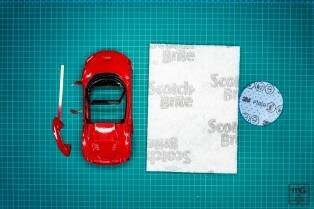
After a few days of impatient waiting, we begin further processing. Once again, the models are accompanied by stickers to illustrate the carbon parts of the vehicle. Therefore, we first completely sand the painted body using sanding sponges and, in hard-to-reach places, also with so-called Scotch Brite meshes.
When the bodywork is completely matte, we start applying the stickers. This time, in order to make handling the model easier, we decided to install emblems in addition to the carbon stickers before the final painting.
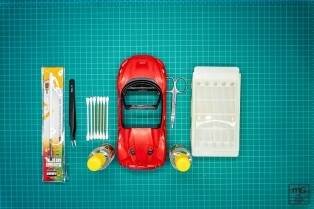
All stickers are carefully cut out of the entire sticker box and placed in the appropriate places on the body with the help of tweezers, a special brush and liquid for softening the stickers. The brush and liquids for stickers from AMMO by Mig were once again supplied to us by the company Miniatures.si. After installing all the stickers, they were dried for a few days and the final layer of varnish was applied to the body.
Polishing — Four-Stage Process
When the varnish has dried, we continue to work. This is the time to give the body its final shine and clean it of tiny dust particles that got caught in the paint during the painting process. The polishing process is also 4-stage this time.
In the first step, we use a 3M Trizact 3000 granulation polishing sponge, we level the varnished surface with this sponge and remove dust particles from it. After treatment with this sponge, the bodywork is completely matte and ready for further steps.
In the second and third stages, with sponges of granulation, first 6000 and later 8000, the bodywork is already restored to a partial shine and the scratches caused by the use of previous sponges are reduced to a minimum.
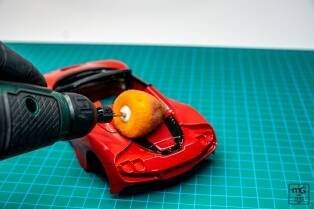
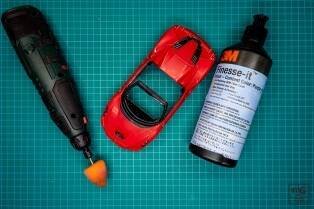
Next comes the last most important step. At this stage, using 3M Finesse-it polishing fluid, a medium hard polishing pyramid and a rotary machine, the bodywork is restored or further improved to its original shine.
Final Touches
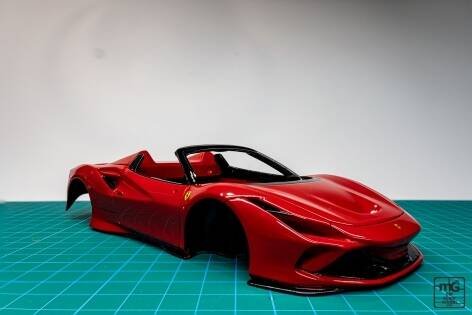
To conclude this contribution, with the help of various brushes and AMMO by Mig matt black paint, we manually paint the tracks and the inside of the windshield arch.
Next: Final Assembly
Advanced Creators
Ferrari F8 Spider Build Guide — Part 6: Final Assembly
Alpha Model AM02-0038 · Build by mG Car Scale Model Works

Recap and Starting Final Assembly
You read that right, we are starting the final assembly of our Ferrari F8 Spider. First of all, for those who did not follow our project, and for those who, from excitedly waiting for the final result, have already forgotten how we made our mockup until now, let's refresh their memory. This time's project also started with an inspection of the contents of the kit and the so-called unboxing, where we showed you in detail what is waiting for us, we continued with the preparation of resin parts, which ensured an adequate basis for our model. Then, due to the roofless nature of this model, the interior was made so that our Ferrari could "drive" around, we took care of making brakes and rims. In the last post, we painted the body in a characteristic red color.
This time we will combine all these sets with a pinch of additional details.
Radiators, Diffuser, and Exhaust
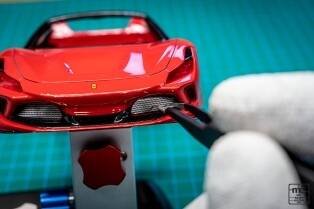
We start everything by installing the metal parts of the radiators and their protective meshes, we continue with the assembly of the rear diffuser, on which we install the reflective bodies and the ends of the exhaust pipes.
Light Fixtures
Assembly continues with the installation of light fixtures. We paint the rear lights transparent red, add some metal details to the front ones and carefully install everything on the polished body.
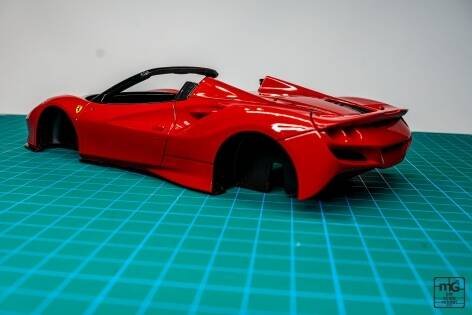
Interior Installation
After installing the lights, we start with the final assembly of the interior, first we install the door panels on the inner parts of the body and then the dashboard, we quickly install the side mirrors and the rear spoiler and we start installing the assembled passenger cabins.
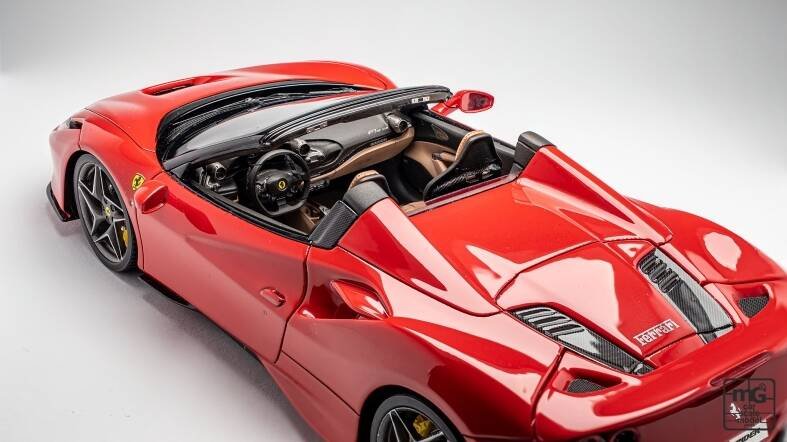
As is usual with Alpha Model models, it is only at this step that we see the fully assembled interior for the first time, and it is truly impressive. This time, unlike the previous mock-ups where the view into the interior was obstructed by the roof, all the smallest details can be seen.
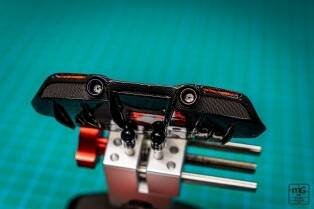
Wheels, Underbody, and Windshield
The finished product is already almost completely visible, but to make it really excellent, we add the bottom of the car to the model and place the wheels in the correct positions.
Caution: In order to prevent damage during work, the windshield is installed just before the completion of the mockup.
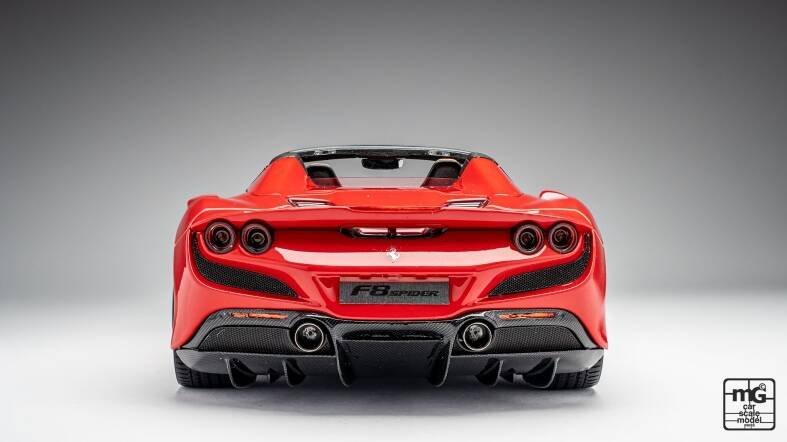
Once the windshield is installed and secured in its final position, metal wipers, metal Ferrari lettering on the rear of the hood, and a model designation in the form of a metal number plate are added to complete the "i".
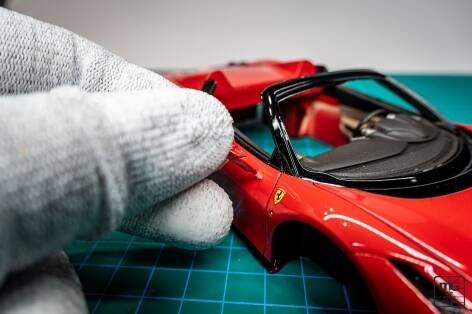
The Ferrari F8 Spider project is now complete. In the last post dedicated to this model, we show you just a few more studio photos where you can admire all the details of the model.
Next: Showcase & Special Thanks
Advanced Creators
Ferrari F8 Spider Build Guide — Part 7: Showcase & Special Thanks
Alpha Model AM02-0038 · Build by mG Car Scale Model Works
Showcase
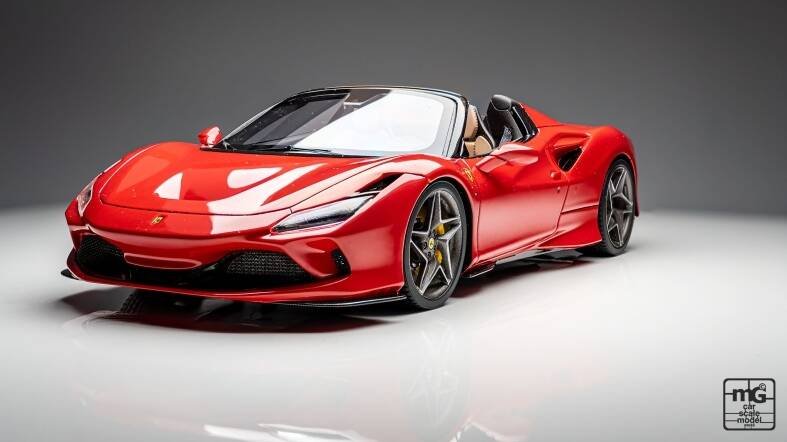
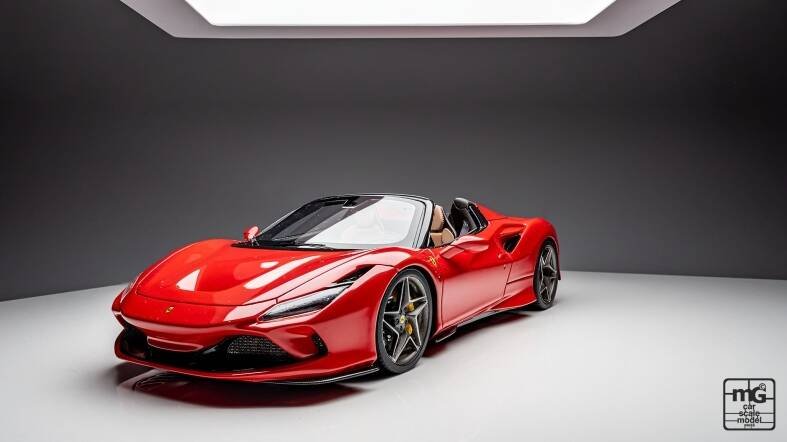
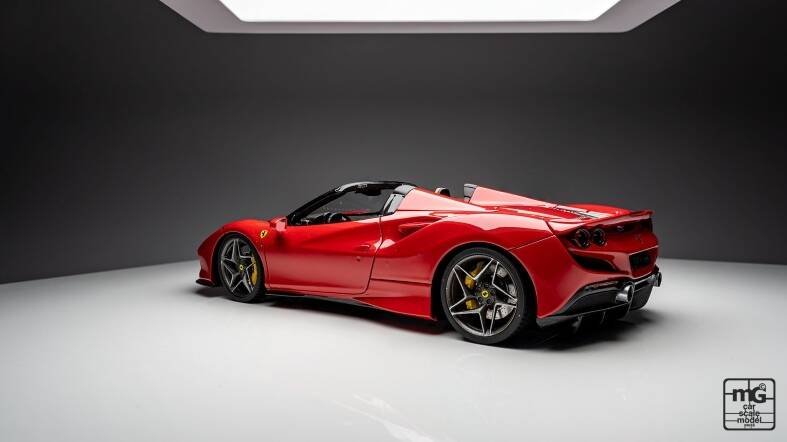
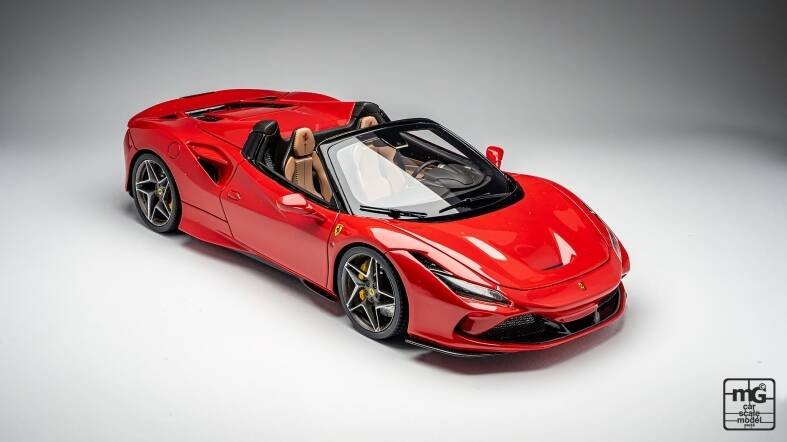
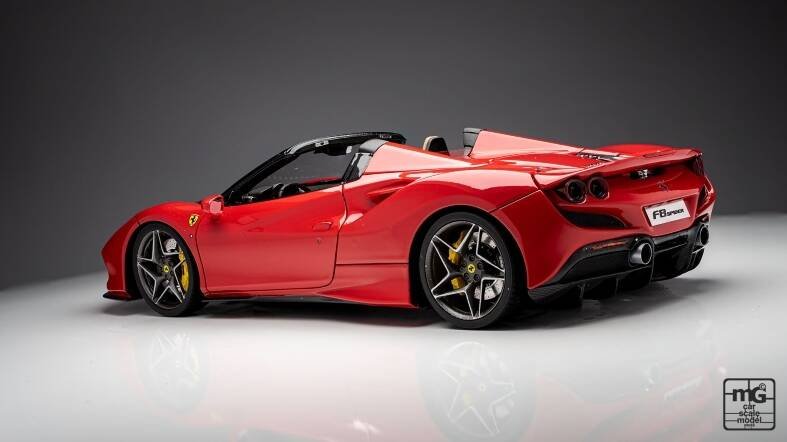
Here are some studio photos of the completed Ferrari F8 Spider model where you can admire all the details of the build.
Special Thanks
This project wouldn't be possible without some amazing companies which helped throughout the build. These companies are:
- Hobby Design / Alpha Model
- Modellisto.at
- Spekter Žalec
- miniatures.si
- AMMO by Mig Jimenez
- caranduser.com
You can find details about all the mentioned companies by scanning the QR-code next to their logo.
For my other projects scan the QR-code with all my social media accounts linked to it and leave a comment and a like if you find something interesting, and also if you want to follow my work do not forget to subscribe to my accounts.
Thanks,
Matej Grofelnik
mG Car Scale Model Works

End of build guide