
 Advanced Creators
Ferrari 488 Pista — Intro & Box Contents
Alpha Model AM02-0010 · Build by Robin Witt
This build guide was written by Robin Witt, UK based Scale Model Builder (see Robin's Scale Models on Facebook). I hope my build of this kit will provide some help and inspiration for you to go on and build your own masterpiece. Most of all though, enjoy your build.
Research & Preparation
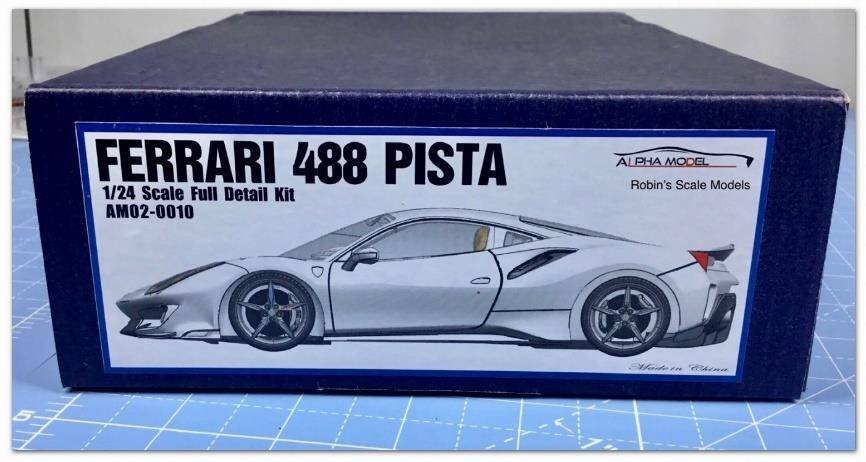
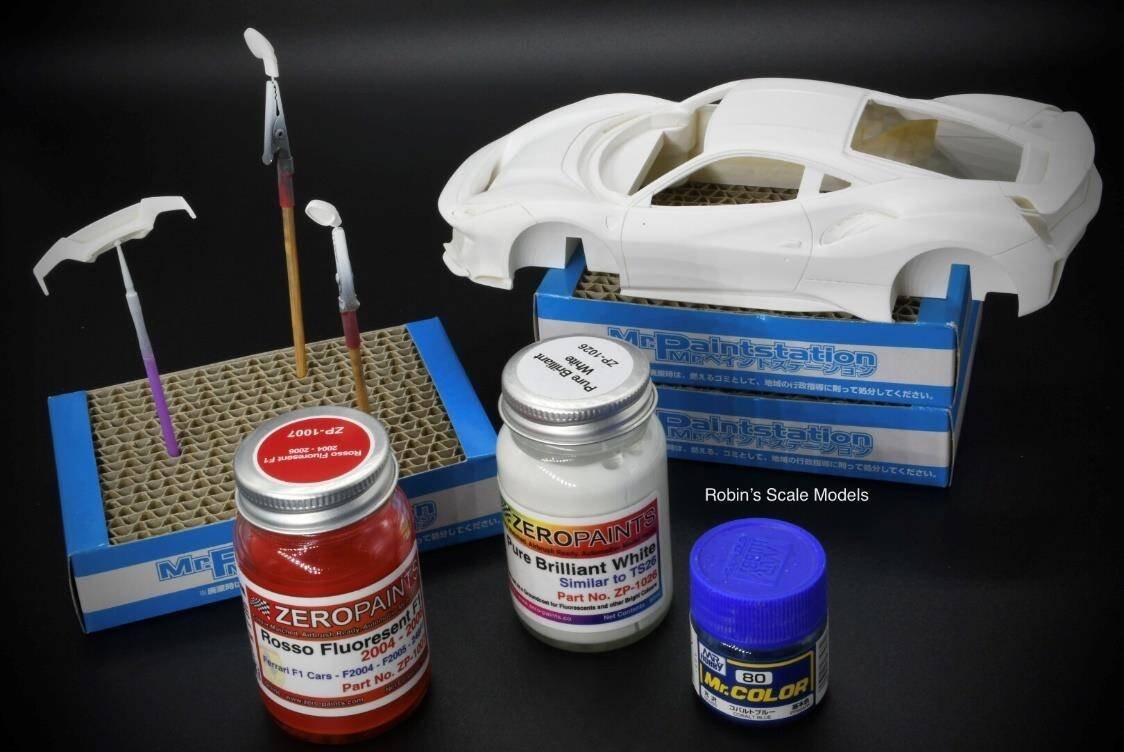
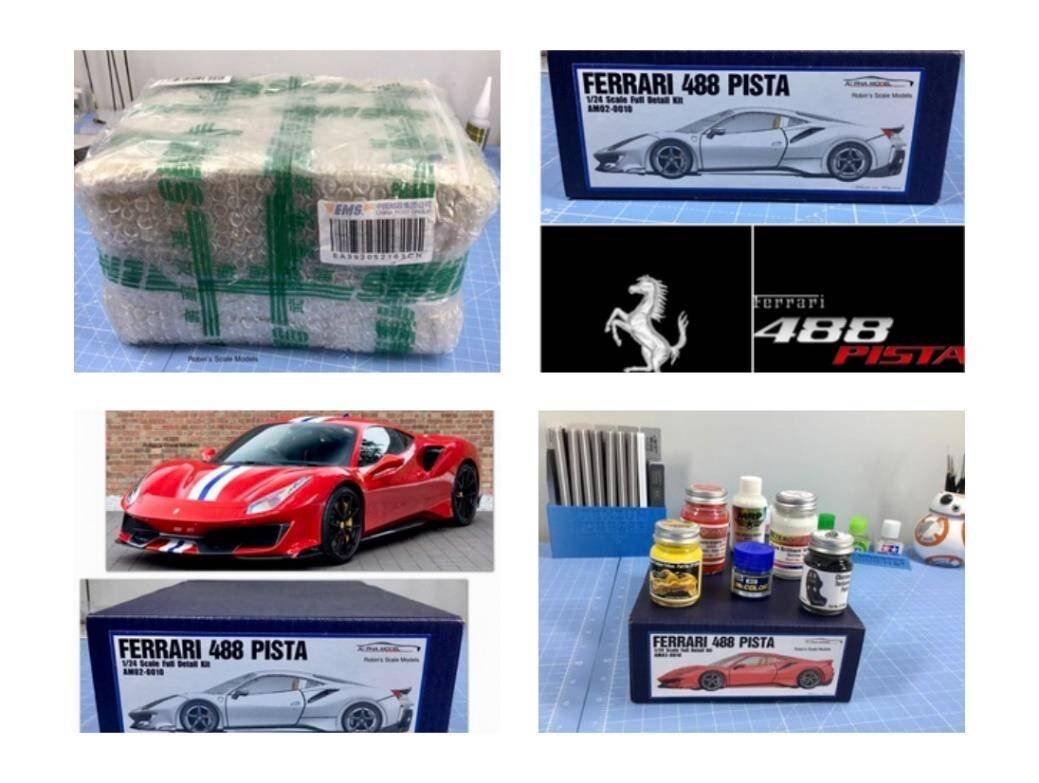
While waiting for my Kit to arrive from China, I researched the Ferrari 488 Pista and selected the car I wanted to base my build on. I also checked my paint stock and ordered the main paints I would need. My Alpha Model kit arrived very securely packaged and the build project commenced.
What's Inside the Box
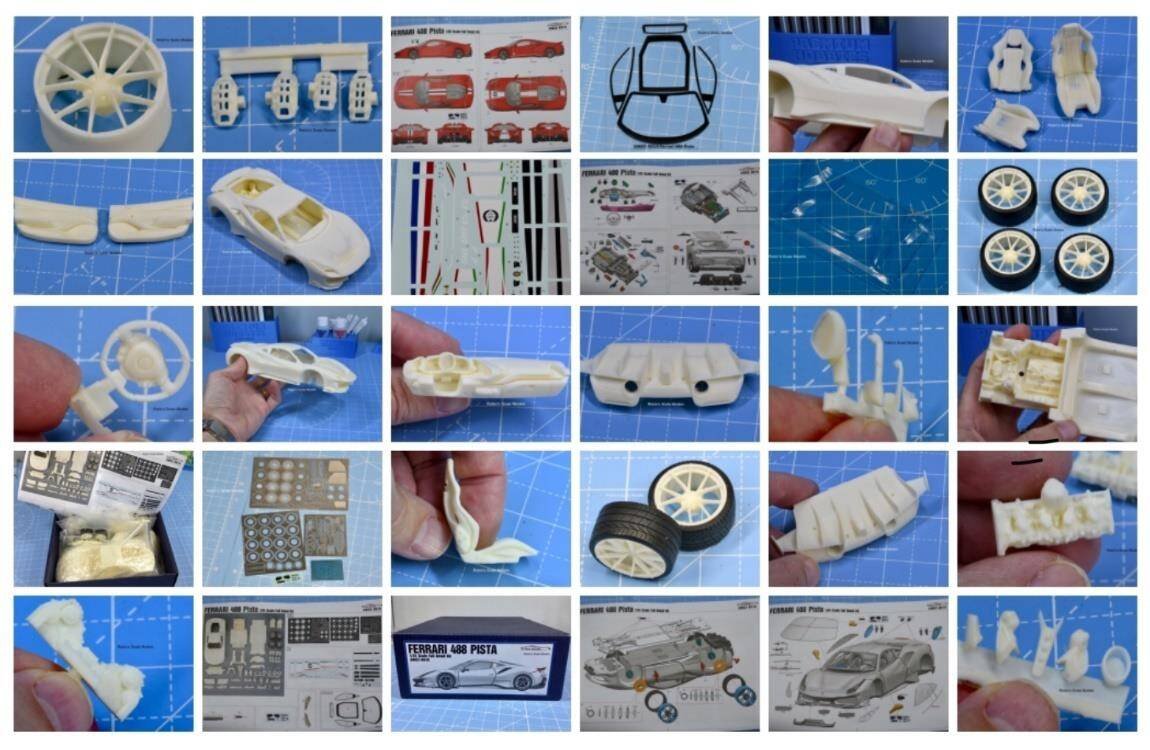
These are the contents of box. The quality is excellent. You have everything here to build a fantastic scale model.
Health & Safety + Body Preparation
Advanced Creators
Ferrari 488 Pista — Health & Safety + Body Preparation
Alpha Model AM02-0010 · Build by Robin Witt
Health & Safety
First thing to consider when using resin materials is health and safety. Resin dust is hazardous — proper protection is non-negotiable.
Resin Safety Warning
You should wear an appropriate mask when sanding, using a file or drilling resin parts as fine resin particles can be dangerous if breathed in. Also, wash all resin parts in soapy water or use an anti-silicone degreaser before priming and painting.
Safety first — always protect yourself when working with resin. The fine particles released during sanding, filing or drilling are harmful if inhaled. A quality respirator mask and good ventilation are essential. Additionally, washing all resin parts removes mould release agents and ensures proper paint adhesion.
Body Preparation
Preparation work on the resin included sanding out some imperfections on the body shell and using scribers to open out the panel lines (make them a bit deeper).
Step 1 — Sanding Imperfections
The first task was to carefully sand out any imperfections on the body shell. This ensures a smooth, flawless surface ready for priming and painting.
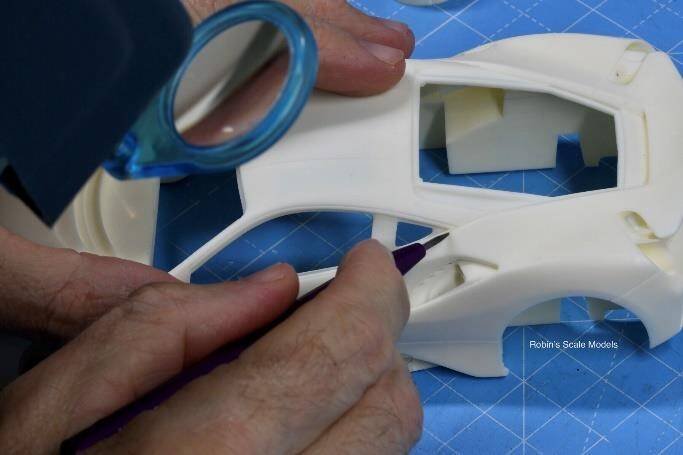
Step 2 — Scribing Panel Lines
Using scribers, the panel lines were opened out and made a bit deeper. This enhances the definition of the body lines and gives a more realistic appearance once painted.
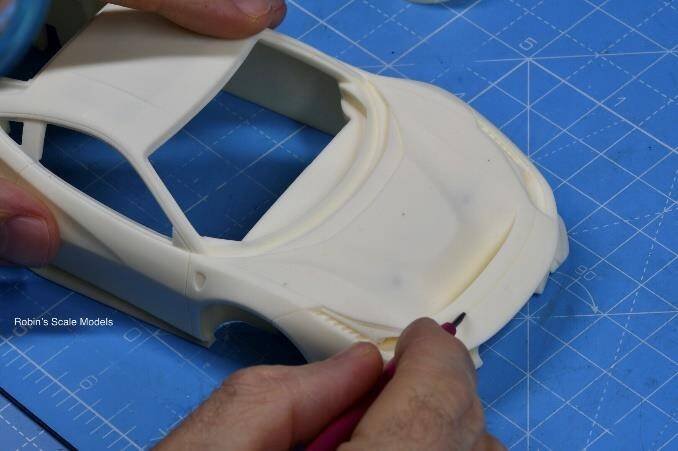
Priming & Painting
Advanced Creators
Ferrari 488 Pista —Priming & Painting
Alpha Model AM02-0010 · Build by Robin Witt
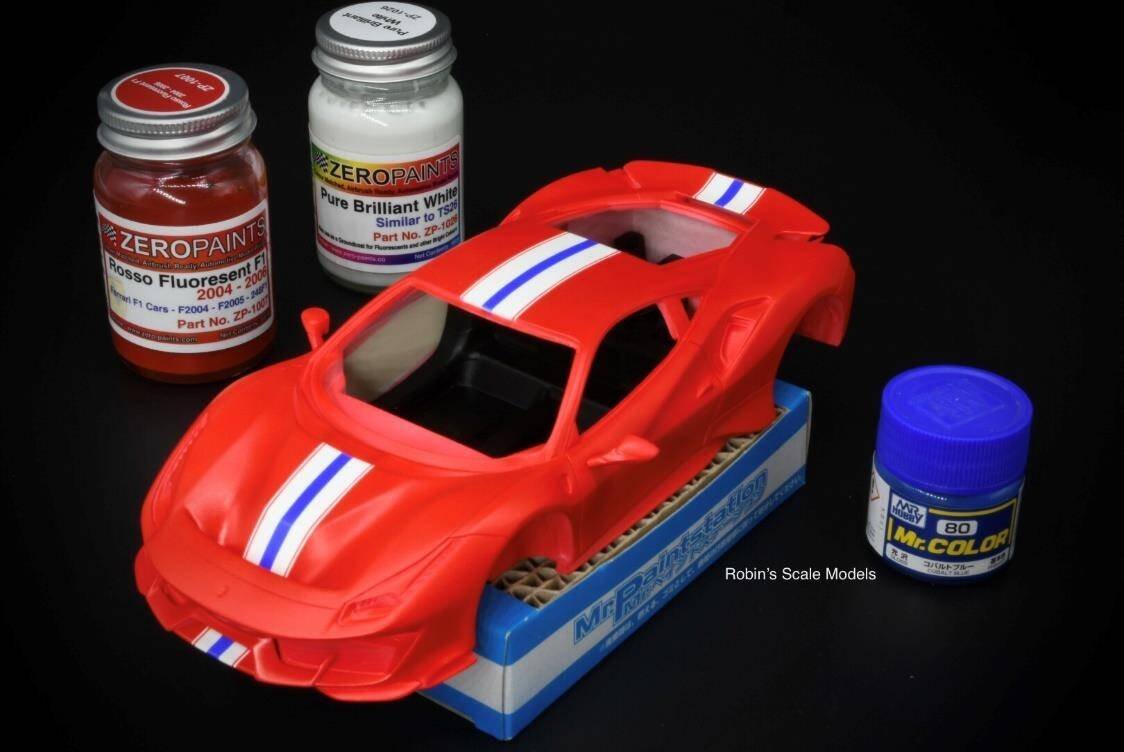
First job on the bodywork was to prime and then give it an overall white basecoat — the perfect base for the Rosso Fluorescent F1 red and the tri-colour stripe.
Step 1 — White Primer & Basecoat
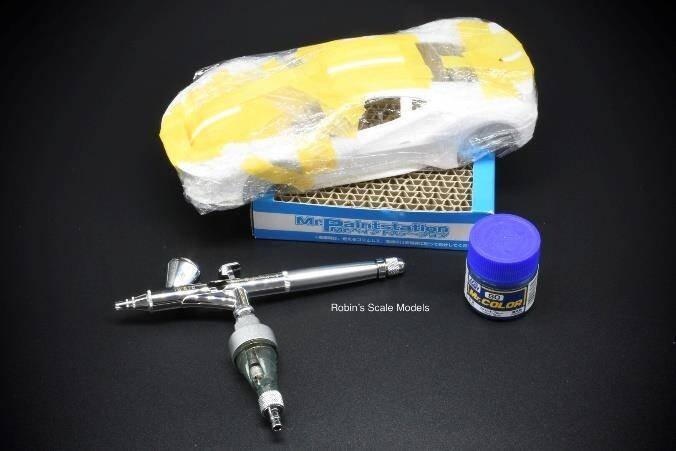
First job on the bodywork was to prime (I used a white lacquer based primer) and then gave it an overall white basecoat. This gave me a perfect base for the Rosso Fluorescent F1 red paint I was using for the main body colour, and also the brilliant white colour that I needed for the tri-colour stripe.
Step 2 — Tri-Colour Stripe Masking
I then used the measurements from the silver and black tri-colour stripe decal supplied by Alpha Model with the Pista kit to help mask for painting my specific tri-colour stripe. The 3mm masking line front to back on the car (including the front spoiler) gave me the centre line to work to.
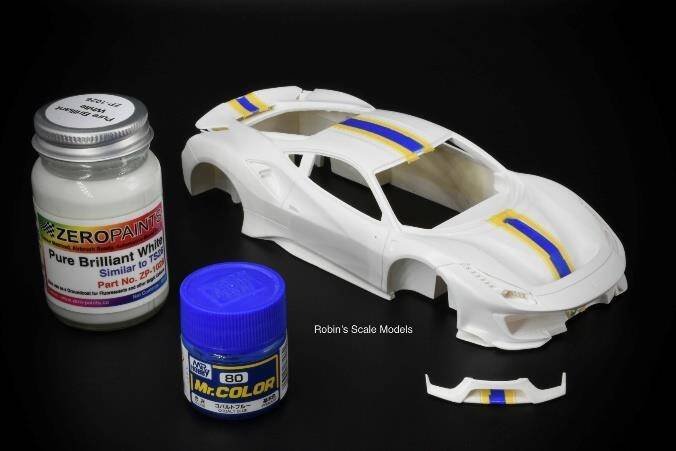
Step 3 — Main Body Colour Complete
More careful masking and painting gave me the perfect finish I was looking for. This is the main body colour and tri-colour stripe prior to 2K clearcoat. Additionally, before clearcoat, I needed to add all of the carbon work depicted in the reference photographs.
Carbon Fibre Decals
Advanced Creators
Ferrari 488 Pista — Carbon Fibre Decals
Alpha Model AM02-0010 · Build by Robin Witt
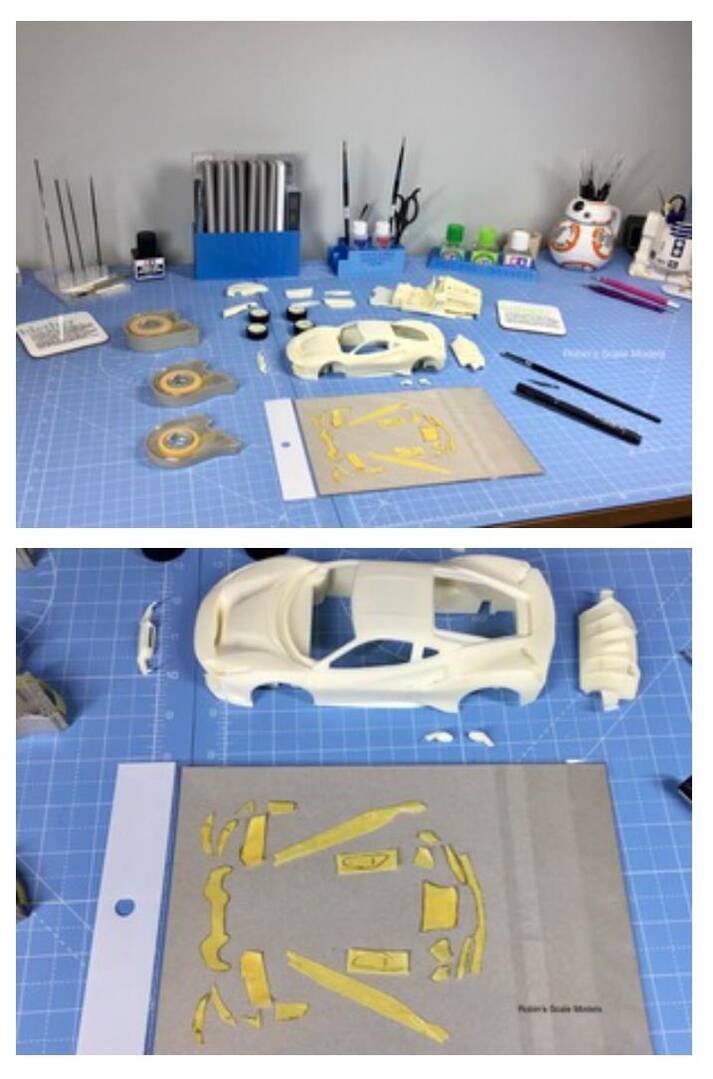
Before priming or painting I used my reference photographs and created masks of all the carbon areas on the bodywork. These masks would be used later to create the high definition carbon decal shapes.
Creating Carbon Masks
Before priming or painting I used my reference photographs and created masks of all the carbon areas on the bodywork. These masks would be used later in the build project to create the high definition carbon decal shapes that I required to represent the carbon areas. These pictures show half of the masks needed.
Carbon Templates & Rear Diffuser
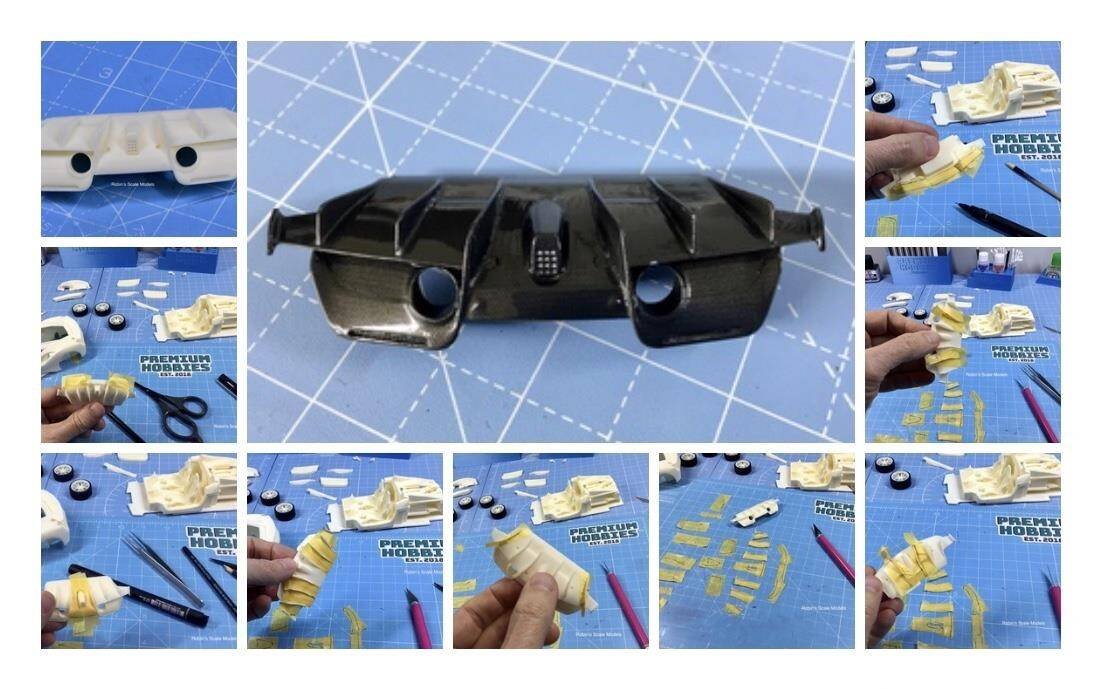
This set of photographs shows the work involved in creating carbon templates and decaling the rear lower air diffuser.
Clear Coat & Polishing + Brake Discs
Advanced Creators
Ferrari 488 Pista — Clear Coat & Polishing + Brake Discs
Alpha Model AM02-0010 · Build by Robin Witt
Clear Coat & Polishing
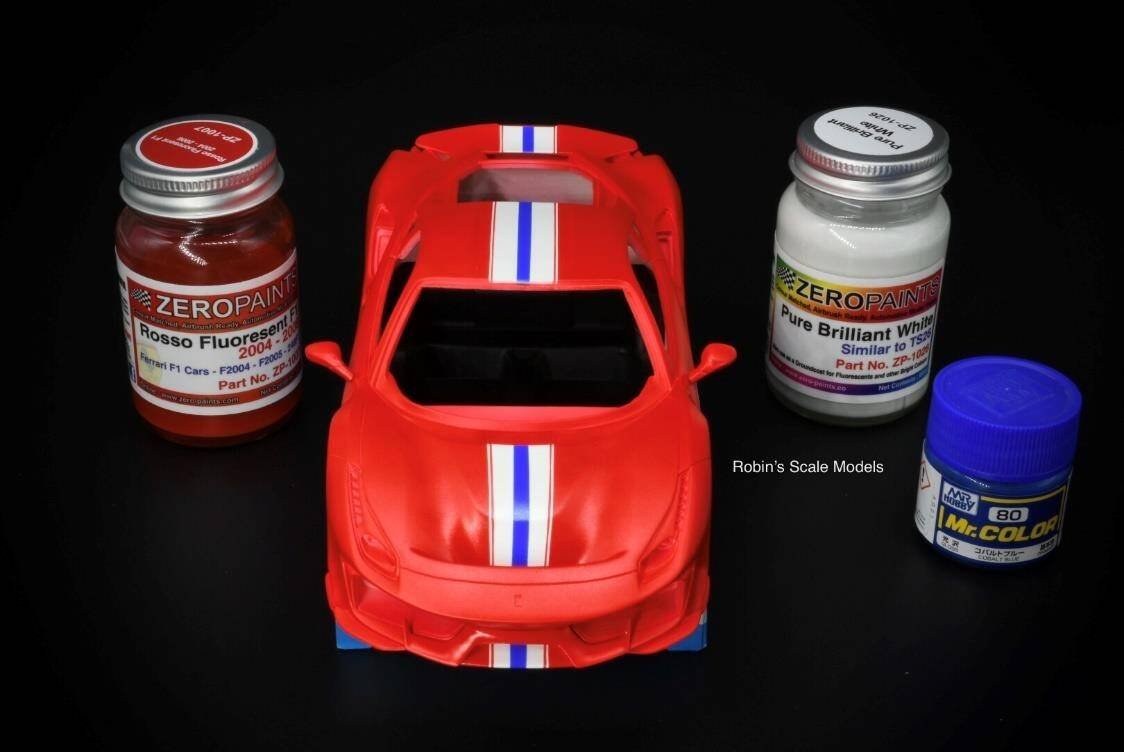
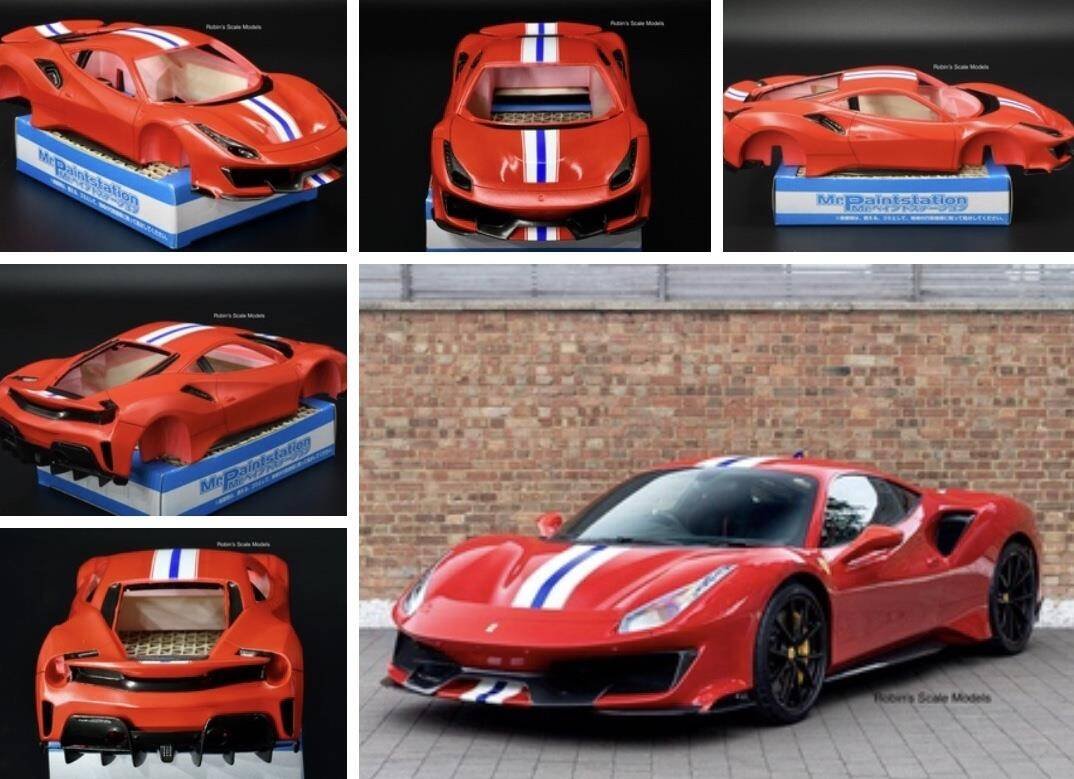
This set of photographs will remind you of the look I was after and shows the bodywork with all painting and carbon decal complete. Next up, the bodywork will be treated to a 2K clearcoat treatment followed by wet sanding and polishing.
Bodywork Complete — Pre-Clearcoat
This set of photographs will remind you of the look I was after and shows the bodywork with all painting and carbon decal complete. Next up, the bodywork will be treated to a 2K clearcoat treatment followed by wet sanding and polishing.
Step 1 — GX100 Clear Coat
Once the bodywork paint had cured I clear coated the body work assemblies with GX100 to protect the paintwork and give a real nice smooth finish for applying the many custom shaped carbon fibre decals. I then left the bodywork for a week to give sufficient time for the carbon decals to fully dry.
Step 2 — 2K Clearcoat & Curing
After that I used a 2K clearcoat across all the bodywork assemblies to give that perfect finish and shine. I then set this aside for, I reckon, three weeks to fully cure before spending a good part of two days wet sanding and polishing to achieve the showroom finish that I wanted.
Step 3 — Panel Line Enhancement
Here you can see the side view with the carbon finishing. I have also used black panel line fluid to enhance the panel lines. The dashboard assembly is also in place here. Hopefully you will also have noticed those prancing horse Ferrari badges.
Brake Discs
The Alpha Model kit gives you a couple of really nice etch sheets to build up realistic brake discs.
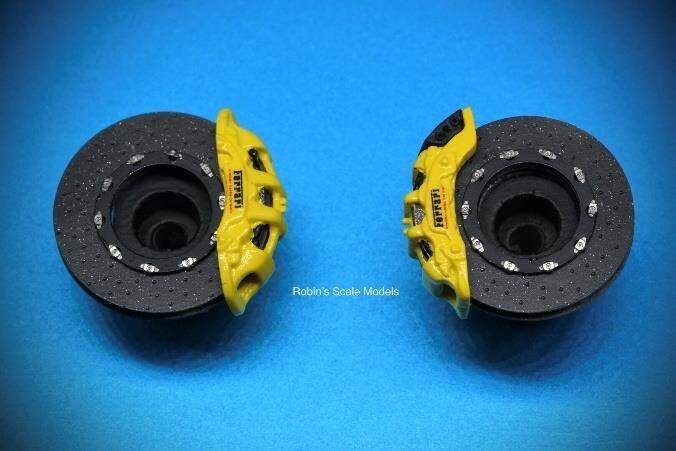
The Alpha Model kit gives you a couple of really nice etch sheets to build up realistic brake discs. I've added further realism by airbrushing the brake surfaces with Carbon Ceramic Grey paint.
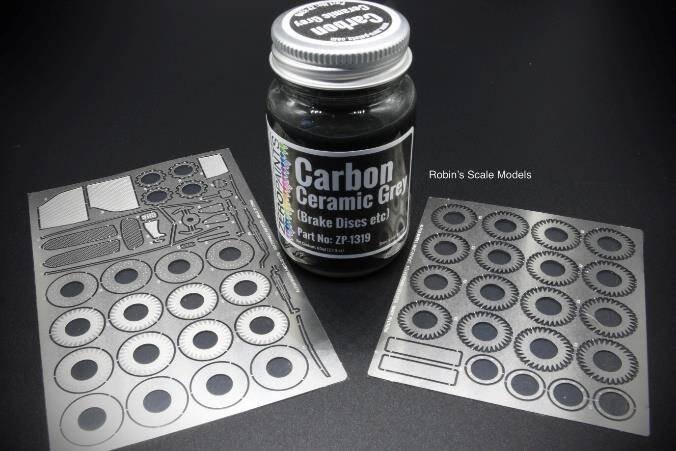
The etch sheets provide excellent detail for the brake disc faces and ventilation vanes. The Carbon Ceramic Grey airbrushing adds that extra layer of realism, closely matching the appearance of the real car's carbon ceramic brake system.
Wheels + Racing Harnesses & Seats
Advanced Creators
Ferrari 488 Pista — Wheels + Racing Harnesses & Seats
Alpha Model AM02-0010 · Build by Robin Witt
Wheels
I decided to add a bit extra detail by drilling and adding turned metal tyre air valves and wheel hex nuts.
Step 1 — Drilling & Metal Valves
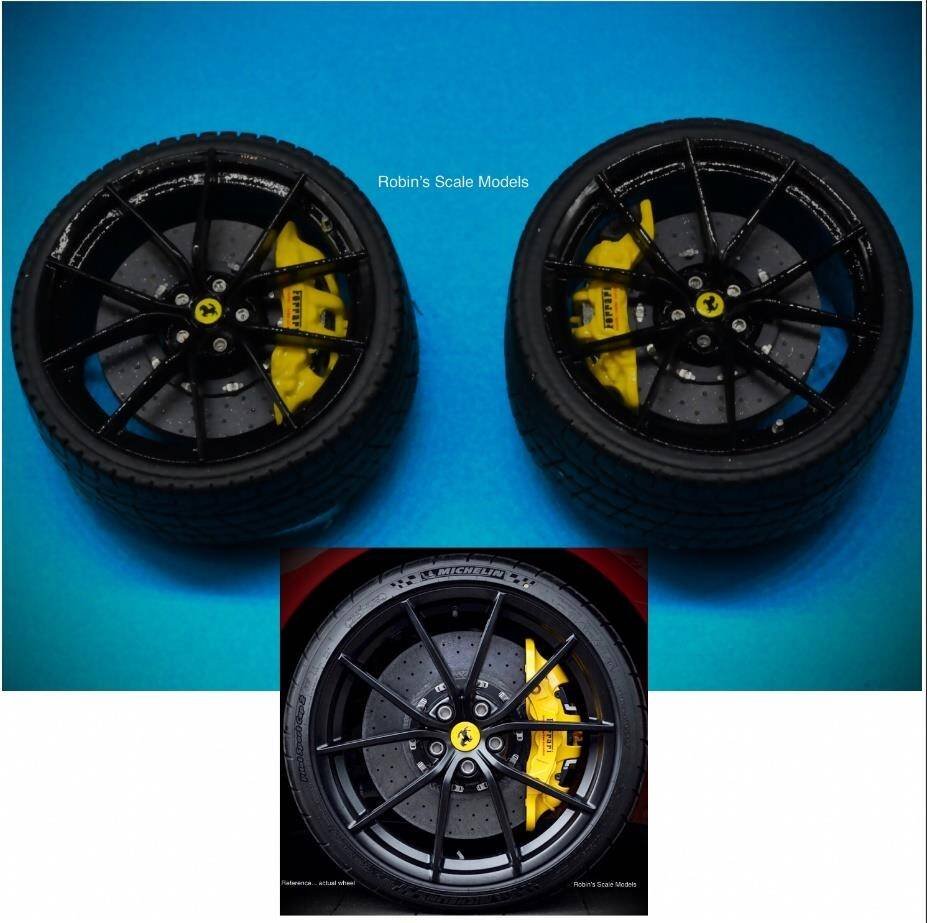
I decided to add a bit extra detail by drilling and adding turned metal tyre air valves and wheel hex nuts. The wheel rims were painted black and given a couple of coats of clear lacquer. The resin printing, using flexible resin, of the tyres and tyre tread is fantastic.
Wheels vs. Reference
Finally you can see my wheels against the inset photograph from my reference Pista. Let's say I was delighted with the outcome.
Racing Harnesses & Seats
I wanted to add racing harnesses rather than normal seat belts. Having found suitable reference within a Ferrari 488 Pista on a www search I set about achieving the finish I was after.
Racing Harnesses & Carbon Seat Backs
I wanted to add racing harnesses rather than normal seat belts. Having found suitable reference within a Ferrari 488 Pista on a www search I set about achieving the finish I was after. The resin seats are the ones that come with the kit. I used aftermarket harness material and decals. I didn't take WIP pictures however the picture below shows the steps I took on another build to achieve the finish on the seat fronts. The back of the seats have been finished with Carbon decal and clear lacquered. Overall this finish represents the 1:1 reference perfectly.
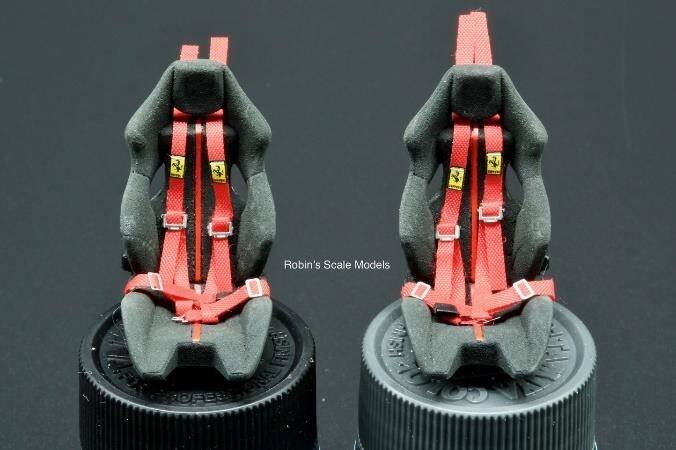
Glass Bubbles Technique
Per above, the seat finish was achieved using a product called Glass Bubbles (or Microspheres). I brush painted black enamel and then sprinkled on the glass bubbles. I recommend that you wear a mask when doing this as the product is basically a very fine dust. Thereafter you just need to airbrush the colour that you wish to use for your subject.
Engine Compartment + Interior + Dashboard
Advanced Creators
Ferrari 488 Pista — Engine Compartment + Interior + Dashboard
Alpha Model AM02-0010 · Build by Robin Witt
Engine Compartment
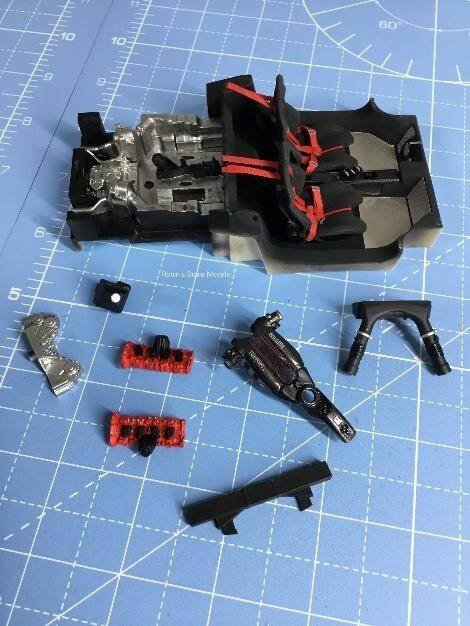
For the engine compartment, initially I painted all of the area that may be seen from above in a metallic aluminium.
Metallic Aluminium Base & Detailing
For the engine compartment, initially I painted all of the area that may been seen from above in a metallic aluminium. I then detailed the individual engine block components, including using carbon decal on various parts per reference material. You can see the final results below. I was real happy with the end result.
Interior
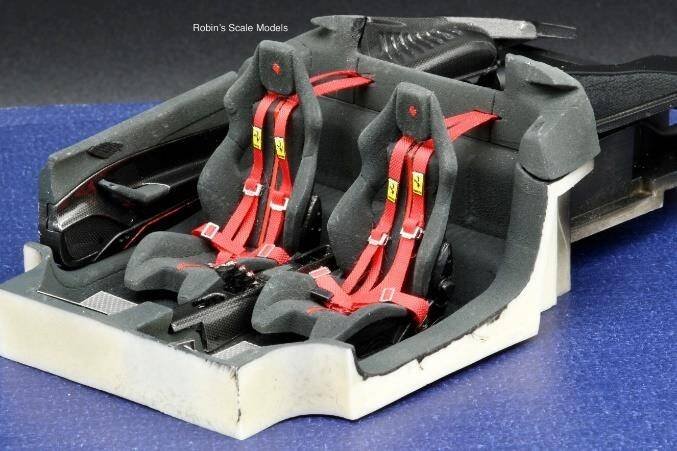
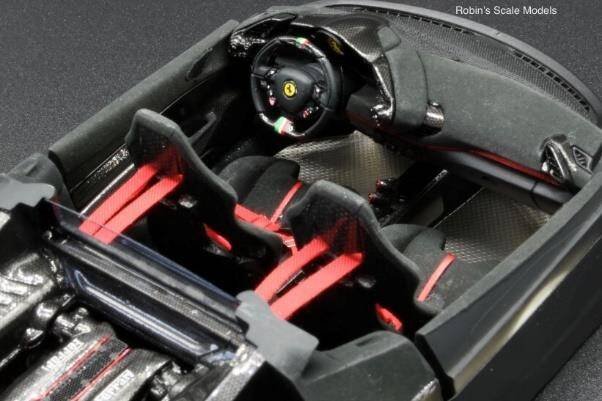
Moving back to the interior of the car, I used my reference pictures of the actual car I am representing in this project and carbon decalled, masked and painted through many stages to get to this… perfect to the reference.
Carbon Decalling, Masking & Painting
Moving back to the interior of the car, I used my reference pictures of the actual car I am representing in this project and carbon decalled, masked and painted through many stages to get to this… perfect to the reference.
Dashboard
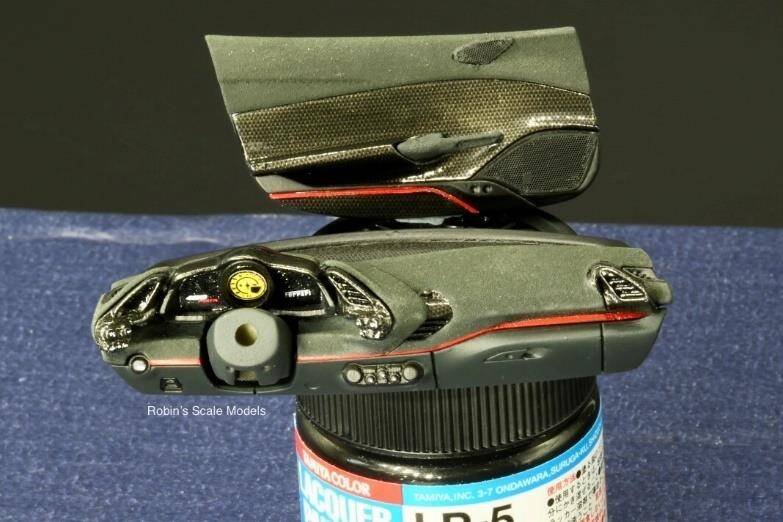
The steering wheel got a lot of attention too, with carbon decal and lots of masking at various stages in order to represent the various finishes on the wheel itself.
Step 1 — Steering Wheel Detailing
The steering wheel got a lot of attention too, with carbon decal and lots of masking at various stages in order to represent the various finishes on the wheel itself. This included using 0.4mm masking tape to airbrush the colours of the Italian flag!
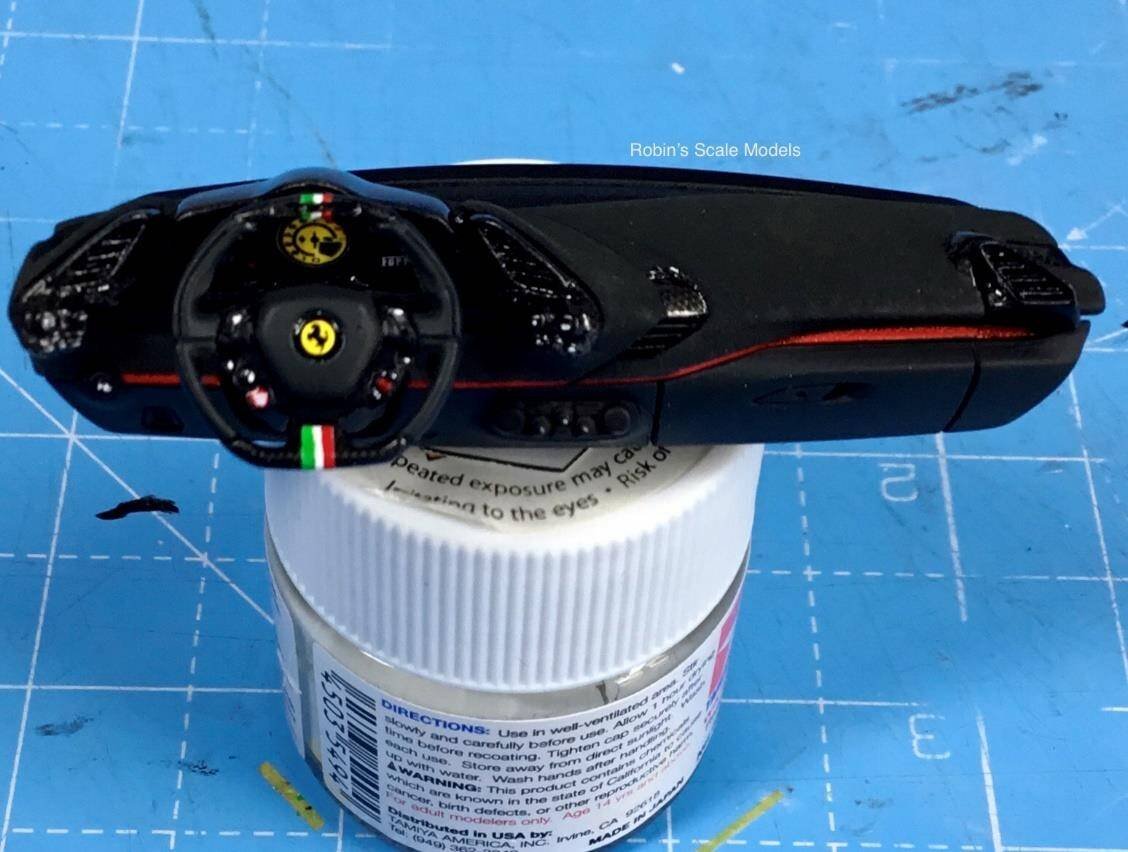
Here is the result, the steering wheel set into the main dashboard.
Step 2 — Dashboard Assembly
Couple of pictures with the dashboard assembly in place. Note however that the dashboard was placed on the interior assembly for the purposes of this photograph. The dashboard assembly is actually glued in place on the main bodyshell.
Final Assembly + Completed Photos
Advanced Creators
Ferrari 488 Pista — Final Assembly + Completed Photos
Alpha Model AM02-0010 · Build by Robin Witt
Final Assembly
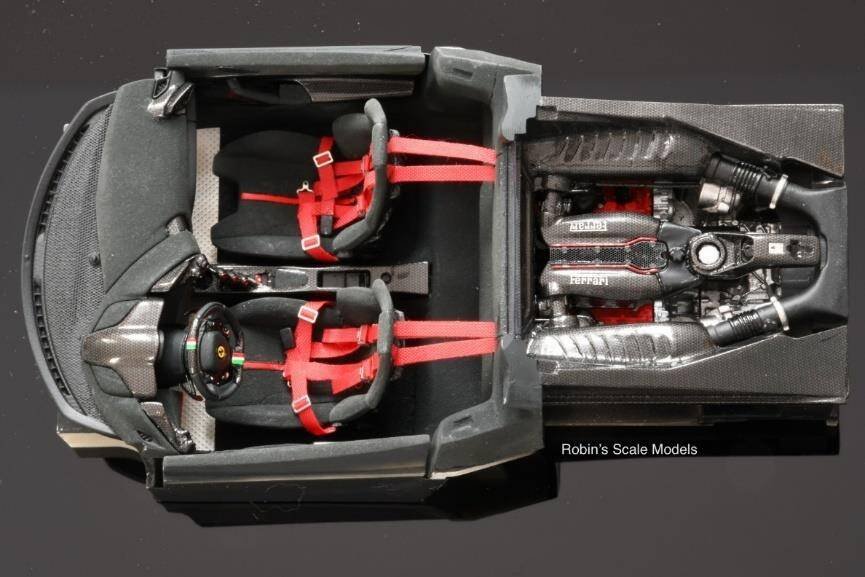
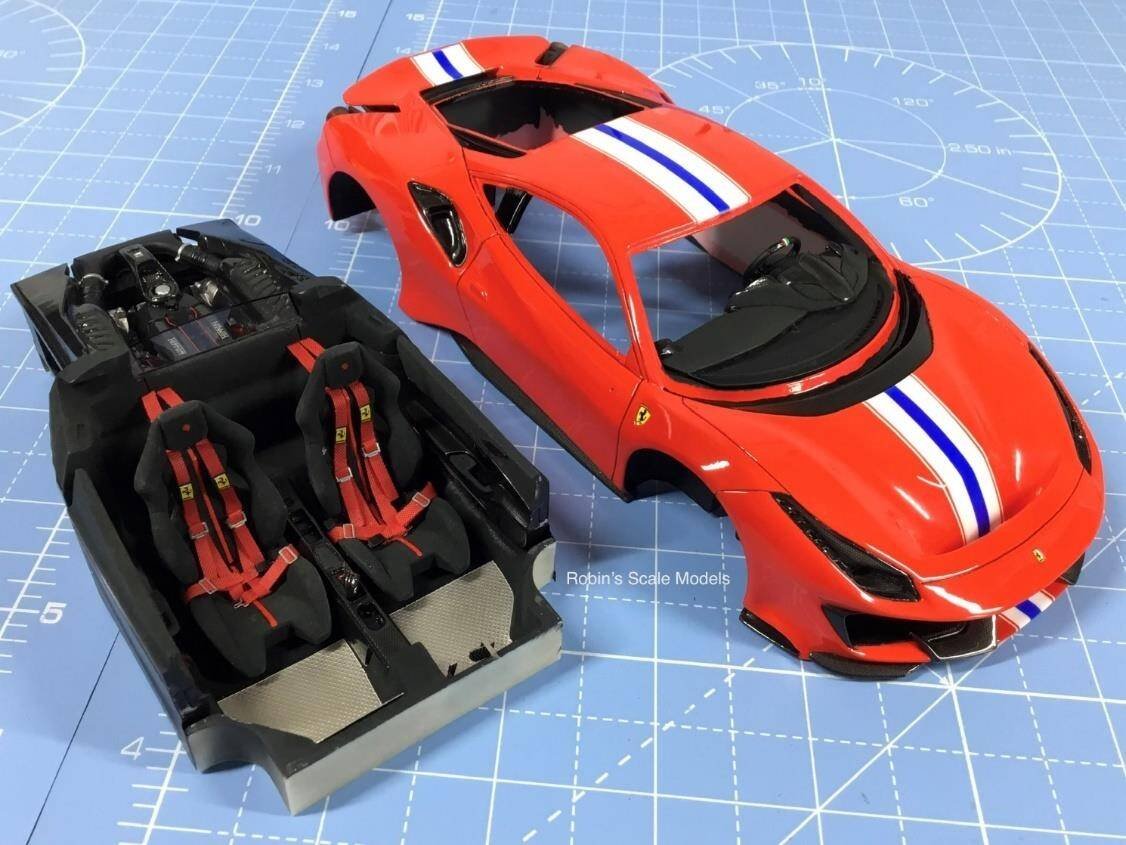
Thought that I would take a final picture of the bodywork and interior before assembling. The moment where everything comes together.
Step 1 — Bodywork & Interior Before Assembly
Thought that I would take a final picture of the bodywork and interior before assembling. Note that, in the areas of the interior of the bodyshell that might be seen once the interior was in, I painted them the interior colour before fixing in the interior and engine assembly.
Step 2 — Interior & Brake Assemblies
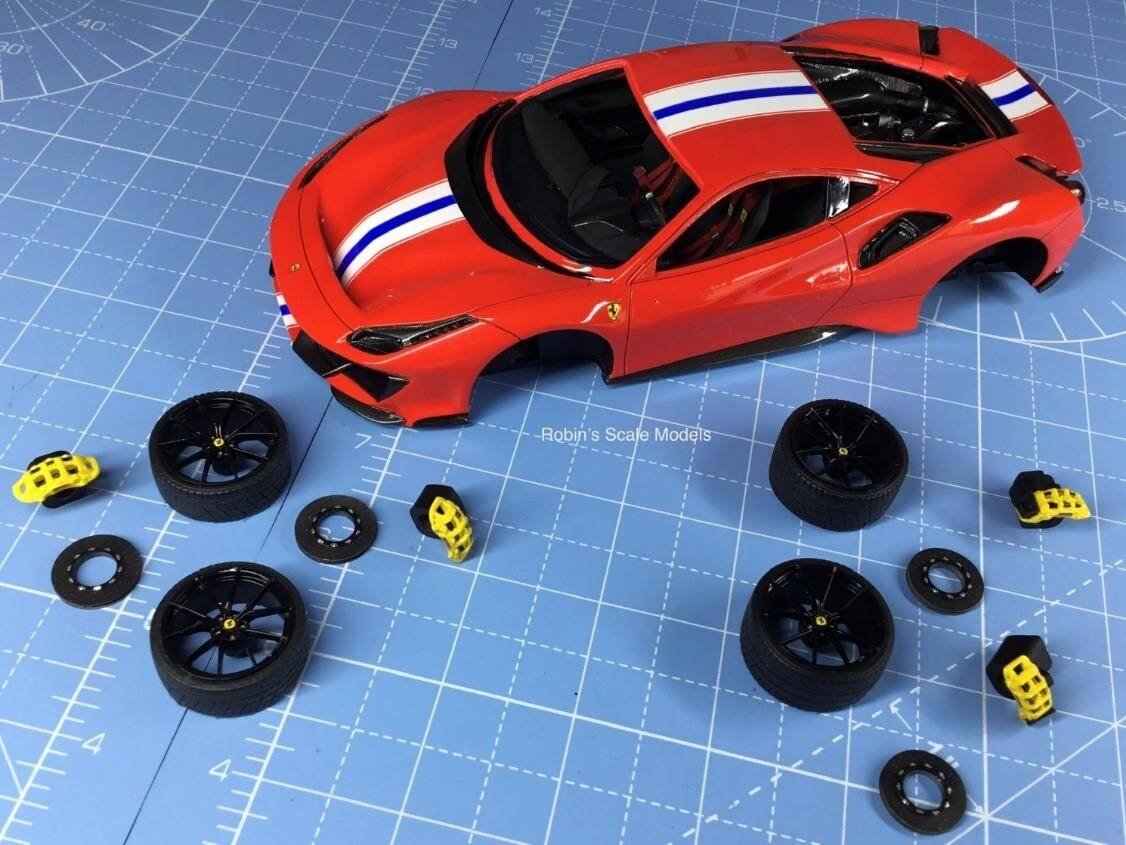
With the interior in place, I progressed with the brake and wheel assemblies. These had been left safely in my work in progress cabinet for quite some time and I had forgotten how good they looked.
Step 3 — Brakes & Wheels On
Brake assemblies positioned on the car body. Finally, we're on all four wheels and looking absolutely superb.
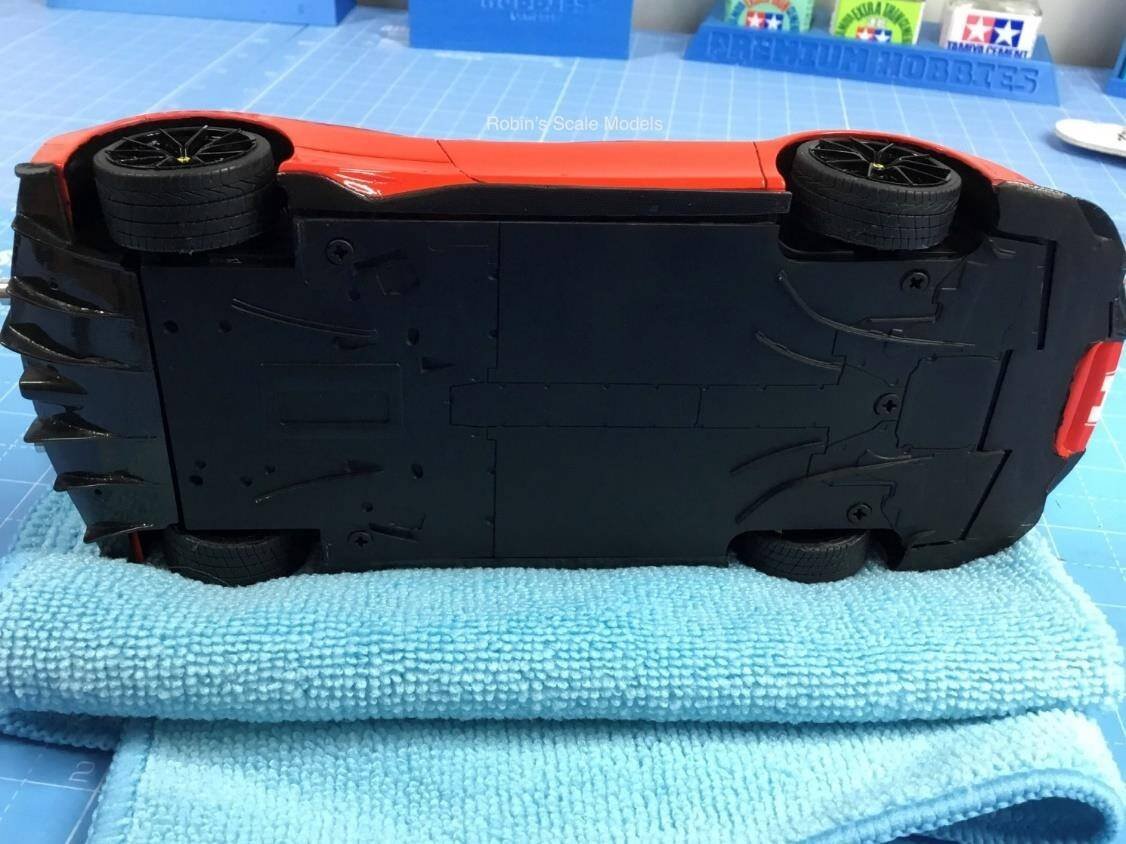
Step 4 — Underside & Screws
Okay, this is definitely the worst view of the model, however I thought I should show you the underside with the underside panel mounted and the five securing screws added. To enhance the look, I painted the screws with an acrylic black. Bonus with this photo is that you can see the underside of the carbon fibre rear floor diffuser.
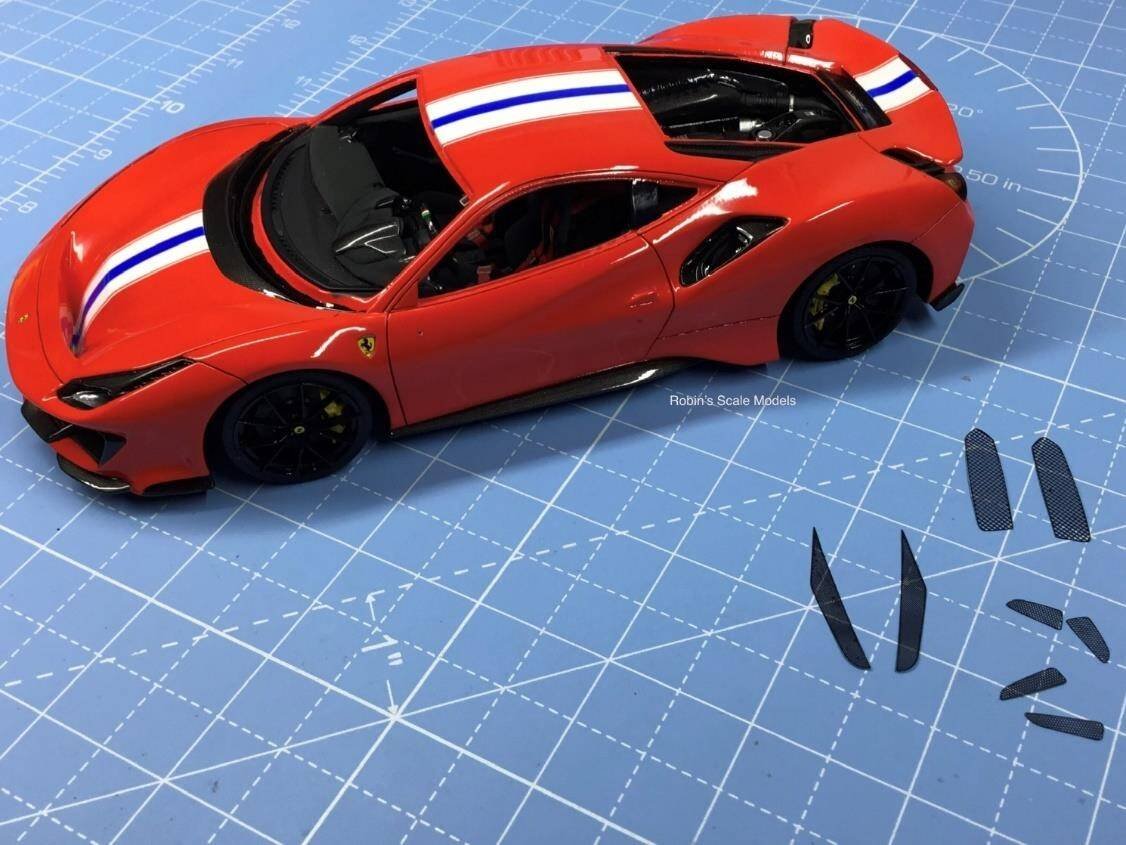
Step 5 — Black Mesh Covers
Next I added the black mesh covers. The etch parts included in the kit are very nice. You get blanking plates too on the etch sheet. I opted not to use these as I had carbon decalled the various areas and I wanted this to be seen under the mesh covers.
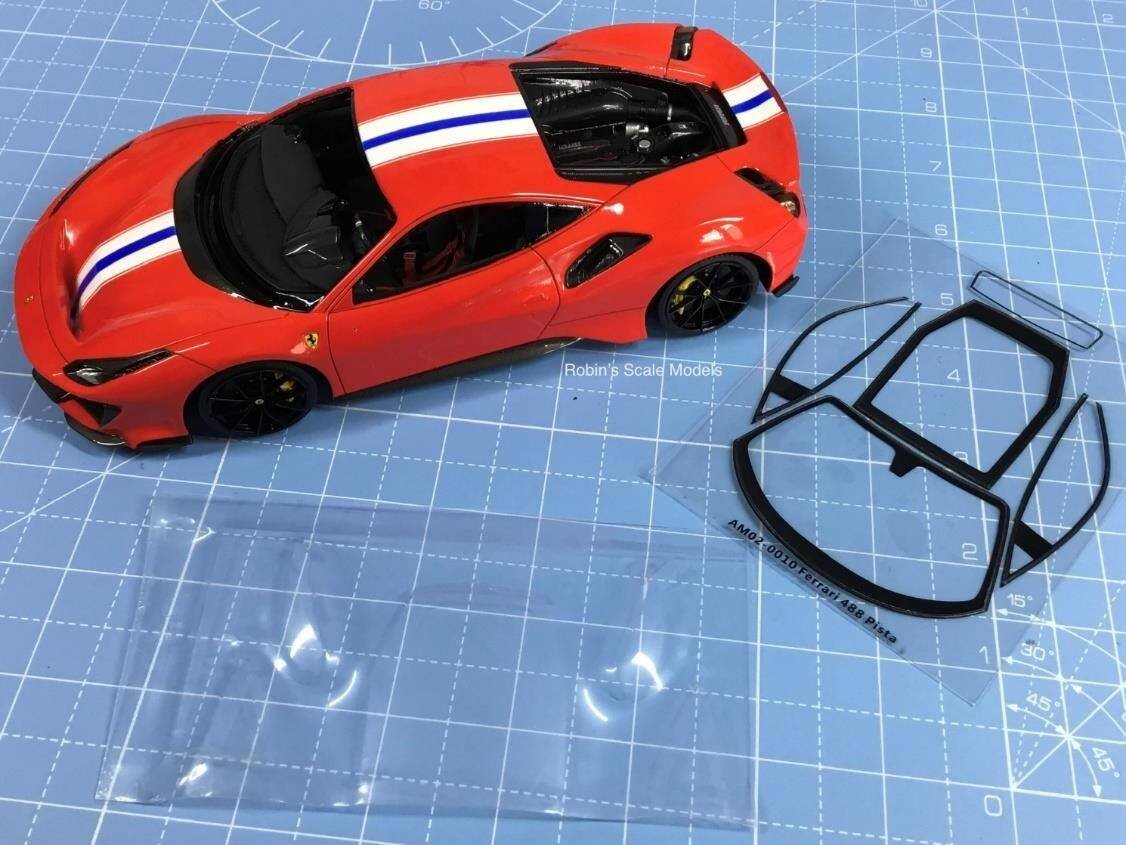
Step 6 — Windows & Clear Parts
I had never used acetate windows or vacuum formed clear parts. This was all going to be new to me. I have to say though that, having now completed the car, I am very impressed with both. Just take your time. Note that both types of clear glass have protective covering on both sides which helps ensure no scratches and reduces the chance of finger prints on your glass.
Step 7 — Windows In Place
This picture has the windows all in place… just the headlight covers and wipers missing here.
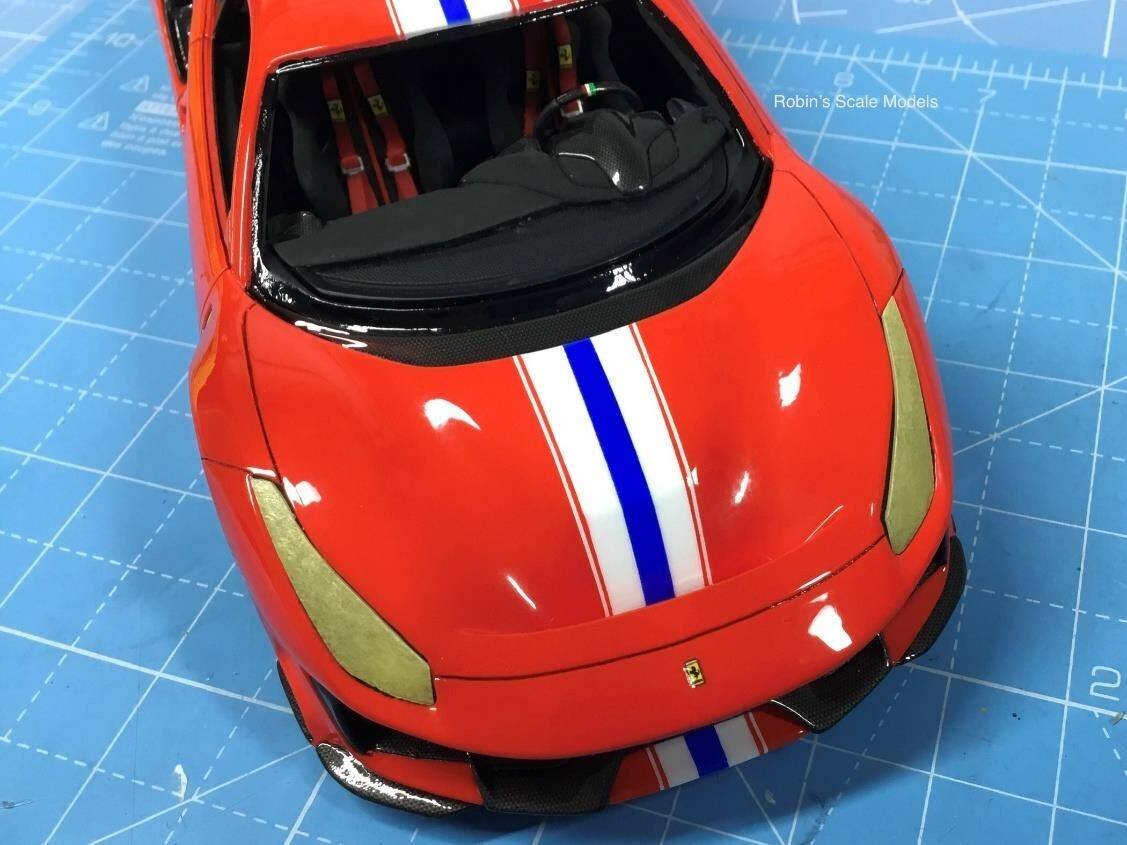
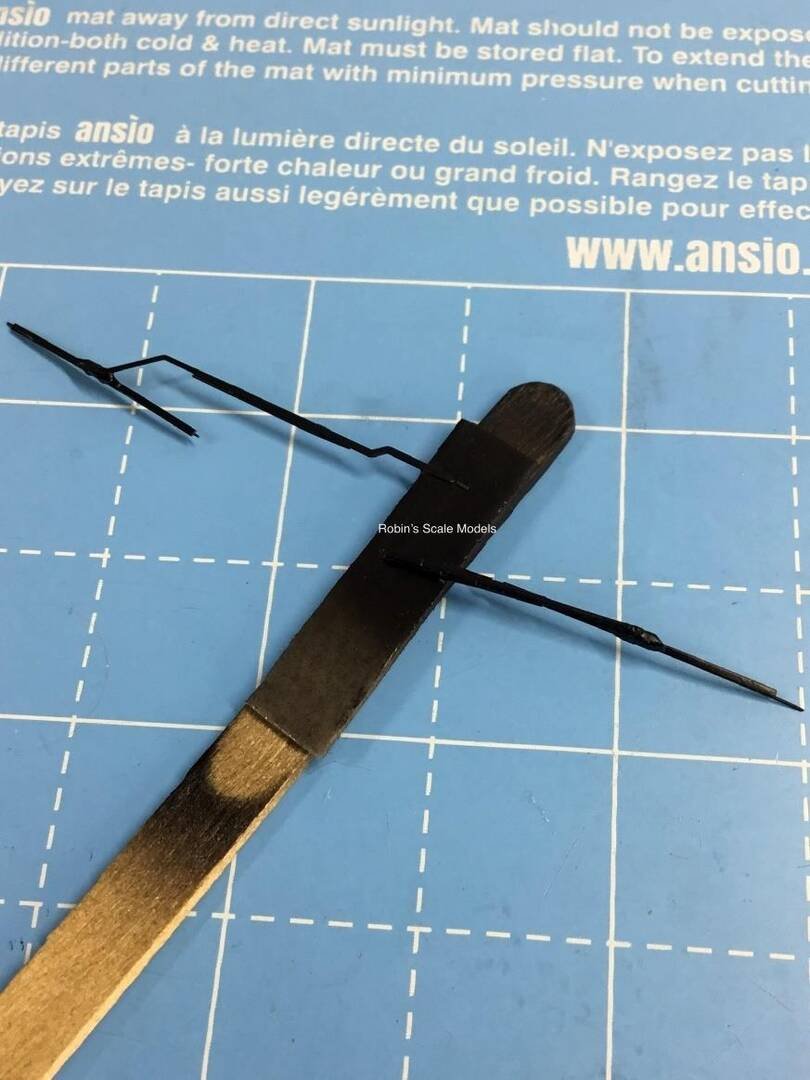
Step 8 — Wiper Etch Pieces
Patience is definitely required when working with the wiper etch pieces. Just take your time and be prepared to walk away from your desk for a while. The end result is good… it's worth a bit of modelling stress.
Step 9 — Model Complete!
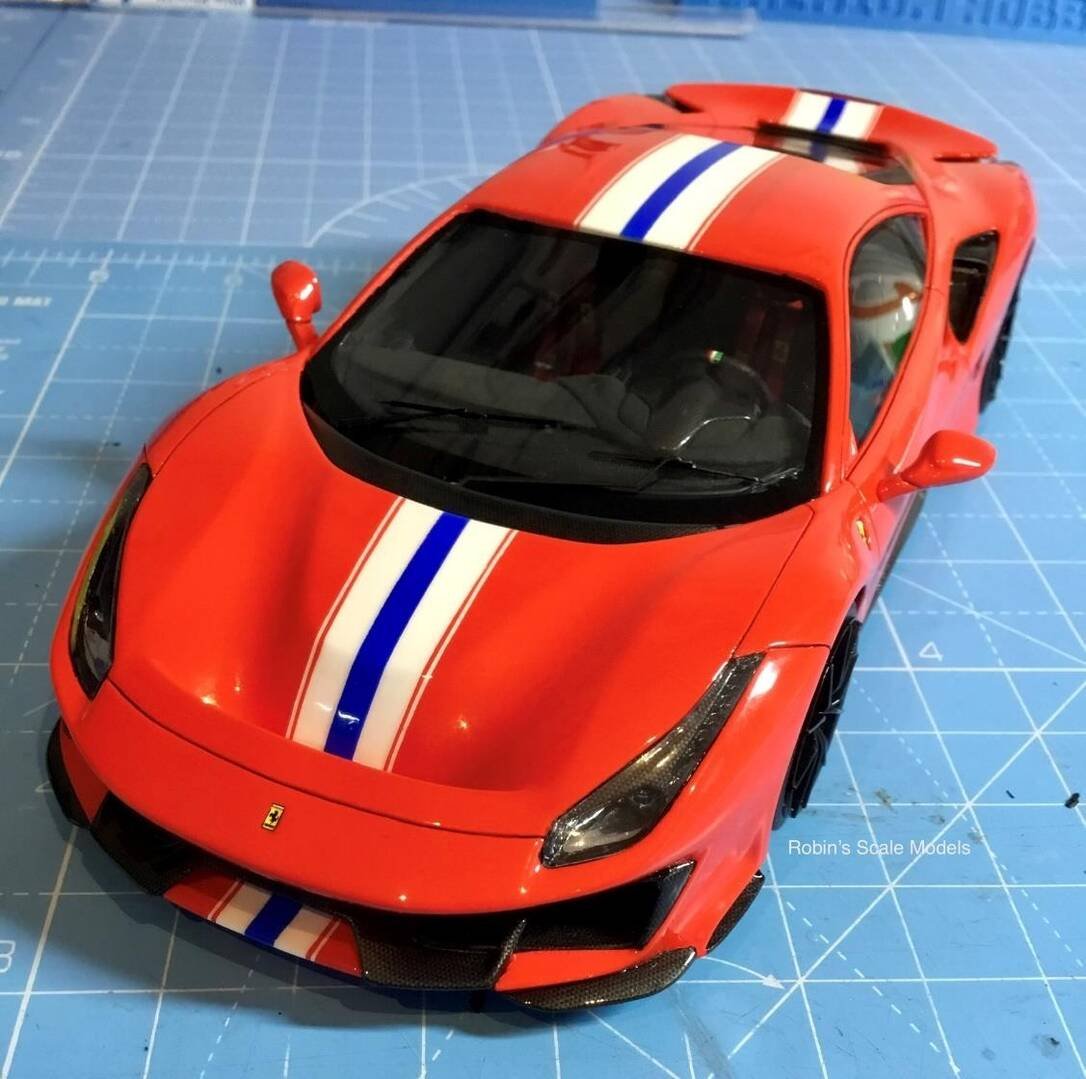
Finally, the headlight covers and windscreen wiper are attached. The model is complete and I am real happy. I hope this builders guide has helped you. I look forward to working with Alpha Model and building more of their delightful models. I really have enjoyed this build project. I'll leave you with a selection on final complete photos from the photo booth.
Completed Photos
Completed Photos Gallery… Ferrari 488 Pista built by Robin Witt
The Finished Ferrari 488 Pista
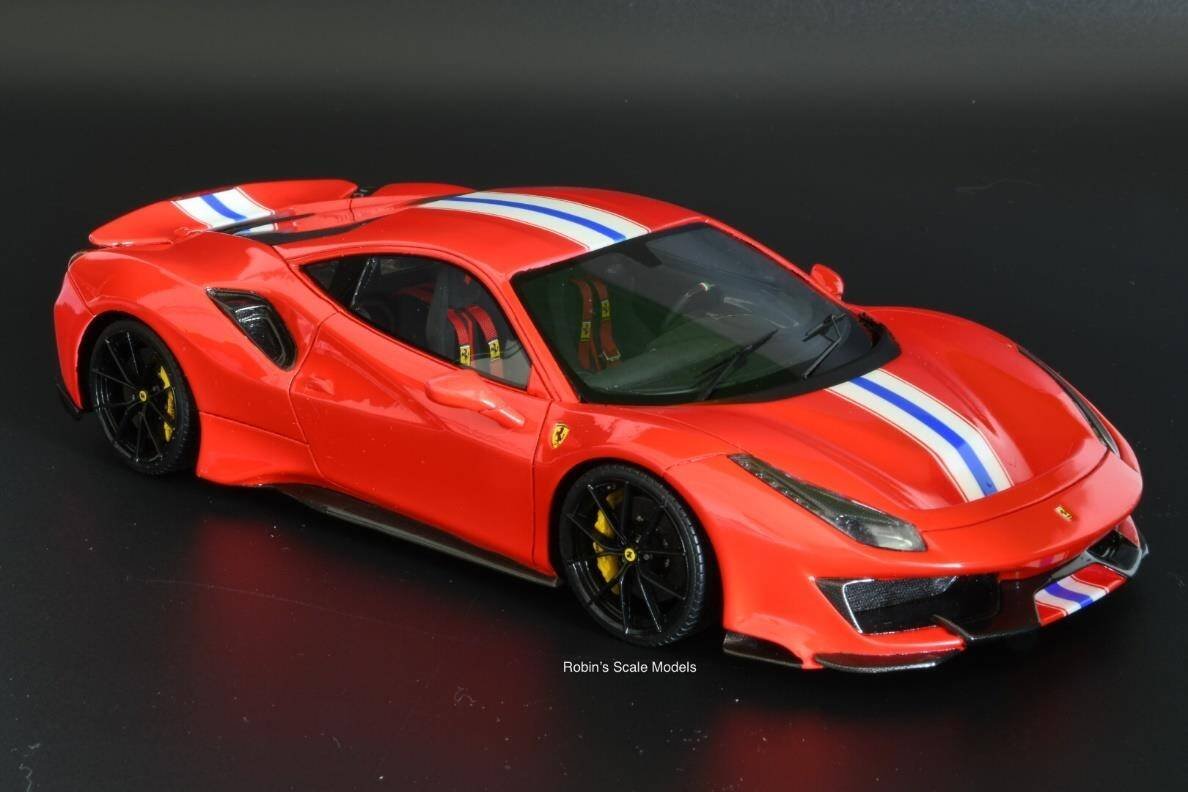
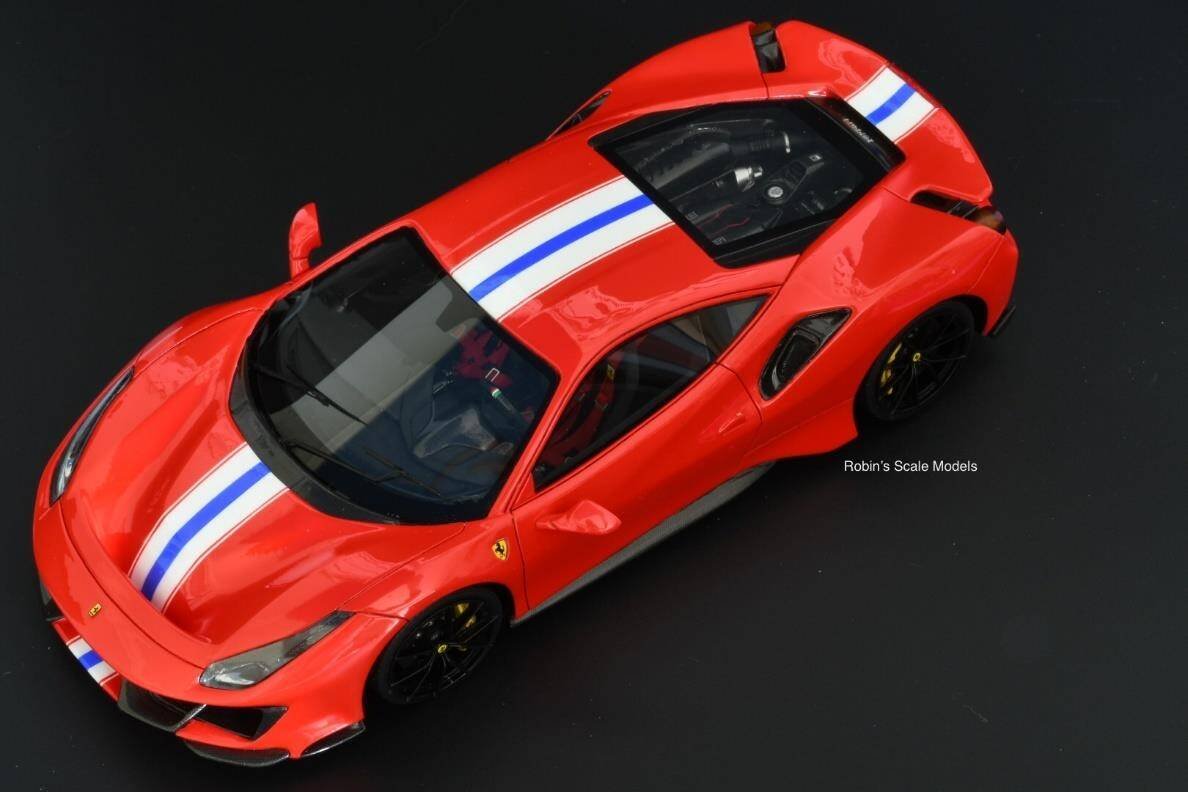
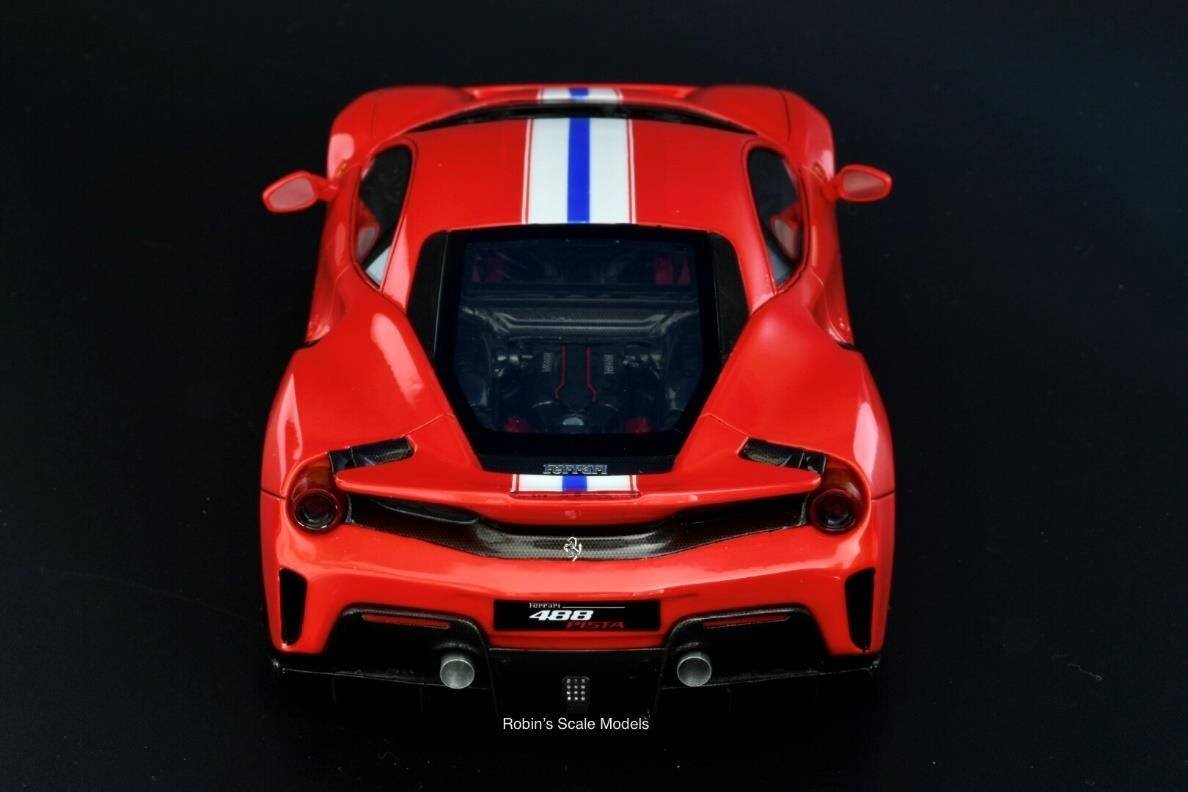
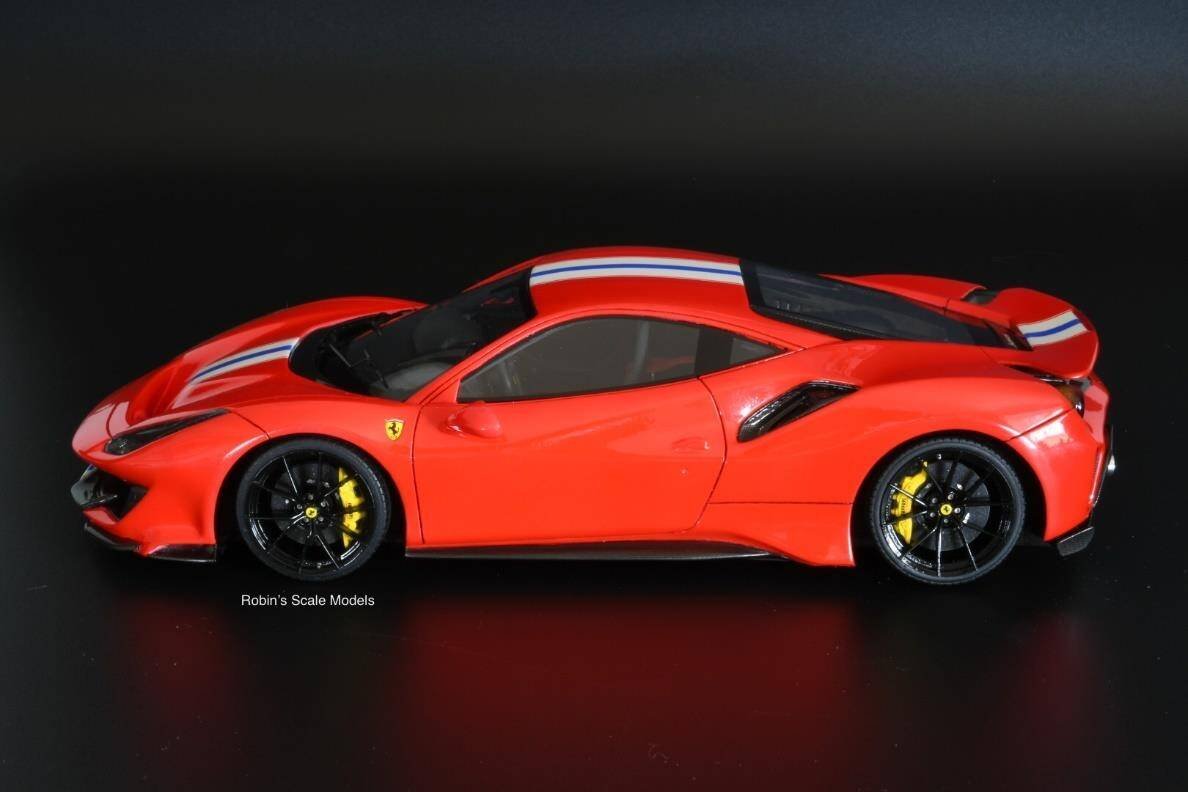
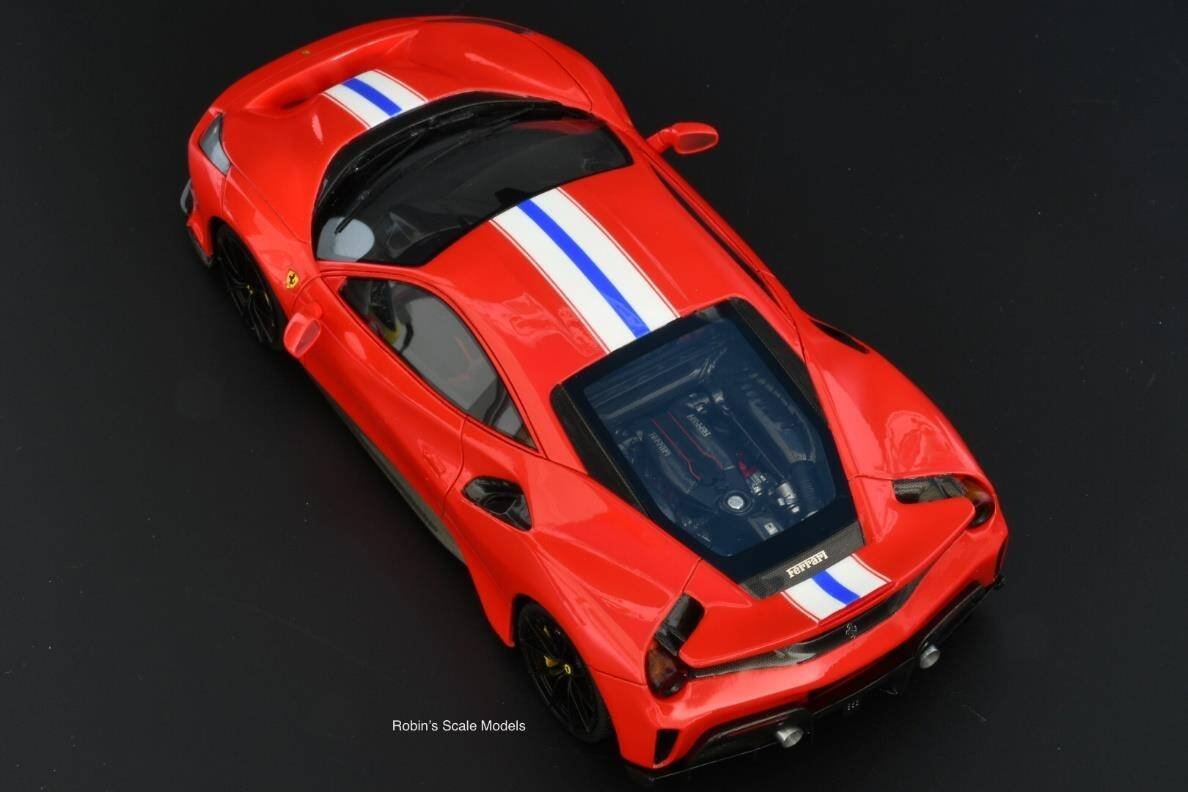
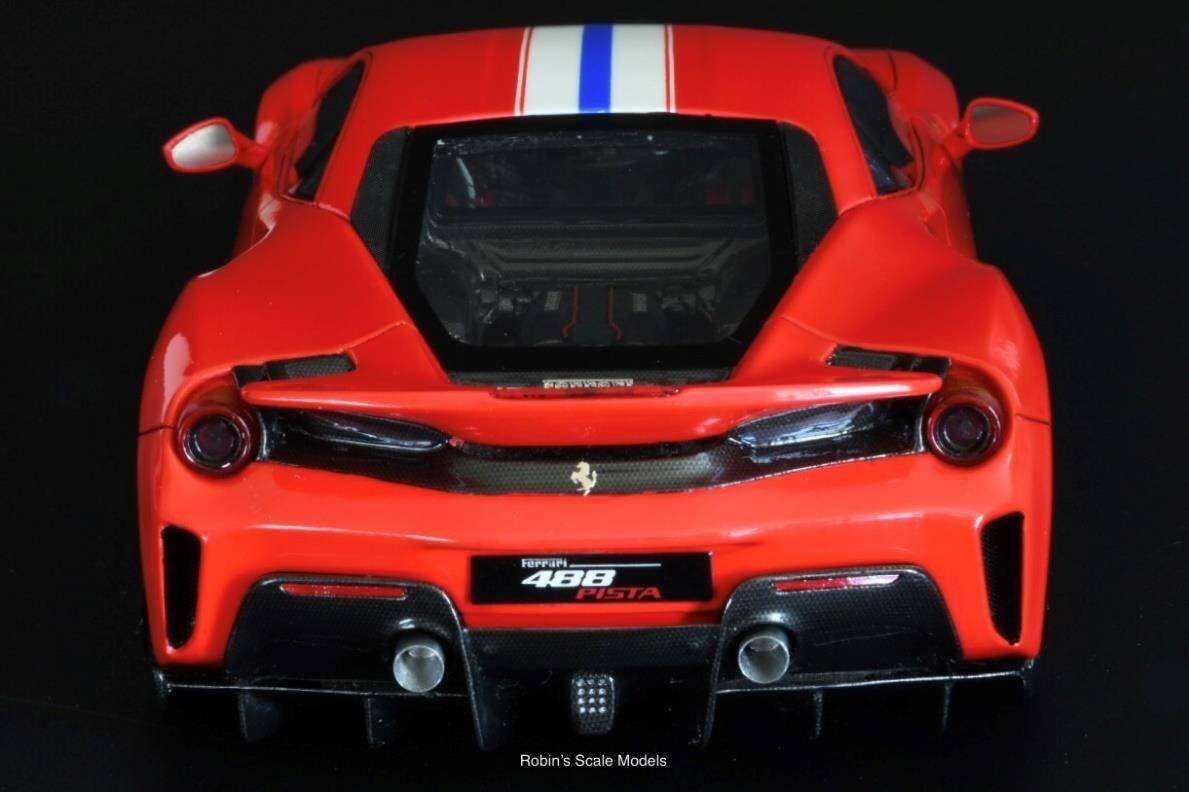
And that wraps up this 14-chapter build of the Alpha Model 1/24 Ferrari 488 Pista! From a blue box to a fully detailed Rosso Fluorescent F1 red masterpiece — it's been a journey. Thank you for following along!
Robin's Scale Models
Build by Robin Witt · UK
See Robin's Scale Models on Facebook for more builds and updates.