
 Advanced Creators
Ferrari Monza SP2 Build Guide — Part 1: Parts Check & The Washbay
Alpha Model AM02-0048 · Build by Anthony Ricco
STEP 1: Parts Check
To start off every build it is advised to unbox the kit and check the parts against the parts diagram in the instructions. This is definitely to ogle over the beautiful detail and start to formulate your build plan in your head — also to check that you have all the parts that are listed.
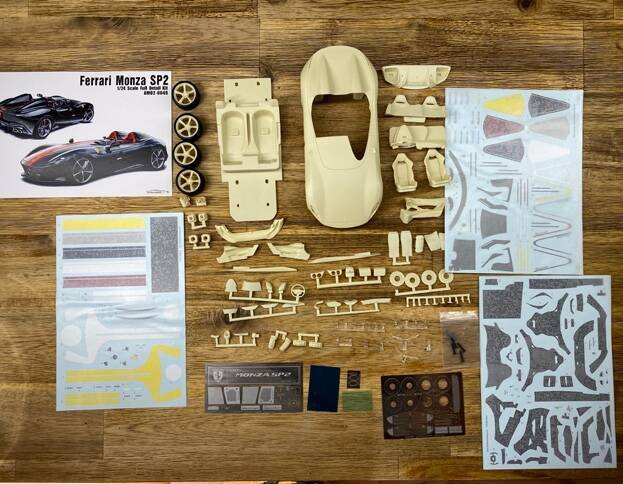
The beautiful Ferrari Monza SP2 comes with about 88 Resin parts of which 18 are clear parts. They are cast amazingly and look perfect with very little to no part cleanup needed.
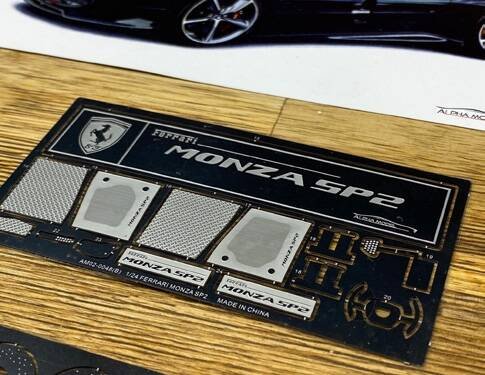
The extra parts consist of 4 rubber tyres, a packet with screws and 2 other small parts, 2 large PE frets with brake disks, grills, pedals, floor mats, number plates and some other details, a smaller PE fret with logos, and some of the small elements, metal mirrors and the very small window on the SP2.
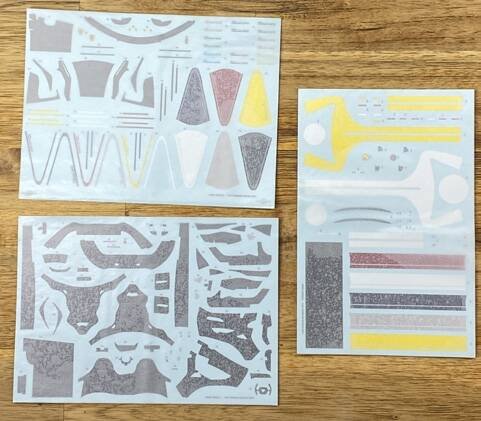
Lastly there are 3 decal sheets with some various options for the car's paint job, with different colour and shape racing stripes.
PRE BUILD CHECKLIST
- Check all parts are present and accounted for.
- Look carefully at the detail and remove all the drool that follows.
STEP 2: The Washbay
When most resin kits are made the mold they are set in has a non stick mold release agent which can be devastating to your paint work. In order to remove this we need to give the resin a valet service.
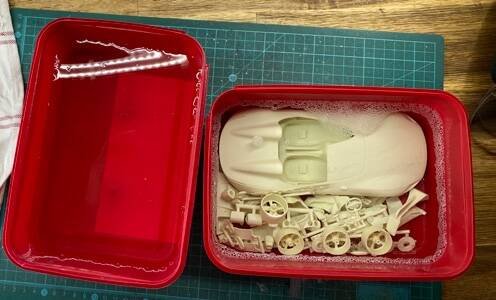
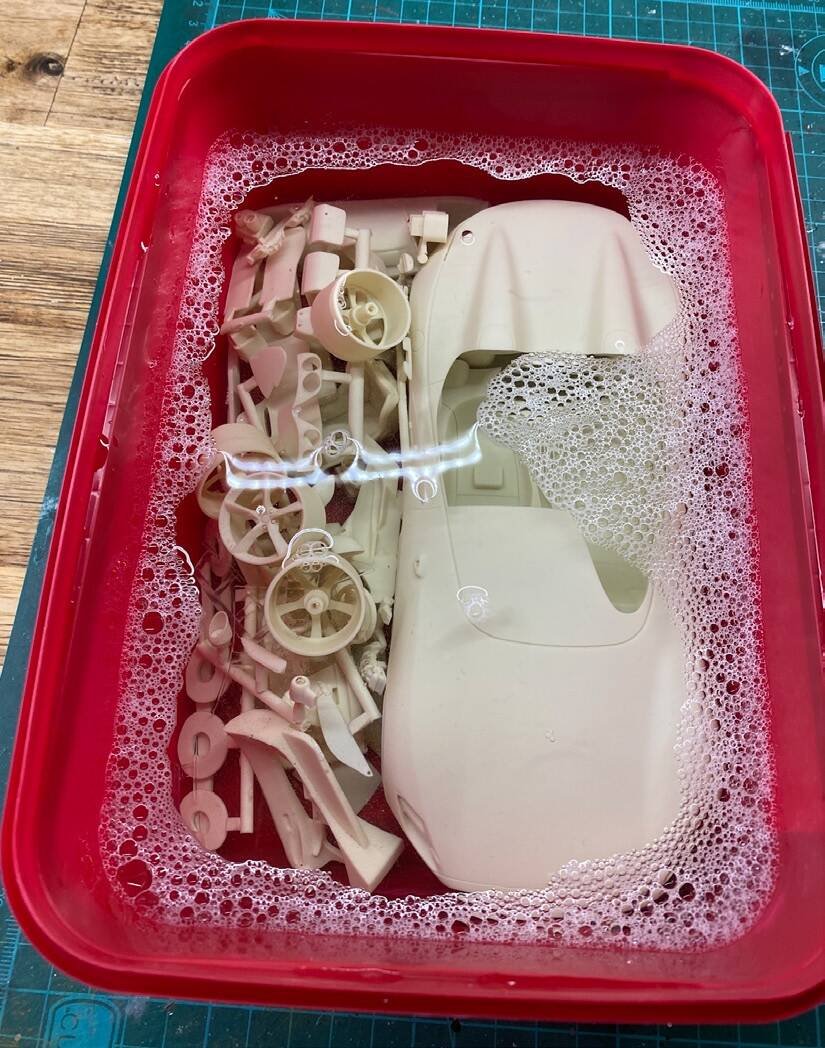
All the parts go into a bucket of warm water with the dishwashing soap that will remove grease — I let it soak for about 30 minutes and get nice and clean.
After that each part is taken out, scrubbed with an old toothbrush (please don't use your spouse's) and then rinsed in clean water and set aside on a dish towel to dry off.
CLEANUP CHECKLIST
- All parts soaked and cleaned in soapy water
- Scrubbed gently with a toothbrush and left to dry.
Next: Part 2 — The Choices (Colour Selection & Sterling Moss Tribute)
Advanced Creators
Ferrari Monza SP2 Build Guide — Part 2: The Choices
Alpha Model AM02-0048 · Build by Anthony Ricco
Colour Selection & The Tribute
One of the steps that takes me longest is usually the colour choices and how I want my model to look at the end. There are endless beautiful options and in the box Alpha Model give some really amazing decal options for a few of the SP2's iconic looks.
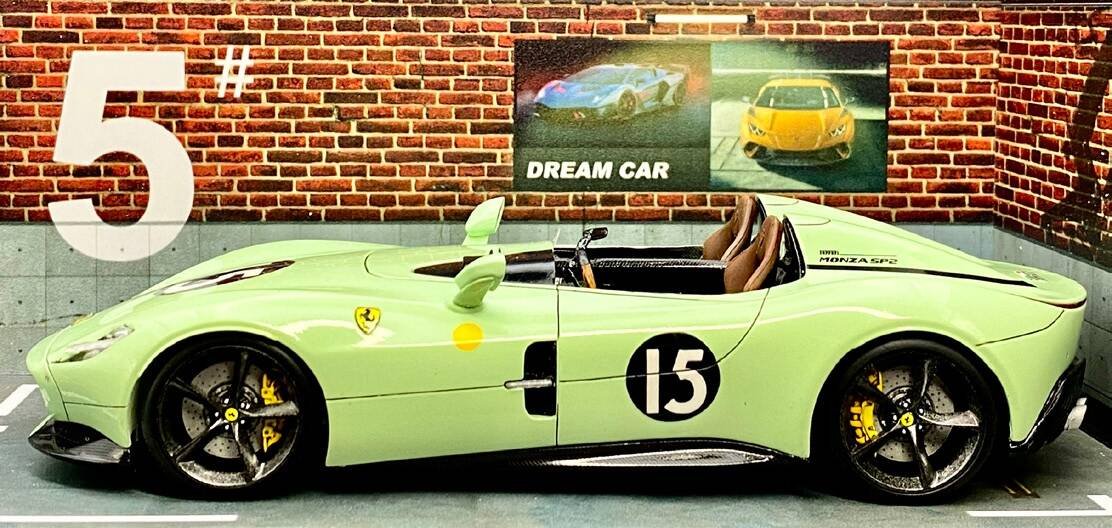
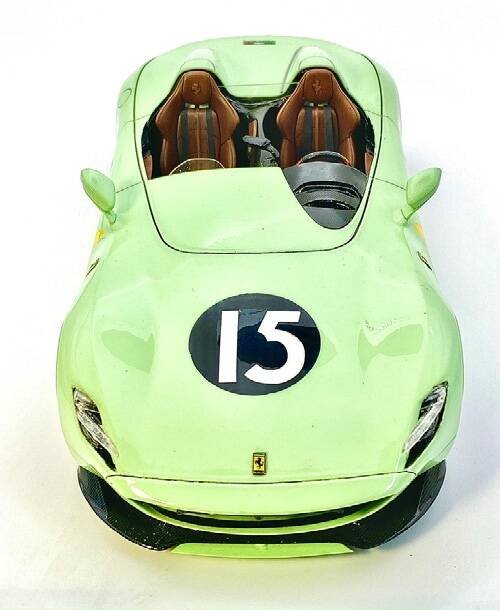
I really liked these but I decided to do something a little different and go with a tribute. I decided to go with the Verde Pallido (Pale Green) and do a tribute scheme to Sterling Moss's famous Ferrari 250 GTO SWB. The Monza SP2 in my opinion has the same beautiful flowing lines as that classic and will make a beautiful Tribute.
So references were searched and strategies on how to take this from images to reality.
The Custom Colour
I would need to get a custom colour, as the green was not available in any of the hobby colours I could find so I looked for the closest match and found RAL 6019 was my best choice. I went to an automotive paint shop and asked them to mix a small tin of it for me. I also got 2K clear and hardener which will be a first for me.
Designing the Livery
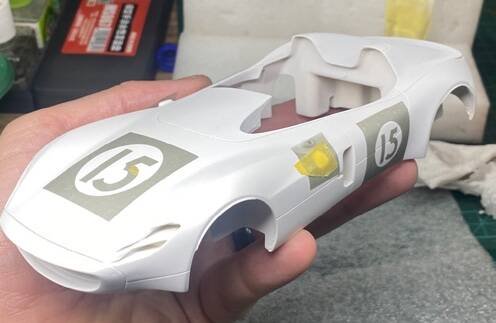
As for the circles and numbers I went onto my design software and drew up the number 15 to look as close to the Sterling Moss number as possible. This I will get cut onto vinyl masks with a Crikut cutter.
Next: Part 3 — Priming
Advanced Creators
Ferrari Monza SP2 Build Guide — Part 3: Priming
Alpha Model AM02-0048 · Build by Anthony Ricco
Why Priming Matters
Priming is a very important step on resin kits especially on the extremely smooth resin that Alpha Models achieve. It will make the paint adhere to the kit better and also give an even finish and even enhance the paint work.
A lot of the time priming can affect your final colour tone, so do tests on some spoons and see which comes out the best.
Over the different primers none seemed to really make a difference to the green paint finish so I decided to prime in white and use Tamiya's Fine Surface Primer White from the spray can. This primer gives a beautiful finish and is always nice and smooth and easy to apply.
Prepping the Parts
First get all the parts that are going to be in the body colour ready for paint onto some kind of stands that you can paint them easily.
You need to prep your model for paint and I use some very fine 3000 grit sanding sponge all over the surface of the parts to give the paint a better surface to stick onto. Very gently — don't push down at all, just give it a soft rub all over.
Paint Preparation
Next I get the paint ready by putting the can into some hot water. This warms it up inside and helps the accelerant spray better. When you are ready, have a cloth to dry the tin, then swirl the tin so you can hear the metal ball inside loosen and start to move around.
The Spraying Technique
Now to the actual spraying. I like to do 3-4 mist coats and 1 wet coat of paint. I wait about 10 minutes in between each coat.
Remember to press the spraycan nozzle to start spraying off the model and let it go off the model in case any clumps of paint come out. For the mist coats spray and move the can over the model quickly so not a lot of paint goes on. These make a tack coat that the next layer can stick to and build on.
Build the paint coverage up with these layers and don't be concerned if in the first 2-3 layers you can still see the resin colour — it will disappear as you build it up.
For the final layer, the wet coat you want to build a nice coat that looks shiny and wet, just be careful not to flood it and create paint runs.
Building the primer and up like this gives you layers of paint so that you can sand and polish out imperfections without burning through to the resin.
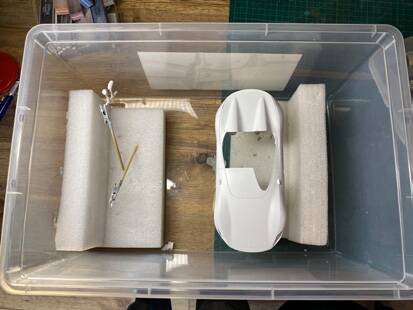
Once you are done put it into some foam into a plastic sealable container so dust can't get onto it and put it away for a few days to cure while you continue working on the other parts.
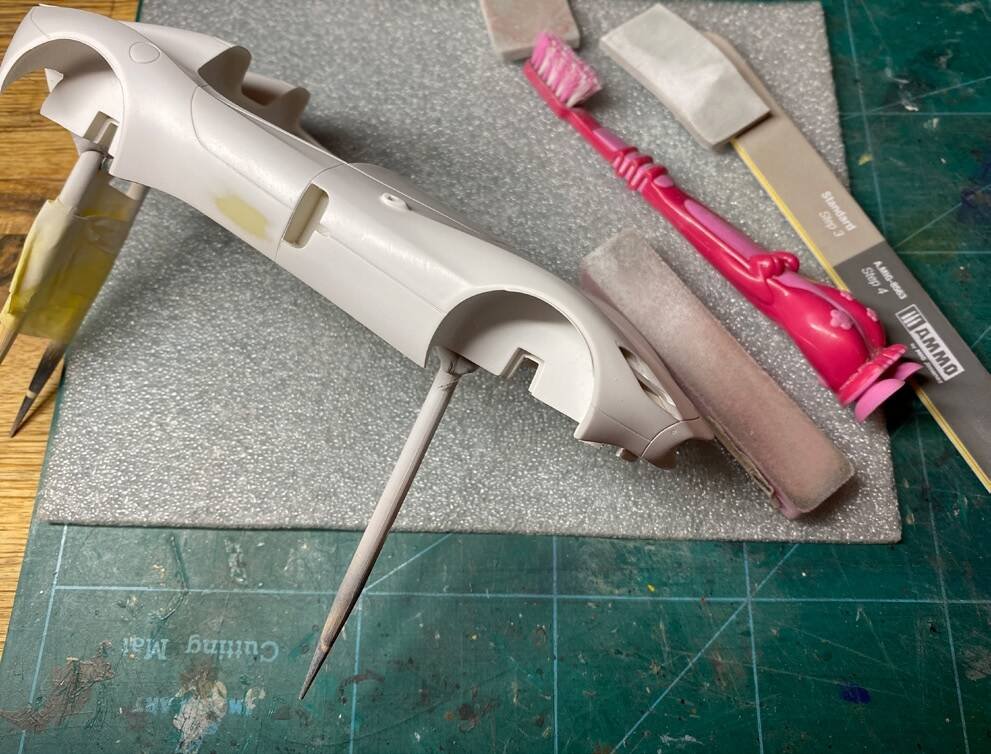
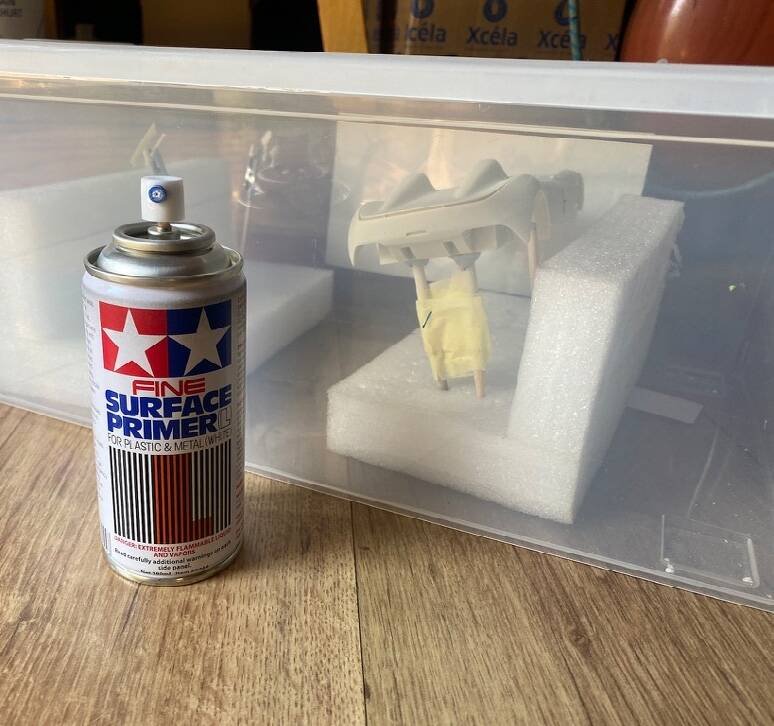
PRIMING CHECKLIST
- Check the correct primer colour for your top coat
- Softly sand all surfaces with a 3000 grit sanding sponge
- Make sure the surface of your model is free of imperfections.
- When painting do a few tack coats first and build up the paint before a wet coat.
- Once dry check for any dust/imperfections and gently sand back and respray if needed.
Next: Part 4 — Interior (Seats, Steering Wheel, Dashboard & Seatbelts)
Advanced Creators
Ferrari Monza SP2 Build Guide — Part 4: Interior
Alpha Model AM02-0048 · Build by Anthony Ricco
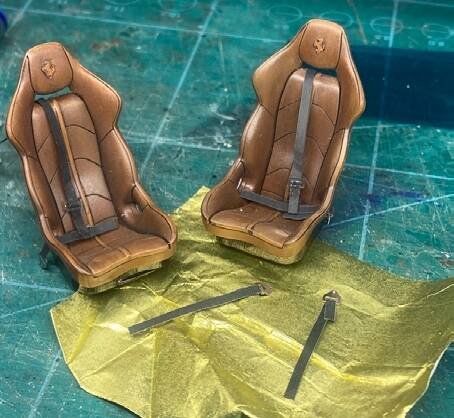
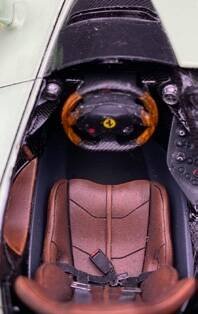
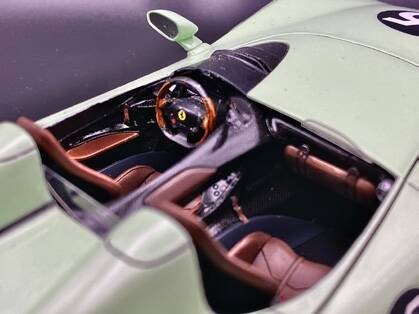
SEATS
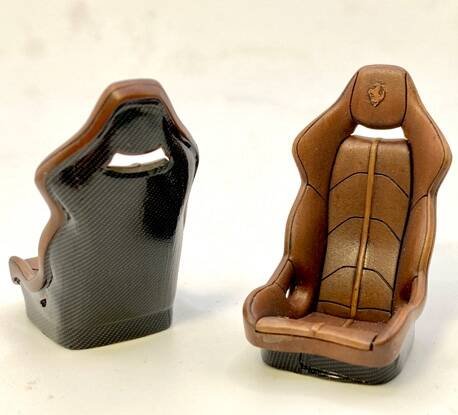
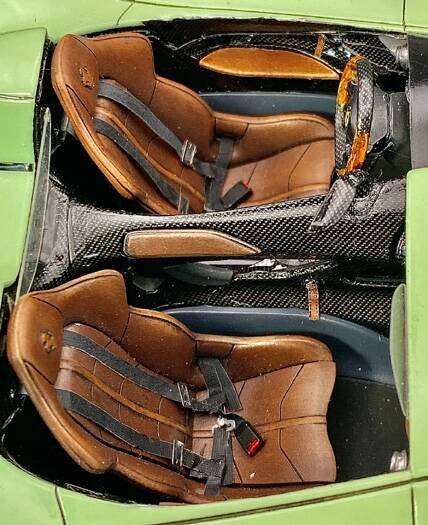
I wanted to paint the seats beautifully like leather. I used Vallejo Paints for this. They are primed black, then I used a 70% Woodgrain, and 30% Orange Brown mix and sprayed that on. Then I dry brushed on Orange Brown in the highlight spots and Dark Sand in the brightest areas. After that I made a wash with Woodgrain and put that over everything to bring it all together. I then clear coated it with a gloss acrylic and used a dark brown wash in all the recesses. It is finished off with a semi gloss coat to give that leather feel.
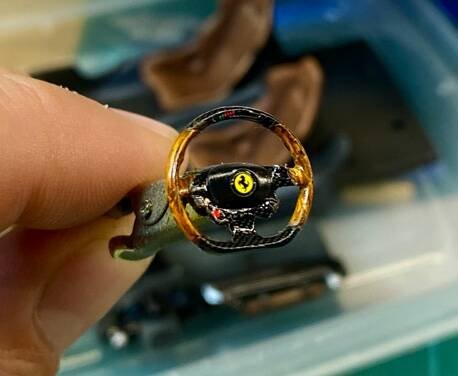
STEERING WHEEL
The steering wheel is a big focal point in an open top car and I wanted to do something a little different because this is a tribute build to an old classic Ferrari 250 GTO, I wanted some more elements that referenced that era, so instead of an all carbon fibre steering wheel I added in some wood to it. I did this by painting a base coat of brown and then making streaks with different shades of browns to make the grain — finally to bring it all together some clear orange was sprayed over it to give it a wooden varnished look.
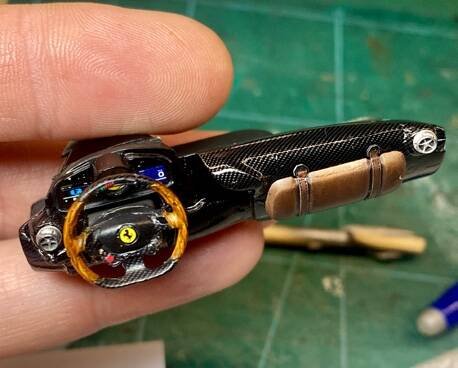
DASHBOARD
The dashboard slowly comes together nicely as all the elements are added. Study references and instructions carefully to see all the decals go in the correct place and the colours are where you want them. Lots of patience and care with the fine details is needed.
SEATBELTS
There are some beautiful parts for the seatbelts in the kit made from resin and Photo etch however there is no material for the actual belts. I tried a ribbon material I usually use but it was too thick so I used a wrapper from a chocolate cut into strips and painted — it has a nice texture on it and is quite easy to position, the instructions show nicely how it all should go together and along with reference images I made them up to fit.
FINAL FIT
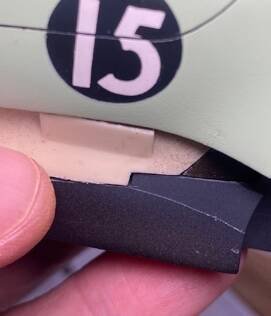
Once all of the parts are individually decaled and painted its time to fit it all together. The fit had one issue — on the instructions the door cards are supposed to fit onto the interior of the body, they have a nice locating tab that sets them in place. However, the issue here is when they go into the backrest on the interior tub they have to go in from below it and then slide into place.
So I solved this by removing the locating tab on the back of the door and instead of gluing them to the body interior, I glued them in place onto the interior tub. After doing this the body slid nicely over the interior into place.
Next: Part 5 — Body Painting (Livery, Clear Coat & 2K)
Advanced Creators
Ferrari Monza SP2 Build Guide — Part 5: Body Painting
Alpha Model AM02-0048 · Build by Anthony Ricco
The Livery — Vinyl Masks
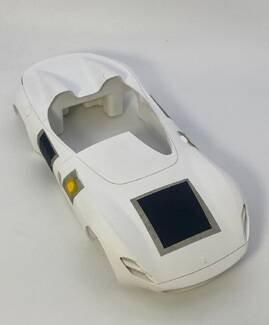
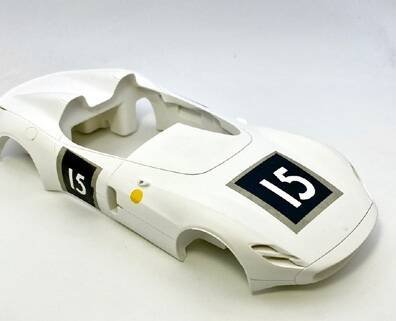
In order to paint the livery I wanted I needed to get masks cut. I designed them on Adobe Illustrator and had them cut out for me on a vinyl cutter. These worked beautifully. I took my time in linking them up on the white then removed the circle and sprayed the black over. Once that was dried I covered the whole area with the masks again so I could spray the body colour.
Spraying the Body Colour
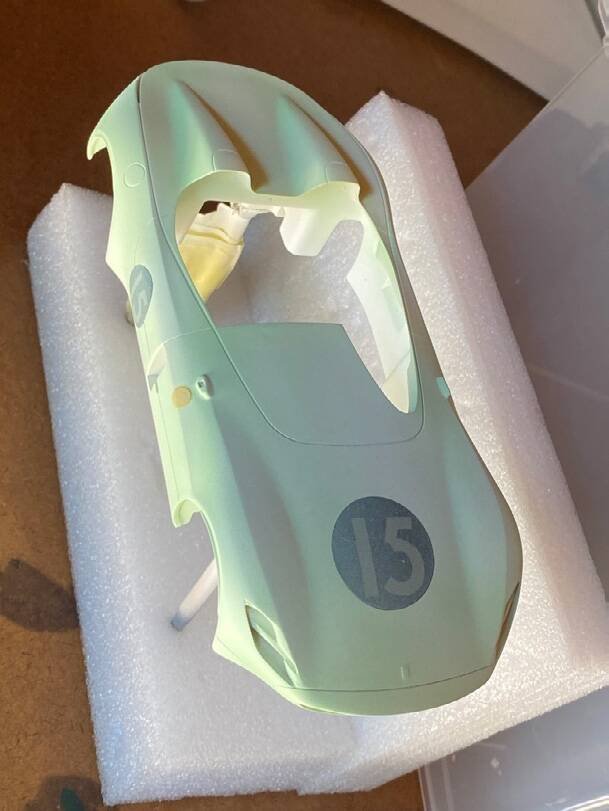
Once the numbers were painted I lightly sprayed the body colour on — it is a specific colour so I went to an automotive paint manufacturer and asked them to mix RAL 6019 for me.
It took a few attempts to get it correct — it looked great. Remember if you ever use these paints they are a lot thicker than hobby paint and need a lot more thinner.
Once done I packed it into a tub and left it to dry for a few days, then I sanded all the imperfections out with a high grit sandpaper so I didn't burn through the paint. Also if you do sand your model be careful of corners and raised areas because those areas burn through the paint a lot faster.
CLEAR COAT — 2K First Time!
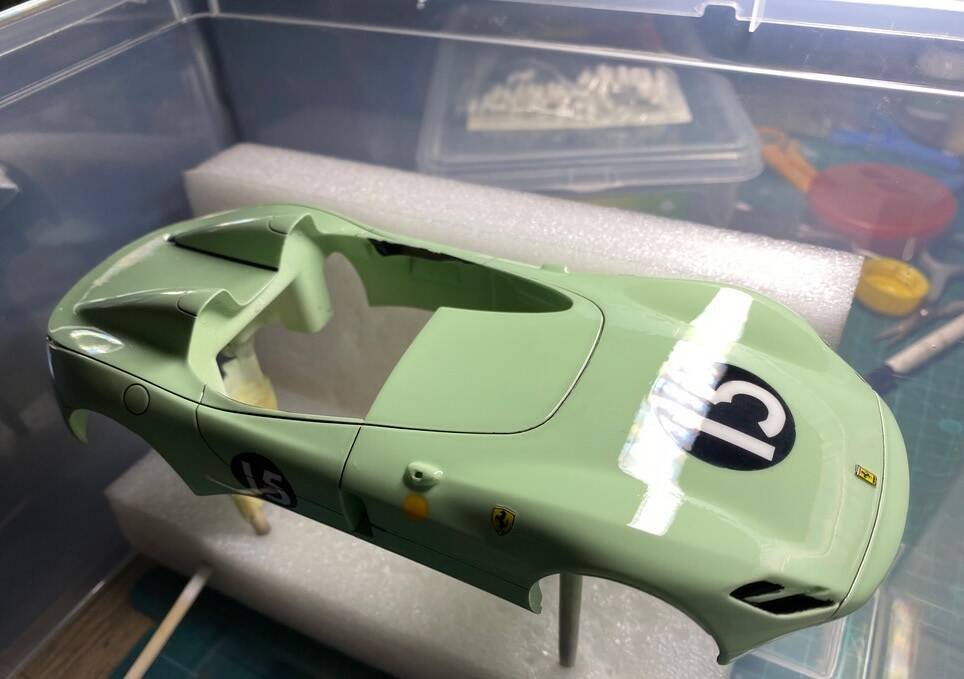
To finish off the paintwork on this beautiful classic I decided to try use 2K clear for the first time and I was very happy with the result. This 2K was from the manufacturer I got the green paint from and went down very nicely.
2K Clear Mixing Ratio:
- 2 parts 2K Clear
- 1 part 2K Hardener
- 2 parts 2K Thinner
I sprayed on quite a high pressure and 2 two medium coats and 2 wet coats with about 10 minutes in between.
After it was sprayed I put it in the box for a week before polishing it up to a finish I was happy with.
PAINTING CHECKLIST
- Make sure body and primer is dust free and smooth before painting starts
- Spray in a dust free area, wipe kit with static free brush and a tack cloth if you have.
- Always use protective equipment when spraying.
- Leave kit for a while for the paint and the 2K to cure properly before sanding.
- Once cured sand out any imperfections with as light a grit as you can then polish with a polishing compound and wax to stop any fingerprints.
Next: Part 6 — Assembly
Advanced Creators
Ferrari Monza SP2 Build Guide — Part 6: Assembly
Alpha Model AM02-0048 · Build by Anthony Ricco
Putting It All Together
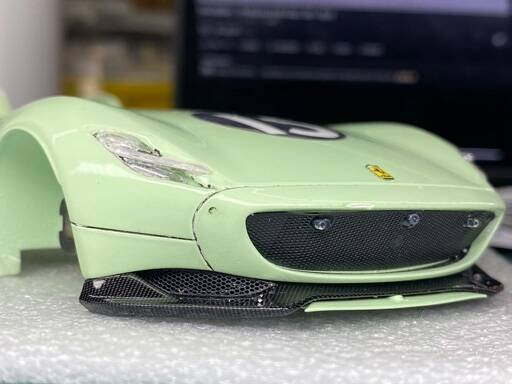
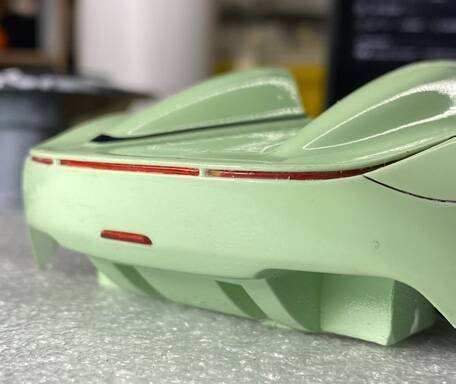
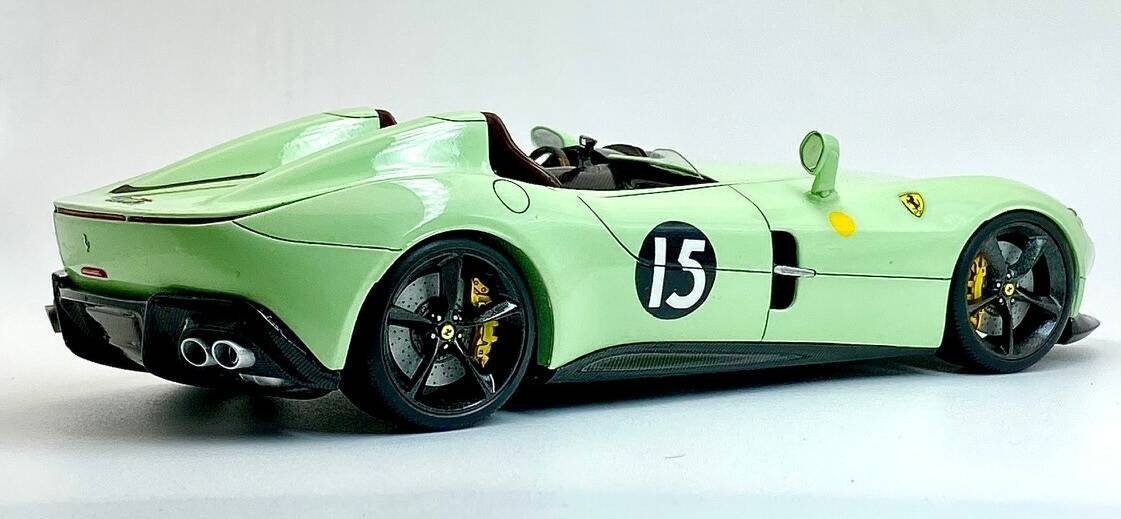
Now that all the parts are painted and ready and the body is polished and shining we can put it all together. All the parts like the grills and lights go onto the body. I used Ammo Ultra Glue to fix it all on because in the past I've had some devastating accidents with super glue. If you make a mess with the Ammo Ultra Glue you can clean it off with some water.
Lights and grilles are glued in as well as the diffusers and side skirts fixed into place. The wheels were put together and installed and the final elements were the Photoetch badges at the back and the mirrors so nothing accidentally got knocked off.
Once all the elements were on the body and all the parts stuck into the interior they finally came together after some test fitting. To make the fit easier please see my note in Part 4 about the body not fitting over with the doors attached.
Next: Part 7 — Photos & The Finished Build
Advanced Creators
Ferrari Monza SP2 Build Guide — Part 7: Photos & The Finished Build
Alpha Model AM02-0048 · Build by Anthony Ricco
STEP 8: Photography Tips
Finally you are done. Well almost — the last thing you need to do is make sure everyone can see the amazing work you have done on this beautiful Alpha Model kit.
Most of the time your build will be seen on social media, or in photos that you send or on your phone. So taking great photos are really what is going to either finish your model and give you a great memory of it for years to come or it can be something that no one notices because although your build is top class, the photos don't show it.
What You Need
Taking good photos is not as hard as it looks, you need a few things:
1. A Clean Background: For this you can use a large piece of paper propped up so that it curves nicely. You can also get these photo booth boxes pretty cheap and they have lights already installed in them.
2. Lights: This is the next very important thing you need. If you have some in a photo booth you can add a few other desk lamps around for when you want to light up other areas. Otherwise use your desk lamps and you can even cover them with thin paper to diffuse the light a bit.
3. A Camera: And no, you don't need a fancy DSLR — phone cameras are so advanced now that you can take some really amazing photos.
4. Patience: The last thing you need is some patience and to play around a bit till you figure it out. Good luck and have lots of fun!
STEP 9: The Finished Build
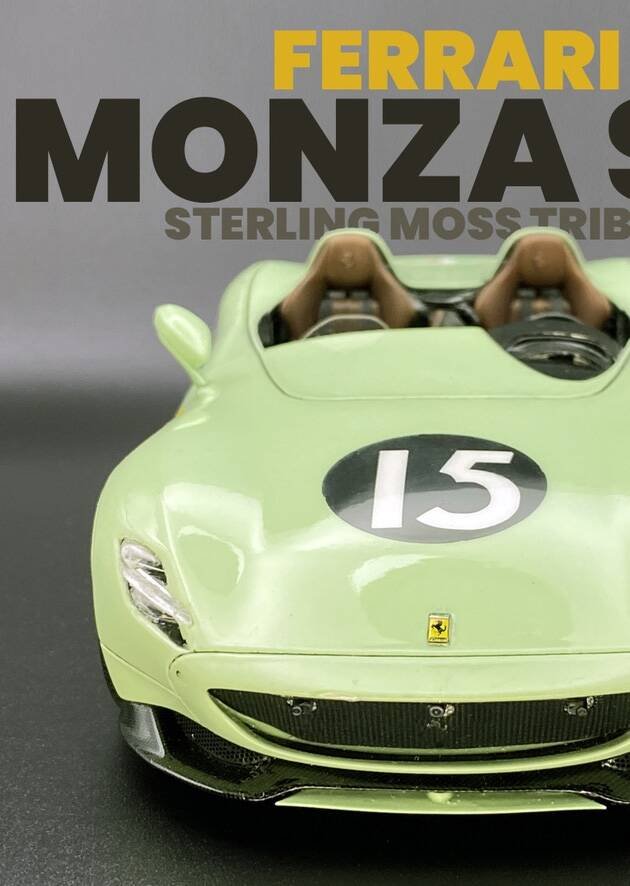
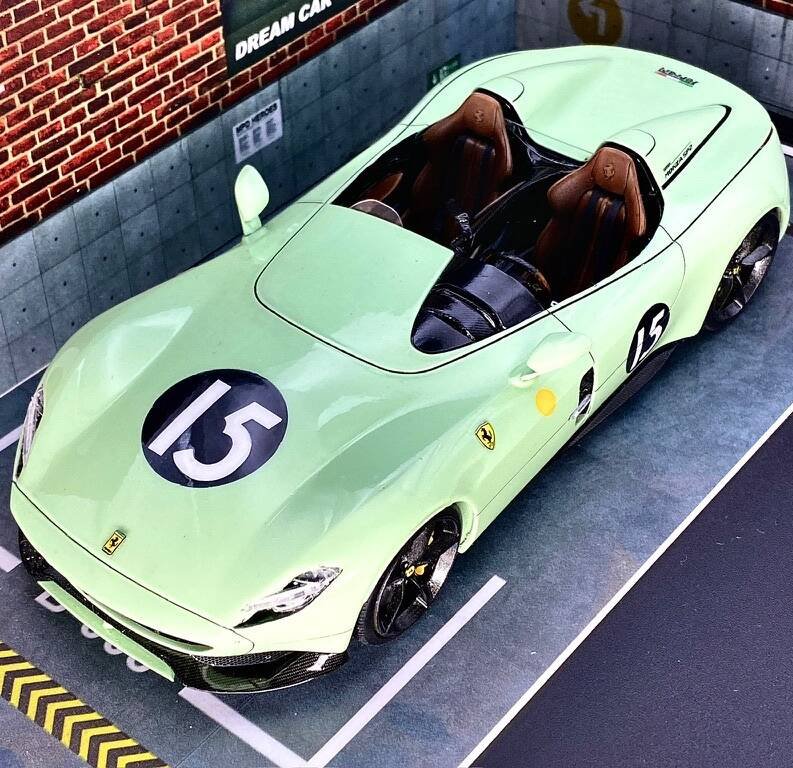
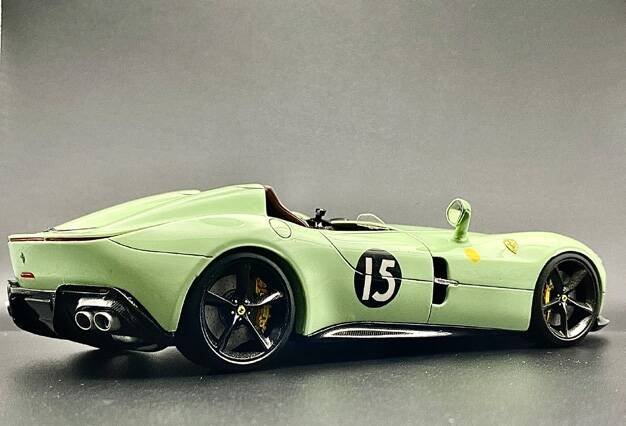
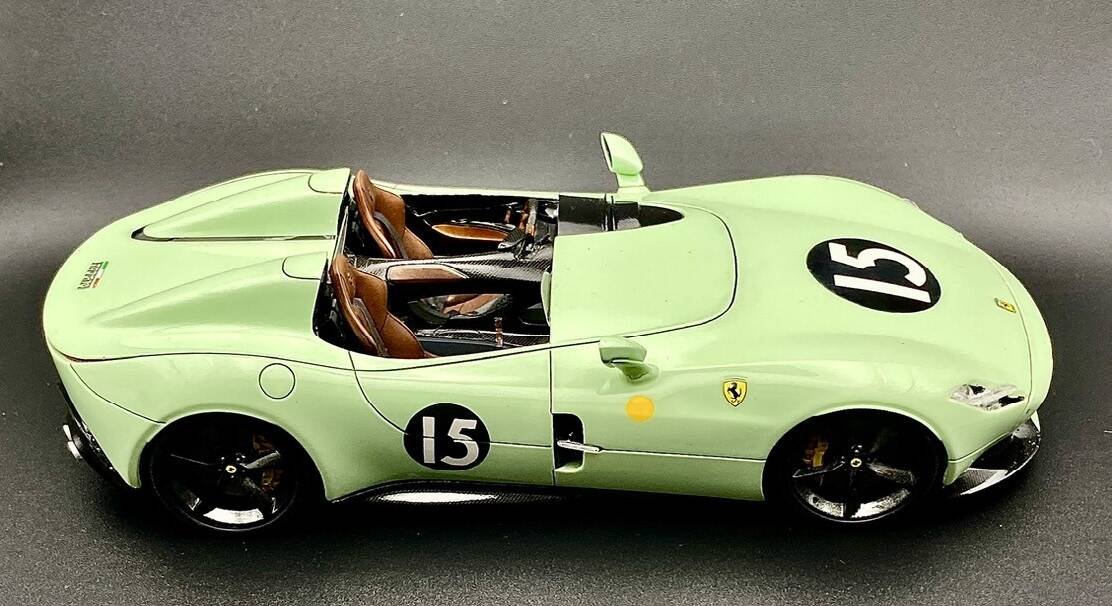
The Sterling Moss tribute Ferrari Monza SP2 is complete! Verde Pallido pale green with the iconic number 15 roundels, this build pays homage to one of racing's greatest legends.
— End —