
 Advanced Creators
From Box to Beauty
A Mercedes-AMG Petronas W10 Build — Chapter 1: The Team in Profile
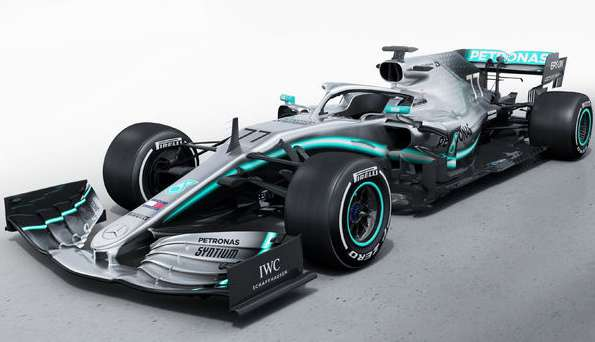
Before we touch a single resin part, let's meet the team behind this car. This is the Mercedes-AMG Petronas Motorsport Formula One team — one of the most dominant squads in the history of the sport, and the inspiration behind our 1/20 scale full-detail kit AM03-0006.
The Team at a Glance
| Headquarters | Brackley, United Kingdom |
| Base Nation | Germany |
| Team Chairman | Niki Lauda |
| Team Principal | Toto Wolff |
| Technical Director | James Allison |
| Race Car | Mercedes-AMG F1 W10 EQ Power+ |
| Power Unit | Mercedes M10 EQ Power+ 1.6 L V6 Turbo-Hybrid |
| Grand Prix Starts | 189 |
| Race Wins | 79 |
| Constructors' Championships | 5 (2014, 2015, 2016, 2017, 2018) |
The Livery — Silver, Carbon, and Petronas Teal
Despite some social-media teasers from Mercedes suggesting a completely different spotted livery, the official presentation revealed a colour scheme quite similar to the team's previous cars, albeit with some changes. Silver is still the dominant colour, but there are also carbon black accents, with the iconic three-pointed star repeated as many small monograms on the engine cover, and a teal-green stripe that runs along the side of the car and reaches the front wing flaps. This latter colour is linked to the main sponsor, Petronas, which appears on the sidepods and nose.
The Monaco Tribute to Niki Lauda
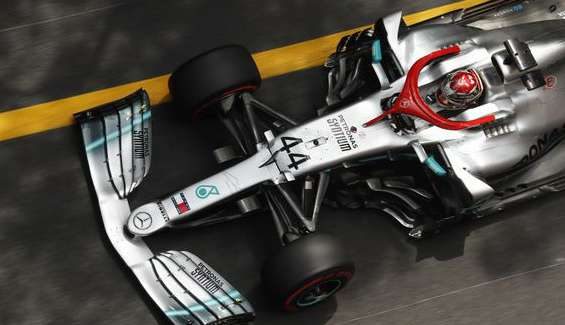
For the Monaco Grand Prix — in memory of Niki Lauda, the team's chairman who had passed away a few days before the race — some small details were added to the original livery. The car's Halo was painted red, like the helmets Lauda used to wear, and it also carried the inscription "Niki we miss you." On the nose cone, his signature was added with the words "Danke Niki" (German for "thank you, Niki"), and finally one of the three-pointed stars on the engine cover was painted red. This last modification was then kept for all the remaining races of the season.
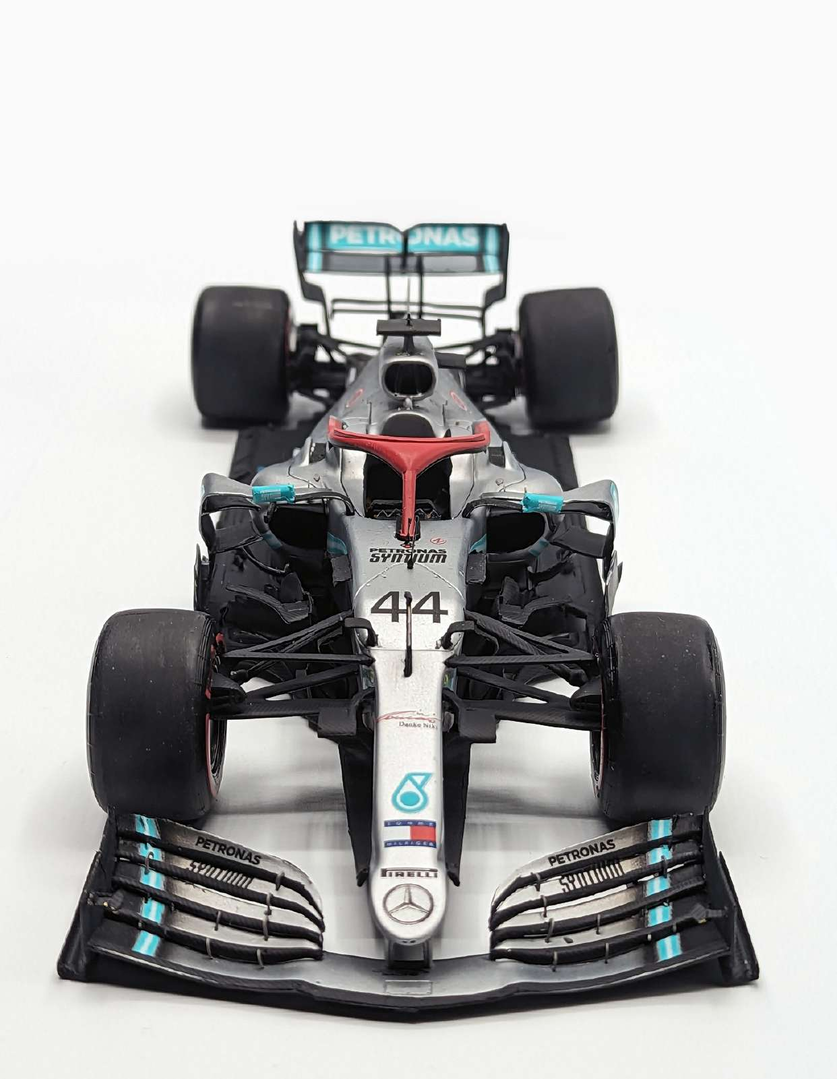
A five-time championship team, a silver-and-teal icon, and a season punctuated by tribute and dominance. Now let's open the box and see what Alpha Model has prepared for us. Up next: Chapter 2: Unboxing & Kit Inspection!
— Build by Enrico Sironi
Advanced Creators
From Box to Beauty
A Mercedes-AMG Petronas W10 Build — Chapter 2: Unboxing & Kit Inspection
Hello everyone! In this article I will walk you through the various steps involved in assembling this resin model kit. The kit looks very good, with the parts divided into transparent bags. Before we go any further, a careful inspection is essential — a quality 1/20 build starts with a quality check.
Step 1 — A First Look at the Resin
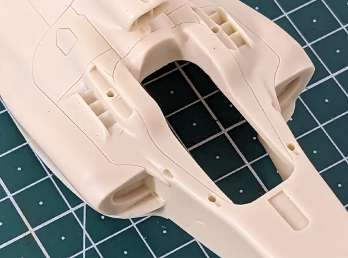
The resin parts are of excellent quality and have been carefully designed. The attachment points (the small gates that connect each piece to its mould) are well defined, allowing you to work on the model without detaching them prematurely. The parts themselves feel solid and have been moulded with care — a strong first impression of the kit overall.
Step 2 — Photo-Etch & Decals
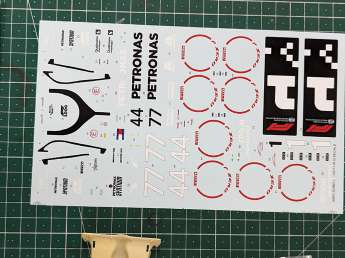
The kit also includes many sheets of photo-etch (PE) and finely printed decal sheets. These details — pre-painted parts with photoreal carbon textures, sponsor logos, and tiny mesh panels — will add a serious touch of realism to your model.
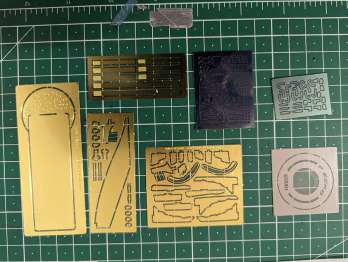
A little tip: Be careful with the sheet with the stars — it has a protective film that must be removed before applying the decals. If you apply the film-covered stars directly, the protective layer will leave a glossy halo around each star and ruin the look.
Step 3 — The Assembly Steps Previewed
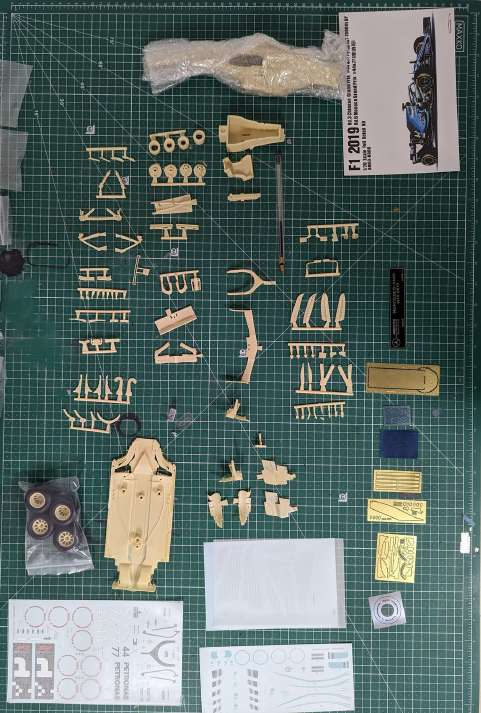
In the following photographs, you can see the various steps of assembling the kit. We will progress in this order: resin inspection → gate removal → cleaning → photo-etch preparation → priming → main body painting → decal application → final assembly.
Step 4 — Checking the Grooves & Paneling
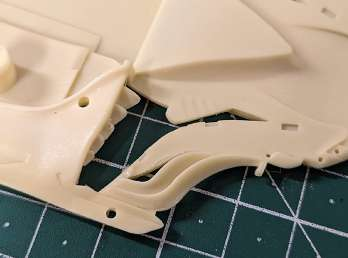
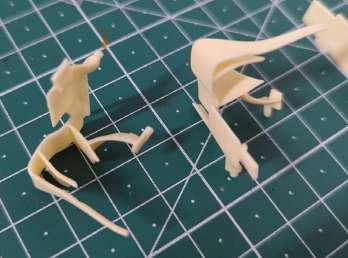
Before starting work, it is important to check the various grooves and paneling of the kit to see if there is any resin build-up or residue. This residue can compromise the finish of the model, so it is important to remove it carefully with a sharp hobby knife.
Step 5 — Opening Closed Parts (An Advanced Option)
Personally, I prefer to open the parts that are closed to increase the detail of the model — exposed brake ducts, hollow wing endplates, opened louvres. However, this intervention is only recommended for experienced modellers, as it could damage the structure of the piece. If you decide to open them, carefully assess your skills and proceed with caution.
Modelling tips:
- Use sharp, high-quality modelling tools.
- Take your time and work patiently.
- If you are unsure of how to proceed, consult a modelling forum or ask an experienced modeller for advice.
With a little care and attention, you can achieve an excellent result from your resin model. Up next: Chapter 3: Cleaning & Photo-Etch Preparation — where we wash every part and prep the brass for paint.
The kit is in great condition, the gates are clean, and the small dangers (the star decal film) have been noted. Now we clean, and we clean properly.
— Build by Enrico Sironi
Advanced Creators
From Box to Beauty
A Mercedes-AMG Petronas W10 Build — Chapter 3: Washing, Degreasing & Photo-Etch Preparation
Before a single drop of paint touches this kit, every resin part must be washed clean of mould-release agent, and every photo-etched brass piece must be prepped so paint will stick to it. Skipping these steps is the single most common reason resin kits fail at the painting stage — so we take our time here.
Step 1 — Degreaser for Parts, Denture Tablets & Dish Soap
I usually use a mixture of products in cold water:
- Liquid dish soap — to break down surface grease
- Degreasing denture tablet — to lift any residual mould-release film
After 24 hours of washing, everything needs to be dried. I use compressed air to blow water out of every recess — this avoids accidentally snapping off the small attachment points by hand-drying with a cloth.
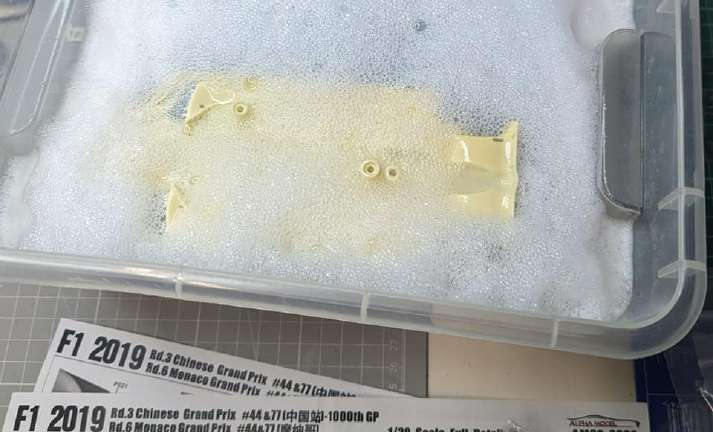
The grease on a freshly cast resin part is invisible — but it is there. Prime over it, and your paint will fish-eye, crawl, and never cure properly. Twenty-four hours of patience now saves a week of frustration later.
Step 2 — Attention and Proper Tools for the Photo-Etch
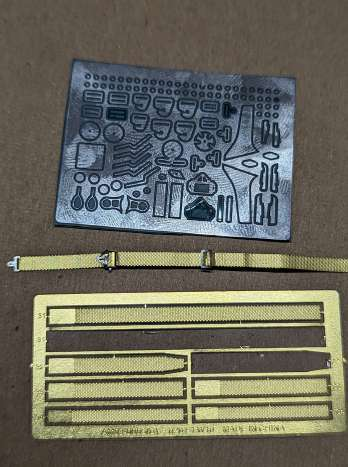
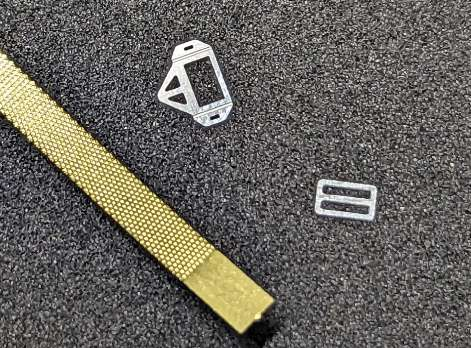
Photo-etching requires special attention and care. To obtain precise folds without ruining the details, it is advisable to use specific tools, such as tweezers, photo-etching shears, and a photo-etch bending tool.
Step 3 — Clear and Detailed Instructions
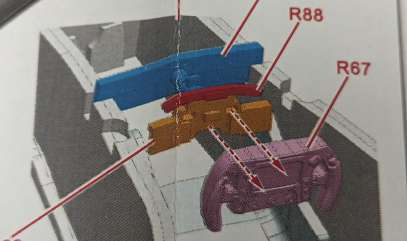
The instructions provided with the kit are generally clear enough. However, if you have any doubts or difficulties, do not hesitate to consult online tutorials or ask for advice from an experienced modeller.
Step 4 — Tips for Impeccable PE Work
Before starting, carefully read the instructions and familiarise yourself with the different parts of the photo-etching. Use sharp and good-quality tools to avoid damaging the material. If possible, do a test on a piece of scrap photo-etching before working on the final piece. Proceed with calm and patience, taking the necessary time to obtain a precise result.
Step 5 — Some Additional Tips
To facilitate bending, you can use a special steel ruler along the bend line as a guide. If the photo-etched parts are very delicate, you can fix them to the work-surface with a little paper tape before working on them — this keeps them from springing away mid-fold. To avoid scratching the surface, use tweezers with rounded tips whenever possible.
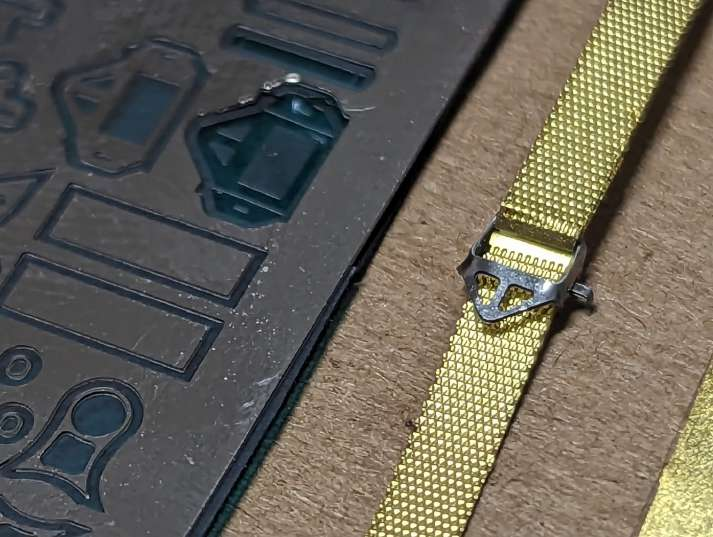
With a little attention and care, you will be able to achieve excellent results from photo-etching. Up next: Chapter 4: Priming — The Foundation of the Silver Finish.
Every resin part is clean, every brass detail is prepped. Now we build the foundation — and for the W10's signature silver livery, that foundation matters more than ever.
— Build by Enrico Sironi
Advanced Creators
From Box to Beauty
A Mercedes-AMG Petronas W10 Build — Chapter 4: Priming, Decal Base & Underbody Carbon Work
The W10's silver paint needs a perfectly smooth, perfectly dark base to shine — and the underbody of an F1 car is a jungle of carbon fibre textures. This chapter is about laying down both.
Step 1 — Gray Primer Then a Light Coat of Black Gloss
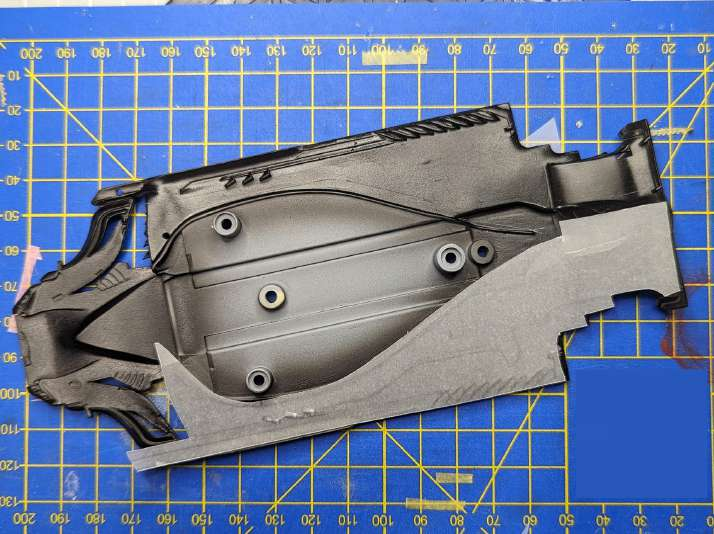
After treating the parts with gray primer, I applied a light coat of black gloss paint. This step creates a smooth and uniform surface, ideal for applying decals later. The silver body paint will then pop dramatically against this dark base.
Step 2 — Decals and Textures
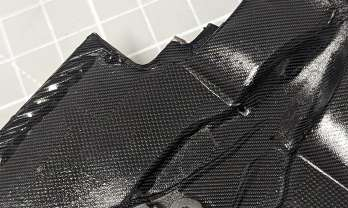
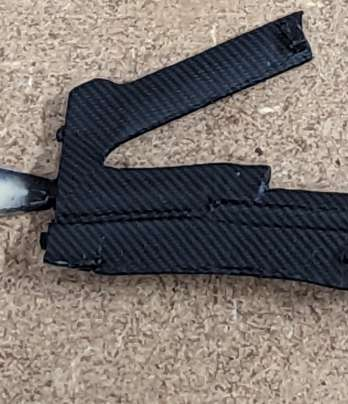
To increase the visual rhythm and overall realism, I used different carbon textures for the various decal areas — twill on the floor, plain weave on the engine cover, forged pattern on the suspension. The decals were applied carefully to avoid air bubbles or imperfections. The kit has a remarkable synthesis of the parts, which makes it not too complicated to assemble and insert into the hull.
Step 3 — The Steering Wheel: A Decal Showcase
The steering wheel decals are of excellent quality and, combined with the very accurate printing of the resin base, they greatly increase its realism. The buttons, the rotary selectors, the shift-light LEDs — every detail is on a single beautifully printed decal.
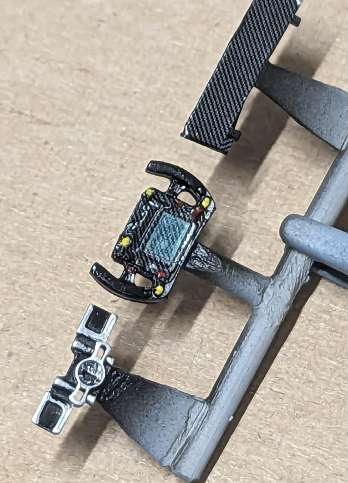
With a little attention and care, it is possible to obtain an excellent result from this kit. The paints, decals, and attention to detail will contribute to creating a realistic and visually striking model.
It is true that the giant steps in overall product printing are greatly reducing the use of decal-treatment products. However, I still recommend using a decal softener. This product helps to make decals softer and more flexible, making them easier to apply and preventing air bubbles from forming.
Step 4 — The F1 Kit and Realism
The F1 kit is a fundamental element to obtain acceptable realism. The carbon-fibre texture and its direction are two aspects to be carefully considered. For an optimal result, I recommend using high-quality decals and applying a matte finish on top to match the satin sheen of real autoclaved carbon.
Step 5 — Tips for Applying Decals
- Before applying decals, make sure the surface is clean and dry.
- Use a decal softener to make decals softer and more flexible.
- Apply decals carefully, avoiding tearing or breaking them.
- Remove any air bubbles with a special tool or a cotton swab.
- Allow decals to dry completely before applying a protective varnish.
With a little attention and care, you can achieve an excellent result from applying decals.
Step 6 — Creating the Decals for the Underside
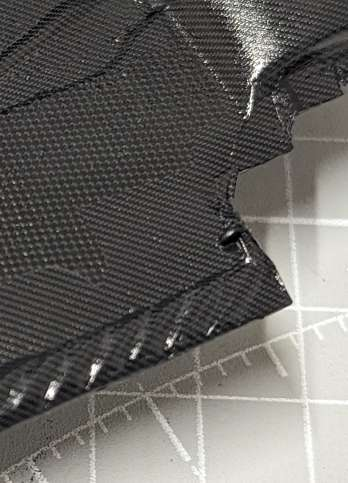
To create the decals for the underbody, I referred to reference images of the real car. This allowed me to realise how incredibly detailed and accurate the kit is. The carbon-fibre textures and directions are very different, and to achieve a realistic result, it is necessary to create a carefully designed mask first.
Step 7 — Creating the Mask
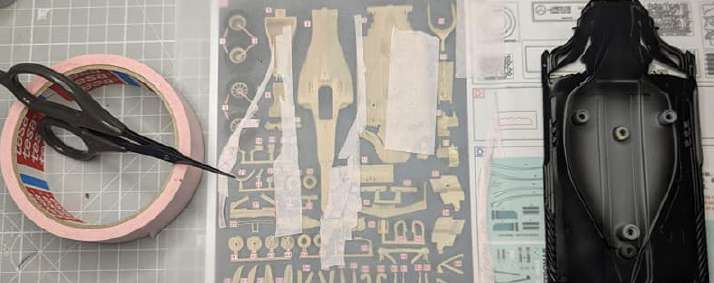
I used clear acetate sheets and medium-pink Tesa tape to create the pre-cut mask. The clear sheet was used to trace the carbon-fibre textures, while the Tesa tape was used to create the masks for the different areas of the bottom.
Step 8 — Pre-Cutting and Painting
After creating the mask, I proceeded with pre-cutting the decals. Next, I applied the black gloss paint, creating a uniform base for the application of the decals.
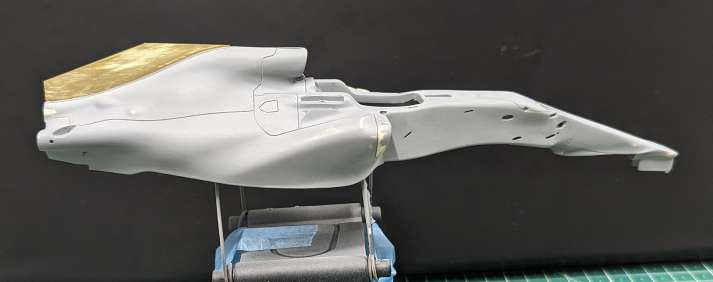
Step 9 — Applying the Decals
The decals were applied carefully, making sure to align the carbon-fibre textures with those of the kit — twill must always run in the direction the real autoclave would have laid the cloth.
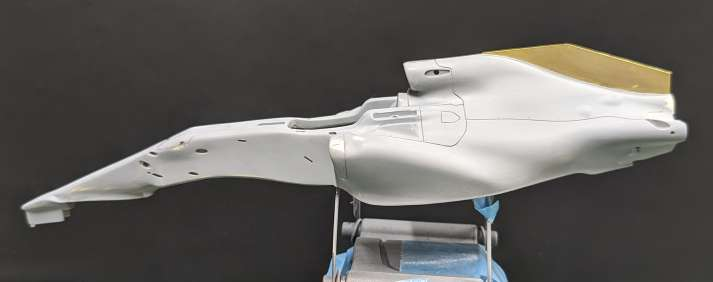
Step 10 — Finishing
After the decals had dried completely, I applied a protective matte varnish to even out the finish and protect the work done. Creating the decals for the bottom was a challenging job, but the end result was very rewarding. The attention to detail and precision of the work resulted in a pleasing realism.
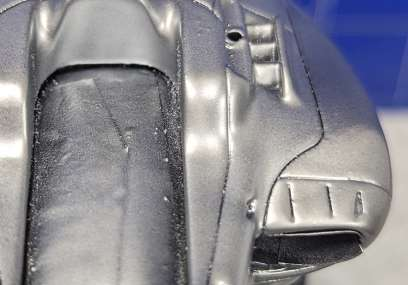
The underbody, the steering wheel, the small carbon details — every texture is now in place. Up next: Chapter 5: Body Painting — Silver & Shading.
— Build by Enrico Sironi
Advanced Creators
From Box to Beauty
A Mercedes-AMG Petronas W10 Build — Chapter 5: Body Painting — Silver & Shading
Now we come to the most defining moment of this build — the silver paintwork of the Mercedes-AMG Petronas W10. Looking at reference photos, the real car is far from a flat silver: there is subtle fading toward black in the deep recesses, and a brilliant mirror gloss on the upper bodywork. Reproducing that two-tone character is what this chapter is about.
Step 1 — Applying Gray Primer: A Fundamental Step for a Flawless Result
The Importance of Primer:
- Checking for cleanliness: The primer highlights any imperfections or resin residues that could compromise the finish of the model. At this stage, it is possible to correct these defects before proceeding with the actual painting.
- Checking for inaccuracies: The primer helps to identify painting errors such as air bubbles or stains, allowing you to intervene and correct them before applying the final colour.
- Preparing the surface: The primer creates a uniform and smooth surface that promotes paint adhesion, ensuring a more durable and long-lasting finish.
Tips for choosing a primer: Choose a primer that offers high resistance and flexibility over time. I chose gray as a neutral base so as not to influence the final colour.
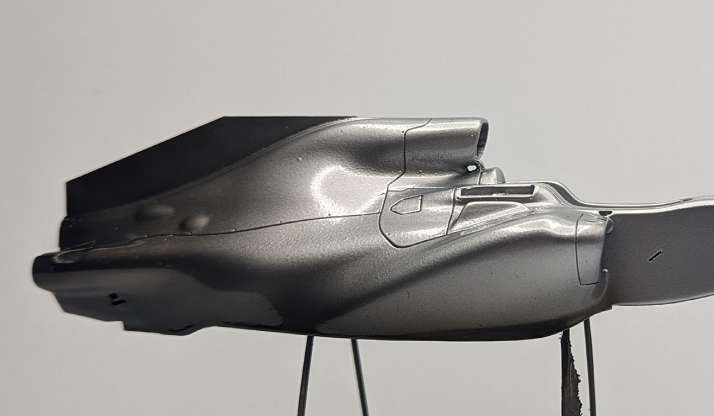
Application Process: I applied several light coats of gray primer, letting each coat dry completely before applying the next. It is important to avoid applying a layer that is too thick, which could create drips or imperfections.
Step 2 — Black Gloss for Silver Depth
After the gray primer, I applied a coat of black gloss to prepare the surface for the silver. The black gloss creates a uniform and reflective surface that enhances the brilliance of the silver.
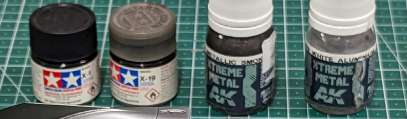
I used AK Interactive products for the painting, which I am extremely comfortable with. However, it is possible to use similar products without any problems, as long as they are of high quality.
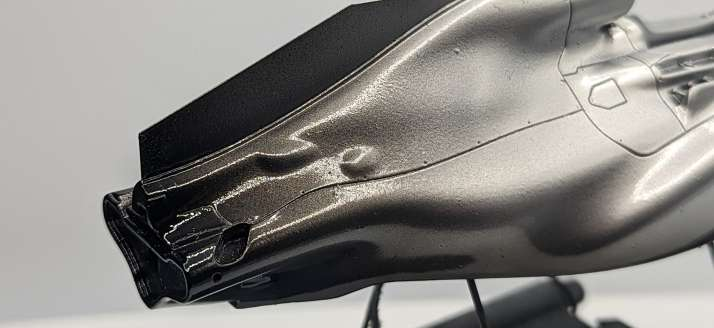
In my opinion, the key element for the correct realisation of the model is the shading. The references I consulted do not show a completely black paint job, but a gradient shading that fades to gray. The black is concentrated only in the final part, probably also to complicate the taking of photographs useful for the development of the cars.
Step 3 — Building the Silver Gradient
To achieve this effect, I used smoke and diluted black. The smoke was applied in several light coats to create a gradual shading, while the diluted black was used to intensify the colour in the shadow areas. The use of different shades of black and the creation of realistic shading are crucial aspects to obtain a model that faithfully reflects the real car.
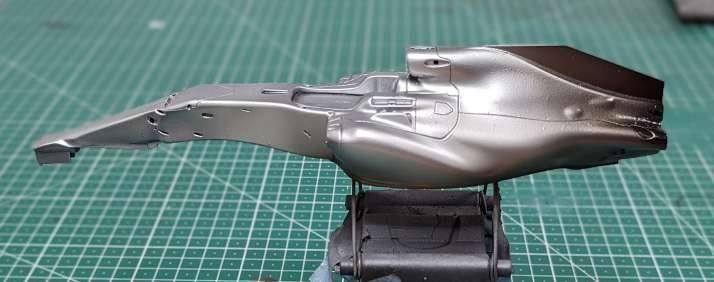
Attention to these details contributes to creating a model with a great visual impact.
The bodywork is now a believable silver-with-black-shading. Up next: Chapter 6: Tyres, Front Wing & Rear Wing.
— Build by Enrico Sironi
Advanced Creators
From Box to Beauty
A Mercedes-AMG Petronas W10 Build — Chapter 6: Tyres, Front Wing & Rear Wing
These three sub-assemblies — the four Pirelli P Zero tyres, the front wing, and the rear wing — are what visually define a modern F1 car when it's sitting on the bench. Let's tackle them one at a time.
1. Painting the Tyres
To paint the tyres, I follow a method that I learned from other experienced modellers.
Removal of printing residue: First, I remove the printing residue with a file. It is important to sand gently to avoid damaging the surface of the tyre.
Cleaning: After sanding, I wash the tyre with running water to remove any dust residue.
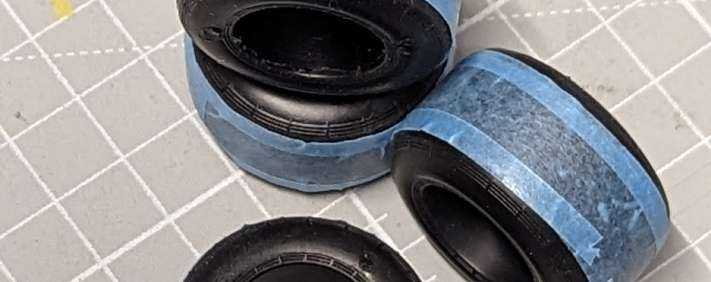
Masking: We tape the tread part to protect it from the paint — only the sidewall will be painted.
Painting:
- Gloss base: I apply a coat of clear gloss paint on the side of the tyre. This layer creates a smooth and uniform surface for the application of the decals.
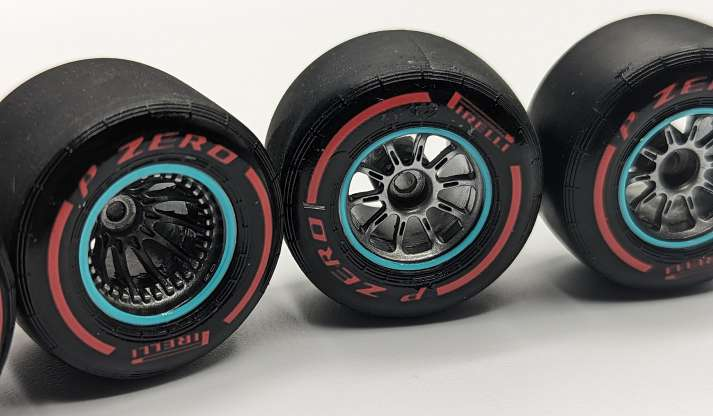
- Decals: After the paint has dried, I apply the decals carefully — the Pirelli logos, the "P Zero" wordmark, and the compound-coloured sidewall bands.
- Protection: Once the decals are applied, I apply a second coat of clear varnish to protect and fix them.
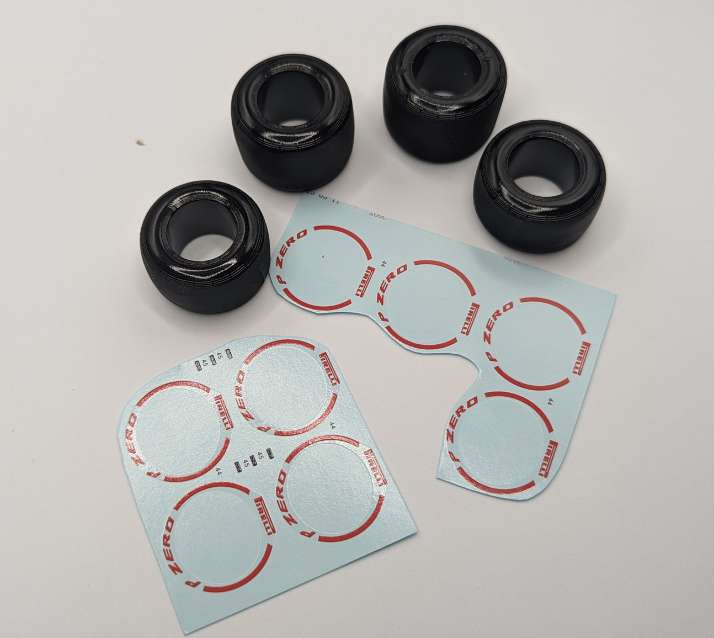
Finishing: After removing the tape from the tread, I apply a layer of black shoe polish. This product gives the tyre a realistic shine and restores the softness typical of a racing product. This method of painting tyres is simple to follow and allows you to obtain a realistic and visually striking result.
2. The Front Wing
The front wing was built following all the processing steps illustrated above, including the black shading.
Decals and photo-etchings: To increase realism, I applied carbon-fibre decals and sponsor decals. The wing also has small photo-etchings — the tiny cascade elements and the endplate vanes — that I applied as a last element.
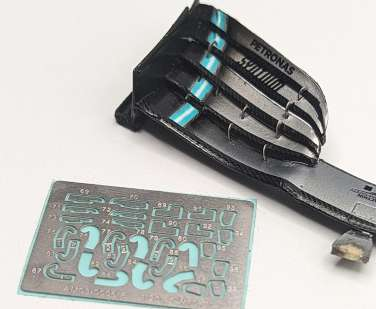
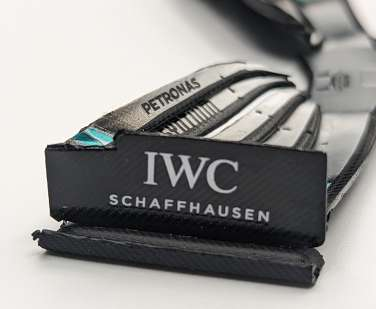
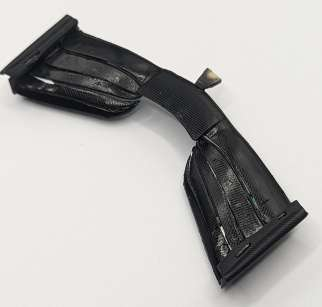
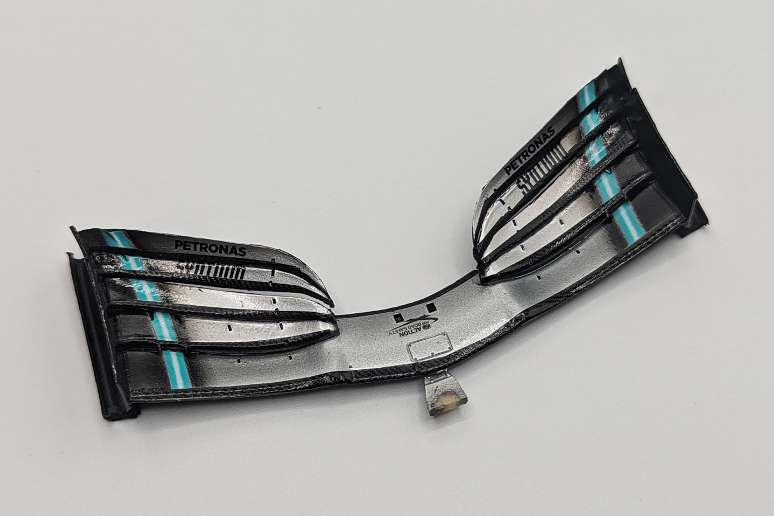
Tips: Follow the instructions carefully, which are extremely clear and precise. Pay attention to the anchor points to ensure correct installation of the photo-etchings. The front wing is an element that, if cared for in detail, can contribute significantly to the realism of the model.
3. The Rear Wing
The rear wing was built by following all the processing steps illustrated previously, including the black shading.
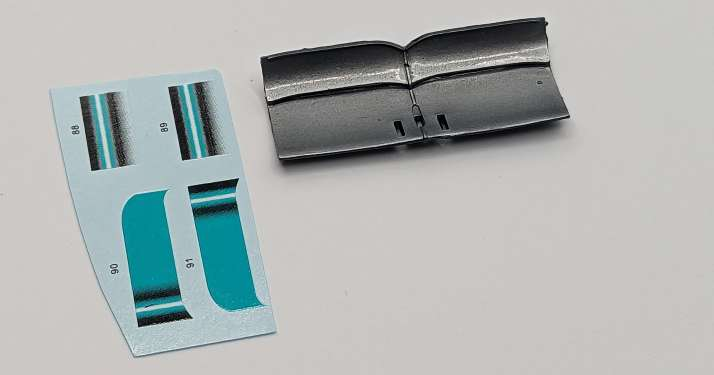
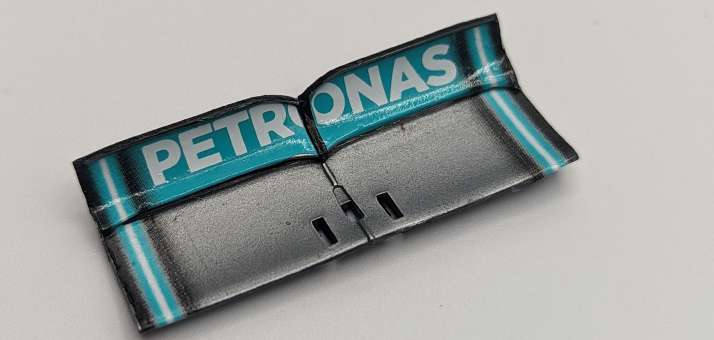
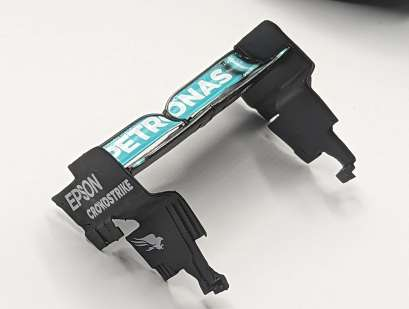
Tips: Follow the instructions carefully, which are extremely clear and precise. Pay attention to the anchoring points to ensure correct installation. The rear wing is an element that, if taken care of in detail, can greatly contribute to the realism of the model.
Four tyres and two wings built, decalled and detailed. Up next: Chapter 7: Body Decals, Final Assembly & Weathering.
— Build by Enrico Sironi
Advanced Creators
From Box to Beauty
A Mercedes-AMG Petronas W10 Build — Chapter 7: Body Decals, Rear End & Final Assembly
Now everything starts to come together: the sponsor decals go on the body, the rear-end sub-assembly is built, and the car's aerodynamic pieces are joined to the floor for the final time.
1. Body Decals — A Careful Job
I applied the decals following carefully the instructions provided. It is important to pay attention to the position and orientation of each decal to obtain a flawless result.
Removing the film: A critical point is the removal of the transparent film that protects the decals. It is important to do this gently to avoid damaging the decals themselves. In particular, in the case of the stars, it is necessary to remove the film before applying the other decals.
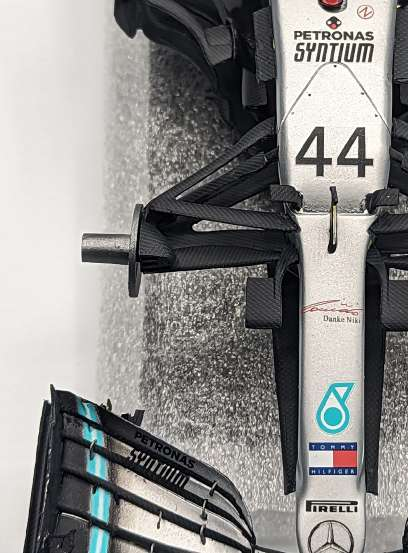
Detail and design: I was very impressed by the detail of the decals on the bottom, which have different textures and designs. This element contributes to creating a realistic and valuable model.
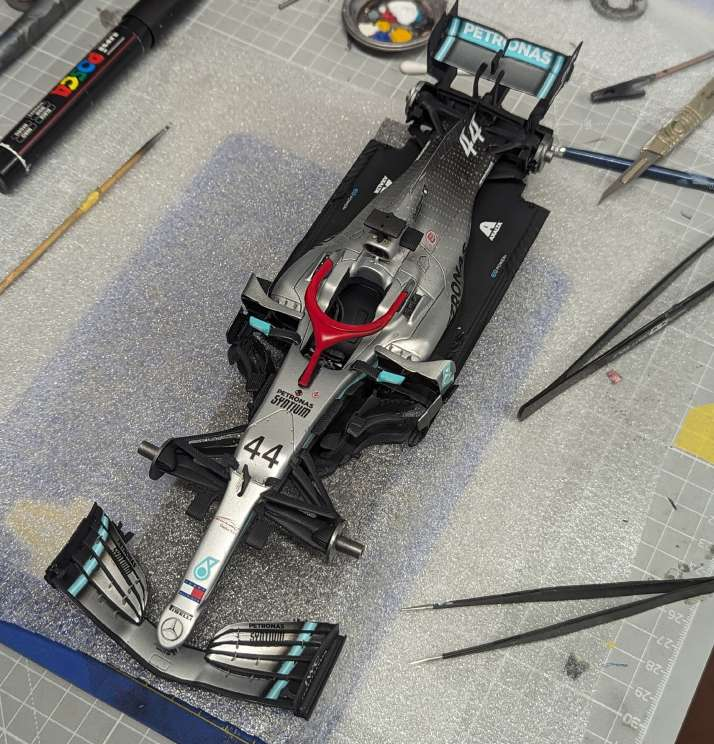
I am very satisfied with the final result obtained with the application of the decals. The attention to detail and the precision of the work done have made it possible to obtain a model of great visual impact.
2. The Rear End Sub-Assembly
The rear end was assembled by carefully following the instructions provided. It is important to follow the indicated steps carefully to obtain a precise and safe result.
Part anchoring: Particular attention was paid to anchoring the parts together. This step is essential to create a solid point capable of supporting the weight of the tyres and ensuring the stability of the model.
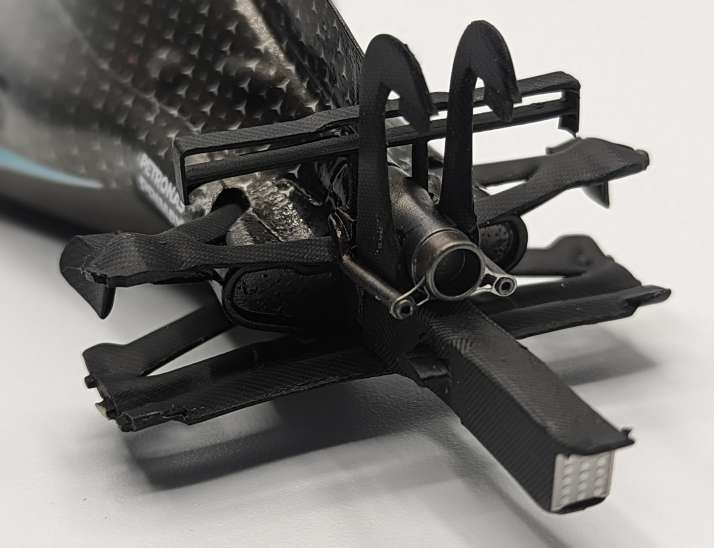
Tyre fixing: The tyres were carefully attached to the rear e
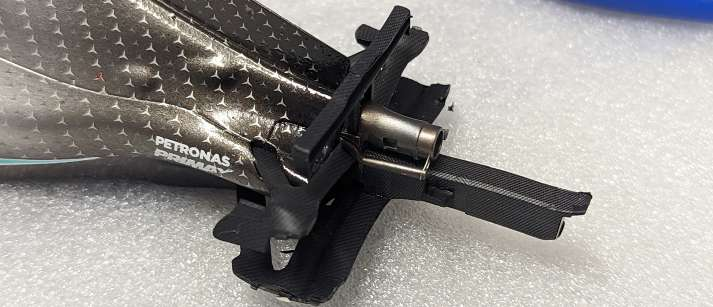
nd, making sure they were centred and aligned.
The assembly of the rear end was successfully completed. The solidity and precision of the work carried out will guarantee the durability and functionality of the model.
3. Final Aerodynamic Assembly
Assembly phase: In this phase, we join the last parts of the aerodynamics before fixing them to the bottom of the model. It is important to work with delicacy and precision to avoid damaging the delicate components.
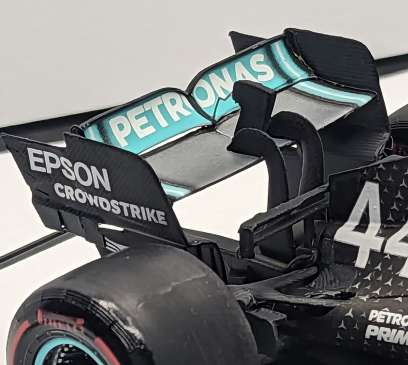
Checking and verification: Before definitively fixing the parts, it is essential to check their position and alignment. Make sure that all components are correctly assembled and that there is no interference between them.
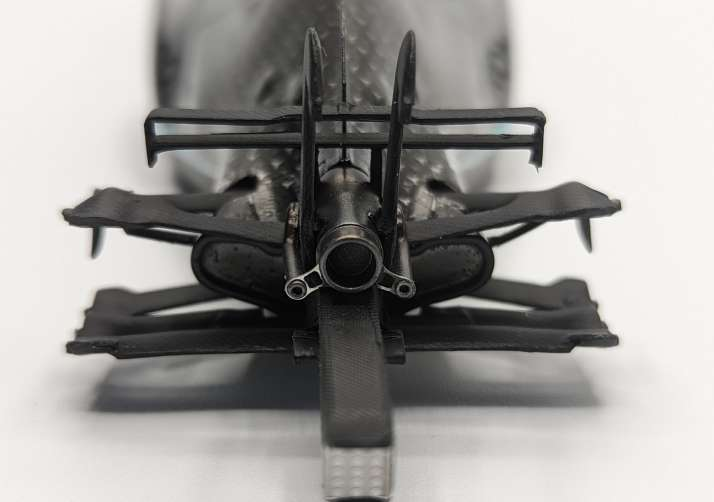
Fixing to the bottom: Carefully fix the aerodynamic parts to the bottom of the model, using the appropriate connectors or screws. Be careful not to apply excessive force to avoid damaging the components.
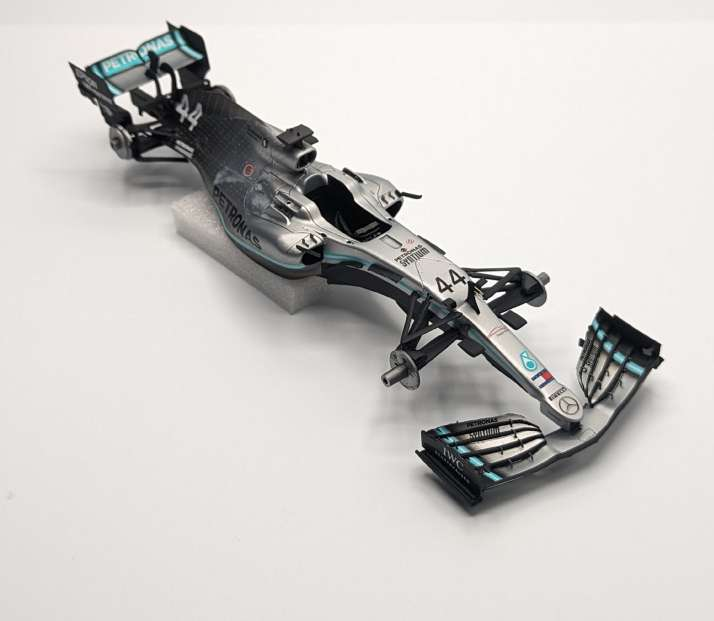
With the final assembly of the aerodynamics, the model is nearing completion. Accuracy and attention to detail in this phase are crucial to achieving a high-quality final result.
A five-time championship team, faithfully captured in 1/20 scale: silver-and-black gradient, teal Petronas stripe, tiny monogrammed stars, four detailed Pirellis, and the iconic red-star tribute painted exactly as Mercedes kept it for the rest of the 2019 season.
— The Finished W10 —
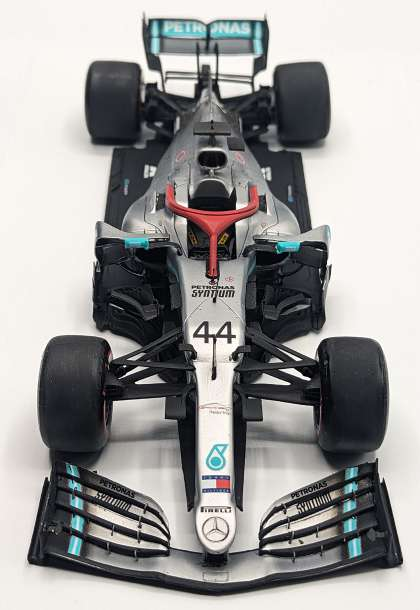
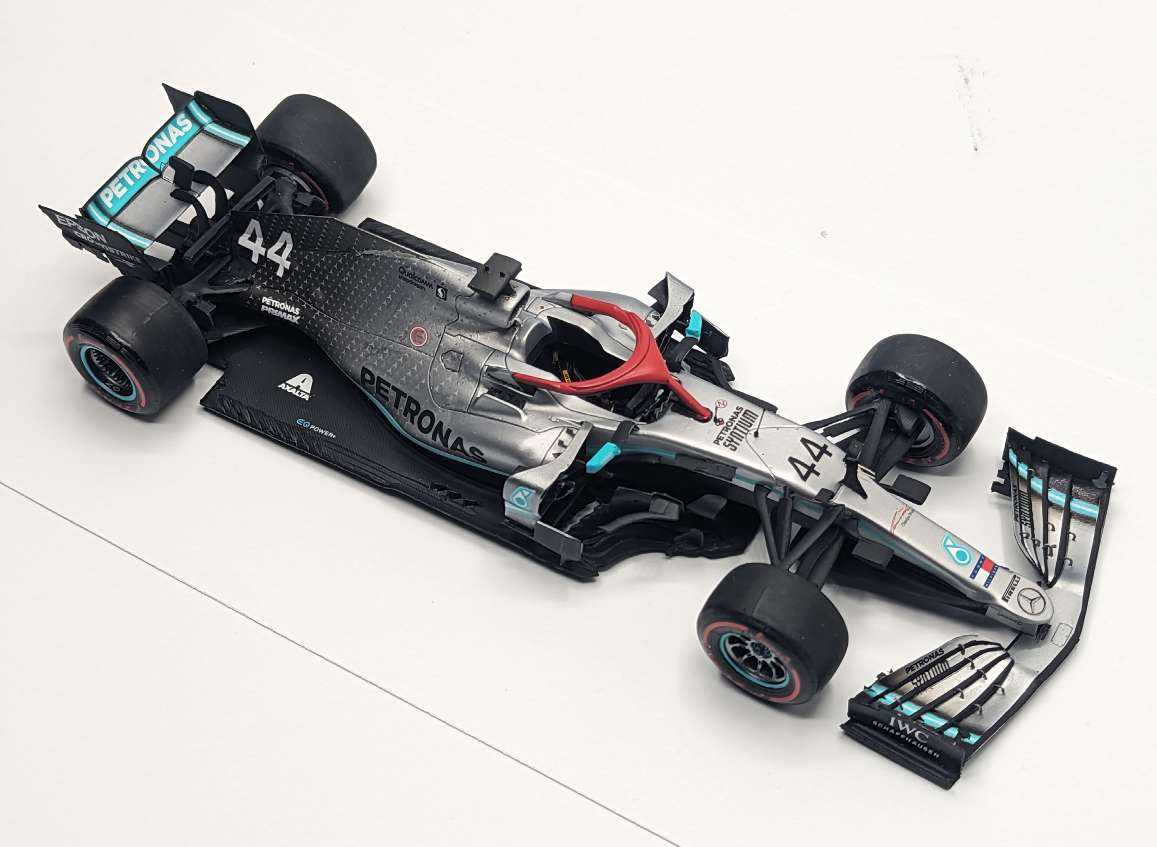
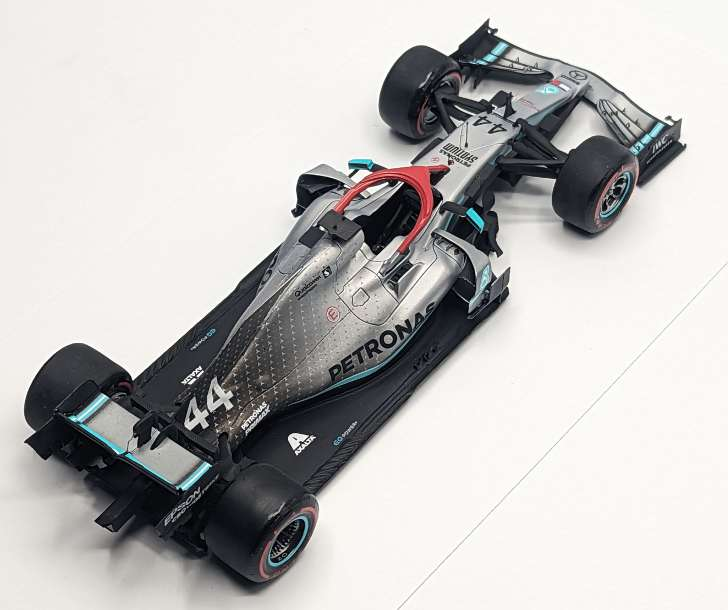
And that wraps up the build of the Alpha Model 1/20 Mercedes-AMG F1 W10 EQ Power+. From a sealed box of resin, brass, and decals to a five-time-championship car — every star, every decal, every silver shade doing its job. Thank you for following along!
Thanks,
Enrico Sironi