
 Advanced Creators
Porsche 911 GT3R (BreakWong)
Alpha Model AM02-0067 · Build by BreakWong
Introduction
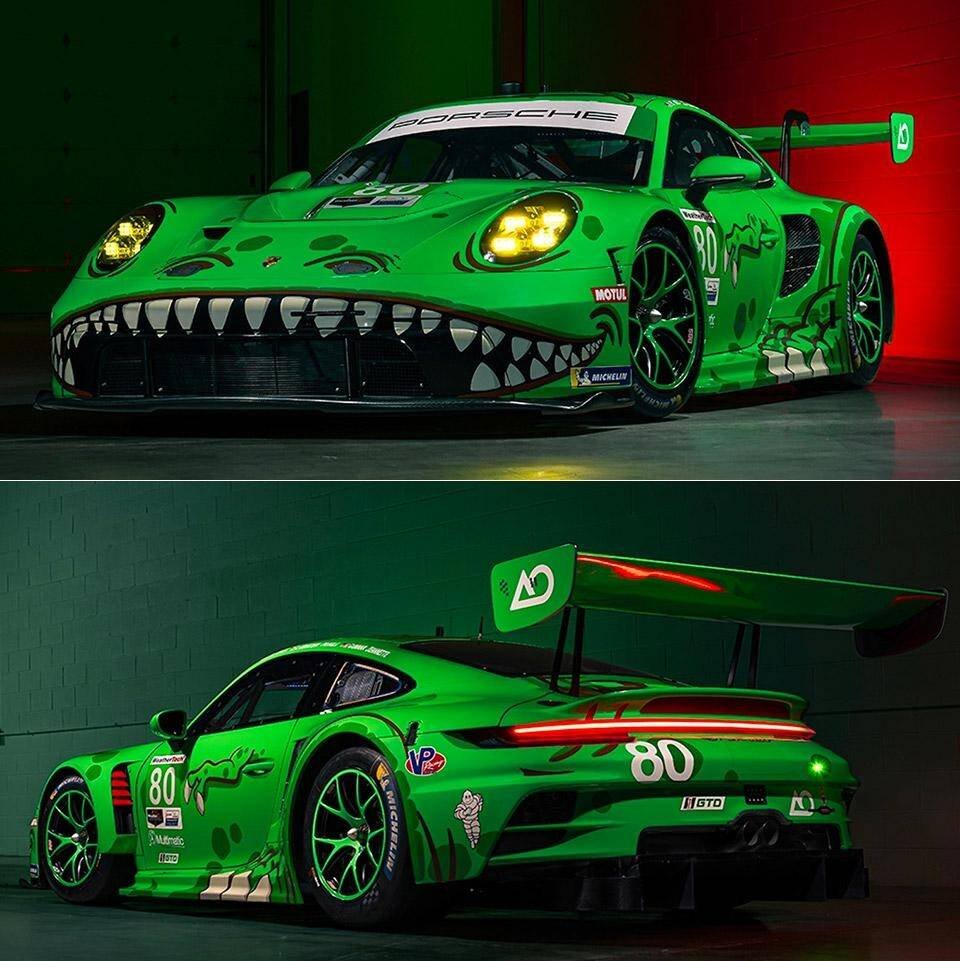
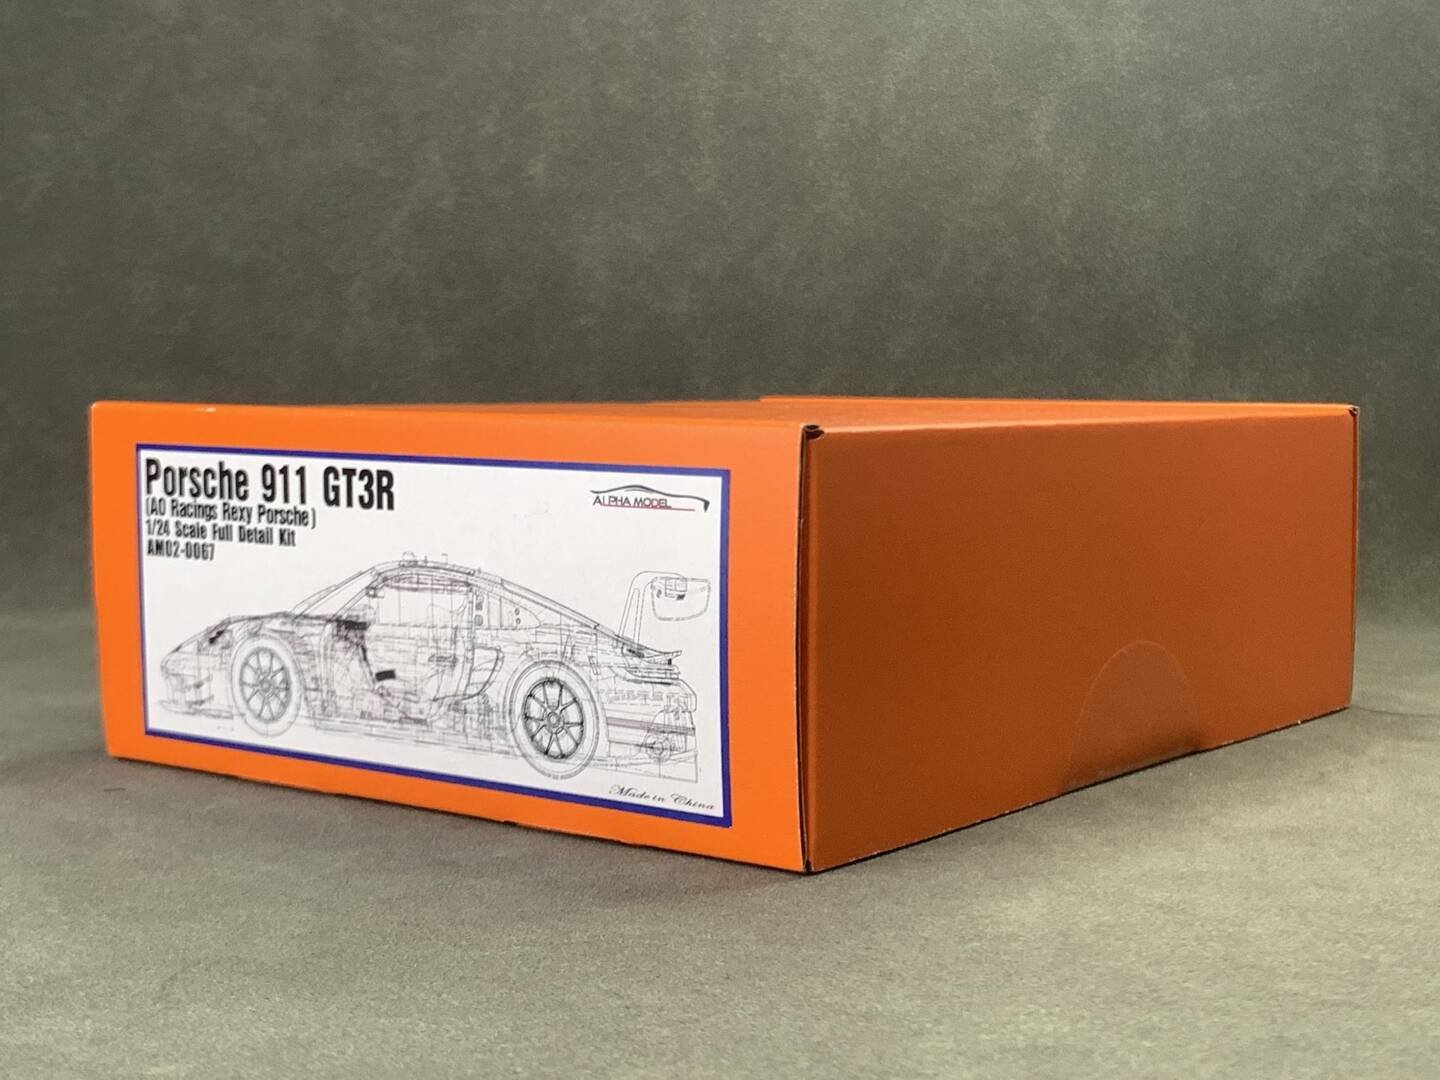
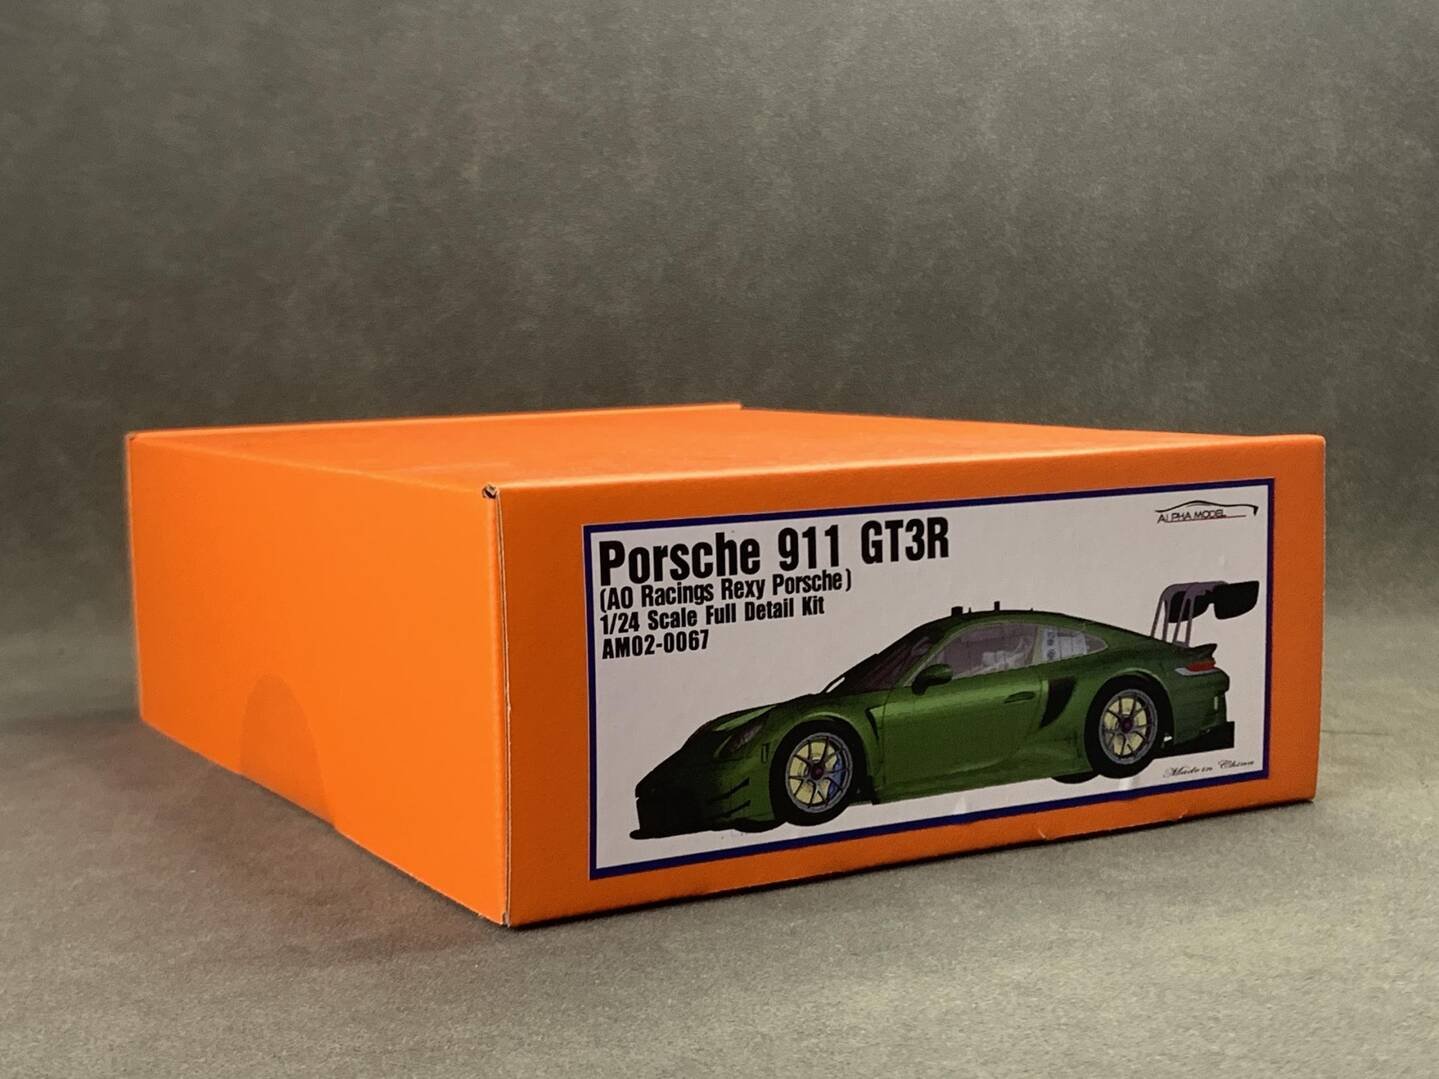
The AO Racing "Rexy" Porsche 911 GT3 R — one of the most eye-catching liveries in modern GT3 racing, built as a 1/24 scale full detail kit by Alpha Model.
In May 2018, Porsche introduced a new iteration of the 911 GT3 R based on the 991.2 GT3 RS for GT3 racing, available for customer teams for the 2019 season. Its 4.0-litre flat-six boxer engine, largely identical to the unit used in the GT3 and GT3 RS street cars and GT3 Cup and RSR race cars, develops approximately 405 kW (551 PS; 543 hp).
Improvements include a larger diffuser for more efficient aero, double wishbone front suspension adopted from the RSR, a shim system allowing setup changes without new alignment, larger front tyres, an electro-hydraulically actuated clutch allowing the removal of the clutch pedal, a fuel cell that can be configured to be refilled from left or right of the vehicle depending on circuit layout, a rear-view camera and collision avoidance system, a fixed seat with movable pedal-box and energy-absorbing impact elements placed in the doors for improved safety as well as air conditioning. The GT3 R is priced at 459,000 Euro excluding taxes.
This particular build represents the AO Racing "Rexy" livery — the famous green dinosaur-themed #80 car that became a fan favourite in the IMSA WeatherTech SportsCar Championship.
Box Contents
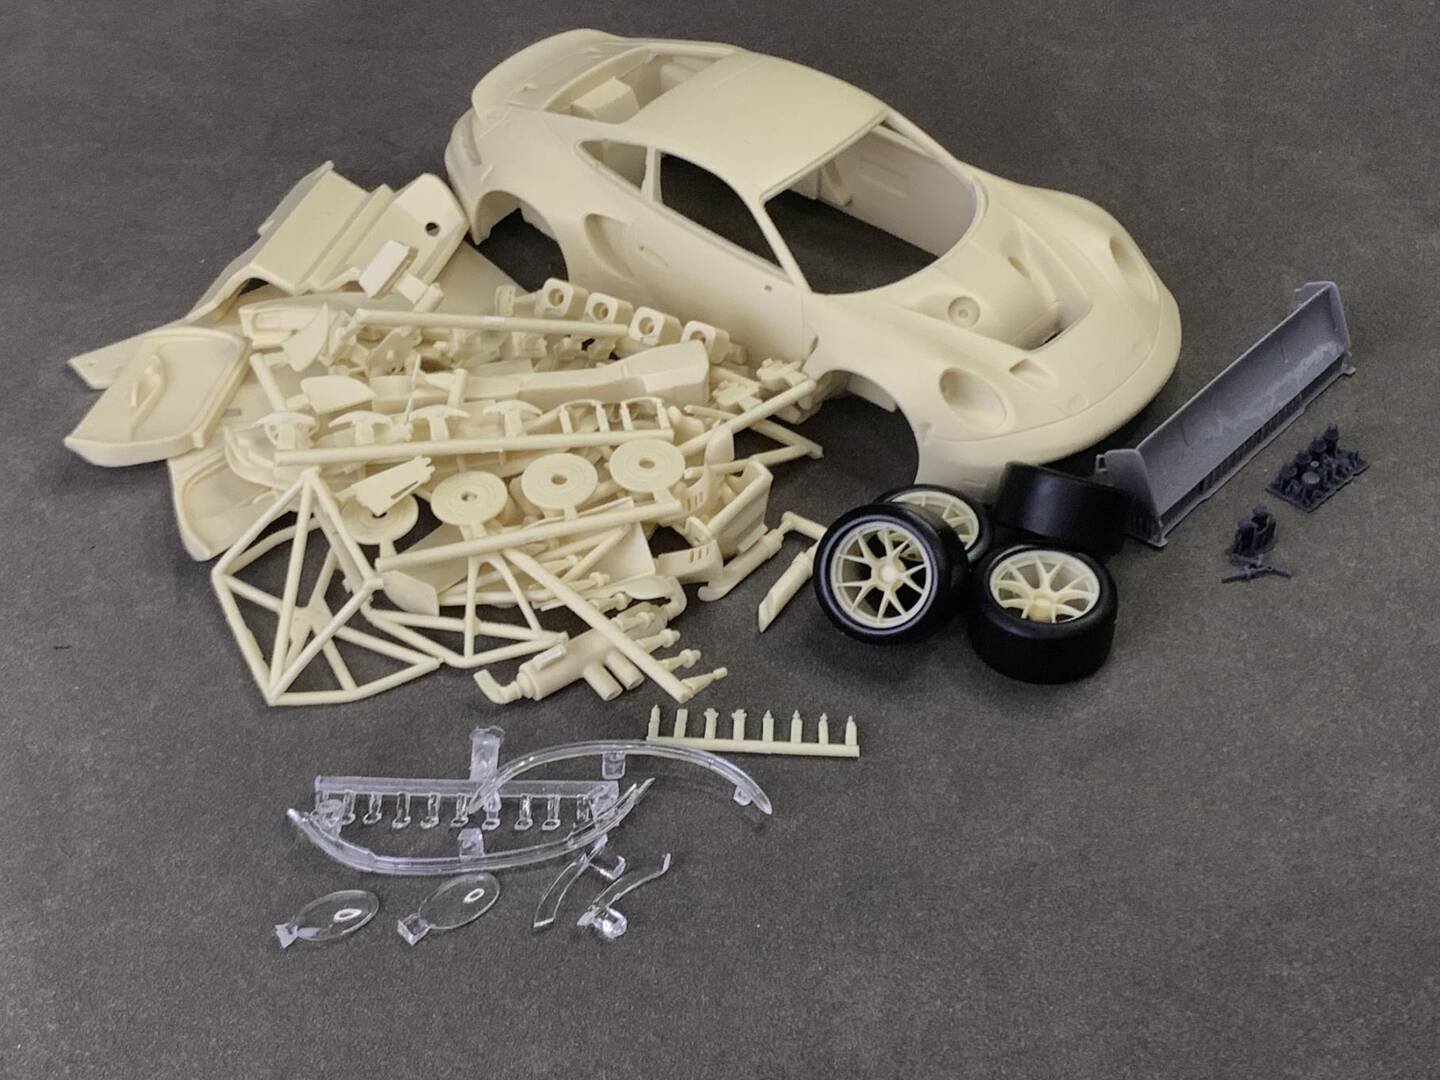
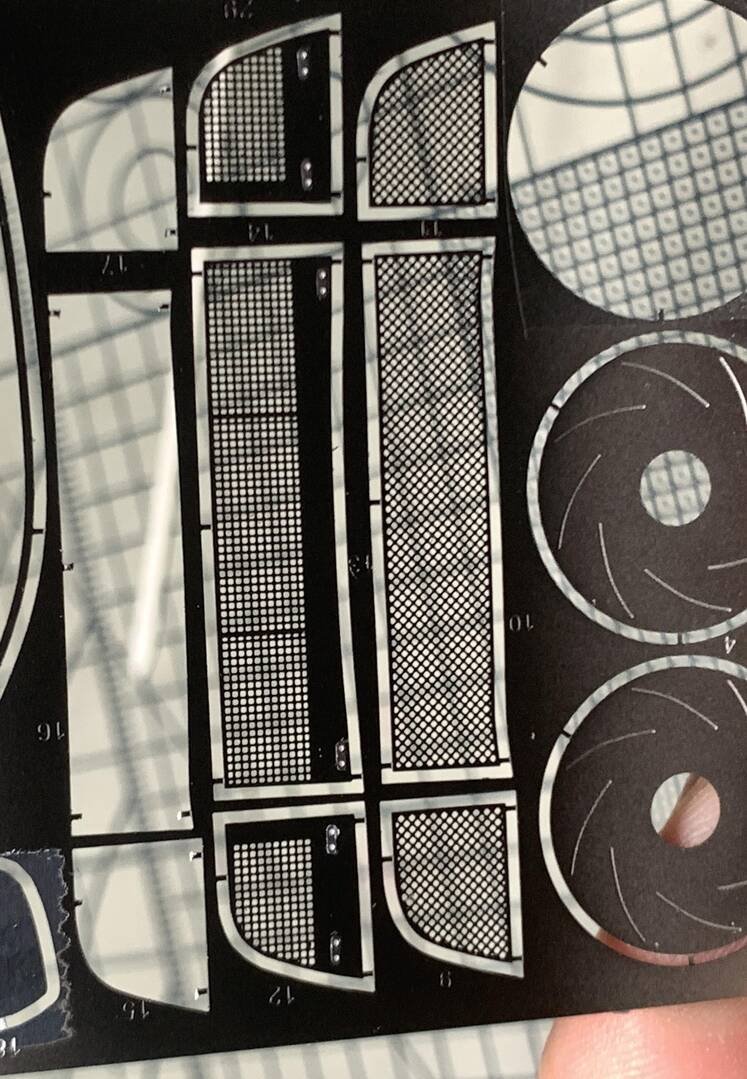
After unpacking the product, take out all the parts bags and the car body. Since there is a risk of damage during transportation by the logistics company, you must first check whether the parts are damaged. The A-pillars, brake calipers, rims and other small parts are more easily damaged. After confirming that the parts are not damaged, please check whether the etching sheet has any bending or damage and whether the water decal sheet has stains. After confirming that all standard items are in good condition, you can start preparations for production.
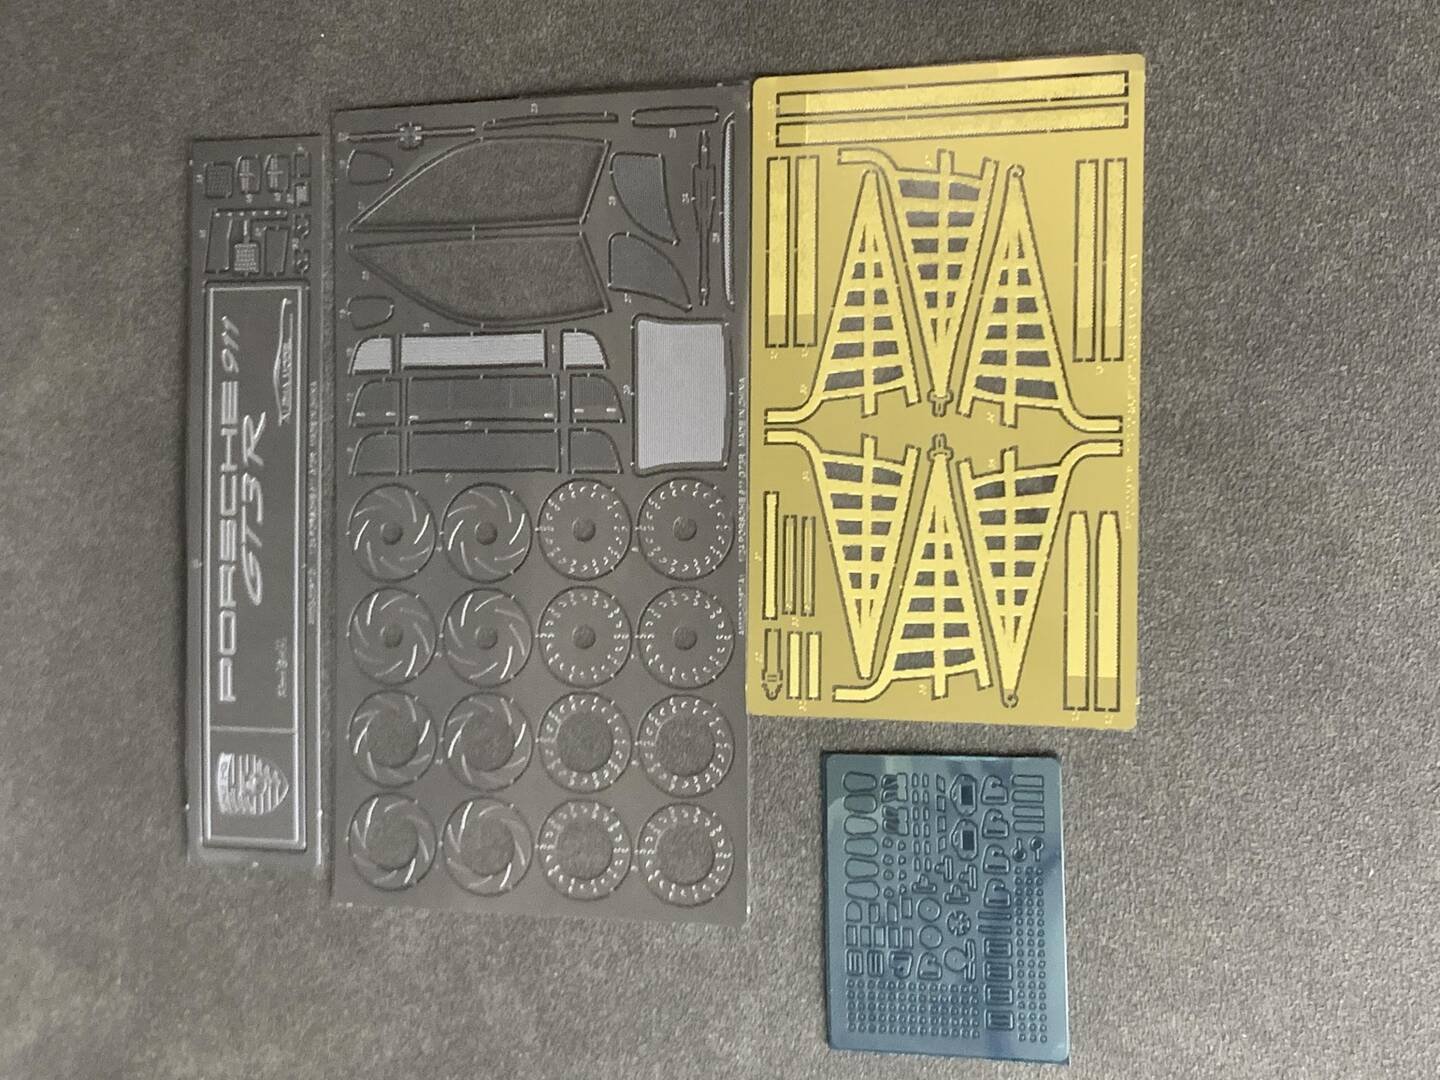
AlphaModel includes a nameplate corresponding to each car model in the photo-etched fret of every kit. Builders can paint the nameplate and display it alongside the finished car in the display case for a high-end presentation.
Mold Quality & Preparation
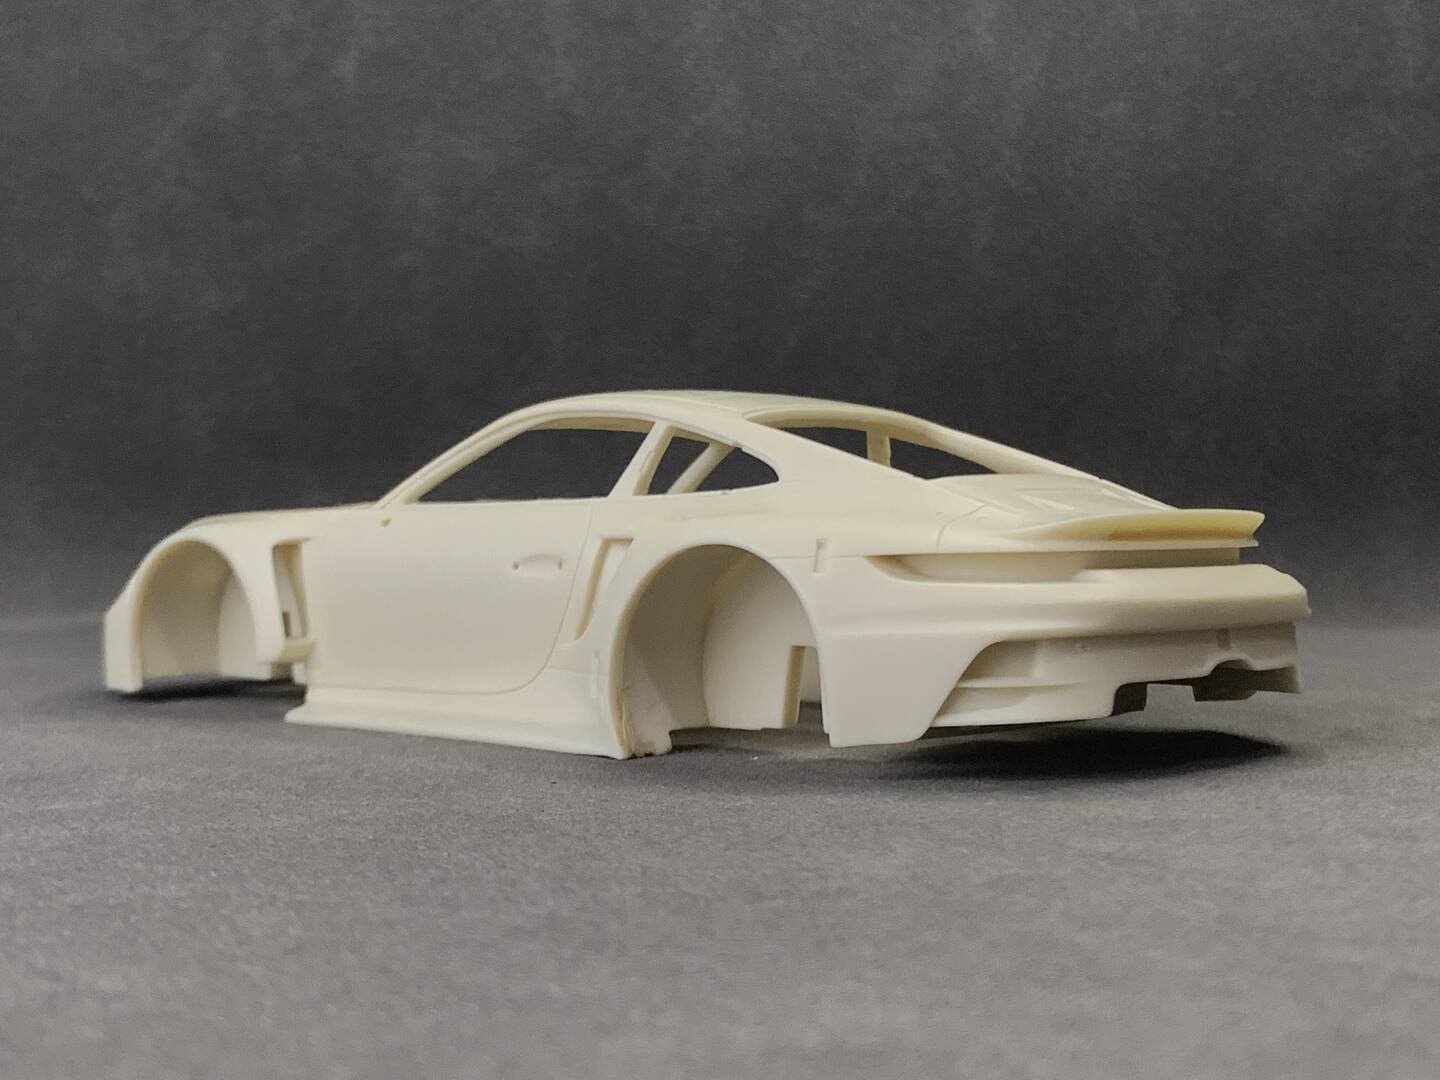
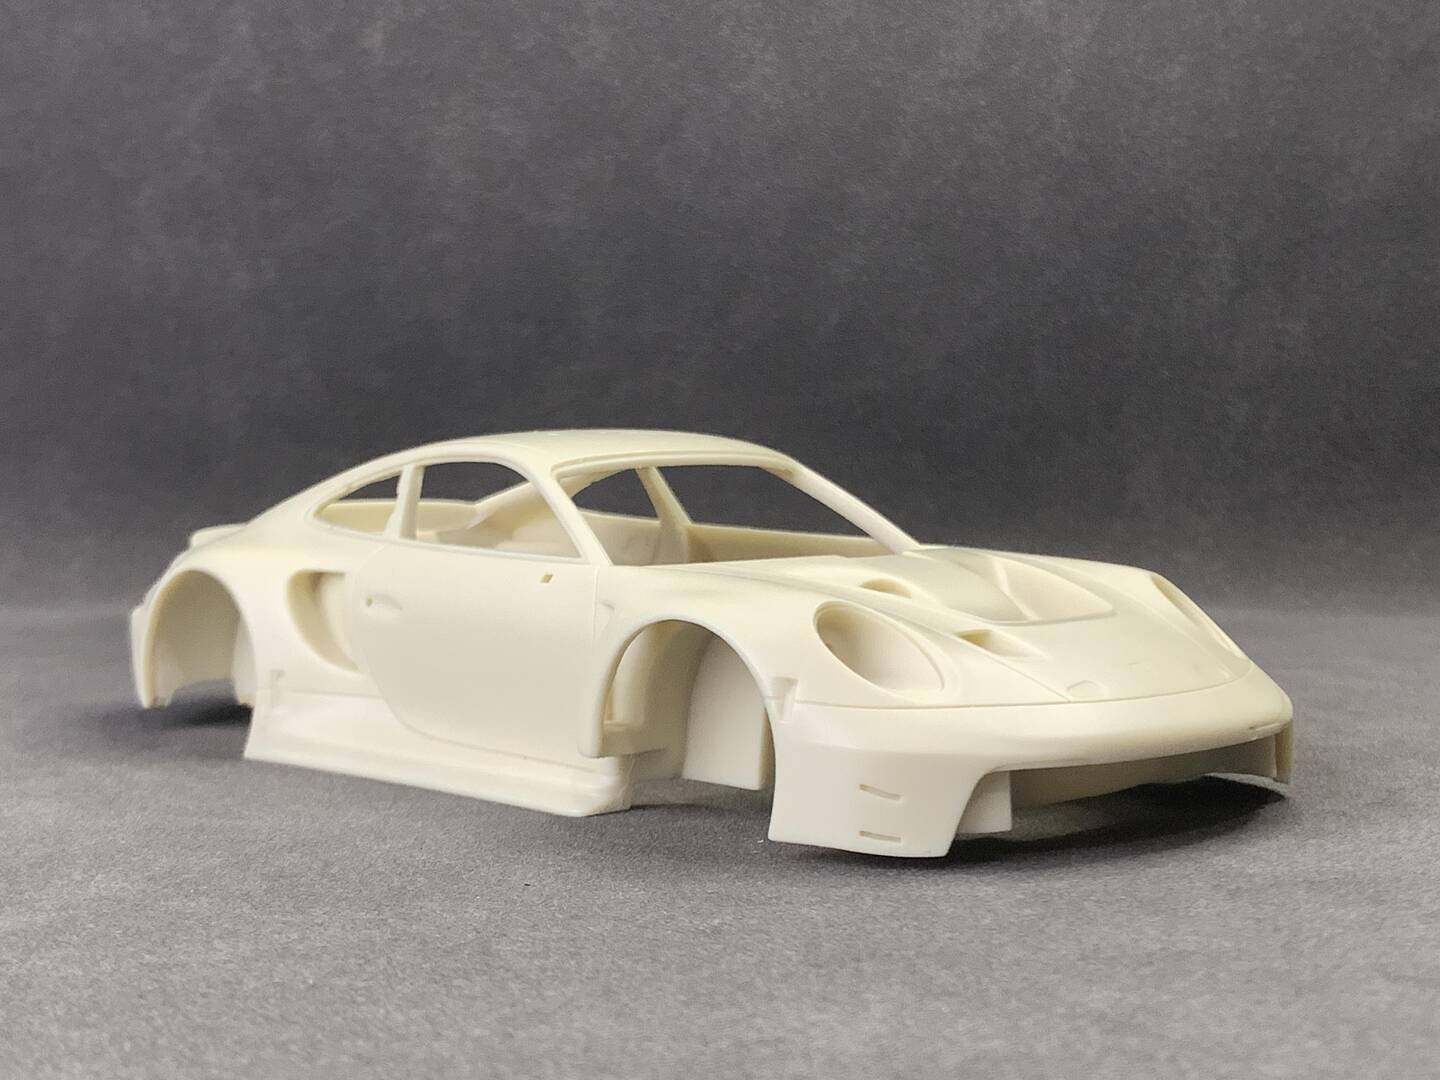
AlphaModel's products feature precise mold making, and their production technology is particularly sophisticated in vehicle shell production. The resulting shells are precisely contoured, with smooth surfaces free of burrs and shrinkage, deep engravings, and sharp edges. These features significantly reduce the difficulty of production, making them ideal for beginners.
Each vehicle has its own unique color scheme and design. Before production, refer to actual vehicle photos. The product manual indicates the color of each component for easy reference during painting.
During the production process, the necessary tools include a liner pen, sandpaper, sponge sandpaper, instant glue (CA glue), tweezers, a scriber, a pen knife, and photo-etched bending pliers. Having the right tools will enhance the crafting experience and make it easier to create high-quality static models.
Clean all parts thoroughly with dishwashing liquid or another degreasing agent suitable for resin materials. The surface of the parts is coated with a layer of grease and mold release agent — painting without cleaning first will result in fish-eyes, poor paint adhesion, and discoloration. After cleaning, simply allow to air dry.
Advanced Creators
Porsche 911 GT3R (BreakWong)
Alpha Model AM02-0067 · Build by BreakWong
Body Inspection
After cleaning and allowing the resin body shell to dry, begin by carefully inspecting the entire body. Pay close attention to the underside of the side skirts, where there will typically be some unevenness and molding seams. Also check for any missing details or flash around the panel lines.
Panel Line Scribing
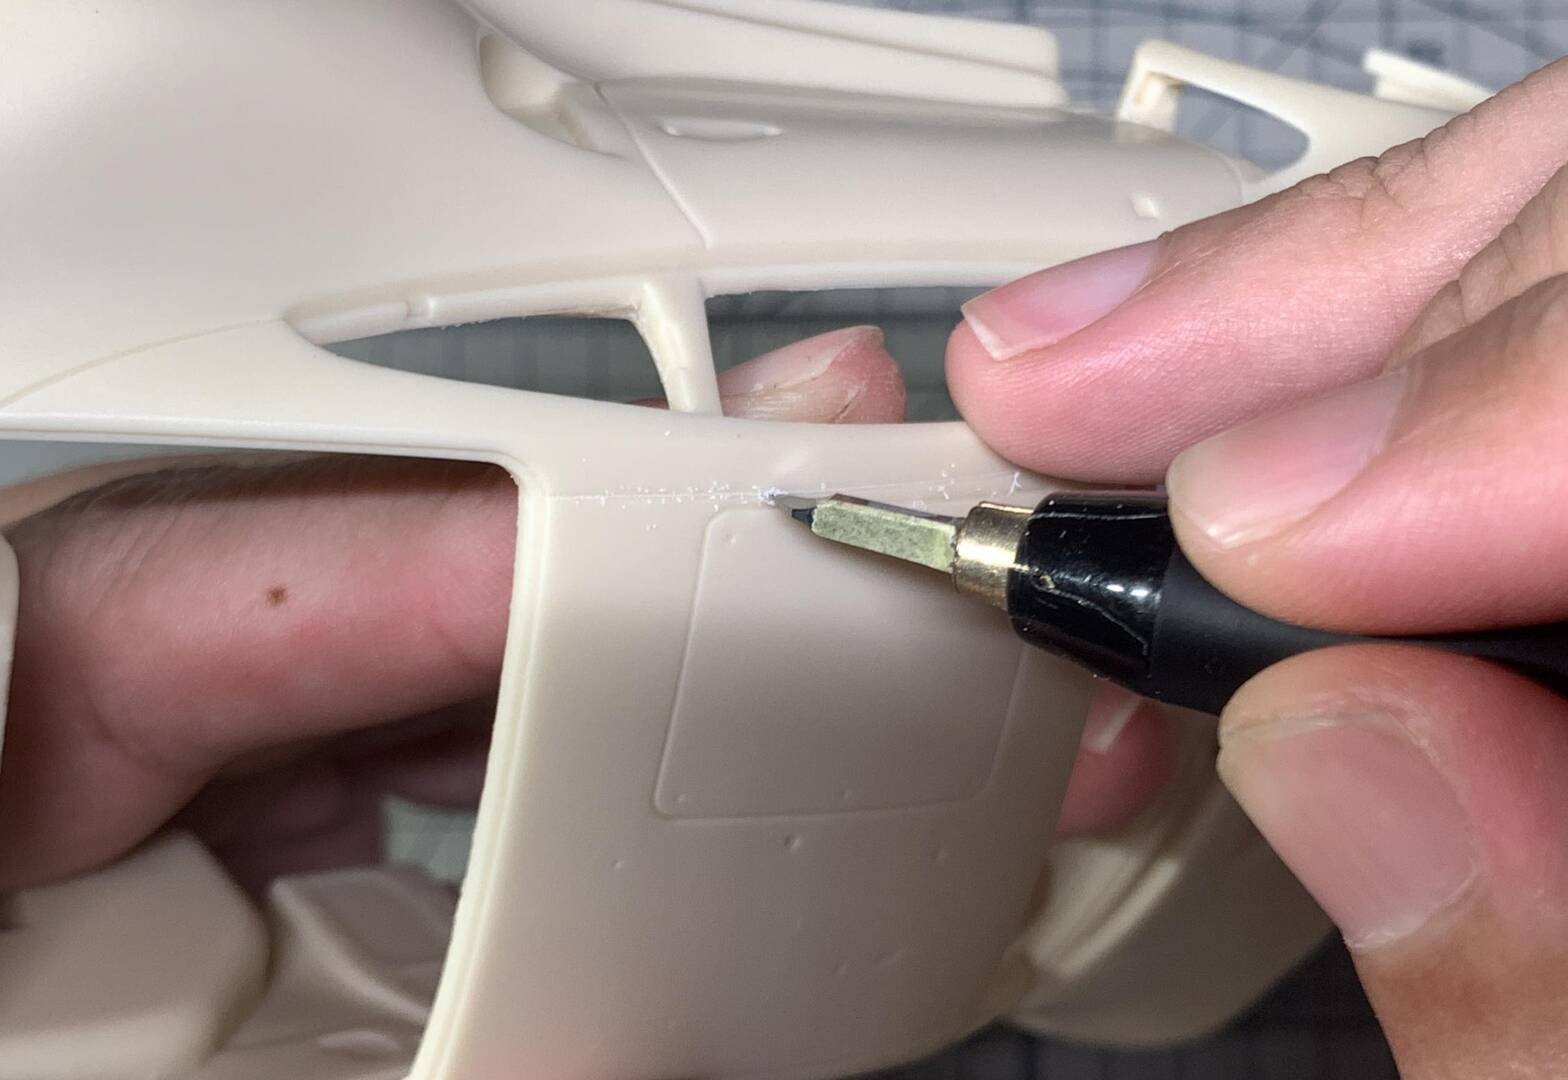
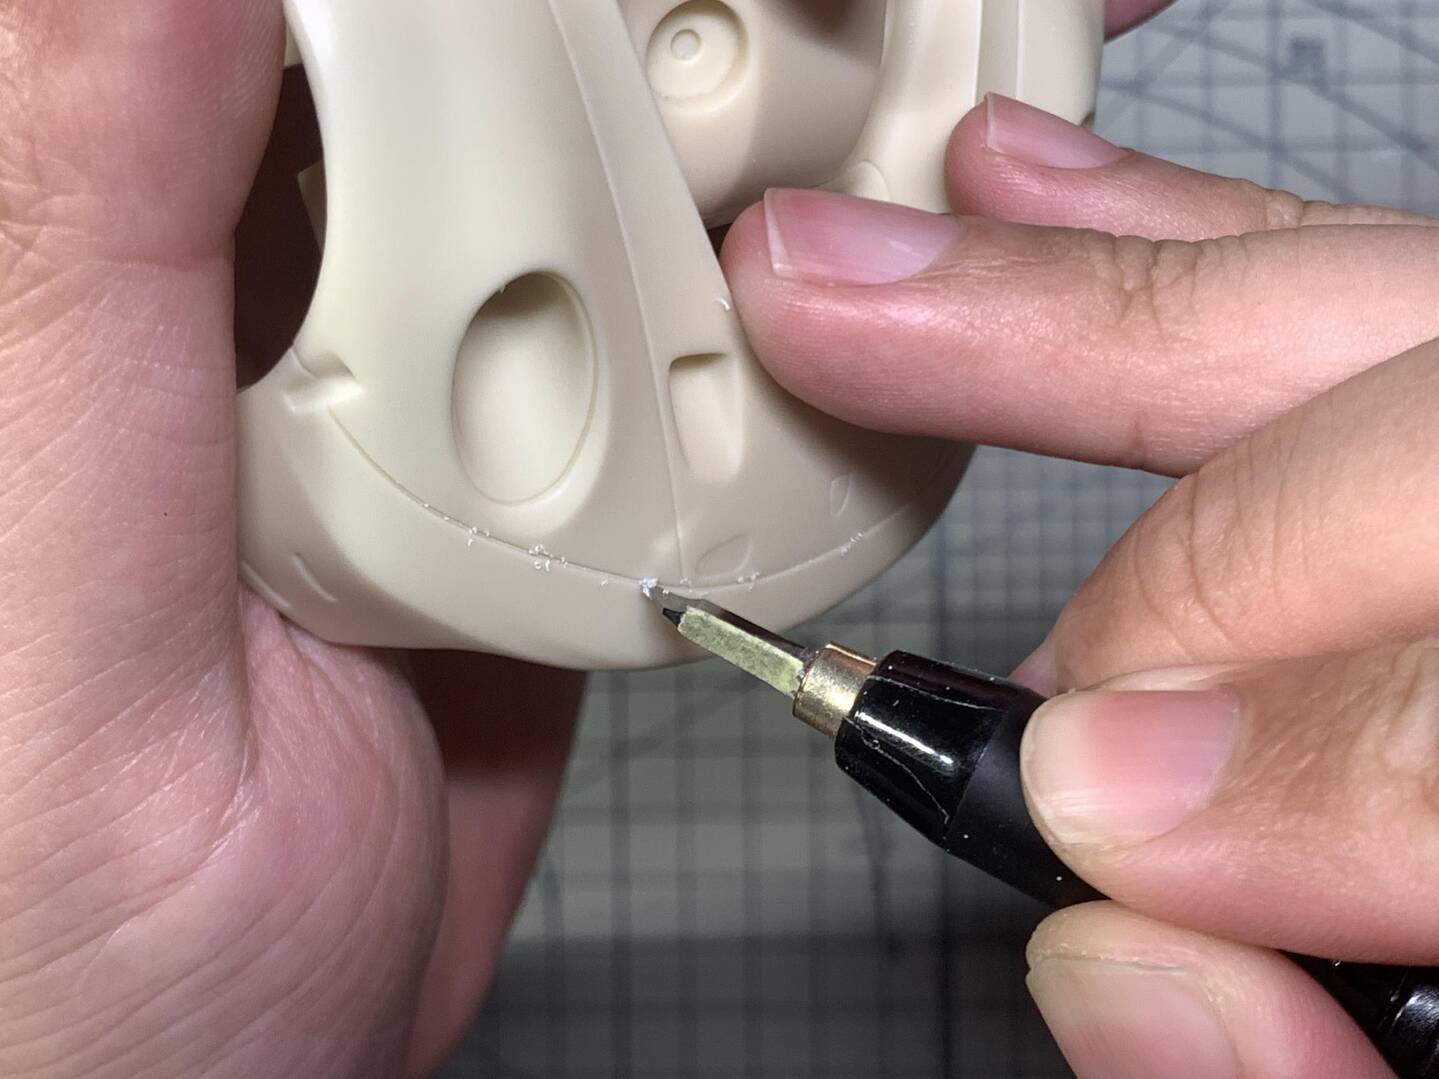
First, inspect the bodywork. The bottom of the side skirts will typically have some unevenness. Sand them down with sandpaper to level them. After ensuring there are no missing pieces, use a 0.15 mm caliber scoring knife (scriber) to deepen the panel line markings.
While the bodywork's panel lines are relatively clear out of the box, they will need to be deepened manually to create a more three-dimensional effect after the model is completed. This prevents paint bleed-through across the lines and allows for natural washes and shading to enhance the texture and definition of the panel lines.
When scribing, apply pressure gradually — increasing from light to heavy. Start by making a few light passes along the markings, then gradually apply more pressure. For curved lines, use a curved scribing blade to follow the contour. If you don't have a curved blade, use a straight-headed scriber with very light, careful passes to avoid slipping outside the markings. Also pay attention to the blade angle — do not treat curved lines as straight lines.
Sanding
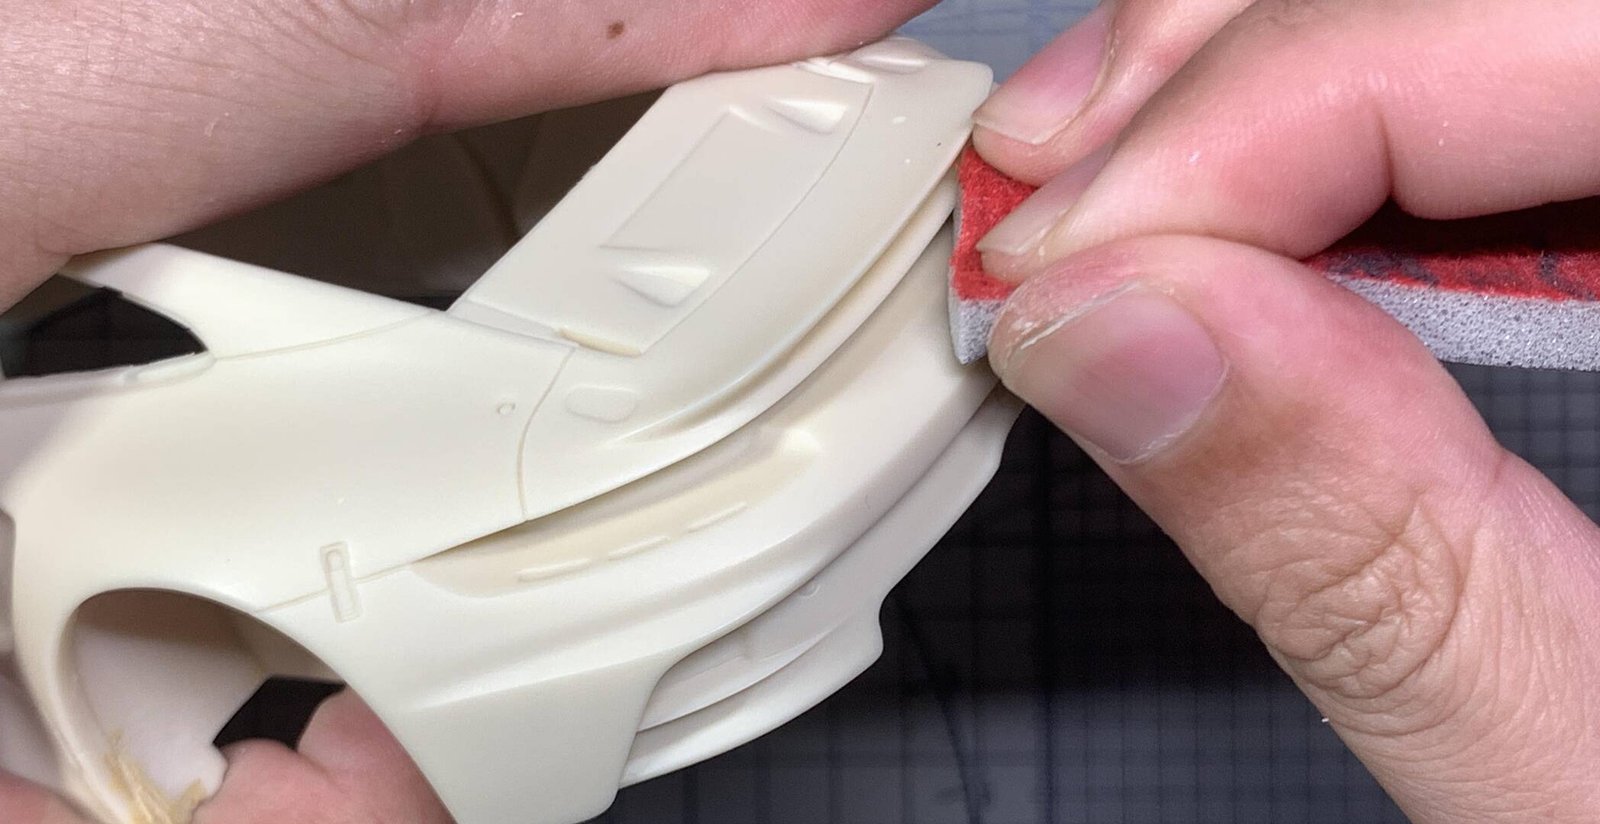
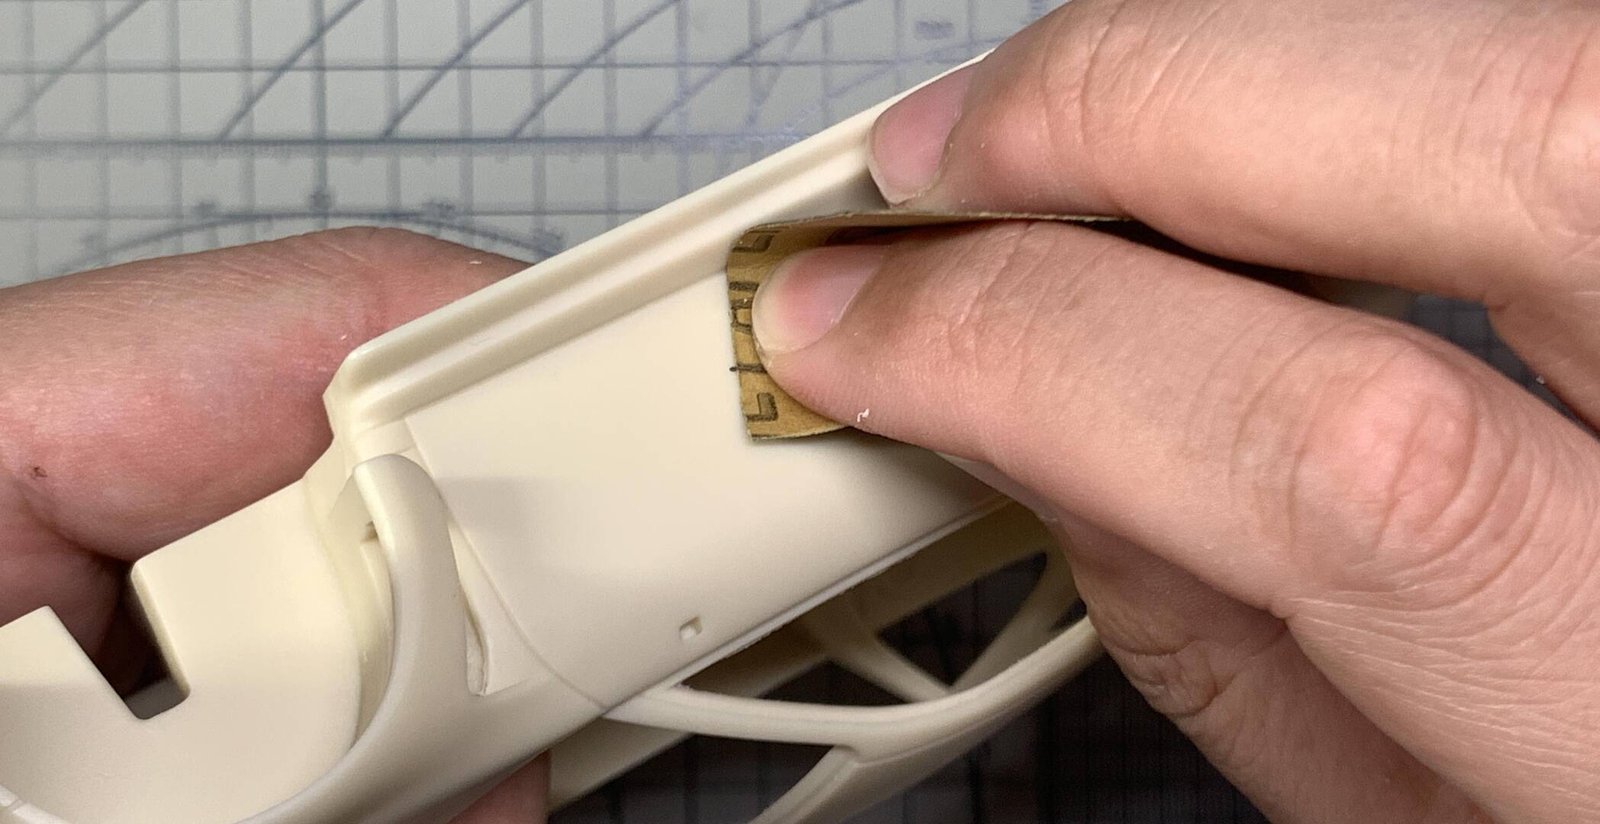
After sanding the entire car body with sandpaper to level the surface and remove any molding imperfections, it is necessary to use a foam sanding pad (sponge sandpaper) to remove any coarse grit marks left by the regular sandpaper. The foam pad conforms to curved surfaces and produces a finer, more uniform finish.
Once the sanding is complete, the body will be ready for a primer coat, which will reveal any remaining imperfections that need attention before the color coats go on.
 Advanced Creators
Porsche 911 GT3R
Alpha Model AM02-0067 · Build by BreakWong
Primer Coat
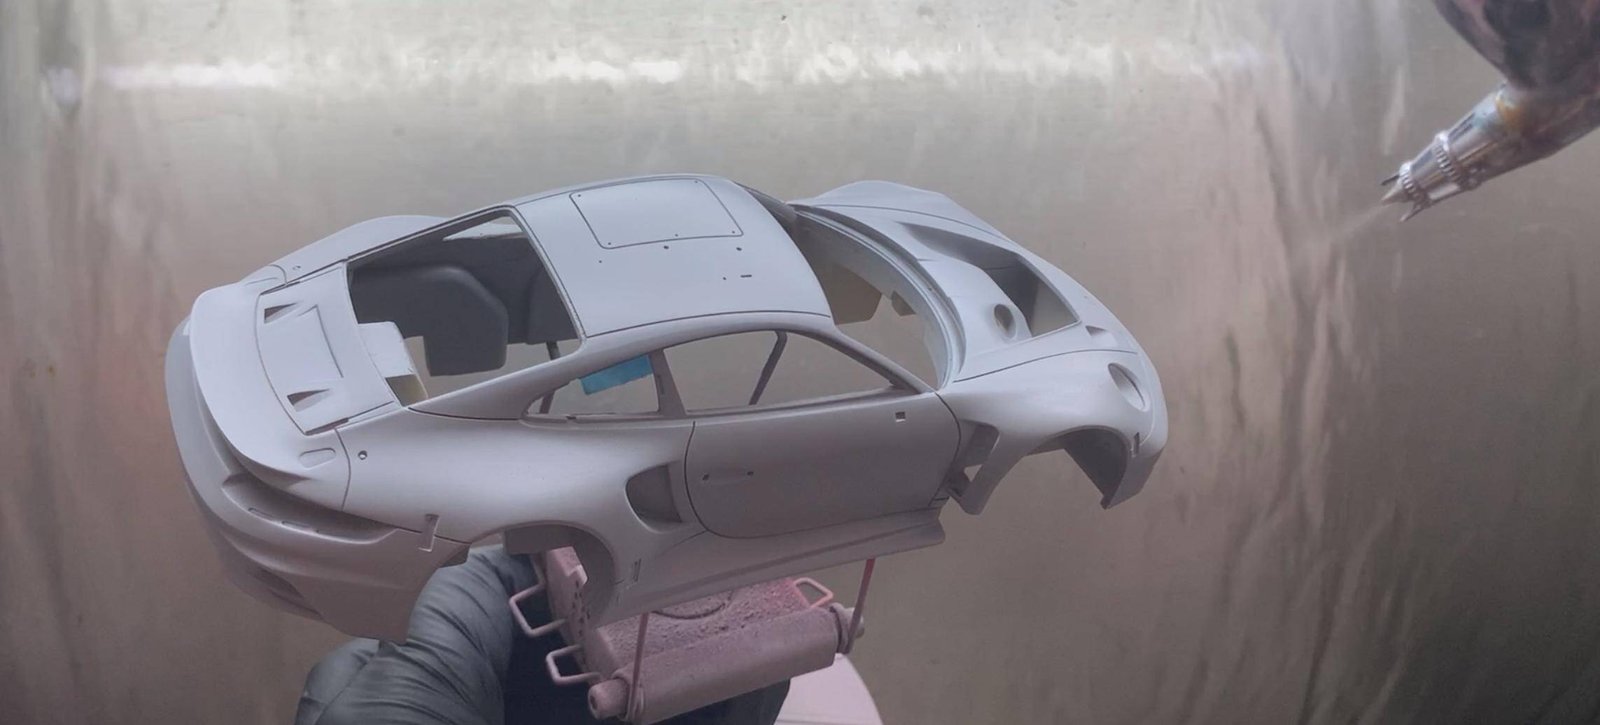
After all sanding is complete, the first step is to apply a primer coat to the body shell. A gray primer or surfacer serves two purposes: it unifies the base color of the resin, and it reveals any remaining surface imperfections, pinholes, or uneven areas that need further attention before the color coats go on.
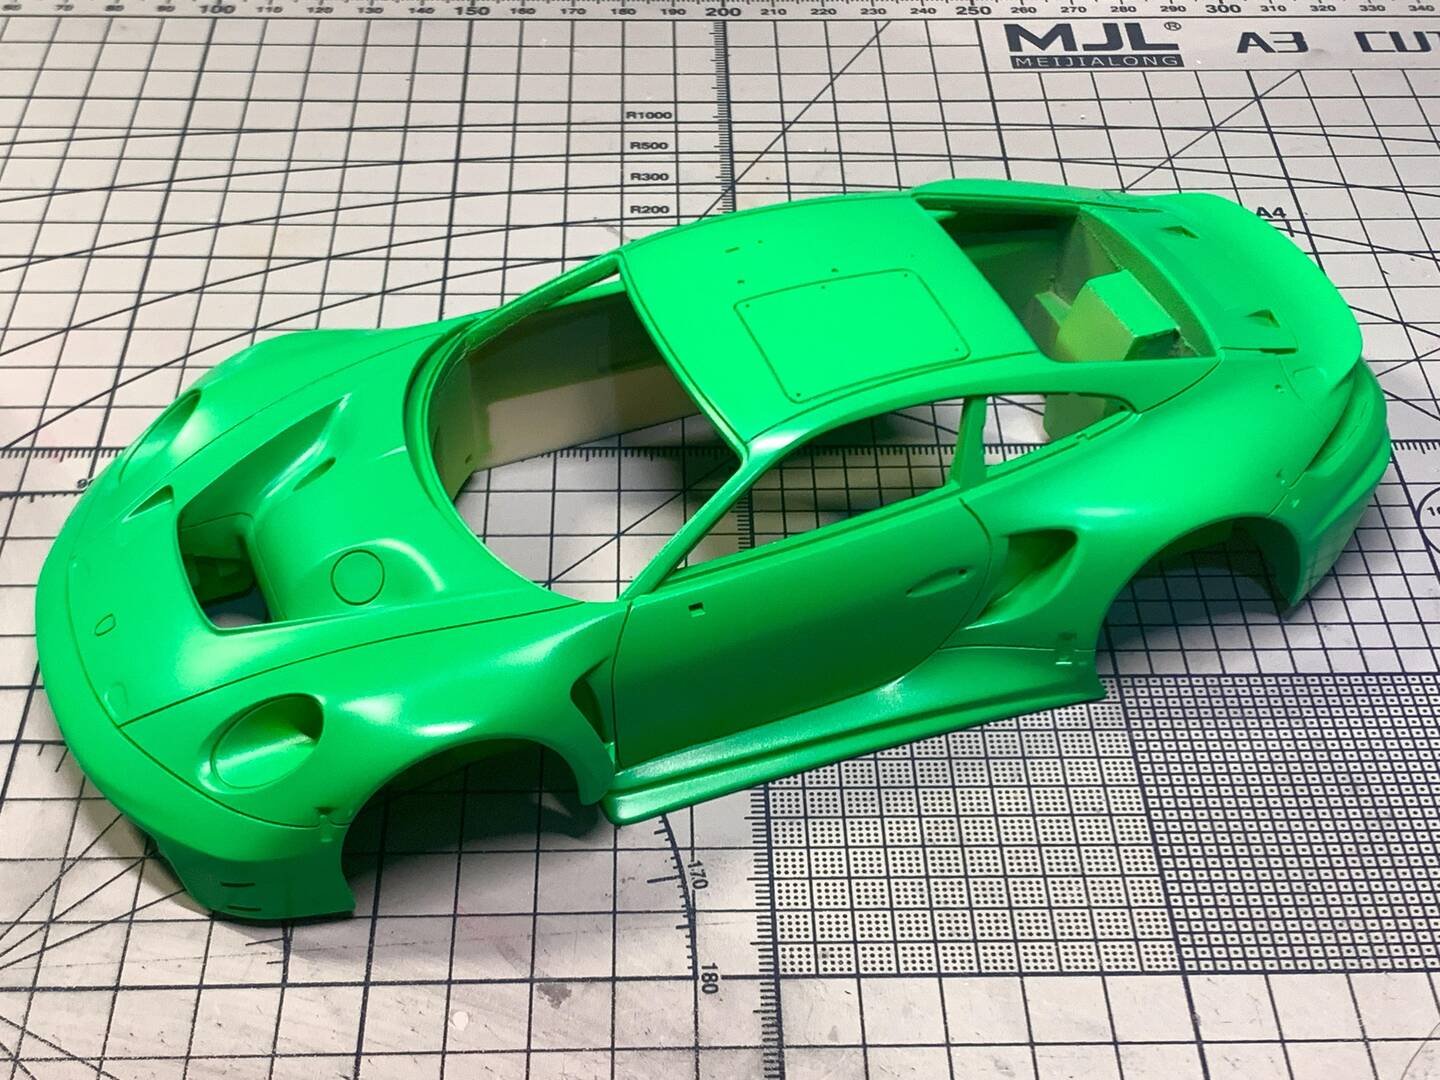
Main Color: JumpWind 027 Grass Green
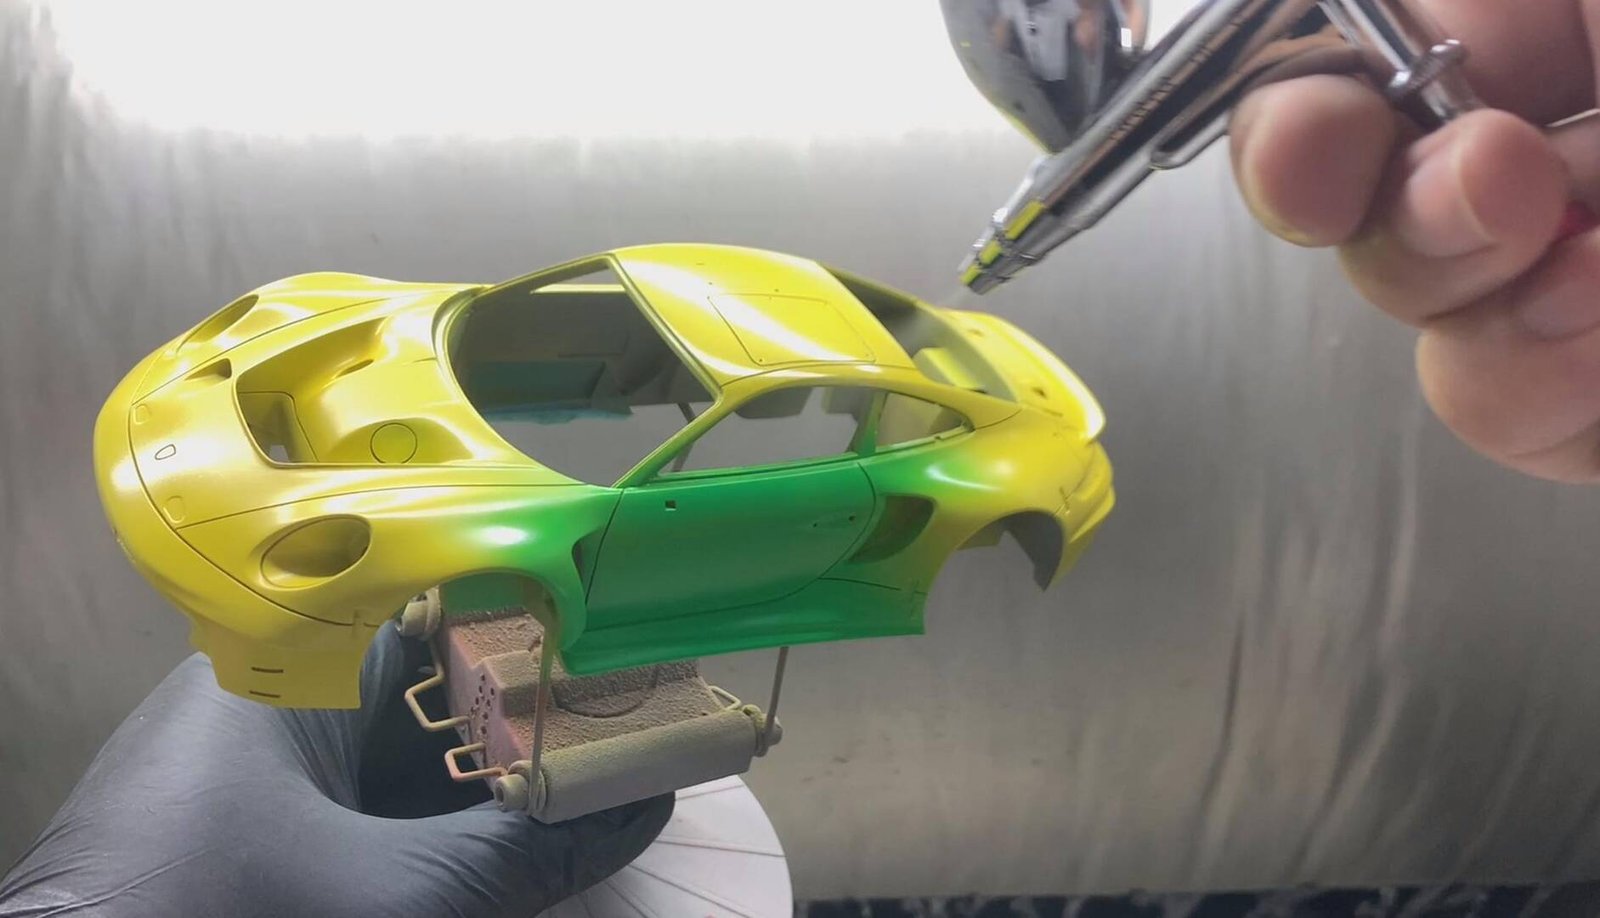
For the main body color of this Rexy livery, I chose JumpWind 027 Grass Green. If you cannot purchase this paint, you can substitute it with Gunze (Mr. Color) C66, which is a very close match.
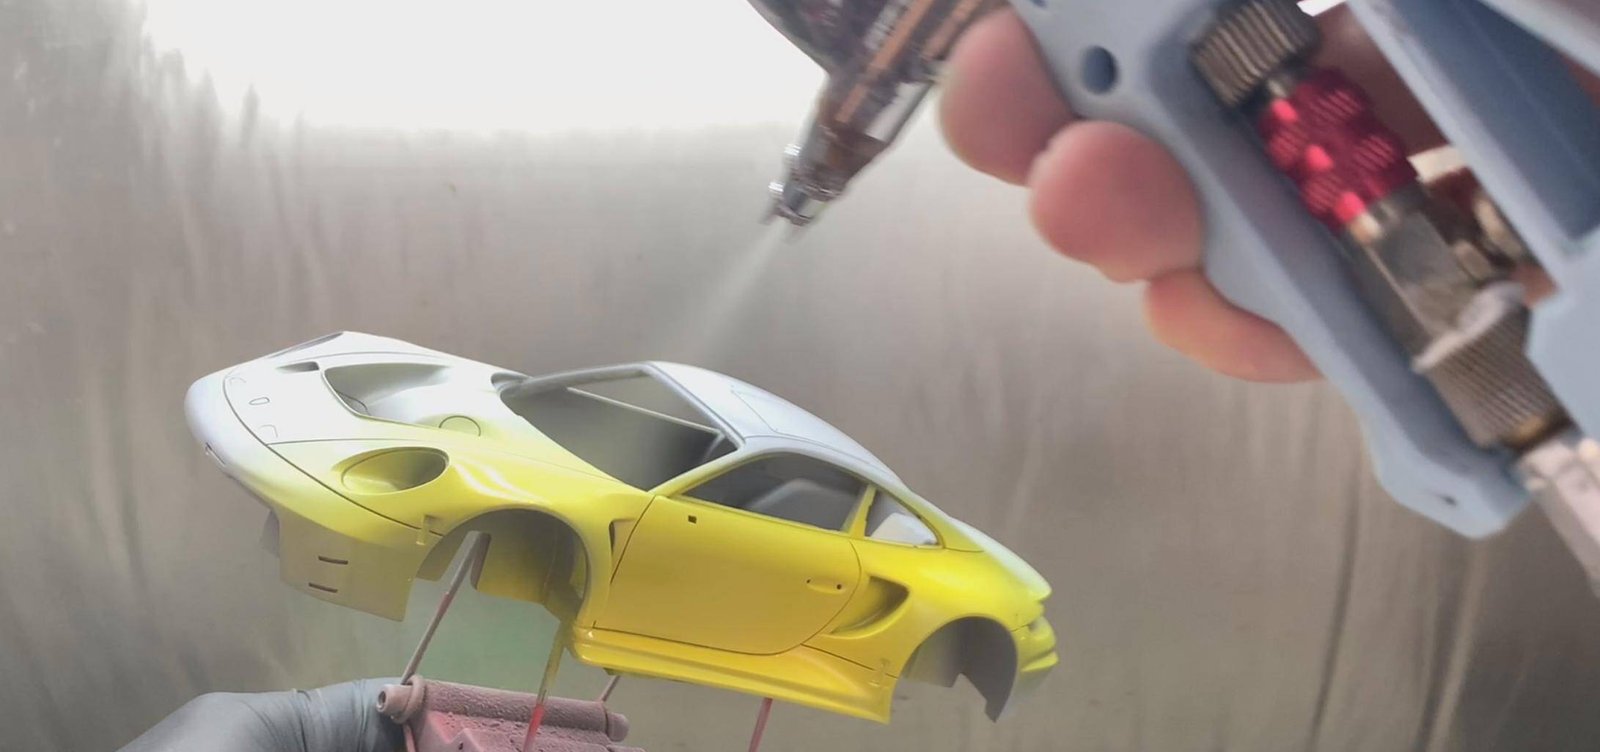
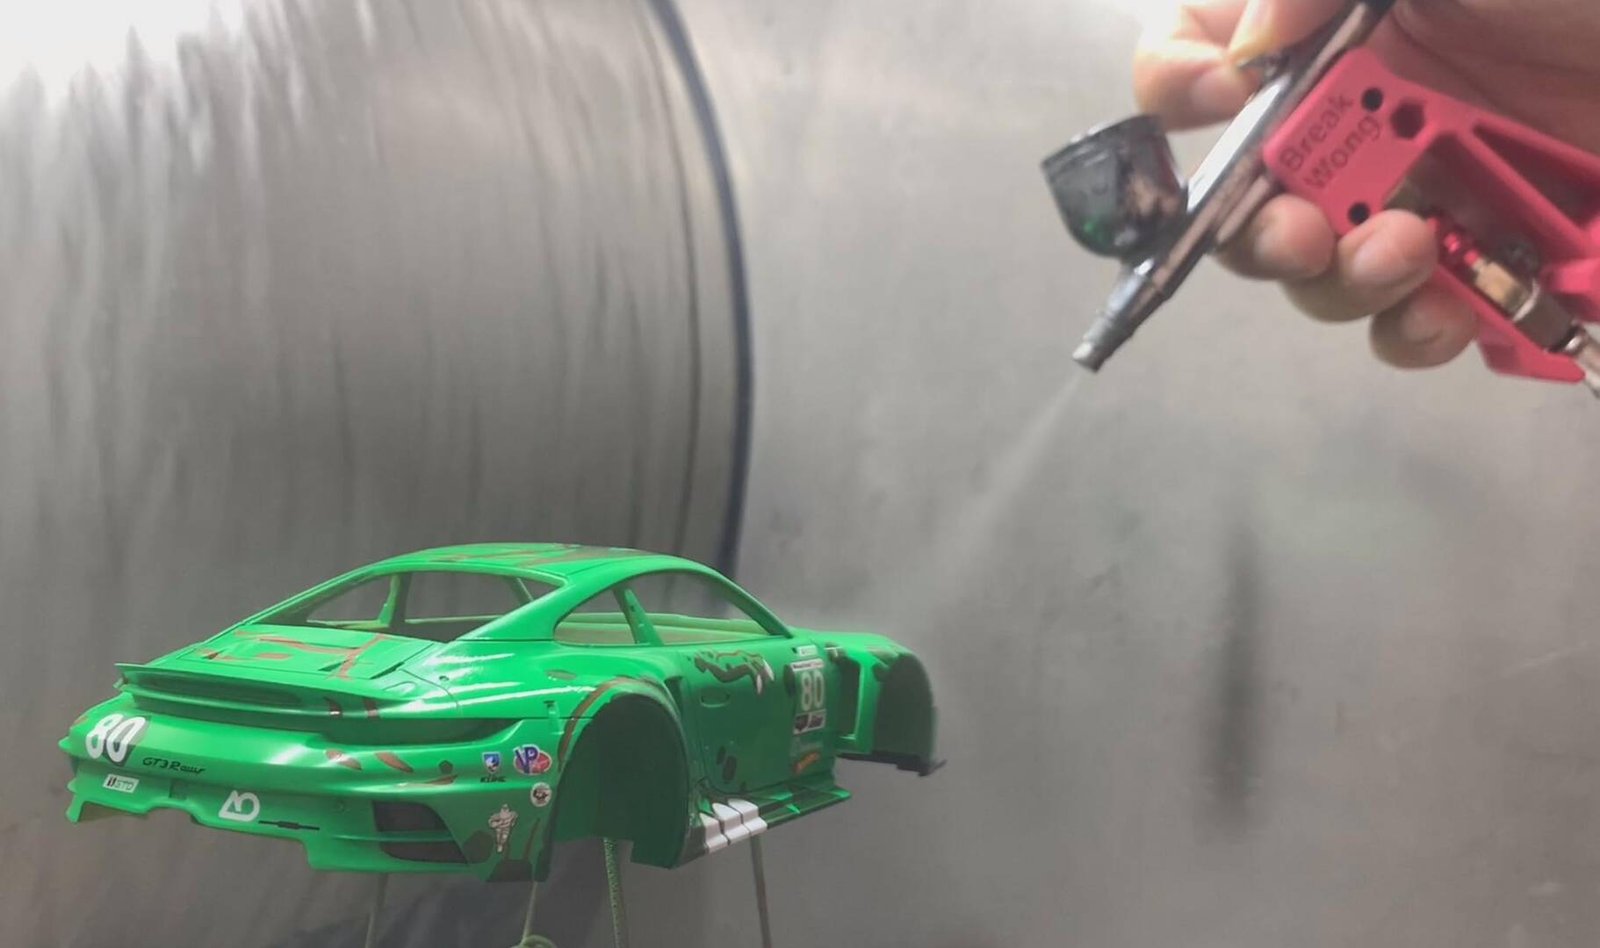
Before spraying the main color, first spray gray surfacer (water putty/primer) to unify the base tone. Then evenly spray a layer of yellow as an undercoat/base color. Finally, spray the main grass green color on top. This layered approach — gray primer → yellow base → green topcoat — makes the final body color appear fuller, richer, and more textured with greater depth.
Painting Reference
Before painting any components, always refer to the actual vehicle reference photos and the kit's painting guide. The instruction manual uses an exploded-view format with color codes indicating which paint to use for each part. Taking the time to plan your paint scheme before starting will result in a more accurate and cohesive finished model.
 Advanced Creators
Porsche 911 GT3R
Alpha Model AM02-0067 · Build by BreakWong
Applying Water Decals
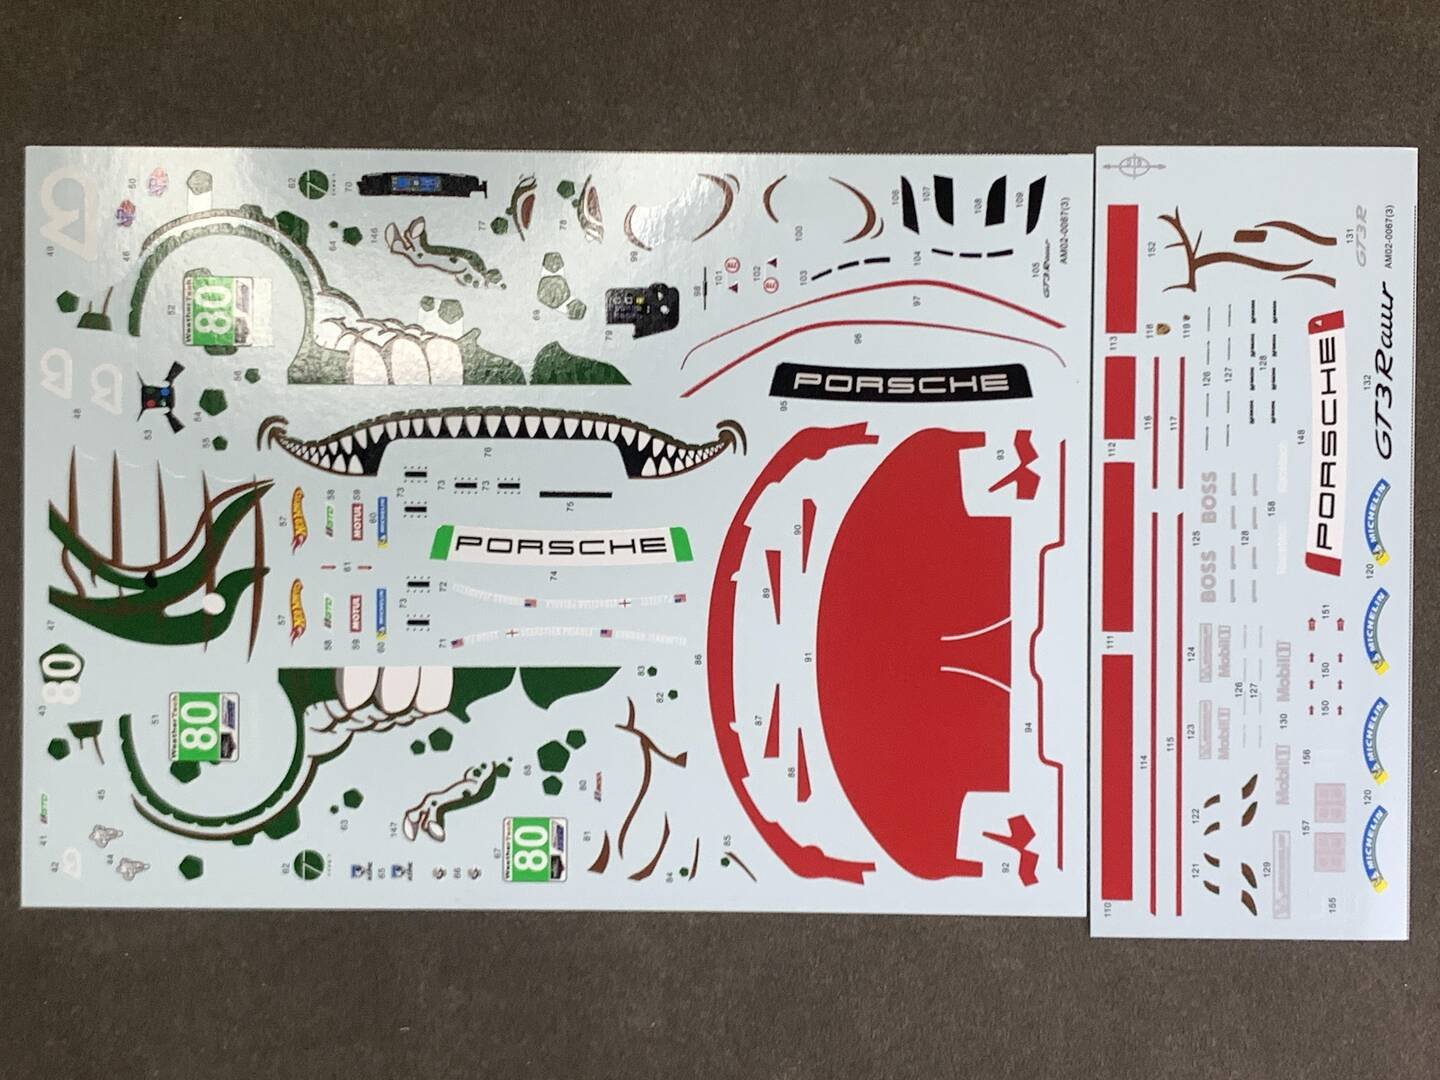
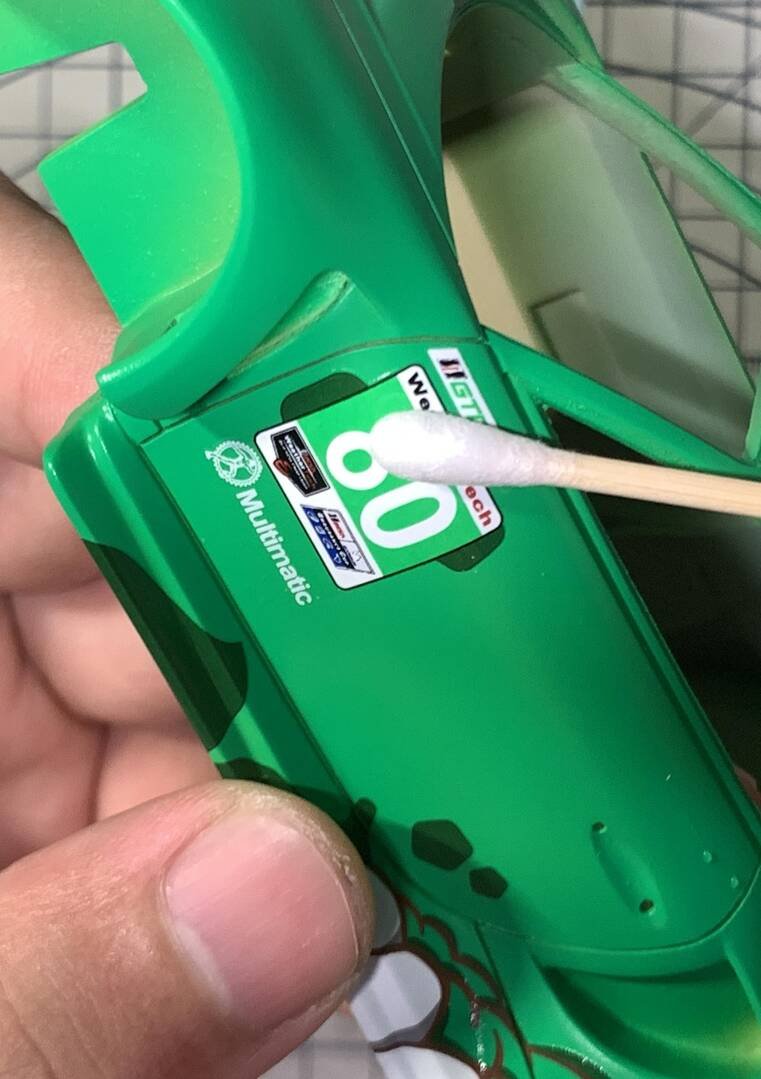
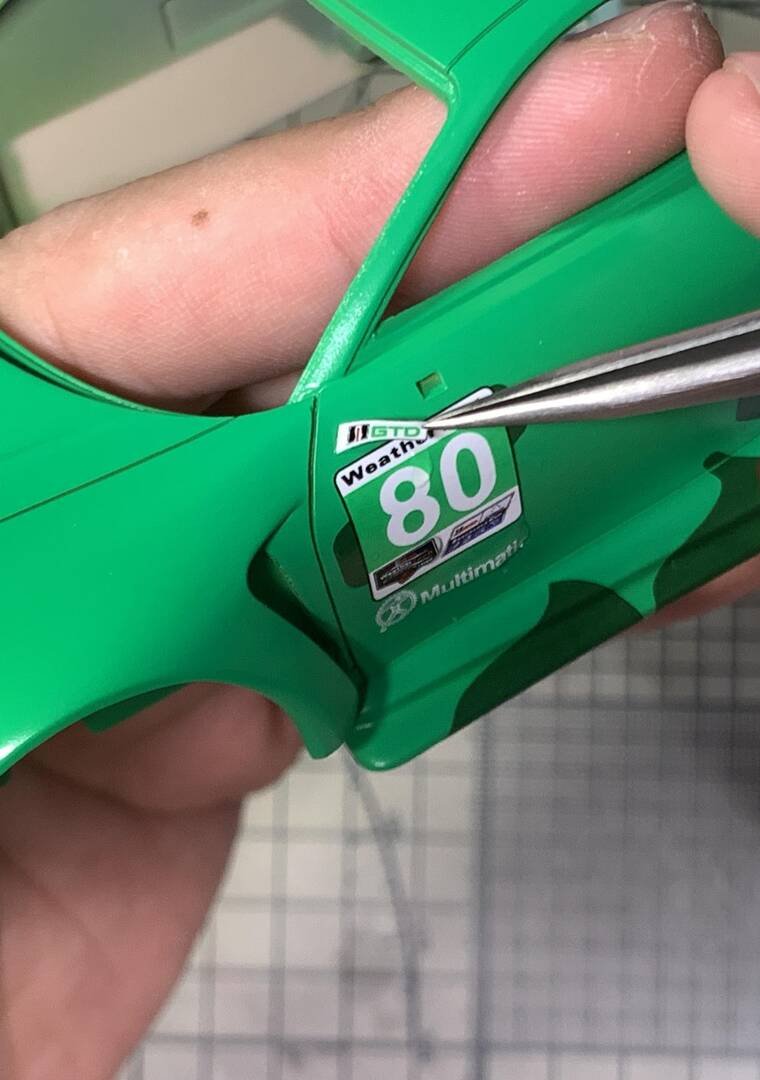
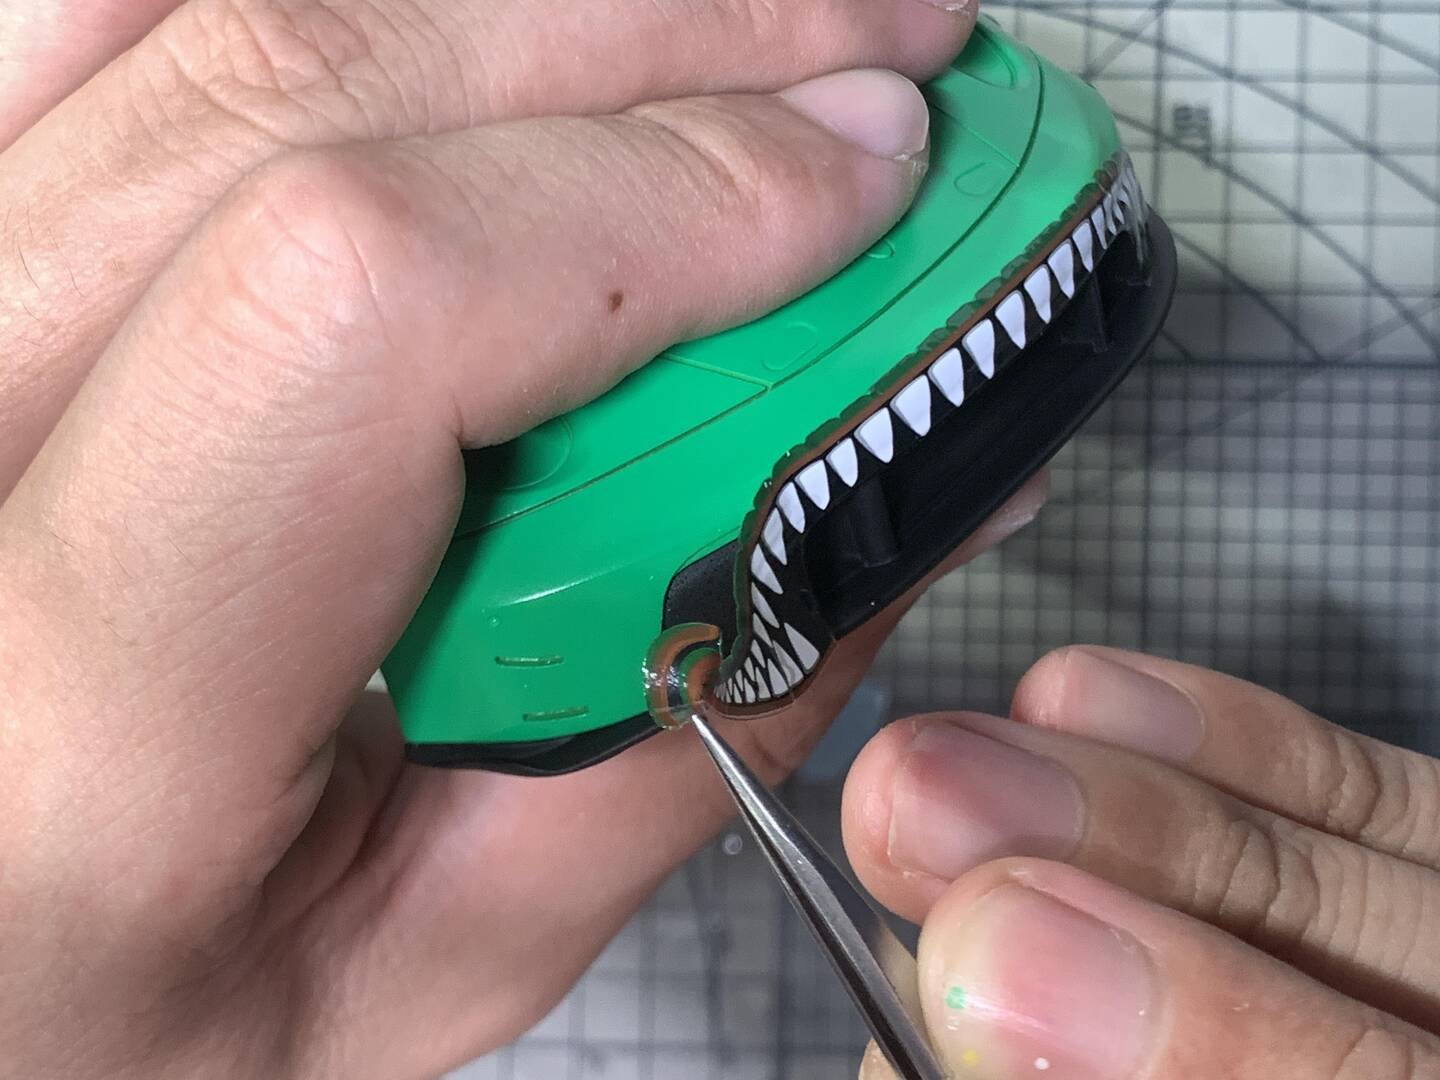
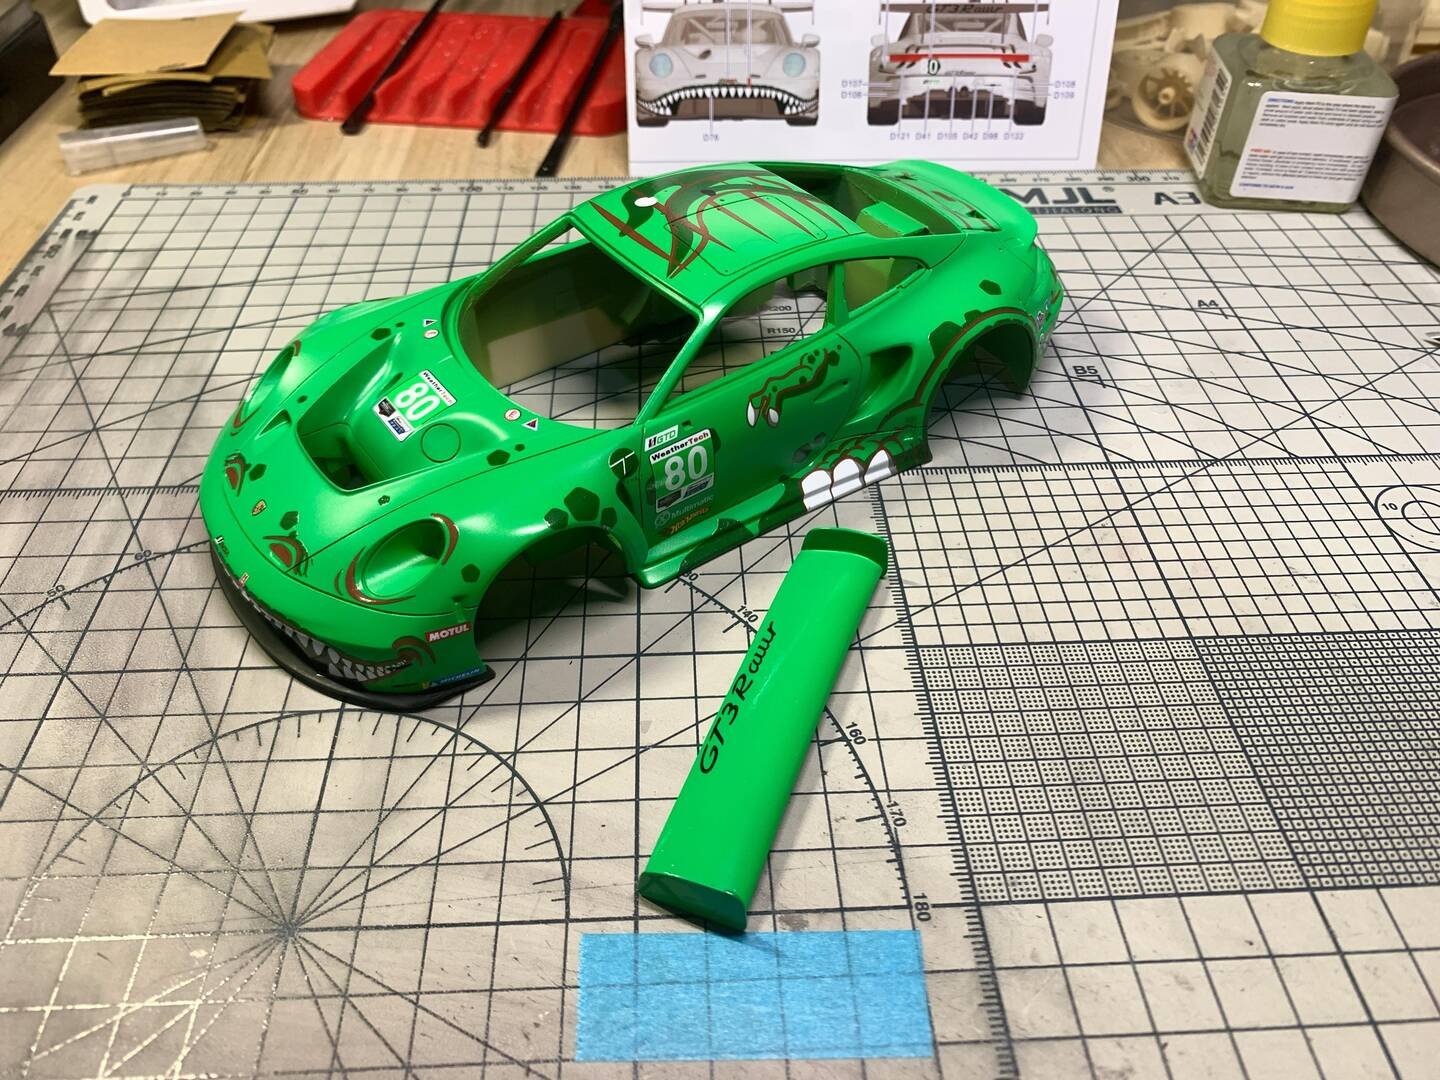
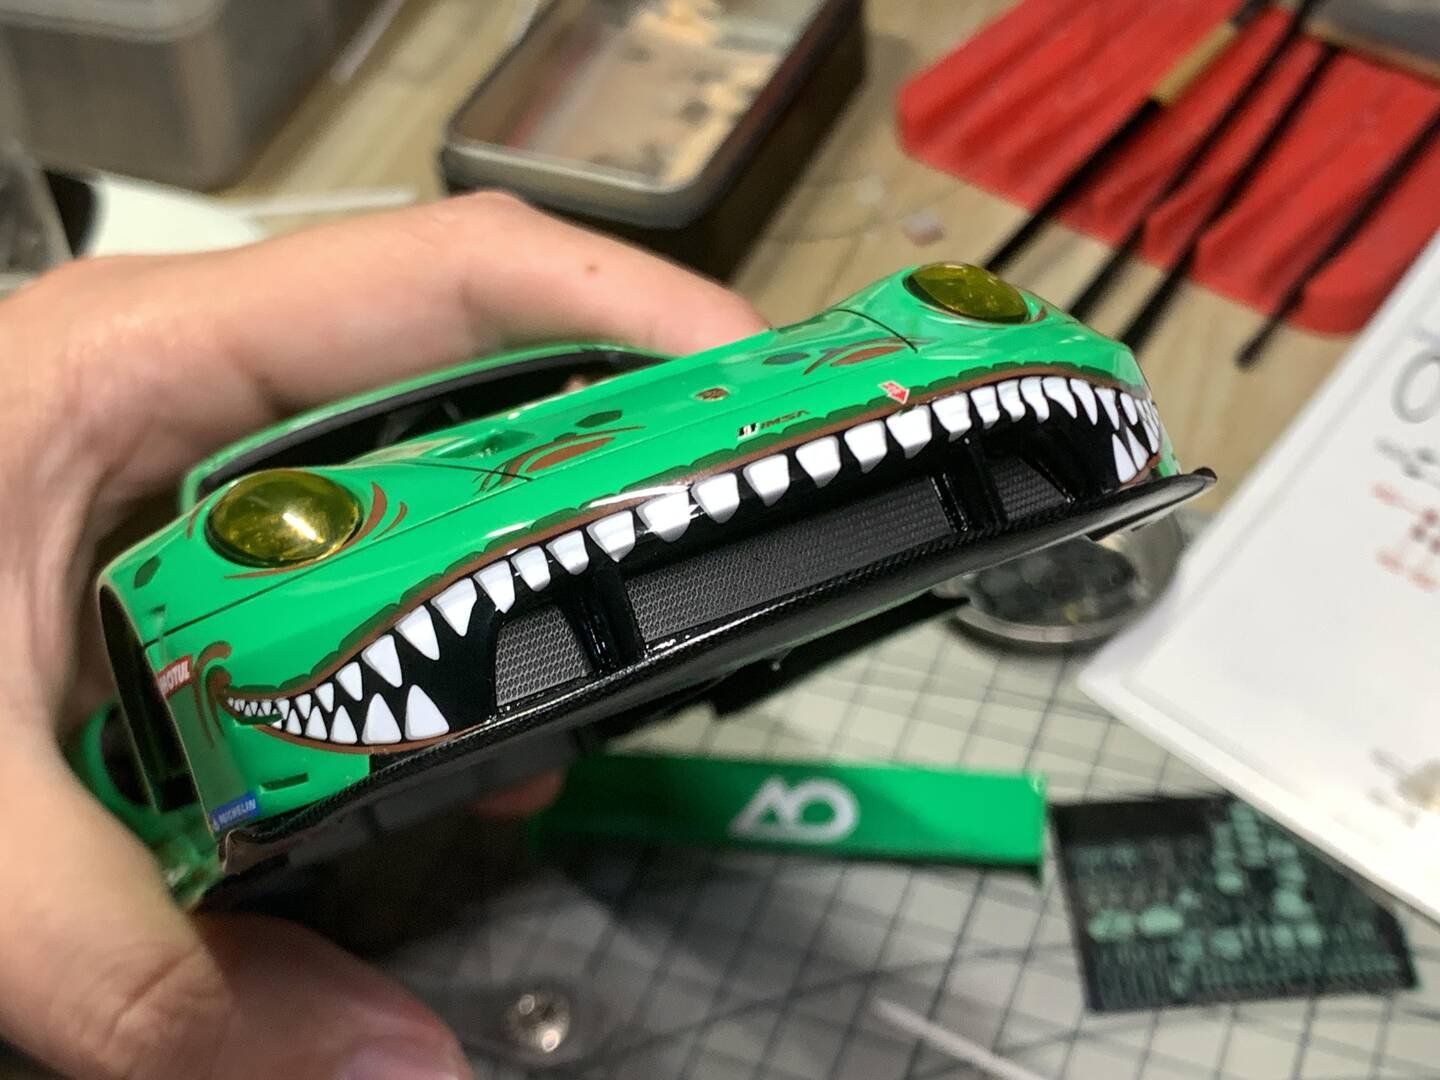
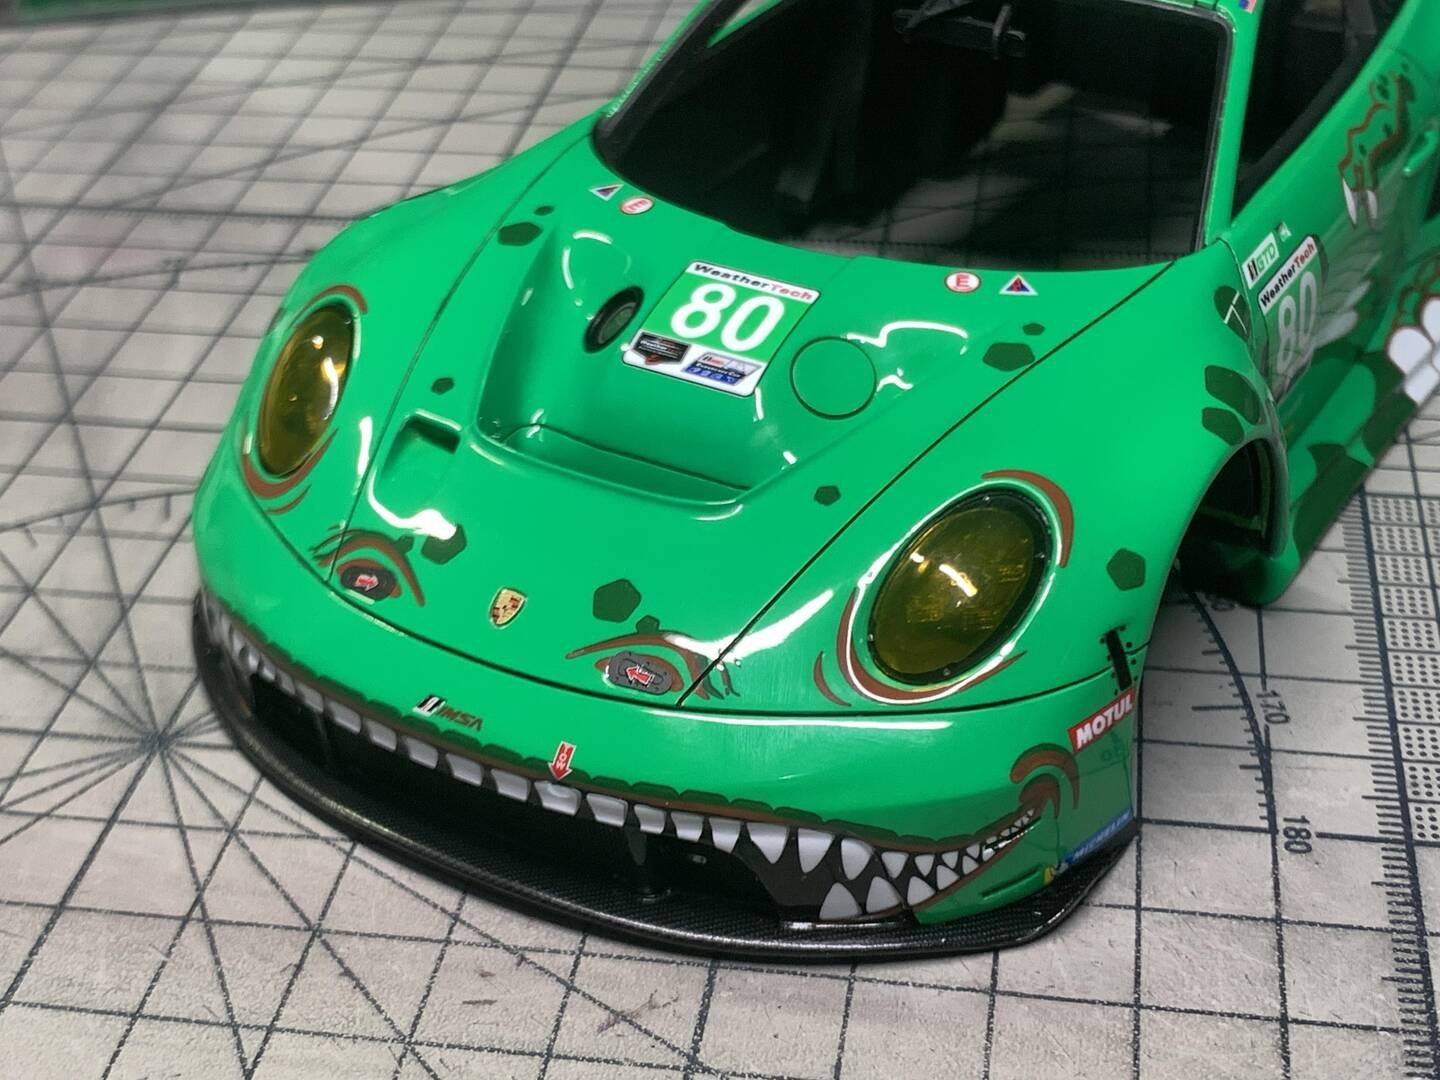
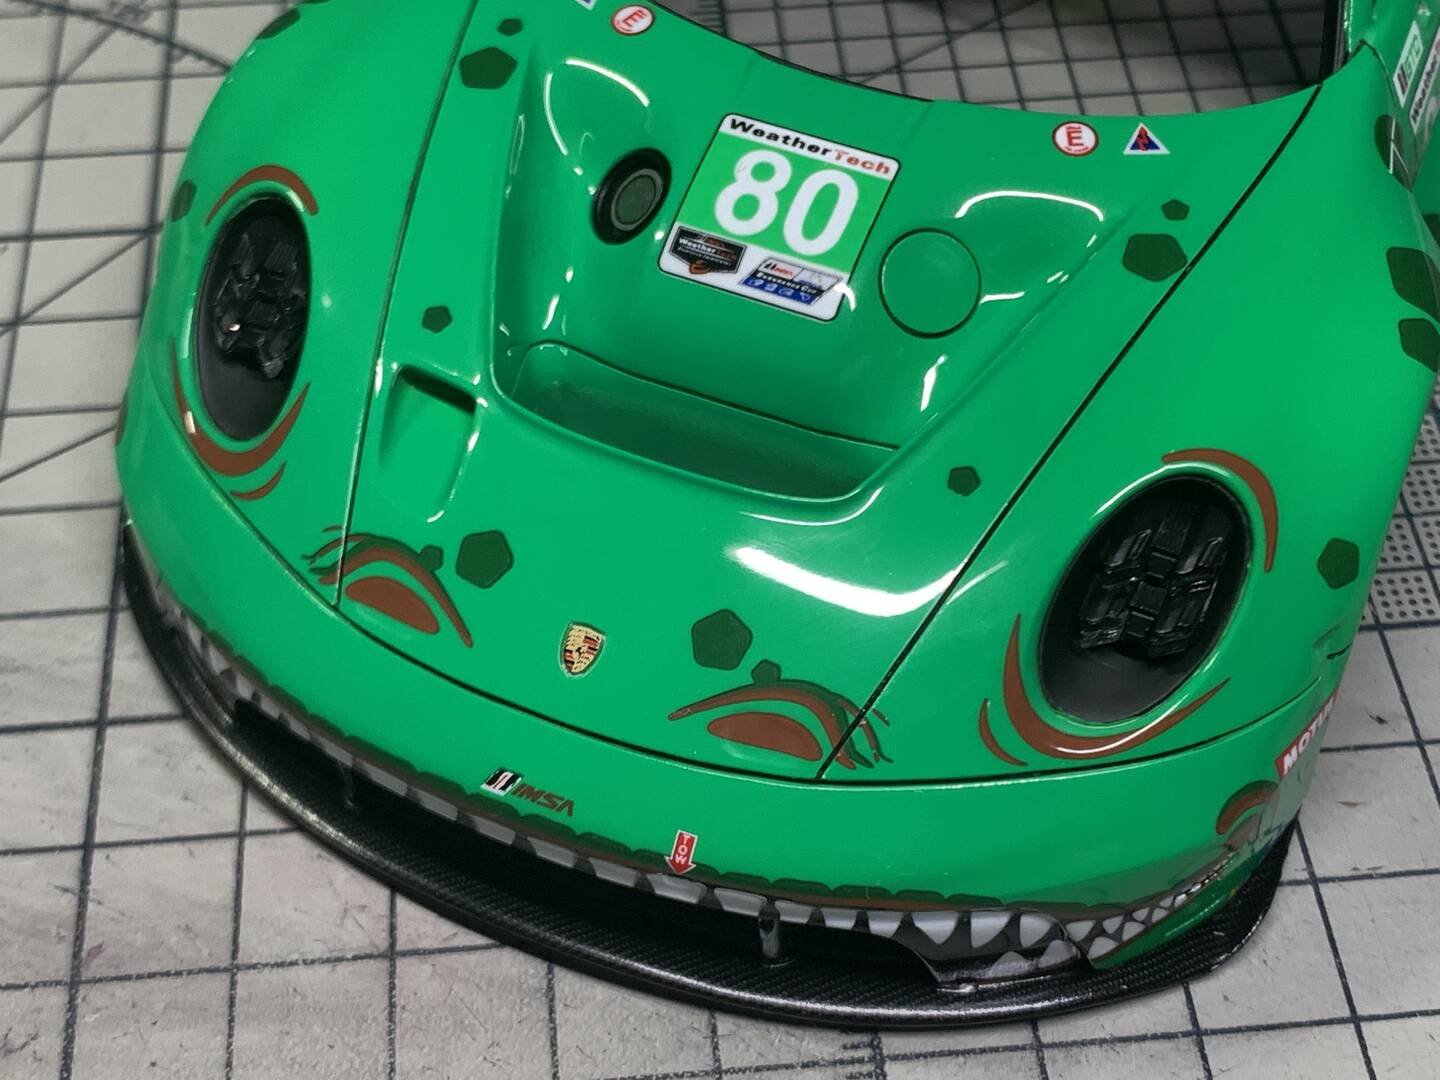
After the body paint has completely dried, you can proceed to apply the water slide decals. The Rexy livery is extensive — featuring the famous dinosaur teeth along the front splitter, claw marks on the sides, the #80 race number, and numerous sponsor logos.
The application process is as follows:
1. First, carefully cut out the desired decal from the sheet.
2. Soak it in clean water for approximately 20 seconds until the decal begins to release from the backing paper.
3. Use tweezers to gently transfer the decal onto the car body and slide it into the correct position.
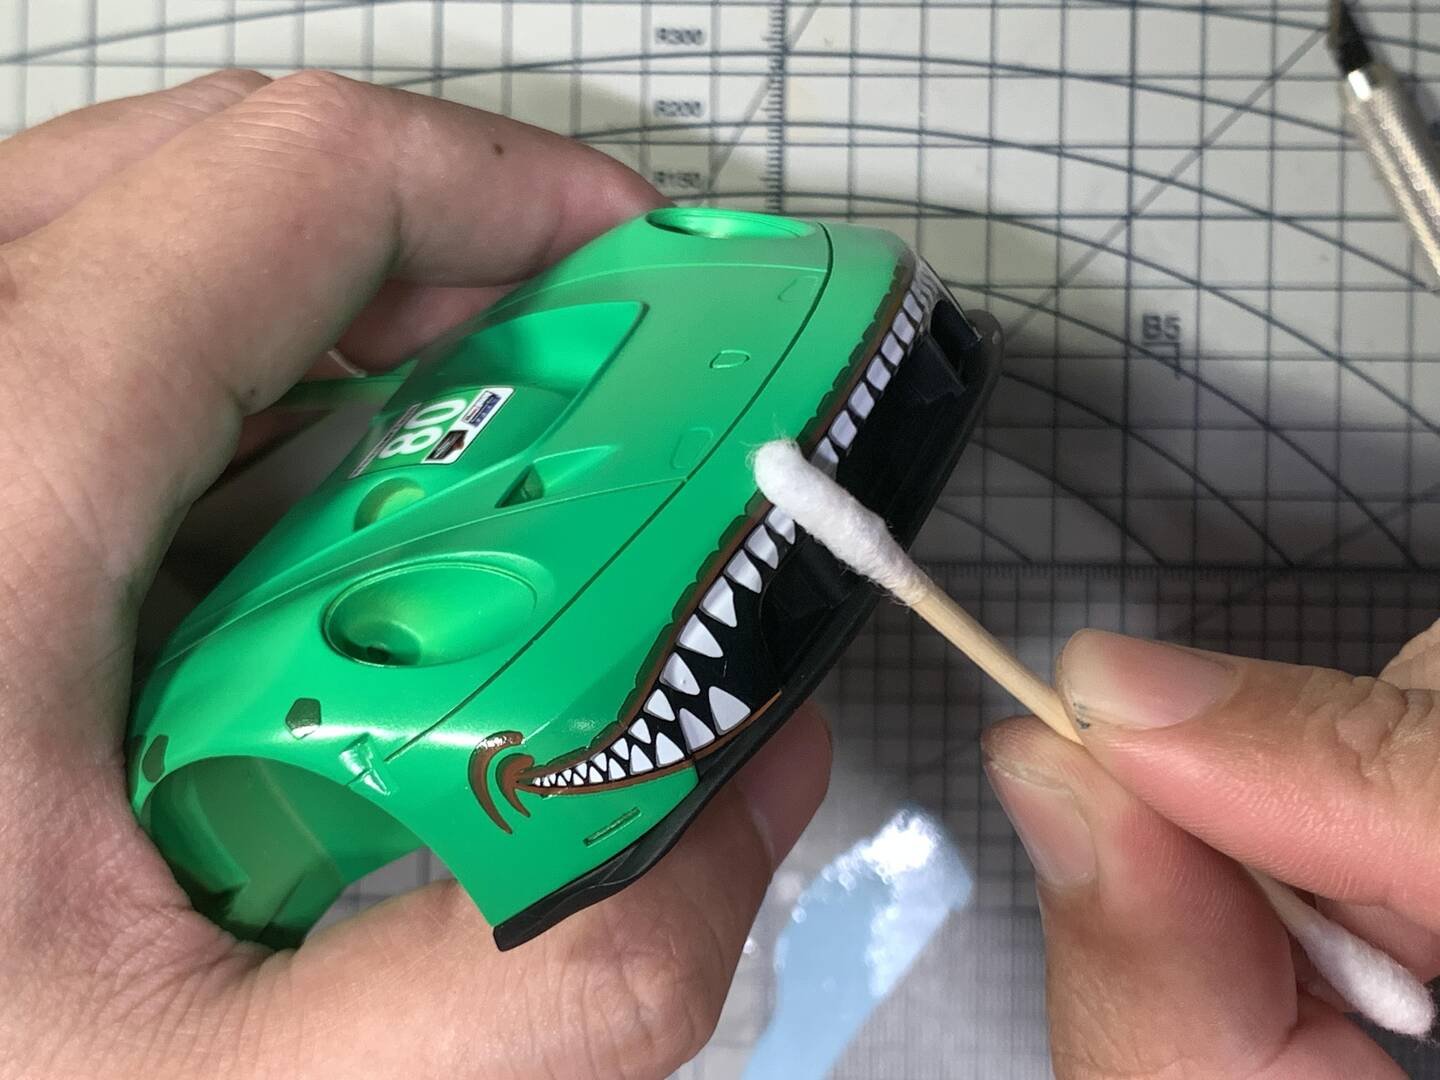
4. Use a cotton swab to carefully blot and roll out excess water and any trapped air bubbles, working from the center outward.
5. Finally, use a heat gun (on low setting) to gently soften the decal so it conforms to curves and panel lines, then press it firmly with a cotton swab to ensure full adhesion.
For decals that must span deep panel lines or complex curves, applying a small amount of decal setting solution before and after placement will help the decal settle and conform. Take your time — the Rexy livery has many large, intricate decals that require careful alignment.
Decal Placement Note
Parts reference: Part R11 should be painted black first and secured to the car body before applying water decal D76 over it. This ensures the black base shows through correctly behind the decal for proper opacity and color accuracy.
Clear Coat
After all water decals have been applied and allowed to fully set, you can proceed to spray the polyurethane clear coat. For this step, I opted for BASF Glasurit 666 clear coat, applying three wet coats before stopping.
Allow 3 to 5 days for the clear coat to fully cure before proceeding with any sanding or polishing. Rushing this stage risks shrinking or cracking the finish over the decals.
At this stage, the main body shell construction is complete. The clear coat leveled out the decal edges and provided a deep, glossy finish. After full curing, wet sanding with progressively finer grits followed by polishing compound will bring out the final mirror-like shine.
 Advanced Creators
Porsche 911 GT3R
Alpha Model AM02-0067 · Build by BreakWong
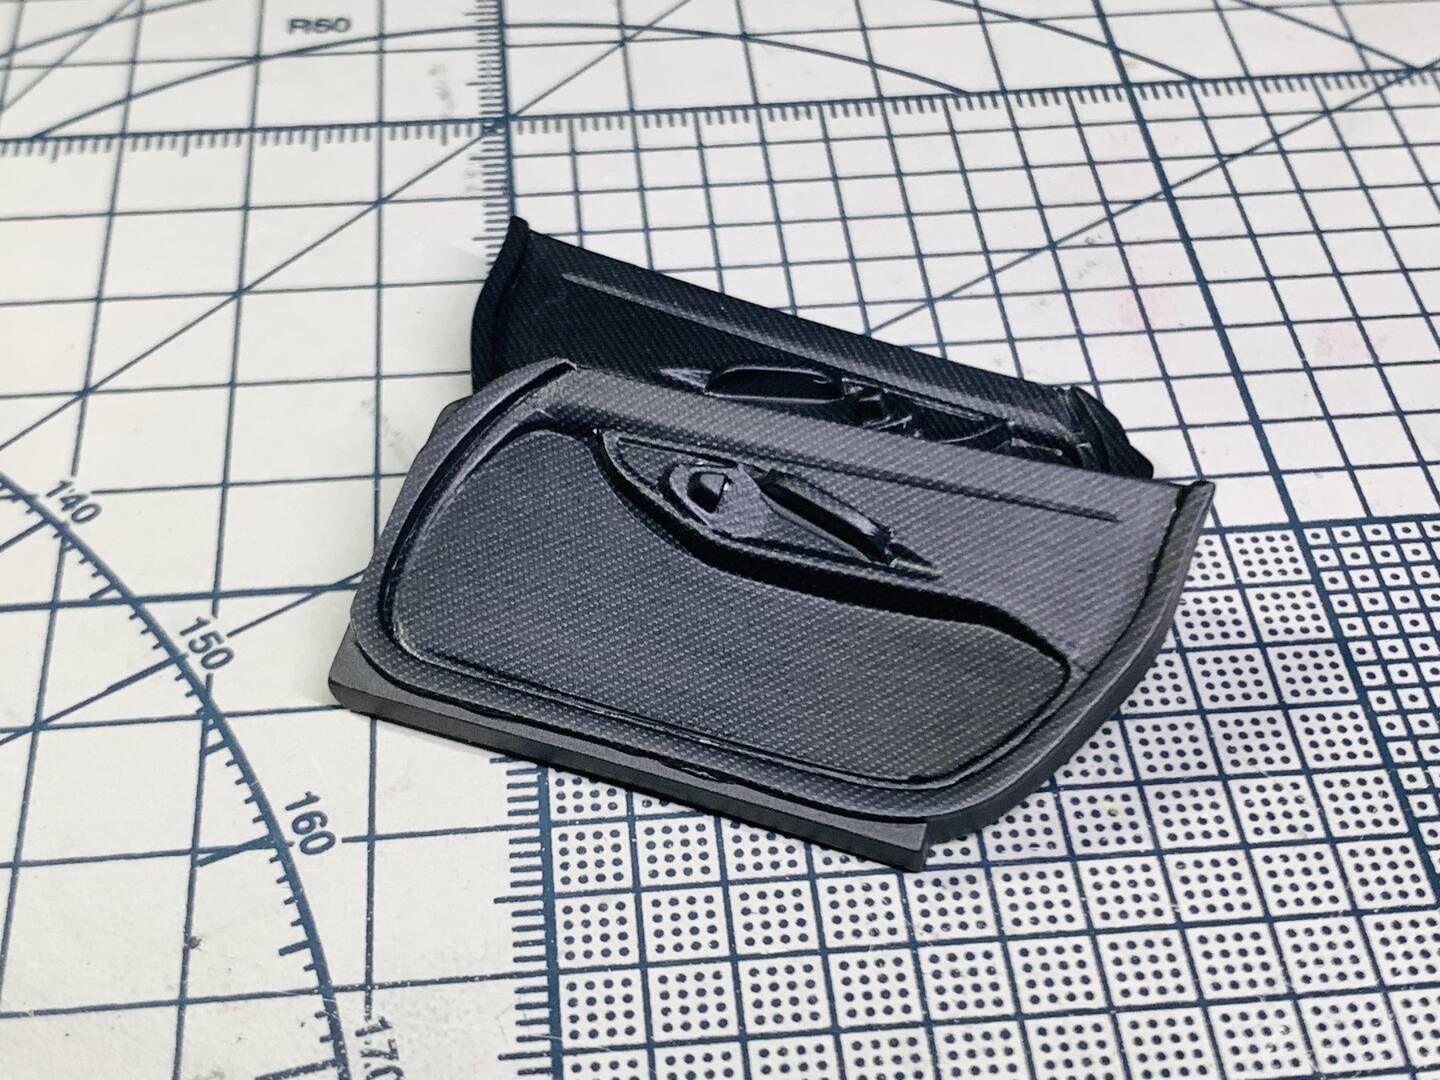
Dashboard & Carbon Fiber Decals
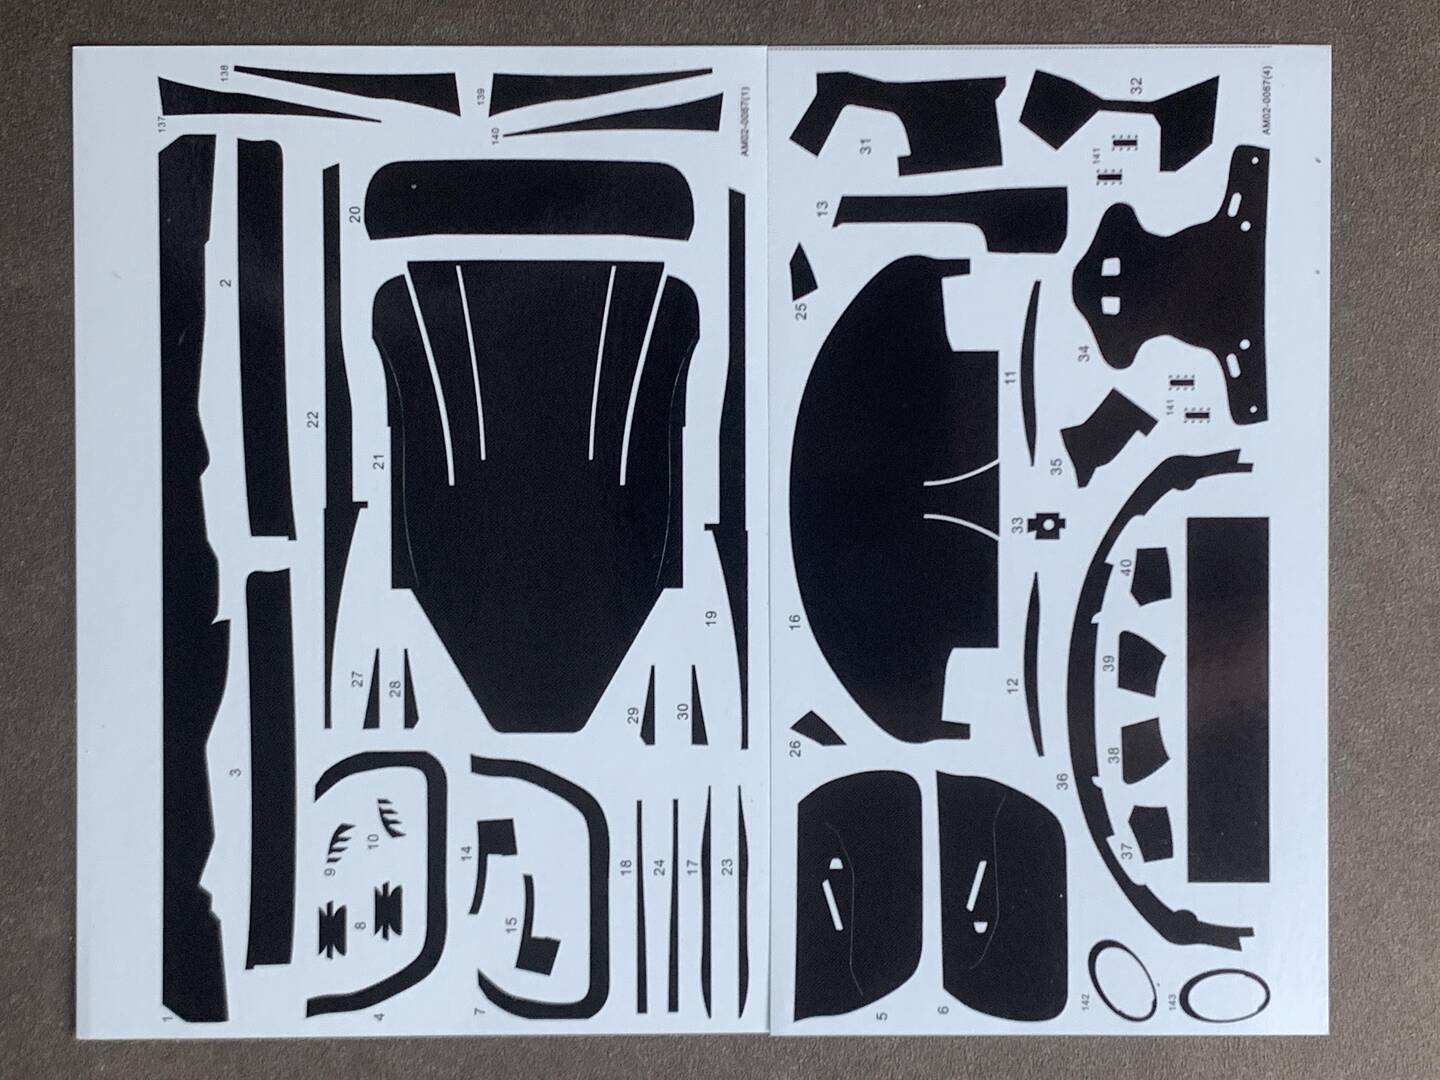
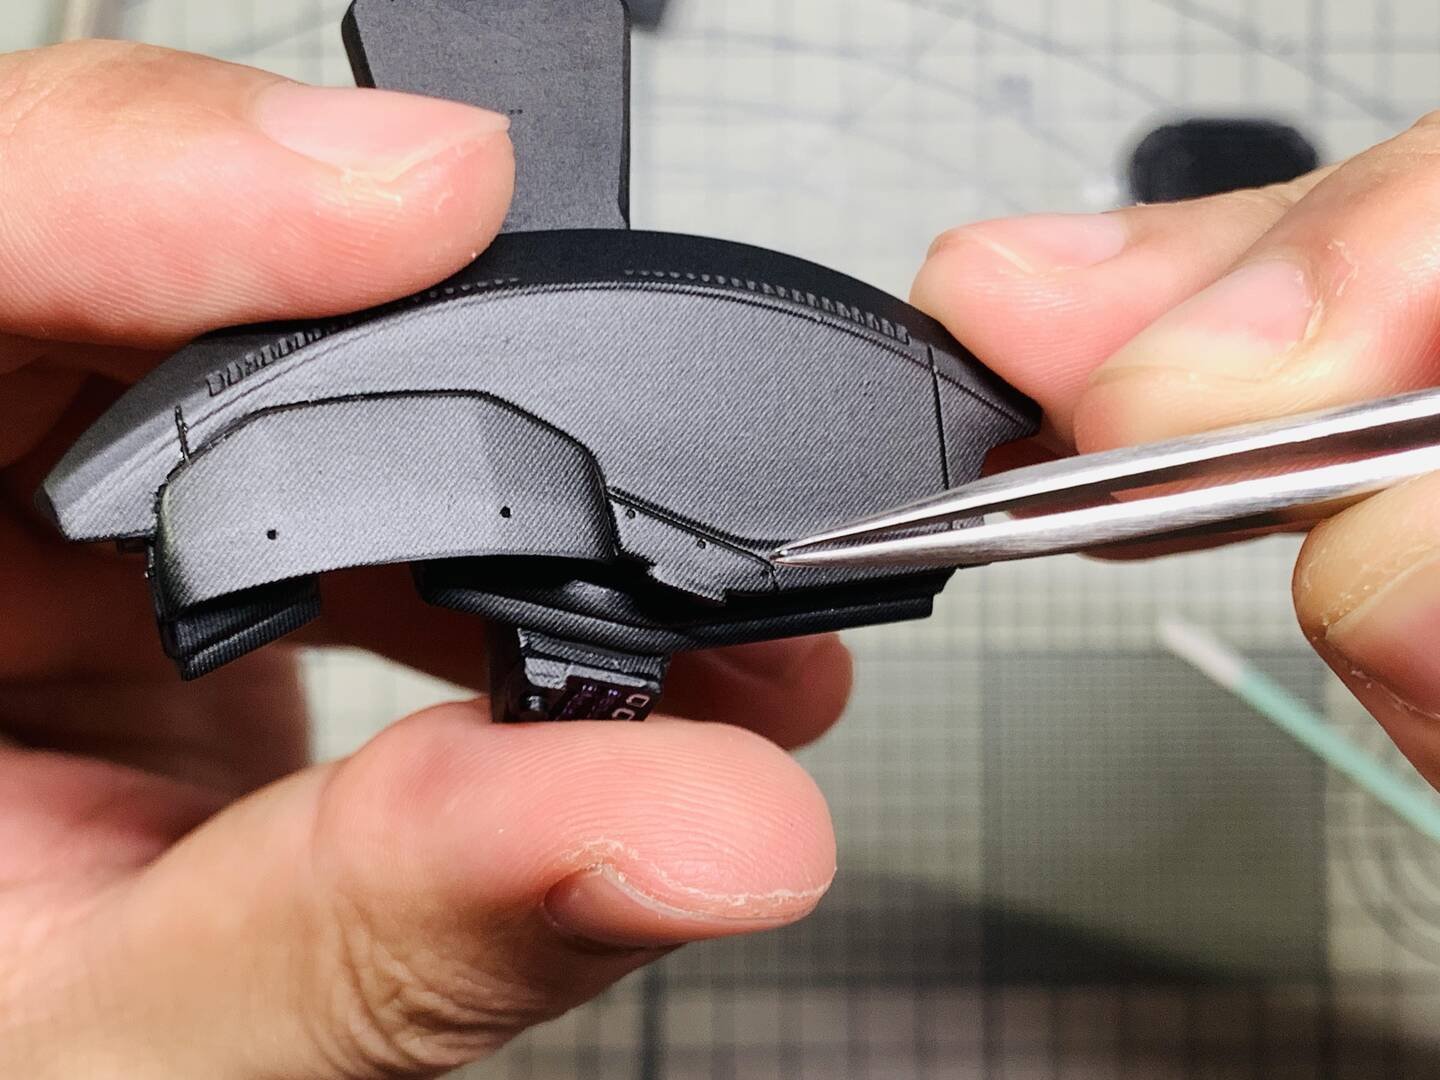
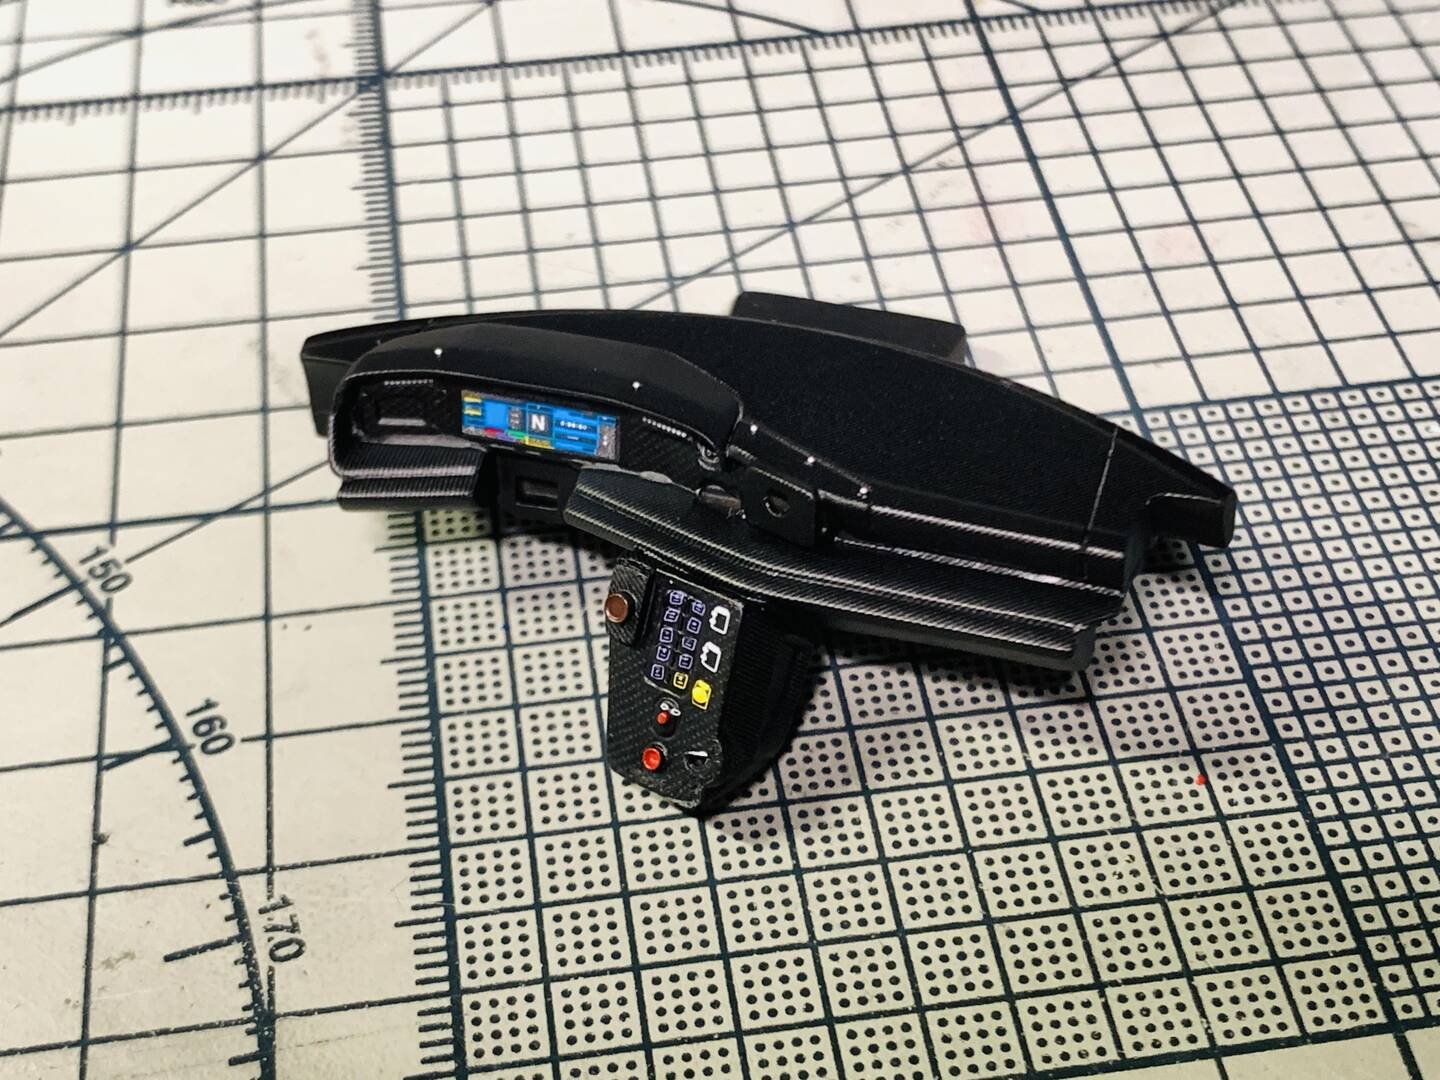
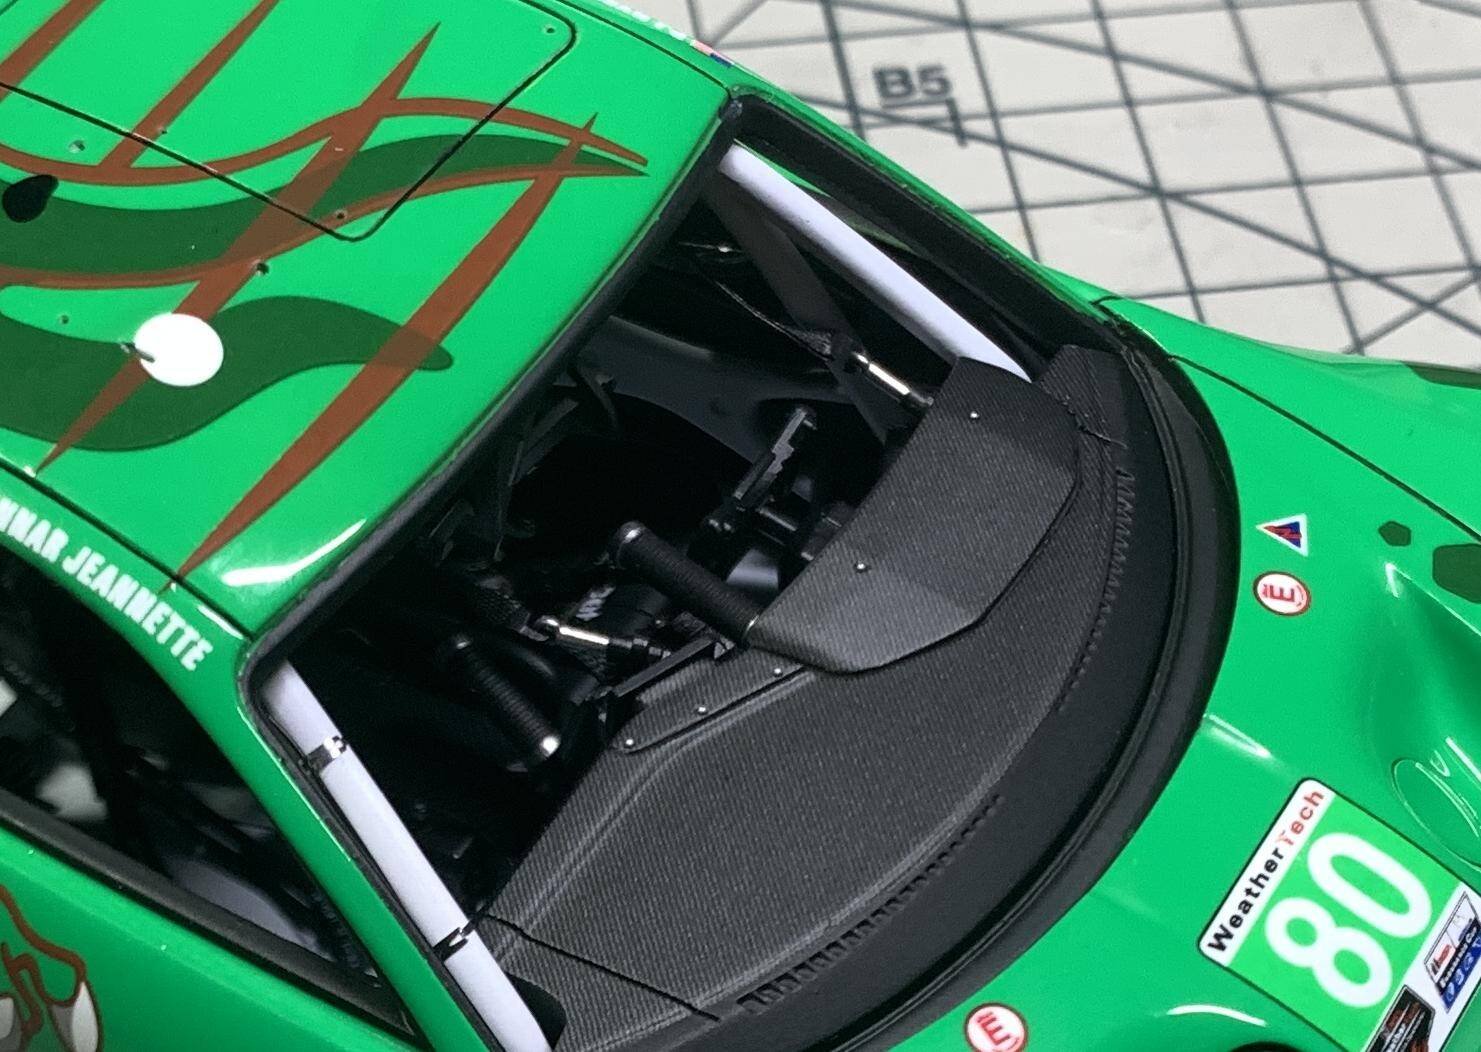
The dashboard should first be sprayed with semi-gloss black as a base color before applying the carbon fiber water decal. The semi-gloss black base ensures that the carbon fiber pattern appears deep and realistic, with the weave showing proper contrast.
For the upper section of the dashboard (part R24), you can optionally add custom-cut carbon fiber water decals using the following technique:
1. Trace the outline of the part onto masking tape.
2. Transfer the traced outline to the carbon fiber decal sheet.
3. Carefully cut along the pattern using a sharp hobby knife.
4. Apply the custom-cut decal to the part.
This template method ensures a precise fit on irregularly shaped parts that do not have pre-cut decals provided on the sheet.
Adding Rivets
For the five holes on this section of the dashboard/instrument panel, I chose to add separate rivet details for extra realism. The process is as follows:
1. Enlarge the existing holes using a 0.4 mm drill bit.
2. Insert 0.5 mm 3D-printed rivet parts into the enlarged holes.
3. Spray the rivet surfaces with chrome silver plating paint for a metallic finish.
Adding individual rivets is a small detail that makes a significant difference in the perceived realism of the cockpit. The 3D-printed rivets provide consistent shape and size compared to manually applied drops of glue or paint.
Steering Wheel & Cockpit Details
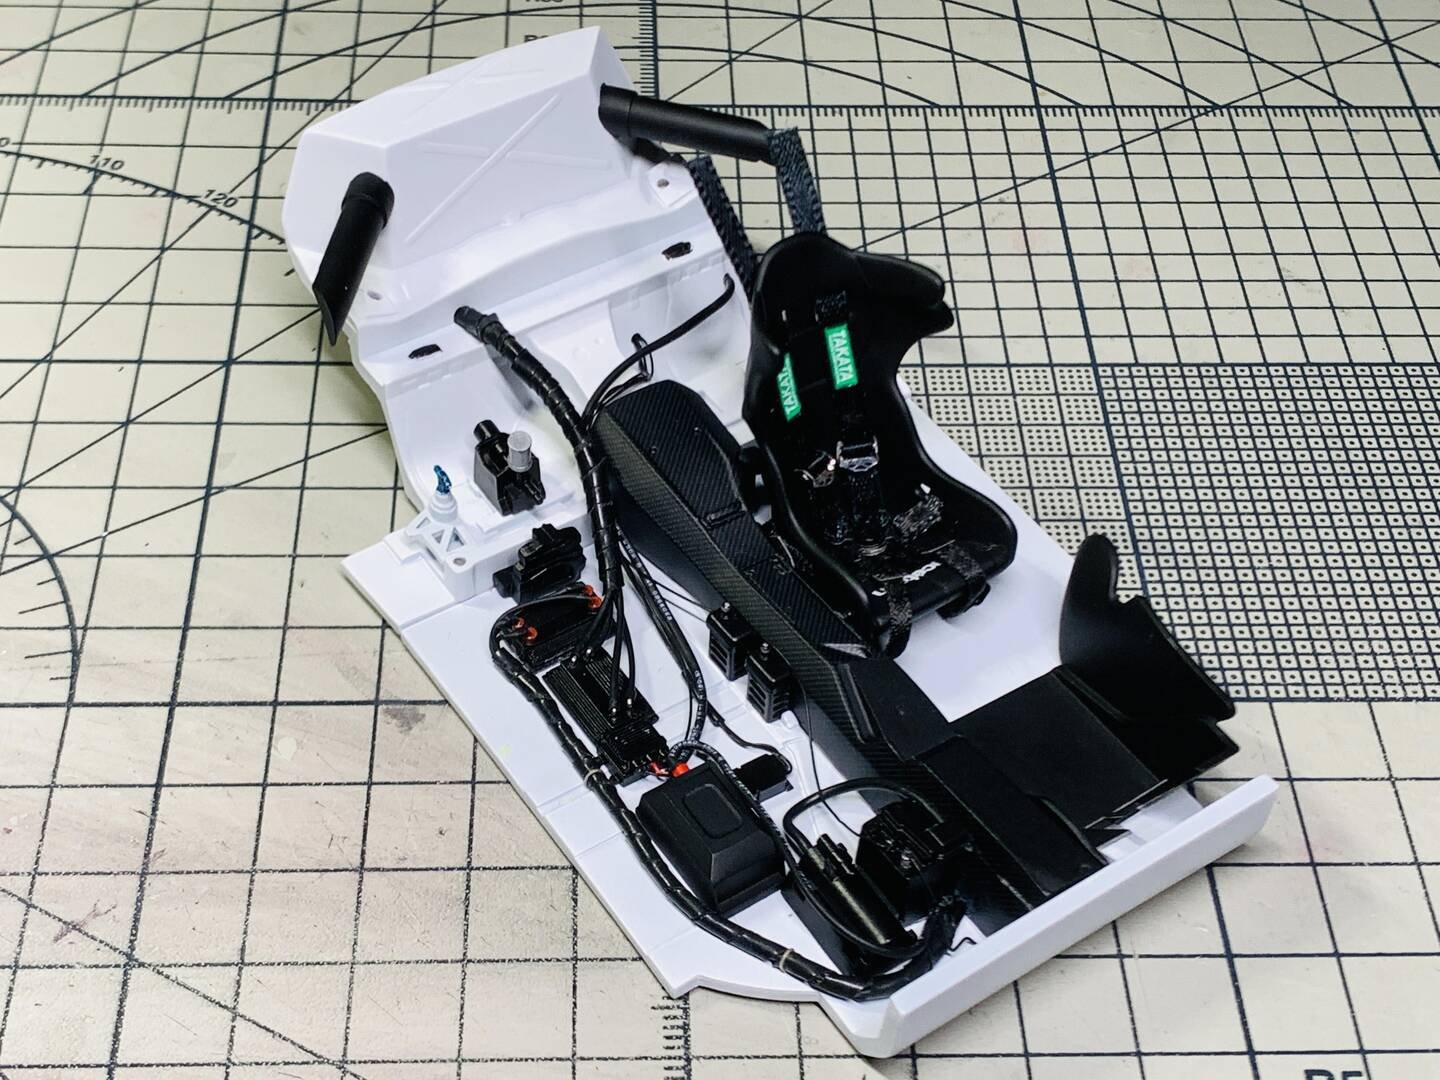
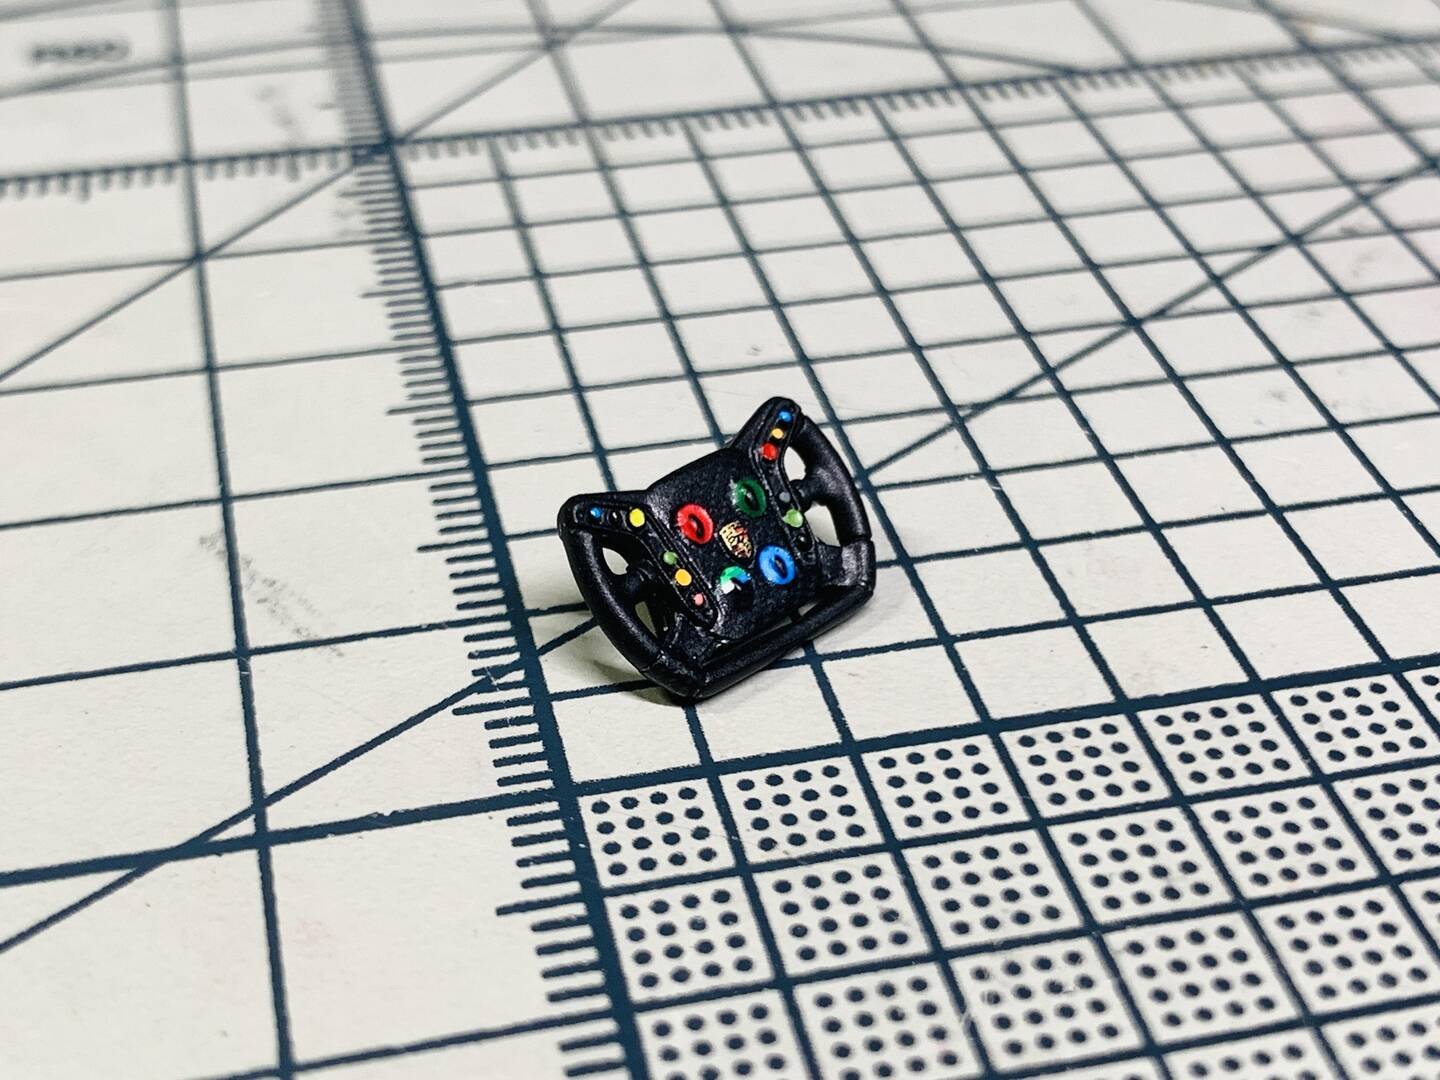
The GT3 R's cockpit is a functional race car environment. The steering wheel receives individual button painting — the various colored buttons on the wheel face should be picked out by hand using a fine brush. Refer to reference photos of the real AO Racing car for accurate button placement and color coding.
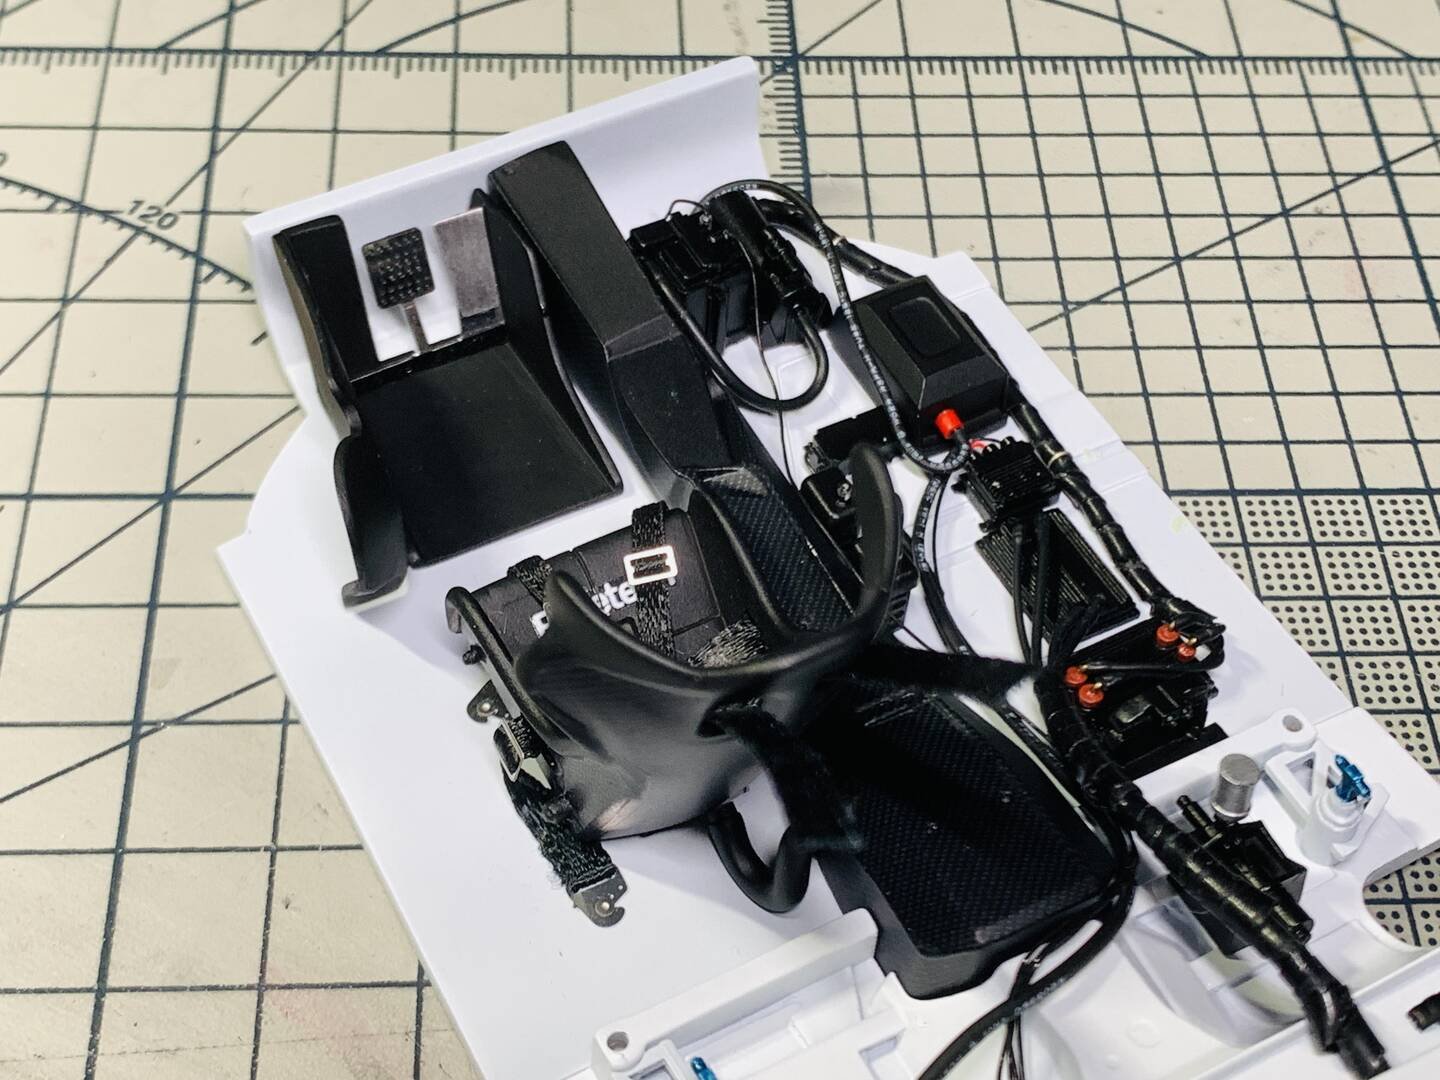
Engine Bay Wiring & Plumbing
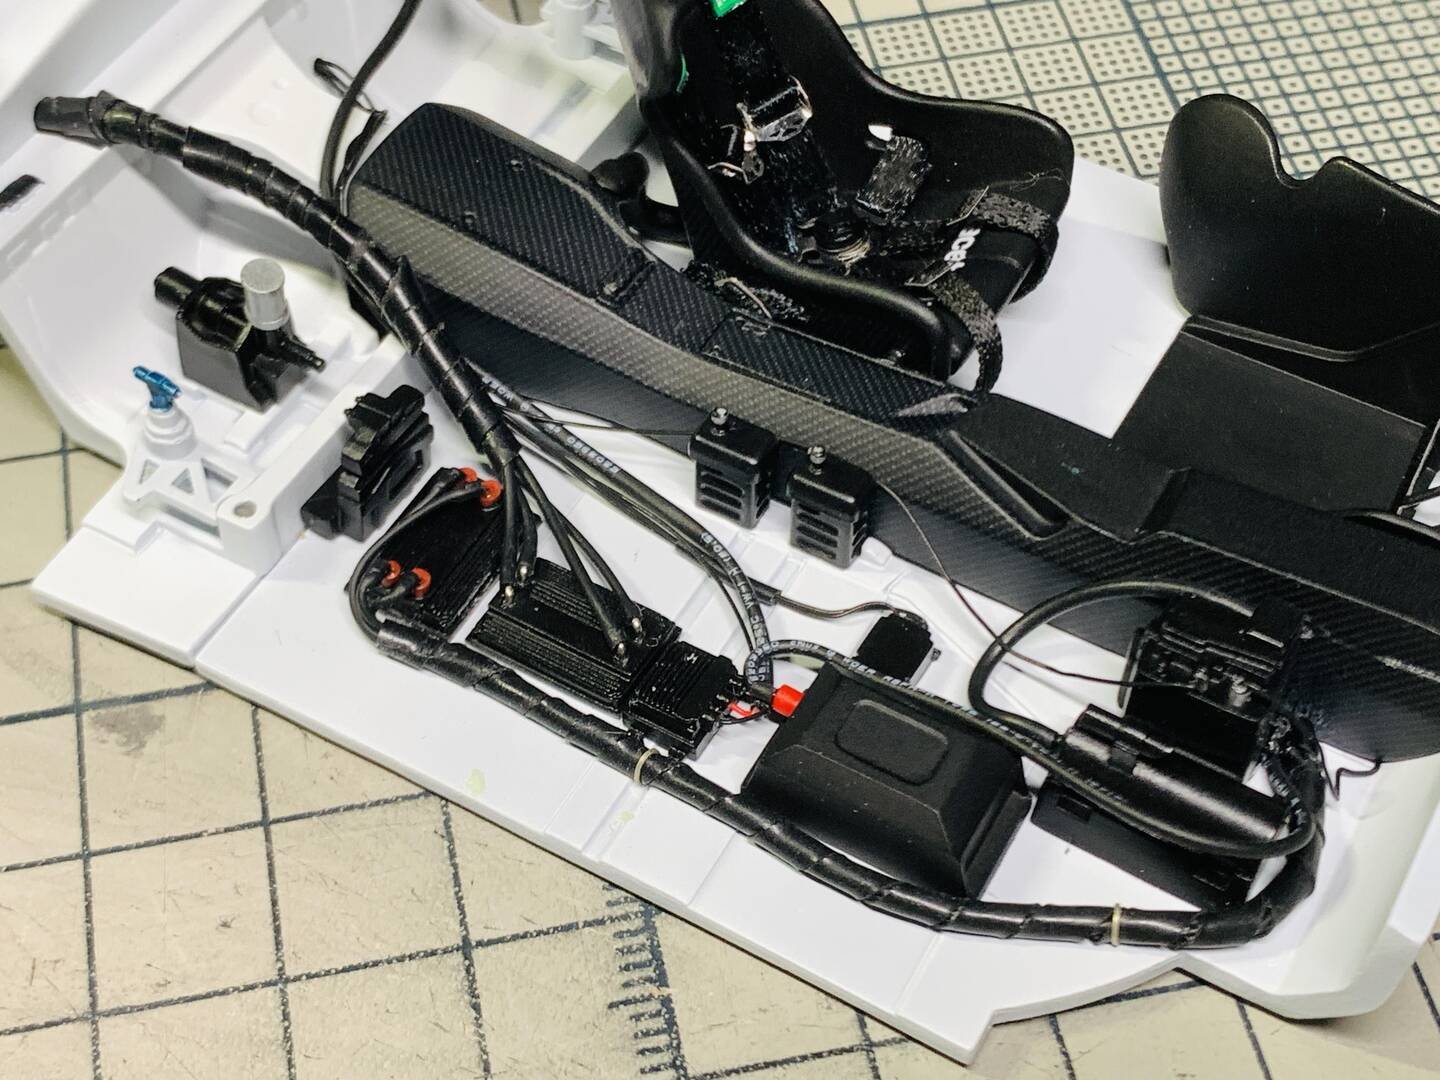
To improve the detail level of the engine bay and electrical components such as the ECU, you can add an appropriate amount of wiring and plumbing. Here I used the following materials:
- 0.4 mm copper wire — for rigid electrical connections
- 0.5 mm stainless steel wire — for structural lines and braided hose simulation
- 0.4 mm single-strand wire — for fine electrical harness detail
- 0.5 mm heat shrink tubing — for small connector boots
- 1 mm heat shrink tubing — for larger hose ends and connectors
- Insulating tape — for wrapping harness sections and adding texture
Since there are relatively few reference photos available of this specific car's engine bay detail, some of the wiring routing was done based on logical inference and best judgment. The basic configuration should be reasonable for a GT3-class race car. Use real 911 GT3 R engine bay photos as a guide where possible, but don't be afraid to add detail that looks convincing.
Advanced Creators
Porsche 911 GT3R
Alpha Model AM02-0067 · Build by BreakWong
Color Table
The following table lists all paint colors referenced in this build guide. Use these as a starting point and adjust to your own preference where indicated.
| Symbol | Paint Code | Color Name | Symbol | Paint Code | Color Name |
|---|---|---|---|---|---|
| Ⓐ | C-1 | Glossy Black | Ⓕ | C-92 | Semi-gloss Black |
| Ⓑ | C-2 | Glossy White | Ⓖ | C-182 | Matte Clear (Flat Clear) |
| Ⓒ | C-33 | Matte Black | Ⓗ | JumpWind 027 or C66 | Body Color (Grass Green) |
| Ⓓ | C-48 | Gloss Clear Yellow | Ⓙ | C-10 | Gun Metal |
| Ⓔ | LP-61 (Tamiya) | Matte Metallic Gray | Ⓚ | — | Silver |
| Ⓛ | C-7 | Brown | Ⓜ | C-3 | Glossy Red |
| Ⓝ | C-76 | Metallic Blue |
Note: The symbol Ⓚ refers to silver tones in a broad sense, including chrome silver, fine silver, C-8 metallic silver, etc. The specific type of silver finish for each part can be customized by the modeler according to preference and reference photos.
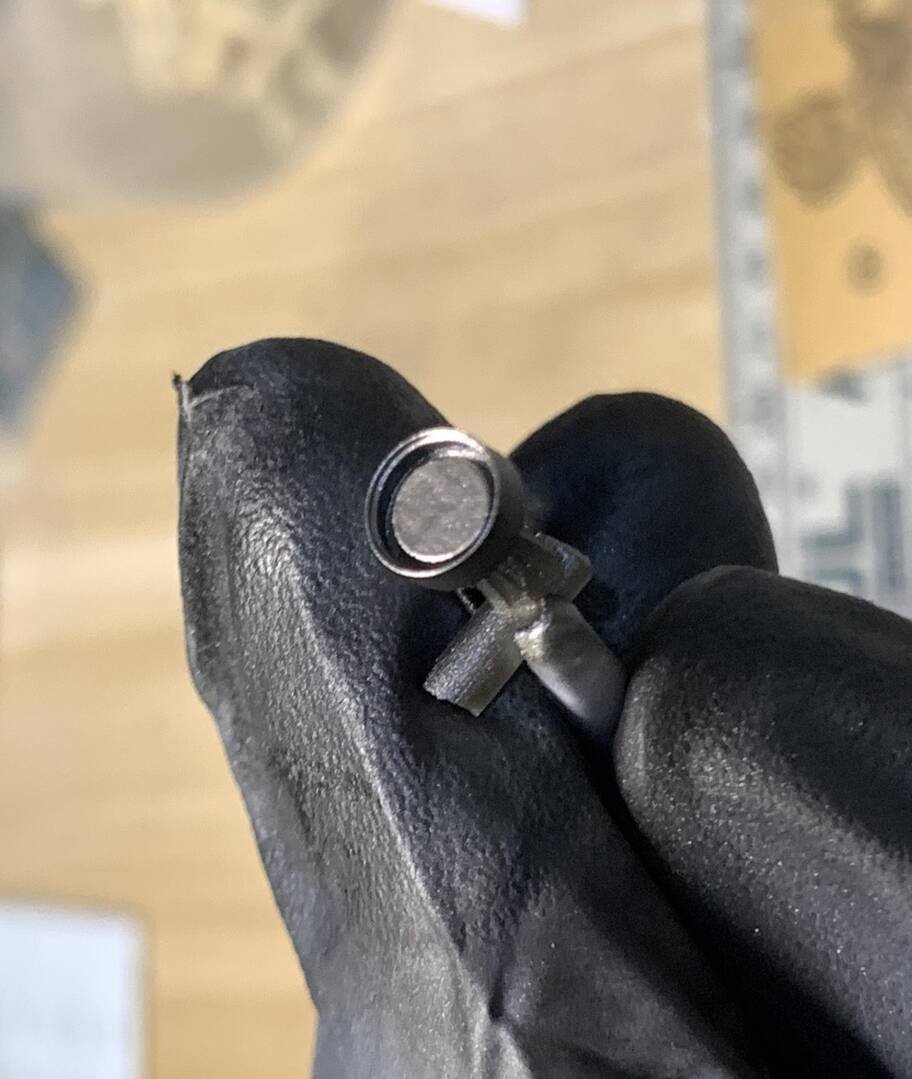
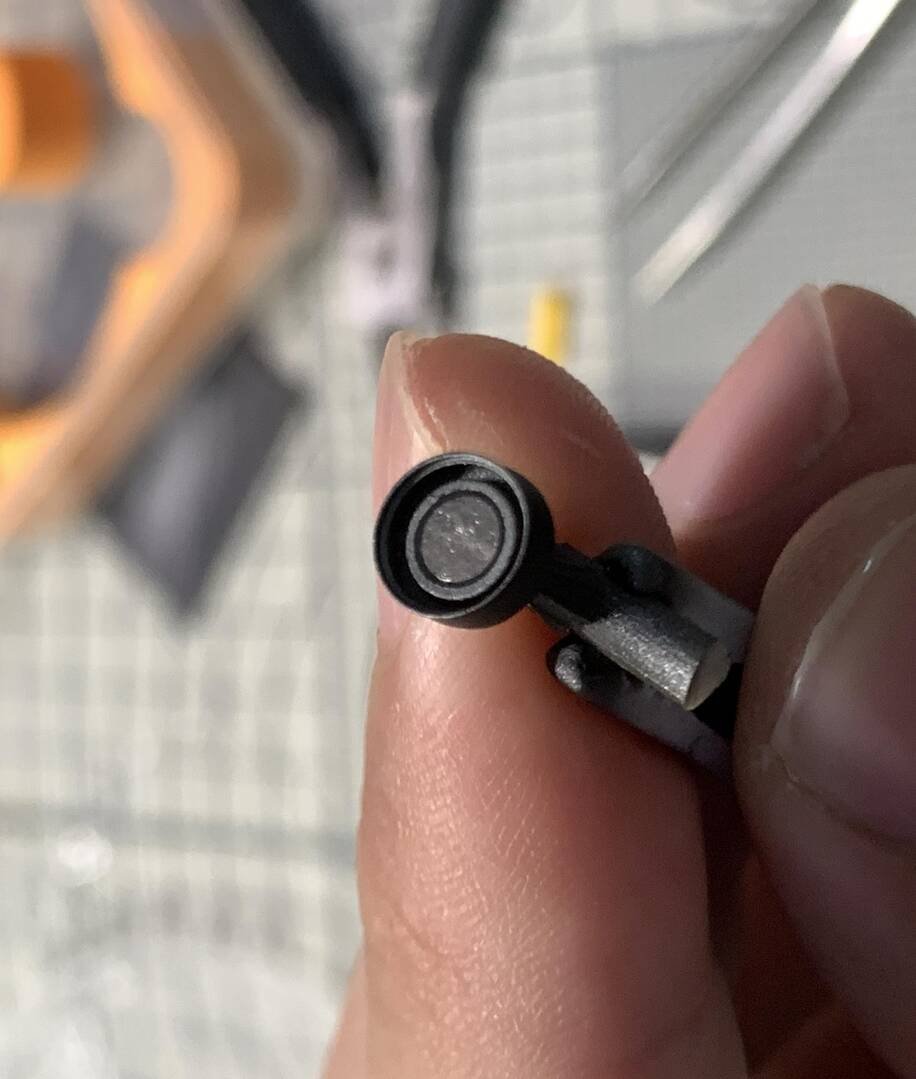
R40 Fuel Tank Cap — Painting Instructions
The R40 fuel filler cap requires a multi-step masking and painting process to achieve a realistic metallic appearance with the correct surrounding finishes.
Step 1 — Base Coating: First spray the entire fuel cap with Dark Silver (for example, Mr. Color SM03 Super Iron or Alclad 107 Dark Aluminum). This provides the metallic foundation for the cap face.
Step 2: Cover the center cap area with a small circle mask, then spray the surrounding ring with matte black (C-33).
Step 3: Cover with a slightly larger circle mask (expanding the masked area), then spray with Tamiya LP-61 Matte Metallic Gray.
Step 4: Finally, mask off/cover the entire fuel tank cap area and spray the outer body panel surrounding it with C-92 Semi-gloss Black.
Assembly Process
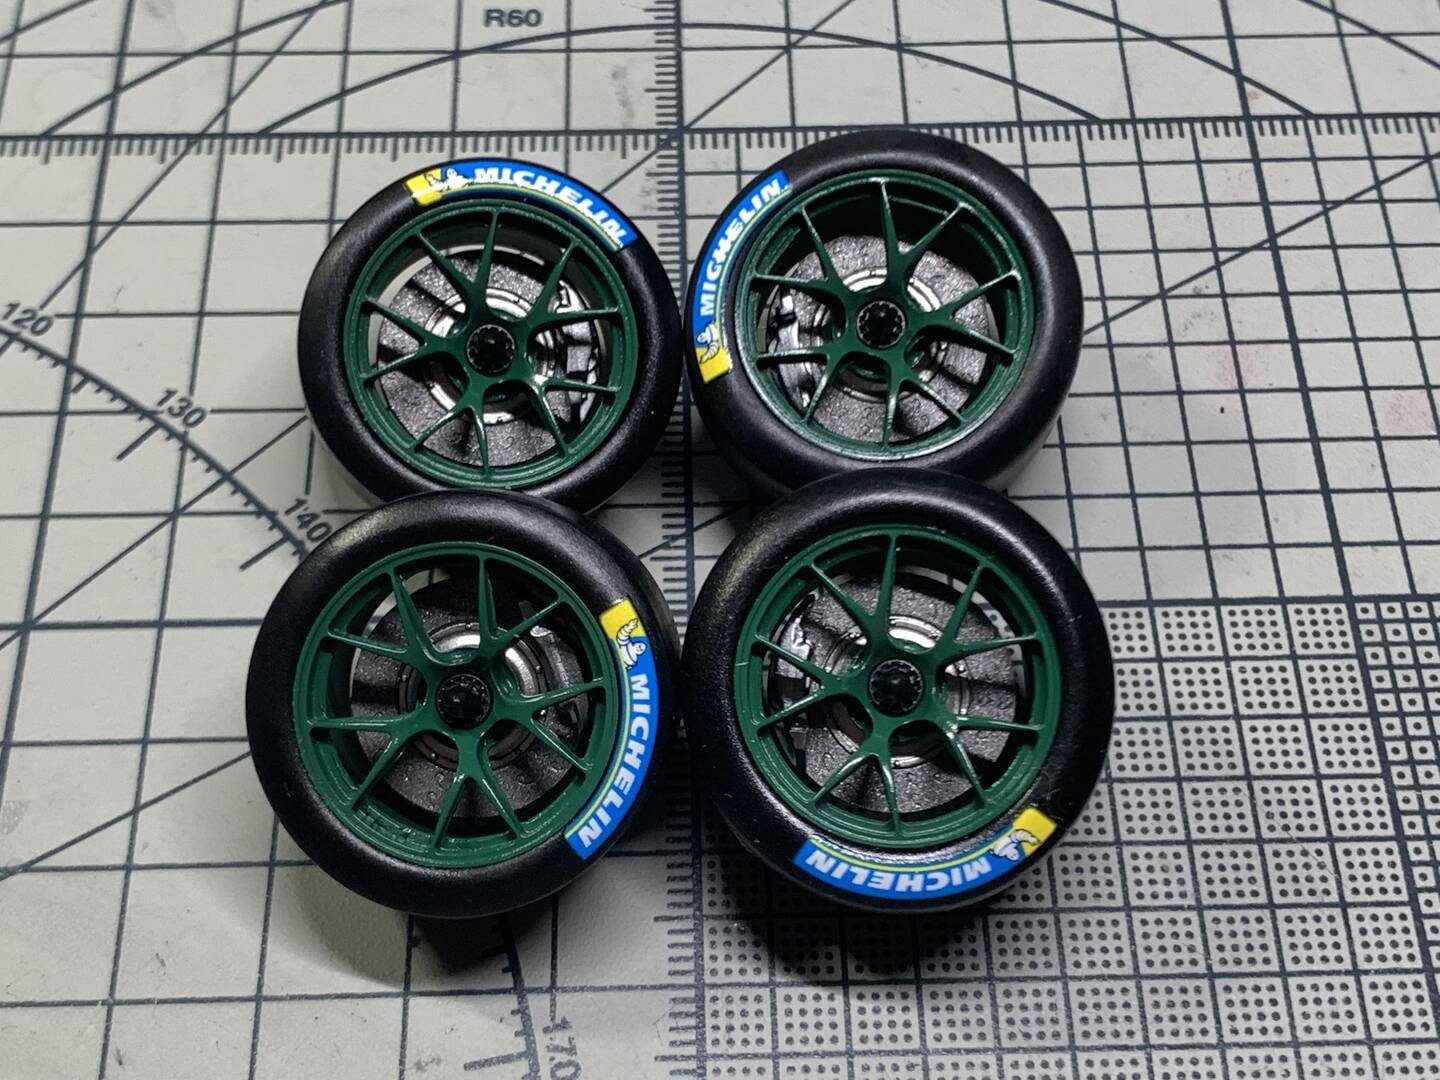
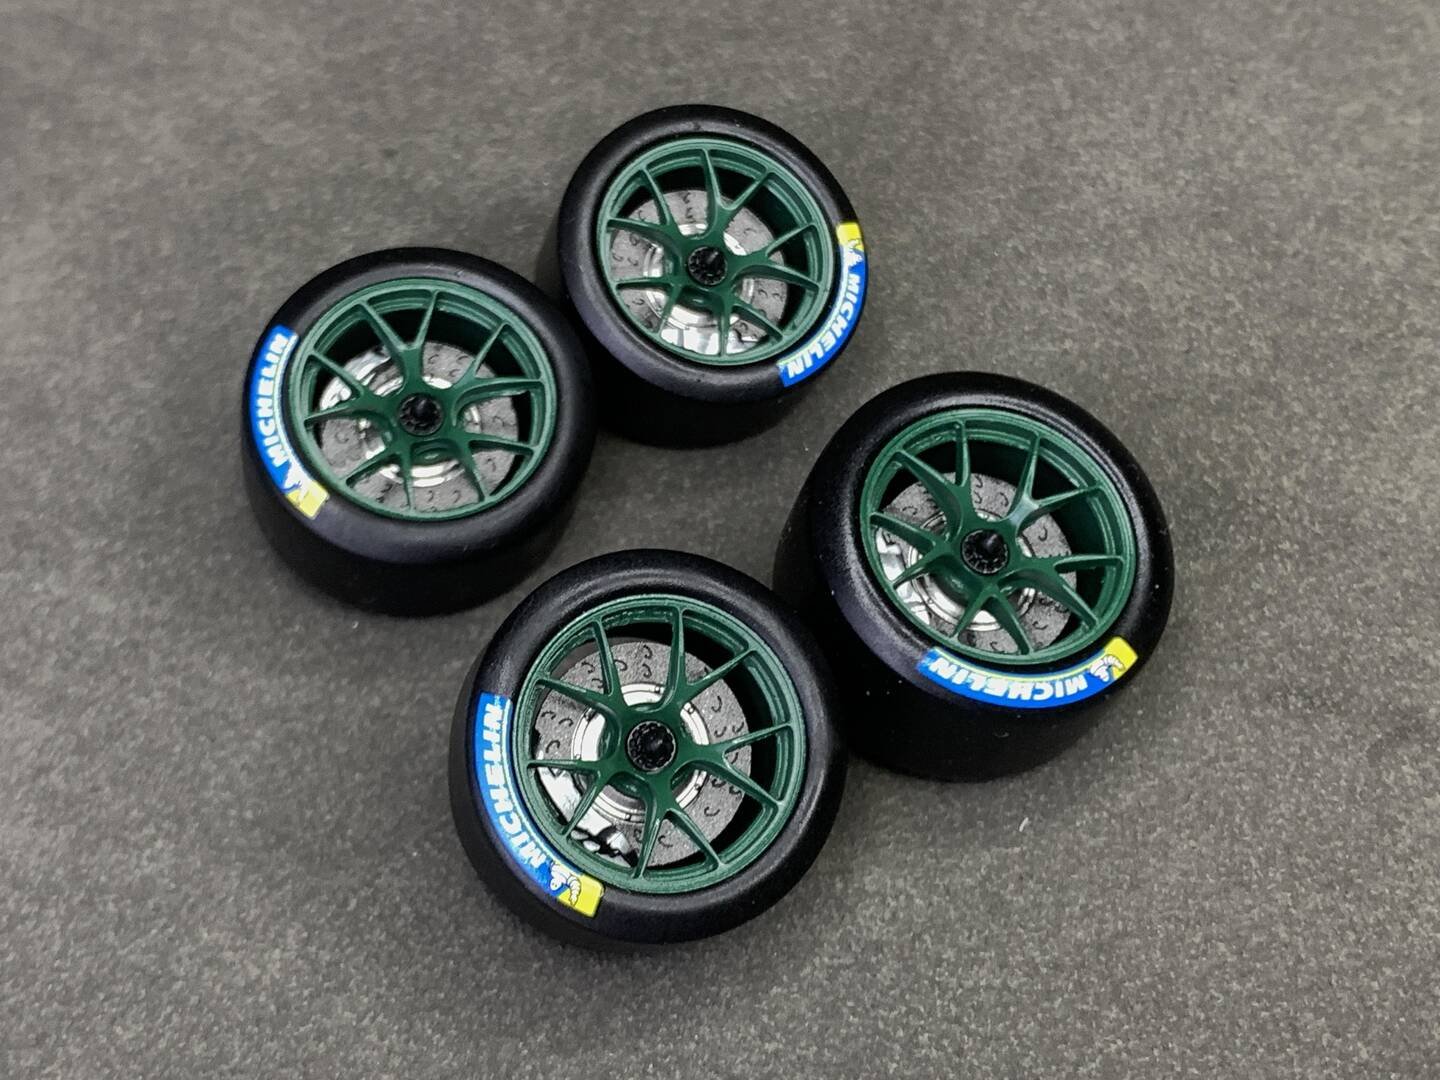
With all major sub-assemblies painted and detailed, the assembly process begins. Work methodically through the instruction manual, test-fitting parts before applying glue. The key sub-assemblies include the front suspension and steering, dashboard and cockpit tub, roll cage, engine and transmission, rear suspension, and exhaust system.
下一篇:总装与成品展示
Advanced Creators
Porsche 911 GT3R
Alpha Model AM02-0067 · Build by BreakWong
Final Assembly
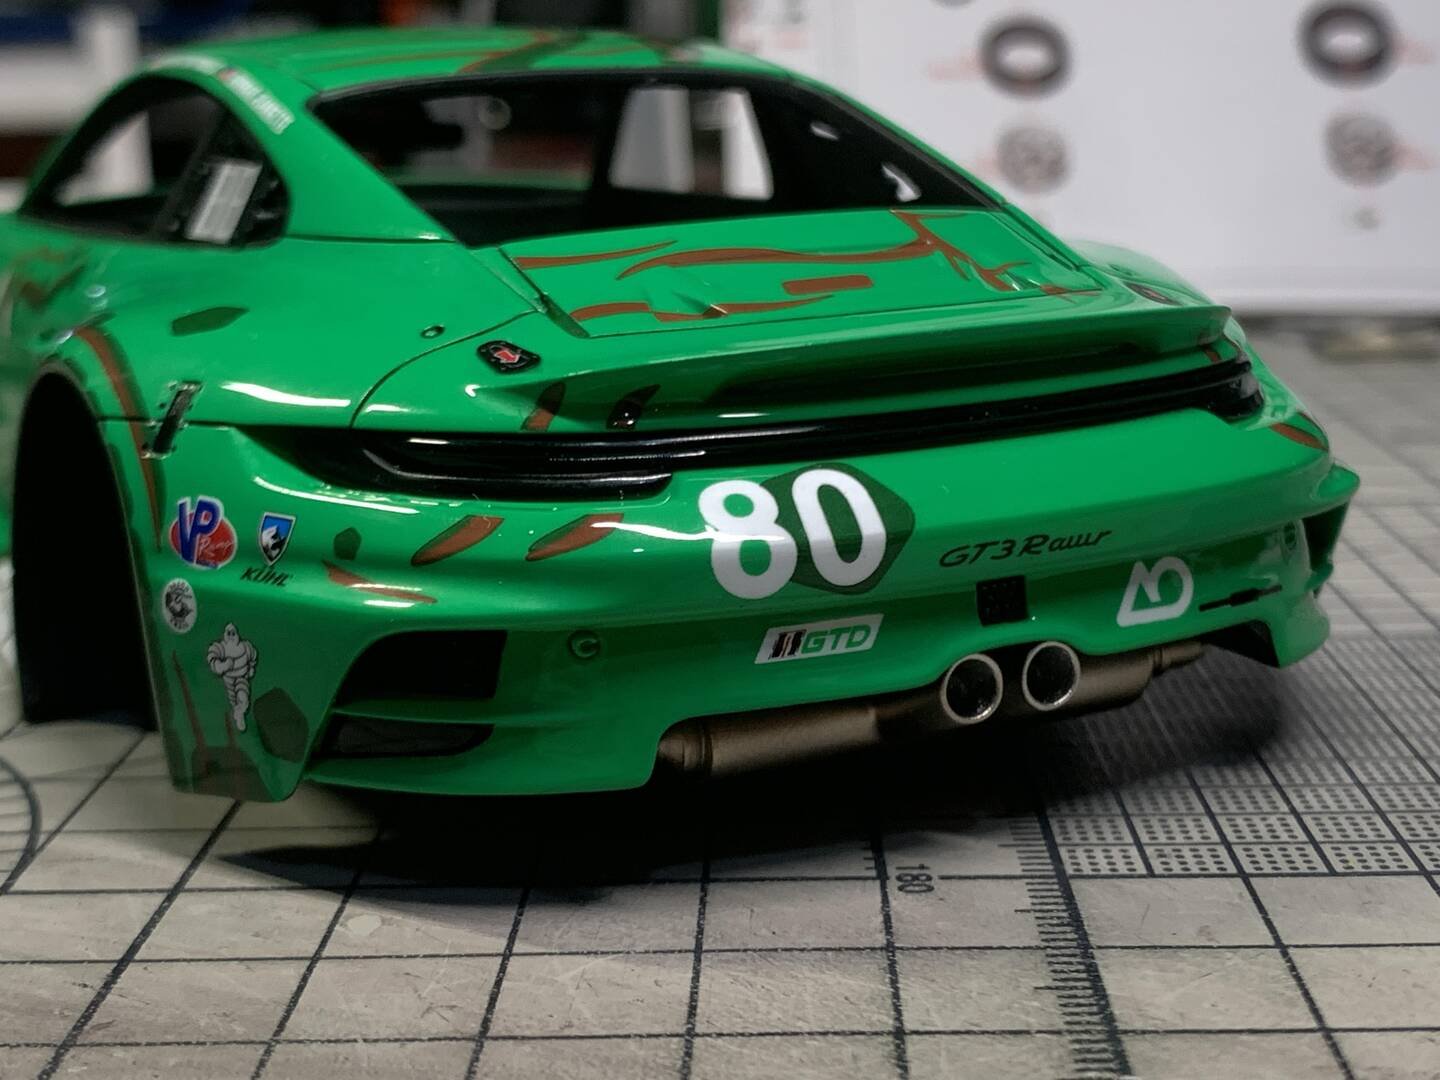
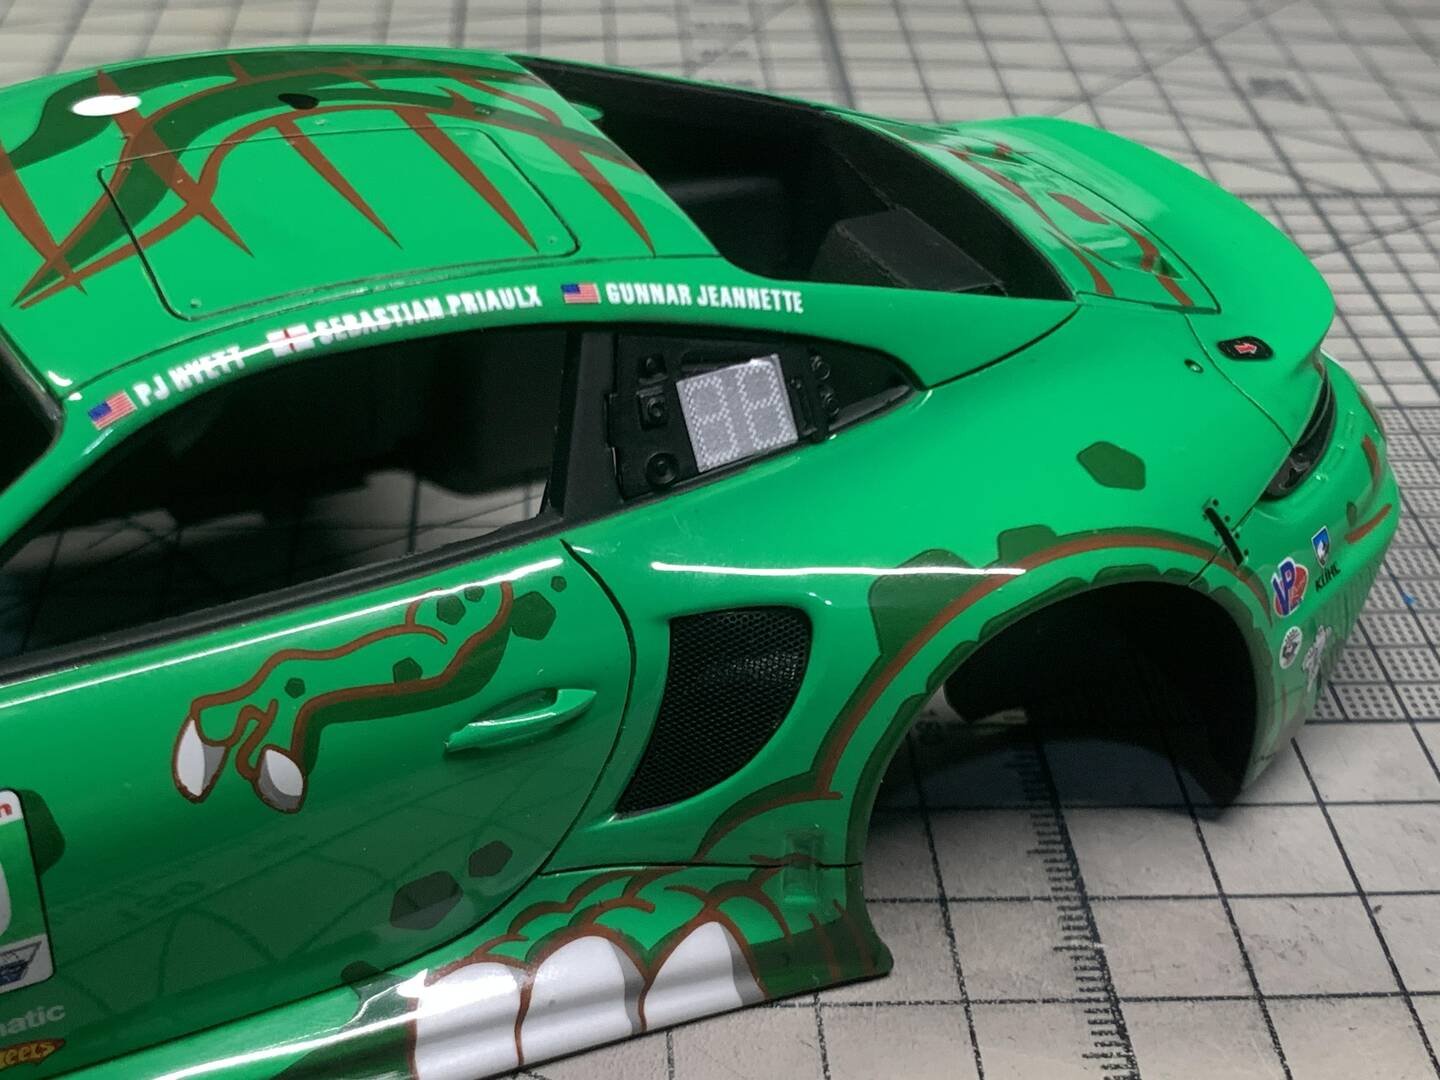
With all sub-assemblies completed, the final stage involves bringing everything together. The painted and clear-coated body shell is mated to the fully detailed chassis. Small details such as light lenses, tow hooks, mirrors, wing supports, and the fuel cap are fitted last to avoid damage during handling.
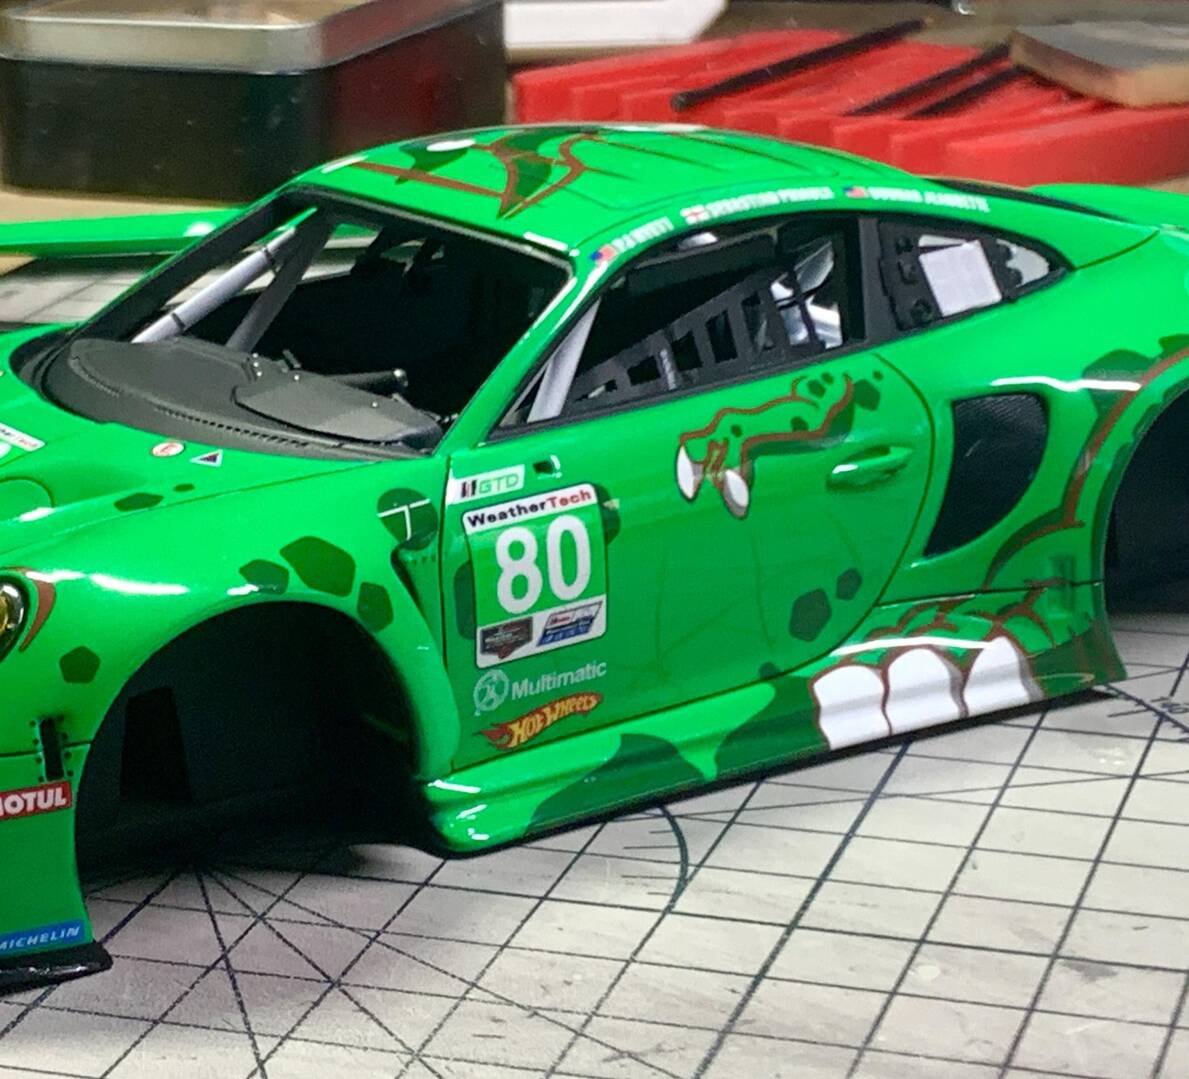
Finished Model Showcase
The completed AO Racing "Rexy" Porsche 911 GT3 R in 1/24 scale. The JumpWind 027 grass green finish, layered over a yellow base coat, provides a deep and vibrant color that perfectly captures the spirit of the real dinosaur-liveried race car. The extensive water slide decals — including the iconic teeth, claw marks, #80 race numbers, and sponsor logos — are seamlessly buried under the Glasurit 666 clear coat for a glass-smooth finish.
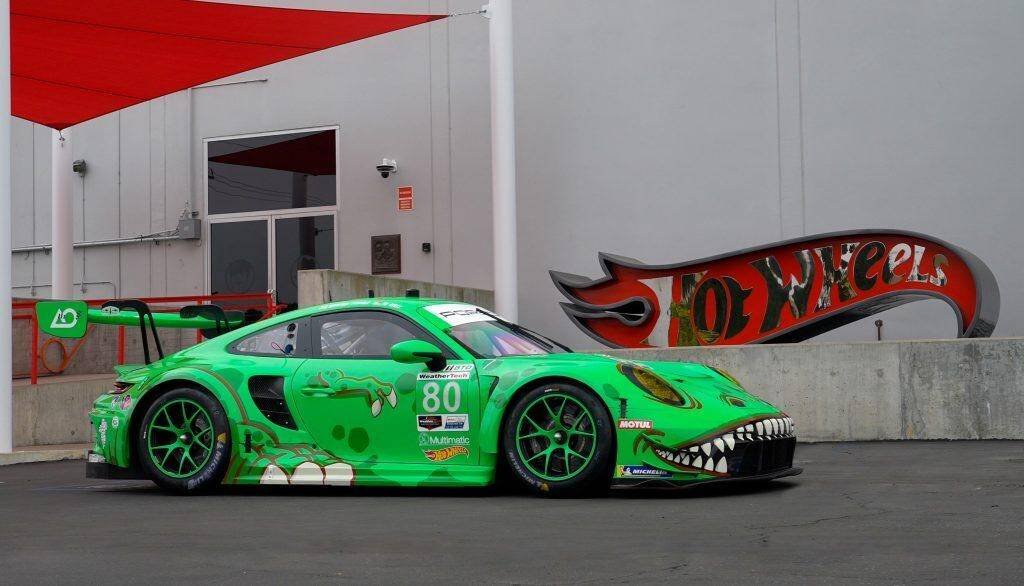
The End — Thank you for reading BreakWong's Porsche 911 GT3R Building Guide. Alpha Model AM02-0067, 1/24 Scale Full Detail Kit.
 Beginner
Looks great!