
 Advanced Creators
BMW M3 (G80) Competition Build Guide — Part 1: Introduction & Colour Choice
Alpha Model AM02-0035 · Build by Robin Witt
This build guide was written by Robin Witt, UK based Scale Model Builder (see Robin's Scale Models on Facebook). I hope my build of this kit will provide some help and inspiration for you to go on and build your own masterpiece. Most of all though, enjoy your build.
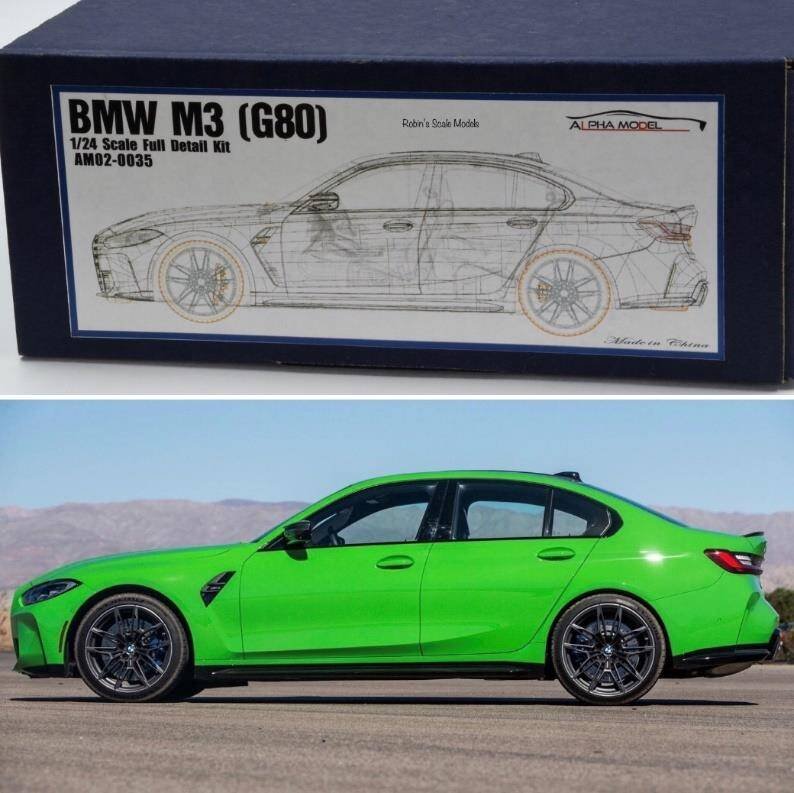
This time I'm building the BMW M3 (G80) Competition. I have opted for Verde Mantis Pearlescent for this build. This is actually a Lamborghini colour however BMW released the M3 Competition with an option to purchase this colour from their BMW Individual colour palette range.
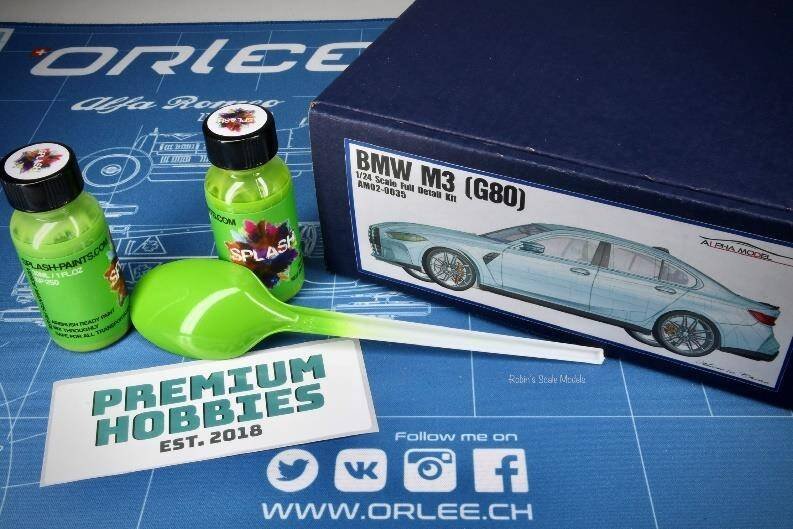
Ed Sutton, owner of the Premium Hobbies model supply company in the UK, kindly sponsored the paint colour for this build and sent me the Splash Paints paint set. If you weren't aware, Ed has provided a discount code for followers of my modelling page, Robin's Scale Models. Just enter RSM10 at the till and you will get 10% off the purchase price, even on already discounted items.
Reference Photos
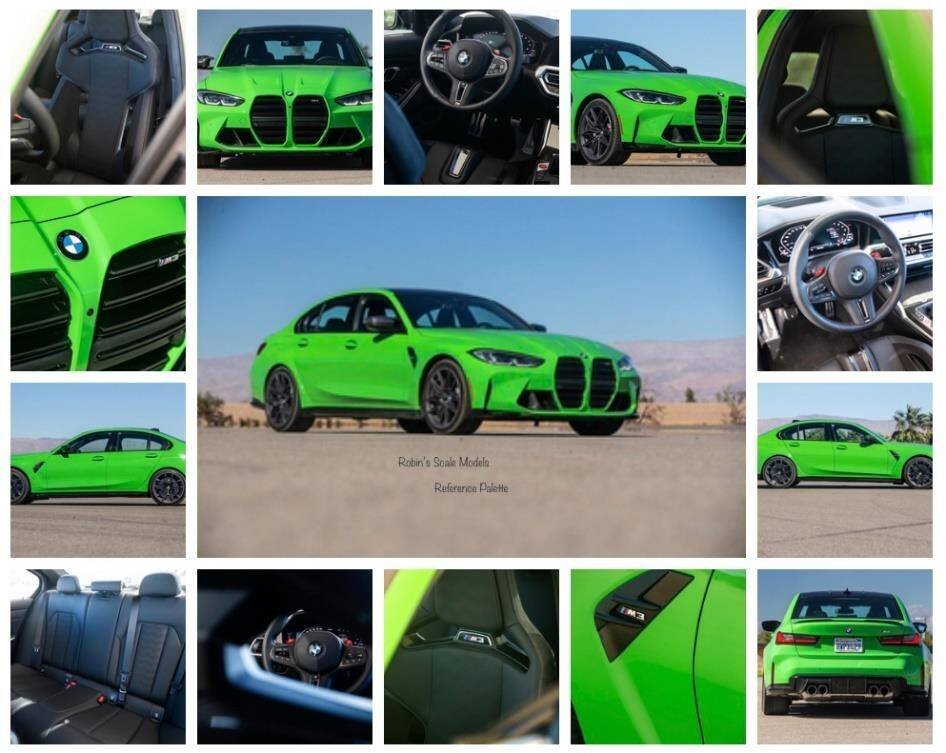
I thought I would share a photo collage with some of the reference pictures I looked at on the web. It's certainly a very striking colour and will look awesome in my display cabinet next to my other Alpha Model sportscars.
Next: Box Contents & Panel Lines
Advanced Creators
BMW M3 (G80) Competition Build Guide — Part 2: Box Contents & Panel Lines
Alpha Model AM02-0035 · Build by Robin Witt
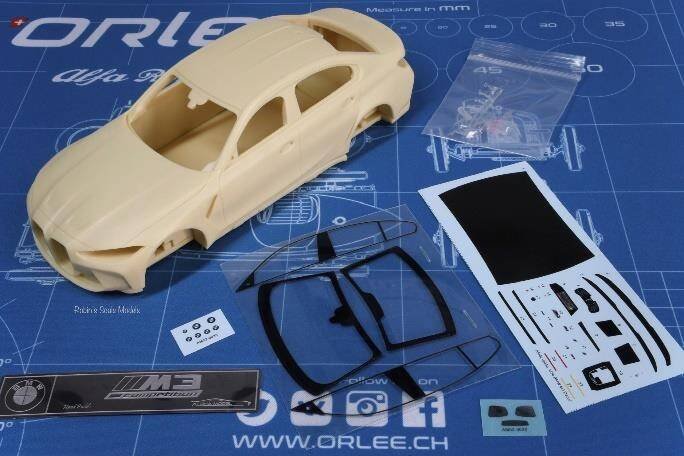
Box Contents
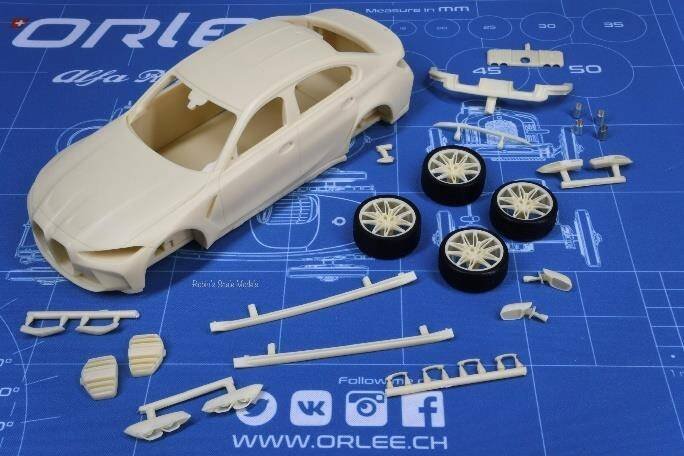
These are the contents of the box. The quality is excellent. You have everything here to build a fantastic scale model.
The Instructions
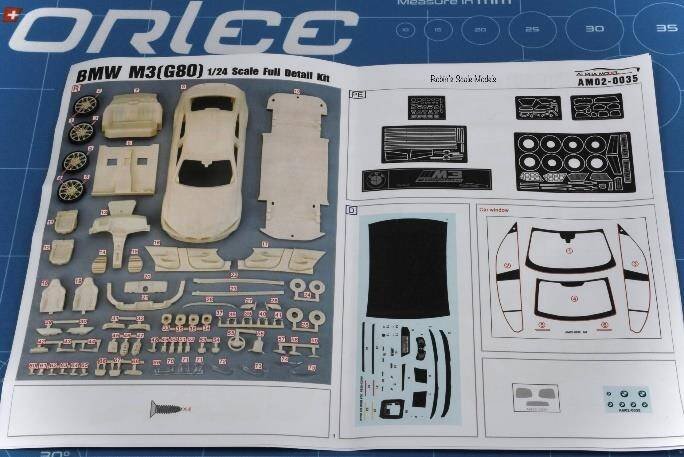
Panel Lines & Body Shell Design
The depth and thickness of the panel lines is just right, no enlarging with a scribing tool is required. The Alpha Model design team have also thought about the carbon fibre decal job that we need to do with the car. The areas on the body shell that need carbon fibre decal treatment are all separate pieces. I love the thought that's obviously gone into this kit.
Next: Health & Safety & Cleaning
Advanced Creators
BMW M3 (G80) Competition Build Guide — Part 3: Health & Safety & Cleaning
Alpha Model AM02-0035 · Build by Robin Witt
Health & Safety
Safety Warning: First thing to consider when using resin materials is health and safety. You should wear an appropriate mask when sanding, using a file or drilling resin parts as fine resin particles can be dangerous if breathed in.
Cleaning Resin Parts
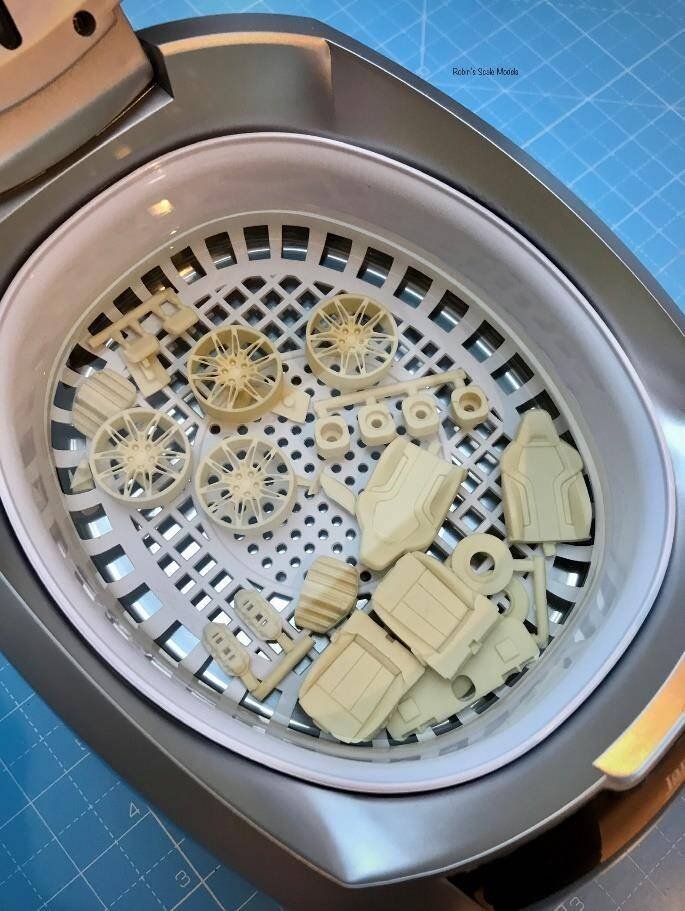
Always wash all resin parts in soapy water or use an anti-silicone degreaser before priming and painting. I actually do both. This stage is needed to remove any resin release or production agents. You risk the primer or paint not laying down on the resin properly if you miss out this stage.
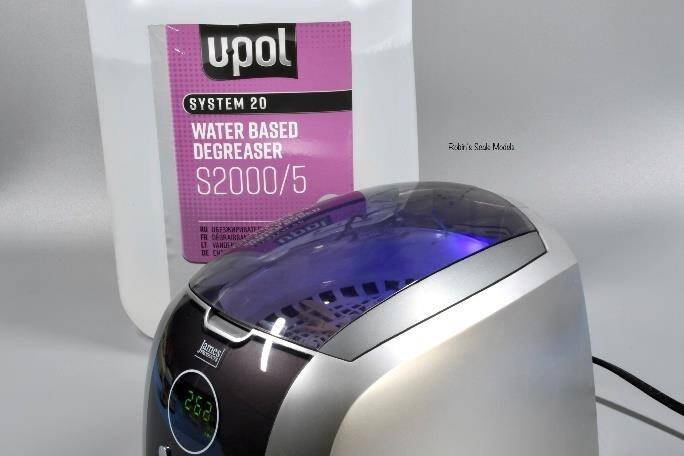
I soaked all resin parts in the UPol degreaser solution in my ultrasonic cleaner. Note that I opted to use a water based degreaser as I thought this would be kinder to the resin. Following this process, I washed all parts in reasonably hot soapy water.
Next: Priming & Painting
Advanced Creators
BMW M3 (G80) Competition Build Guide — Part 4: Priming & Painting
Alpha Model AM02-0035 · Build by Robin Witt
Colour Testing
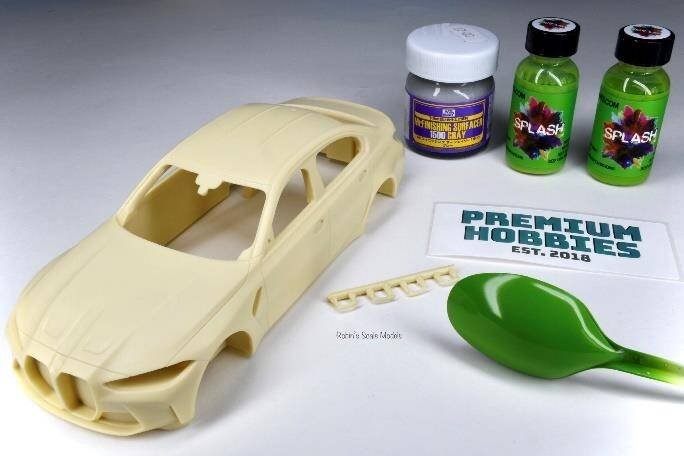
Prior to starting the build I tested the colour on a white plastic spoon, priming white and then following up with the base coat green and the pearlescent green, and then a clearcoat. I found that I got a richer green in the end result using a light grey primer under the green coats.
Preparing the Carbon Fibre Roof
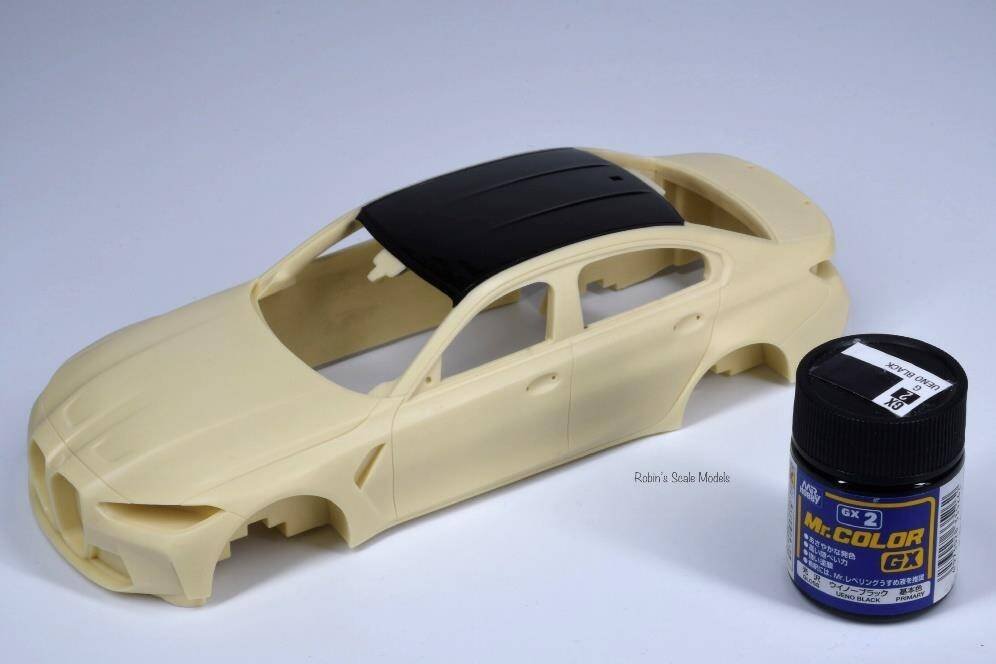
As I will be creating a carbon fibre roof, prior to priming, I sprayed the roof using Mr Color GX-2 which is a fantastic gloss black to use on bare styrene or bare resin. It leaves a nice smooth glossy finish ideal for decaling on top of.
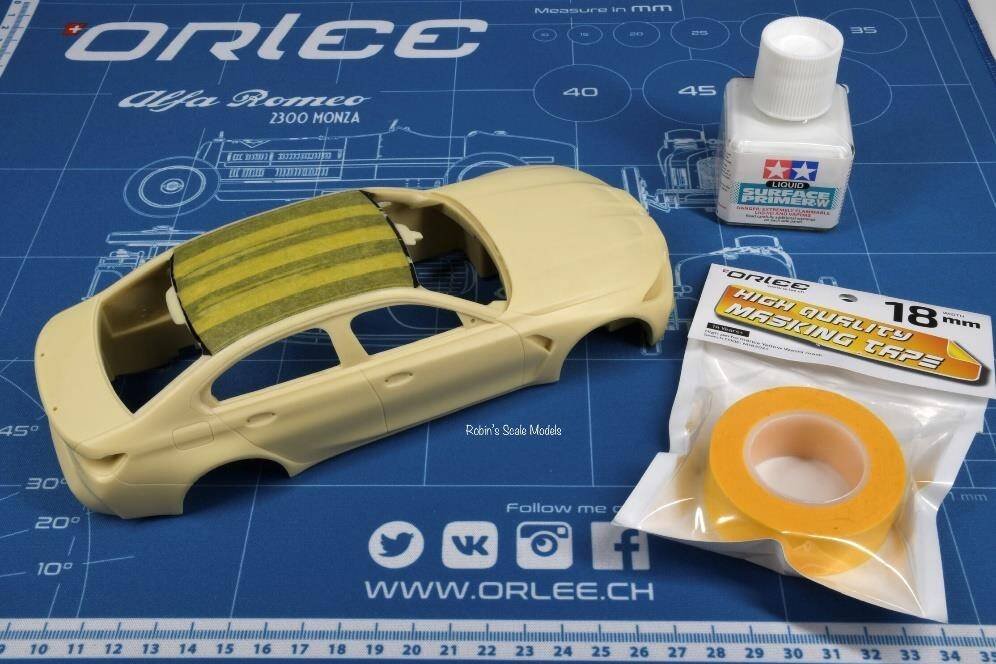
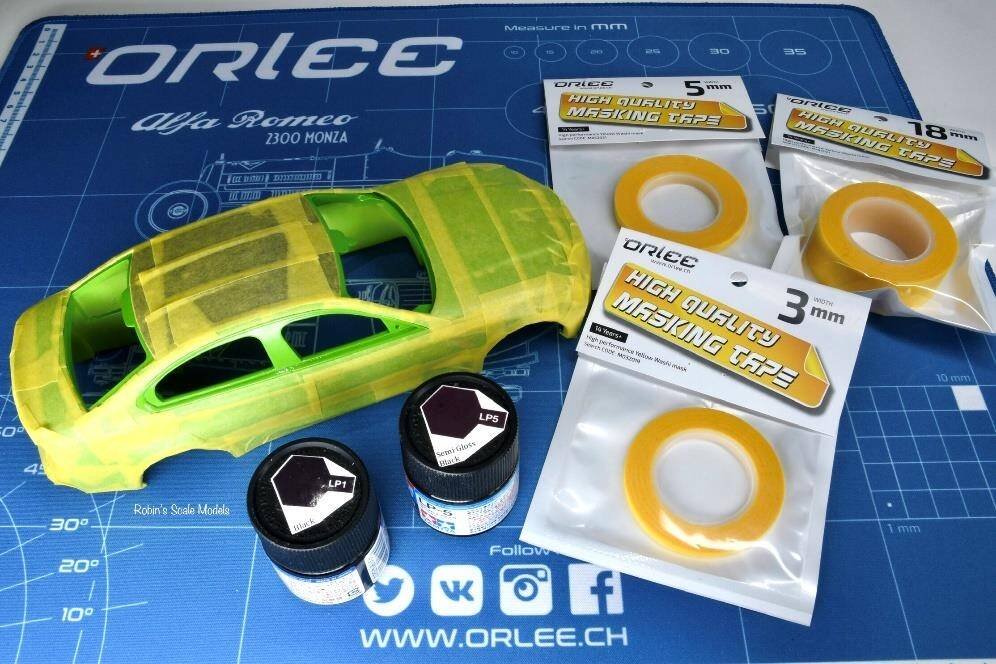
I then masked over the roof area. I used my new favourite masking tape from Orlee for this. The Orlee masking tape holds great and peels off so much better than Tamiya tape, with no paint coming away. Previously I would have used Tamiya masking tape and detacked it first. I didn't detack the Orlee tape. Obviously you need to peel back carefully. If you would like to try Orlee masking tape, it is available directly from the Orlee website page you can see in the picture. Luigi has set up a 10% discount code for followers of my modelling page. Simply enter code rsmorlee10 at checkout time.
Priming the Bodywork
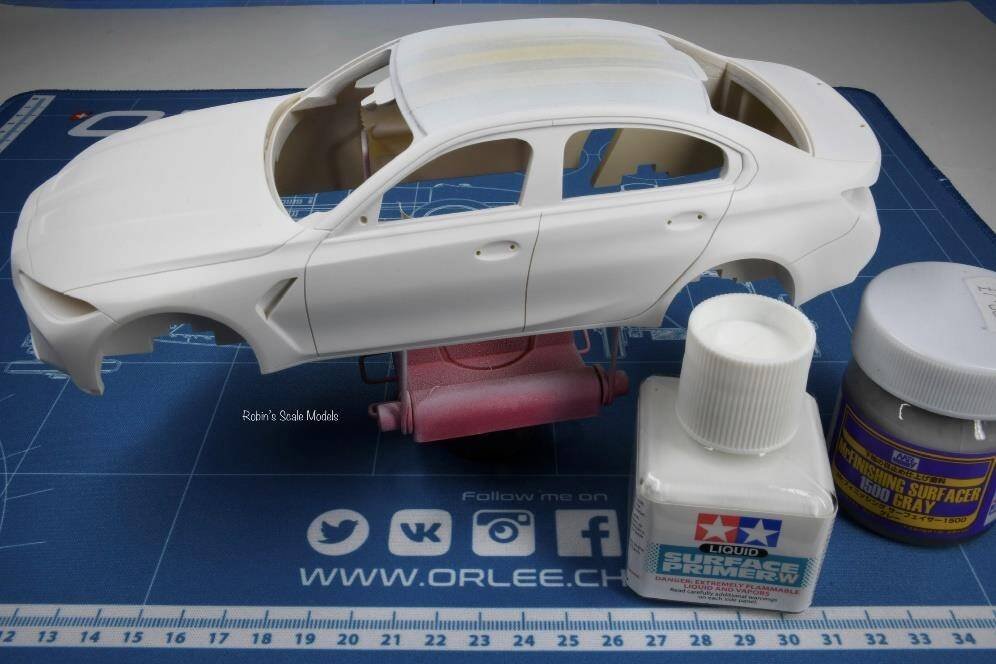
As my test spoon painting was done on a white spoon and the Alpha Model resin is a creamy yellowish colour, I first primed the bodywork and the door handles using Tamiya's White Surface Primer diluted 40% primer to 60% Mr Hobby Self Levelling Thinner. Next up I sprayed Mr Finishing Surfacer Grey using the same dilution. Had I not used white first the grey base would likely have been darker.
Applying the Verde Mantis Paint
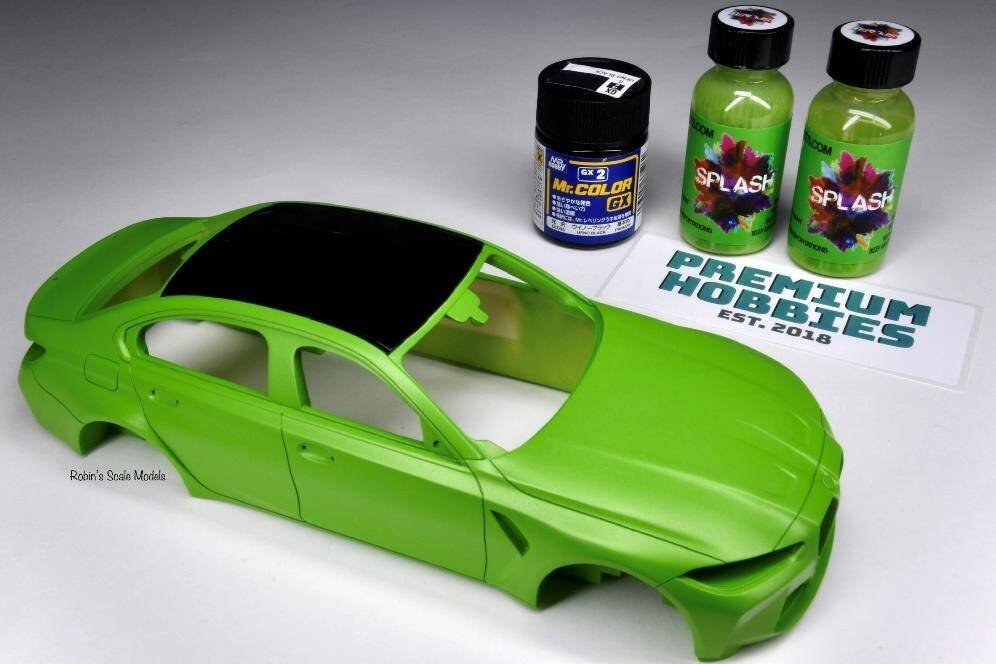
Next I used the Splash Paints paint set provided to me by Ed Sutton from Premium Hobbies. I sprayed three light coats of the base green followed by three light coats of the pearlescent green, with around half an hour or so between coats.
Here is the end result after removing the Orlee masking tape from the roof, all ready for a 2K clearcoat once I have applied carbon fibre decal to the roof.
Next: Carbon Fibre Roof Decal
Advanced Creators
BMW M3 (G80) Competition Build Guide — Part 5: Carbon Fibre Roof Decal
Alpha Model AM02-0035 · Build by Robin Witt
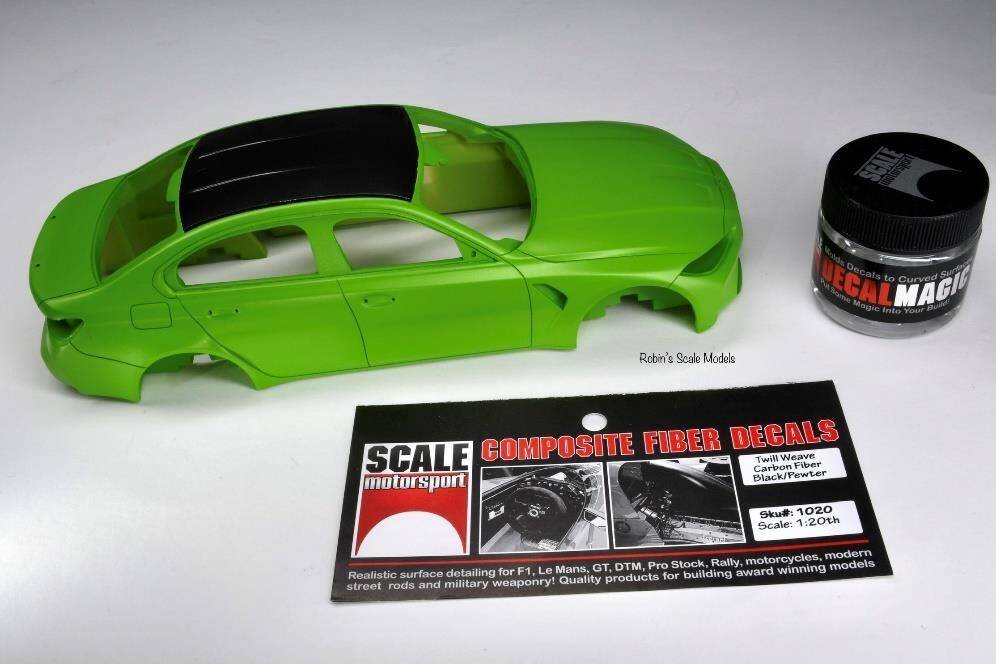
Choosing the Carbon Decal
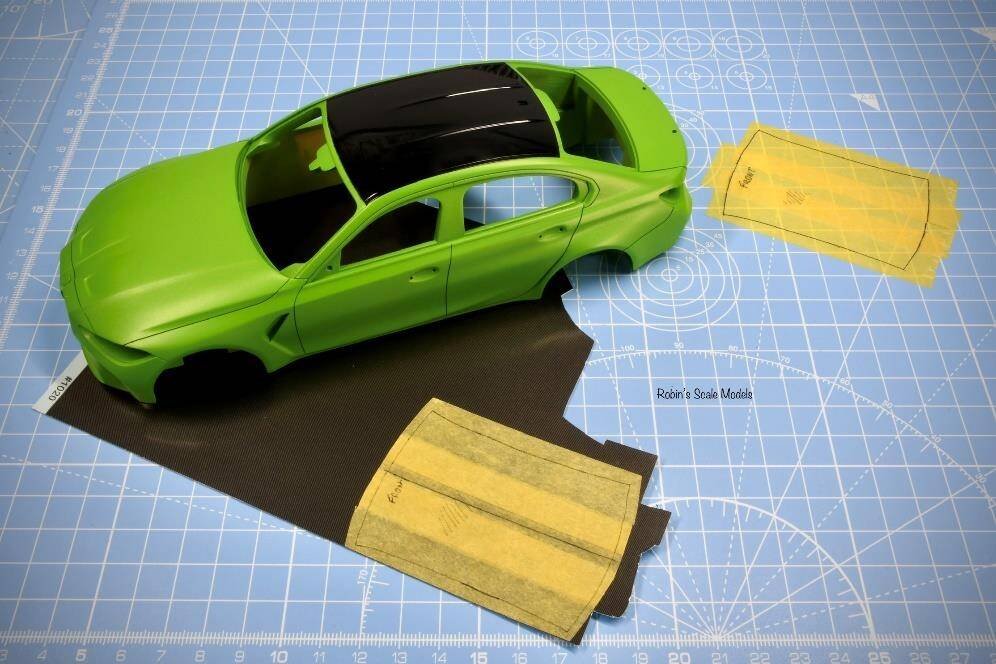
Alpha Model provide a carbon decal for the roof. Given the possible complexity of the two aerofoils towards the back of the roof, I chose however to use ScaleMotorsport carbon decal as I know exactly how it works. Here you can see (top right) the template I made using Orlee masking tape. I created a duplicate template in case of problems.
Cutting & Applying the Decal
I cut the decal with an overlap so that there was no risk of an area not being decalled. This needed careful edge cutting with a sharp blade once I was happy that the decal was sitting properly. I had previously ensured that I'd scribed lines around the carbon roof to help with guiding the blade.
Carbon decal cut and masking tape removed, ready for some nice warm (quite hot actually) water.
Setting the Decal
And there we have it, the completed job after half an hour or so working the decal with decal softening solution and blasts of hot air from a hairdryer.
Macro lense out for this photo. The decal conformed beautifully to the roof and is all ready for a 2K clearcoat.
Next: Clear Coat, Polishing & Black Trim
Advanced Creators
BMW M3 (G80) Competition Build Guide — Part 6: Clear Coat, Polishing & Black Trim
Alpha Model AM02-0035 · Build by Robin Witt
2K Clearcoat Application
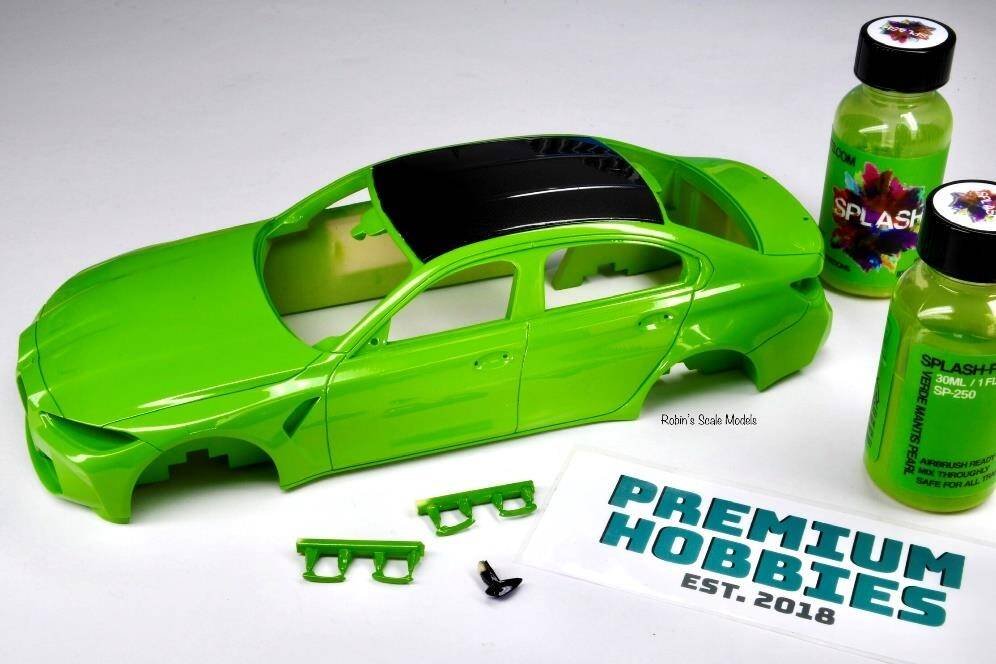
This picture was taken after the 2K clearcoat had been applied and left for around a week to fully cure. The Zero Paints Diamond Finish gloss clearcoat went down real nice but did need flattening back and polishing which was done next. Here you can see me dry fitting the resin body spoilers, side skirts and other fittings.
Flattening Back (Wet Sanding)
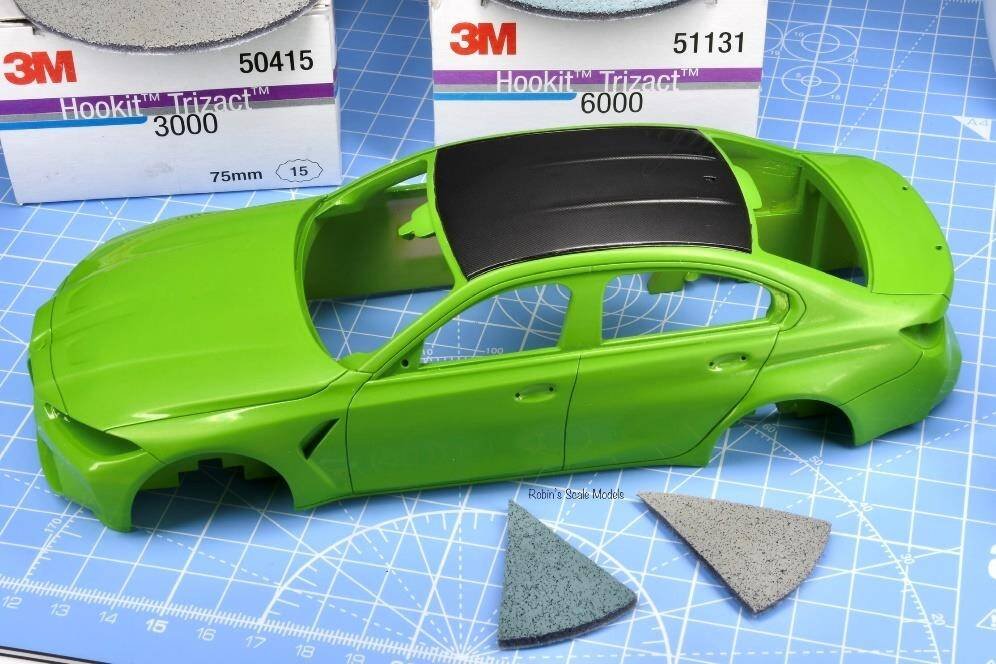
Flattening the 2K clearcoat removes all the high spots and orange peel in the air brushed clearcoat. The process is also called wet sanding. I tend to use 3M Trizact sponge and Micromesh fine abrasive cloth for this process, with copious amounts of water. This picture was taken after the flattening back process.
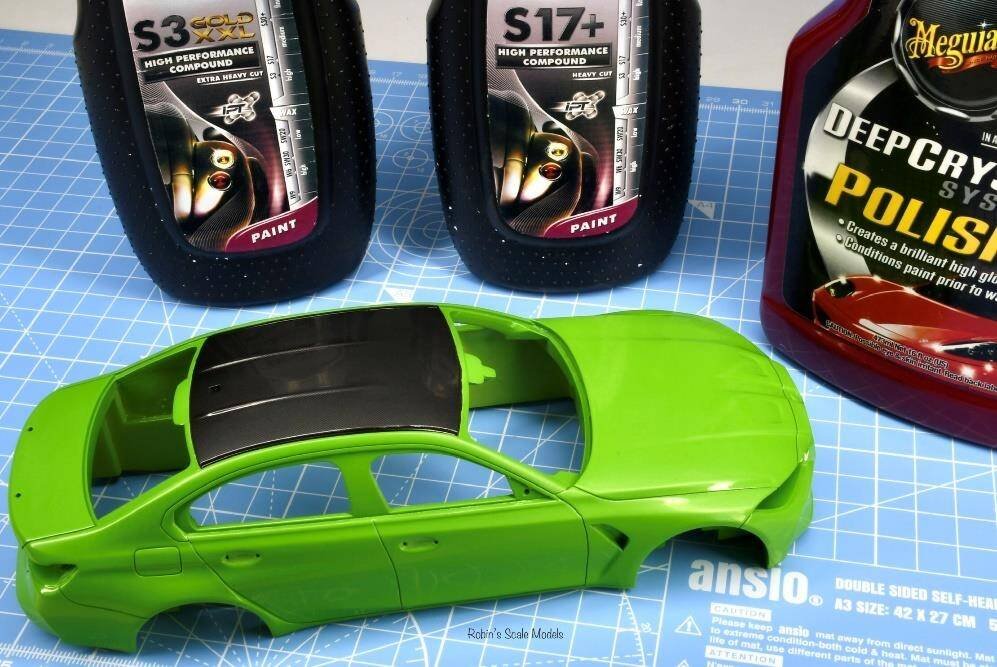
Three-Stage Polishing
The flattening back process will give your paint finish a flat look with no gloss. I get my shine back using a three stage polishing process.
Wow, that Verde Mantis Pearlescent pops with its 2K finish flattened and polished. The paint for this project was kindly sponsored by Premium Hobbies in the UK.
Black Trim & Panel Lines
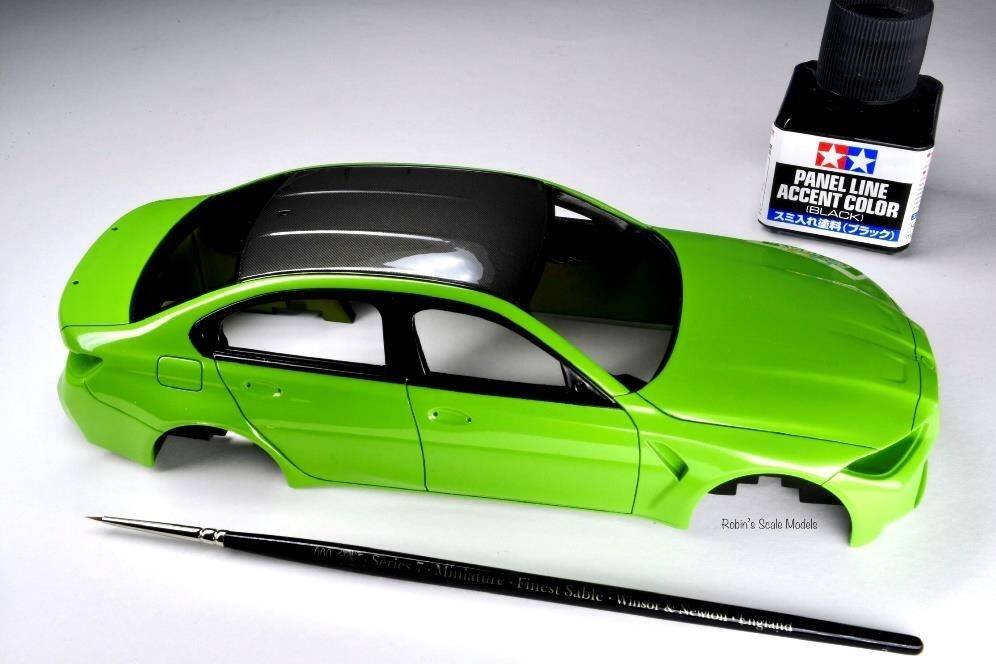
Now I needed to get the window surrounds and wheel arches black. At the same time, I sprayed the interior parts of the bodyshell that will be seen. Applying masking tape to my beautifully polished bodywork was a horrible thought, but a necessary job. Here I put my trust in my favorite masking tape which is produced by Orlee. This tape adheres really well and equally, it pulls off leaving no adhesive marks. It's also thinner than Tamiya masking tape so less potential for paint buildup.
After I had painted the required areas either semi-gloss black or gloss black according to my reference, I applied Tamiya Panel Line Accent Color to the door, bonnet and boot lines, and to the fuel filler cover. This makes these areas stand out as in the real car.
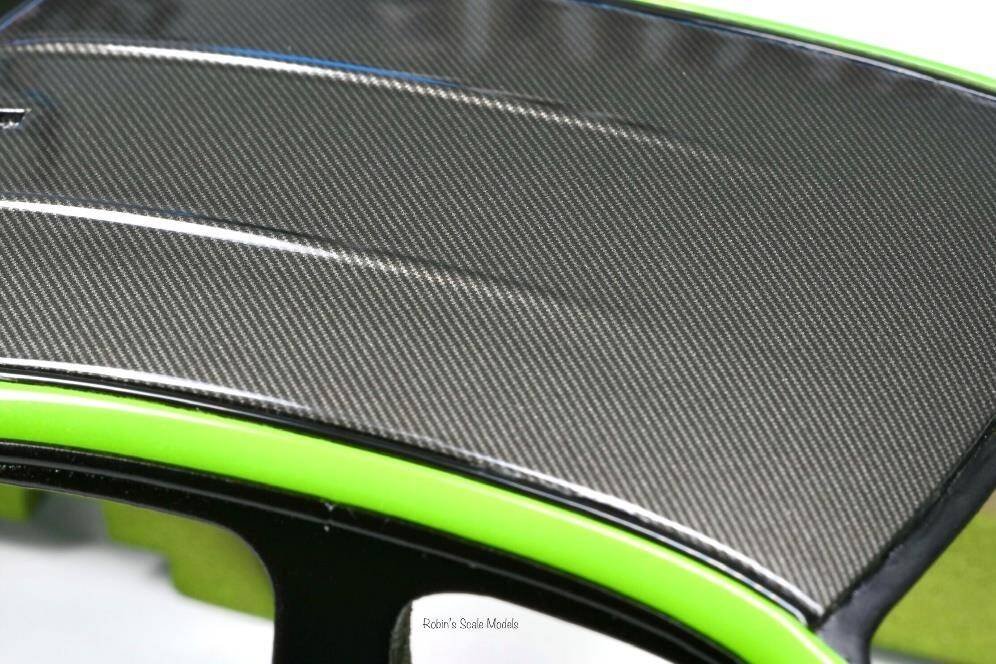
Here we have that beautiful carbon roof, complete with its 2K finish.
Next: Diamond Cut Wheels & Brakes
Advanced Creators
BMW M3 (G80) Competition Build Guide — Part 7: Diamond Cut Wheels & Brakes
Alpha Model AM02-0035 · Build by Robin Witt
Wheels Overview
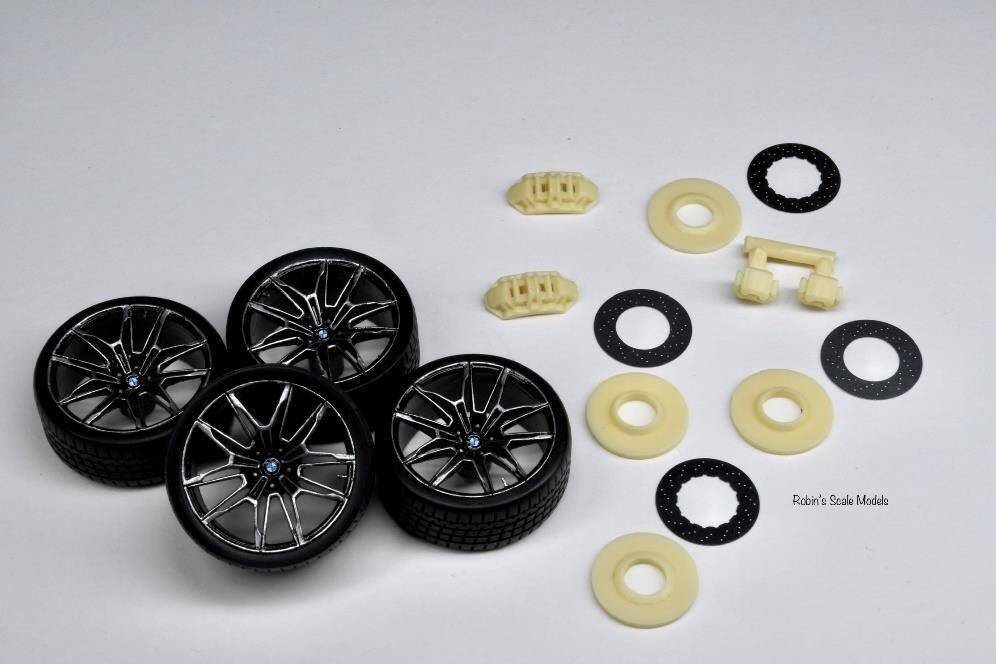
Alpha Model provide really nice resin wheels to represent the BMW Competition alloys. This model will depict the diamond cut finished alloy which is a first for me, so a new challenge. I'm also enhancing the wheels further by adding aftermarket turned metal hex wheel nuts and air valves. In the picture below you can see the before and after transformation. I'll now show you how I did it.
Preparing the Wheels
Having the right tools for the job is key. I'll explain more about the tools I used against each WIP picture.
On the right you can see the resin wheel once the resin moulded wheel nuts have been removed and the necessary holes have been drilled for the aftermarket wheel nuts. There is also a hole drilled (three o'clock in the photo) for the air valve.
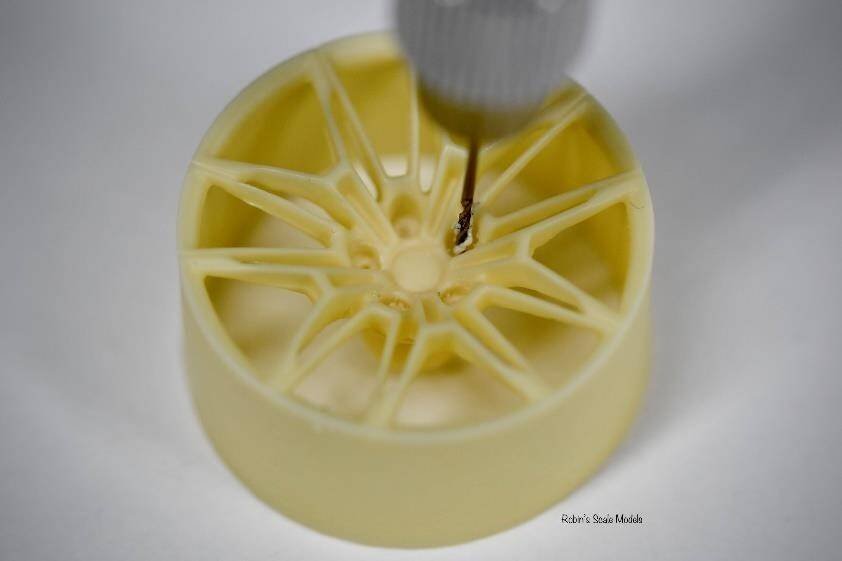
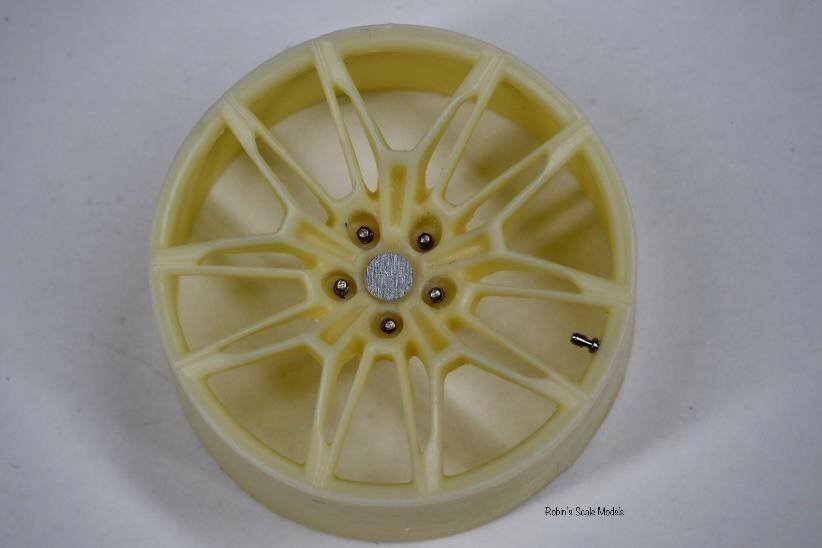
First off I removed the resin moulded wheel nuts with a PCB end mill drill bit. After that I used my Hasegawa TryTool 1mm flat blade chisel to tidy up and give me a nice flat surface at the bottom.
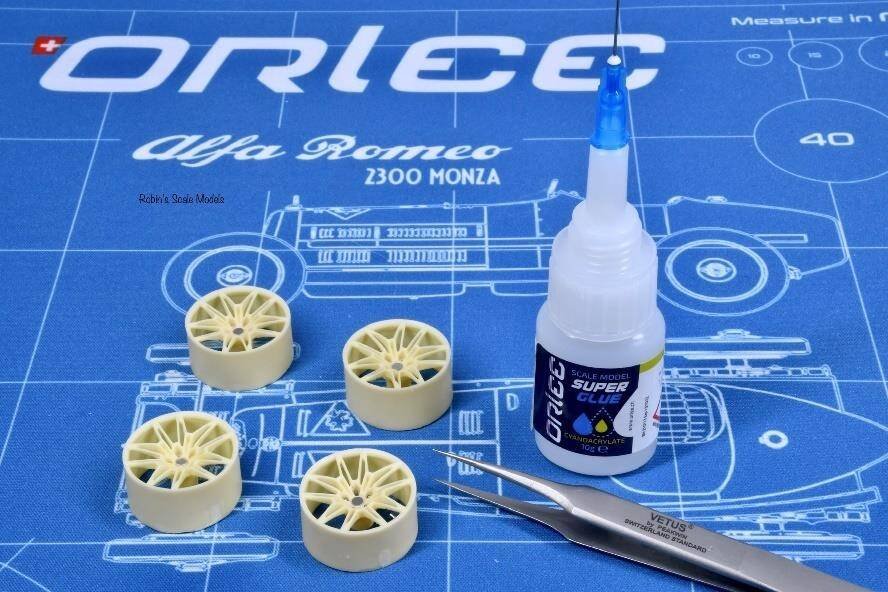
Next I marked the hole centres and used my Hasegawa TryTool scriber to give me a centre point for the drill bit.
First drill out with a 0.4 mm PCB drill bit.
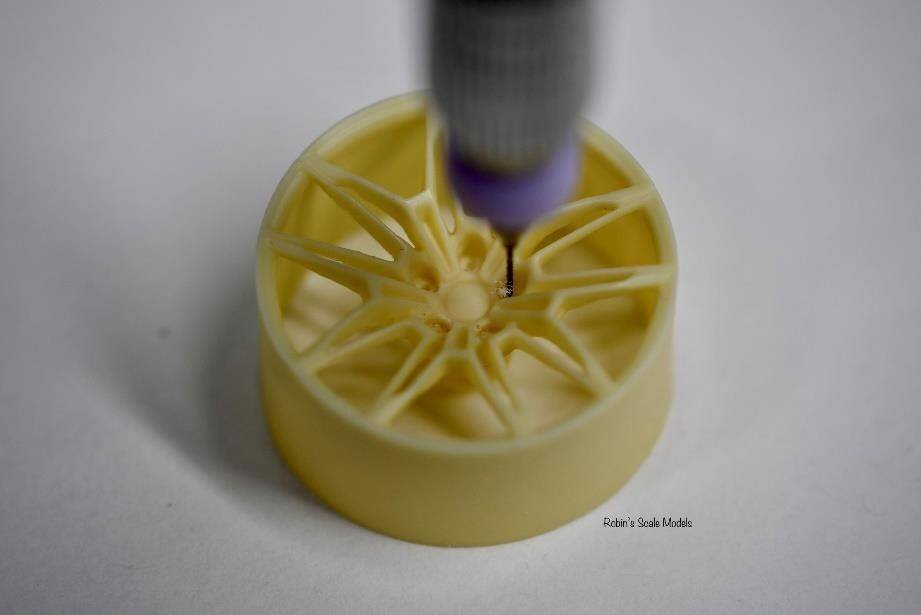
Then move to the appropriate drill size for the wheel nuts being used. I used a 0.5 mm drill bit in this instance.
Centre Hub Etch & Detailing
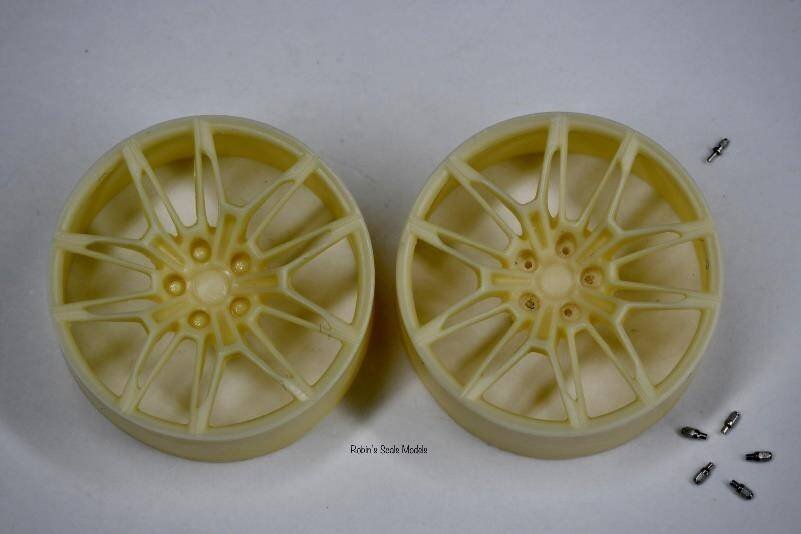
A macro shot of the resin, etch and turned metal items. The centre hub etch piece comes with the Alpha Model kit. This gives a flat surface later to add the BMW wheel decal.
The centre hub etch discs have been secured with Orlee Super Glue. This was my first time using this product and it's excellent. The precision tip is a great idea. I have ordered more. Also, the screw bottle top comes within a pin in it to prevent the super glue blocking the nozzle.
Painting the Diamond Cut Finish
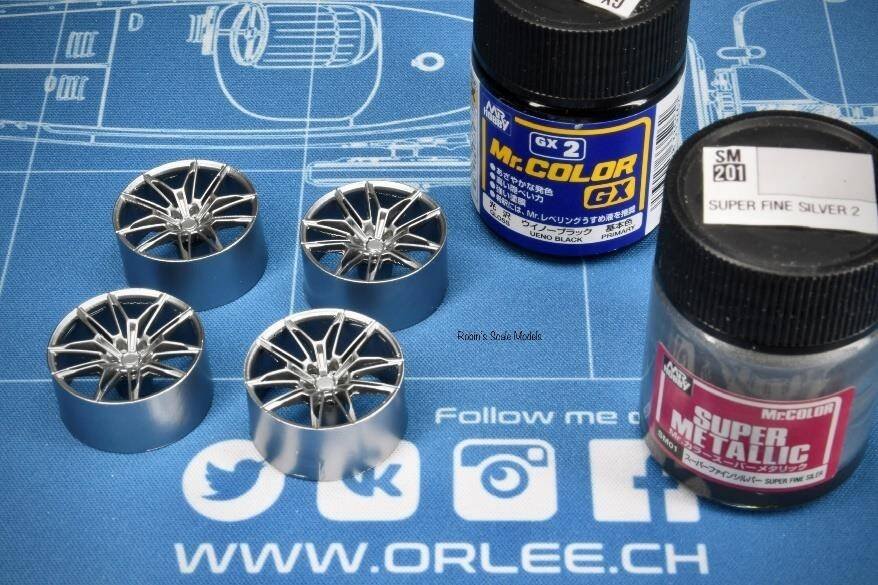
Next I gave the wheels a coat of Mr Color GX2, my new favourite gloss black, ready for aluminium paint after that.
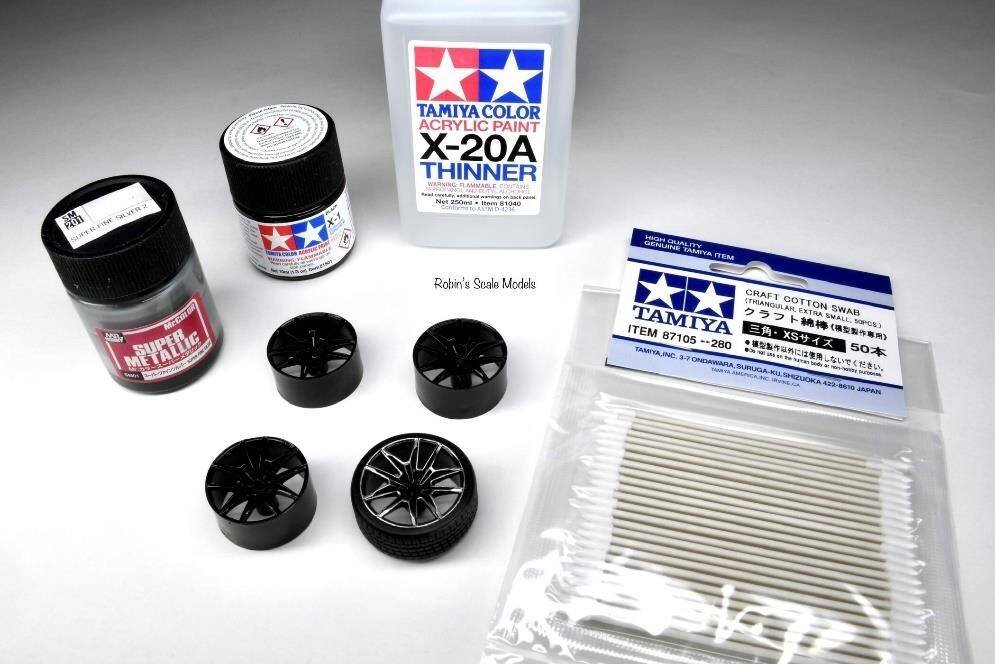
After gloss black I used Mr Color Super Metallic Super Fine Silver to represent the aluminium part of the diamond cut wheels.
The wheels were going to represent gloss black diamond cut alloys. First I used a pure lacquer based metallic to represent the wheel alloy. I left that to cure and then sprayed with Tamiya X1 Gloss Black acrylic. The order of painting is important as the lacquer paint is stronger than the acrylic. Finally (and it took ages) I used extra small Tamiya cotton buds dipped in Tamiya X20A thinner and carefully rubbed over the areas where I wanted the diamond cut to show, leaving the rest of the wheel gloss black.
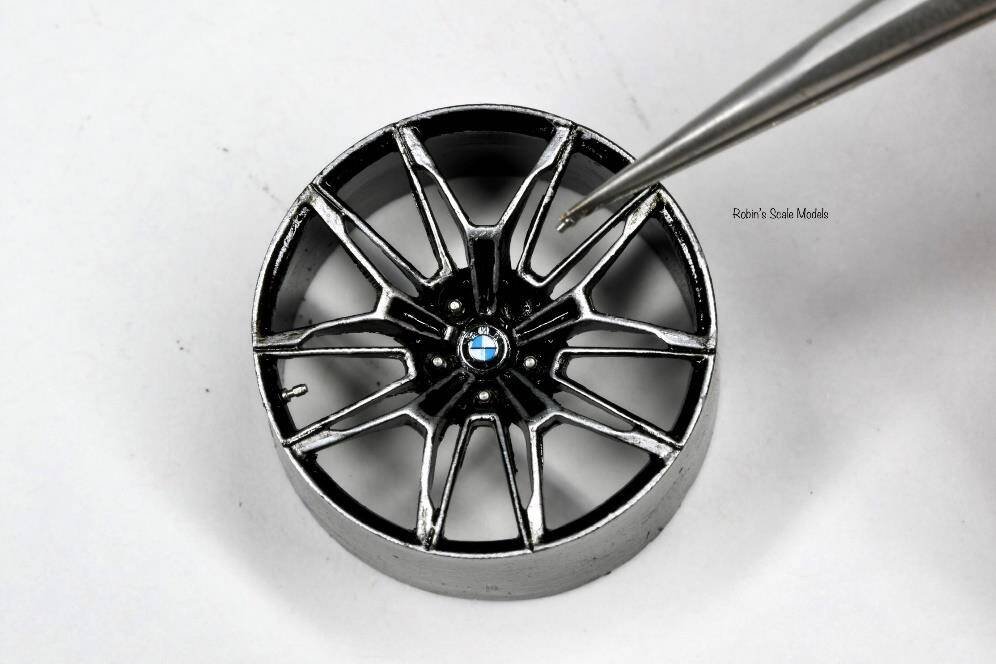
Completed gloss black diamond cut wheels with the BMW metal centre hub decals provided by Alpha Model. They are really nice decals.
Installing Turned Metal Details
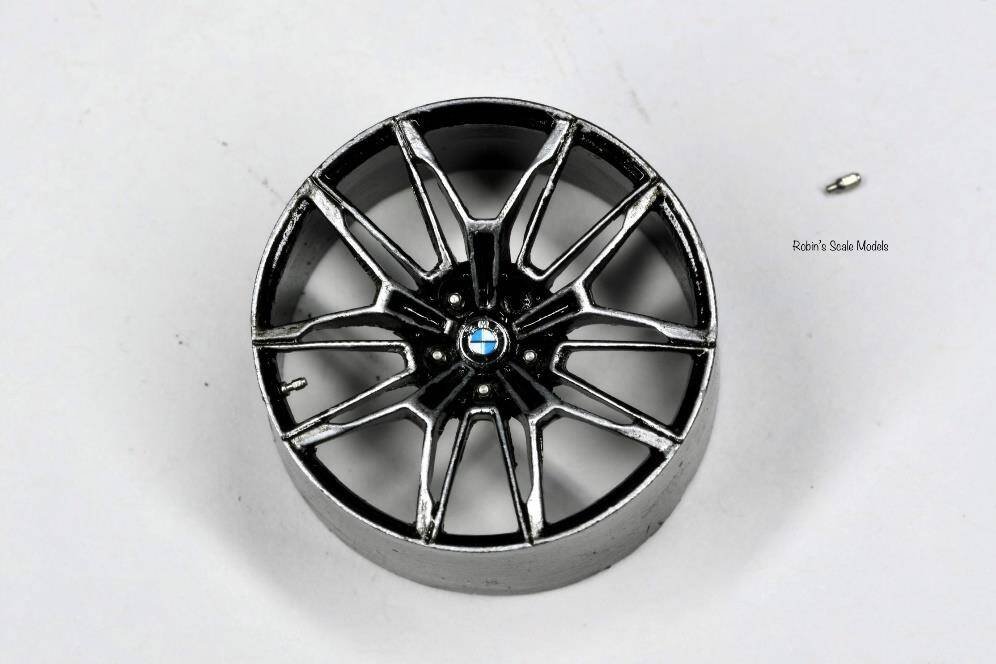
I used Orlee's super glue to secure the turned metal hex nuts and air valves in the holes that I had prepared previously. My Orlee glue came with some really nice applicators for precision glue work.
Macro lense out for this picture. One wheel nearly complete… just one more hex nut to install.
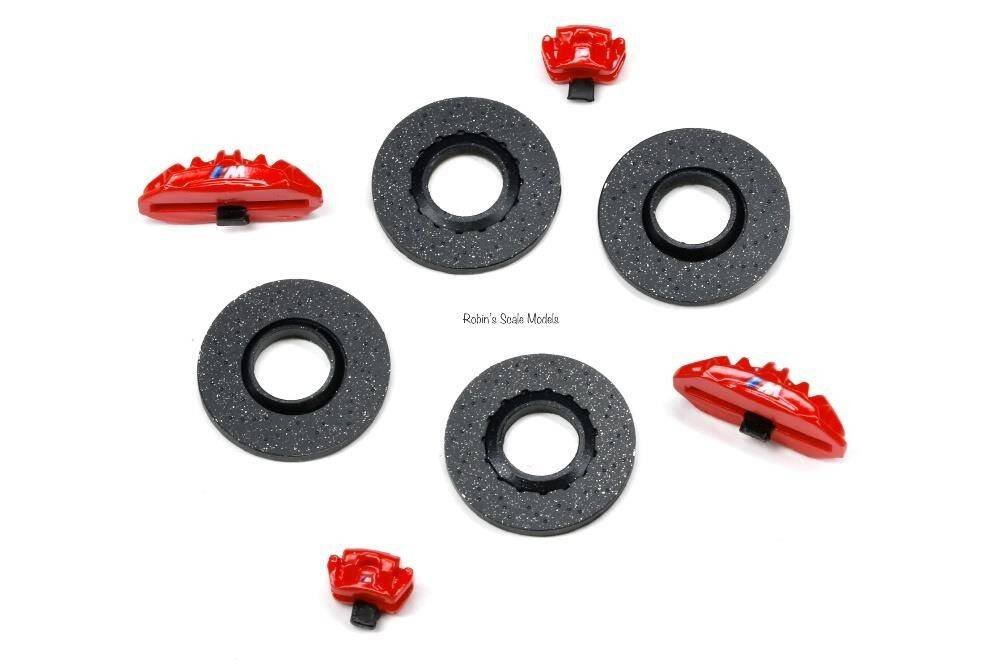
Last hex nut… going in.
Completed Wheels
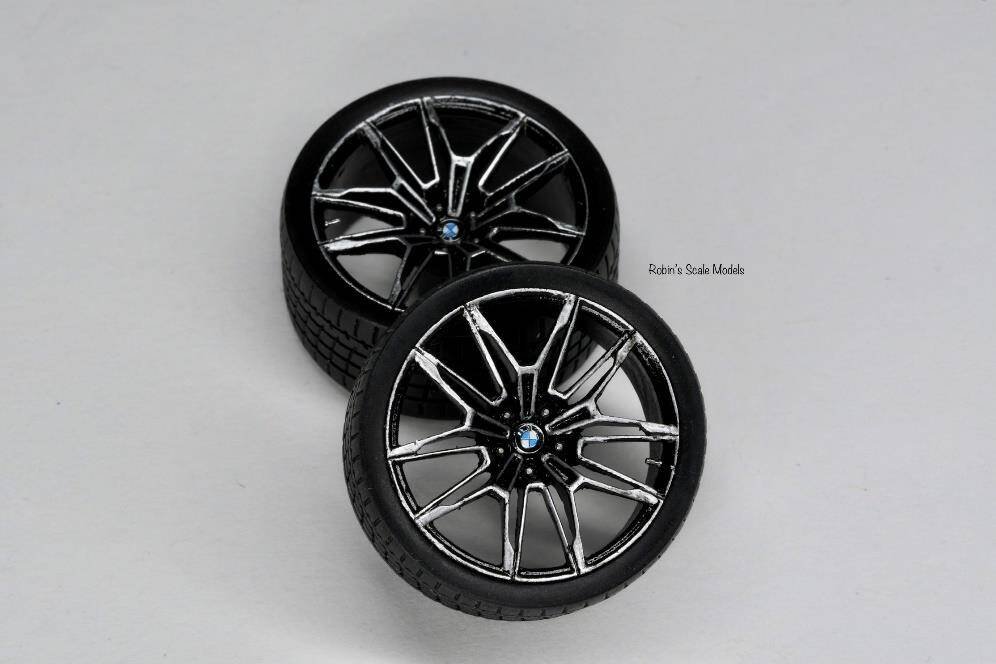
And there you have it… completed gloss black diamond cut finished wheels for my BMW G80 M3 Competition.
Brake Discs & Callipers
Next up is the brake discs and callipers. Alpha Model provide the resin and etch for some nicely detailed brake assemblies.
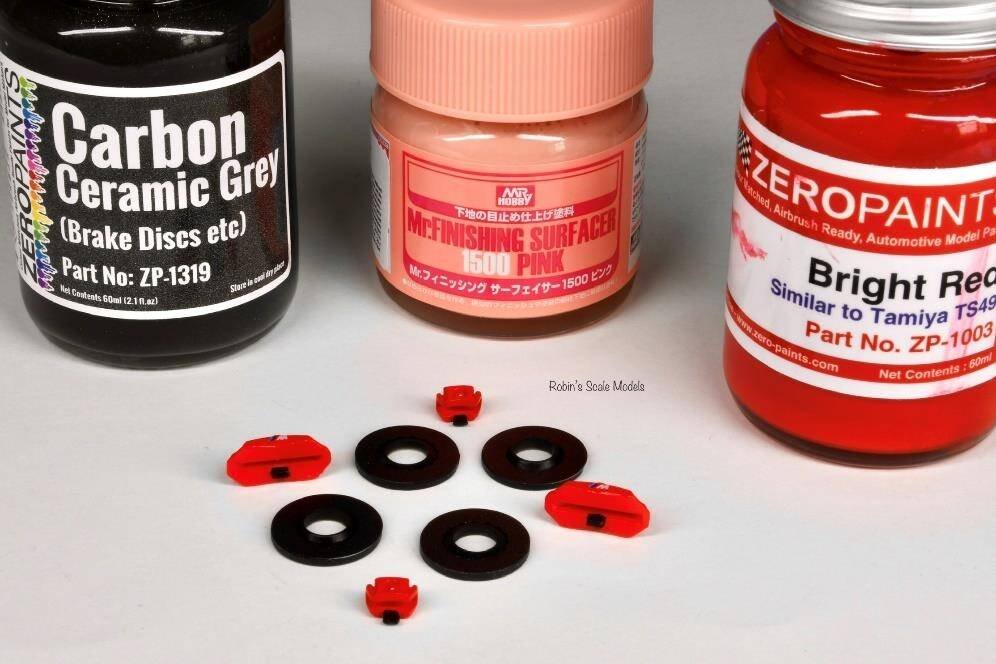
After pondering for a while between bright yellow or red for the M3 callipers, I decided that red would stand out better behind my gloss black diamond cut alloys. I opted for Zero Paint Bright Red over a pink base which gave me brilliant rich red callipers. For the ceramic disc brakes I used Zero Paint Carbon Ceramic Grey.
Alpha Model provide really nice M Sport decals for the callipers. Macro lense picture here of the completed parts, all ready for assembly.
Next: Interior, Final Assembly & Completed Photos
Advanced Creators
BMW M3 (G80) Competition Build Guide — Part 8: Interior, Final Assembly & Completed Photos
Alpha Model AM02-0035 · Build by Robin Witt
Interior Parts Preparation
Moving to the interior, here are the parts ready for a small amount of tidy up.
I needed a good separation line to denote the rear of the driver and passenger seat so I followed the resin mold lines and used my scribers to open up a good line that would look more representative of the real thing and also give me a line that I could mask to for painting.
Flocking the Carpet Areas
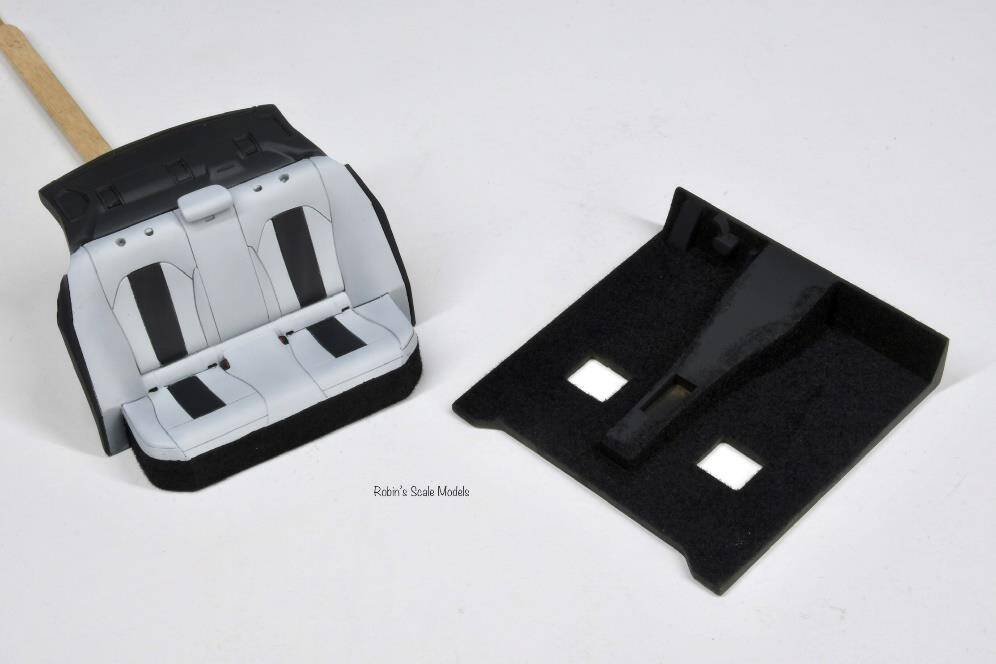
I'll give you my process here for flocking of the carpet areas. The carpet area and the base of the rear seats needed flocking. I use a matt black enamel paint and a black flocking powder. The grey leading edge around the rear seat has been masked to prevent any black paint straying to areas that I didn't want it.
Firstly I use a flat brush and paint the required area with enamel matt black. The enamel paint will stay wet and sticky for a while and will act as a glue for the flocking powder. I then dust on the black flocking powder using a small sieve. Here you can see the flocking powder dusted on. I then simply knock off the extra "spilled over" flocking powder.
Here you can see the end result, with the carpet areas complete using black flocking powder.
Painting the Interior
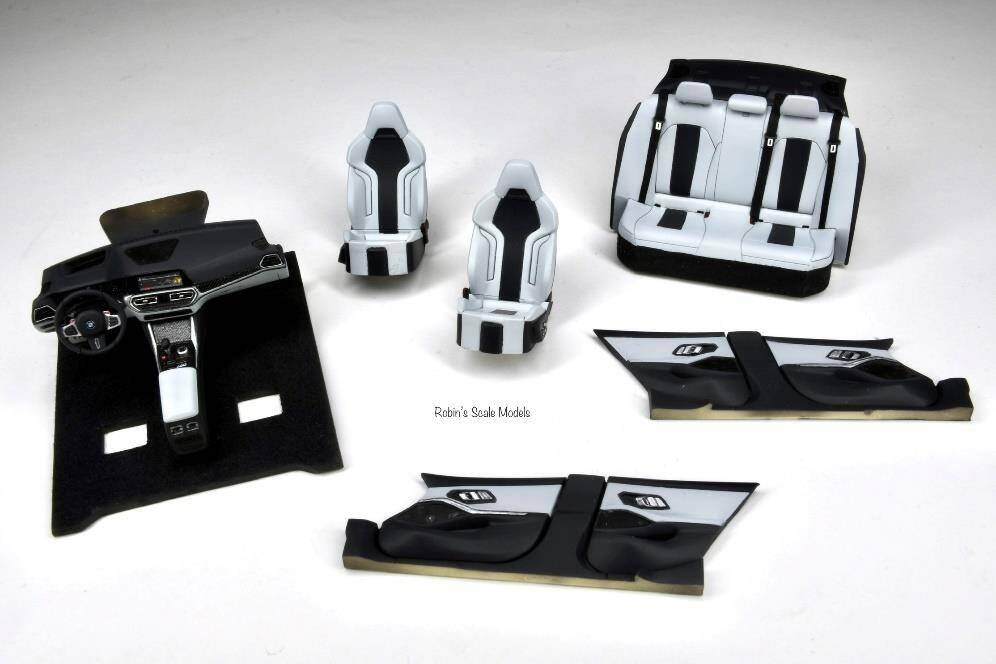
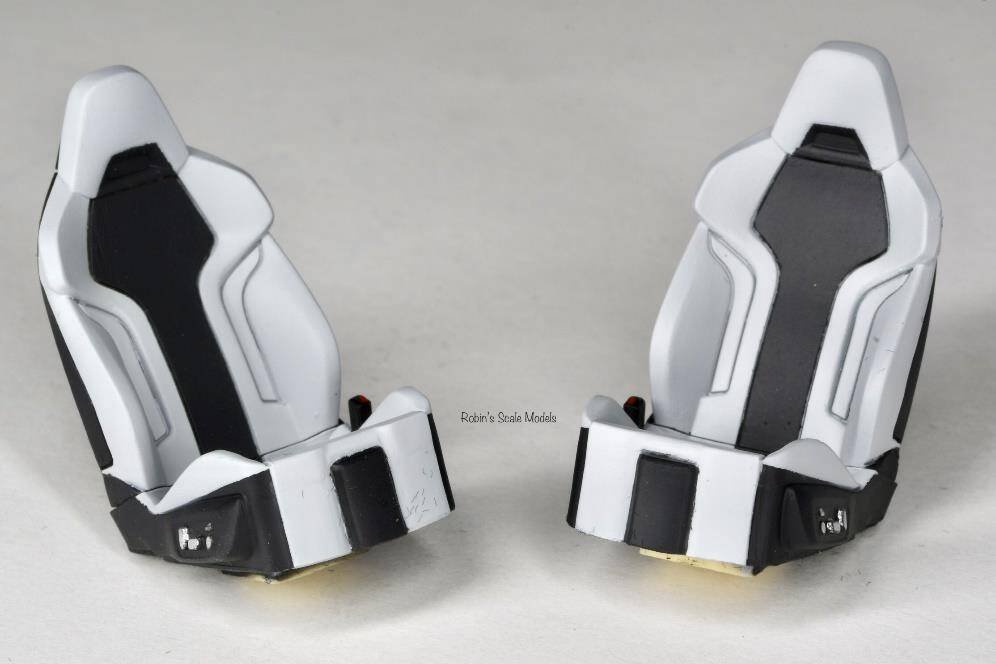
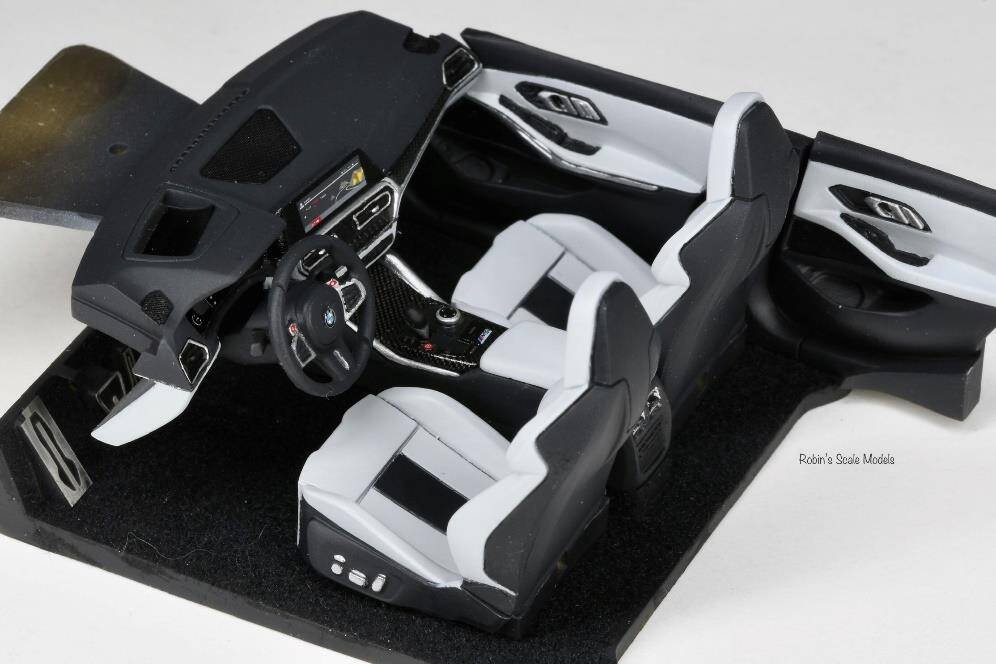
And now we have the completed interior. I wanted a light colour scheme inside the car so I replicated a grey/black scheme that I saw on the wonderful www of reference material. I used my go to colour for leather black which is Tamiya's LP-65 Rubber Black. The grey that I used was Mr Color 338 Light Grey. I then followed up with my usual trick of using Mr Color GX114 Flat Clear thinned with self levelling thinners to give a really nice semi matt leather sheen.
For the seats, I initially air brushed black across the whole seat area. I then masked the black and went on to spray grey. Doing this has left the "crease" areas of the leather seats nice and dark. The black panel around the electric seat buttons was painted semi gloss black, as was the seat belt catch. The button on the seat belt catch was painted gloss red. I used gloss aluminium to hand paint the electric seat switches.
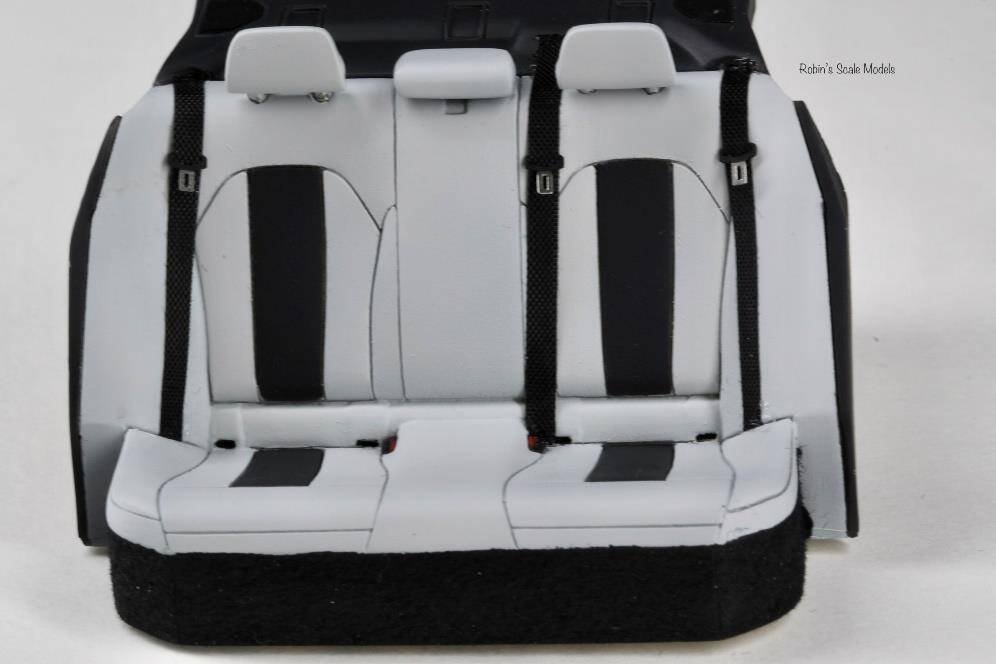
The same painting process was carried out for the rear seats. Highlights wise I hand detail painted the black isofix catches, the seat belt catches and the uprights for the head restraints. I used the etch seatbelt fixings provided by Alpha Model and air brushed the top area semi gloss black. I cut black material to 2mm for the belts.
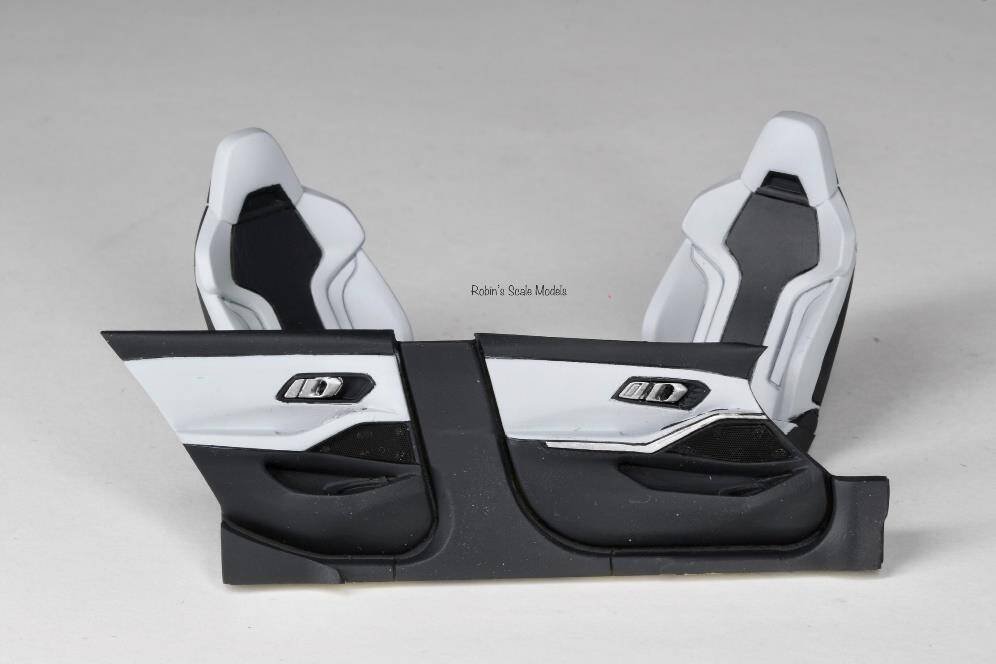
Just sharing the door cards here as well.
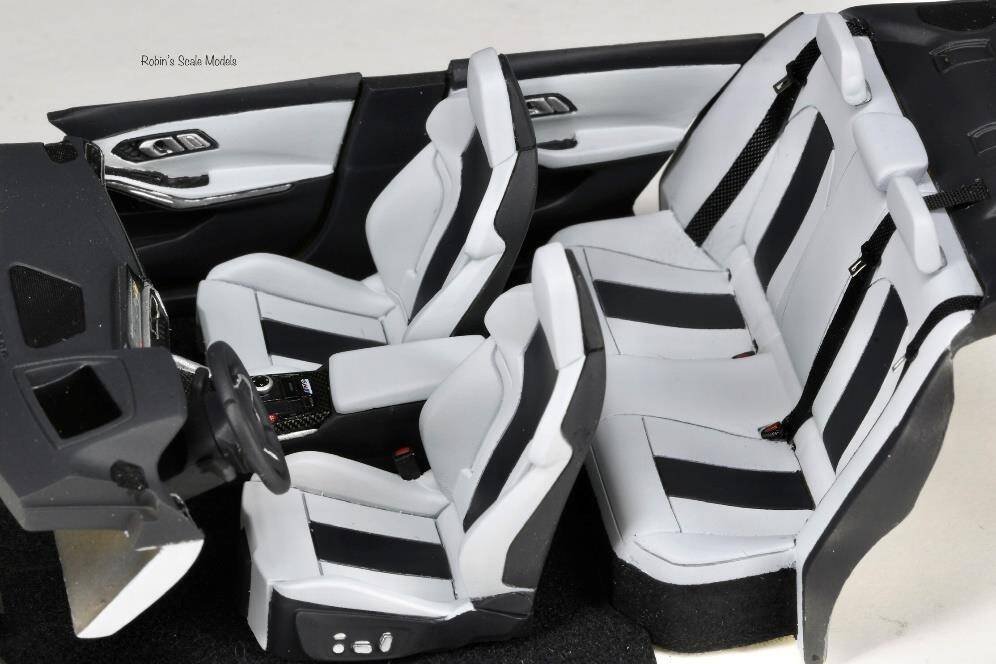
I'll leave you with some mock ups of the completed interior.
Exterior Accessories
Moving back to the exterior for now, here are all the spoilers, air deflectors and other gloss black items for the body. These were painted gloss black and then given a 2K gloss clearcoat.
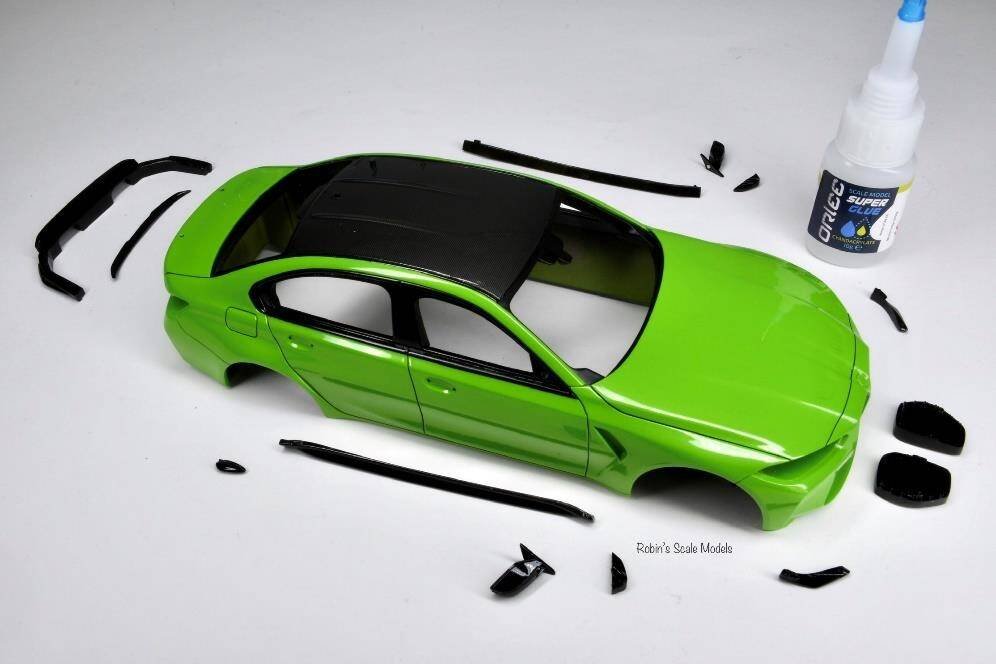
Gloss black "accessories" added. I couldn't resist sharing the wheels and brake assemblies in this picture.
Interior Installation Sequence
When installing the interior there is a definite sequence to follow. Firstly install the dashboard assembly and the rear seats. At this stage DO NOT include the interior floor base and seats.
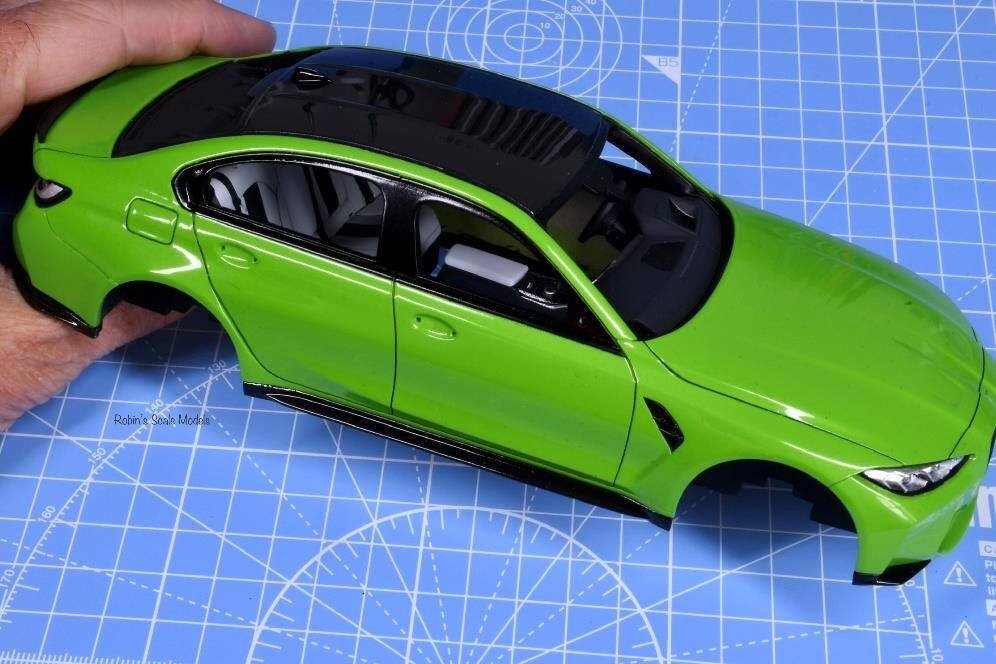
Here you can see the rear seats installed along with the dashboard assembly.
Next you can slide the door cards in place. After sliding them in place and checking position I added some super glue in a couple of places to ensure the door cards would not move.
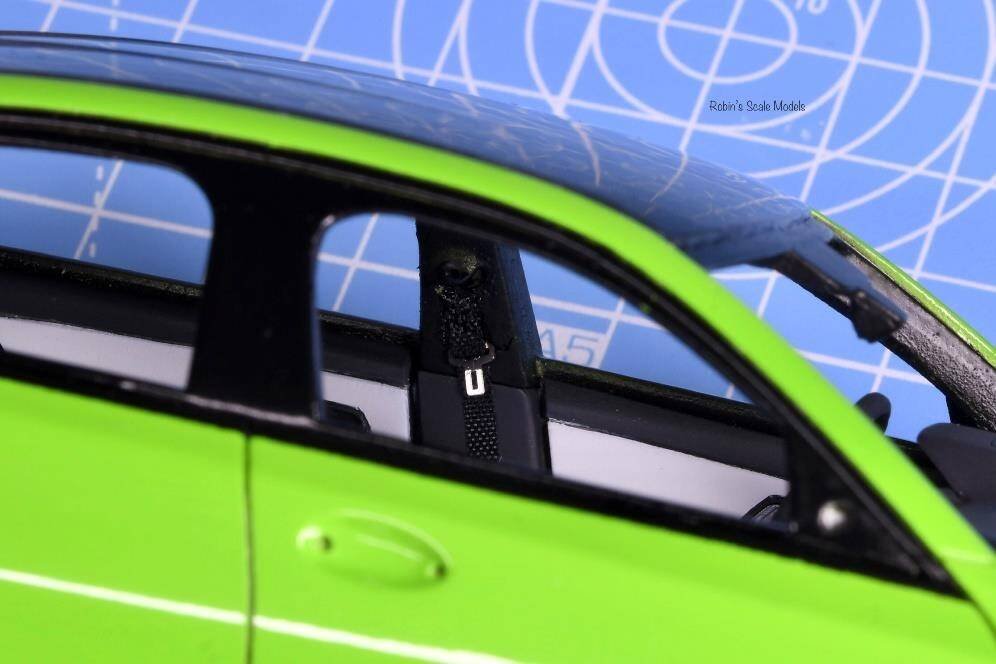
With the door cards now in place you can carefully add the driver and passenger seat belts. The fixing points for these are inside the body shell.
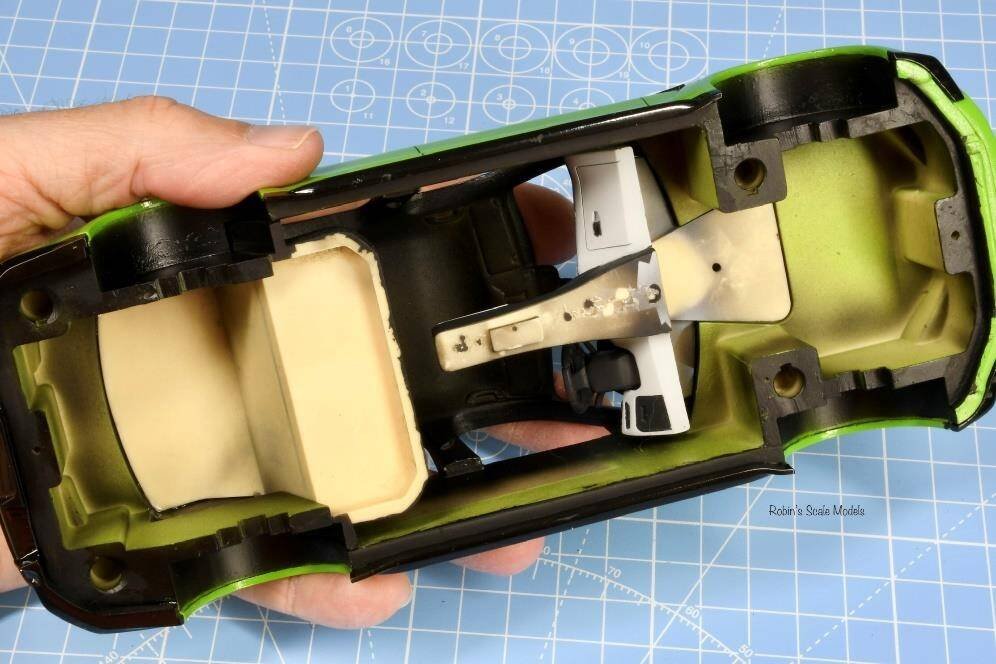
With the door cards and front seat belts in place, you are ready to add the floor base with seats already glued in place.
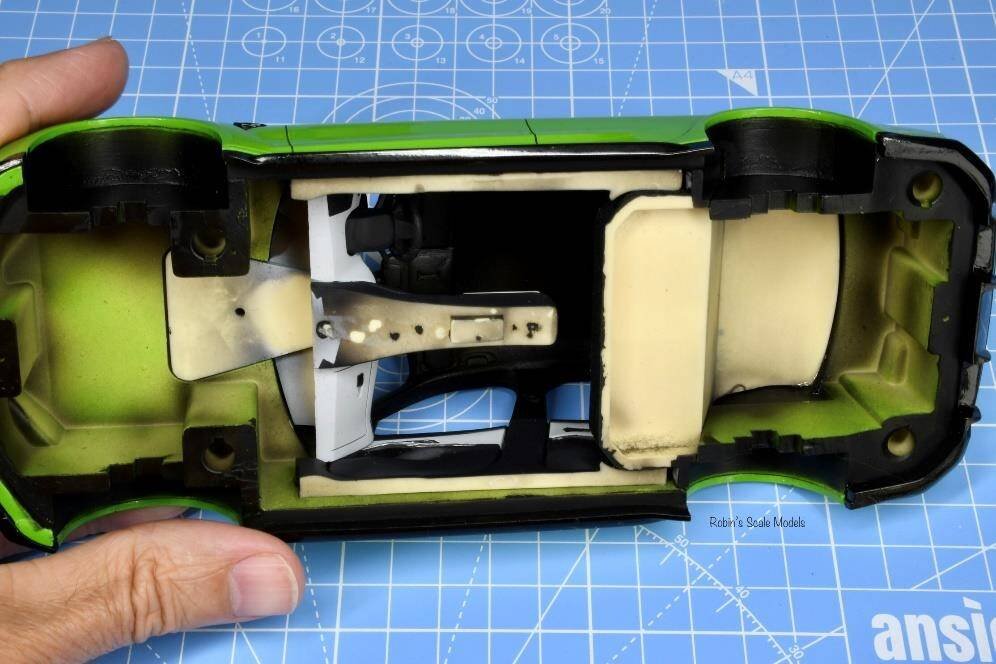
Here you have the completed interior. It's all very easy to get in, as long as you follow the correct build sequence.
Final Assembly
At this stage I installed the base of the car. Alpha Model provide screws to hold the base. I prefer to secure the base to the body with super glue as I don't like the screws showing, and I do not intend to ever remove the floor of the model.
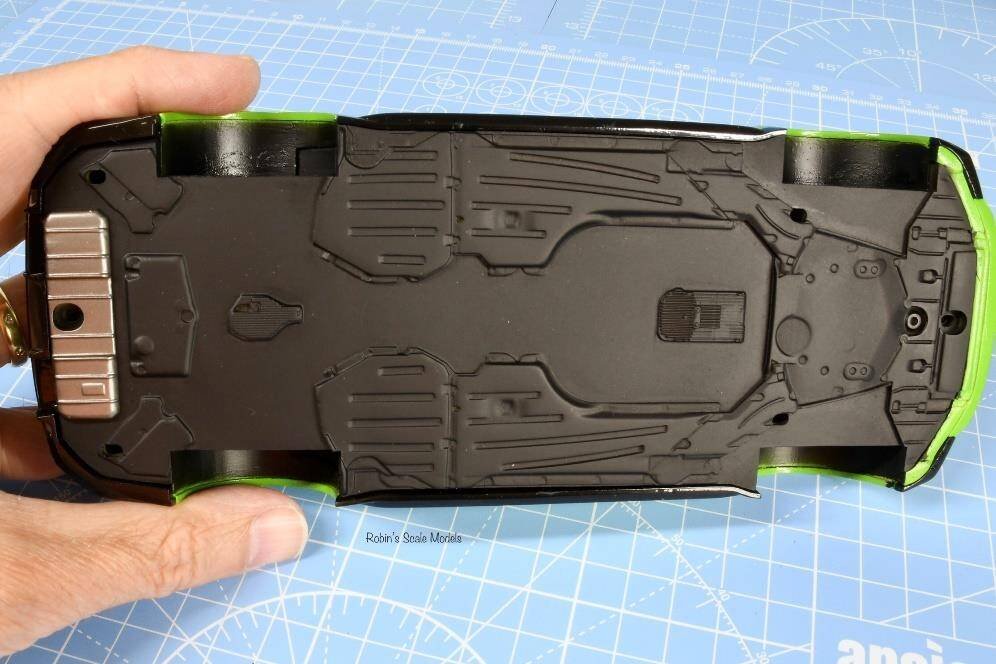
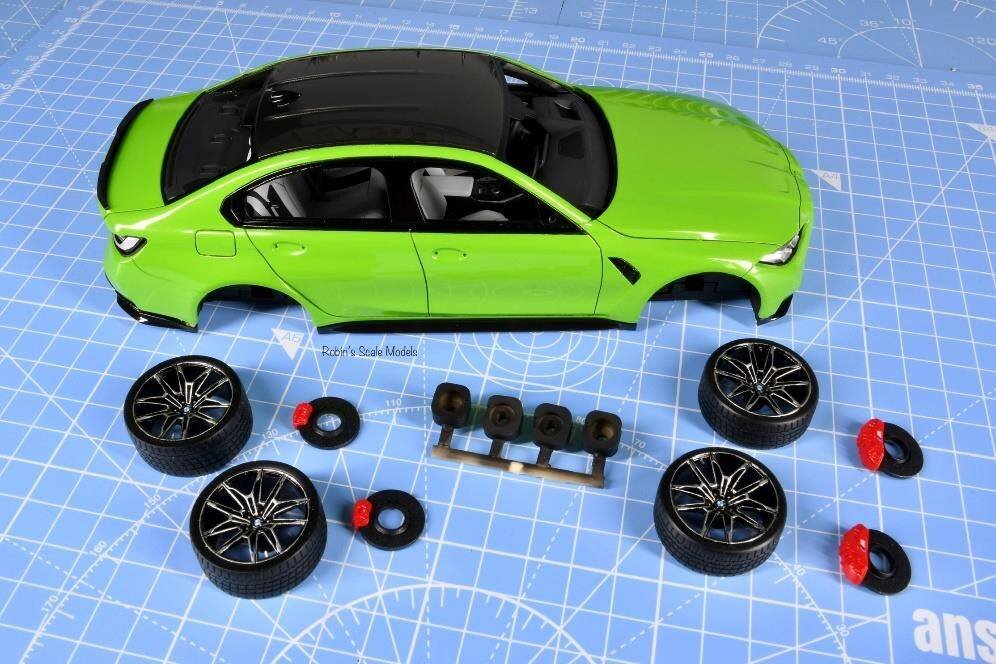
Ready to add the wheel assemblies. The brilliant red brake callipers will look stunning next to the bright green bodywork.
Wheels are installed and the car is very close to completion.
Headlamp lenses added. I painted around the edges, to replicate rubber, using a black Edding 751 acrylic paint marker.
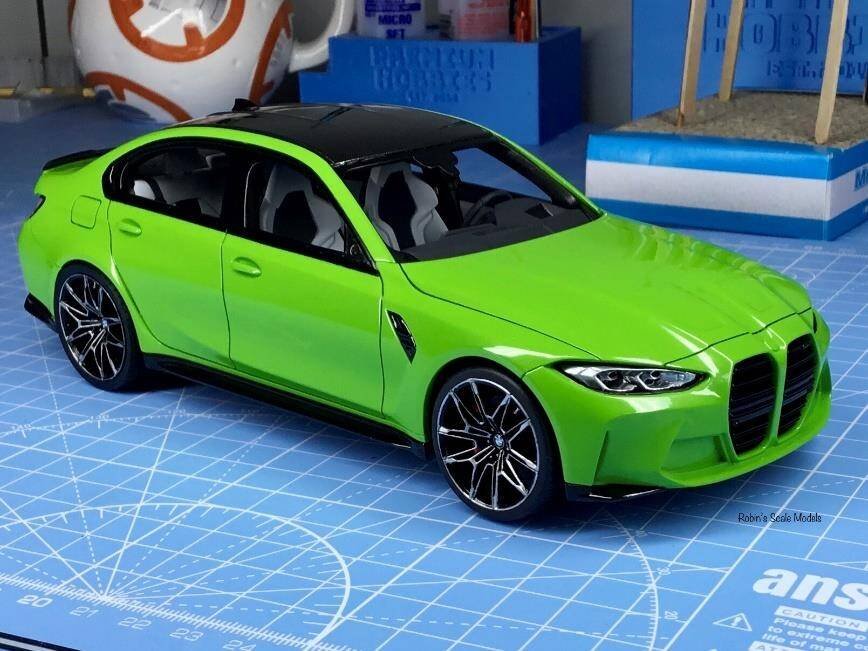
Tail light lenses now. These were masked to leave the reversing light area clear, and then painted with clear red for the remainder. Again, the black rubber was replicated using the Edding 751 black acrylic paint marker.
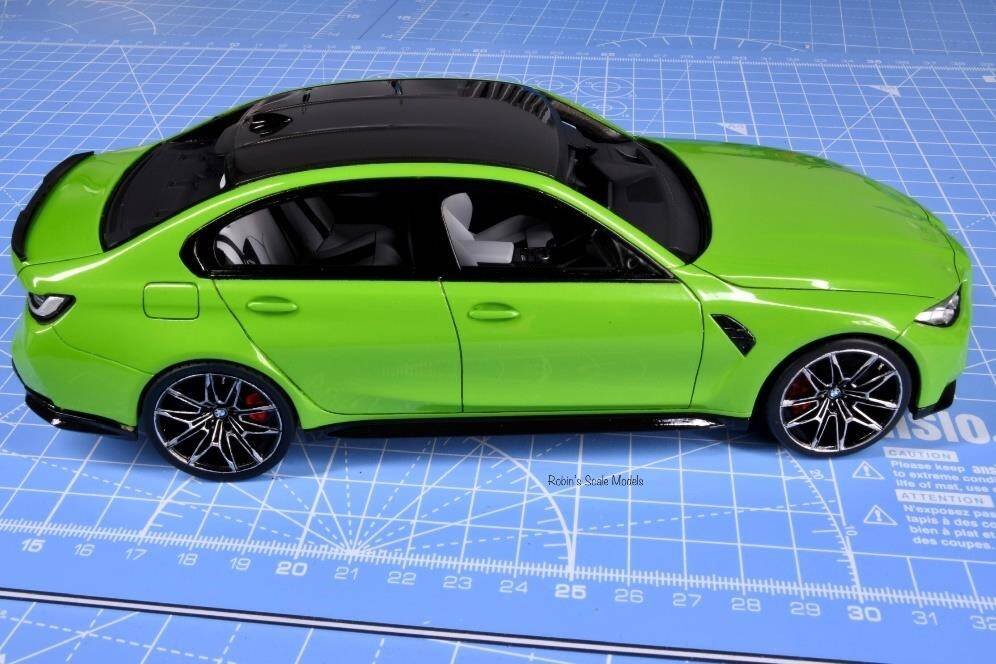
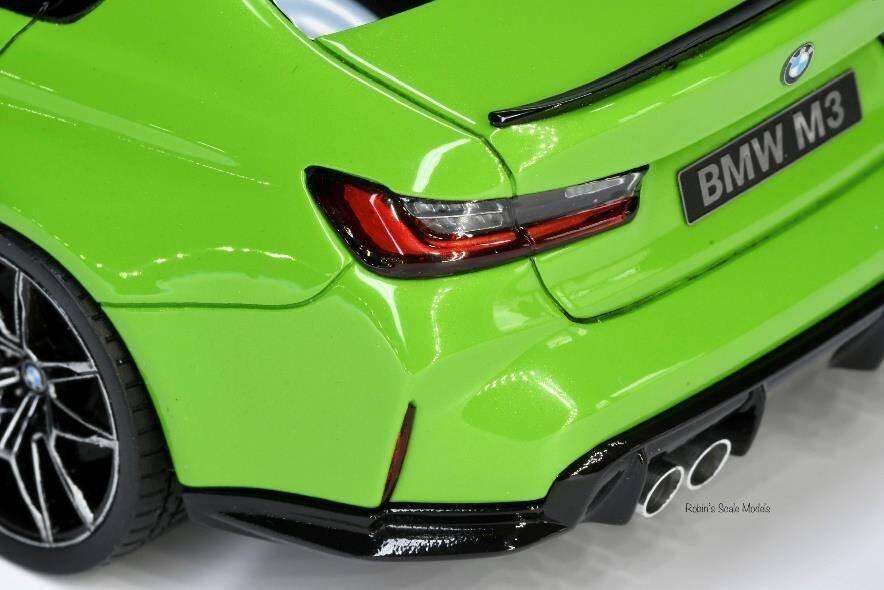
You'll see the rear lower reflectors here too, along with the turned metal exhaust tail pipes and the rear registration plate.
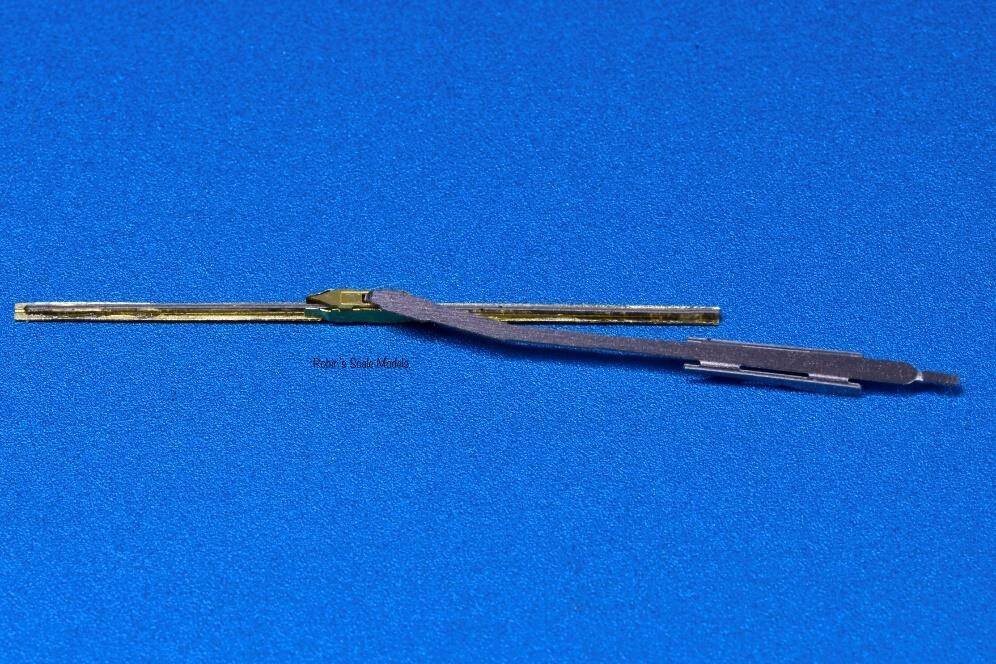
Final stages… adding the wipers for the windscreen.
One of the wipers assembled and ready for black paint.
Completed Photos Gallery
Completed Photos Gallery… BMW M3 Competition built by Robin Witt.
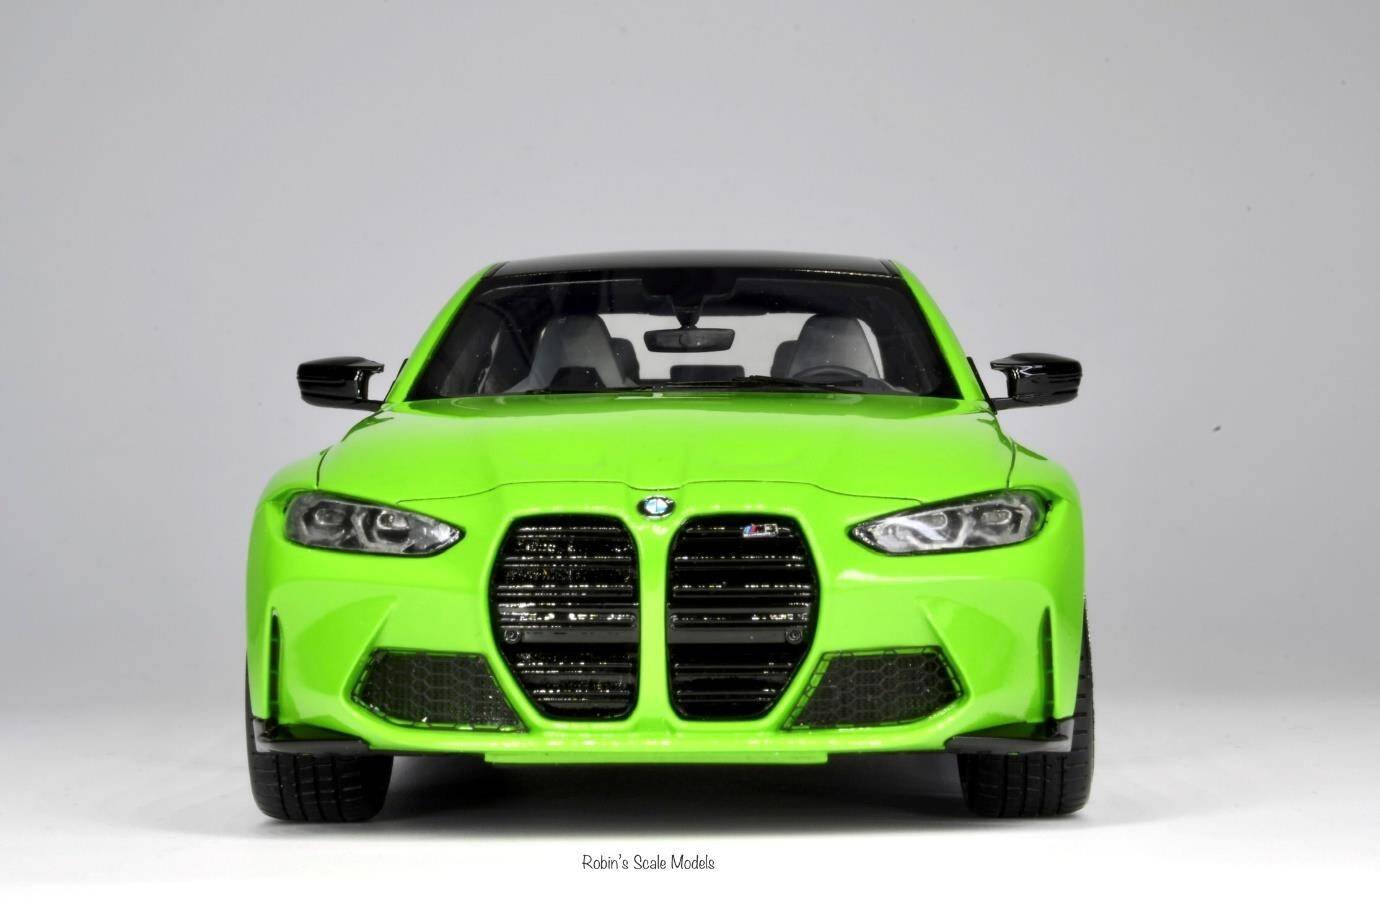
Completed Photos Gallery… BMW M3 Competition built by Robin Witt.
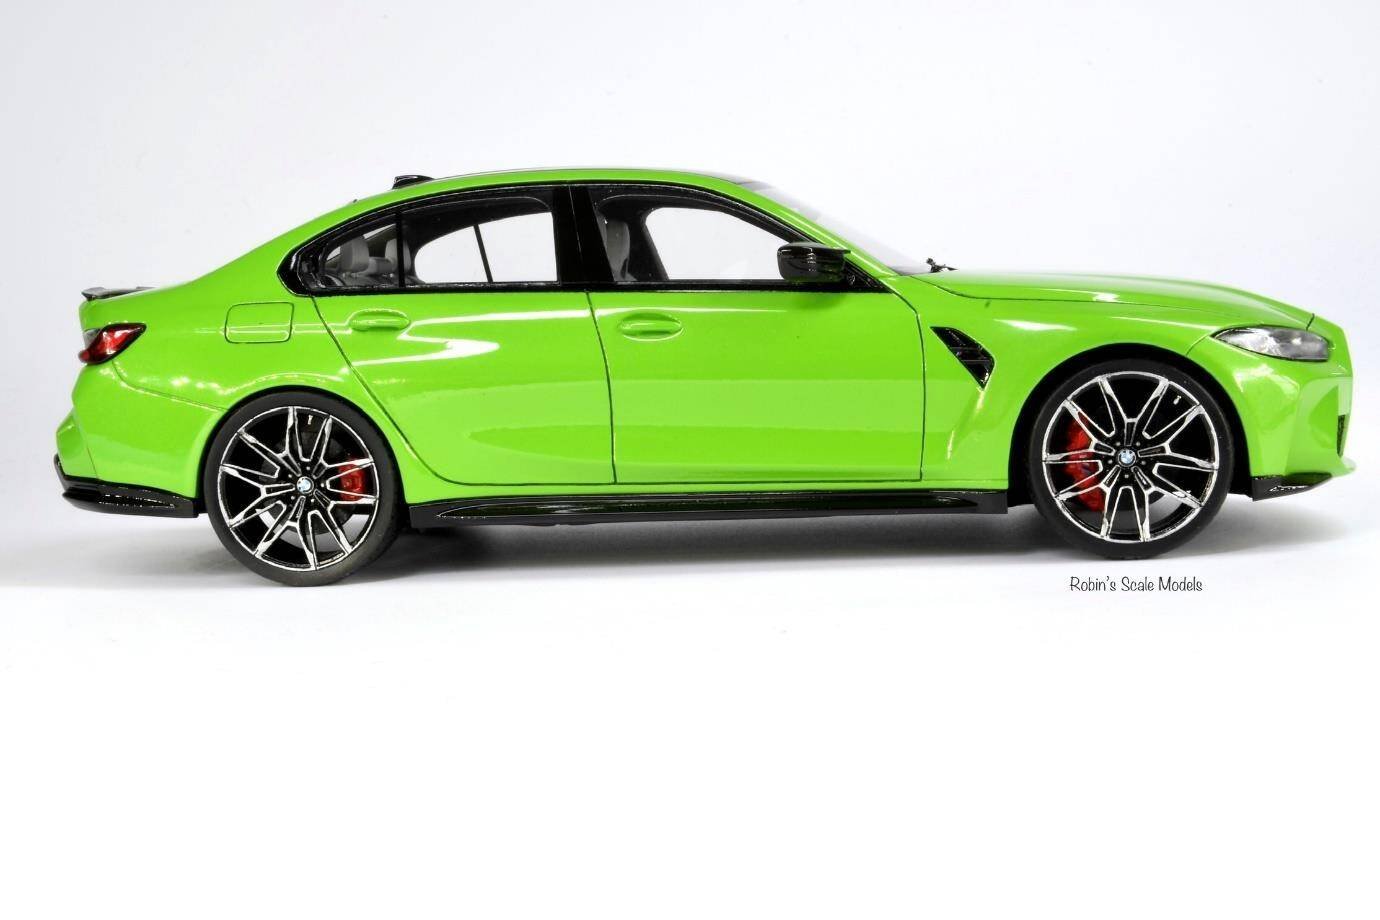
Completed Photos Gallery… BMW M3 Competition built by Robin Witt.
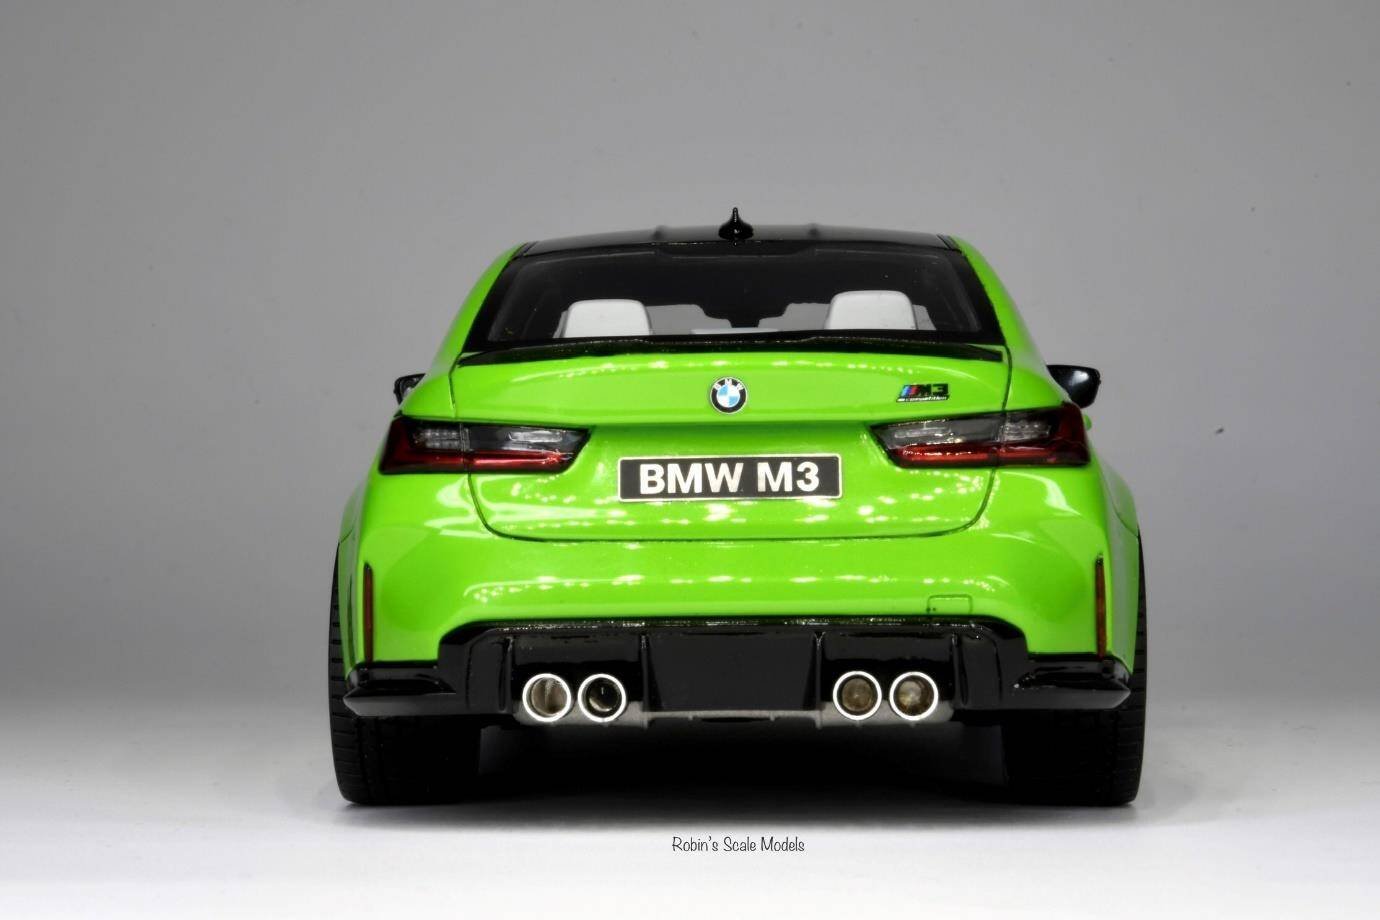
Completed Photos Gallery… BMW M3 Competition built by Robin Witt.
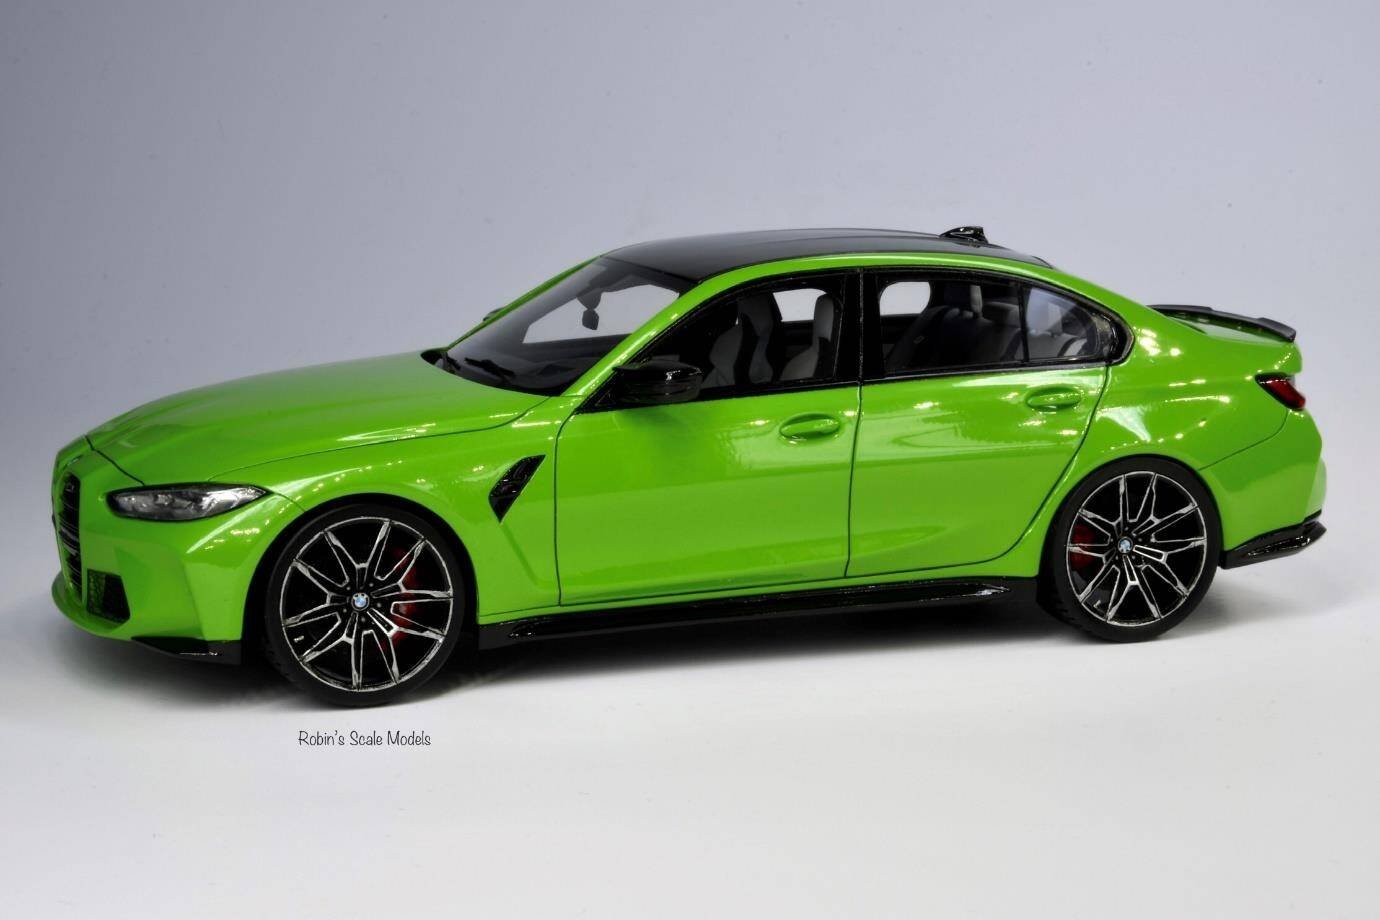
Completed Photos Gallery… BMW M3 Competition built by Robin Witt.
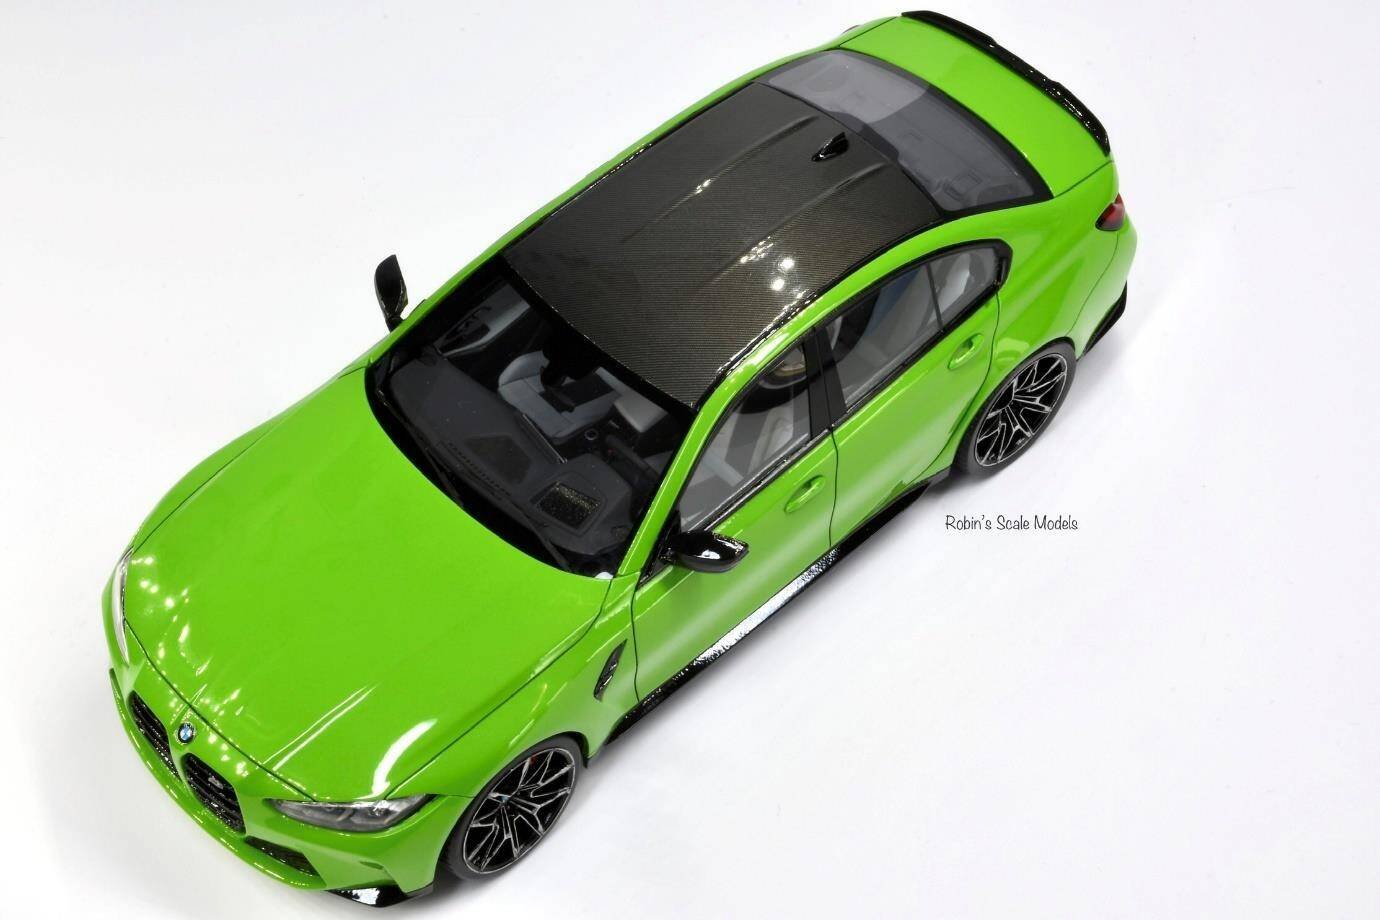
Completed Photos Gallery… BMW M3 Competition built by Robin Witt.
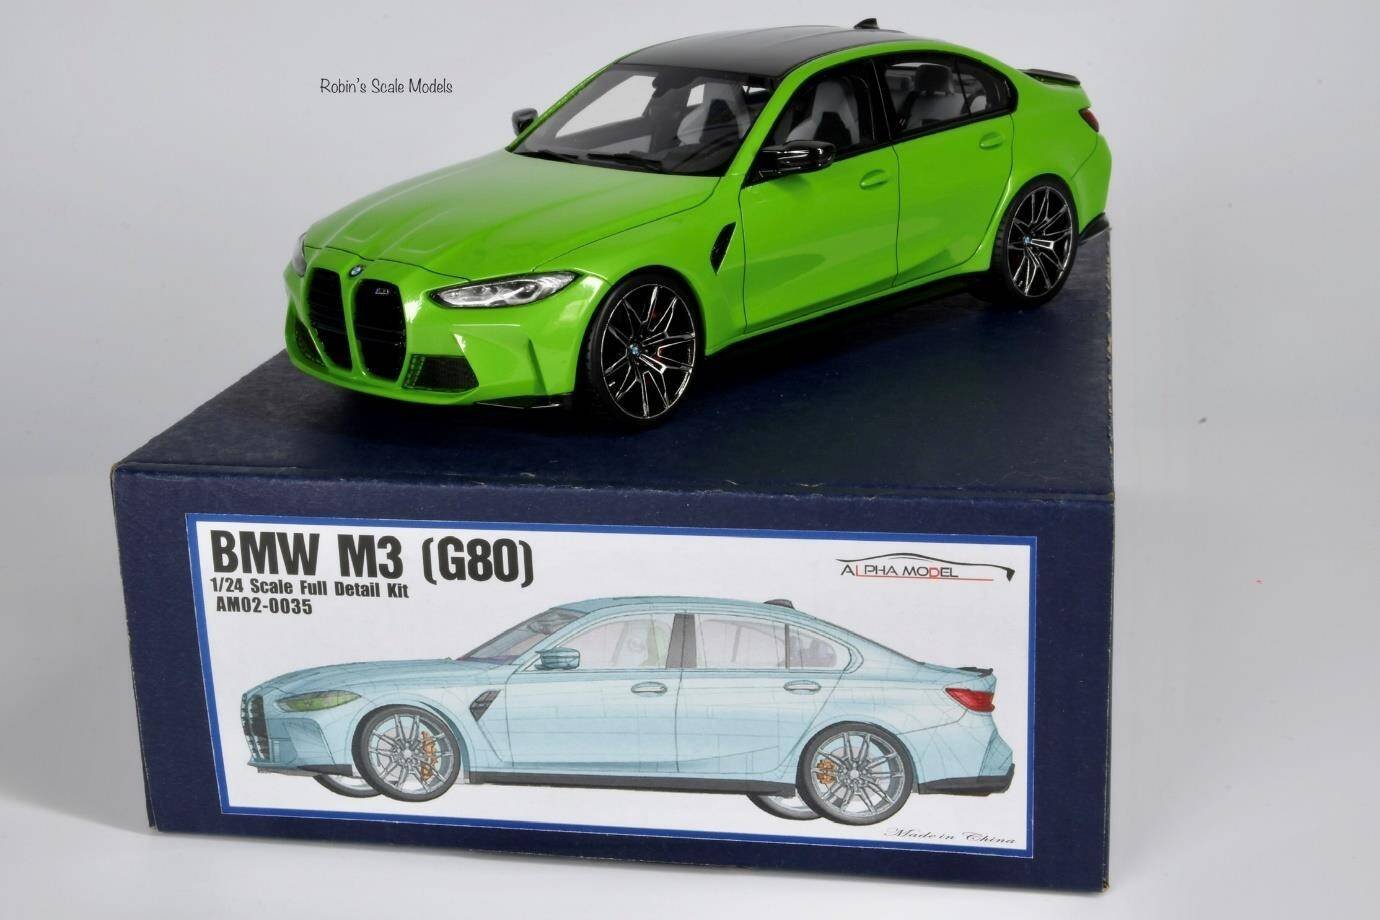
End of build guide