
 Advanced Creators
From Box to Beauty
A Ferrari Monza SP2 Build — Chapter 1: Background
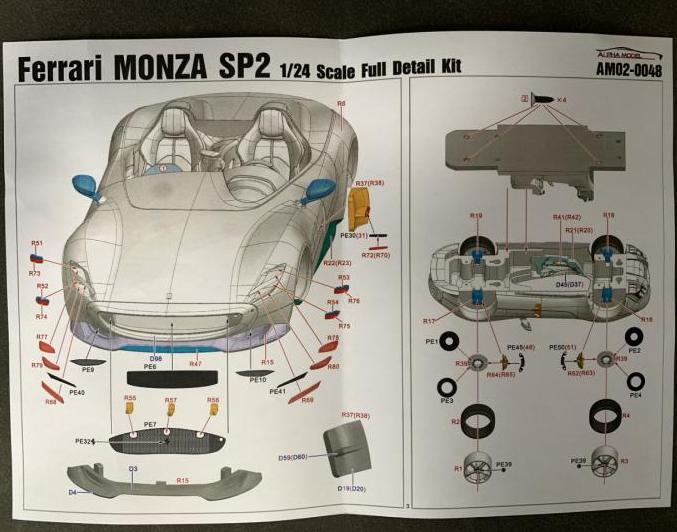
Before we touch a single resin part, let's meet the car that inspired this build — a 1/24 scale full detail kit of the Ferrari Monza SP2, reference AM02-0048, produced by Alpha Model.
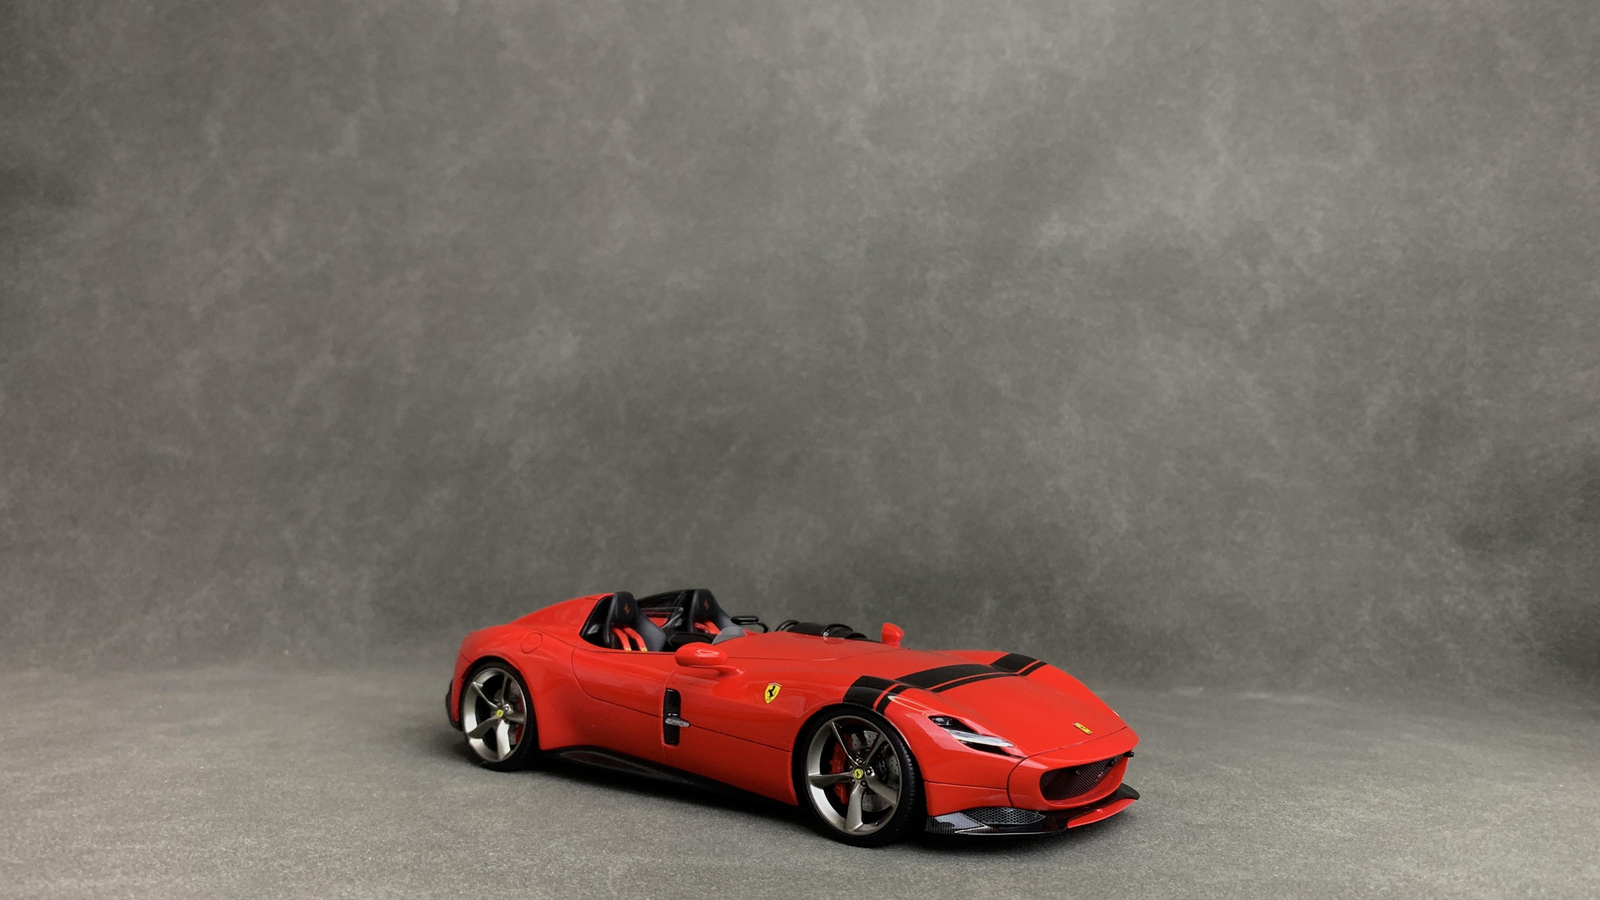
The Real Car Behind the Kit
The Ferrari Monza SP1 and SP2 are limited production sports cars produced by Italian automobile manufacturer Ferrari, introduced in 2018 for the 2019 model year. The cars mark the start of a new lineage of models called the "Icona" series, a program aimed at creating special cars inspired by classic Ferrari models, all to be produced in limited series.
The first cars of the new lineage are the Monza SP1 and SP2, whose designs are inspired by the 750 Monza, 250 Testarossa and 166 MM. The SP1 and SP2 nomenclature refers to the number of seats for each model. 499 units are expected to be produced at a price of €1.58 million before options.
Technical Specs
| Engine | 6.5 L F140 GC V12 |
| Power Output | 596 kW (799 hp; 810 PS) |
| Transmission | 7-speed dual clutch |
| Class | Sports car (S) |
| Body Style | 2-door speedster |
| Layout | Front-engine, rear-wheel-drive |
| Related | Ferrari 812 Superfast |
| Wheelbase | 2,720 mm (107 in) |
| Length | 4,657 mm (183 in) |
| Width | 1,996 mm (79 in) |
| Height | 1,155 mm (45 in) |
| Kerb Weight | 1,520 kg (3,351 lb) |
A modern Icona inspired by 1950s Ferrari legends — and one of the most open, most driver-focused cars the brand has ever built. Now let's see what Alpha Model has prepared for us. Up next: Chapter 2: Unboxing & Kit Overview!
— Build by Break Wong
Advanced Creators
From Box to Beauty
A Ferrari Monza SP2 Build — Chapter 2: Unboxing & Kit Overview
After opening the product package, take out all the parts bags and the car body. Before we go any further, a careful inspection is essential — a quality 1/24 build starts with a quality check.
Step 1 — Inspection After Transit
Since the product may be damaged during transportation through the logistics company, you must first check whether the parts are defective. Pay special attention to the A-pillar of the car shell, brake calipers, wheel rims and other small parts, as these are the most easily damaged in transit.
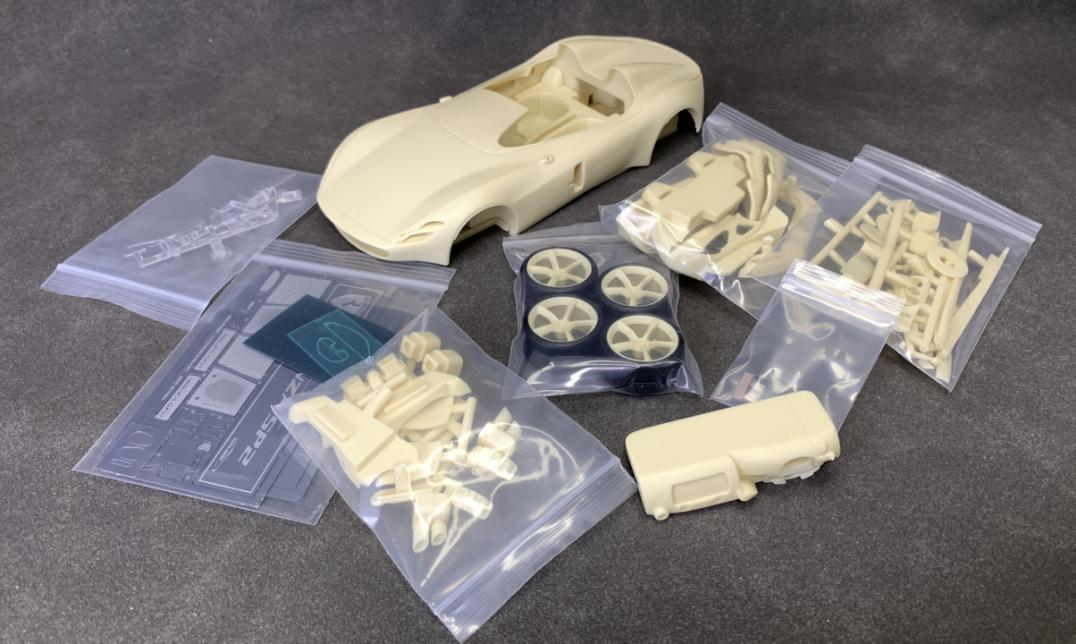
After confirming that the parts are not damaged, please check whether the etched sheet is bent and damaged and whether the water slide decals are stained. After confirming that all standard items are normal, you can start the preparation work for production.
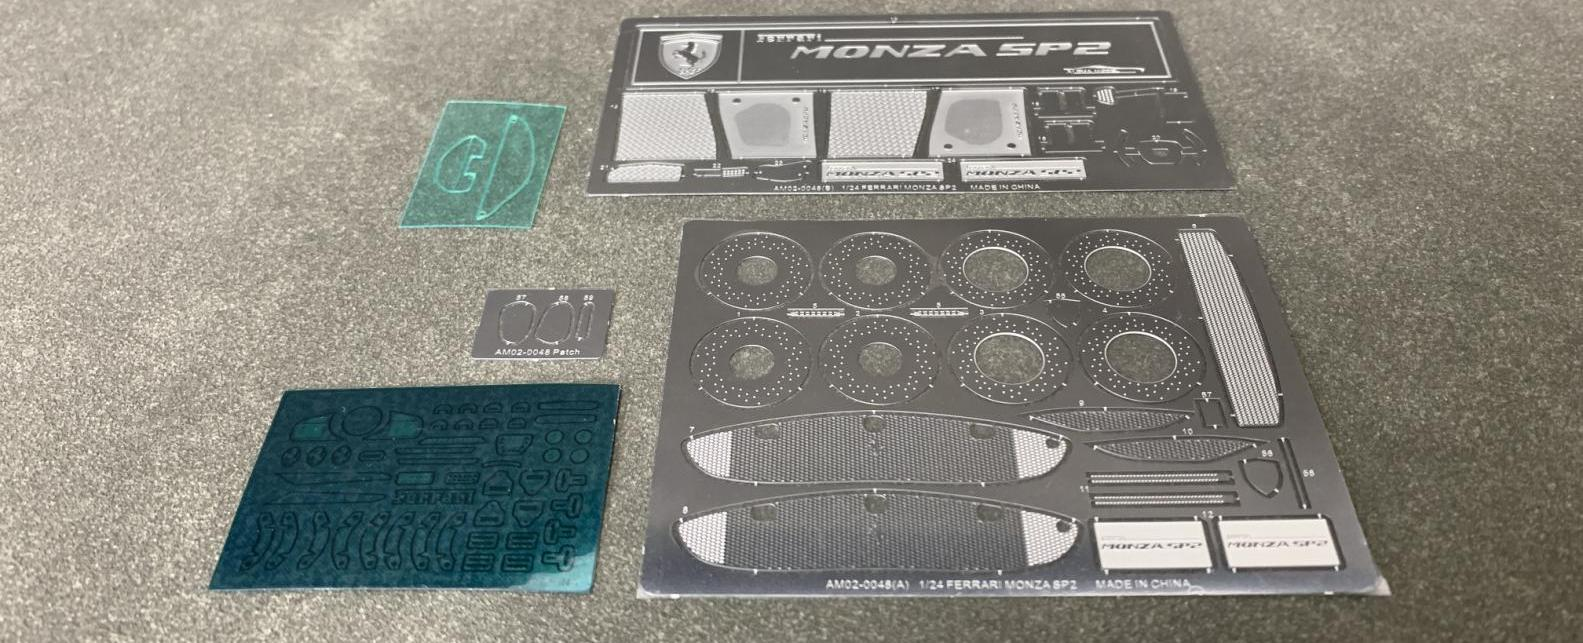
Step 2 — What Makes This Kit Special
AlphaModel provides a wealth of carbon fiber decals on a large number of parts, including the steering wheel, shift paddles, center console, instrument panel, rear diffuser, air knife, and more — basically the same as the real car.
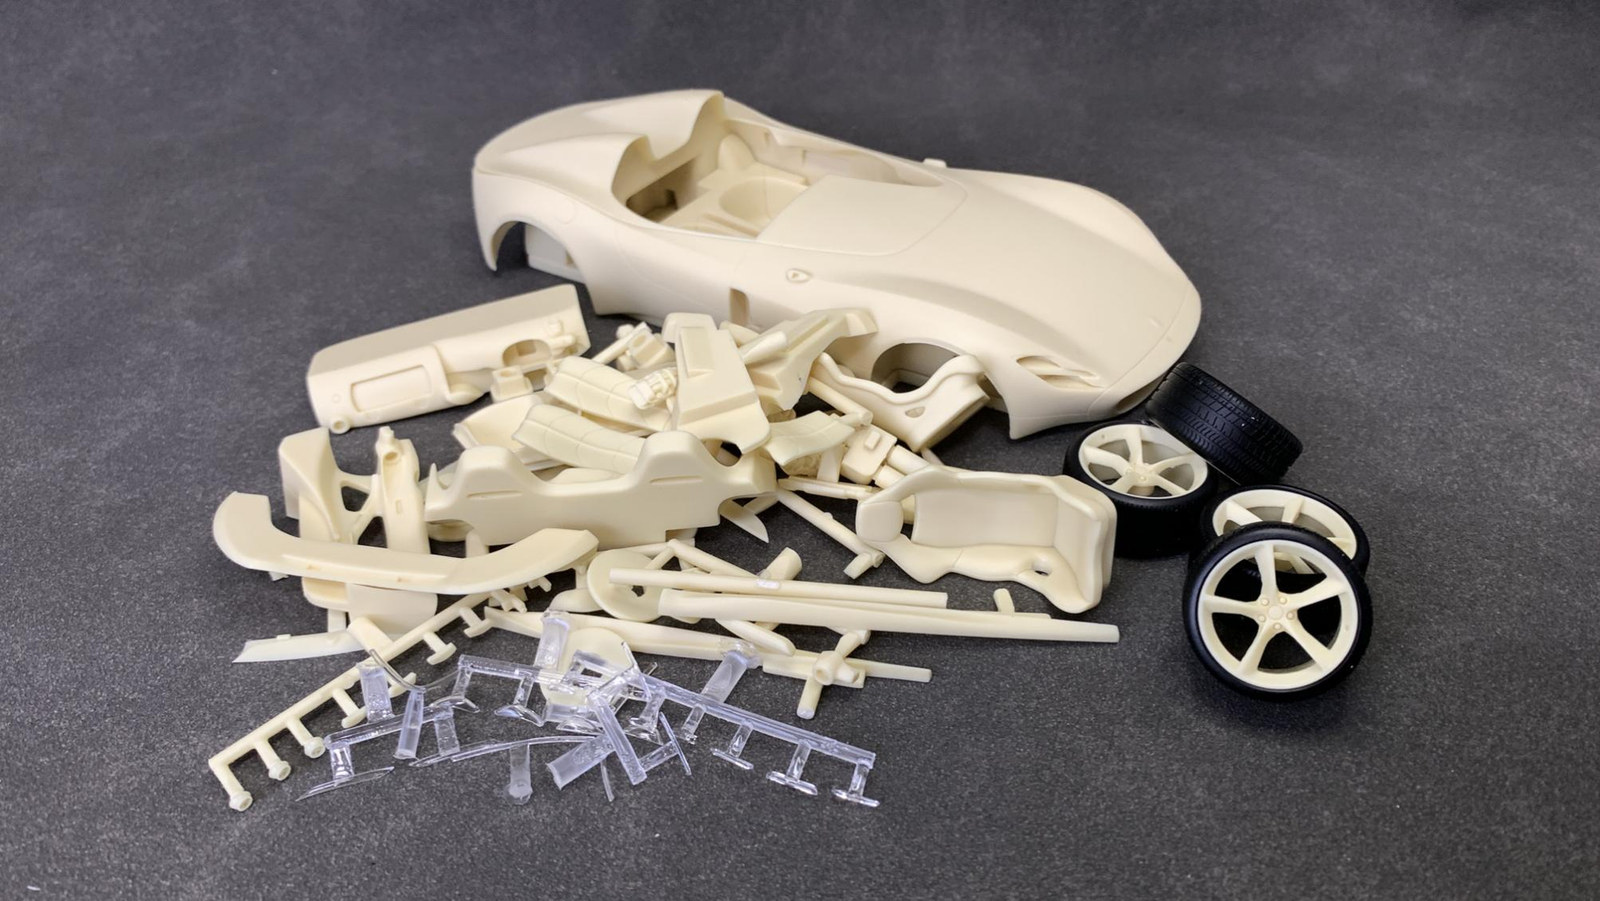
In addition, the main and passenger seats in the cab, details such as floor mats and seat belts are also enhanced with etched sheets, and a variety of decals are provided according to different vehicle colors.
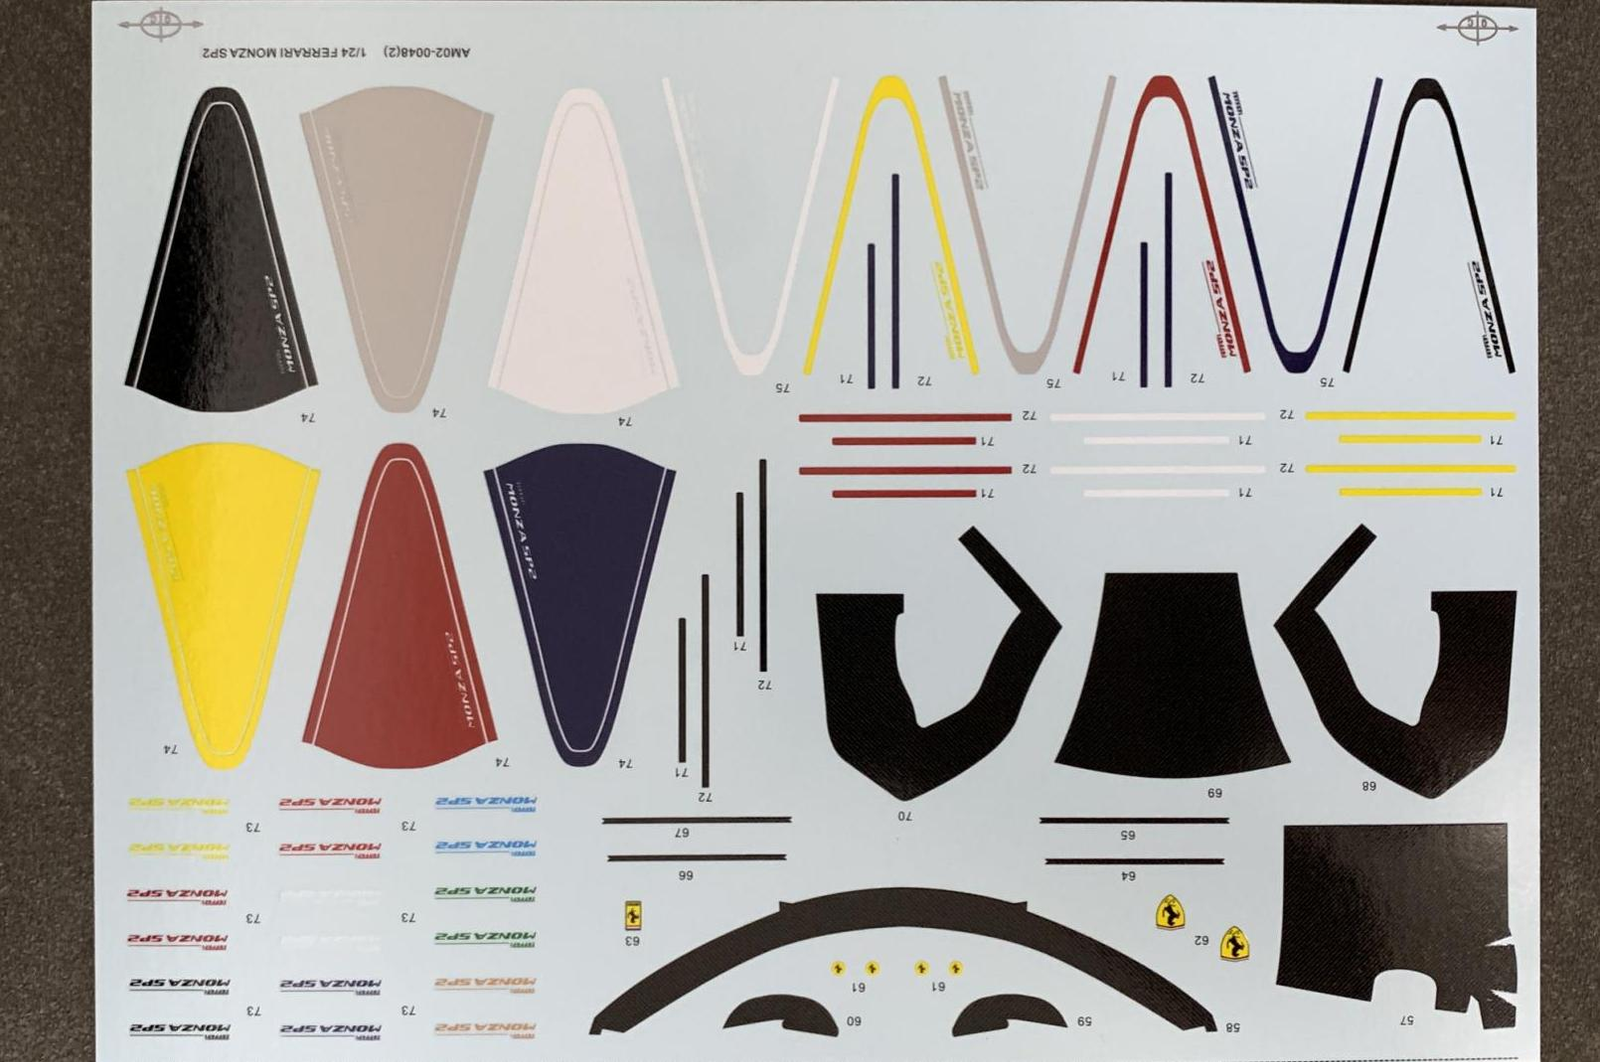
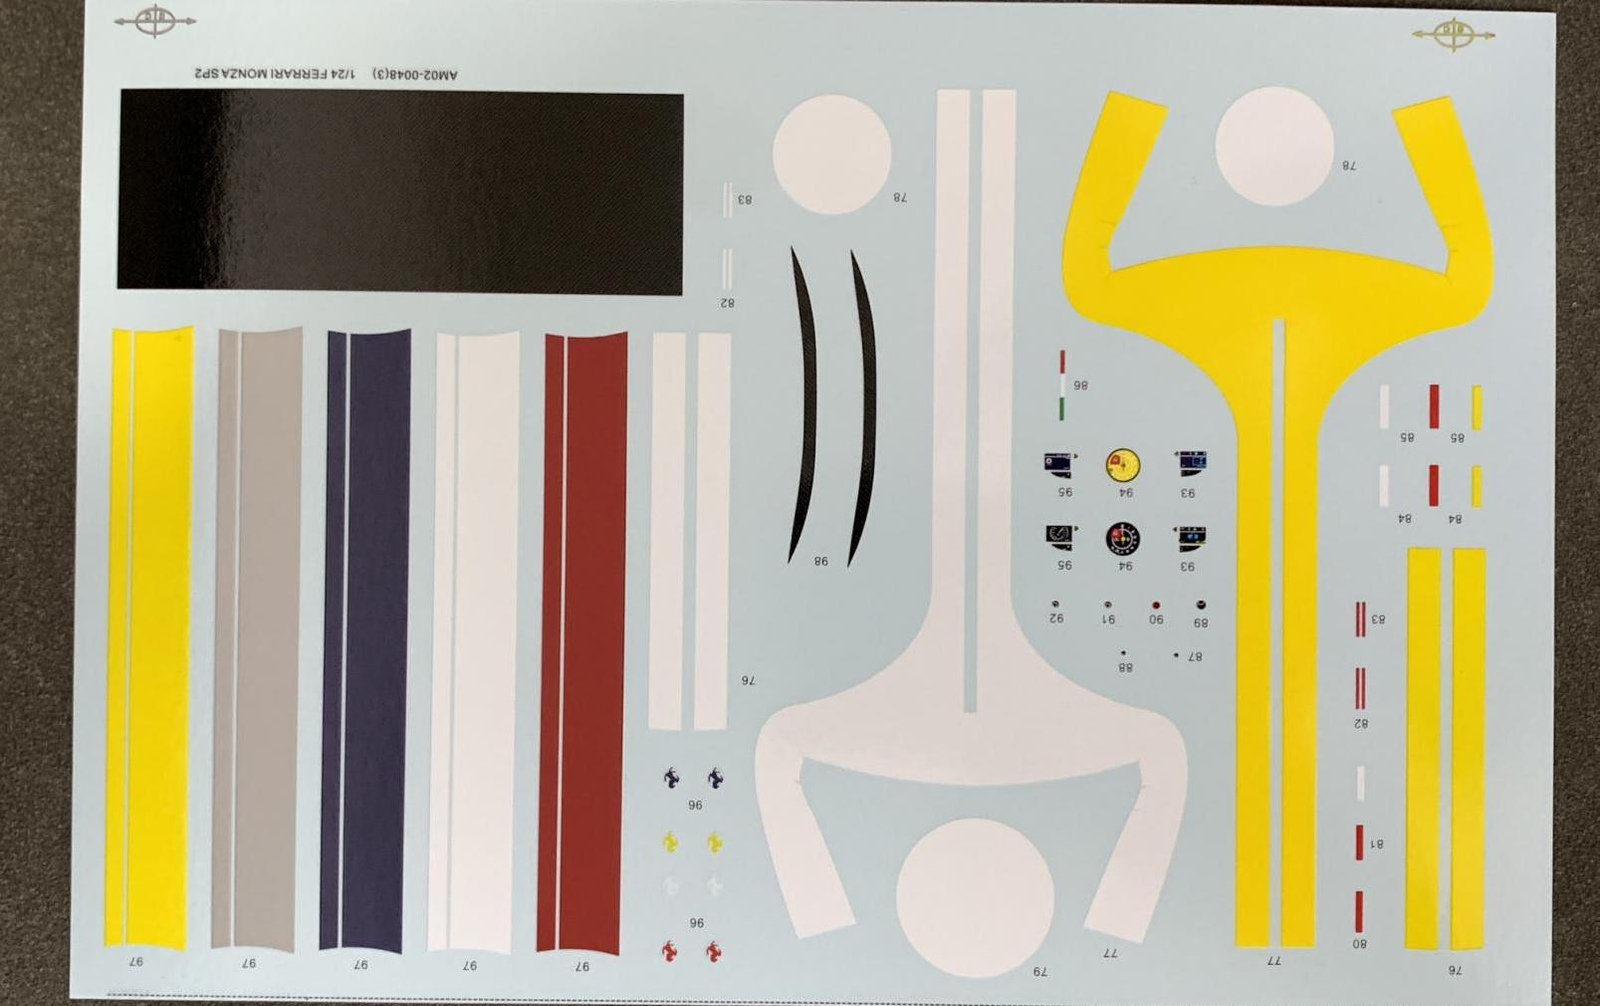
I believe the effect will be amazing after the production is completed. Let's keep going!
Step 3 — Mold Quality & The Complete Engine
AlphaModel's products have precise mold opening, especially in the production technology of car casings. The car casings have precise shapes, smooth surfaces without burrs and shrinkage, deep engraved lines, and sharp edges. These features greatly reduce the difficulty of production and are very suitable for newbies.
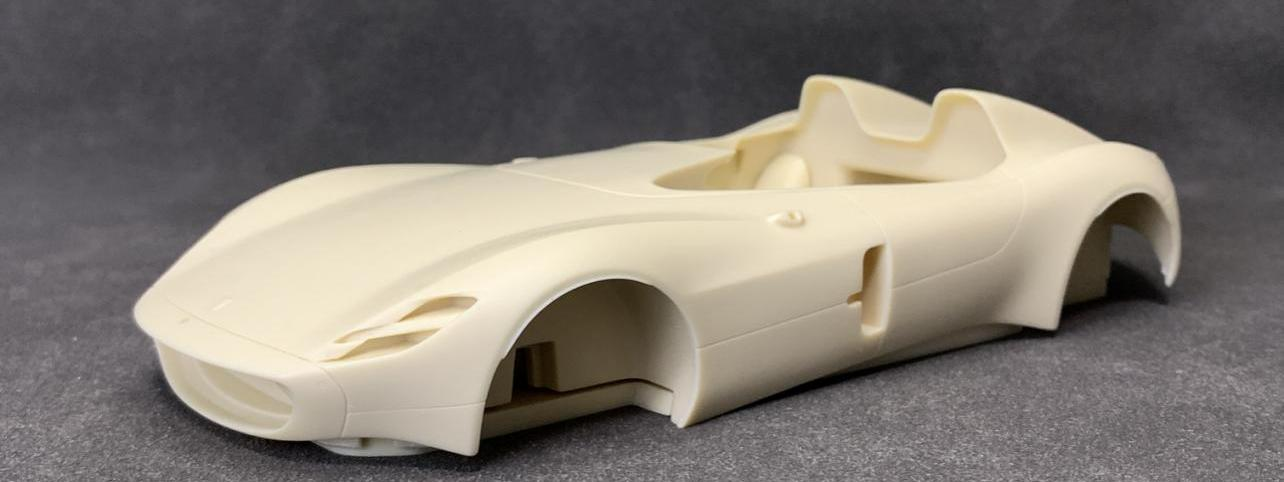
This product not only has traditional brake discs, interior details and other details, but also has a complete engine for players to build. There are a large number of detailed pictures of real cars on the Internet for your reference. After the production is completed, you can see the engine at the rear of the car through the cover window giving full view of the engine.
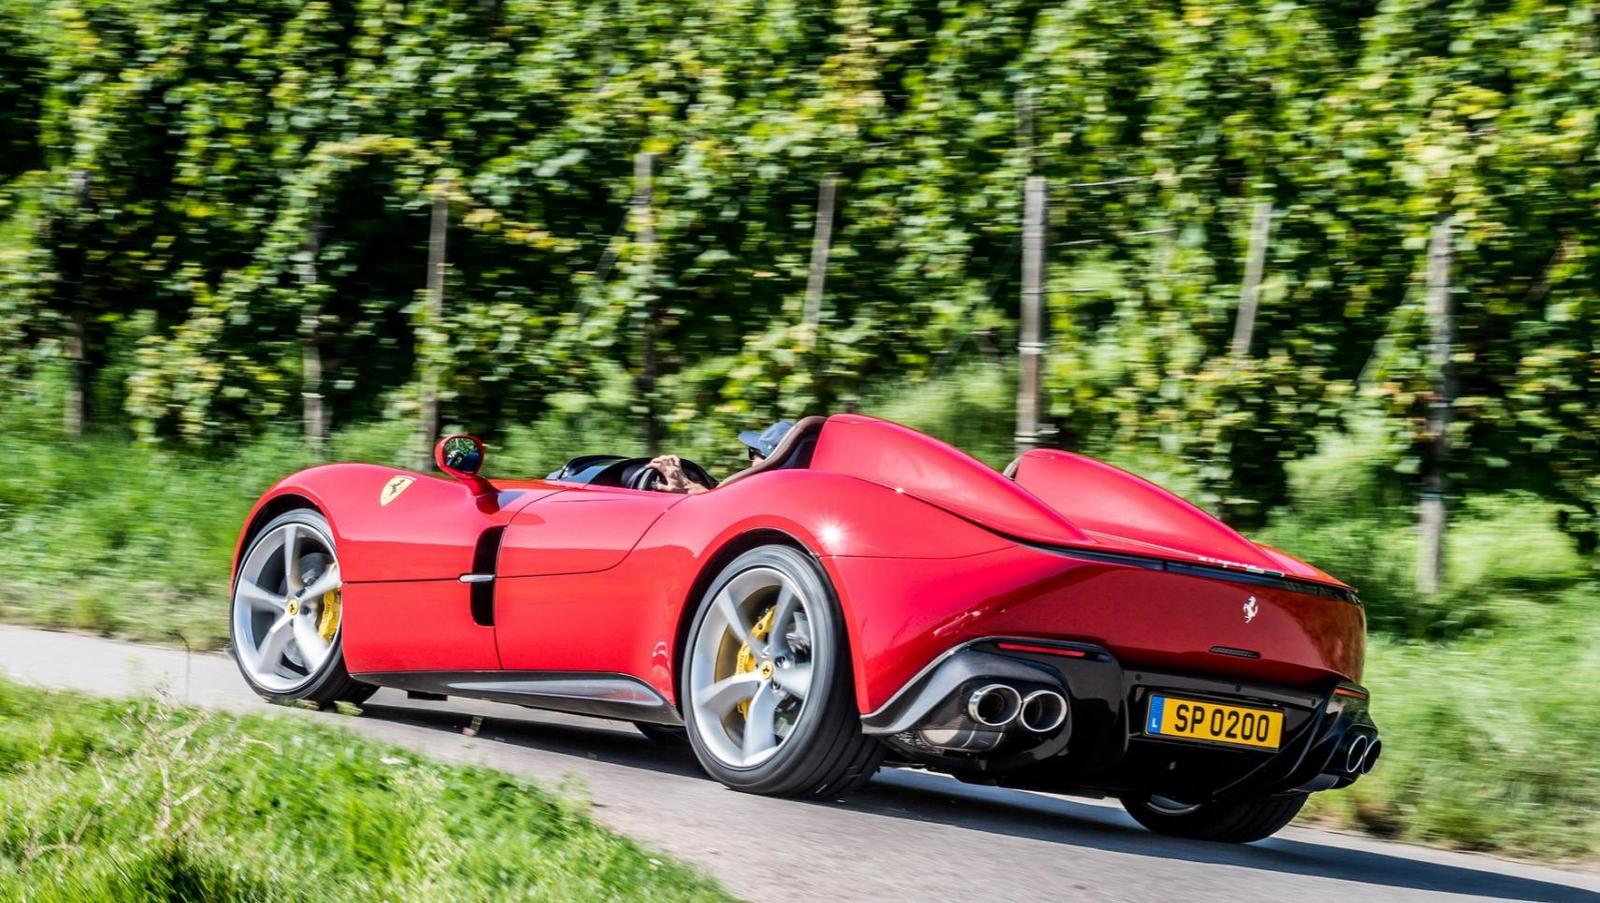
Each car has its own unique color matching, and players can also color it according to their own preferences. Before production, you can refer to photos of the actual car and mark the color of each part on the product manual to facilitate later coloring.
Step 4 — Tools You Need
In the process of making the Ferrari Monza SP2, we need to prepare some necessary tools in advance, such as:
- Outline pen (描边笔)
- Paper sandpaper (various grits)
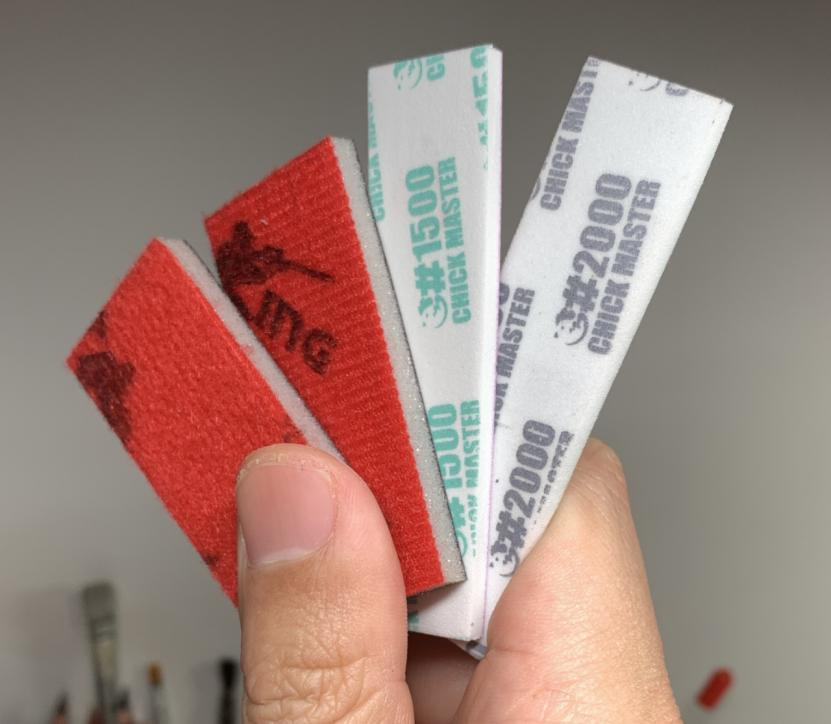
- Sponge sandpaper
- Instant glue (cyanoacrylate)
- Tweezers
- Marking knife
- Pen knife
- Etched sheet bending pliers
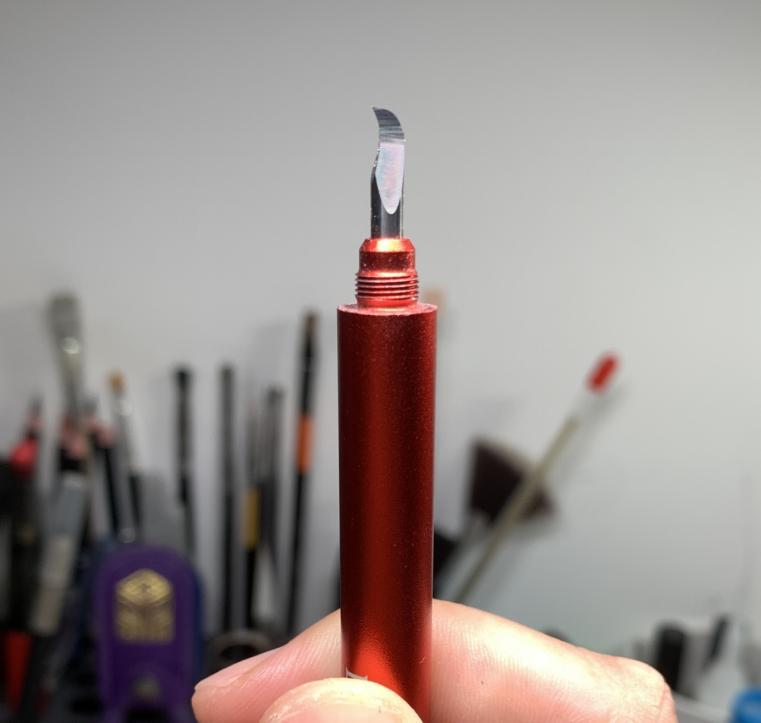
Having tools that are handy and feel good when making can help players create high-quality static models more easily.
Step 5 — Cleaning All Resin Parts
Use dish soap or other resin cleaning fluid to clean all the resin parts. Because there is a layer of grease release agent on the surface of the workpiece, if it is not cleaned and directly sprayed, problems such as fish eyes and lack of adhesion of the paint will cause discoloration. After cleaning, just let it dry.
All parts are clean, dry, and ready. Up next: Chapter 3: Car Body Treatment — where we shape the iconic Icona bodylines.
— Build by Break Wong
Advanced Creators
From Box to Beauty
A Ferrari Monza SP2 Build — Chapter 3: Car Body Treatment
The Icona body is a sculptural piece — to make it shine, we need to start by treating the shell properly: flattening, deepening the panel lines, and sanding to a flawless surface.
Step 1 — Inspect & Flatten the Side Skirts
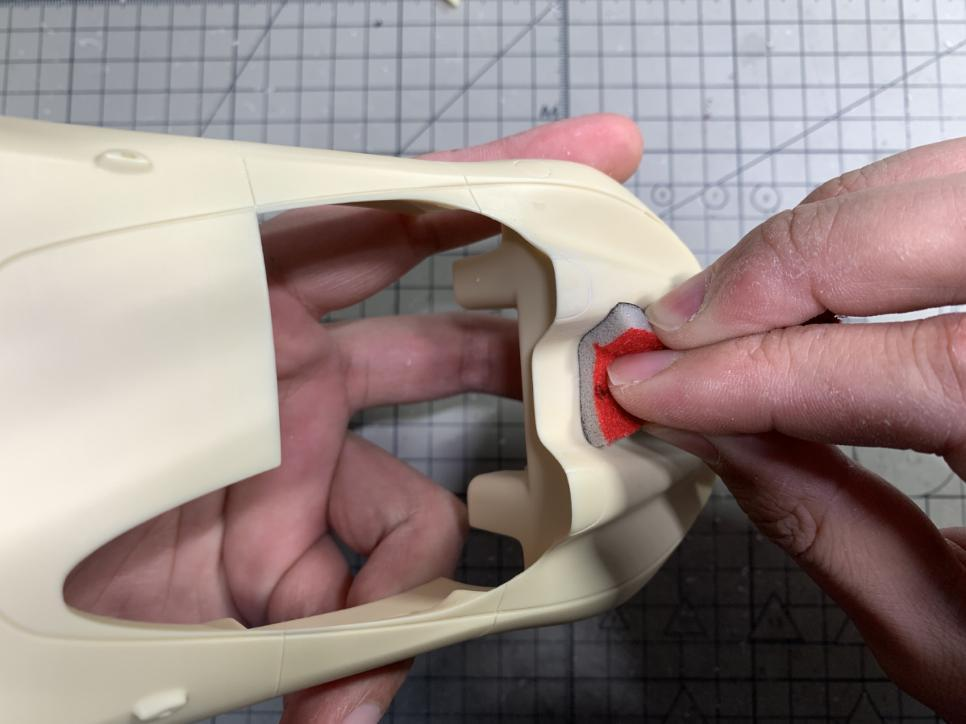
First, observe various parts of the car shell. Generally, there will be some unevenness at the bottom of the side skirts. You can first use sandpaper to polish and level it. After making sure there are no problems such as missing material, move on to the next step.
Step 2 — Deepening the Panel Lines
Use a 0.15 mm caliber scoring knife to deepen the scoring. Although the engraved lines on the car shell itself are relatively clear, we need to manually deepen them again. This is to make it more three-dimensional after the production is completed. We can also consider not bleeding the lines and using natural shadows to show the texture of the engraved lines.
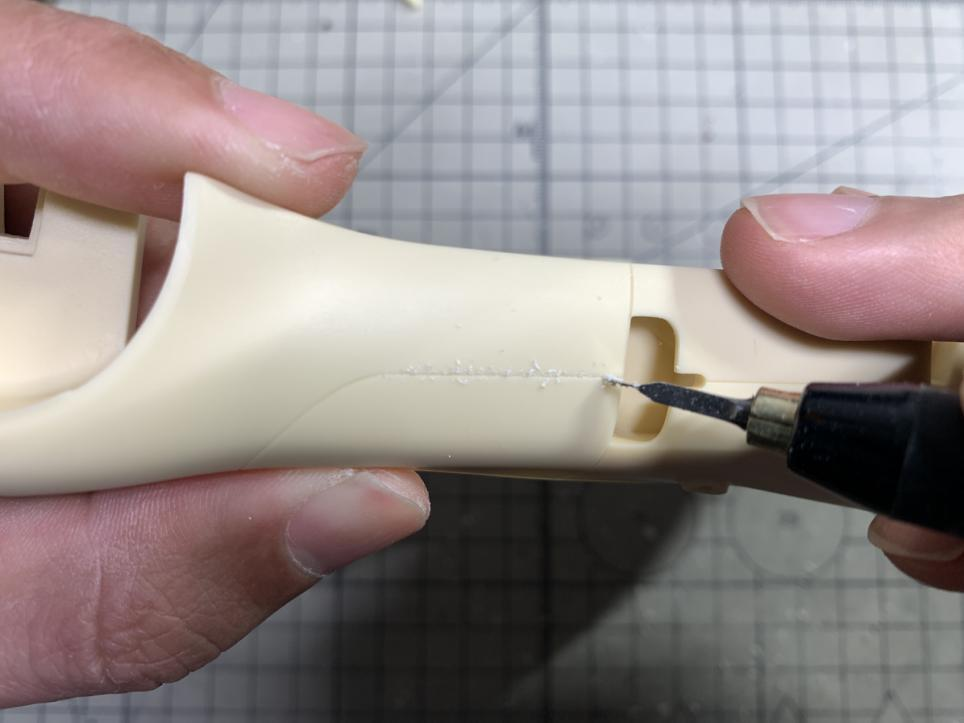
Technique — pressure from light to heavy: When carving, you need to pay attention to the intensity from light to heavy. First, gently draw 2 strokes along the carving line, and then slowly apply pressure.
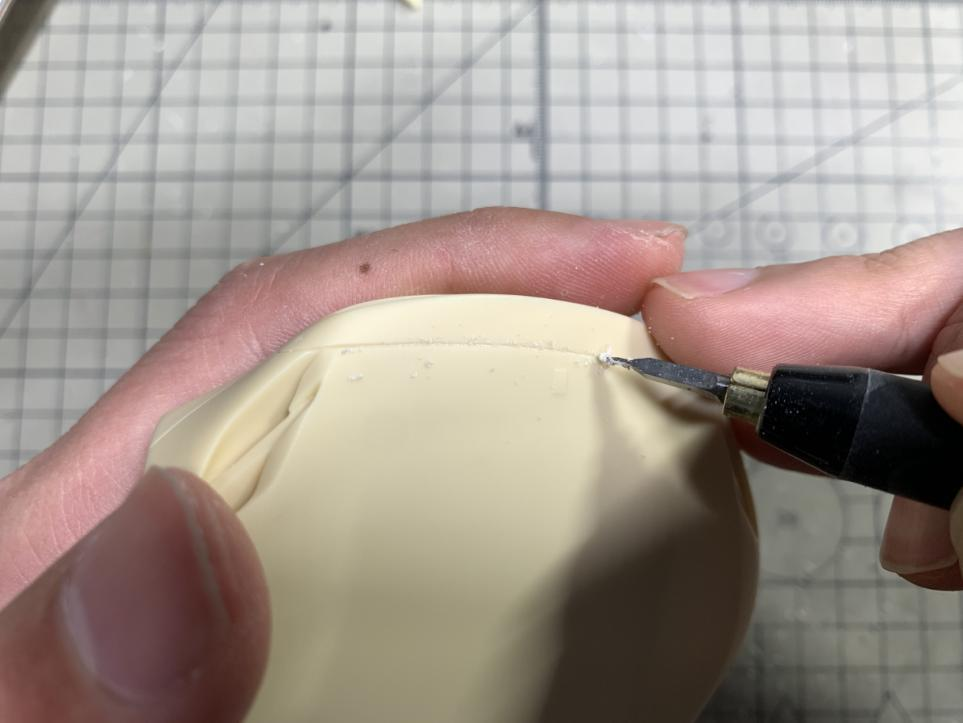
Technique — curve handling: At the arc position, you can use the elbow hook knife to deepen the carving line. If there is no hook knife, when using a straight-edged scoring knife to deepen, do not carve out of bounds to avoid more trouble, and pay attention to the angle of the knife head — do not carve the curved score line into a straight line.
Step 3 — First Sanding Pass
After adding the deep lines, first use No. 800 paper sandpaper to polish and level the entire car shell. This will increase the sharpness of the entire car. The position of the engraved lines will be more obvious and the position of the large plane will be smoother. In the later stage of painting, the effect will be better with varnish.
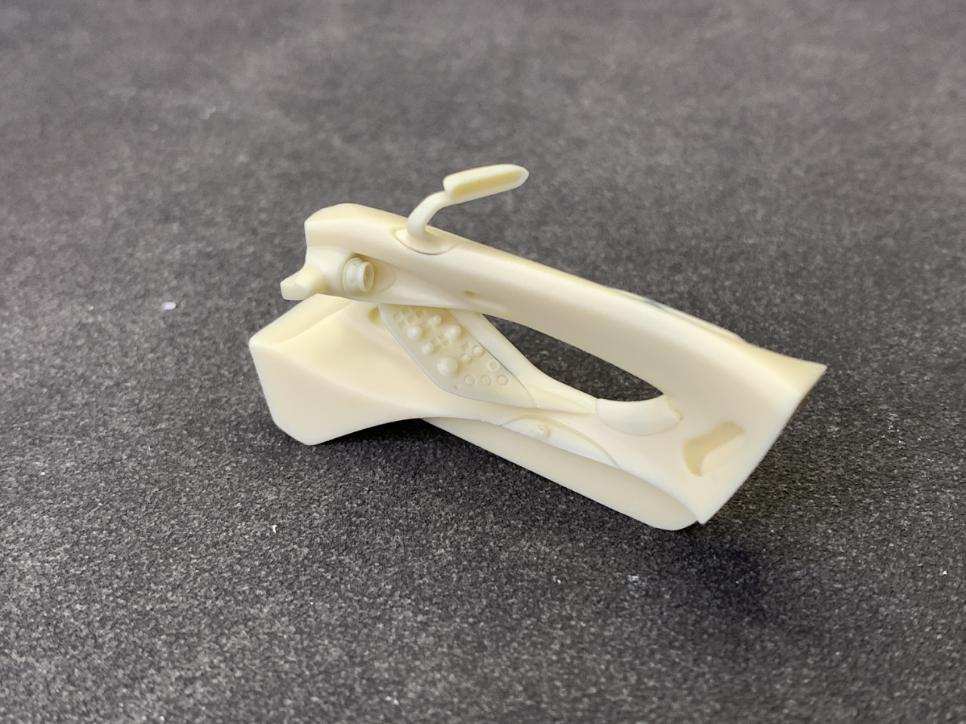
During the polishing process, be careful to use light force on the arcs and protruding parts to avoid grinding away the complex details.
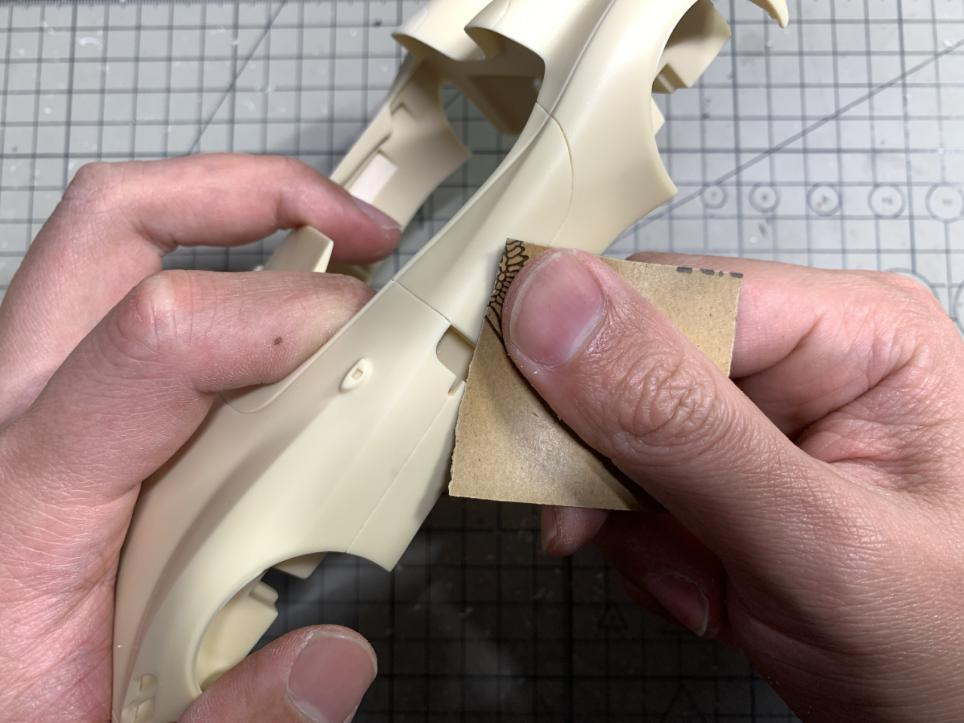
Step 4 — Progressive Sanding
After leveling, use 1000 and 1500 grit sandpaper to remove the thicker scratches, and then use 1500 and 2000 sponge sandpaper to polish it again. Use high-grit sandpaper and apply a little more force, which will make it easier to polish off the rough scratches.
Only after the surface of the workpiece has been properly treated, the painting effect will be better.
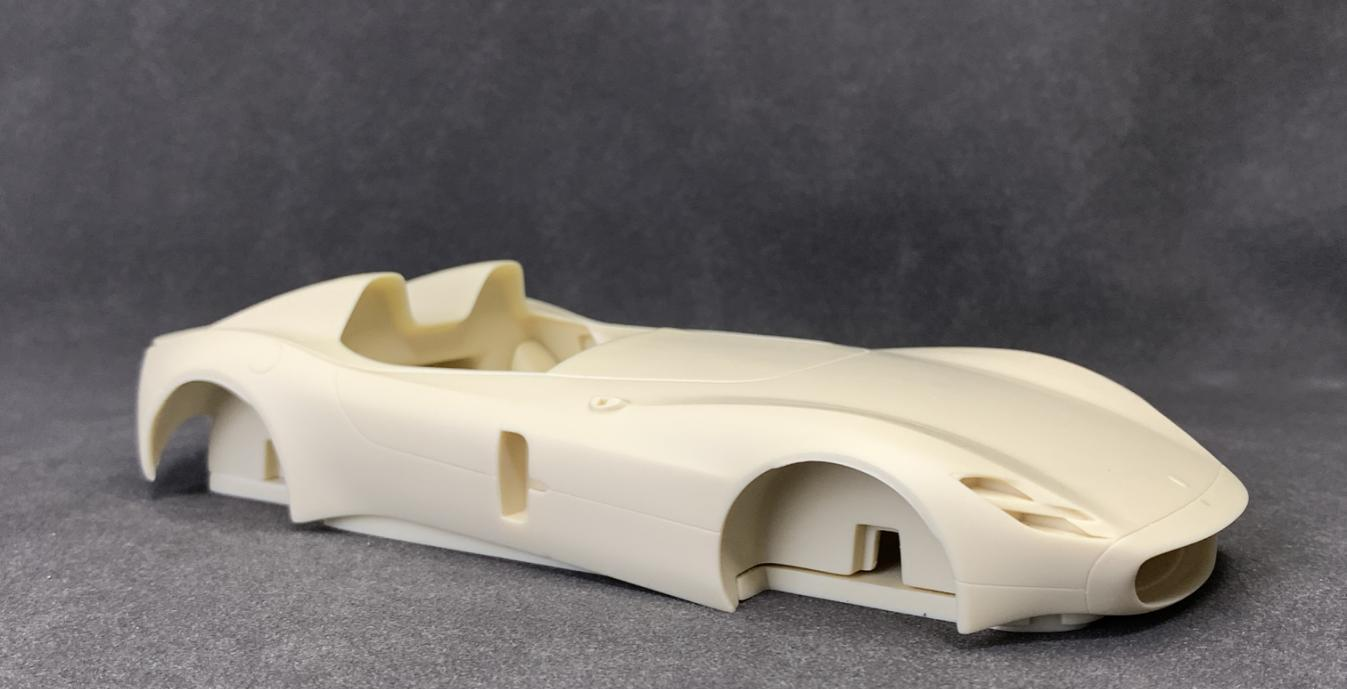
⚠️ Safety Warning: Be careful to wear a gas mask during the polishing process. Resin dust is toxic — pay attention to protection!
The body is now scribed and sanded to perfection. Up next: Chapter 4: Preassembly & Color Preparation — where we dry-fit the parts and lay down our base colors.
— Build by Break Wong
Advanced Creators
From Box to Beauty
A Ferrari Monza SP2 Build — Chapter 4: Preassembly & Color Preparation
Before we commit to glue, a careful preassembly pass saves us from costly mistakes — and gives us a roadmap for the painting process.
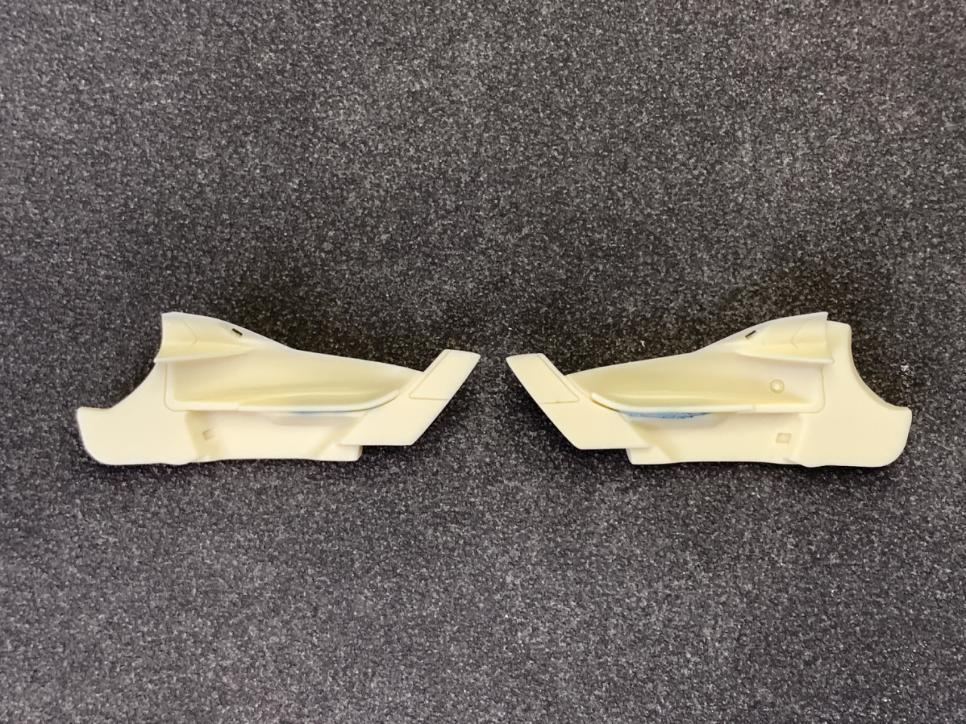
Step 1 — Cutting the Gates
Use nozzle pliers to cut off the nozzle of the part bit by bit. Do not cut off the entire nozzle at once to avoid missing material.
Step 2 — Dry-Fit by Part Number
Assemble the polished parts according to the part number in the instruction manual. AlphaModel's mold opening is very precise, and every part can be assembled directly, with perfect fit and reasonable gate position.
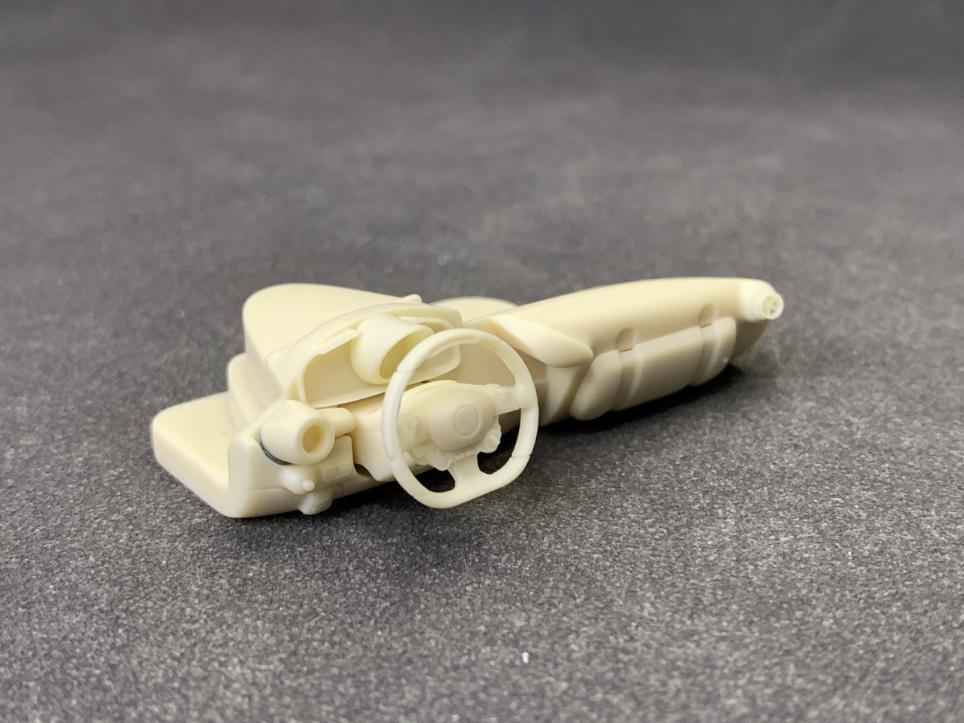
In addition, the dry assembly can also let players know the order of some parts during the assembly process, so that they will not install the wrong parts during the final assembly.
In the process of polishing the nozzle and the dry assembly, be careful not to use excessive force to cause damage to some very small parts. The parts are easy to fall apart when clamped with tweezers. Parts that are not easy to clamp can be assembled with a dispensing pen.
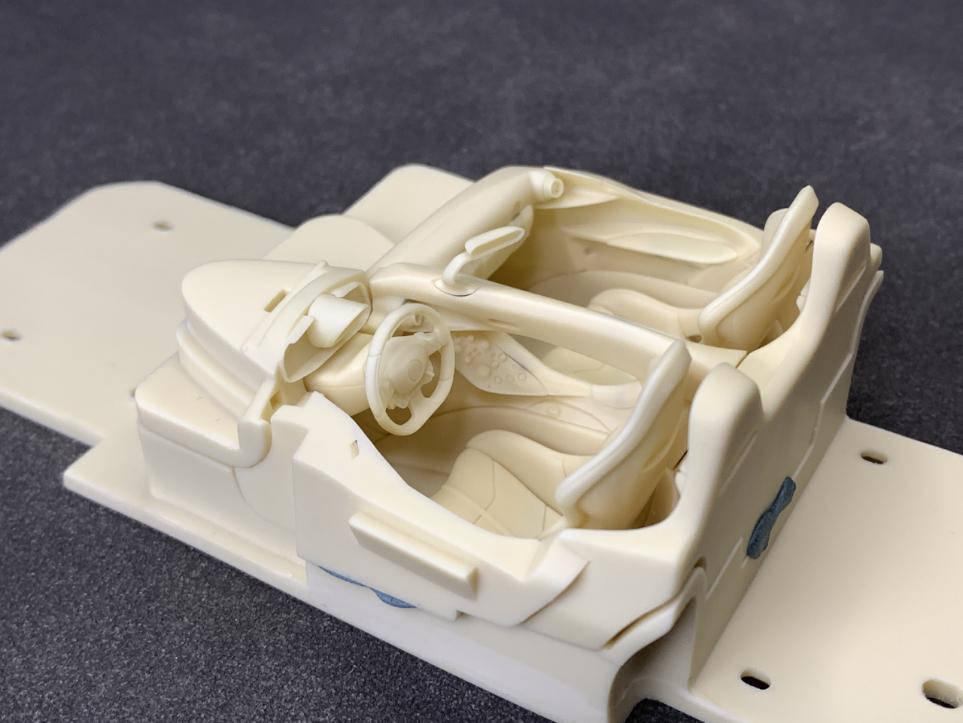
The adhesive used in the dry assembly can use blue tack glue (butyl rubber cement) — temporary, repositionable, and won't damage the parts.
Step 3 — Planning Your Color Palette
Referring to the actual car drawings, you can determine the color of each component, and choose the appropriate paint for spraying based on different colors and glosses.
【图片6:参照真车图纸确定各部件颜色的示意图】
If you want to paste water stickers on the instrument panel, center console, and door interior panels, you need to use semi-gloss black (Gunshi C92) as the base, which can effectively avoid color leakage.
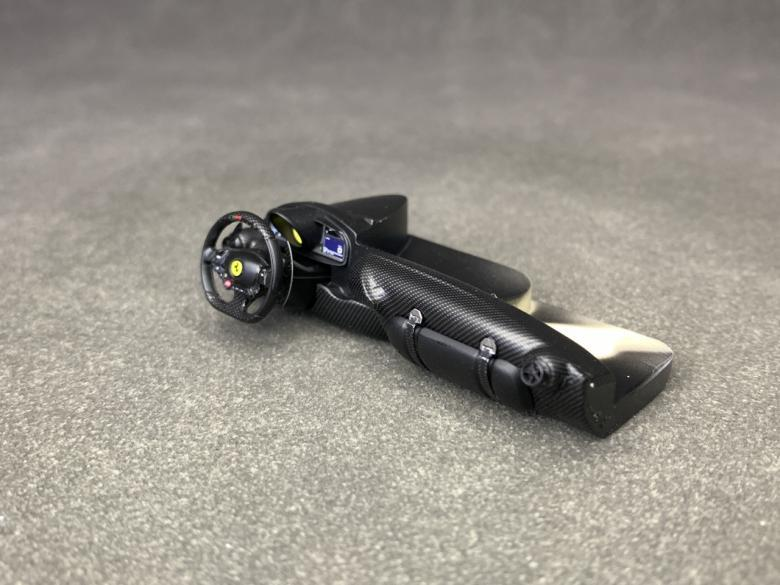
Step 4 — Priming Etched Metal Parts
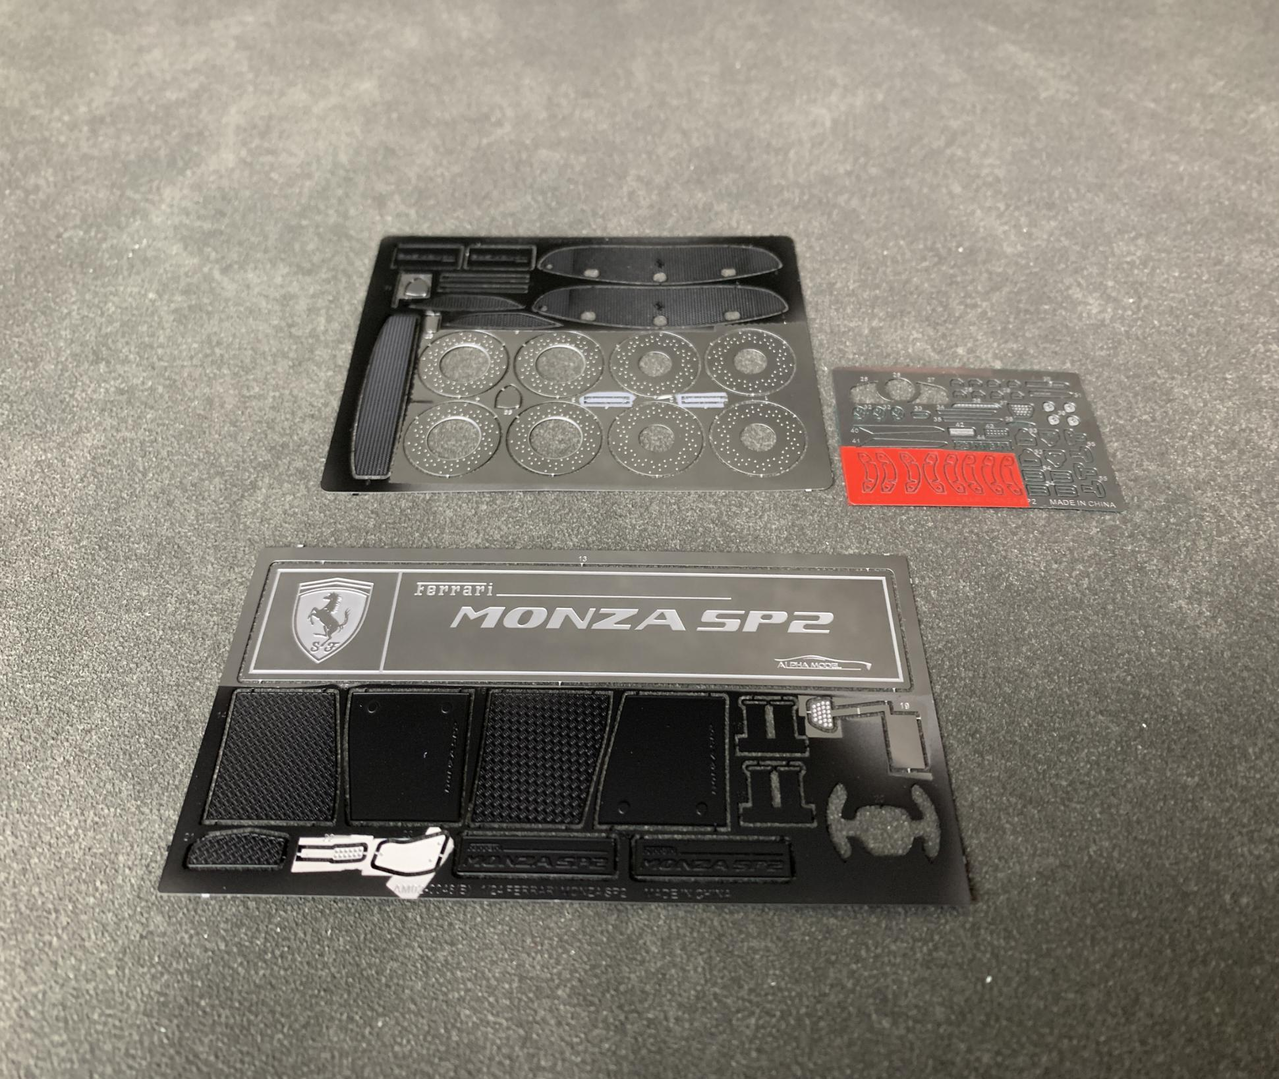
For metal parts such as etched sheets, after using 800-grit sandpaper to remove the thick oxide layer on the surface, you can use Gunshi SF287 No. 1000 water-based surfacer for primer.
This water-based surfacer can provide strong adhesion to the metal surface. Be careful not to cause the paint to fall off with the slightest touch after it dries.
Now we have a clear roadmap of every part, every color, and every base. Up next: Chapter 5: Interior Detailing — Part 1 — where we paint and detail the cabin components.
— Build by Break Wong
Advanced Creators
From Box to Beauty
A Ferrari Monza SP2 Build — Chapter 5: Interior Detailing — Part 1
Welcome to the heart of the model — the Monza SP2's open cockpit. In this chapter, we'll detail the major cabin components: AC vents, glove box, steering wheel, airbag, mirror, and door panels. Each part gets its own treatment to match the real car.
1. Air-Conditioning Outlets
The air-conditioning outlets can be sprayed in semi-gloss black (Gunshi C92) to form a natural contrast with the carbon fiber of the instrument panel, which can improve the look and feel.
2. Glove Box
The glove box is made of matte black (Gunshi C33). The buckle etched piece of the glove box strap is very small. When dispensing glue, be careful not to dispense too much to prevent glue from overflowing.
3. Steering Wheel LED Indicator
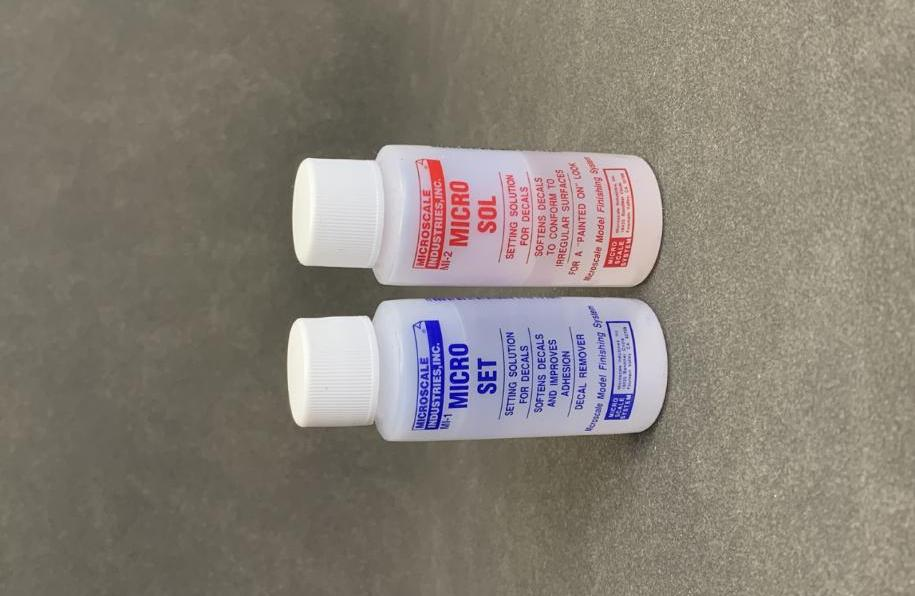
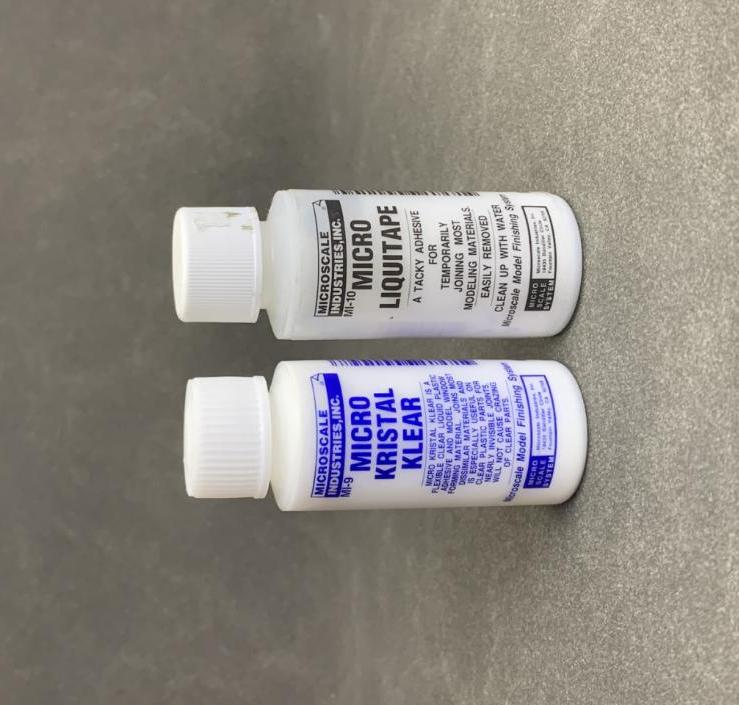
The LED indicator light on the top of the steering wheel needs to be attached with the etched sheet first and then the water sticker. Since the parts are small, be careful not to overflow when dispensing and pasting them. You can use jelly glue to bond them.
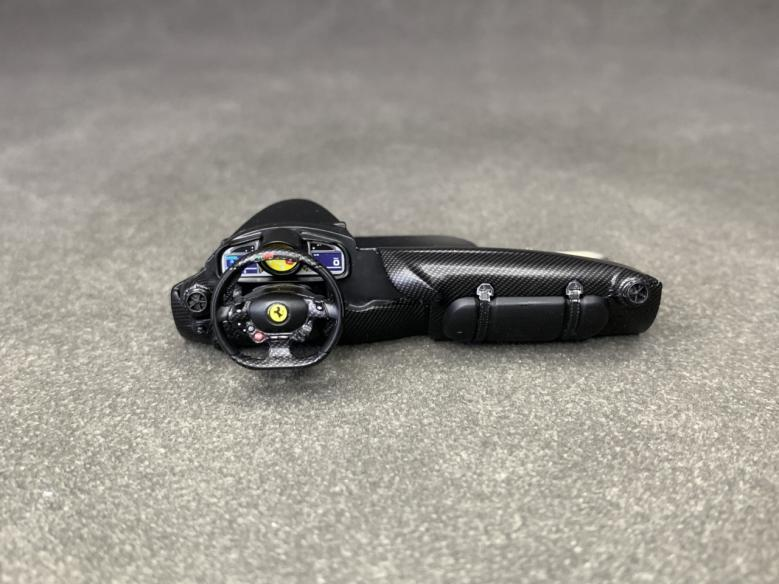
4. Airbag Cover
The airbag cover is made of semi-gloss black, and when attaching the Prancing Horse logo, pay attention to adjusting the angle of the sticker.
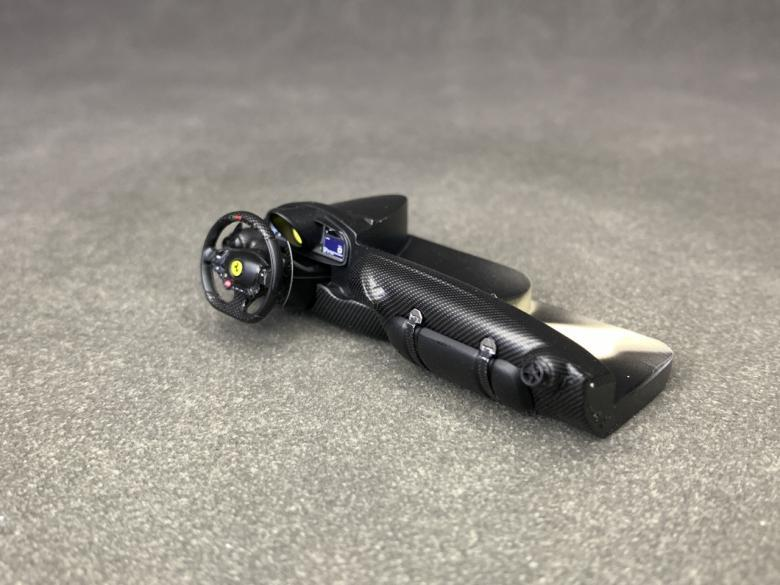
Before spraying, you can assemble it with the car shell to determine the position of the spray color to avoid omission and rework.
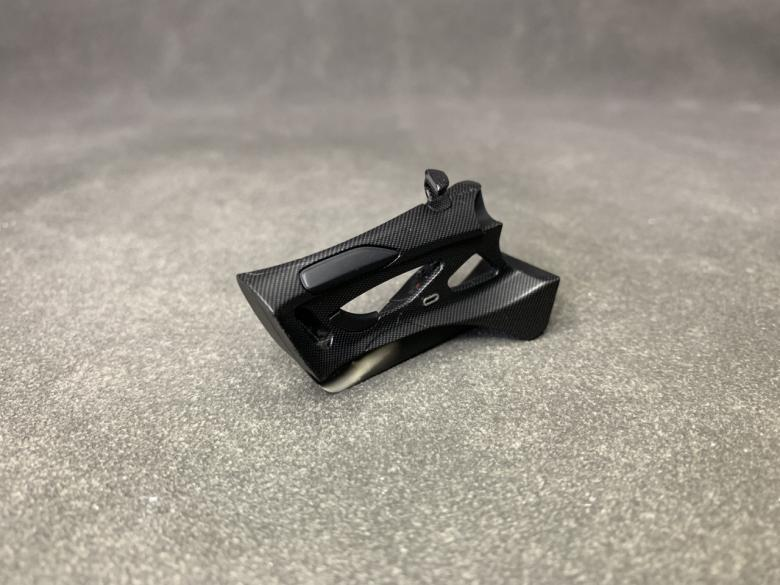
5. Rear-View Mirror
Be gentle when applying carbon fiber stickers to the rearview mirror to avoid damaging the parts with excessive force.
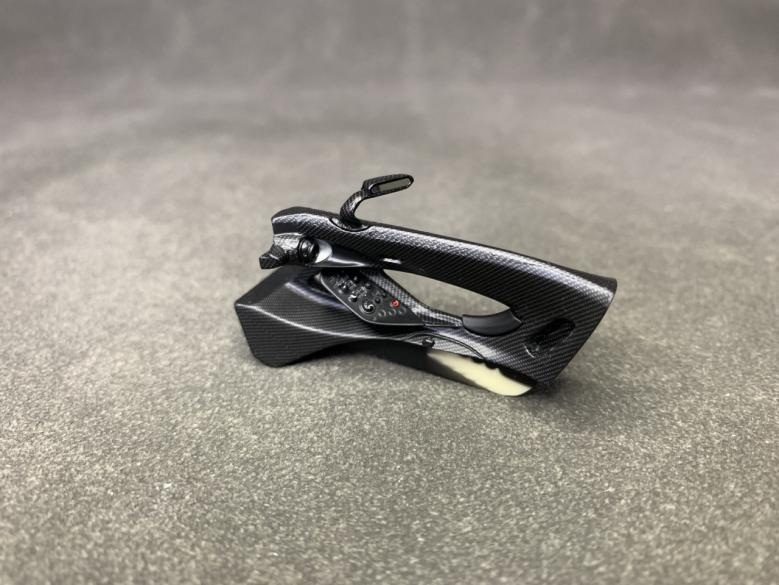
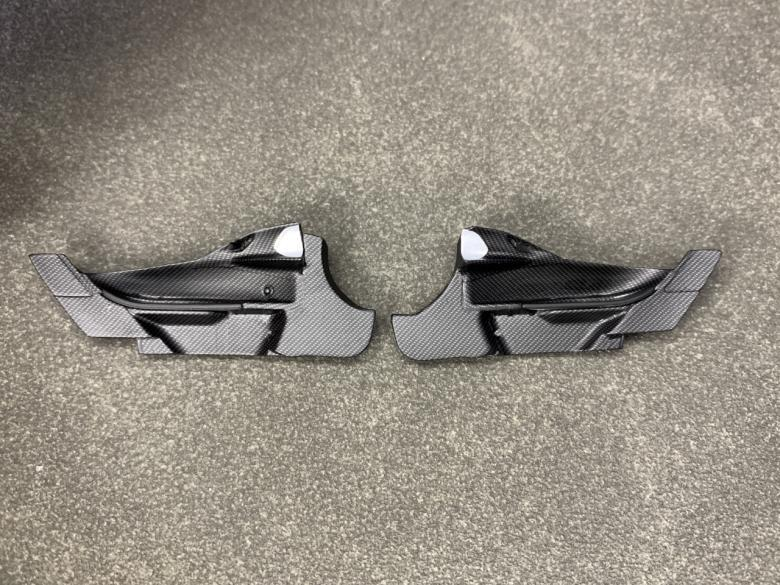
6. Door Panel Carbon Fiber
The interior of the door panel is made of full carbon fiber water sticker. Because the surface of the part is composed of complex planes, a softener is used to soften it and then slowly shape it, and finally it is fixed with a heat gun.
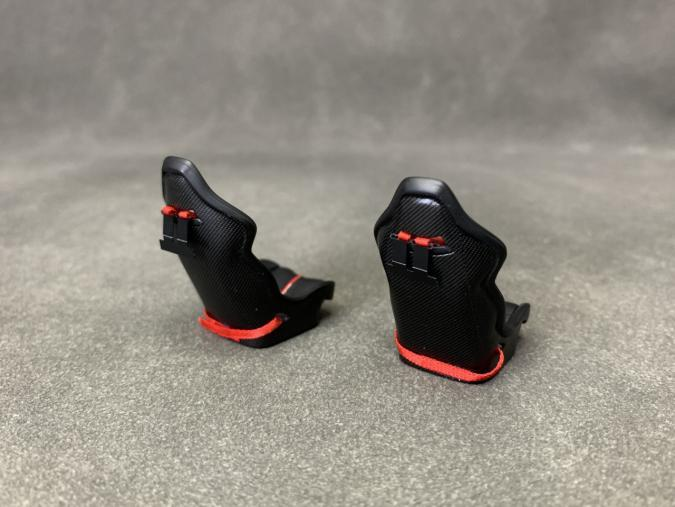
7. Seat Back Carbon Fiber
The carbon fiber water sticker on the back of the seat needs to be pasted carefully. If you feel that the irregularity of the curved surface makes it difficult to paste, you can cut it in advance and then splice each piece together.
Seven cabin components, each with its own detail technique. Up next: Chapter 6: Interior Detailing — Part 2 — diffusers, exhaust, rims, seat belts, and the final clear coat for the carbon parts.
— Build by Break Wong
Advanced Creators
From Box to Beauty
A Ferrari Monza SP2 Build — Chapter 6: Interior Detailing — Part 2
Continuing our interior work — this time we tackle the rear diffuser's carbon fiber treatment, the exhaust and tail throat, the wheels, and the seat belts. These are the pieces that bring the engineering drama of the Monza SP2 to life.
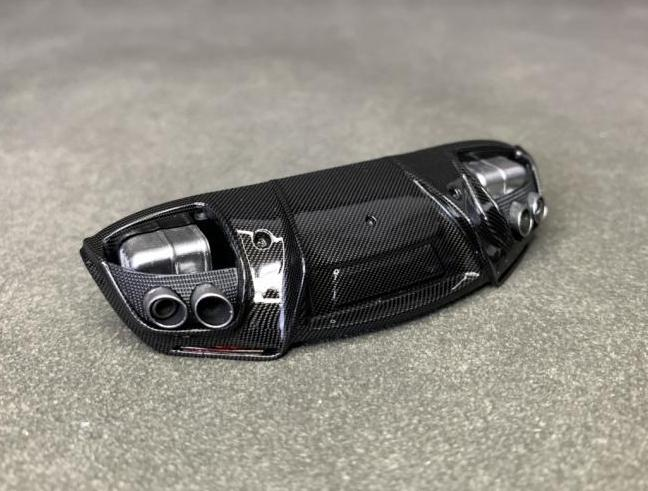
1. Rear Diffuser — Carbon Fiber & Silicone Varnish
After the carbon fiber decals were applied to the diffuser, I sprayed a layer of silicone-based varnish on the surface according to the gloss of the real car.
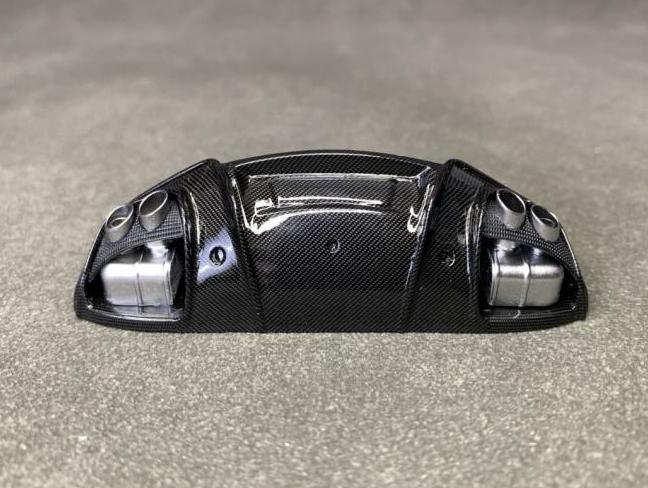
Technique note: This varnish is thinner than amino varnish, and it can also achieve a mirror effect after it is completely dry, but the disadvantage is that it cannot be polished or repainted, so it requires higher spraying techniques.
2. Exhaust Tail Package & Tail Throat
I chose to use Finisher's chrome silver for the exhaust tail package and tail throat. After being fully sprayed, it is not glossy but maintains texture.
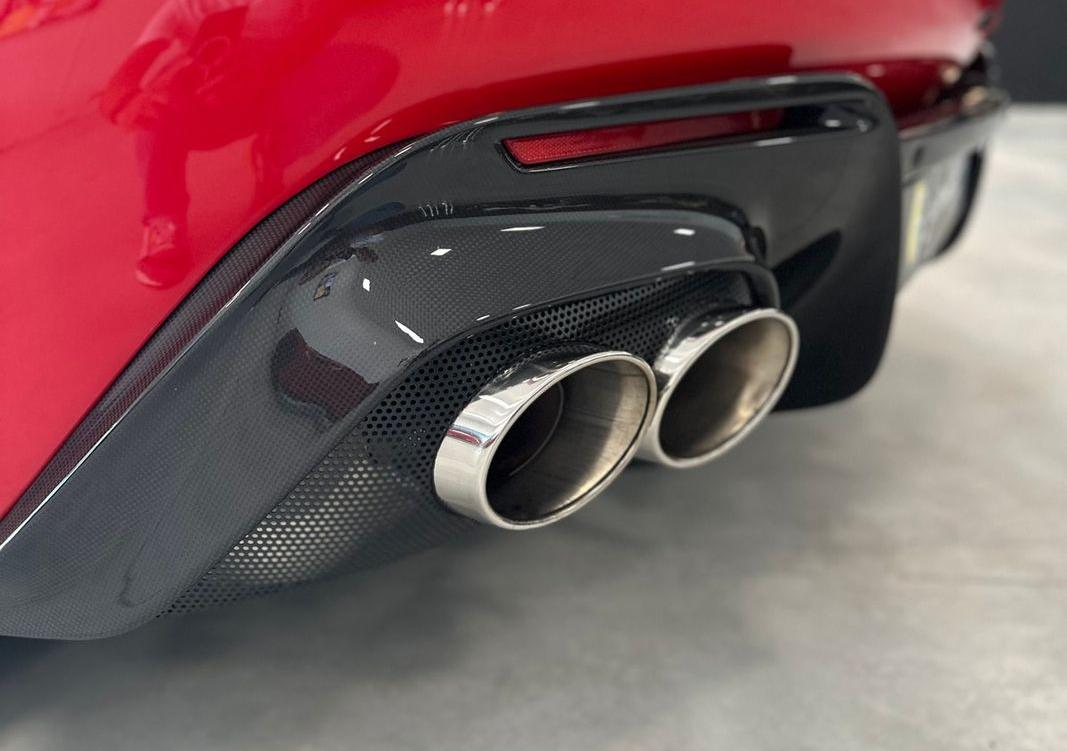
The tail bag protective net is sprayed in semi-gloss black (Gunshi C92), which can contrast with the gloss of the diffuser and improve the look and feel.
【图片7:尾袋保护网 C92 半光黑喷涂效果(与扩散器光泽对比)】
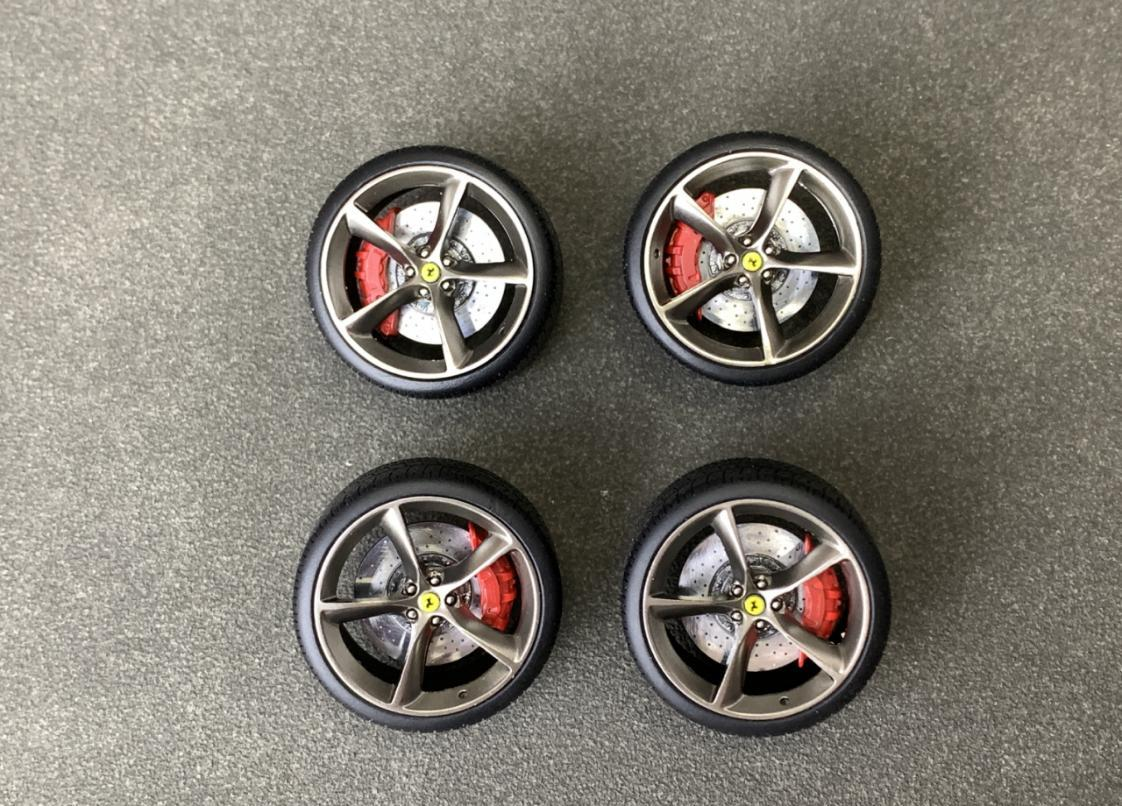
3. Wheel Rims — Bright Black + Tungsten Steel
The rim is primed with bright black, and then sprayed with tungsten steel color. During the spraying process, multiple layers of thin spraying are required. Pay attention to the changes in color to avoid color difference.
4. Rear Windshield Installation
When fixing the rear windshield, pay attention to avoid glue spillage. You can put a little glue around the opening, and then use a third-party rivet-etched patch to stick it on it to cover the blemishes.
5. Carbon Fiber Parts — Silicone Varnish
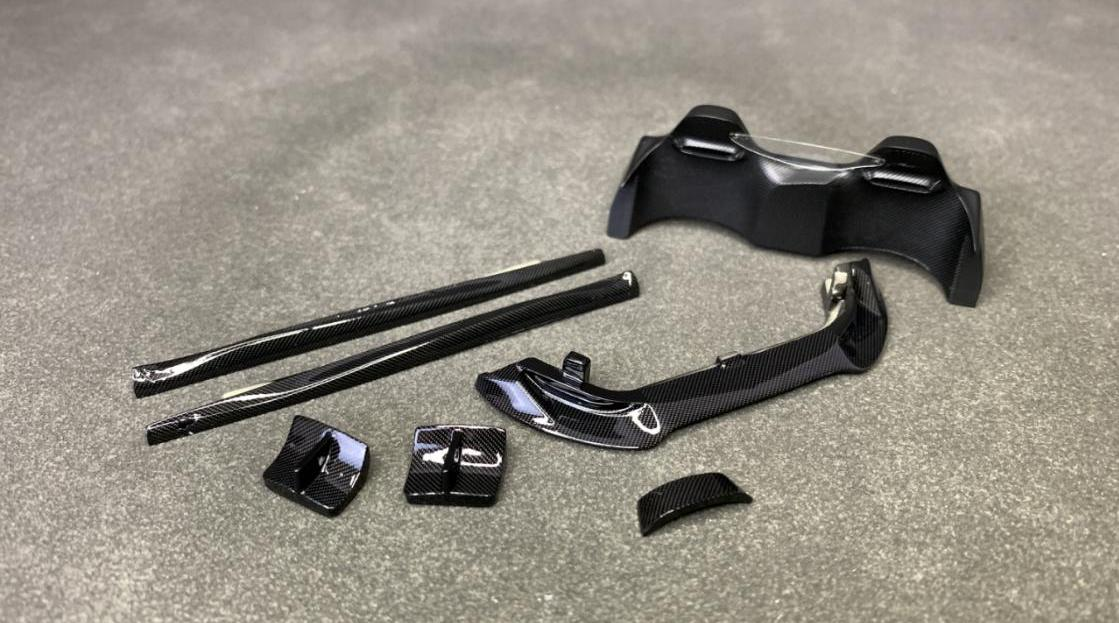
The surfaces of parts with carbon fiber patterns such as the front shovel, dashboard cover, and side skirts are also sprayed with silicone-based varnish to achieve a mirror effect.
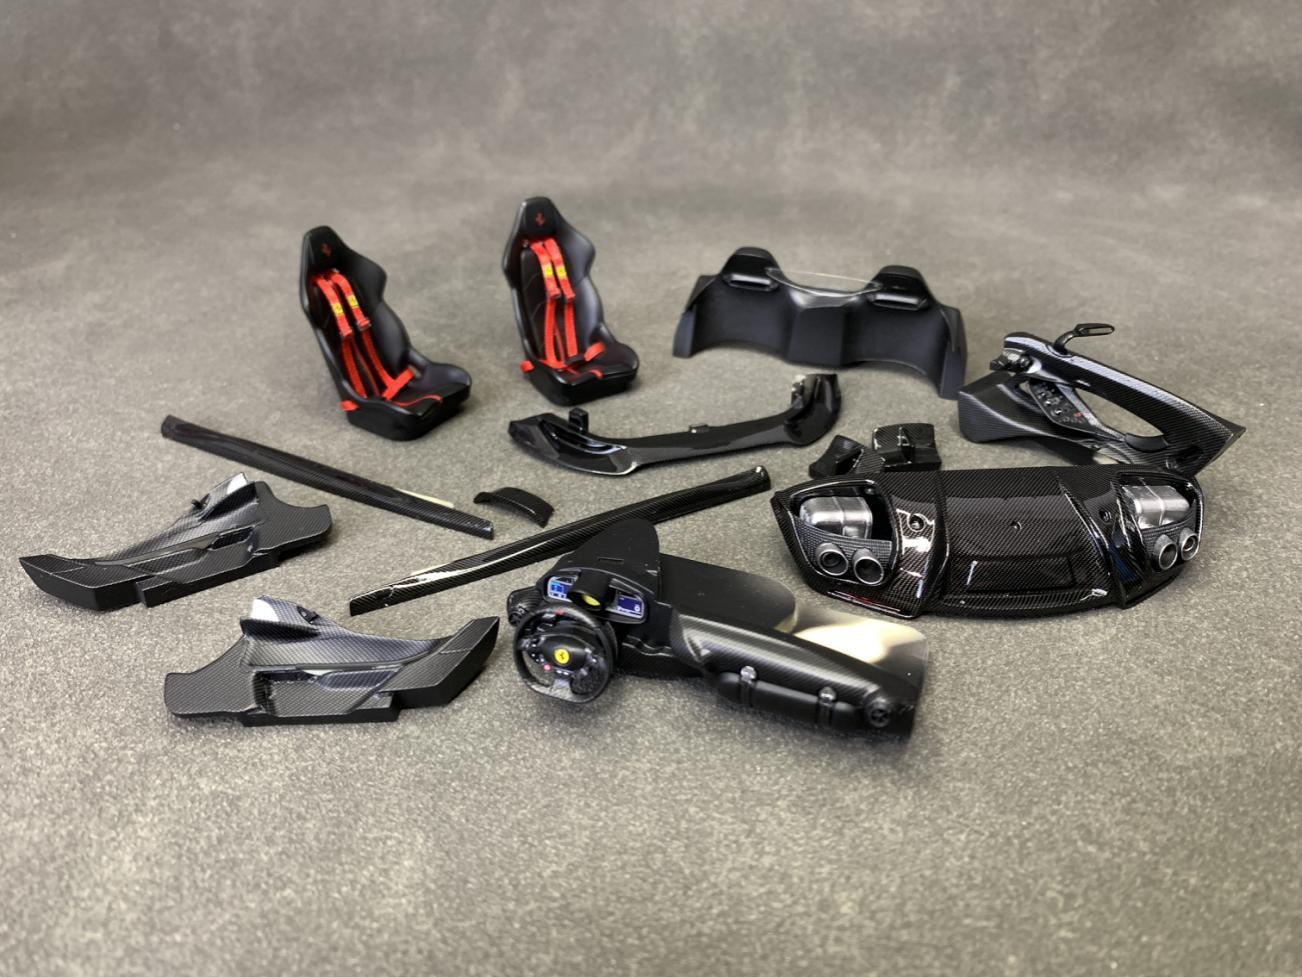
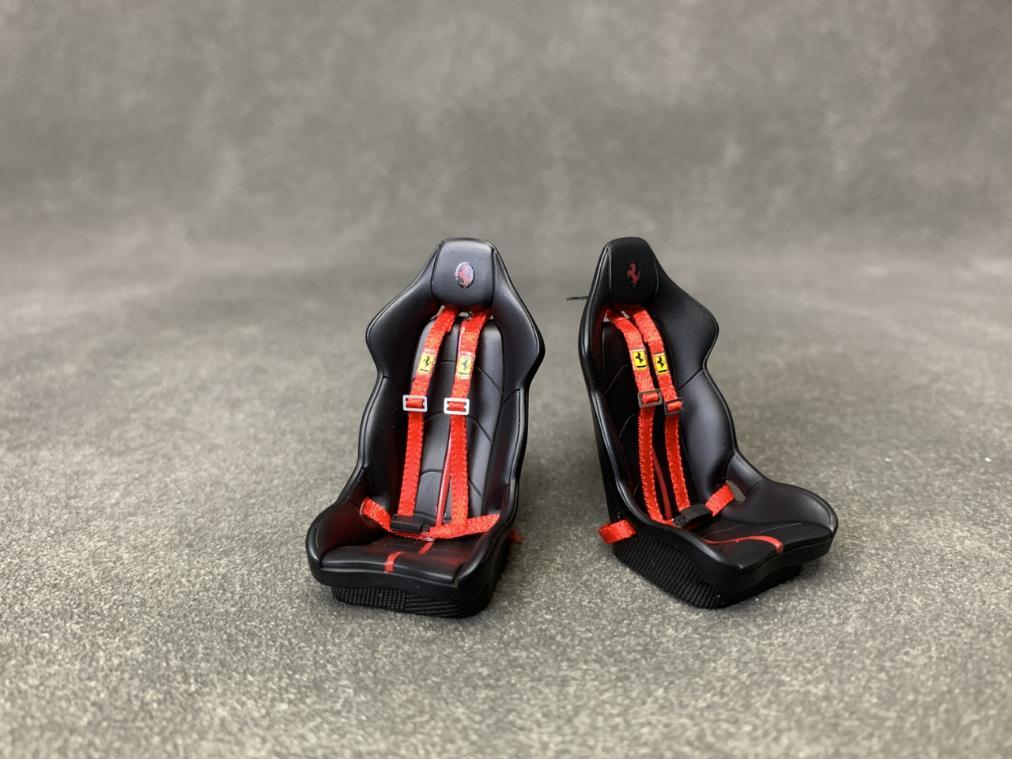
6. Seat Belts — 2mm Woven Tape
The seat belt can be replaced with a 2mm woven tape, and the prancing horse logo on it can be affixed according to personal preference by choosing a third-party decal.
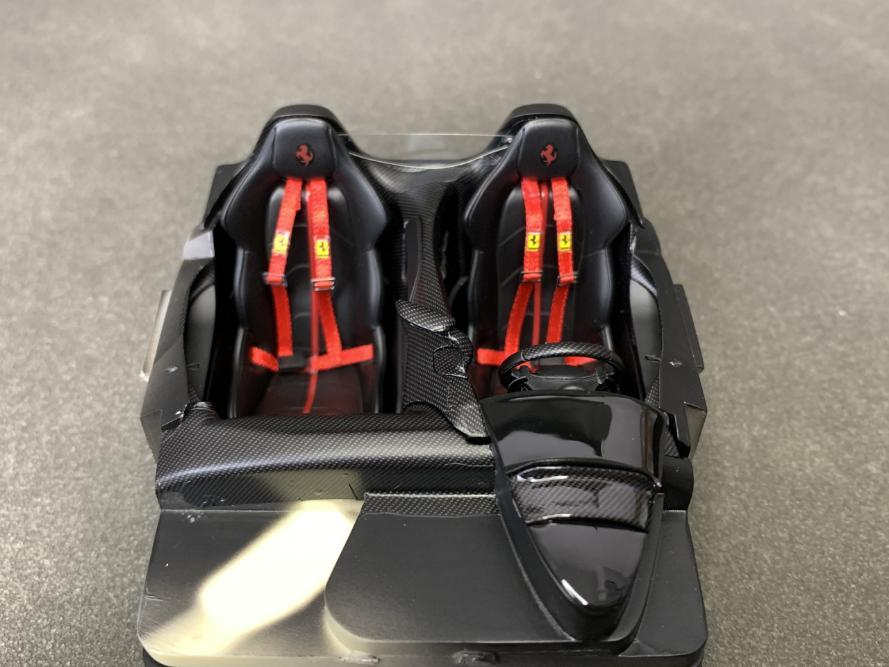
The interior is now complete in every detail. Up next: Chapter 7: Body Shell — Painting & Varnish — the moment we put the iconic Rosso Russ red on the Icona body.
— Build by Break Wong
Advanced Creators
From Box to Beauty
A Ferrari Monza SP2 Build — Chapter 7: Body Shell — Painting & Varnish
Now for the most dramatic moment in any car model build — putting color on the body. The Monza SP2 deserves nothing less than a flawless finish. Let's go step by step from primer to final varnish.
Step 1 — Inside the Shell: Matte Black
Matte black (C-33) is used on the inside of the car shell to improve the look and feel. Since black decals have an irregular curved surface, be sure to use a decal softener to soften them when posting them, and then set them before applying them in water.
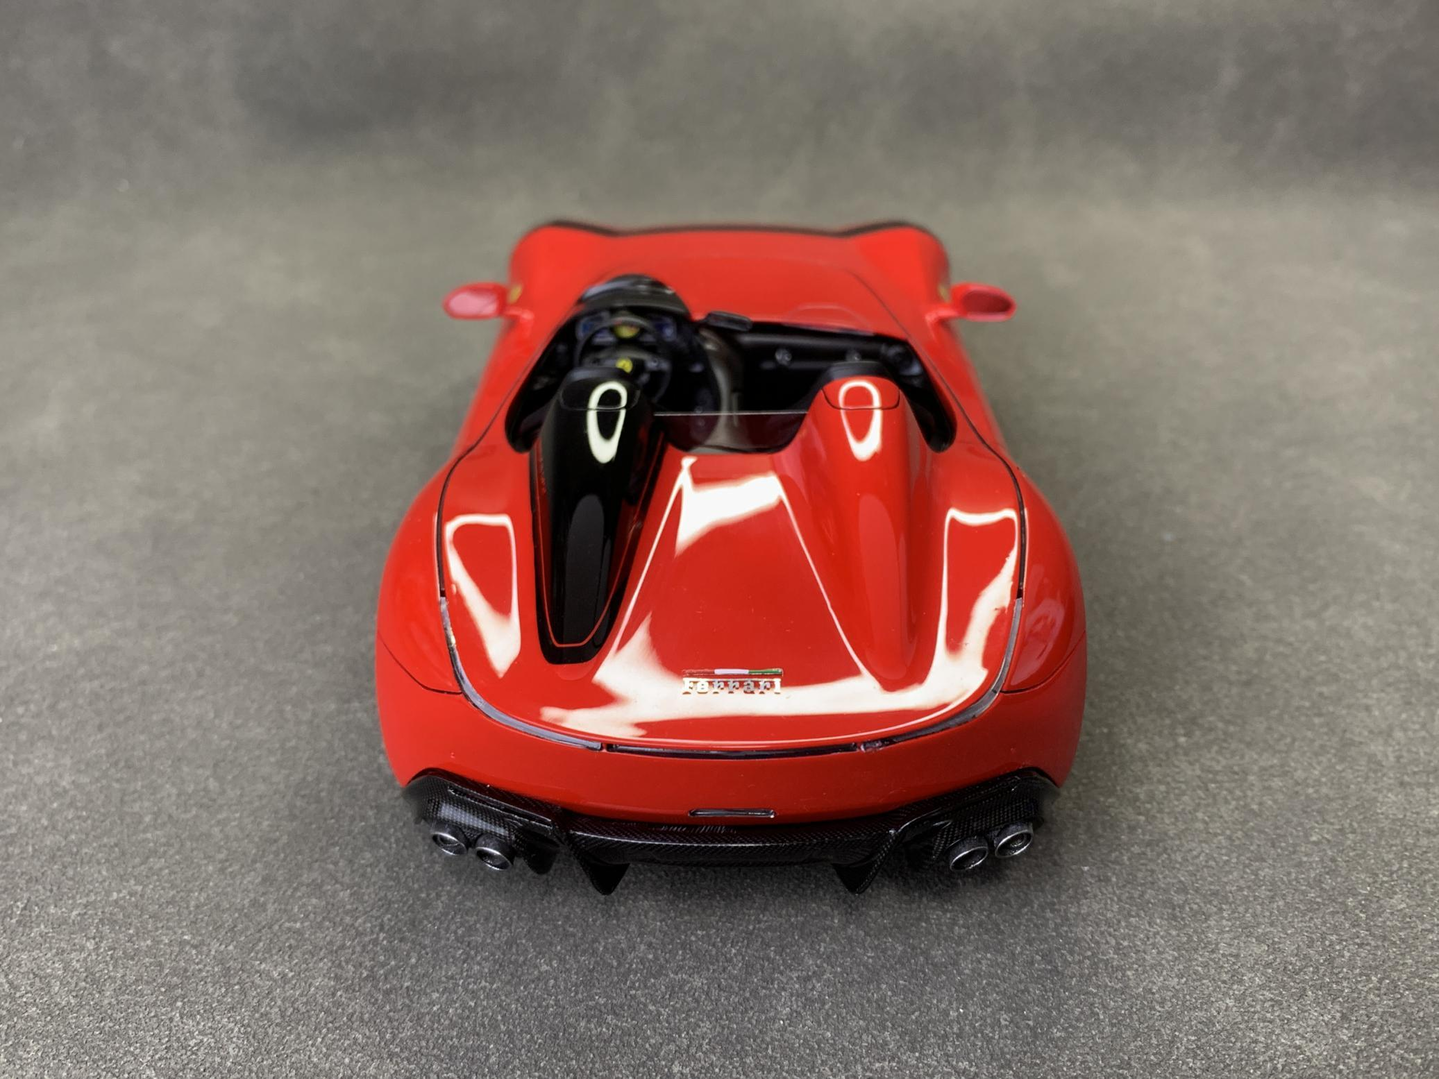
Matte black (C-33) is used inside the wheel arches for a shadow effect.
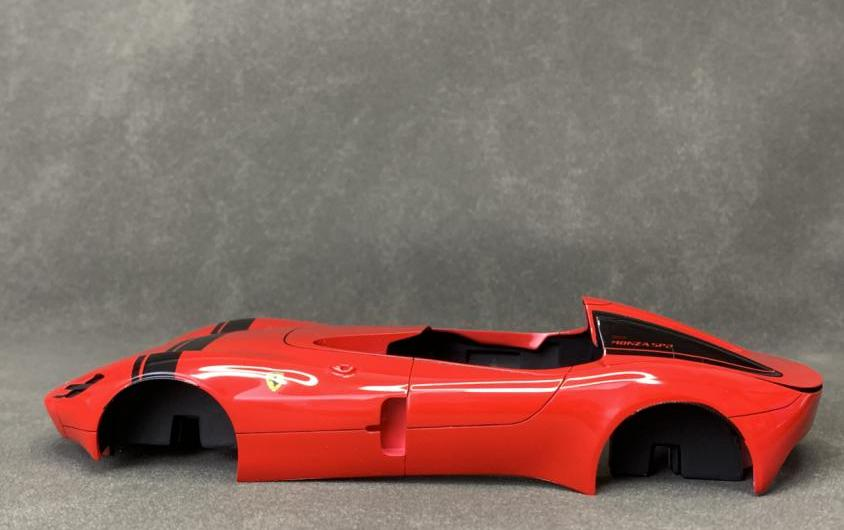
Step 2 — Racing Lines with Curve Masking Tape
Since the black racing lines are not provided in the water sticker, you can use Tamiya 87177 curve masking tape for masking and spraying. Since the curved masking tape has a slightly lower viscosity, press it tightly before spraying.
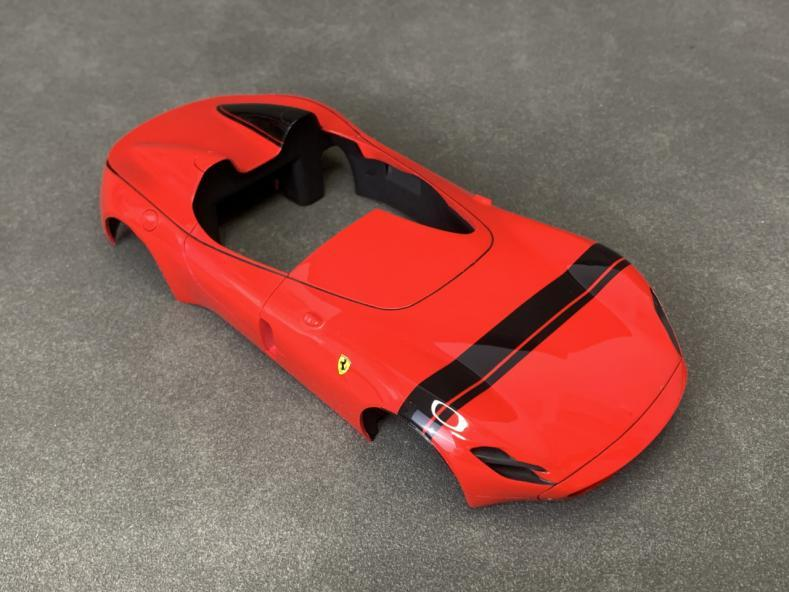
Step 3 — Primer Layer
The car shell is first primed with gray resin water-based surfacer, then pink is used as the primer.
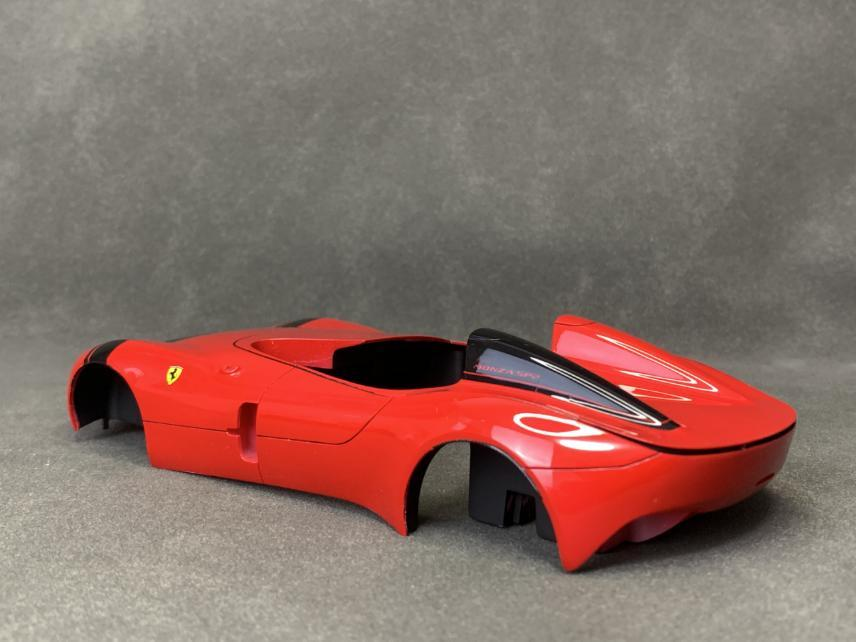
Step 4 — Ferrari Rosso Russ Red
Finally, it is sprayed with Ferrari Rosso Russ Red. We recommend using County C-185.
Step 5 — Amino Varnish (Clear Coat)
If you are looking for a mirror effect, you can spray amino varnish. We recommend using Glasurit BASF brand 447 varnish.
⚠️ Technique — Amino Varnish Application:
- You need to pay more attention to the amino varnish during the spraying process.
- Spraying too much at one time will cause accumulation at the edges.
- If the engraved line is shallow, it will also fill up the engraved line, thus losing the better texture.
- Especially the positions on both sides of the line need to be paid more attention to.
- Once the paint output of the airbrush is large, it will cause varnish to accumulate on the edge of the plane.
- If there is no way to accurately control it, you can use sandpaper and polishing paste to polish it after it dries.
In general, in addition to maintaining the gloss and smoothness of the paint surface, we must also ensure the overall texture of the car shell. The beauty of a model is not only reflected in the color or gloss, but is composed of many details. To make good-looking and reasonable works requires a lot of effort and careful craftsmanship.
Step 6 — Front Grille Interior & Light Details
The interior of the front grille is matte black.
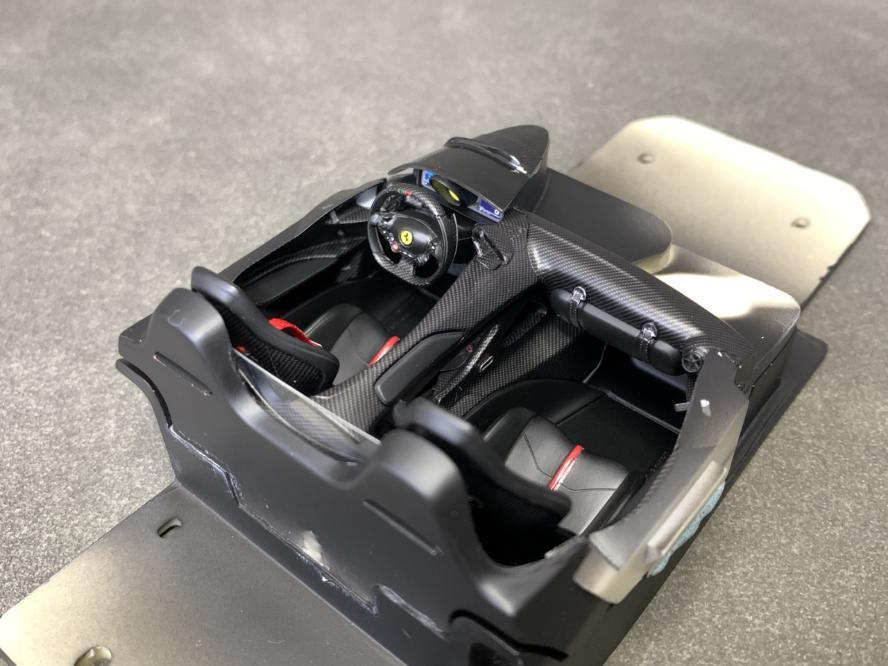
Note that the inner side of the taillight is black. The thick lines of the cockpit shell can be filled with Tamiya weathering liquid (penetrating liquid). After it dries, use a cotton swab dipped in a little X-20 to wipe off the excess weathering liquid.
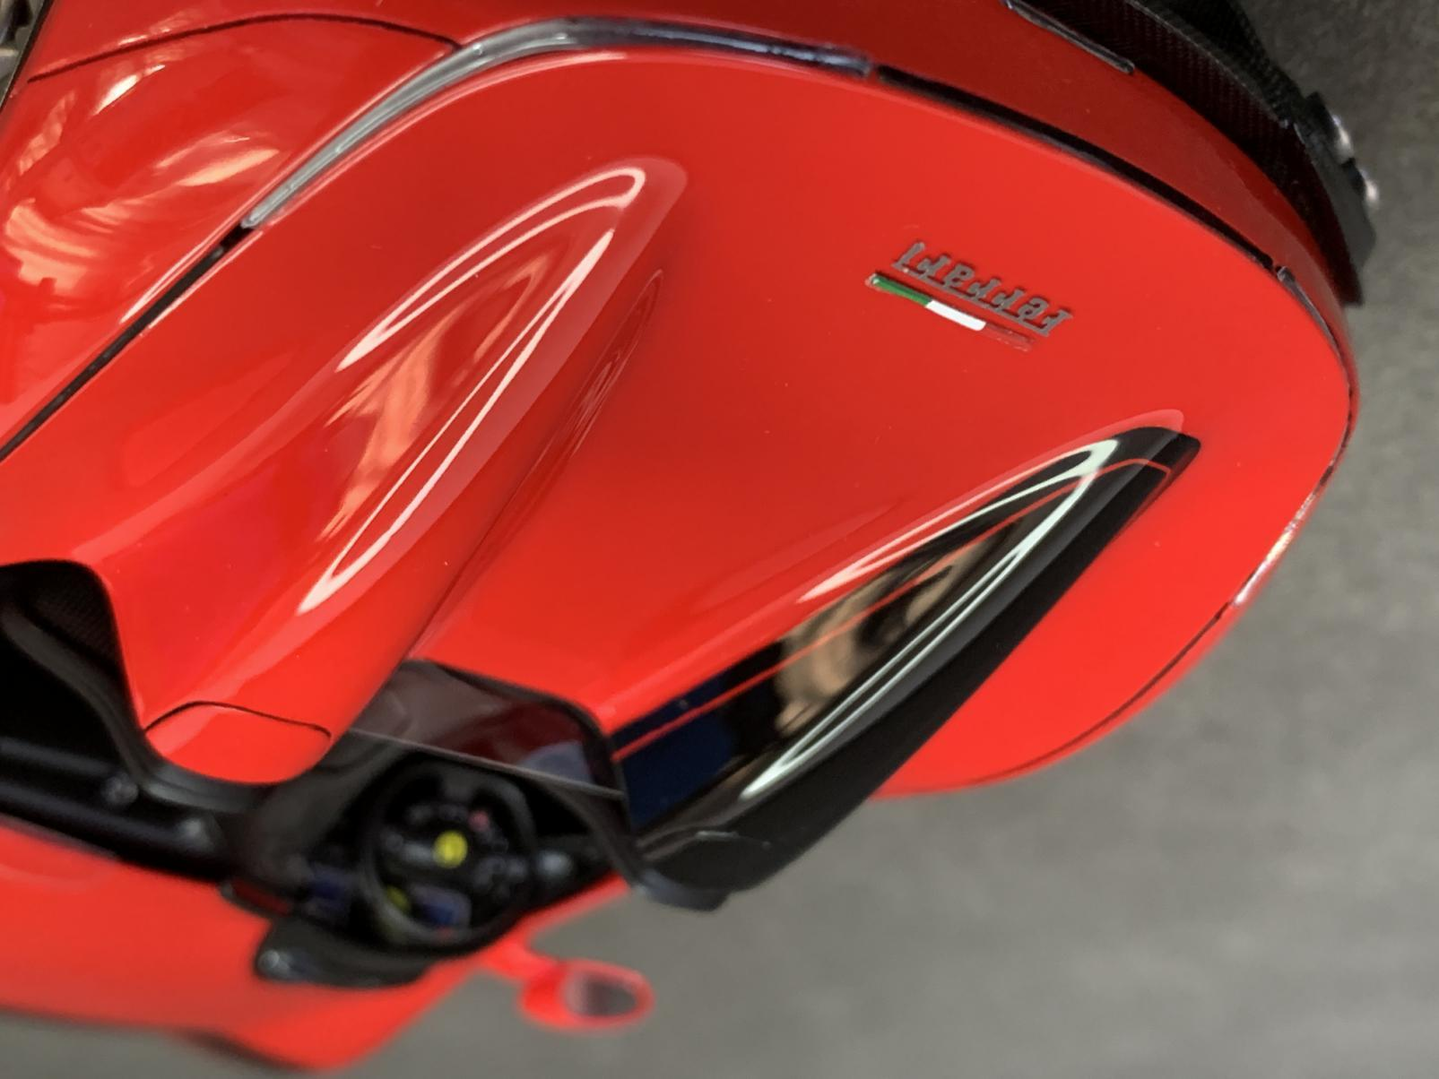
The interior of the headlights are matte black, and if you feel it's not easy to cover, you can use water-based paint for pen painting.
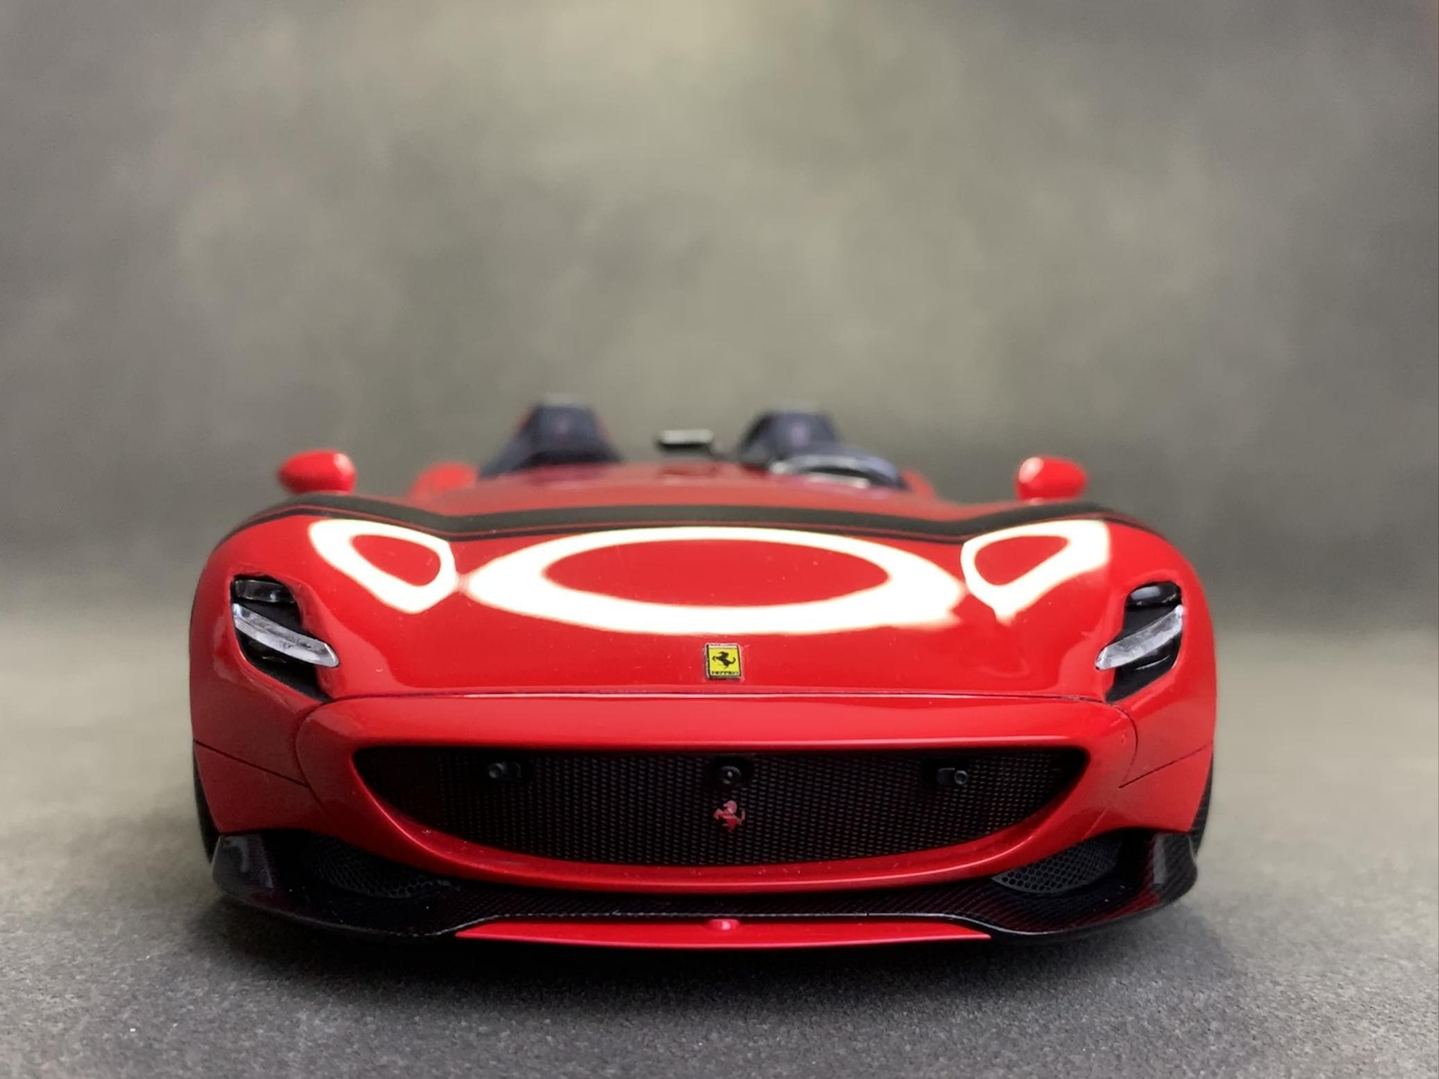
The body is now finished in Icona red, with deep gloss and clean panel lines. Up next — the final chapter: Chapter 8: Final Assembly & Exhibit!
— Build by Break Wong
Advanced Creators
From Box to Beauty
A Ferrari Monza SP2 Build — Chapter 8: Final Assembly & Exhibit
This is it — the final chapter. Every painted part, every decal, every polished surface comes together to become the Monza SP2.
Step 1 — Front Intake Grille
The air intake grille at the bottom of the front of the car needs to be compared in advance and bent at a small angle. AlphaModel is accurate in mold opening, and you only need to compare the slots.
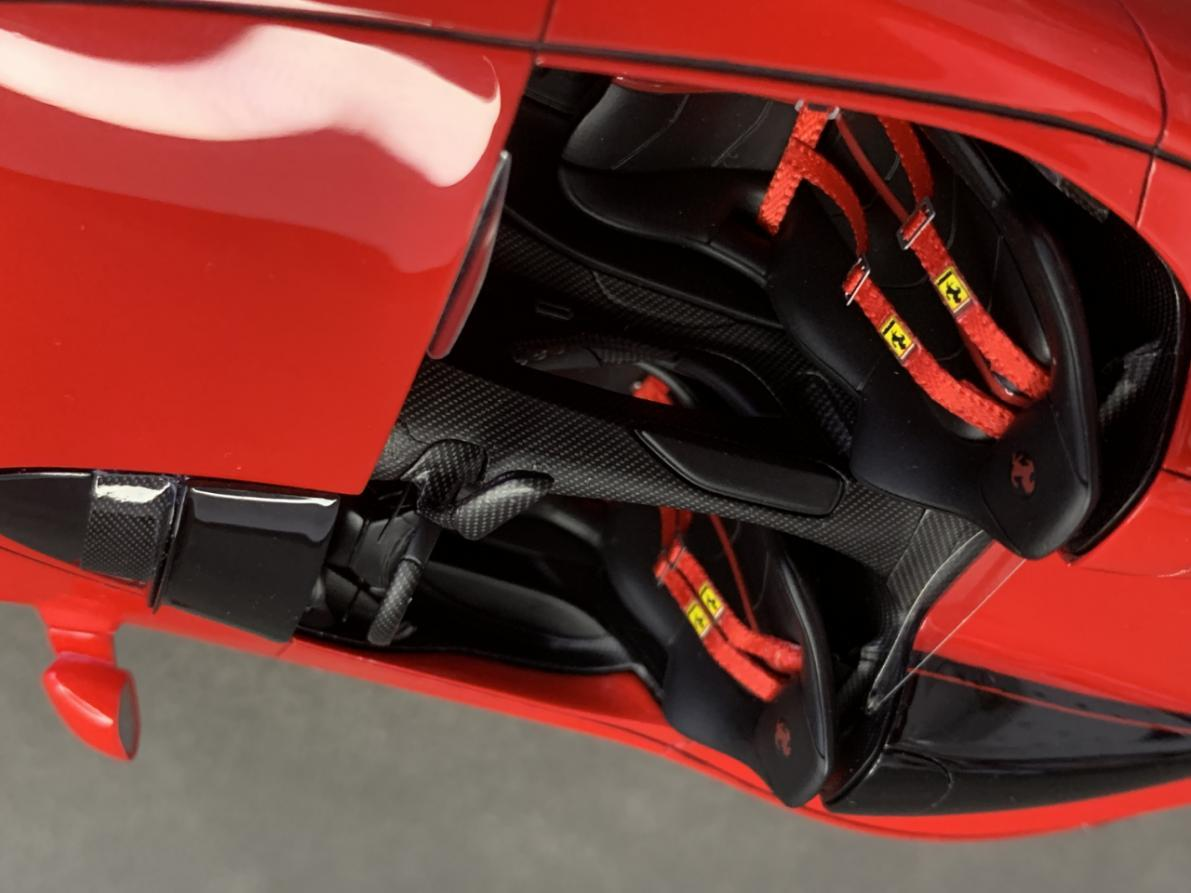
When dispensing glue, it is recommended to use jelly-like instant glue for bonding. Pay attention to the amount of glue control.
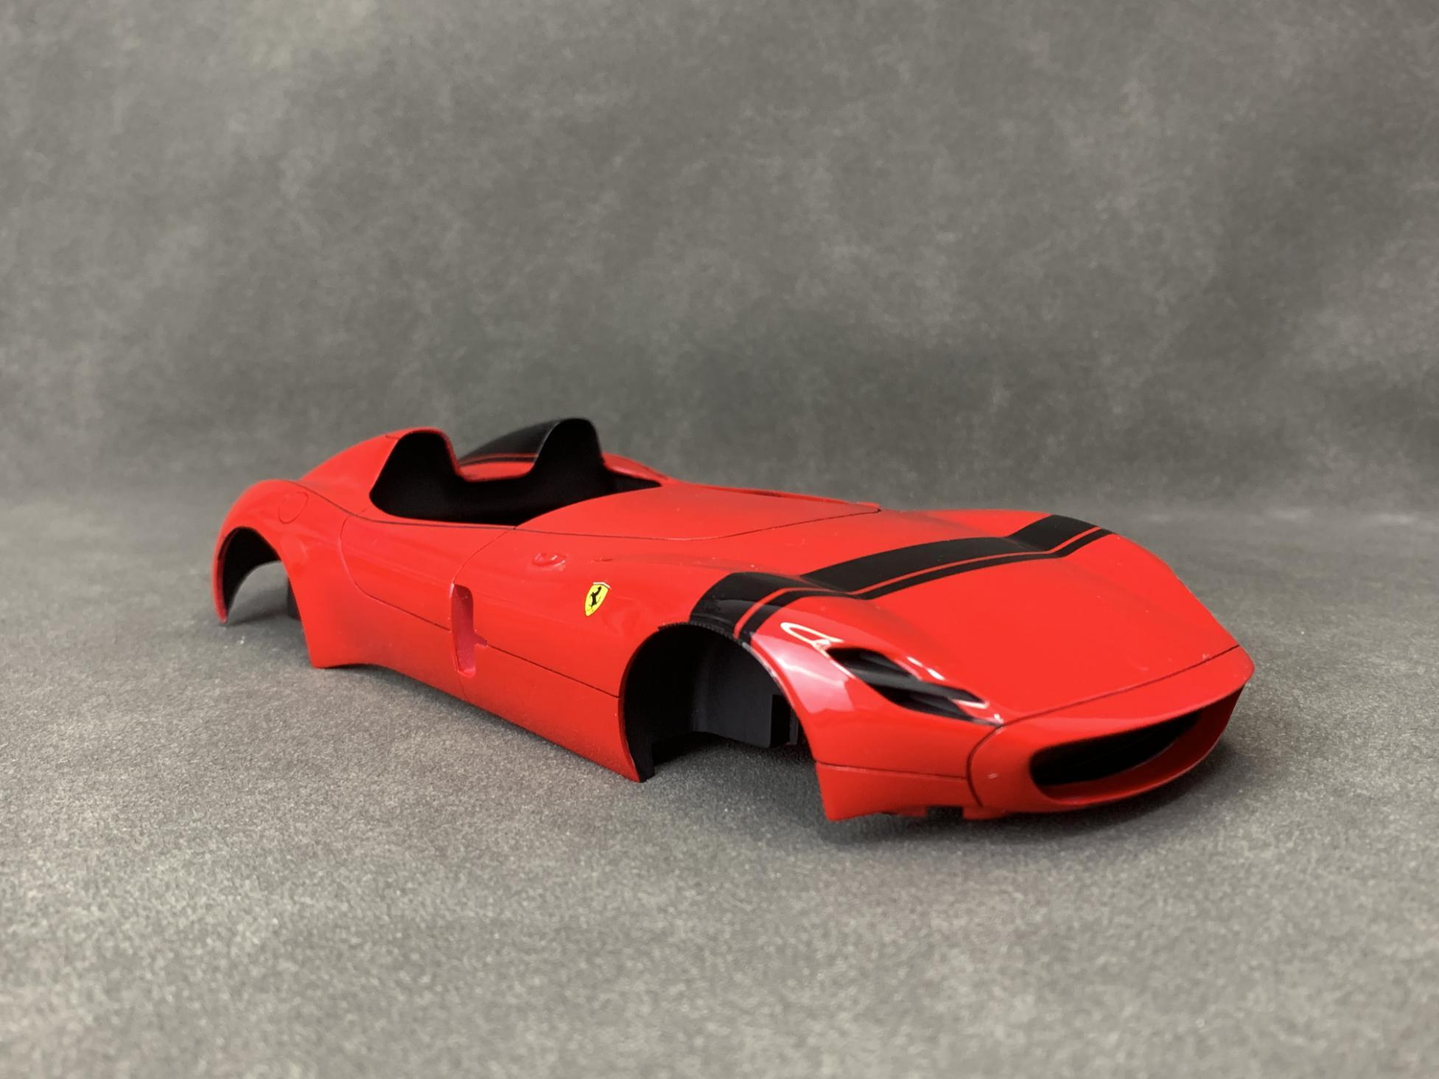
You can use colorless and transparent UV glue for the headlights. Even a trace amount of glue overflow will not be visible. Just wait for the position to be adjusted and then use the ultraviolet lamp to solidify.
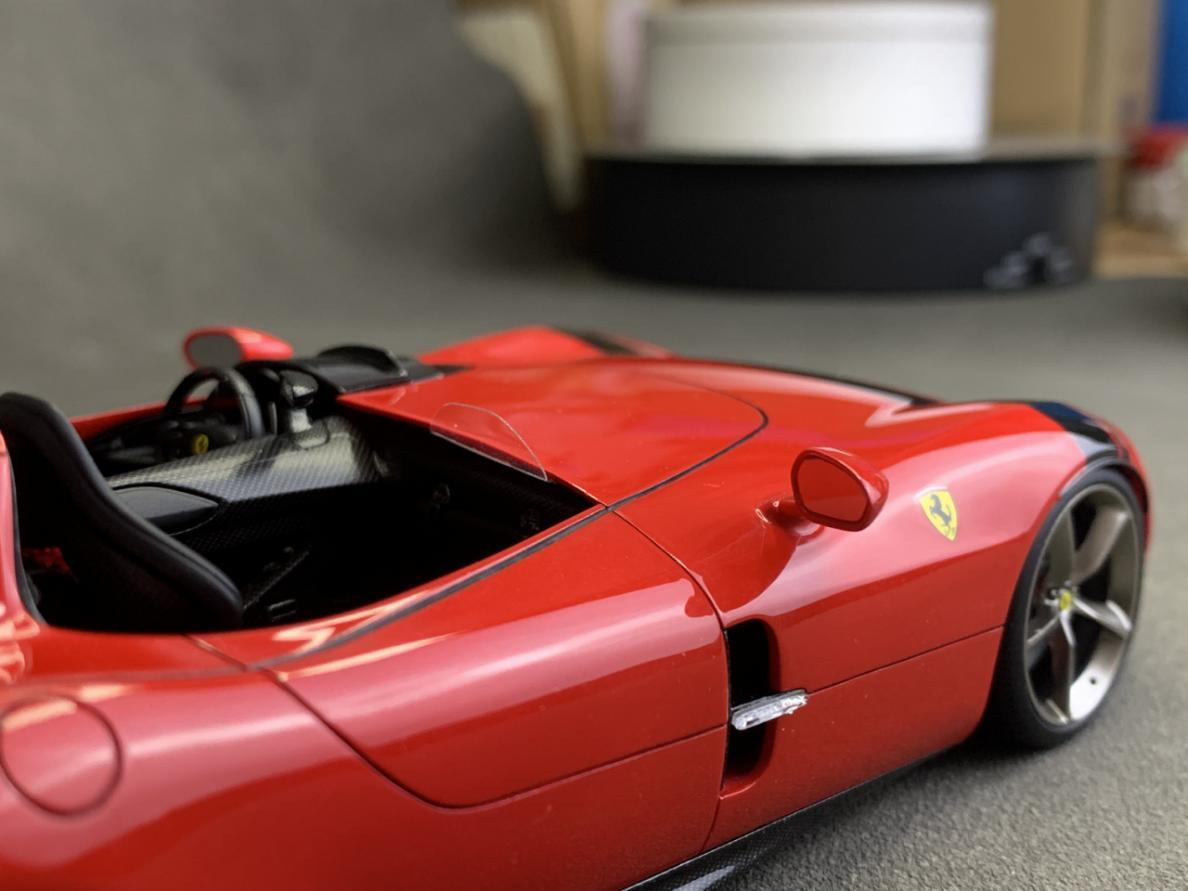
Step 2 — Rear Badging & Italian Flag
The Ferrari logo on the rear of the car and the etched sheet of the Italian flag logo need to be carefully compared. Be careful not to deform when removing them from the etched sheet.
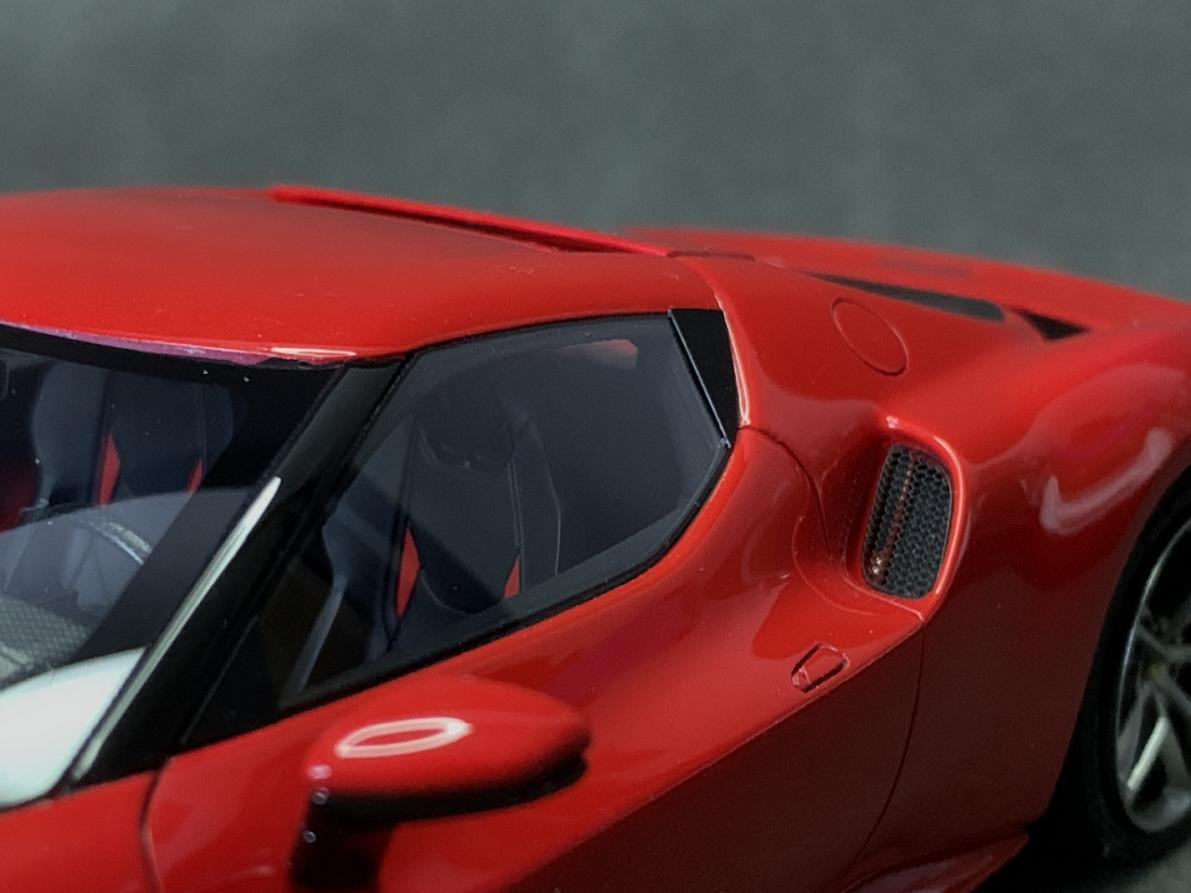
Finally, be careful not to apply too much glue during the dispensing process. When pressing the etched sheet, do not scrape off the paint on the etched sheet, and be careful not to get glue on the parts.
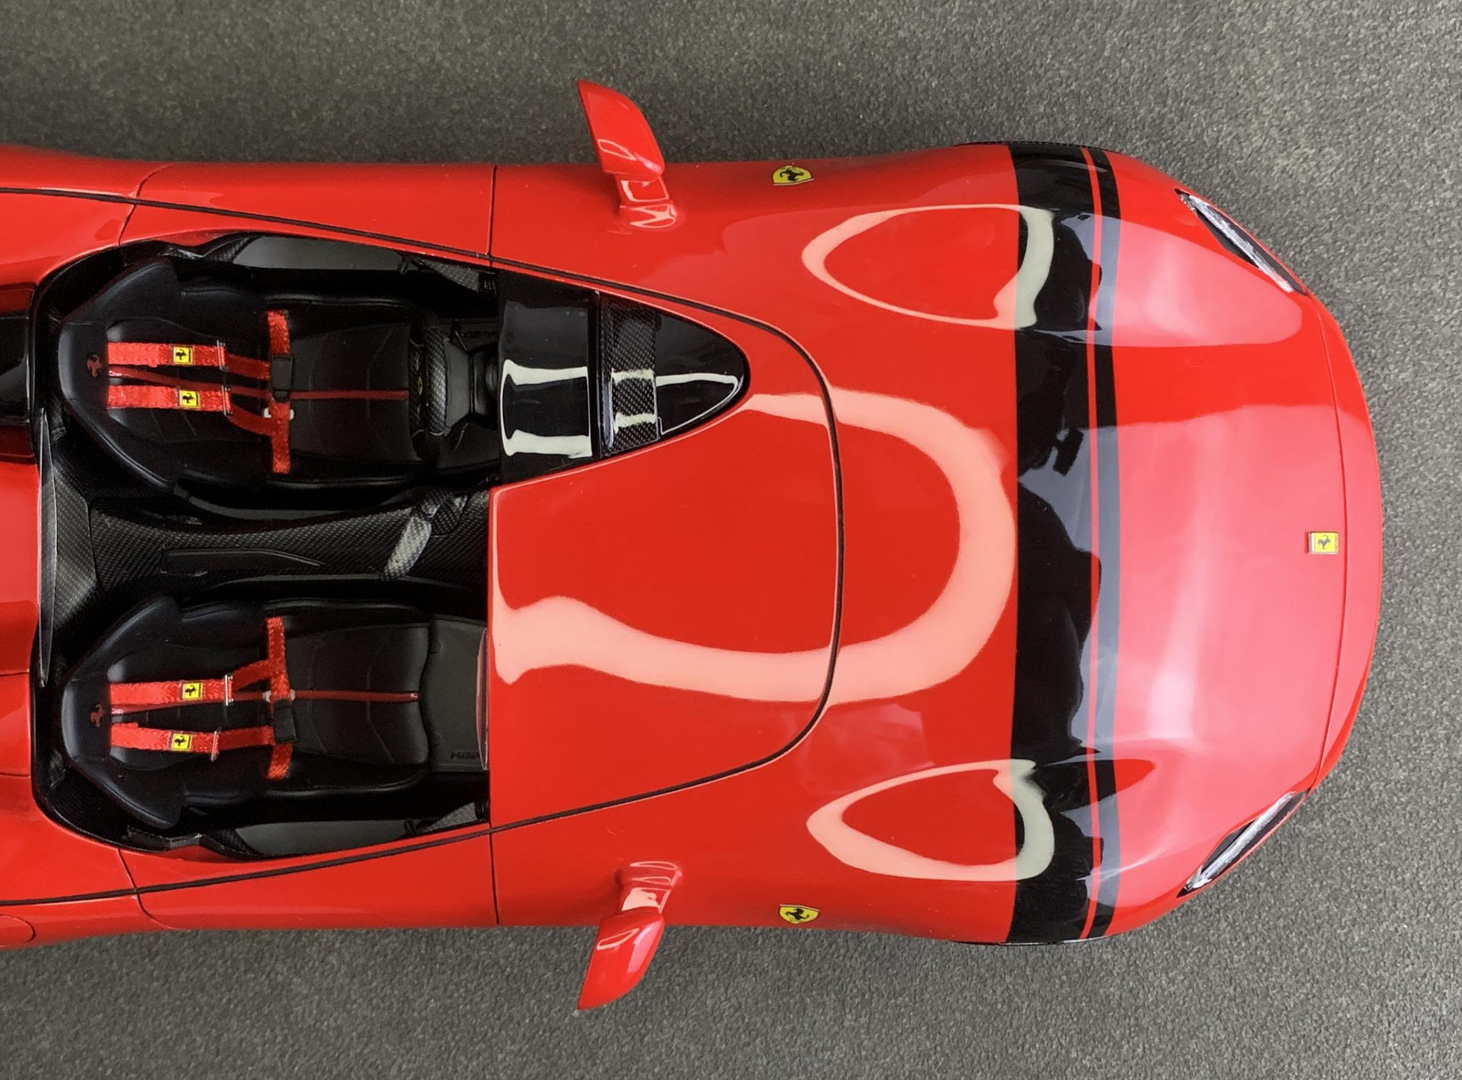
— The Finished Monza SP2 —
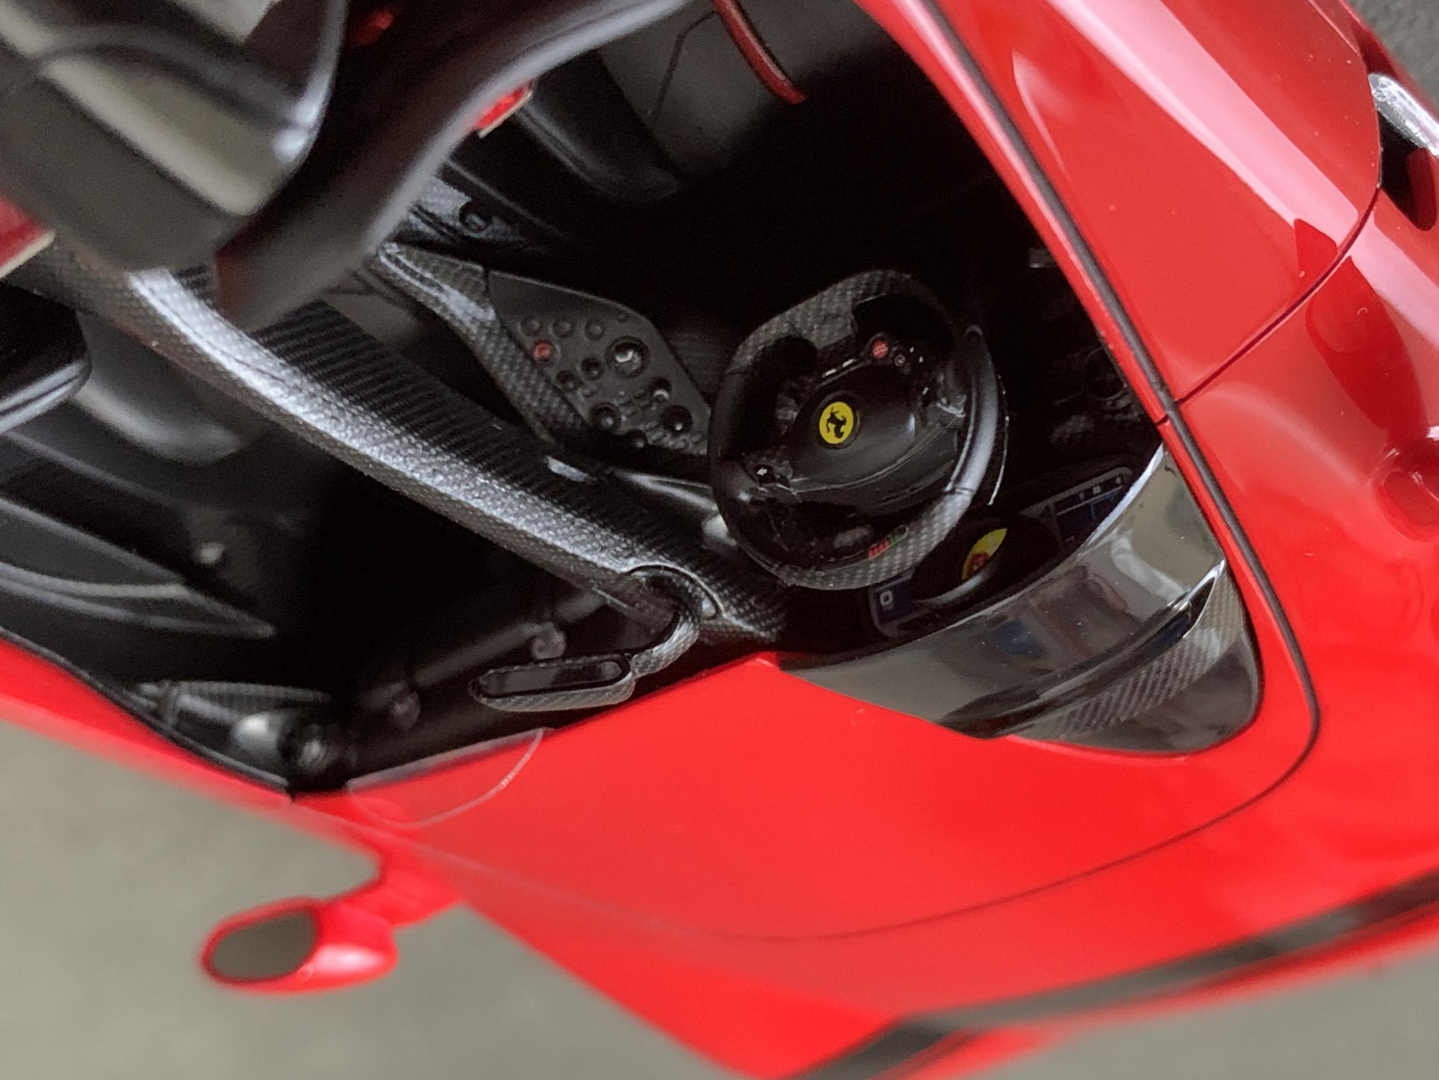
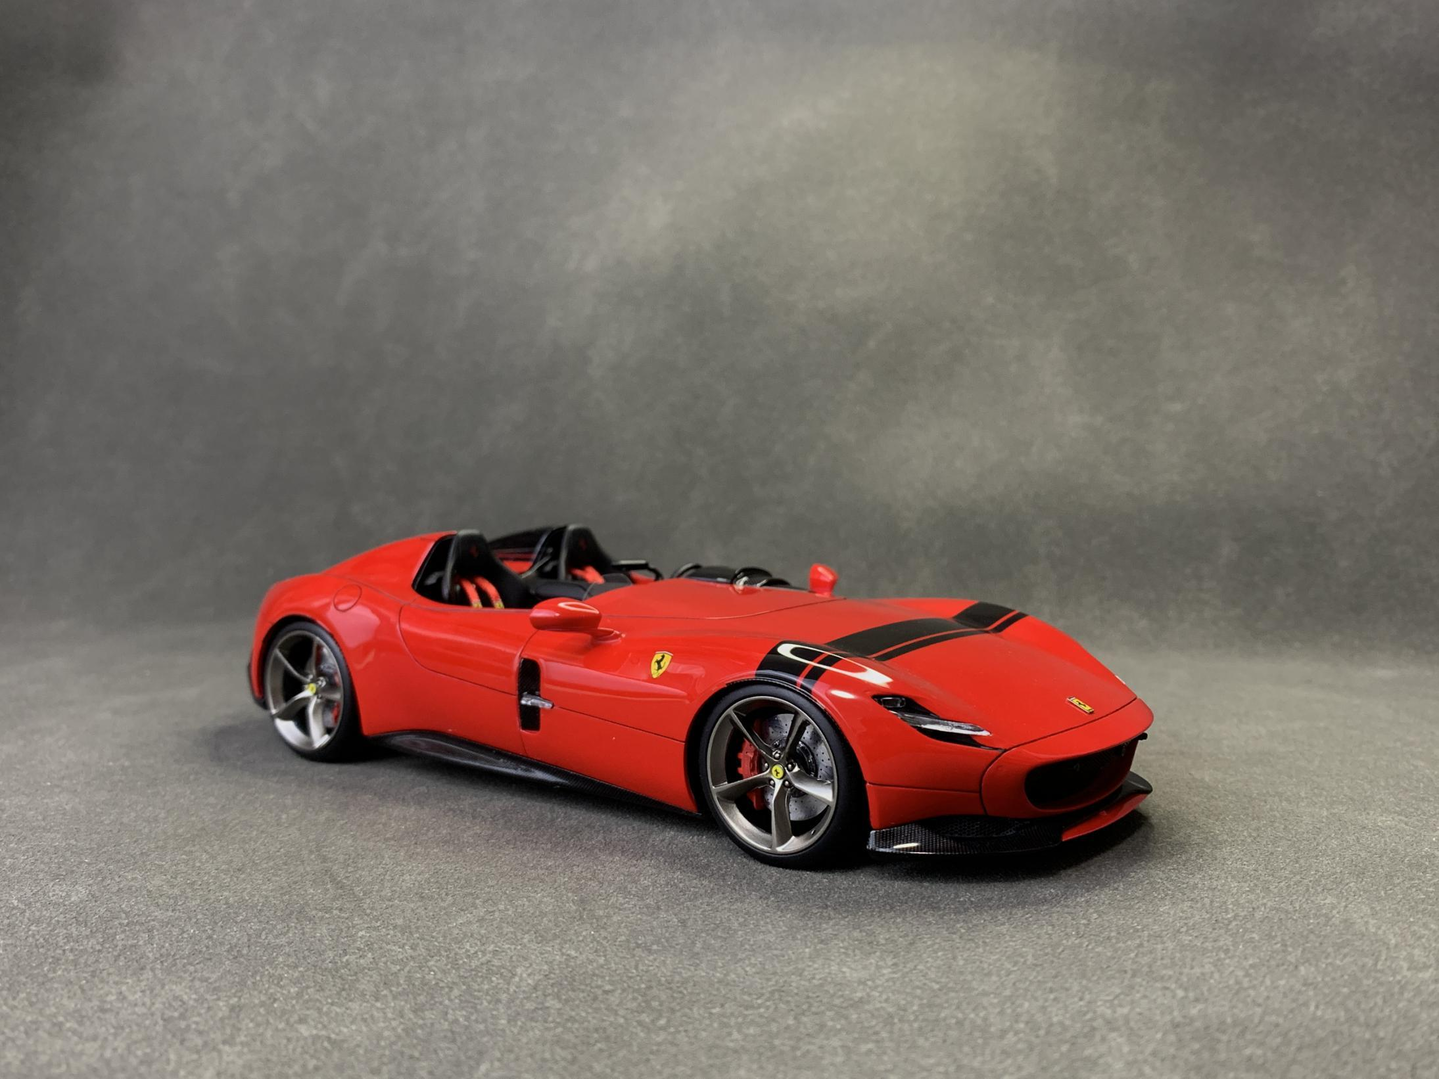
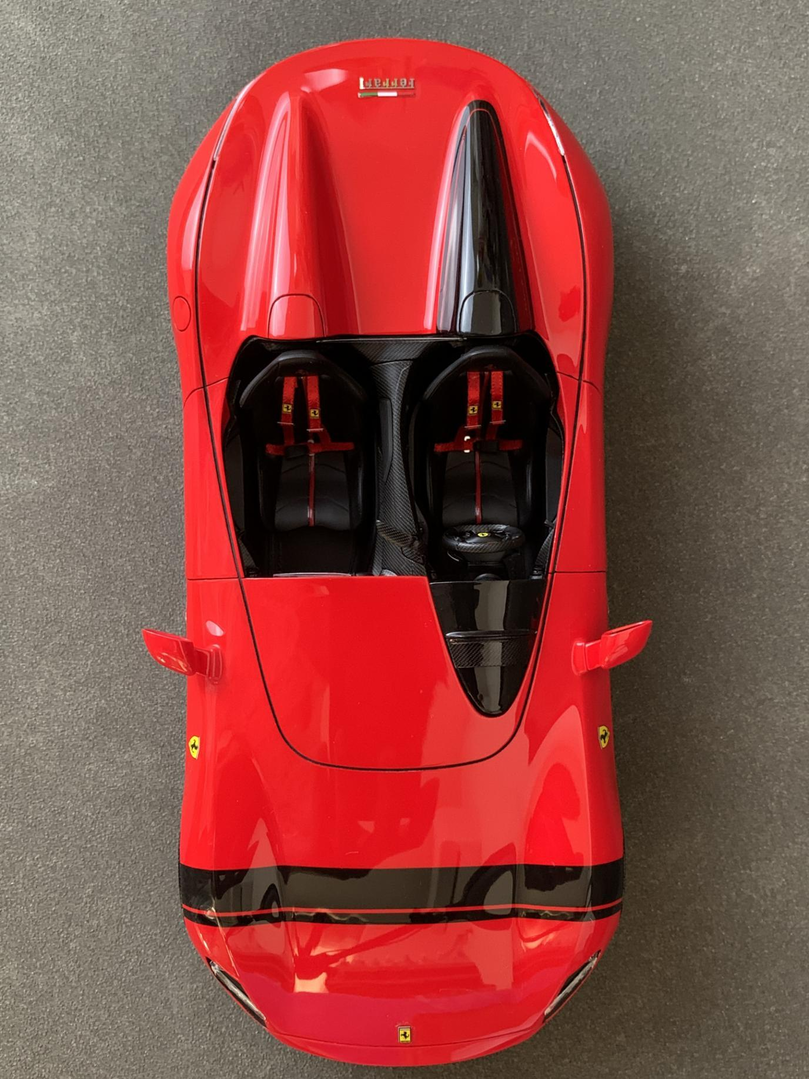
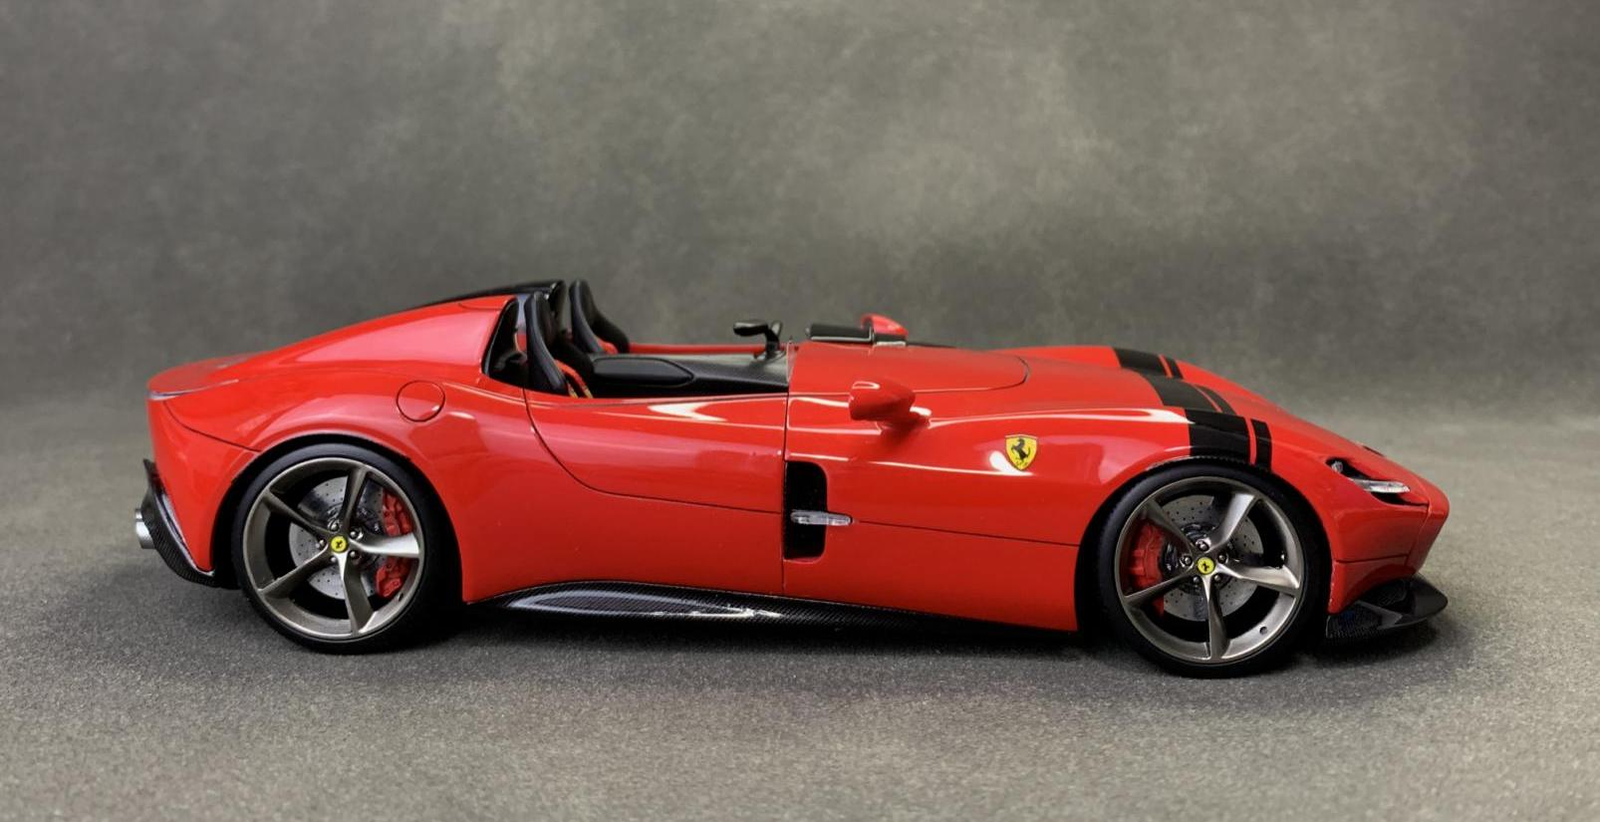
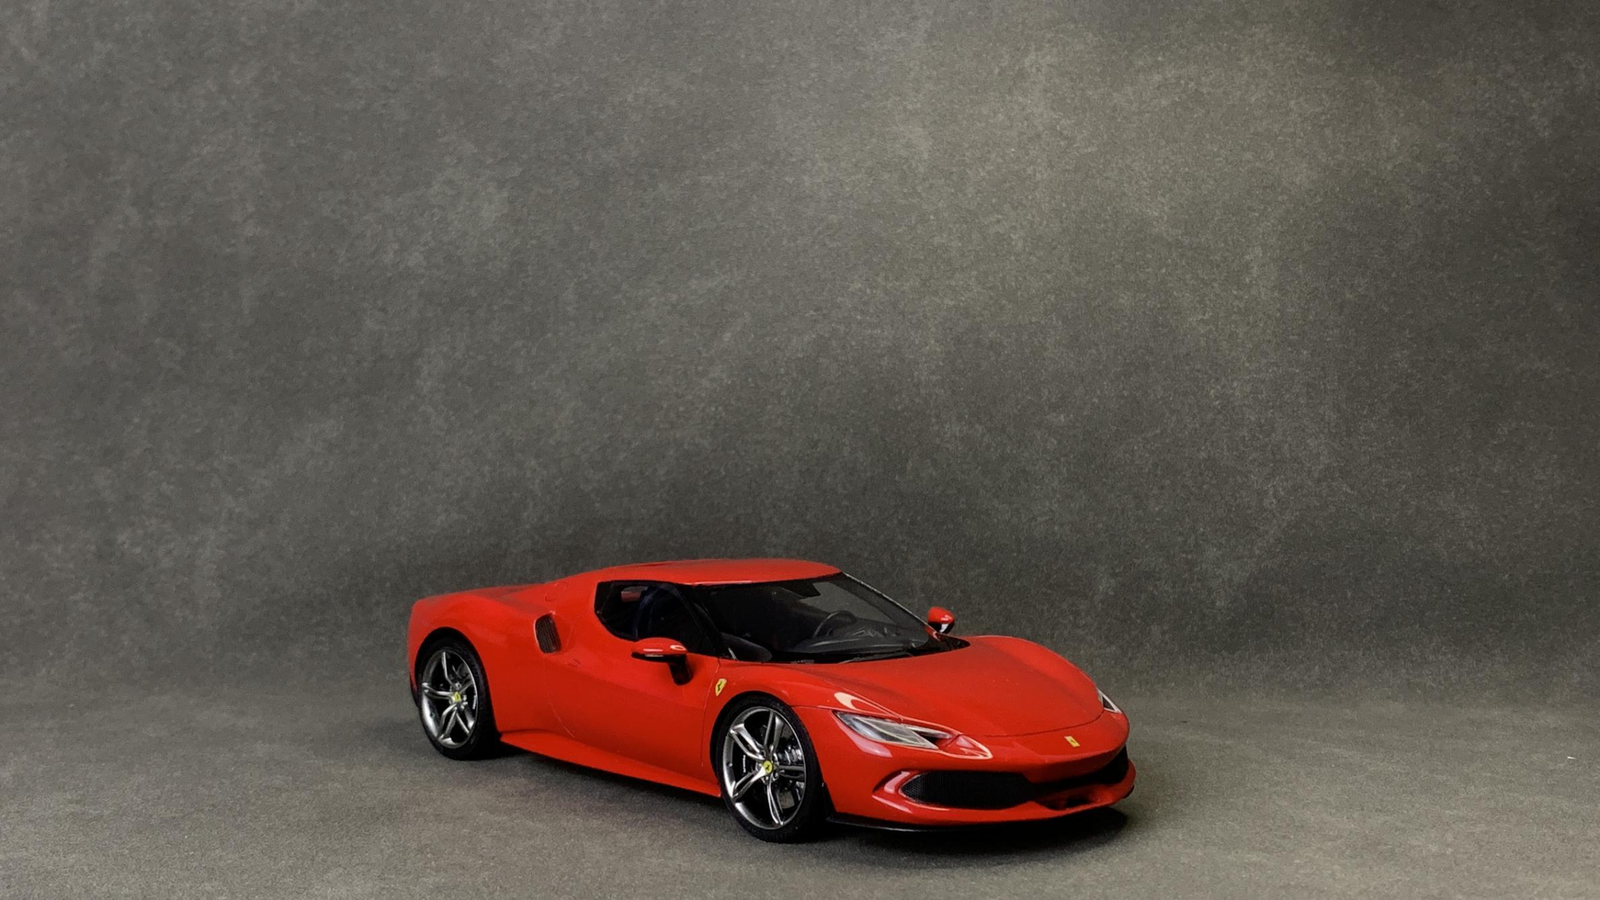
And that wraps up this 8-chapter build of the Alpha Model 1/24 Ferrari Monza SP2. From a blue box to a fully detailed Rosso Russ Icona — every line, every decal, every coat of varnish earning its place. Thank you for following along!
Thanks,
Break Wong