
 Advanced Creators
From Box to Beauty
A Ferrari F1 SF23 Build — Chapter 1: Parts Check & Box Opening
Before we touch a single resin part, let's open this kit and see what Alpha Model has packed inside. The SF23 is one of the most ambitious F1 kits ever produced by Alpha Model, and it shows the moment you open the box.
STEP 1: PARTS CHECK
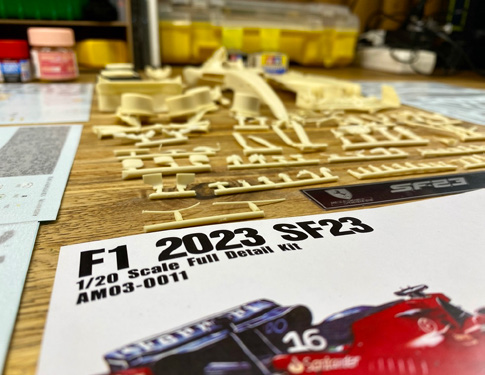
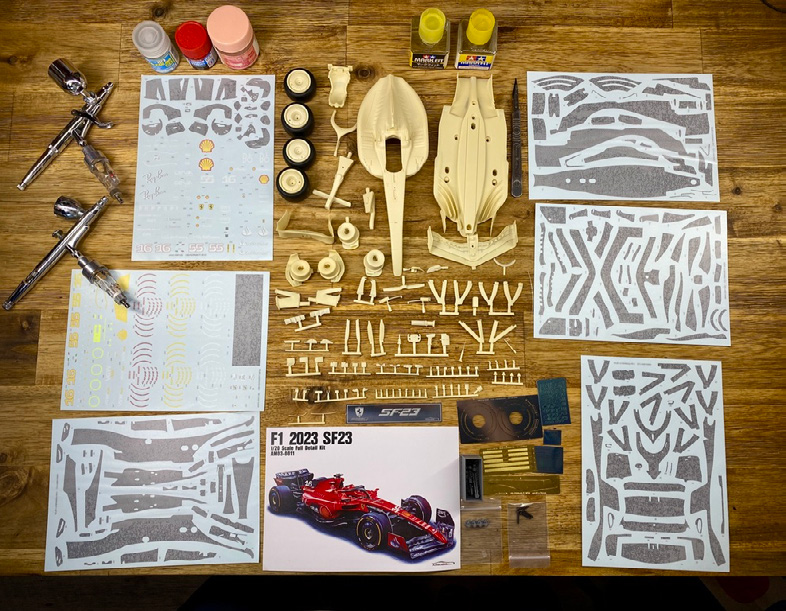
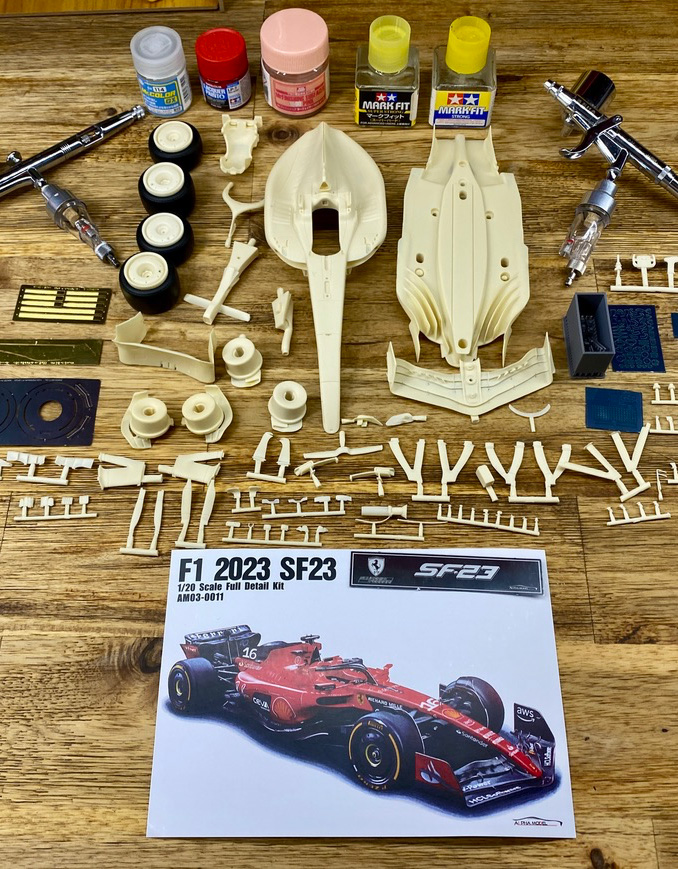
One of my favourite parts of receiving the beautiful Alpha Model kits is unboxing them, and every time I do, I'm blown away by the quality of the parts and all the extras packed into the box. This beautiful model has decals like crazy — 4 big sheets of carbon fibre and 2 logo and extras sheets.
Along with that comes the incredibly moulded resin parts, the beautiful sheets of photo-etch, and with this one comes some really elegantly made 3D-printed parts — printed in a fine resin that takes primer and paint beautifully.
The Car — Italian GP with Charles Leclerc #16
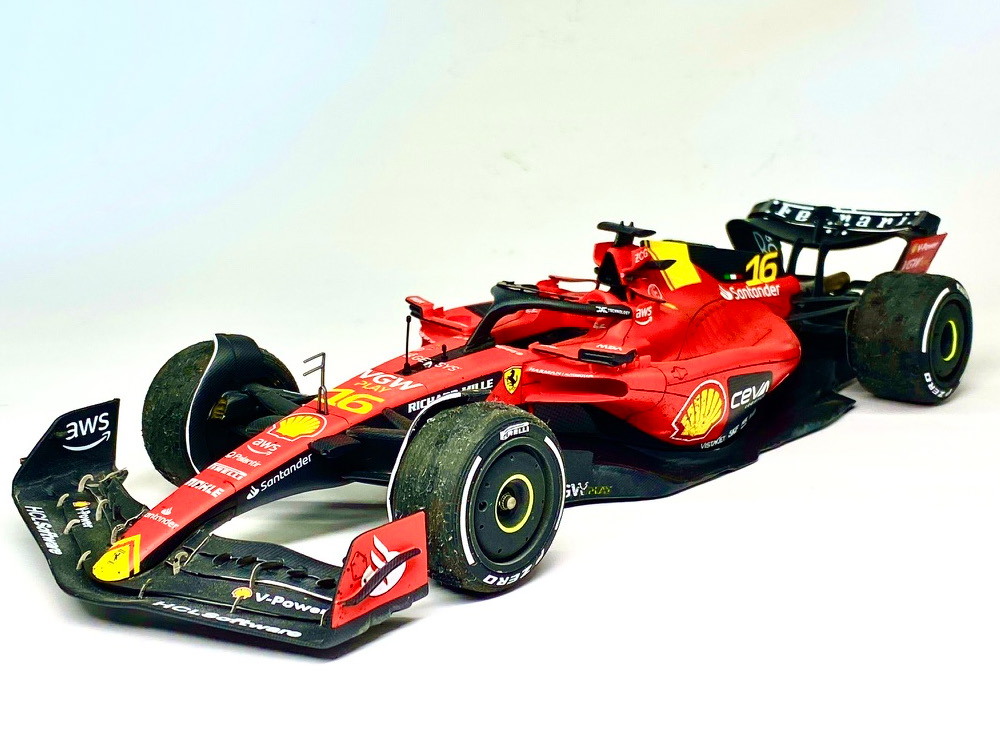
The decals have the option to do the Italian GP car, which had the awesome yellow highlights — and that is almost certainly what I will be doing. You can also choose between Charles Leclerc and Carlos Sainz, and although I'd love to do the Sainz car to celebrate his time at Ferrari, I am a massive Charles fan — so I will be doing the number 16 car in its yellow-accented Italian livery.
Pre-Build Checklist
- Check all parts are present and accounted for.
- Look carefully at the detail and remove all the drool that follows.
A great thanks to Alpha Model for giving me the opportunity to build this incredible kit. This is going to be fun.
The box gives us everything — resin, brass, 3D-printed finesse, and six decal sheets. Now let's get the parts ready. Up next: Chapter 2: The Washbay!
— Build by Anthony Ricco
Advanced Creators
From Box to Beauty
A Ferrari F1 SF23 Build — Chapter 2: The Washbay
The first dirty job of any resin-kit build: cleaning off the mould-release agent. Skip this and the paint will never sit right. The SF23's resin is exceptionally smooth, which makes primer adhesion a real challenge — so the washbay step is doubly important here.
STEP 2: THE WASHBAY
When most resin kits are made, the mould they are set in has a non-stick mould-release agent, which can be devastating to your paintwork. In order to remove this, we need to give the resin a good old bath.
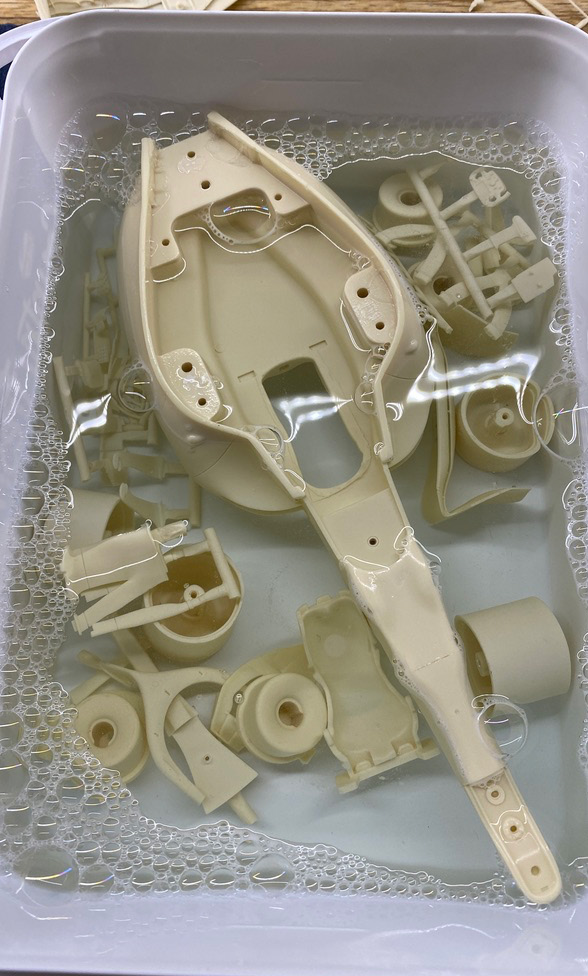
All the parts go into a bucket of warm water with the dishwashing soap that will remove grease. I let it soak for about 30 minutes and get nice and clean. After that, each part is taken out, scrubbed with an old toothbrush (please don't use your spouses'), and then rinsed in clean water and set aside on a dish towel to dry off.
Cleanup Checklist
- All parts soaked and cleaned in soapy water.
- Scrubbed gently with a toothbrush and left to dry.
Tip: Don't rush this stage. The smoother your parts come out, the less work you'll have later. For the SF23's high-gloss resin, I let the soak run a full 45 minutes instead of the usual 30.
All parts are now clean and dry. Up next: Chapter 3: Adjustments & Detail Work — where we make small moulded parts even better.
— Build by Anthony Ricco
Advanced Creators
From Box to Beauty
A Ferrari F1 SF23 Build — Chapter 3: Adjustments & Detail Work
The SF23 comes out of the box already impressive, but there are a few small modifications that elevate the model from "great" to "show-stopping." This chapter is about those final refinements.
STEP 3: ADJUSTMENTS
The kit had closed slats obviously because the openings are so small. I decided that I'd like to try to open them — this gives the model that "track-ready" look that the actual F1 cars have. The resin is already extremely thin, so this took a lot of careful time and gentle work.
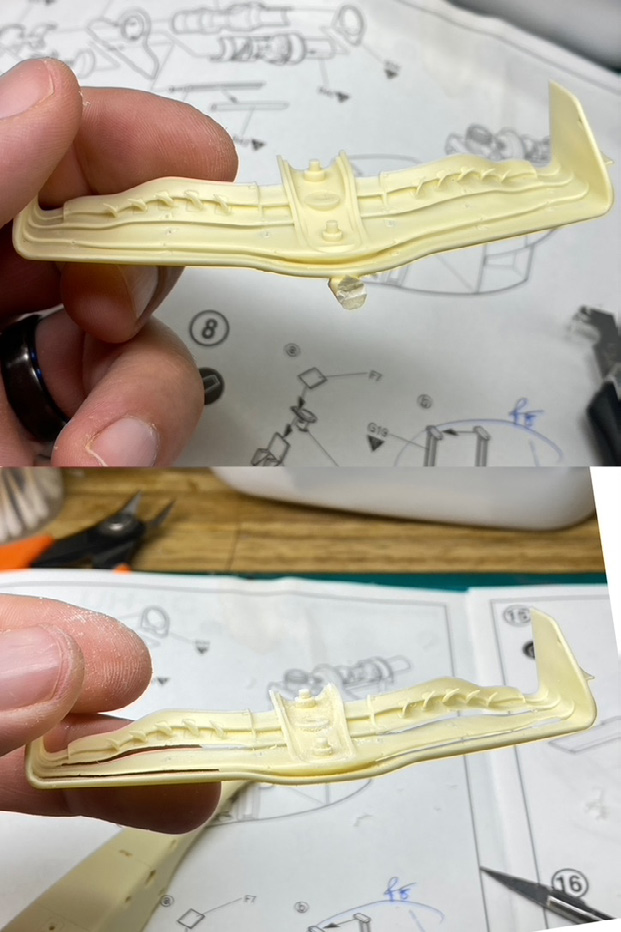
I started by scribing into the gaps with a Tamiya scriber to get a nice gap, then used a hobby knife to carefully widen the gap. Once I was happy with the size of it, I slid a piece of sandpaper in and pushed it up and down a few times to smooth it off, then turned it over and did the other side.
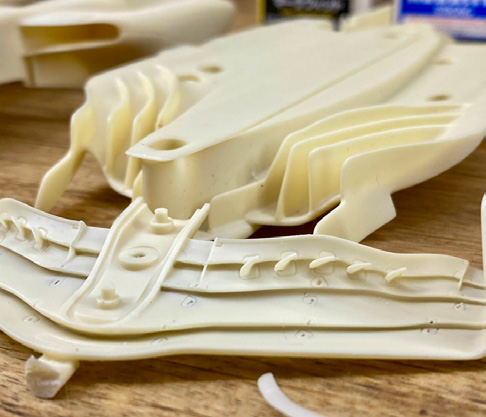
If you try this, just keep in mind the resin is already very thin, so always make sure you support the part from behind. The blow-moulded walls on an F1 wing are paper-thin in real life, and the Alpha Model parts capture that thinness faithfully — which is both the appeal and the danger of this kind of work.
Other Adjustments
Beyond the slat-opening, I made a handful of other small refinements:
- The brake-duct vanes came slightly thick — I sanded them paper-thin for the correct look.
- The flooring edges had a faint mould line that needed a swipe of 3000-grit.
- The rear light (rain light) was polished with micromesh to remove a faint parting line.
Rule of thumb: If a detail on a 1/20 scale F1 model looks wrong, it's usually because it's too thick rather than too thin. The real wings have knife-edges — yours should too.
All the small adjustments are done. Up next: Chapter 4: Priming — laying the foundation for that gorgeous Ferrari red.
— Build by Anthony Ricco
Advanced Creators
From Box to Beauty
A Ferrari F1 SF23 Build — Chapter 4: Priming
Priming is a very important step on resin kits — especially on the extremely smooth resin that Alpha Model achieves. It will make the paint adhere to the kit better, give an even finish, and even enhance the paintwork.
STEP 4: PRIMING
You need to prep your model for paint, and I use some very fine 3000-grit sanding sponge all over the surface of the parts to give the paint a better surface to stick onto. Very gently — don't push down at all, just give it a soft rub all over.
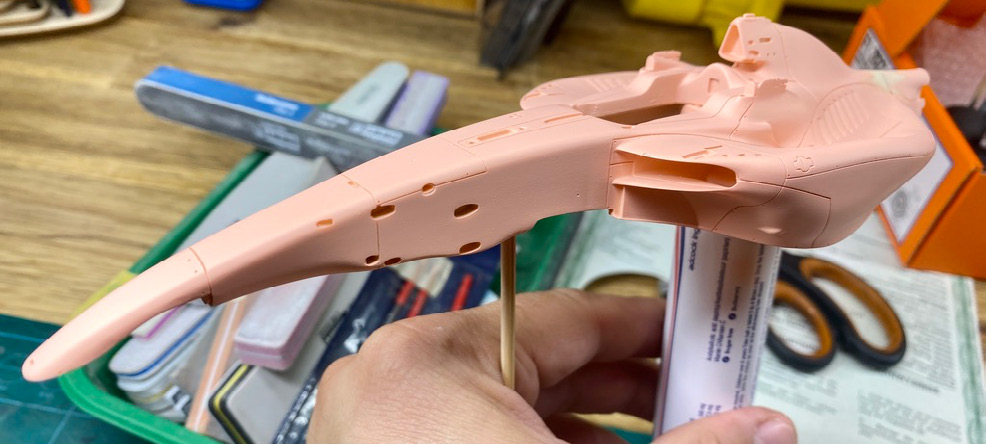
I wanted the red to show off the brightness, and red over a pink primer really pops nicely, so I used Mr. Surfacer 1500 Pink as my base layer. Pink primer under red is a classic modeller trick — it gives the red a depth and a saturation that gray primer alone can't match.
How to Apply the Primer
Now to the actual spraying. I like to do 3-4 mist coats and 1 wet coat of primer. I wait about 10 minutes in between each coat. Build the paint coverage up with these layers, and don't be concerned if in the first 2-3 layers you can still see the resin colour — it will disappear as you build it up.
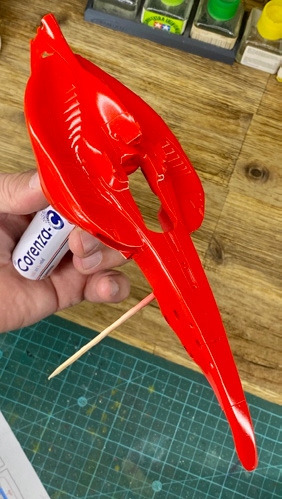
Building the primer up like this gives you layers of paint so that you can sand and polish out imperfections without burning through to the resin. Luckily, the Mr. Surfacer 1500 with Mr. Levelling Thinner goes down so well I didn't have any imperfections for once.
Curing Time
Once you are done, put it into some foam into a plastic sealable container so dust can't get onto it, and put it away for a few days to cure while you continue working on the other parts.
Priming Checklist
- Check the correct primer colour for your top coat.
- Make sure body and primer is dust-free and smooth.
- Softly sand all surfaces with a 3000-grit sanding sponge.
- Spray in a dust-free area — wipe kit with a static-free brush and a tack cloth.
The pink prime is in place, and the model is curing. While the body rests, let's start work on the cockpit. Up next: Chapter 5: Painting & Decal Base.
— Build by Anthony Ricco
Advanced Creators
From Box to Beauty
A Ferrari F1 SF23 Build — Chapter 5: Painting — Rosso & Yellow
Now for the moment we've been waiting for — putting the iconic Ferrari colour on the body. With the SF23's Italian-GP yellow highlights, we have a two-colour scheme to plan carefully.
STEP 5: PAINTING
The painting on the SF23 kit was very easy. The part separation is done so well that very little masking was needed — I think I only needed it on the front and rear wings. The thought put into this kit is excellent.
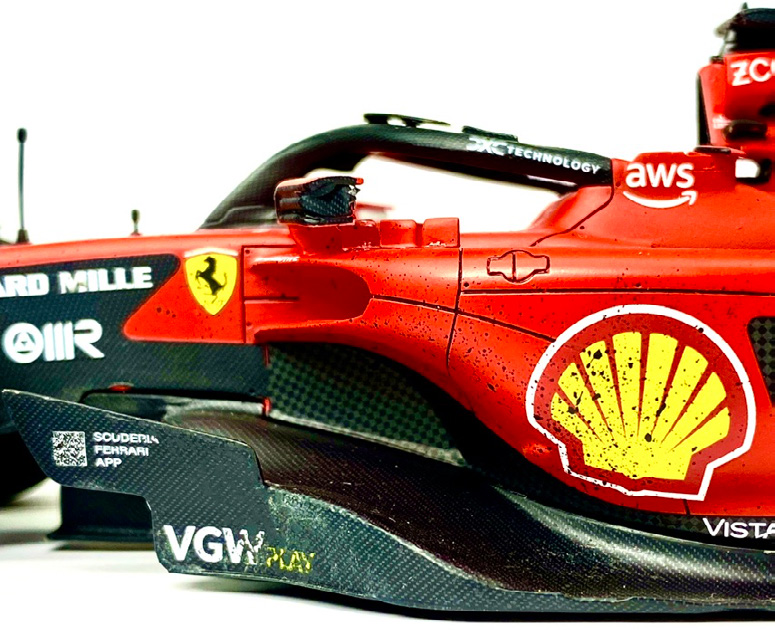
The main colour on the SF23 is a nice bright red, and I used Tamiya LP-7 Pure Red, which is a great match. The parts are quite irregularly shaped, so use many light coats to build up the colour so you get into all the little nooks and crannies.
The Yellow Highlights
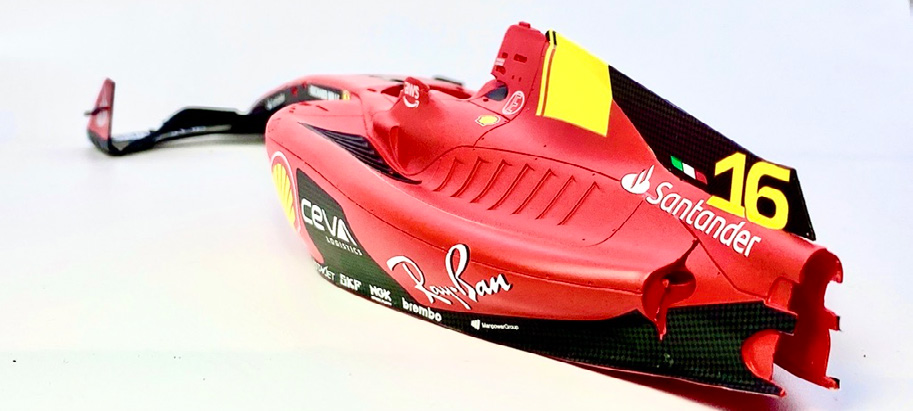
The Italian GP yellow highlights are also Tamiya — I used LP-9 Yellow for the bright accents on the engine cover, the sidepod leading edge, and the rear-wing endplates.
Carbon Areas — Primed Black
There are many carbon-fibre parts, and in case there were any decals I didn't place precisely, I primed them in black. I used Mr. Surfacer 1500 Black thinned with Mr. Levelling Thinner — this gives a beautifully smooth surface and means I don't need to clear-coat before I add the decals.
Make sure if you don't clear-coat before decals, give it a few days for the primer to cure properly. Rushing primer to decal stage is how you end up with peeled edges.
Painting Checklist
- Make sure the surface of your model is free of imperfections.
- Always use protective equipment when spraying.
- When painting, do a few tack coats first and build up the paint before a wet coat.
- Leave the kit for a while for the paint to cure properly.
- Once dry, check for any dust/imperfections and gently sand back and respray if needed.
- Sand out imperfections with as light a grit as you can.
Rosso red on the body, yellow on the accents, satin-black on the carbon areas — the paintwork is done. Up next: Chapter 6: Interior & Cockpit Details.
— Build by Anthony Ricco
Advanced Creators
From Box to Beauty
A Ferrari F1 SF23 Build — Chapter 6: Interior & Cockpit Details
Welcome to the heart of the model — the F1 cockpit. The seats, the steering wheel, and the harnesses are what bring the SF23 to life. I'll be doing the cockpit as a "post-race, driver-just-climbed-out" look.
STEP 6: INTERIOR
SEATS
As usual, the seat comes with a lot of beautifully replicated details. All the buckles and loops and seat-belt parts are in the kit, and there are a lot of detailed parts to make these up that leave a very nicely detailed-looking cockpit.
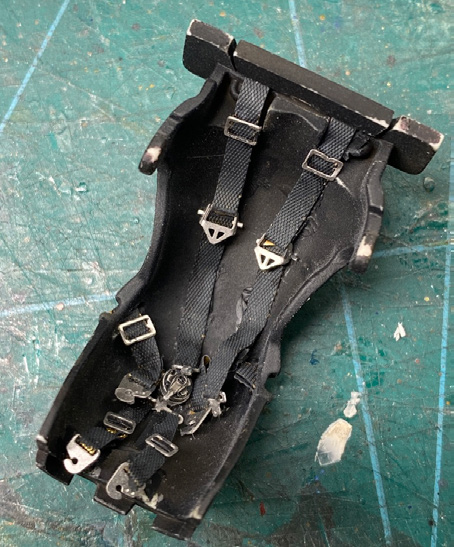
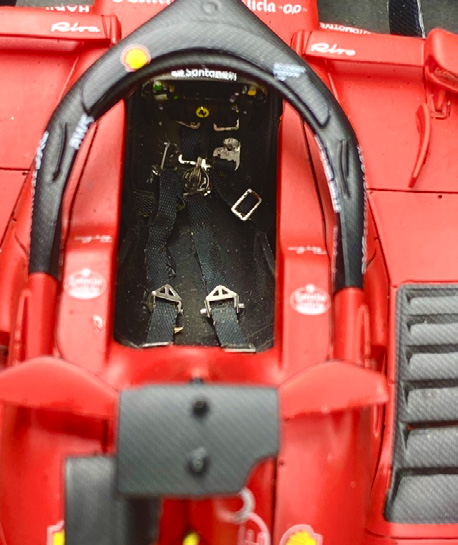
I left mine loose and all thrown around because my finished build is a post-race version, so I wanted it to look like the driver had just climbed out. The seat itself sits loose in the chassis, and the harness clips are dangling.
STEERING WHEEL
The one thing that would have been nice in this kit was better detail on the steering wheel. The F1 steering wheels are very colourful and detailed, but the one decal that isn't in the kit is the rings to go around the buttons. I tried to paint them, but it didn't look great, so I decided to leave it plain and just use some colours on the buttons. I wanted to have the steering wheel out and on the front of the car but because it wasn't accurate, I decided to leave it inside.
I've seen people use aftermarket sets, but for this build I wanted to keep it 100% Alpha Model. I painted the central display dark grey-blue, the rotary selectors red and yellow, and let the Ferrari shield at the top do the heavy lifting visually.
Modeller's note: The aftermarket decal sets are worth it if you want a perfect Ferrari display, but a hand-painted wheel still reads clearly on a finished build — and it's all-Alpha Model, which I appreciate.
Cockpit Preparation for Decals
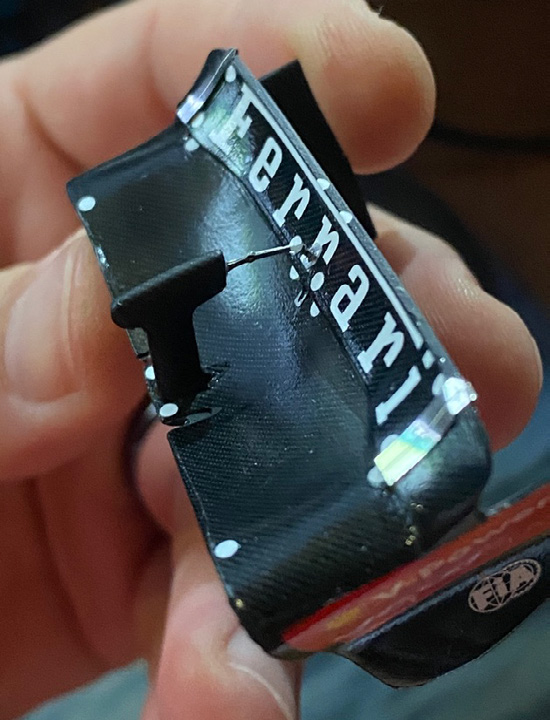
This beautiful kit is all about the decals, and 60% of your time on this build will be putting them on. Fortunately, the Alpha Model decals are incredible quality — they are so hard to break, you really have to try if you want to mess them up (not that you would want to do that).
I always prime the parts to be decalled over with Mr. Surfacer 1500 black primer — that way, if I don't align a decal perfectly, it won't be noticed because of the black.
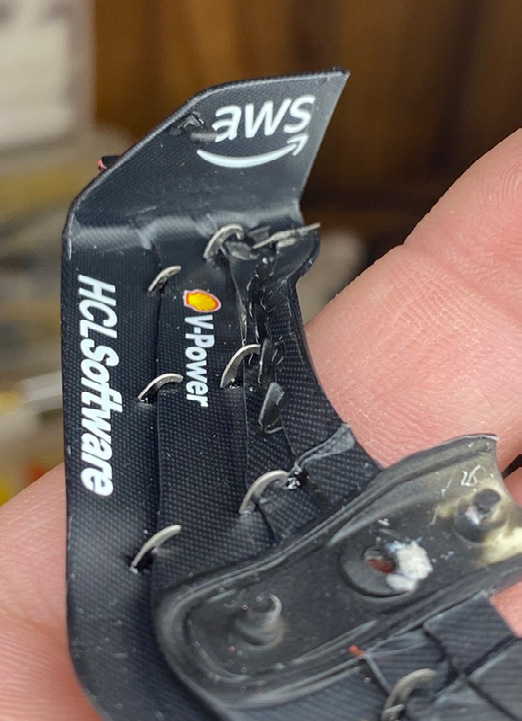
Pro tip: A black base under small sponsor decals is your secret weapon. Even a sub-millimetre misalignment becomes invisible.
Up next: Chapter 7: Decal Application — the most time-consuming and rewarding part of this build.
— Build by Anthony Ricco
Advanced Creators
From Box to Beauty
A Ferrari F1 SF23 Build — Chapter 7: Decal Application
Now for the heart of this kit — the decals. There are over 200 individual decals in the SF23 box, and they are the single biggest reason this model looks so much like the real car.
STEP 7: DECALS
To apply the decals I used plain water — I didn't need decal solutions and went over the paint because the finish was nice and smooth. In areas where there were details under the decal, I used some decal solution (Tamiya MarkFit Strong), but didn't put it everywhere.
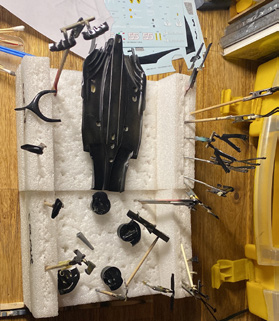
It really starts getting exciting and coming together when you start with the sponsor decals — now it starts to look like the part. Remember to keep checking references so you don't make some mistakes like I did.
The Italian GP Yellow Accents
The Italian-GP-specific decals are the yellow #16 roundel, the yellow Ferrari shield on the engine cover, and the "Charles" name on the cockpit side. They go down just like the regular decals but make a huge visual impact.
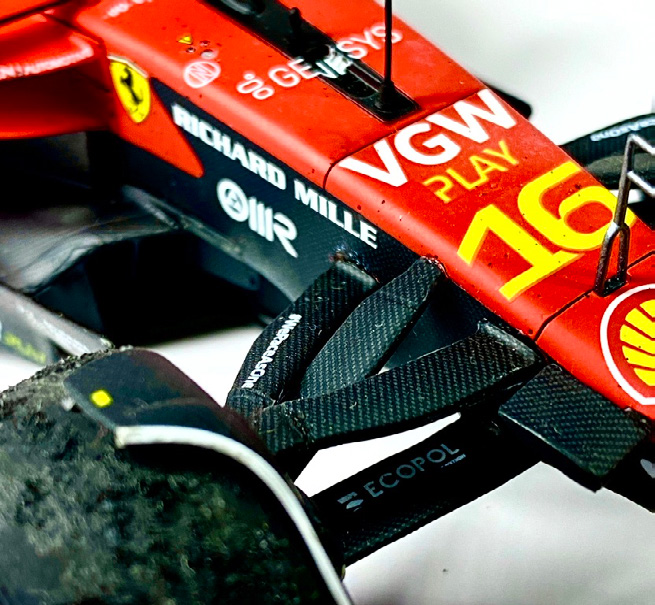
Carbon Decals — Direction Matters
For the carbon decals on the sidepods, the floor, the suspension fairings, and the rear wing, pay close attention to the direction of the weave. Real autoclaved carbon has a very specific direction, and your decals have it printed in a specific way — they need to align.
Tip — Decal on Complex Curves
For decals over complex compound curves (like the suspension fairings), I use both MarkFit Strong and a soft paintbrush to massage the decal into the recesses. Once it's settled, I wait 30 minutes before touching it.
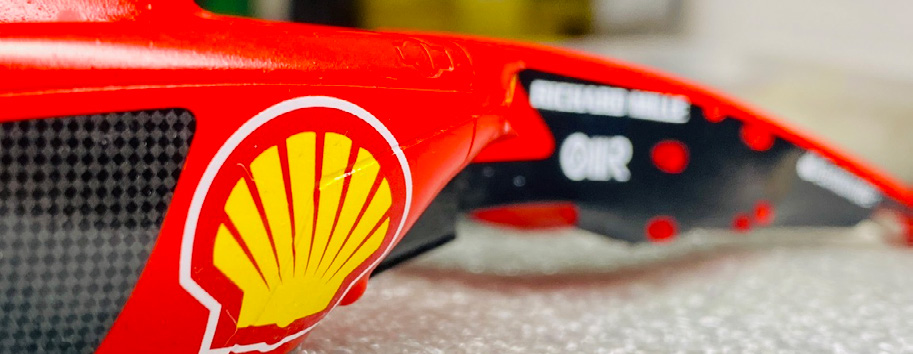
Rule of thumb: When applying decals to compound curves, less is more. Small sliver decals (each carbon piece as a separate cut-out) will conform better than large sheets spanning complex surfaces.
Decal Checklist
- Apply over a dust-free, cured paint surface.
- Use plain water for most decals, MarkFit only on tight curves.
- Match weave direction on every carbon decal.
- Allow 24-48 hours of full drying before clear-coating.
Up next: Chapter 8: Detailing — The Tiny Pieces That Matter Most.
— Build by Anthony Ricco
Advanced Creators
From Box to Beauty
A Ferrari F1 SF23 Build — Chapter 8: Detailing — Tiny Pieces, Huge Impact
Once the big surfaces are painted and decalled, the model's character comes from the small details — the ones you only notice when you look up close. This is where the SF23 stands out from the crowd.
STEP 8: DETAILING
This kit has fantastic details — from the tiny DRS and wing levers, to probably every aerodynamic flare and part that was on the real car, to the wiring on the side of the car that holds up the floor. This is yet another place that Alpha Model really flexed and showed off.
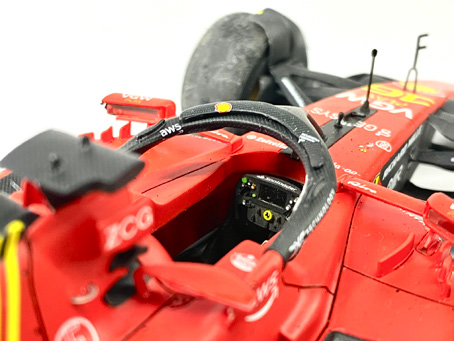
Applying the Tiny Parts
When applying these, look for good reference photos for placement and have patience — this is where all your hard work can get messed up quickly. Use CA glue on one side and an accelerator on another so the parts stick quickly. Set the part, count to five, and you're done. Don't fiddle.
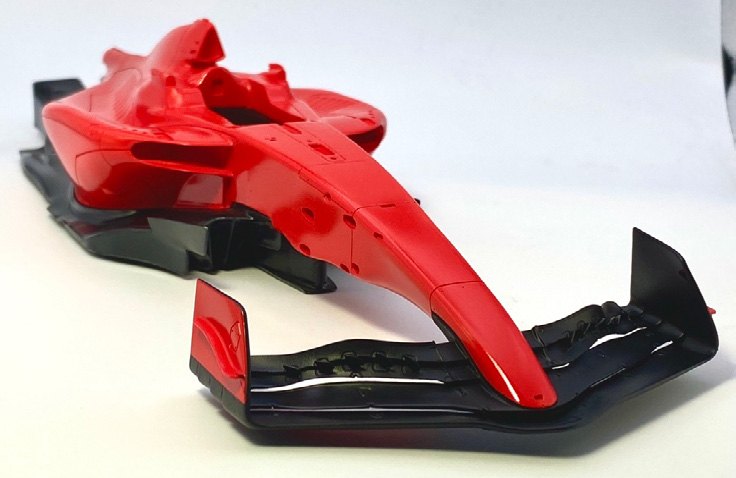
3D-Printed Details
The 3D-printed parts in the kit are extraordinary. They're printed at a fine layer height that takes primer and paint like resin, and they include details that would be impossible to mould in traditional injection resin.
Reference-Driven Placement
I cannot stress this enough — use reference photos for every detail placement. The real car has a specific arrangement of sensors, cables, and actuators on each surface, and the right reference photo makes the placement obvious.
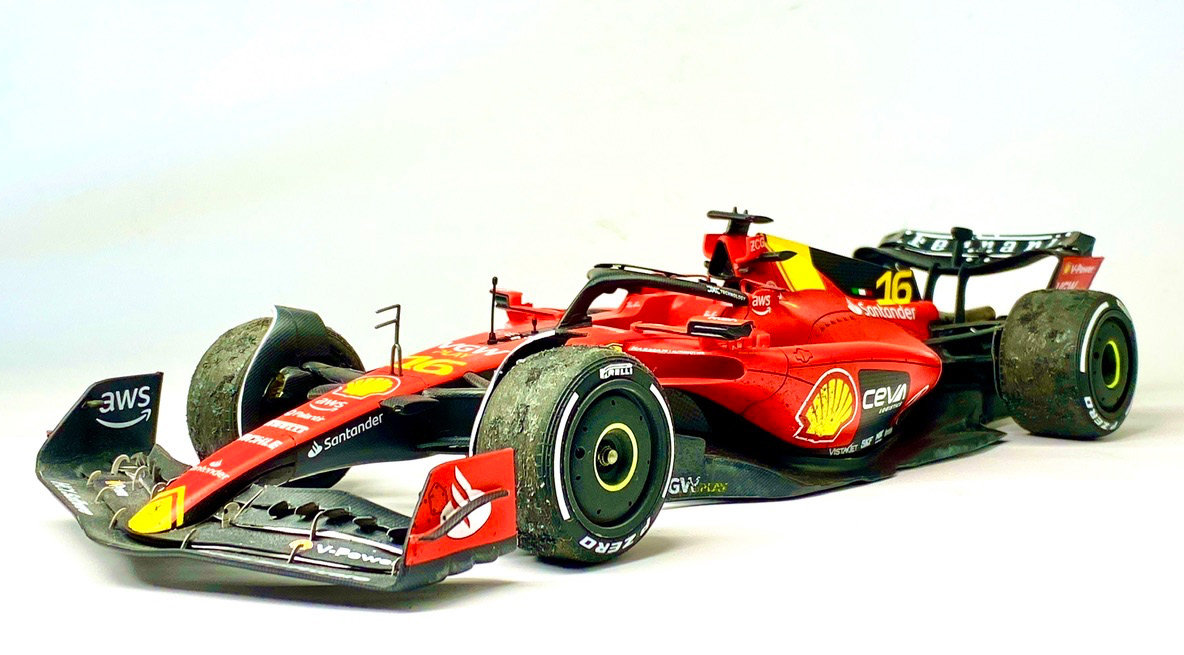
Rule of the trade: Set everything in CA first. If the position is wrong, the part pops off cleanly and can be re-set. Trying to "slide it a bit" with CA already cured is how detail parts get broken.
Detailing Checklist
- Have all reference photos open and to hand.
- Work one area at a time — don't jump around.
- Use CA + accelerator for any part smaller than your fingernail.
- Look at the model under a strong lamp every few pieces — shadows catch mistakes instantly.
All the tiny details are in place. Up next: Chapter 9: Weathering — Post-Race, Just-Climbed-Out Look.
— Build by Anthony Ricco
Advanced Creators
From Box to Beauty
A Ferrari F1 SF23 Build — Chapter 9: Weathering — A Post-Race Look
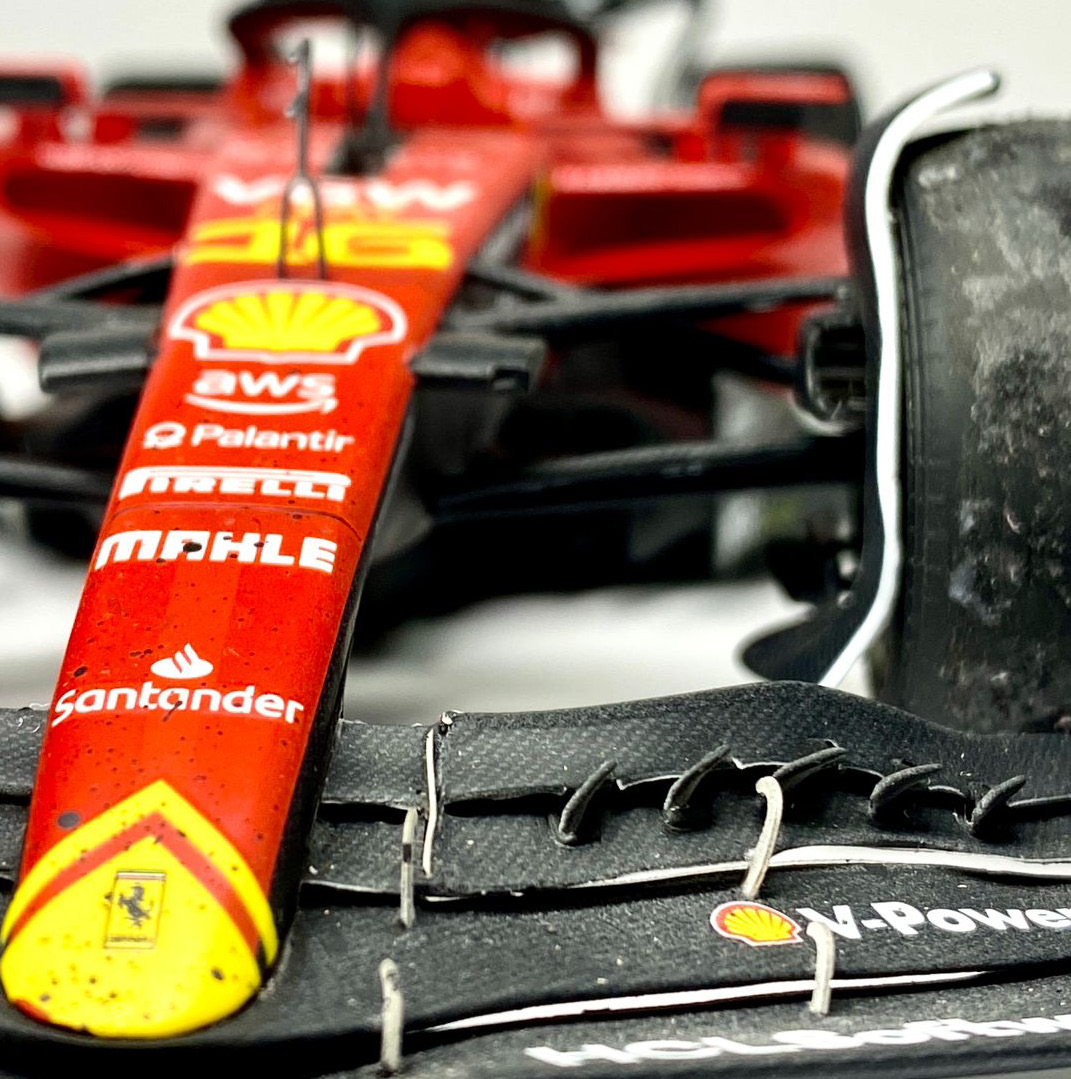
Wait what? Weathering? Not something you often hear about with car builds. But I wanted my SF-23 to stand out — because it's going to be the same livery as everyone else who builds it — so I decided to make a post-race version of the car, weathered and looking like it had a good race.
STEP 9: WEATHERING
I looked at a lot of references and honestly found that they really didn't get that dirty and weathered. However, everyone knows that the tyres degrade and pick up rubble, there are rubber and oil spots on the car from the track, and a bit of dust on the floor plate.
Tyres — Rubble & Rubber
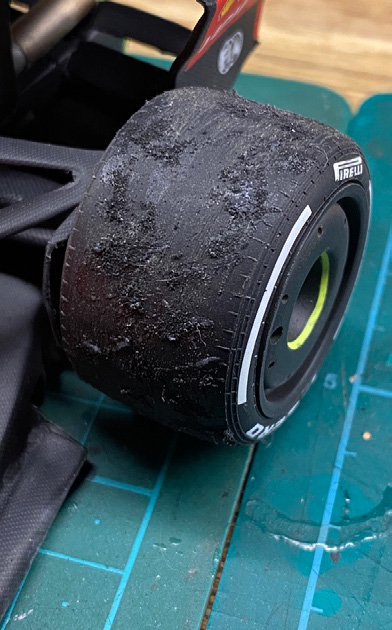
For the tyres, I kept the rubber that came off from sanding seams out of tyres — all the bits that came off were kept and glued onto the tyres. I used a product called Mod Podge Matte — which is a kind of white glue that dries matte. I put it on the tyre in patches randomly and then sprinkled on the rubber.
Body — Tamiya Rubber Black
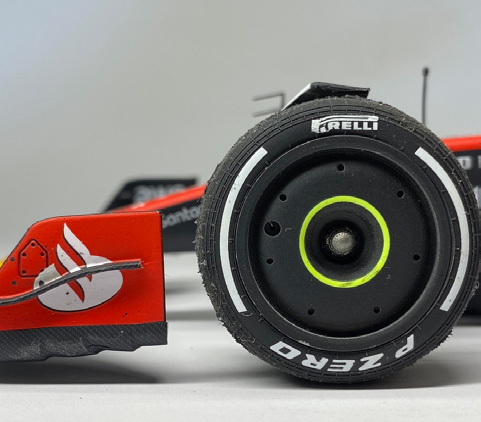
I then used Tamiya Rubber Black paint, put a little on a firm paintbrush, and used a toothpick to flick it onto the car under the air ducts behind the front wheels and on the nose. Check references to see where it picks up.
Floor — Dust & Light Debris
Finally, a light brown/sand-coloured chalk pastel can be ground up and brushed lightly onto the floor board and in some other areas I saw on the references. There you go — nicely weathered and looking the part.
Tip: Less is more with weathering. If you can immediately see the dirt from across the room, you've gone too far. Real race cars are subtly grimy — the weathering should be discoverable, not shouty.
The model is fully weathered, post-race, and ready for final assembly. Up next — the final chapter: Chapter 10: The Finished Build.
— Build by Anthony Ricco
Advanced Creators
From Box to Beauty
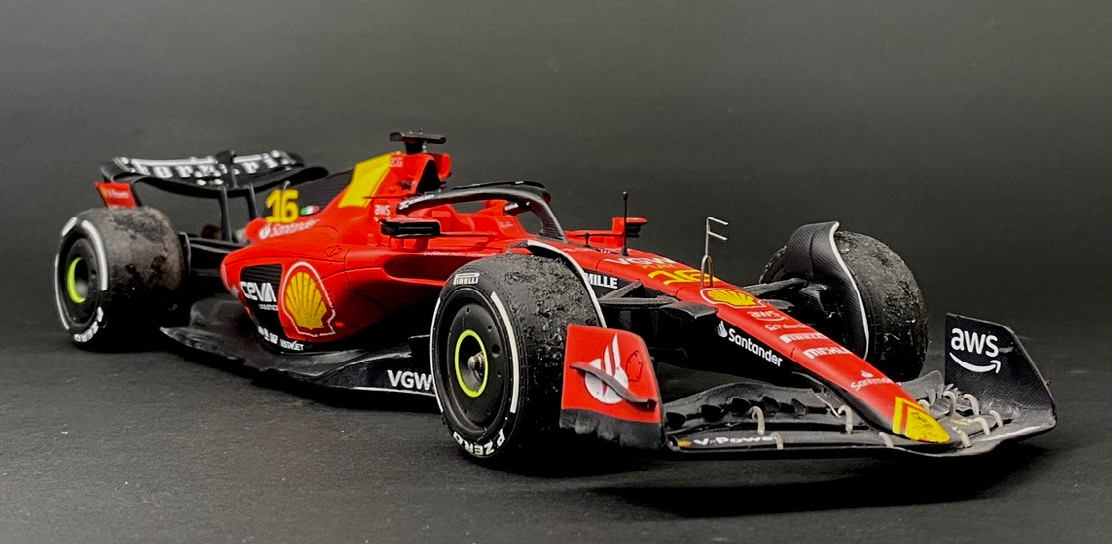
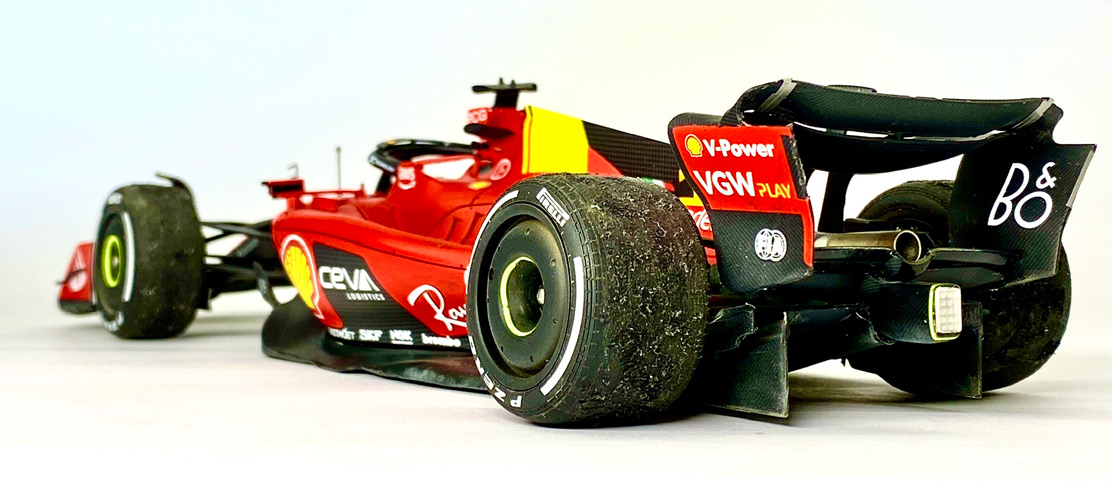
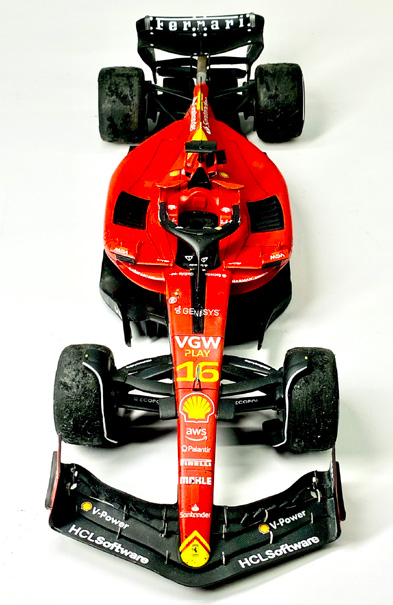
This is it — the final chapter. Every painted part, every decal, every weathered surface comes together to become a post-race SF-23, captured exactly as Charles climbed out at Monza.
THE FINISHED BUILD
Final Reflection
What started as a box of resin, brass, and 200+ decals became a post-race Scuderia Ferrari SF-23, captured in its Italian GP yellow-accented livery, looking as if Charles had just climbed out after a hard stint at Monza.
The kit itself is up there with the best of Alpha Model's recent releases — the resin quality, the photo-etch coverage, the 3D-printed details, and the decal design all combine to make this one of the most rewarding 1/20 F1 kits available. The Italian-GP yellow option elevates it from a great kit to a unique, characterful build that stands out from any other SF-23 on the shelf.
And that wraps up this 10-chapter build of the Alpha Model 1/20 Ferrari SF-23 — Italian-GP Charles Leclerc spec. From a sealed blue box to a weathered, post-race Ferrari — every decal, every drop of rubber paint, every cable doing its job. Thank you for following along!
About the Builder
- Kit: Alpha Model AM03-0011 - Ferrari F1 SF-23
- Livery: 2023 Italian GP - Charles Leclerc #16 (yellow accents)
- Build & Manual by: Anthony Ricco - Model Mercenary
- Brand: ALPHA Model
- Follow: @alphamodel_hd · @alphamodel_sa · @model_mercenary
- Web: www.alphamodelkit.com
Thanks,
Anthony Ricco — Model Mercenary