
 Advanced Creators
Mitsubishi Lancer Evolution IX WongenBuild Guide — Part 1: Introduction & Ultrasonic Cleaner Tutorial
Alpha Model AM02-0045 · Build by Marcin Pyziak
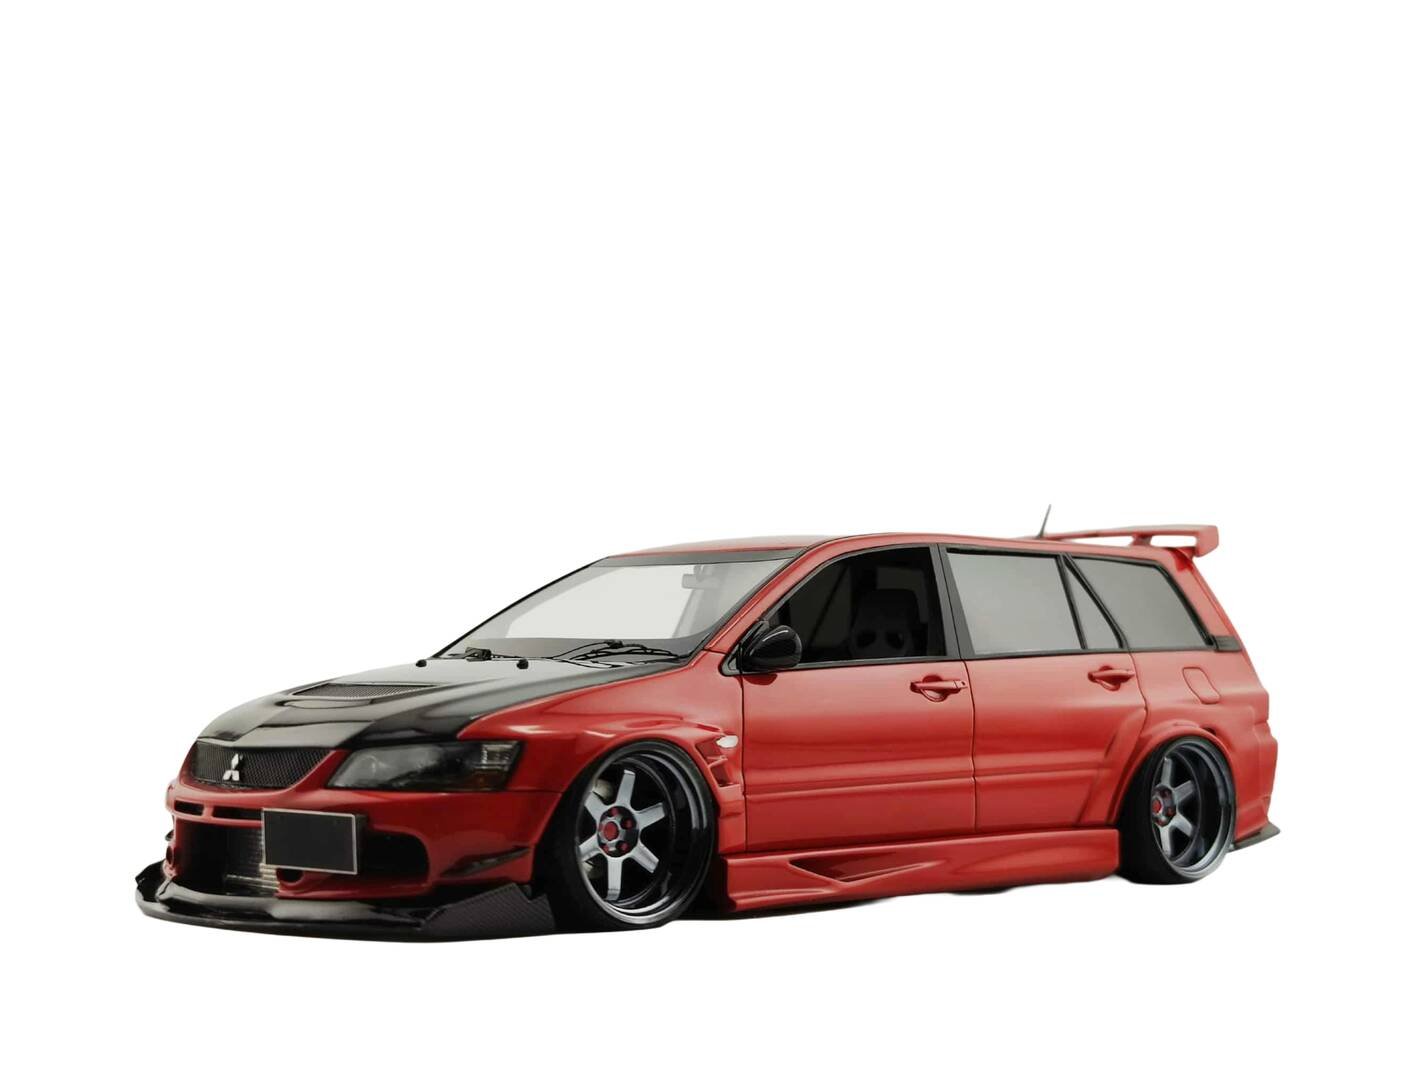
Welcome to the Build
Welcome to the complete build guide for the Alpha Model AM02-0045 Mitsubishi Lancer Evolution IX Wongen resin model kit. This guide documents every step of the build process — from initial part cleaning through final assembly — with tips, tricks, and lessons learned from an experienced modeler.
This is a high-end resin model kit designed for builders who want museum-quality results. The kit includes detailed resin body panels, interior components, wheels, and decals. Throughout this series, we will cover all the essential techniques needed to bring this iconic rally legend to life.
Official website: www.alphamodelkit.com
Tutorial: Cleaning Resin Parts with an Ultrasonic Cleaner
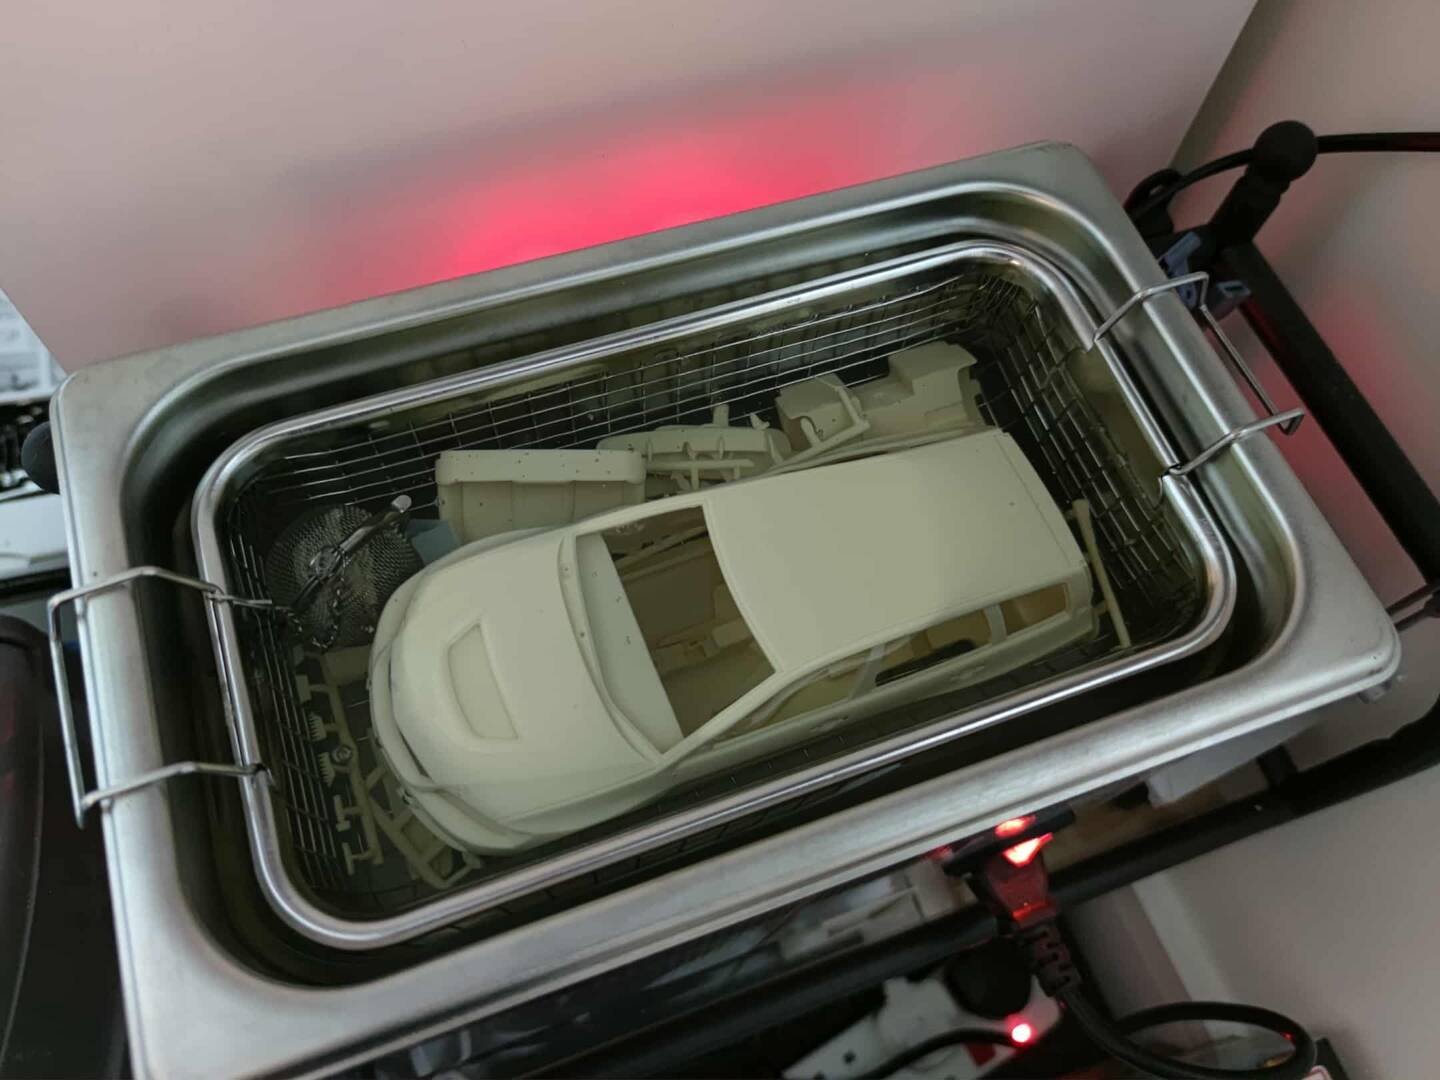
Before any painting or assembly begins, resin parts must be thoroughly cleaned. Resin kits come with release agents and residue from the molding process that will interfere with paint adhesion if not removed.
Preparation Tools
- Ultrasonic cleaner
- Resin-specific cleaning fluid (e.g. isopropyl alcohol)
- Clean water
- Tweezers
- Lint-free cloth
- Protective gloves (optional)
Operating Steps
- Brush off loose debris: Use a soft brush to remove large impurities from the surface of the parts.
- Fill the tank: Pour the cleaning fluid into the ultrasonic cleaner's tank until it can fully submerge the parts.
- Place the parts: Gently place the resin parts into the tank, avoiding collision between parts.
- Start the machine: Set to 300–500W power and run for 5–10 minutes.
- Rinse: Take out the parts and rinse with clean water 2–3 times to remove all cleaning fluid residue.
- Dry: Blot dry with a lint-free cloth or air-dry in a well-ventilated area.
Pro tip: Isopropyl alcohol is an excellent choice for resin cleaning — it effectively removes mold release agents without damaging the resin surface. Avoid using water alone, as it may not dissolve all contaminants.
Next: Polishing Resin Car Body
Advanced Creators
Mitsubishi Lancer Evolution IX Wongen Build Guide — Part 2: Polishing Resin Car Body
Alpha Model AM02-0045 · Build by Marcin Pyziak
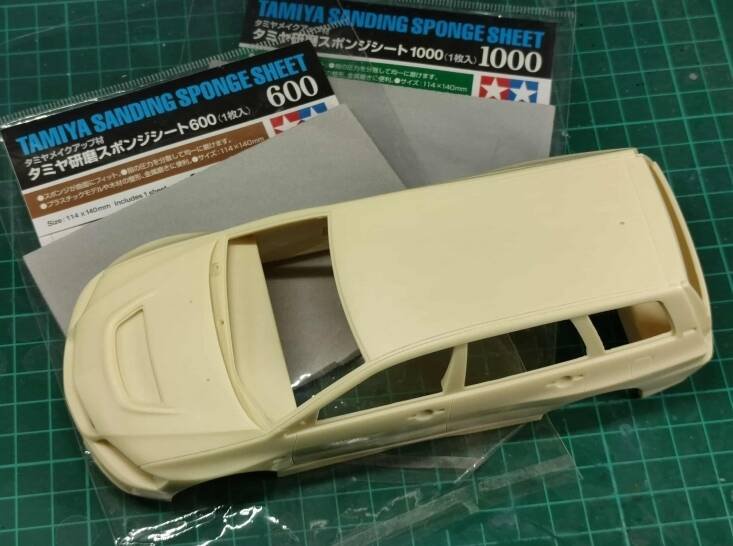
After cleaning, the next critical step is polishing the resin car body. Resin parts straight from the mold will have visible mold lines, minor flash, and surface texture that must be smoothed before any primer or paint is applied.
Step 1: 600-Grit Rough Sanding
Begin with 600-grit wet sanding. Dampen the 600-grit sandpaper — wet sanding reduces dust and protects the resin surface from overheating. Wrap the sandpaper around a sanding block for flat surfaces, or hold it by hand for contoured areas.
- Sand unidirectionally along the body's contours
- Focus on mold lines, burrs, and scratches
- Repeat until the surface is mostly smooth
Pro tip: Always use a sanding block on flat panels — this prevents creating uneven dips in the bodywork. On curved areas, your fingers will follow the natural contour better.
Step 2: Cleaning Transition
Rinse the body with clean water to remove resin debris and sanding dust. Dry with a lint-free cloth. At this stage, check whether major flaws are gone. If deep scratches remain, repeat the 600-grit sanding on those specific areas before moving on.
Step 3: Fine Sanding
Progress to 1000-grit sandpaper (or finer) using the same wet sanding technique. This step refines the surface further, removing the scratches left by the 600-grit paper.
- Continue wet sanding in one direction
- Pay special attention to transition areas between panels
- Work until the surface feels uniformly smooth to the touch
Step 4: Final Check
Rinse thoroughly and dry completely. Ensure:
- No visible scratches remain under good lighting
- The surface feels smooth when you run your fingers over it
- All mold lines have been removed
If minor flaws remain after the 1000-grit pass, repeat with 1500-grit or 2000-grit paper for an even finer finish.
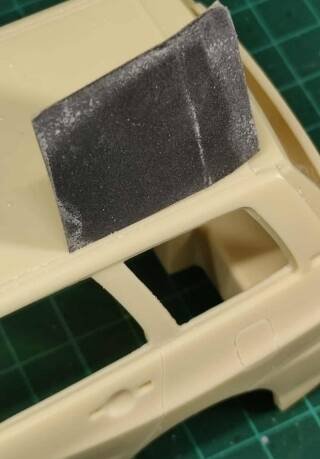
Pro tip: Use a bright work light at a low angle to reveal any remaining imperfections — this is the technique professionals use to find surface flaws that paint will otherwise highlight.
Next: Adjustments — Body Lines & Carving
Advanced Creators
Mitsubishi Lancer Evolution IX Wongen Build Guide — Part 3: Adjustments — Body Lines & Carving
Alpha Model AM02-0045 · Build by Marcin Pyziak
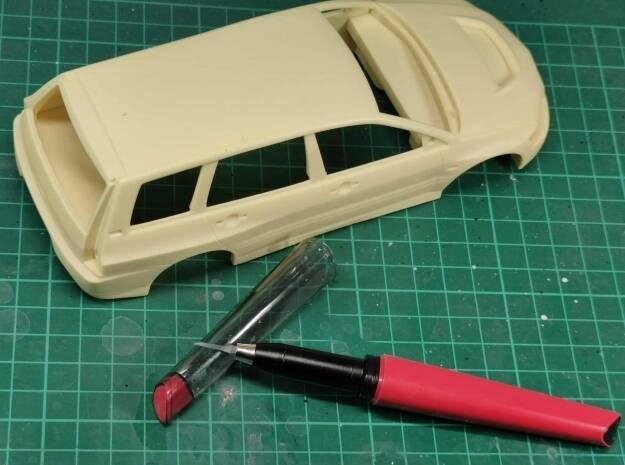
Now we enter one of the most important — and most patient-requiring — stages of the build: adjusting the body lines and carving panel details. This step separates a good model from a great one.
Starting with the Body
I always start with the body and the parts that need luster and transparency. It makes sense to finish the background color treatment in advance so these parts are ready when you need them later in the build.
Carving Body Lines
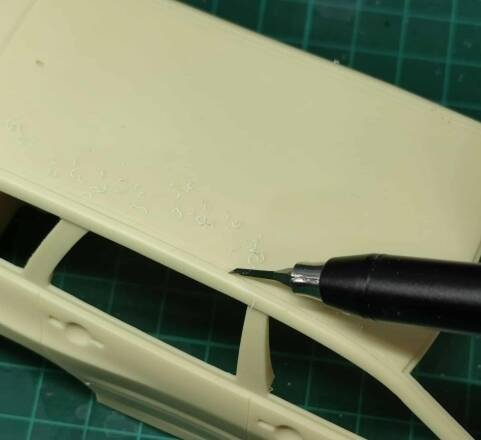
Enter the critical stage: carefully carve all body lines with a 0.3mm carving knife. This work requires patience — please slow down and avoid rushing.
- Use a sharp 0.3mm blade for precise, clean lines
- Follow the original panel lines on the body carefully
- Work in 2–3 passes, gradually deepening the lines rather than trying to cut deep in one pass
- Keep the wrist stably supported while carving
Pro tip: A dull blade will tear the resin instead of cutting it cleanly. Change your blade frequently — a fresh blade every 15–20 minutes of carving work is a good rule of thumb.
Small Decorative Pieces
Don't ignore the small decorative pieces! I draw the outline for them specially, which can greatly simplify the subsequent covering and masking process. Believe me, you will realize the value of doing so at the coloring stage.
- Mark all small trim pieces before painting begins
- Outline their placement boundaries clearly
- This preparation saves enormous time when masking for multi-color painting
Key Reminders
- Fix parts firmly when carving — keep a systematic workflow
- Handle body panels gently — they are fragile and can crack under pressure
- Clear lines lay a better foundation for subsequent coloring
- Patience is essential — rushing this step leads to slipped blades and damaged panels
Next: 3D Printing Wide Body + UV Glue Sealing
Advanced Creators
Mitsubishi Lancer Evolution IX Wongen Build Guide — Part 4: 3D Printing Wide Body + UV Glue Sealing
Alpha Model AM02-0045 · Build by Marcin Pyziak
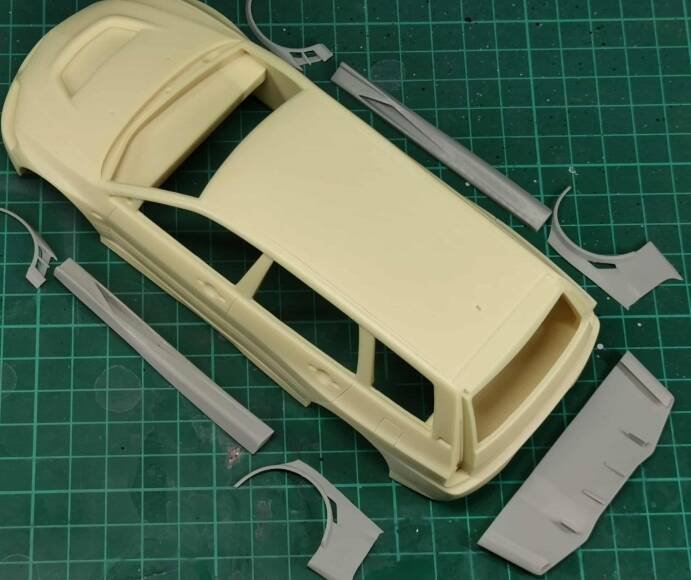
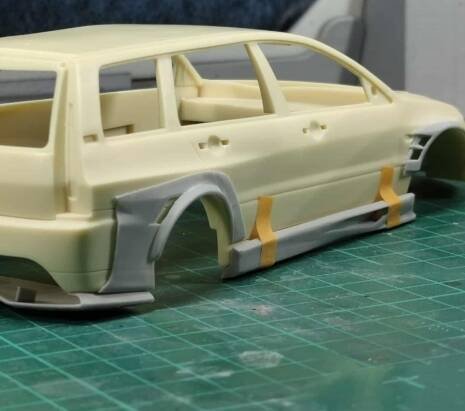
For builders who want to take their Evo IX to the next level, this section covers the complete process of fitting a 3D-printed wide body kit and sealing all joints with UV curing glue for invisible, strong bonds.
Prepare Tools
- 3D printing wide-body kit (body customization)
- Adhesive: CA glue / epoxy resin or UV curing glue (special for plastic/resin)
- Processing tools: Coarse and fine files, 1000–2000 mesh sandpaper, toothpaste for gap filling
- Auxiliary materials: Cotton swabs, model solvent, isopropanol
- Safety protection: Fixture (optional), protective gloves and goggles
- Special for UV technology: UV lamp (365–405nm), fine nozzle dispensing bottle
Key Tips
- Select the adhesive type according to the strength requirements of the joint
- Avoid deformation of parts caused by excessive pressure during curing
- Always wear protective glasses for UV operation
Step 1: Component Pretreatment
Clean the joint surface between the car body and the wide body with solvent. Trim any wide burrs to ensure the bonding surface is flat and clean. A good fit starts with proper preparation.
Step 2: Positioning and Marking
- Try-fit the wide body and align the wheel arch with the body line
- Mark the fitting boundary accurately with a pencil
- Check all edges and seams before any glue is applied
Pro tip: Dry-fit everything at least twice. If a piece doesn't sit flush, trim and file until it does — forcing it will only create gaps later.
Step 3: Adhesive Curing
For CA glue or epoxy resin: Apply a thin layer and clamp the parts in position until the adhesive sets.
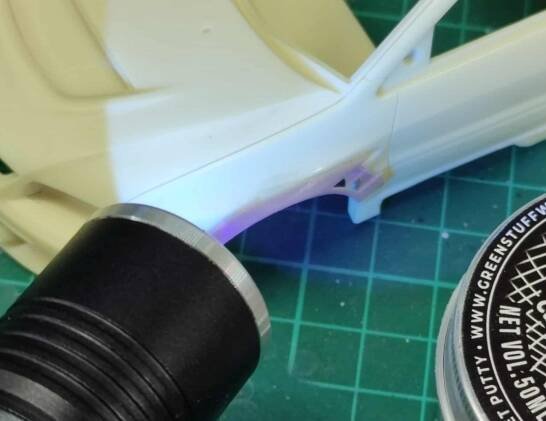
For UV glue: Use a fine-mouth dispensing bottle to control the dosage precisely. After positioning, irradiate with ultraviolet light at a distance of 5–10 cm for 30–60 seconds to cure the bond.
Step 4: Joint Treatment
- Fill any remaining gaps with gap-filling putty (toothpaste-type filler works well)
- Allow to dry thoroughly
- Polish from coarse to fine: 1000 → 2000 mesh sandpaper
- Finally, clean the surface with a solvent-dipped cotton swab
Next: Standard Process Guide for Painting
Advanced Creators
Mitsubishi Lancer Evolution IX Wongen Build Guide — Part 4: 3D Printing Wide Body + UV Glue Sealing
Alpha Model AM02-0045 · Build by Marcin Pyziak
For builders who want to take their Evo IX to the next level, this section covers the complete process of fitting a 3D-printed wide body kit and sealing all joints with UV curing glue for invisible, strong bonds.
Prepare Tools
- 3D printing wide-body kit (body customization)
- Adhesive: CA glue / epoxy resin or UV curing glue (special for plastic/resin)
- Processing tools: Coarse and fine files, 1000–2000 mesh sandpaper, toothpaste for gap filling
- Auxiliary materials: Cotton swabs, model solvent, isopropanol
- Safety protection: Fixture (optional), protective gloves and goggles
- Special for UV technology: UV lamp (365–405nm), fine nozzle dispensing bottle
Key Tips
- Select the adhesive type according to the strength requirements of the joint
- Avoid deformation of parts caused by excessive pressure during curing
- Always wear protective glasses for UV operation
Step 1: Component Pretreatment
Clean the joint surface between the car body and the wide body with solvent. Trim any wide burrs to ensure the bonding surface is flat and clean. A good fit starts with proper preparation.
Step 2: Positioning and Marking
- Try-fit the wide body and align the wheel arch with the body line
- Mark the fitting boundary accurately with a pencil
- Check all edges and seams before any glue is applied
Pro tip: Dry-fit everything at least twice. If a piece doesn't sit flush, trim and file until it does — forcing it will only create gaps later.
Step 3: Adhesive Curing
For CA glue or epoxy resin: Apply a thin layer and clamp the parts in position until the adhesive sets.
For UV glue: Use a fine-mouth dispensing bottle to control the dosage precisely. After positioning, irradiate with ultraviolet light at a distance of 5–10 cm for 30–60 seconds to cure the bond.
Step 4: Joint Treatment
- Fill any remaining gaps with gap-filling putty (toothpaste-type filler works well)
- Allow to dry thoroughly
- Polish from coarse to fine: 1000 → 2000 mesh sandpaper
- Finally, clean the surface with a solvent-dipped cotton swab
Next: Standard Process Guide for Painting
Advanced Creators
Mitsubishi Lancer Evolution IX Wongen Build Guide — Part 5: Standard Process Guide for Painting
Alpha Model AM02-0045 · Build by Marcin Pyziak
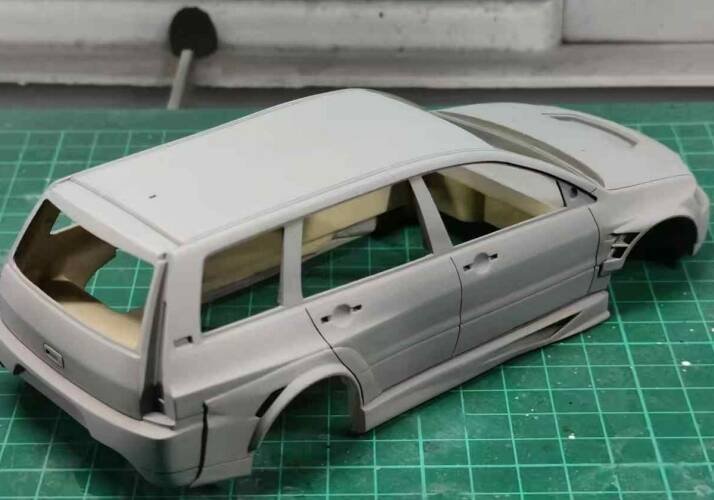
Painting is where your model truly comes to life. This section covers the complete standard process for achieving professional-quality paintwork on your resin model.
Core Principles
- Priority order: Give priority to spraying large-area main parts (such as the car body), then deal with detailed parts that need luster and transparency
- Finish the background color spraying ahead of time, laying the foundation for the subsequent processes
- Work systematically — plan your color sequence before you start spraying
Required Tools
- Airbrush and air pump
- Model-specific paint (base color paint, main color paint, transparent/clear coat paint)
- Color mixing dish and thinner
- Brush washing liquid
- 2000 mesh sandpaper or 3M fine grinding sponge
- 0.3mm carving knife (for re-cutting lines after painting)
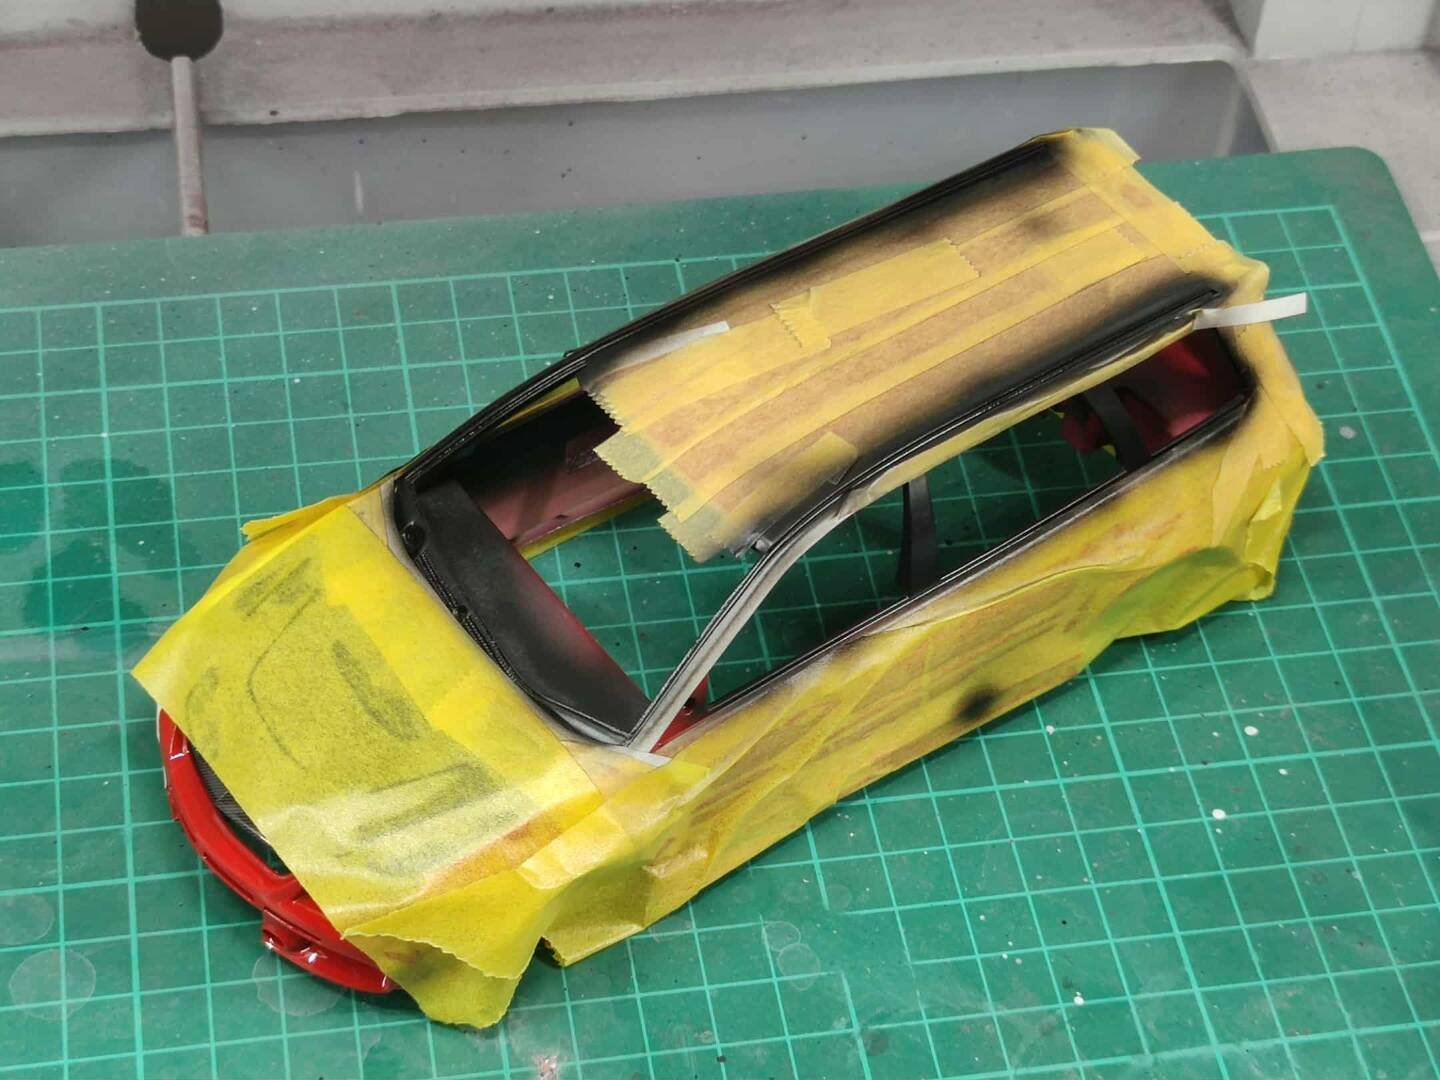
- Cover tape (masking tape)
- Protective mask
Step 1: Surface Preparation
Before spraying, ensure the surface is completely clean and free of dust. Lightly sand with 2000-grit paper or a 3M fine grinding sponge to create a smooth base for paint adhesion. Wipe down with a solvent-dampened cloth.
Step 2: Primer / Base Coat
- Apply a light primer coat to reveal any remaining surface imperfections
- Allow to dry, then inspect and sand any remaining flaws
- Apply a second primer coat if needed
Step 3: Main Color Application
- Mix your paint to the correct ratio with thinner
- Apply in multiple thin coats rather than one thick coat
- Each layer of paint film should be thinner rather than thicker to avoid sagging and running
- Allow each coat to flash off (5–10 minutes) before applying the next
Step 4: Clear Coat
After the base color is fully cured, apply clear coat for depth and protection. Use the same thin-coat technique — 2–3 light coats build a beautiful, even gloss finish.
Step 5: Re-Carve Panel Lines
Once the paint has fully cured, use the 0.3mm carving knife to carefully re-open all panel lines that were filled during painting. Work with a steady hand and stable wrist support.
Pro tip: Keep the environment ventilated and low-dust. Systematic operation — properly fix parts on a stand or jig to ensure even coverage from all angles.
Next: Interior
Advanced Creators
Mitsubishi Lancer Evolution IX Wongen Build Guide — Part 6: Interior
Alpha Model AM02-0045 · Build by Marcin Pyziak
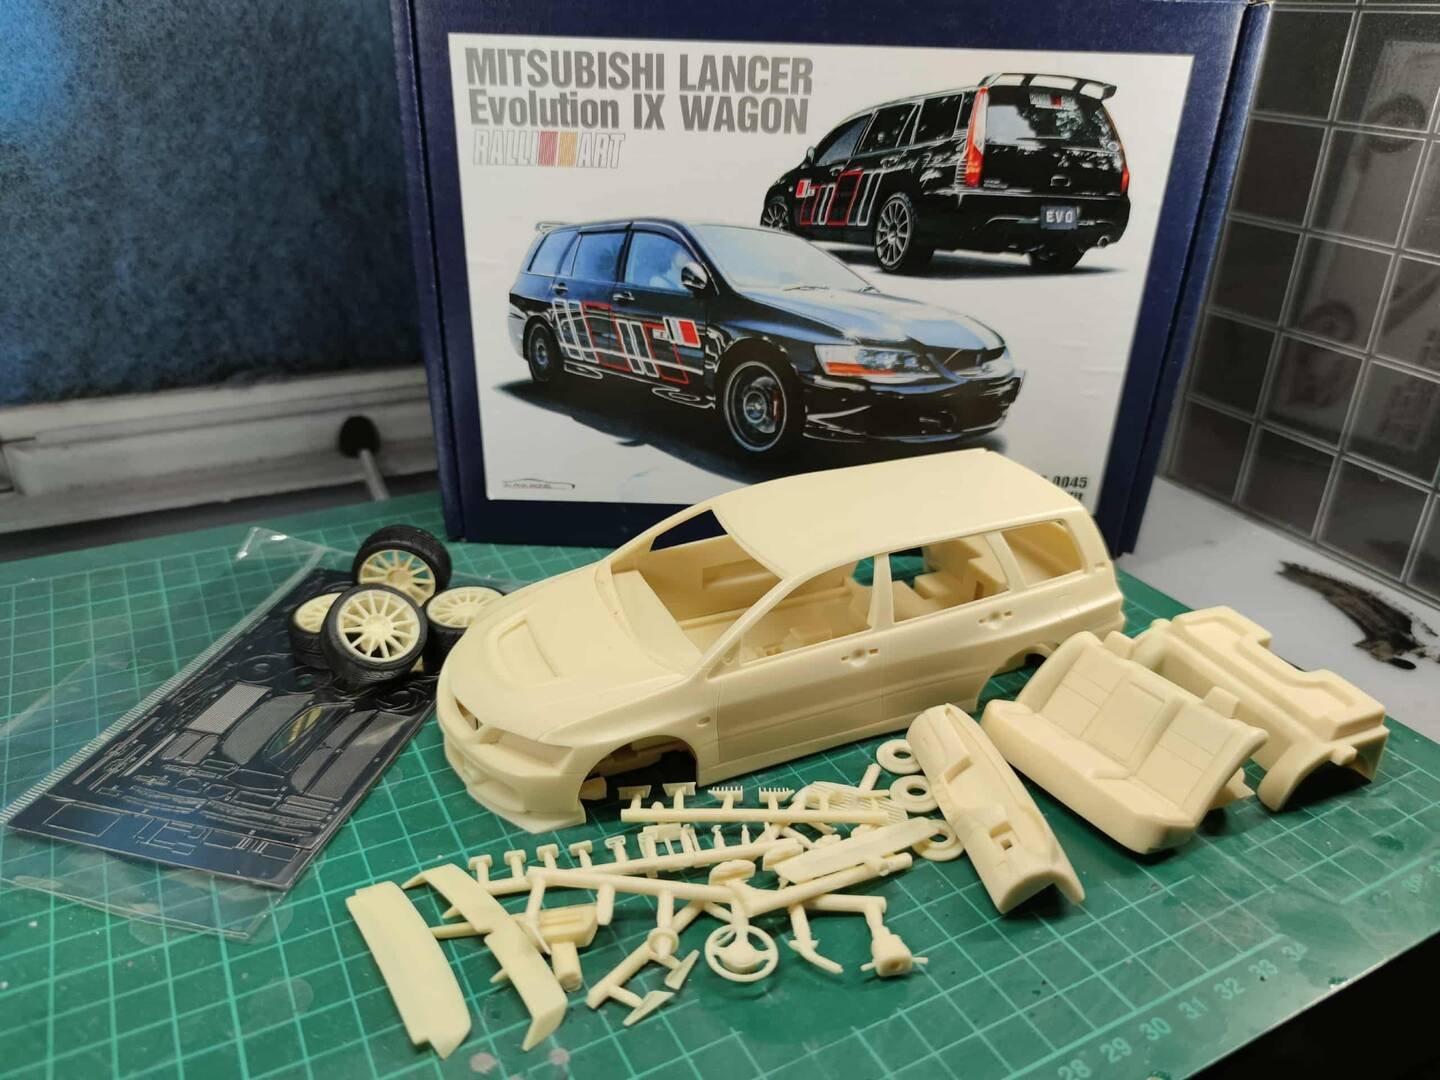
The interior is where the eye is drawn immediately when looking through the model's windows. Getting this right requires patience, a steady hand, and the right sequence of operations.
Required Tools
- Model paint for airbrushing / brush painting (main color, background color, and detail color)
- Fine-tip pen brush and flat-headed brush
- Old stain solution (wash/darkening solution)
- Dry-cleaning pigment (light dry-brush powder)
- Cover tape (masking tape)
- Sponge fragments
- Gloss / matte protective paint (final coat)
Core Principles
- Order first: Follow the principle of "from inside to outside, from deep to shallow" — spray the dark base of the interior first, then deal with the light-colored details
- Deep first, then light: The dark base effectively covers and provides a natural shadow effect for the lighter main color
- Patience is key: Stable gestures and patience are needed for detail painting and dry sweeping — no haste is allowed
Step 1: Substrate Spraying
Uniformly spray a dark base (such as dark gray or black) on the entire interior trim. This provides a unified shadow basis for all subsequent steps and creates depth in the finished piece.
Step 2: Main Color Coloring
Spray or brush the main color for large-area parts such as seats, instrument panel, and door panels. Adopt a "thin multi-layer" approach to ensure uniform color without obscuring detail.
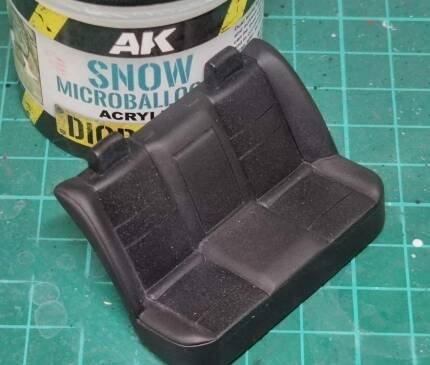
Step 3: Detail Painting
- Use a fine-tip pen to paint screens, buttons, meters, and other widgets
- Dip a sponge in silver paint and lightly touch the buttons to simulate the texture of metal wear
- Use a flat-headed brush for precise detail work on small surfaces
Step 4: Wash and Dry Clean
Wash treatment: Apply old chemical solution (wash fluid) to the entire interior, embedding it into lines and corners to enhance the shadow effect and simulate years of use.
Dry brushing: After it is completely dry, dip a small amount of light-colored pigment with a flat-headed brush for dry scanning to highlight the texture and edges.
Step 5: Dry Scanning Finishing Touch
Finally, dry scanning techniques are used to highlight details such as buttons and textures to enhance the three-dimensional effect. This is the step that brings realism to the cabin.
Step 6: Protective Paint Fixing
The final protective coat is very important — it fixes all the aging effects and gives the correct surface texture.
- According to the material of parts (leather vs. plastic), selectively spray matte or semi-gloss protective paint
- This unifies the texture across all interior components
- Leather areas → matte; plastic areas → semi-gloss for realistic differentiation

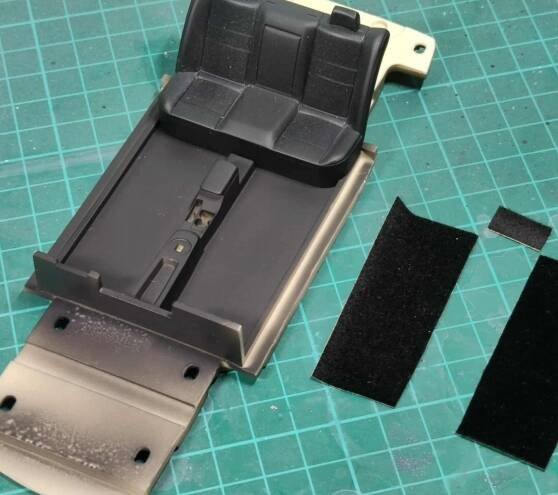
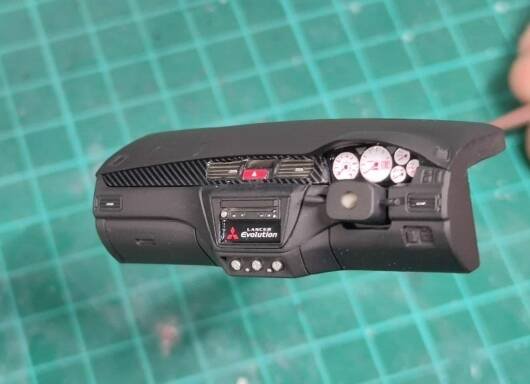
Next: Tire Manufacturing & Installation
Advanced Creators
Mitsubishi Lancer Evolution IX Wongen Build Guide — Part 7: Tire Manufacturing & Installation
Alpha Model AM02-0045 · Build by Marcin Pyziak
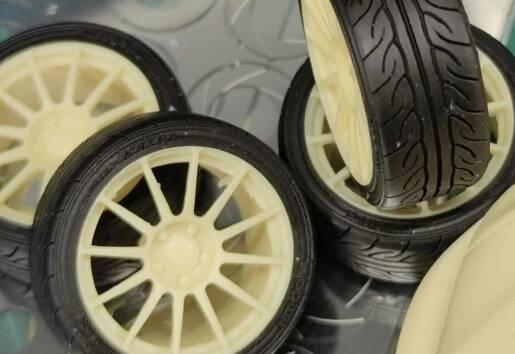
Tires and wheels are one of the first things people notice on a finished model. This guide walks you through the complete process of manufacturing, aging, and installing model tires for a realistic, road-worn look.
Core Principles
- Aging first, then assembling: Be sure to finish the aging treatment of tires before bonding, so as to avoid polluting peripheral parts such as brake discs
- Nature first: Simulate the wear and dust effect of real tires through wash and dry brushing techniques
Step 1: Dry Fit and Inspection
First, assemble the tire and wheel hub in a temporary (dry) fit — without any glue — to check whether the bonding is tight and proper.
- Check the fitment around the entire circumference
- If necessary, the hub edge can be slightly polished to ensure a perfect fit
- Mark alignment points for consistent reassembly later
Step 2: Wheel Hub Coloring
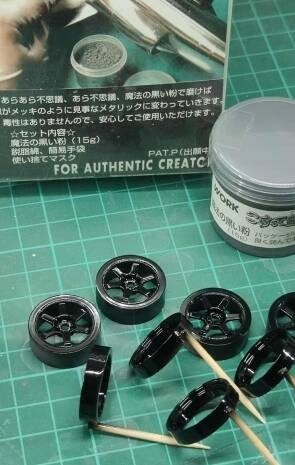
Spray or brush paint the wheel hub separately.
- Common colors: silver, gunmetal gray
- Add rust color to the brake disc using dry brushing technique to highlight the metallic texture
- Allow paint to cure fully before proceeding to tire aging
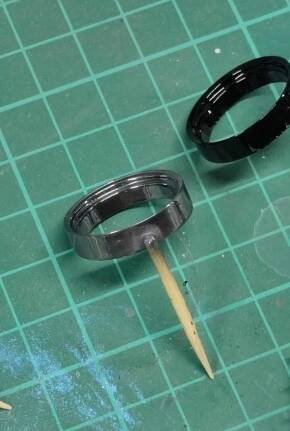
Step 3: Tire Aging
Wash treatment:
- Apply brown or gray wash solution to the tire surface
- After it penetrates into the texture, wipe off the excess liquid material with a cotton swab dipped in solvent
- This makes the tread pattern and sidewall texture stand out clearly
Dust effect:
- Lightly wipe aged powder or eyeshadow powder at the tire ground contact area
- This simulates the dust adhesion that builds up after real driving
- Keep it subtle — less is more for a natural look
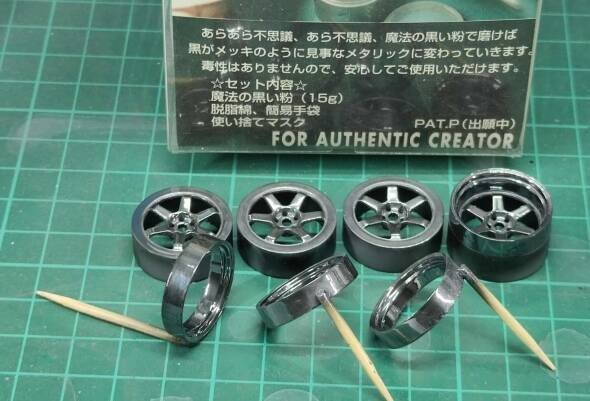
Step 4: Final Assembly
- Formally bond the aged tire with the colored wheel hub
- Ensure the bonding surface is clean and dry
- Apply a small amount of glue evenly around the inner edge
- Press together and hold until completely fixed
Pro tip: Work on all four tires at the same stage so the aging looks consistent across the entire model. Mixing aging stages between tires can lead to noticeable color differences.
Next: Final Assembly
Advanced Creators
Mitsubishi Lancer Evolution IX Wongen Build Guide — Part 8: Final Assembly
Alpha Model AM02-0045 · Build by Marcin Pyziak
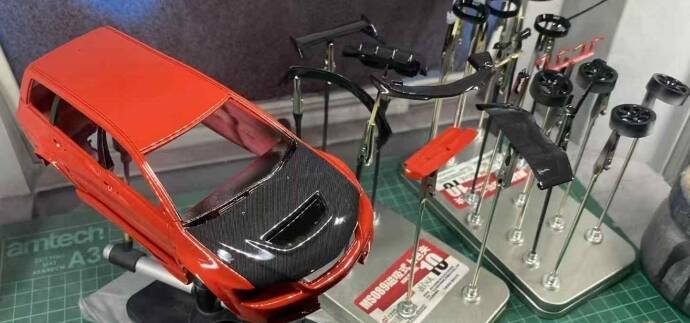
This is the moment everything comes together — the final assembly. All the preparation, painting, aging, and detail work culminates in building your completed model.
Core Principles
- Cleanliness first: All operations are carried out in a dust-free environment. Wear gloves to prevent fingerprint pollution on finished surfaces
- Sequential assembly: Follow the assembly logic of "from inside to outside, from bottom to top"
Step 1: Interior Installation
Begin by installing the completed interior into the body shell.
- Ensure all interior components are fully cured and protected
- Carefully slide the interior tub into the body — take your time
- Secure with small dots of CA glue at hidden mounting points
- Verify door panels and seats are properly aligned
Step 2: Window and Glass Installation
- Carefully fit the clear window panels into their recesses
- Use clear adhesive or canopy glue to avoid visible glue lines
- Hold in place until set — use tape to secure if needed
Step 3: Body Panel Attachment
Attach any separate body panels (doors, hood, trunk, fenders) that were painted separately.
- Check panel gaps on all sides before gluing
- Use pins or magnets for removable panels if desired
- Ensure all panel lines are consistent
Step 4: Wheel and Tire Installation
- Install the aged and assembled tire/wheel combos onto the axles
- Verify the car sits level and at the correct ride height
- Check that all wheels spin freely (if applicable)
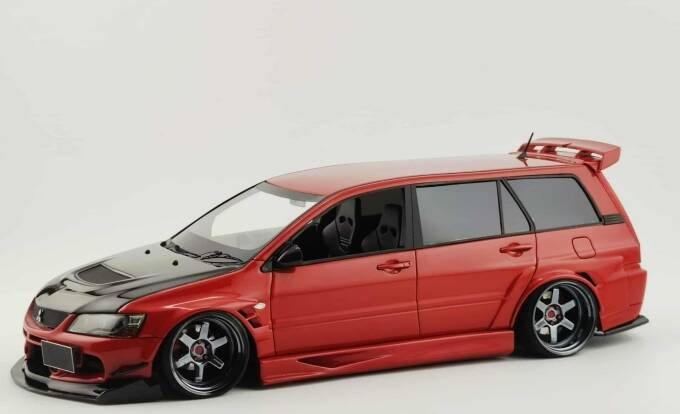
Step 5: Final Details and Decals
- Apply any remaining decals (badges, logos, number plates)
- Install rear-view mirrors, spoilers, and other small附件
- Touch up any minor paint chips or scratches
Step 6: Final Inspection
- Inspect the model under bright light from multiple angles
- Check for any glue residue, fingerprints, or dust particles
- Clean with a soft brush or compressed air if needed
- Apply a final overall clear coat if desired for unified gloss
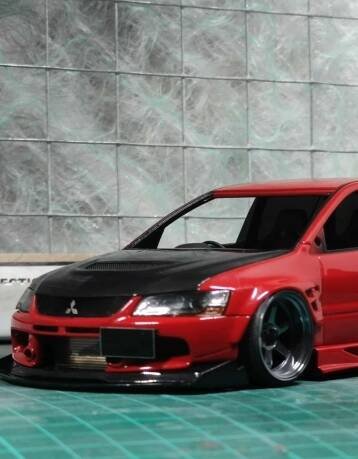
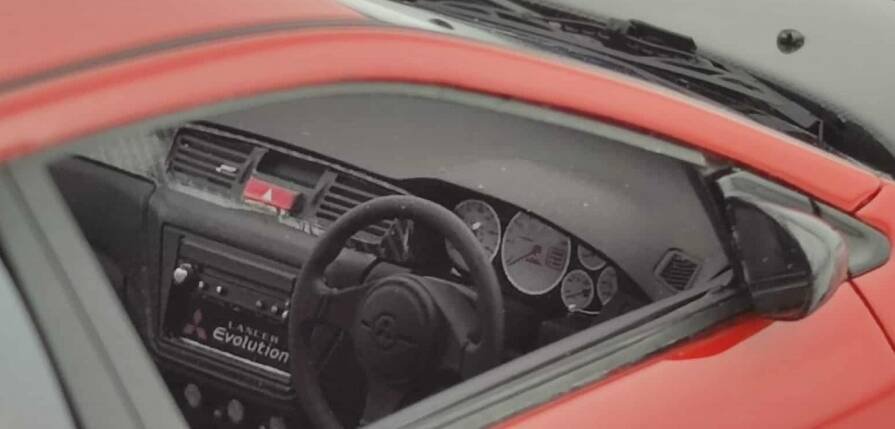
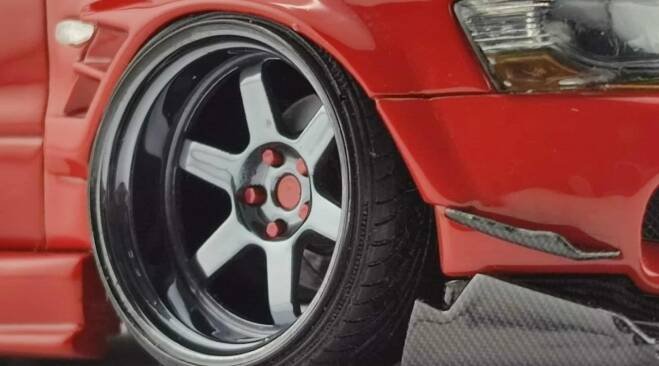
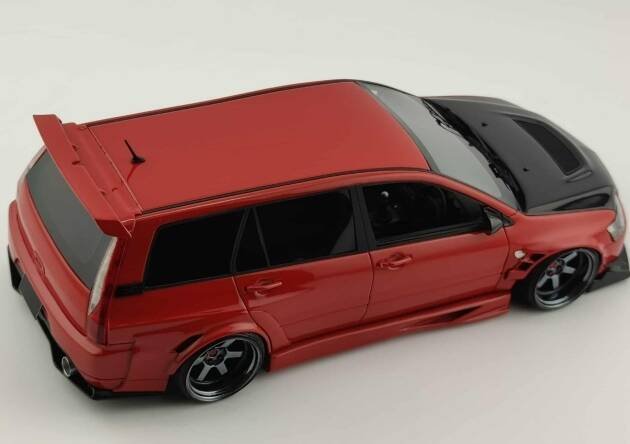
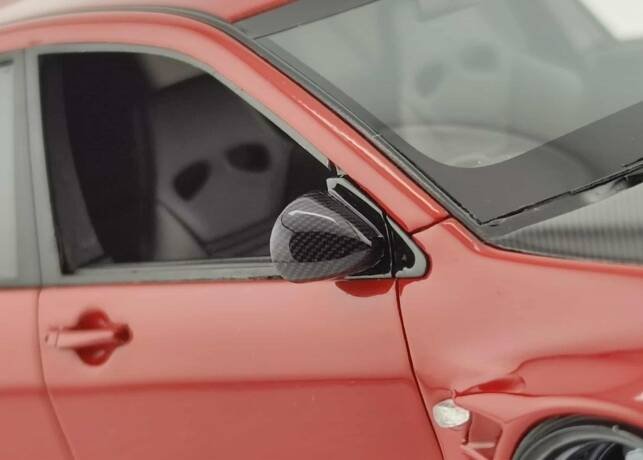
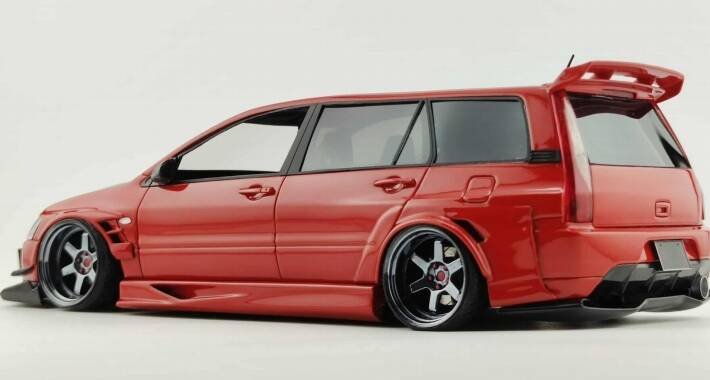
Pro tip: Take your time with the final assembly. After all the work you've invested in preparation and painting, rushing the last 10% can undo all your careful work. Work in a clean, well-lit space and handle finished parts with cotton gloves.
Congratulations — your Alpha Model AM02-0045 Mitsubishi Lancer Evolution IX Wongen build is complete!
— End —