
 Advanced Creators
Alfa Romeo Giulia Quadrifoglio
Alpha Model AM02-0029 · Build by Robin Witt
Introduction
A stunning Alfa Romeo Giulia Quadrifoglio in Rosso Competizione Pearlescent — a 505hp beast with a Ferrari-derived V6 engine.
This build guide was written by Robin Witt, UK based Scale Model Builder (see Robin's Scale Models on Facebook). I hope my build of this kit will provide some help and inspiration for you to go on and build your own masterpiece. Most of all though, enjoy your build.
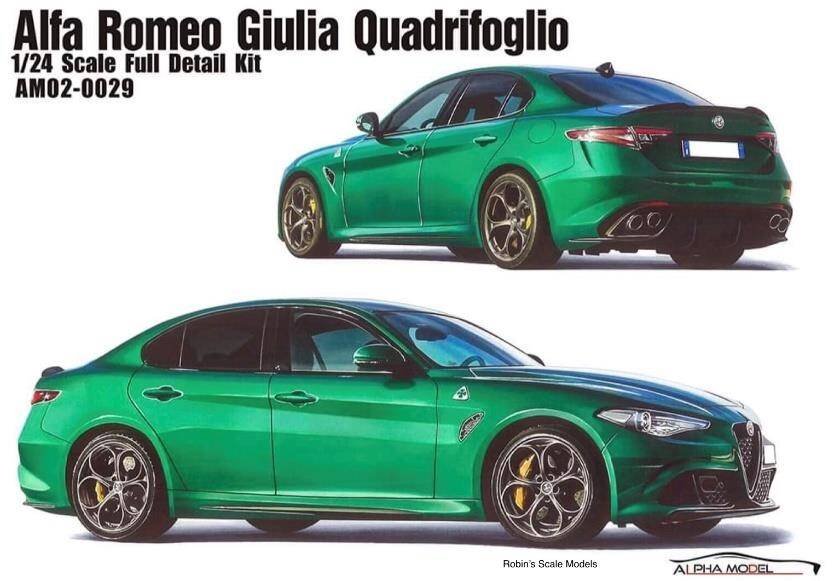
This time I'm building the Alfa Romeo Giulia Quadrifoglio, my chosen body colour being the stunning Alfa Romeo Rosso Competizione Pearlescent finish. The car will also have areas with a twill weave carbon fibre highlight.
With its 505 horsepower twin turbocharged 2.9 litre Ferrari-derived V-6 engine, the Giulia Quadrifoglio has a 0-62 time of just 3.9 seconds. It's one amazing beast of a car.
Reference Photos
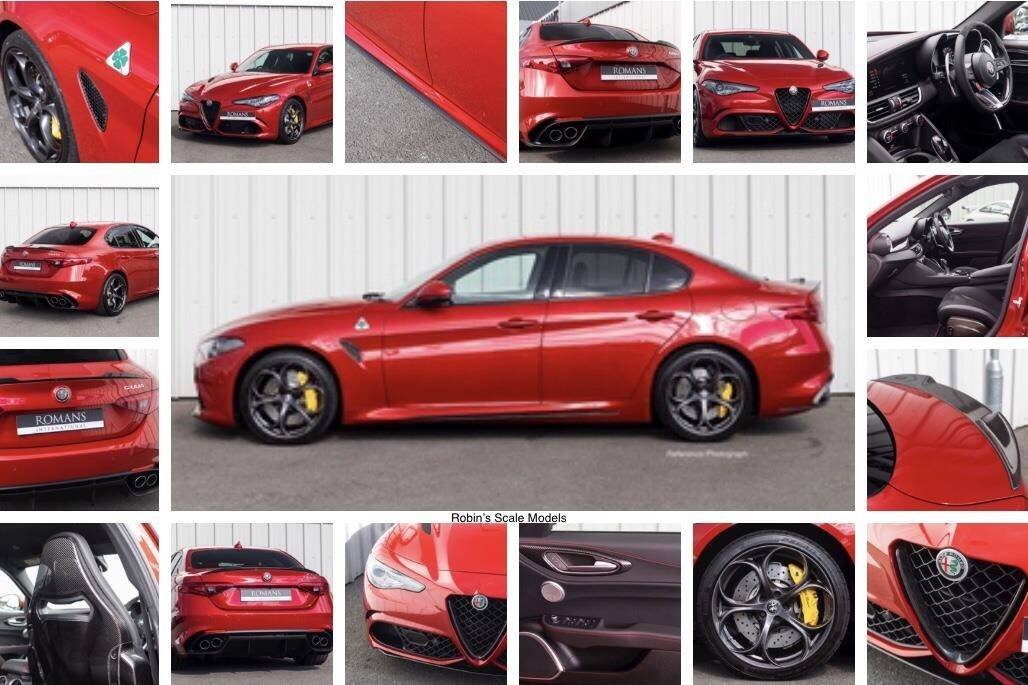
I thought I would share a photo collage with some of the reference pictures I looked at on the web.
Box Contents
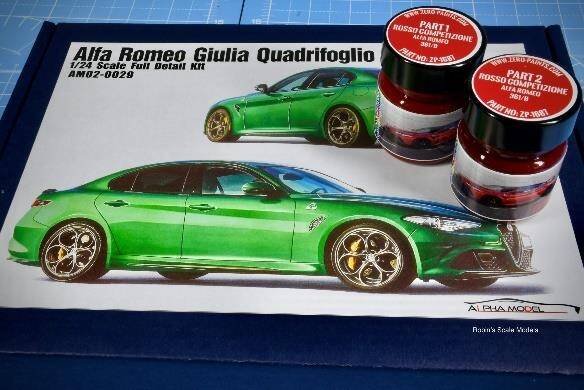
A look inside the Alpha Model blue box — everything you need to build a fantastic scale model.
These are the contents of box. The quality is excellent. You have everything here to build a fantastic scale model.
Advanced Creators
Alfa Romeo Giulia Quadrifoglio
Alpha Model AM02-0029 · Build by Robin Witt
Panel Lines
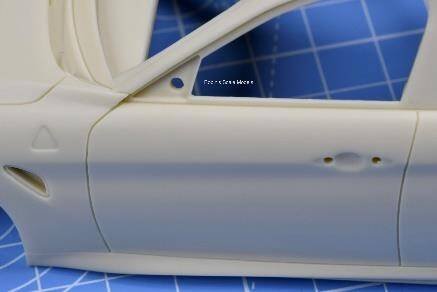
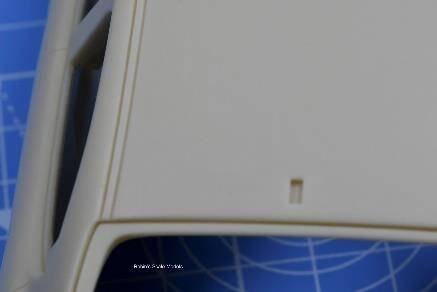
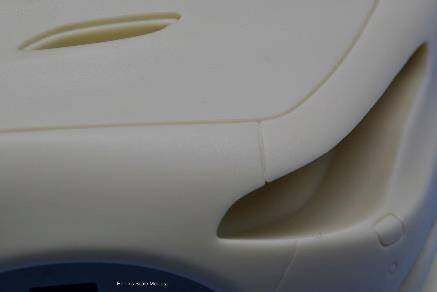
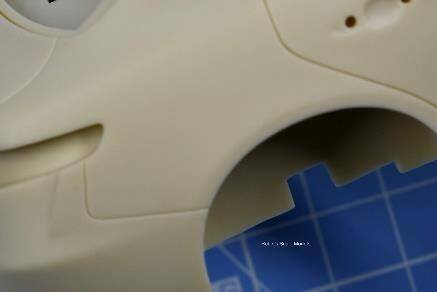
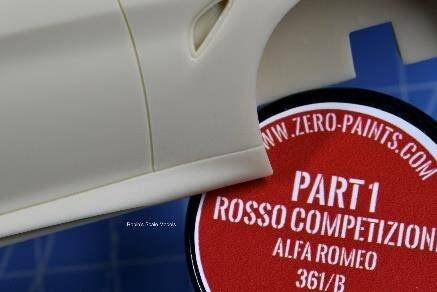
The depth and thickness of the panel lines is just right — no scribing required. A thoughtful design for carbon fibre decal application.
The depth and thickness of the panel lines is just right, no enlarging with a scribing tool is required. The Alpha Model design team have also thought about the carbon fibre decal job that we need to do with the car. The areas on the body shell that need carbon fibre decal treatment are all separate pieces. I love the thought that's obviously gone into this kit.
Health & Safety
When using resin materials, health and safety must come first. Always protect yourself and prepare your parts properly.
Resin Dust Safety
First thing to consider when using resin materials is health and safety. You should wear an appropriate mask when sanding, using a file or drilling resin parts as fine resin particles can be dangerous if breathed in.
Washing Requirements
Always wash all resin parts in soapy water or use an anti-silicone degreaser before priming and painting. I actually do both. This stage is needed to remove any resin release or production agents. You risk the primer or paint not laying down on the resin properly if you miss out this stage.
Cleaning
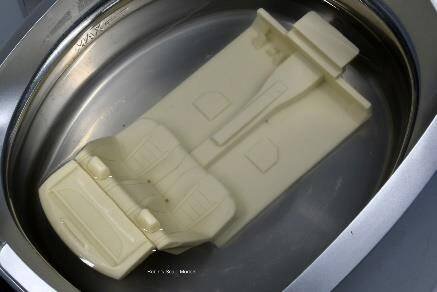
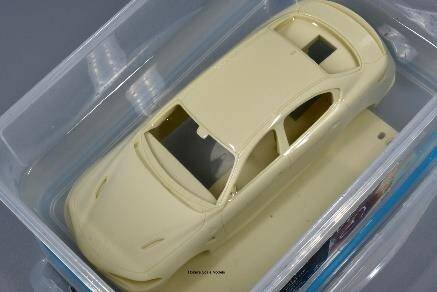
A thorough cleaning process using UPol degreaser and an ultrasonic cleaner, followed by hot soapy water.
I soaked all resin parts in the UPol degreaser for an 8 minute cycle in my ultrasonic cleaner. Note that I opted to use a water based degreaser as I thought this would be kinder to the resin. Following this process, I washed all parts in reasonably hot soapy water.
 Advanced Creators
Alfa Romeo Giulia Quadrifoglio
Alpha Model AM02-0029 · Build by Robin Witt
Paint Testing
Finding the perfect Rosso Competizione — many spoons of testing to achieve the right colour for both indoor display and outdoor brightness.
The Challenge
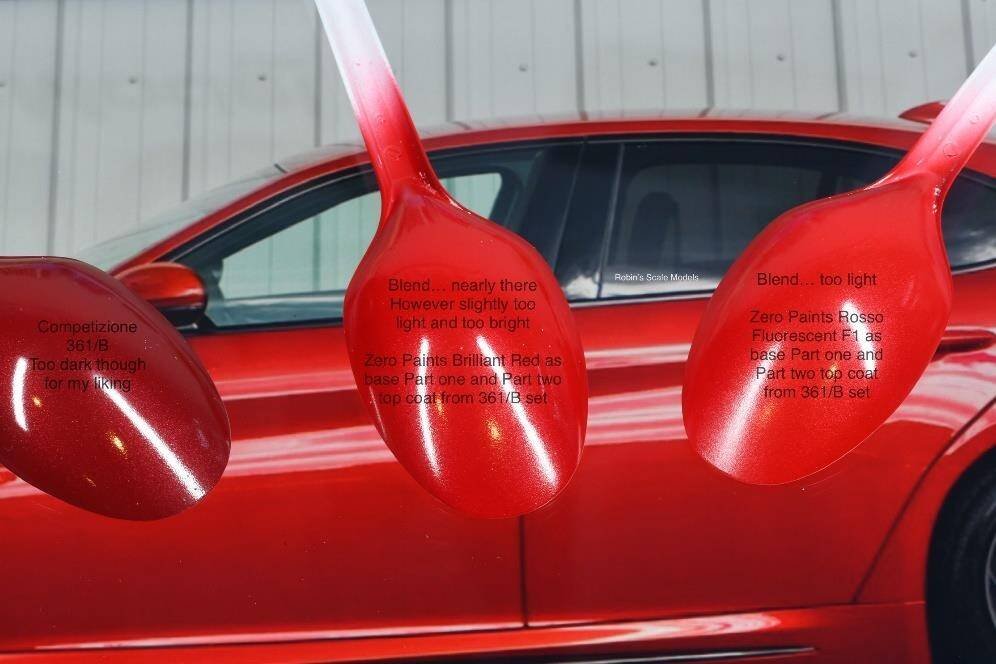
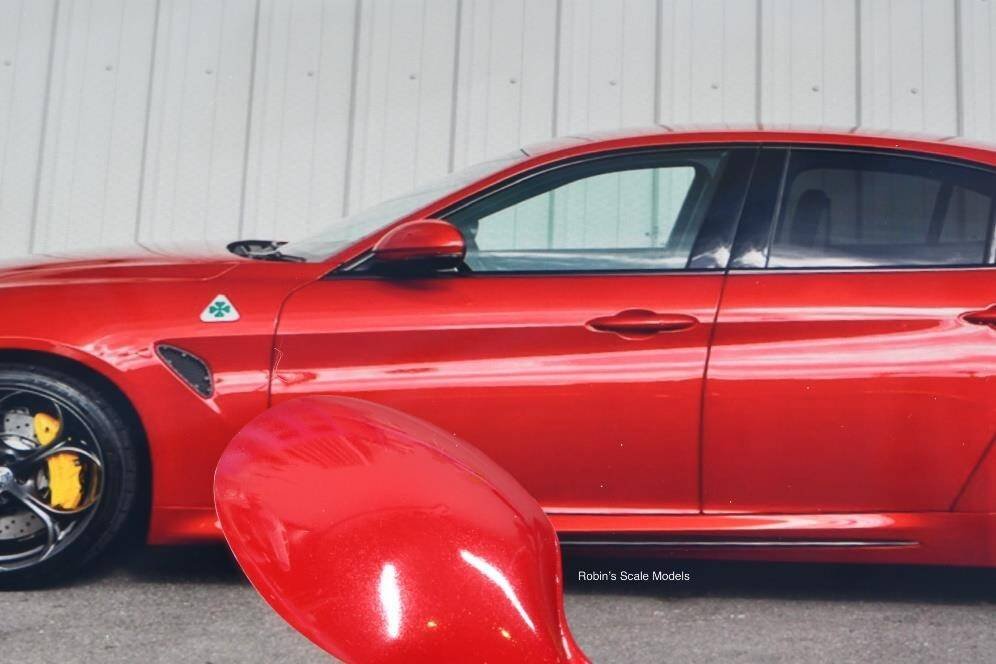
Before I started painting the bodywork I had a feeling that work might be required to get the colour exactly as I wanted. Rosso Competizione can look quite different according to the lighting conditions. I wanted to have the colour as it would be outside on a bright sunny day, however the car would be inside in my LED lit display case.
I bought the Zero Paints Rosso Competizione paint set but, as can be seen on the far left spoon, the standard two part paint was going to be too dark for me. I spent quite an amount of time, and used many spoons, testing various blends of paint mixing.
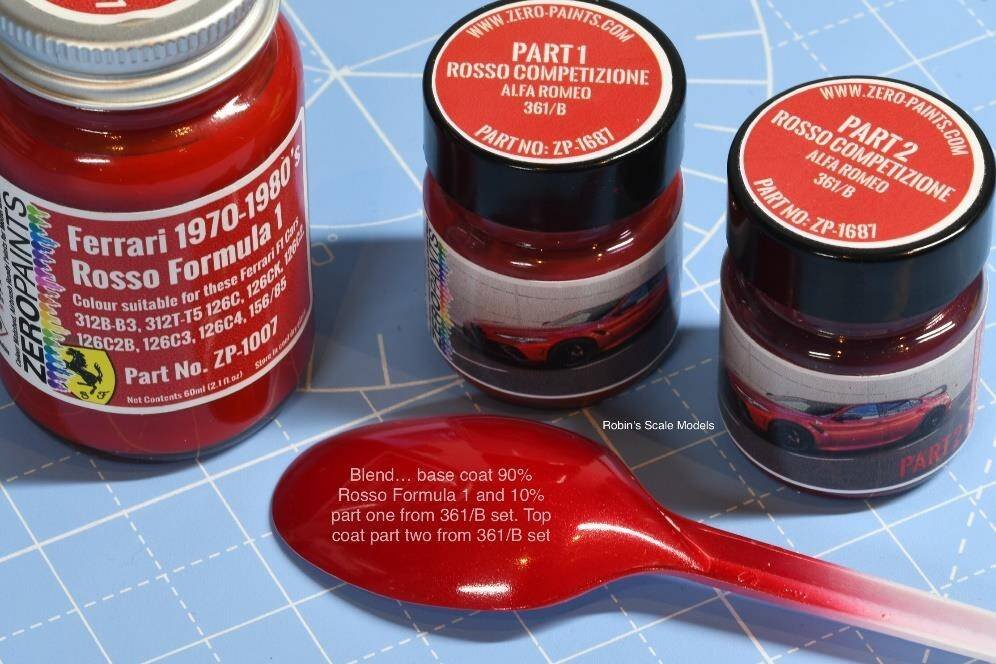
Getting Close
This was getting real close to the colour I wanted as the finished car. I'll not say how many spoons I used up in the process of getting here :-).
The Final Formula
The final blend, all using Zero Paints lacquer paint, was a base coat of 90% Ferrari Rosso Formula 1 and 10% of the Part 1 jar for the Alfa Rosso Competizione. The top coat was 100% from the Part 2 jar for the Alfa Rosso Competizione. This was all done on a pure white base after primer.
Advanced Creators
Alfa Romeo Giulia Quadrifoglio
Alpha Model AM02-0029 · Build by Robin Witt
Wheel Color
The metallic alloy wheels were troublesome to match. More paint bought and blends tried on both black and grey base spoons.
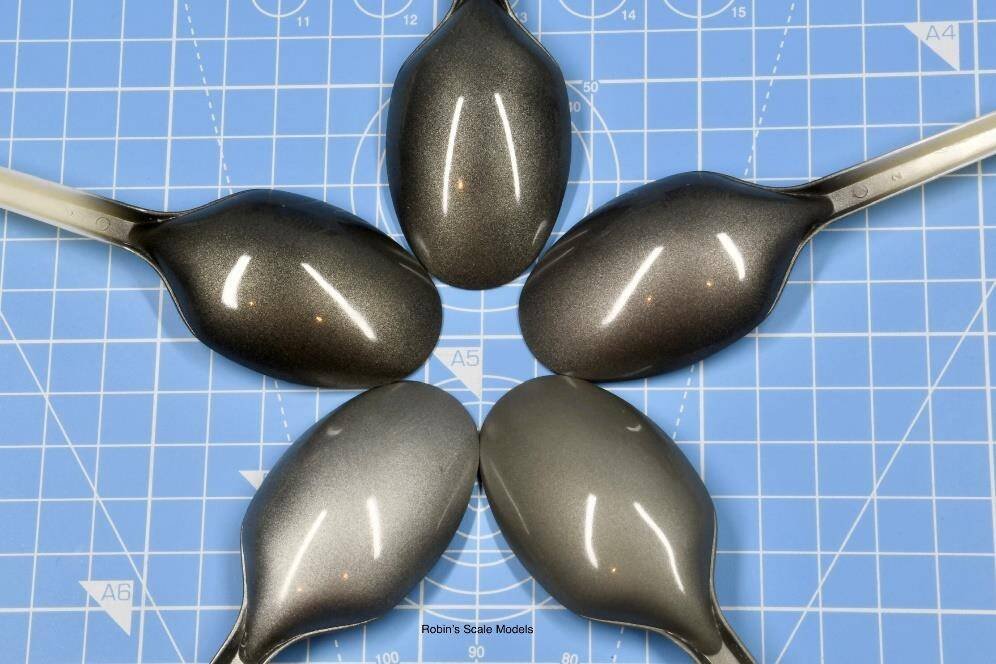
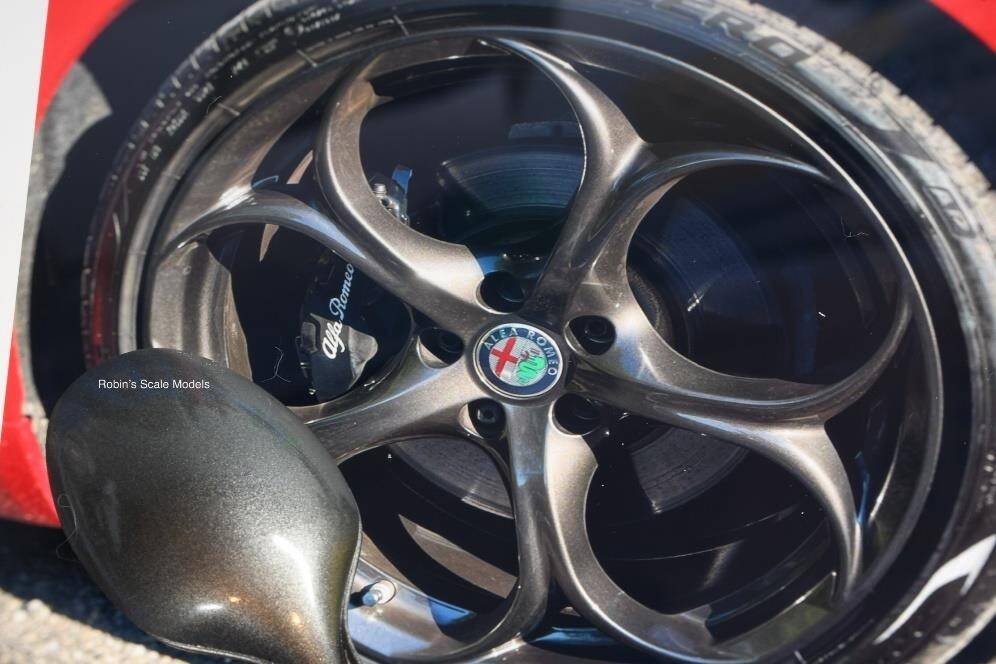
Again, the metallic alloy wheels were troublesome to find the right colour to match my reference car. More paint bought and blends tried. I tried each blend on a black base spoon and on a grey base spoon.
The Final Mix
After many spoons had been painted with all sorts of blending, my final mix was 40% black, 30% Porsche Seidenmatt Grey and 30% Subaru Gold. I used a black primer as the base.
2K Clearcoat & Polishing
A full two weeks of curing, followed by careful wet sanding and polishing to achieve a beautiful, non-toy-like shine.
Now I was ready to paint the car. After primer, all body colour parts had a few light coats of white before I commenced the two part red paintwork as I described a few pictures ago. Of course, between each colour change I gave the model some time for the paint to cure. After this I used 2K clearcoat to add a rich shine to the parts. Sorry but I didn't take pictures of the two different red paint sessions. I really don't know why.
Step 1 — Curing
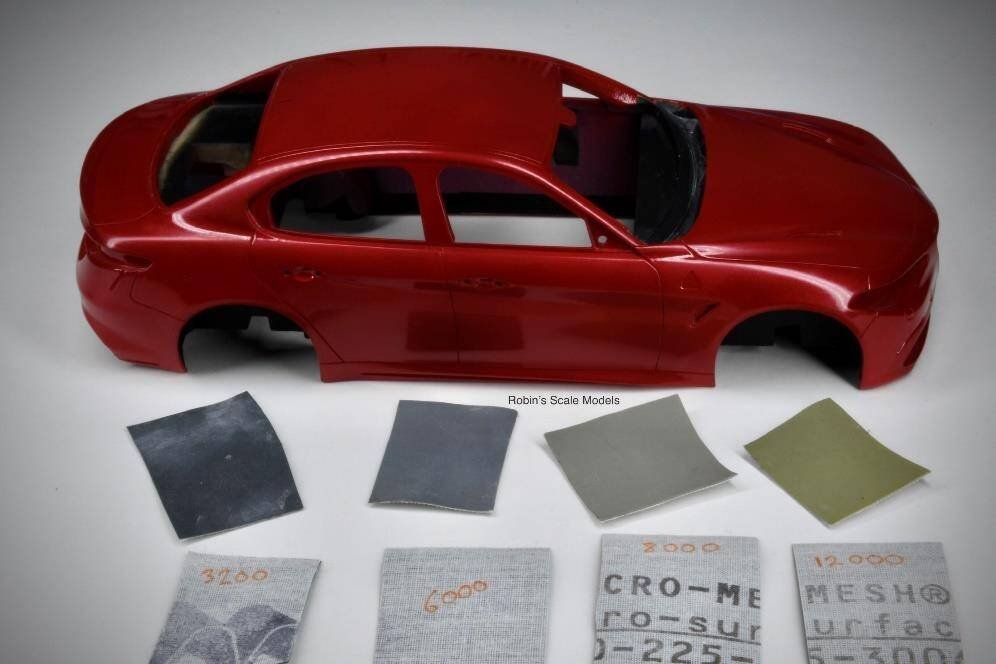
I left the 2K clearcoat treated parts a full two weeks for the 2K to fully harden, and then started the polishing process.
Step 2 — Wet Sanding
First stage was to very carefully wet sand the body with different grades of wet micromesh abrasive. This reduces the thickness of the clearcoat and removes any "orange peel" created in the surface when 2K'ing.
Step 3 — Polishing
Once happy with the surface, I progressed the polishing process using various polishing compounds.
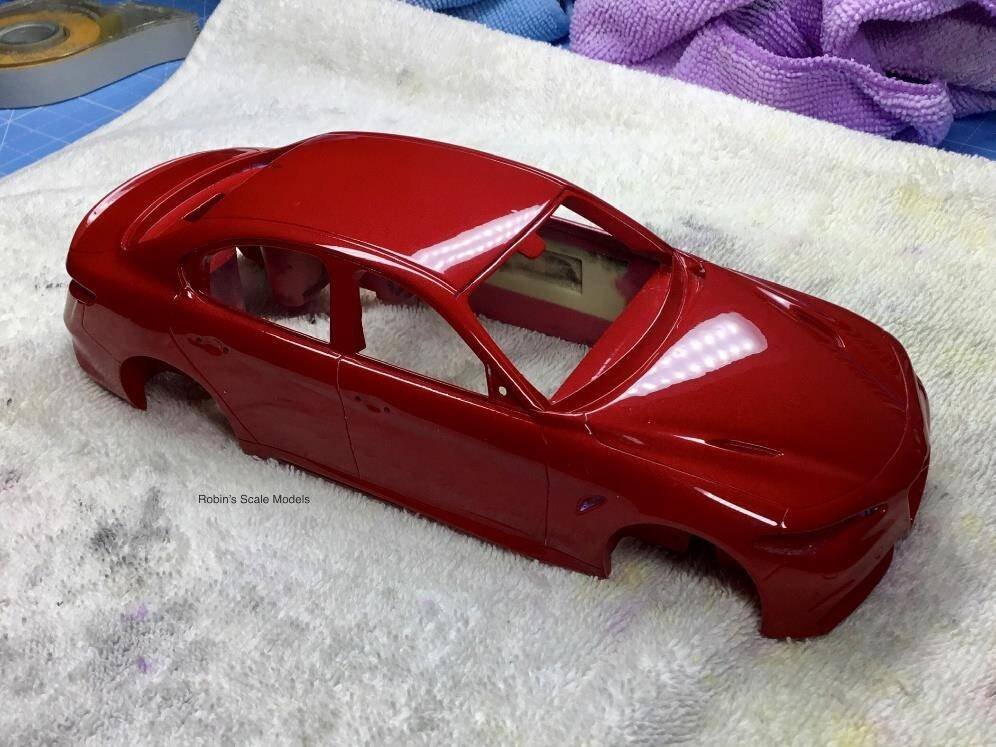
This is the result after the wet sand and polish process. The car body has a beautiful shine and the clearcoat is not too thick… not toy like. I was very happy with the result.
Advanced Creators
Alfa Romeo Giulia Quadrifoglio
Alpha Model AM02-0029 · Build by Robin Witt
Semi-gloss Black
Painting the semi-gloss black areas with a new masking tape discovery — Orlee from Switzerland.
A New Masking Tape Discovery
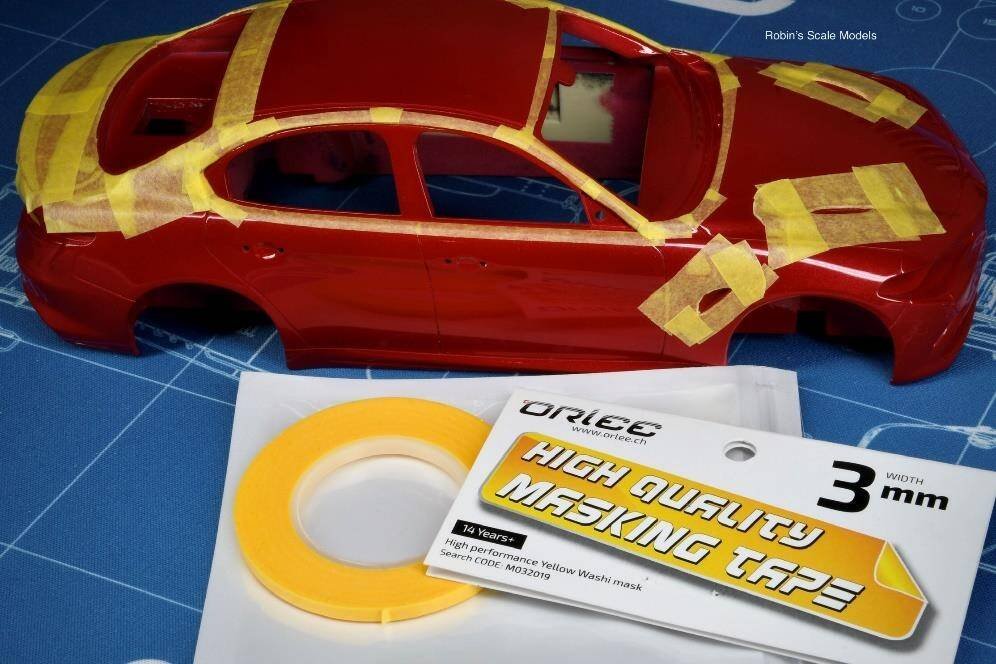
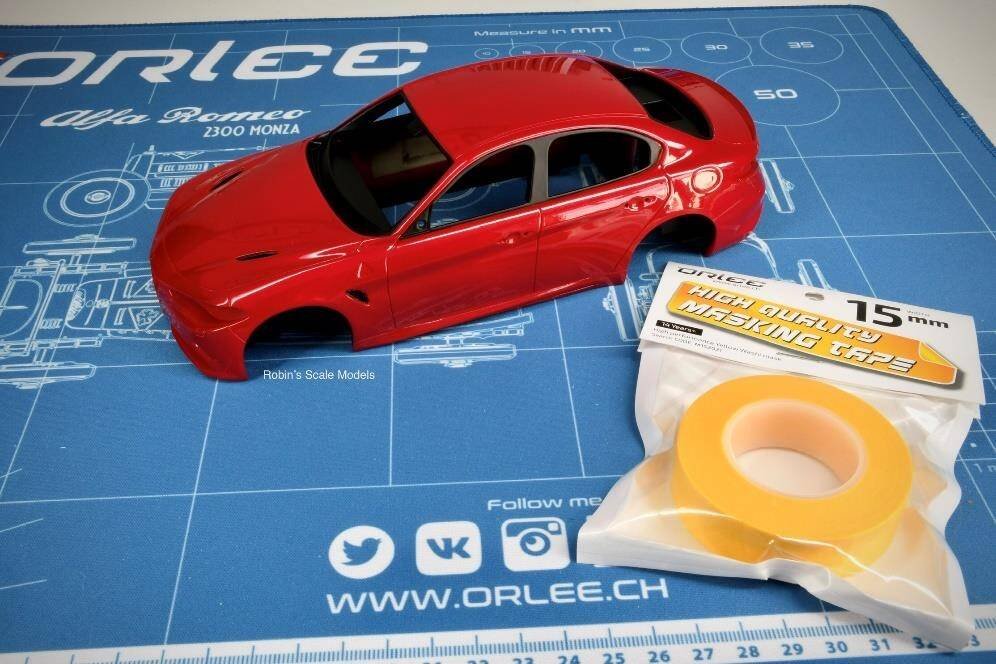
The next stage was to paint the areas of the body that I wanted to be semi-gloss black. For this stage I had recently received a new brand of masking tape that I wanted to try. I had heard good reviews about the tape. The masking tape is by a company called Orlee, based in Switzerland. I have to say that I was very impressed with the tape, so much so that I will be moving to use this tape all the time now, rather than the Tamiya tape that I have used for years.
Application
I used the 3mm masking tape around the windows and various sizes elsewhere. Orlee has the best range of widths available in masking tape as far as I'm aware. The tape had an excellent hold and was easy to apply.
Results
The end result was super. The masking tape came off with no residue left. All black edges were nice and crisp. Perfect result. The bodywork was finished for the time being.
Wheels
Replacing molded resin hex nuts with turned metal ones, adding air valves, and painting with the custom wheel colour mix.
Upgrading the Wheels
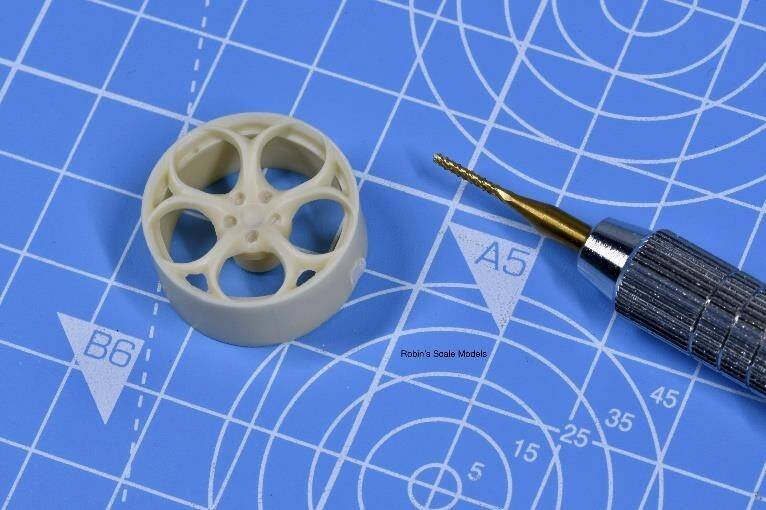
Next I started working on the wheels. Alpha Model have represented those fabulous Alfa wheels very well indeed. As with my other build projects, I wanted to replace the molded resin hex nuts with turned metal ones. I also wanted to add turned metal tyre air valves.
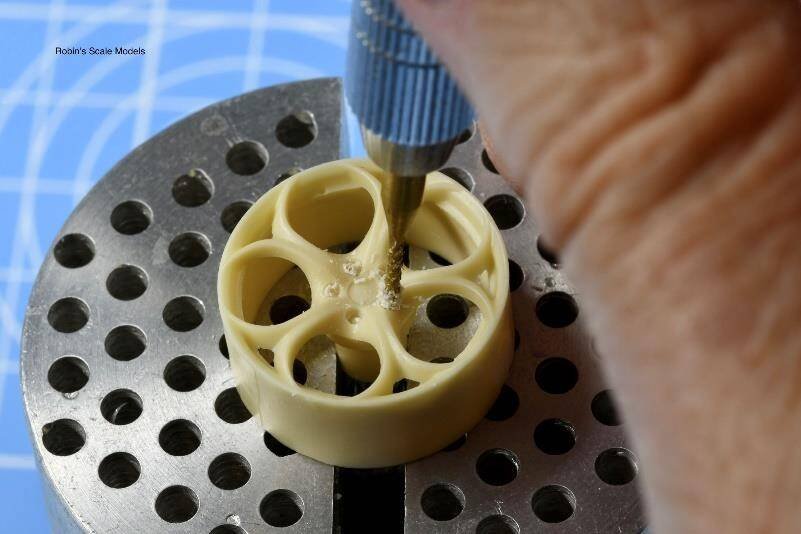
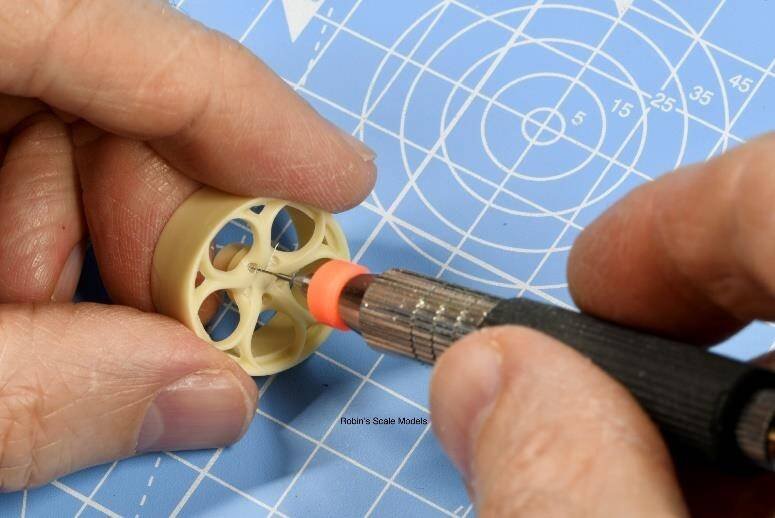
Step 1 — Drilling Out Hex Nuts
First thing was to carefully drill out the resin hex wheel nuts with a tiny end mill drill bit in my Tamiya pin vice. I then drilled holes to accept the end of the turned metal hex nuts.
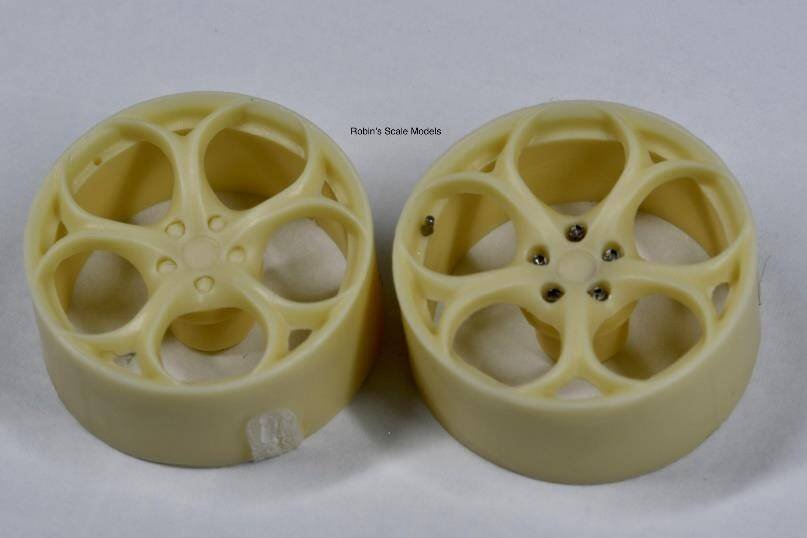
Step 2 — Before & After
Before and after image. This really does show the added realism the turned metal parts add to the wheel. My wheel next to the reference picture of the wheel that I wanted to represent in the model.
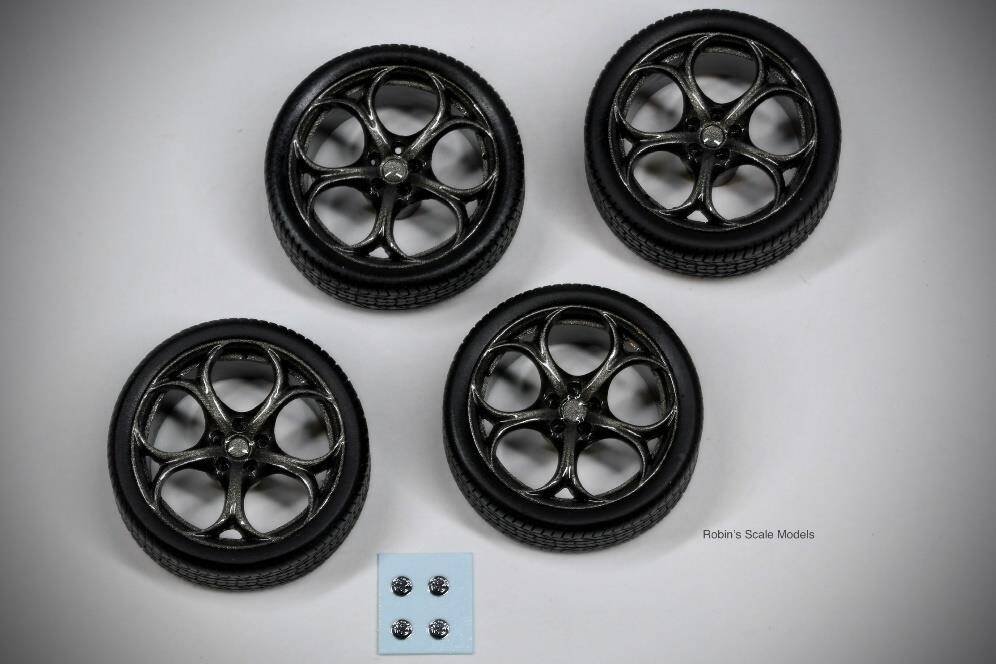
Step 3 — Painting & Decals
Here are the wheels all drilled out and painted using the paint mix that I mentioned previously in this build guide. Alpha Model provide really nice metal decals for the centre hubs.
The Alfa wheel hub decal laid down perfectly. All that remained was to use super glue and glue in the turned metal parts. Note that these were not supplied in the Alpha Model kit. I have added these as extras.
The four wheels complete and looking splendid. I had managed to achieve the look that I wanted.
Brakes
Brake discs and calipers with PE parts, different colours for front and rear, and Alfa Romeo decals.
Brake Discs & Calipers
Next step was to work on the brake discs and callipers. As with my previous Alpha Model builds, I was really impressed with the quality of the parts provided by Alpha Model.
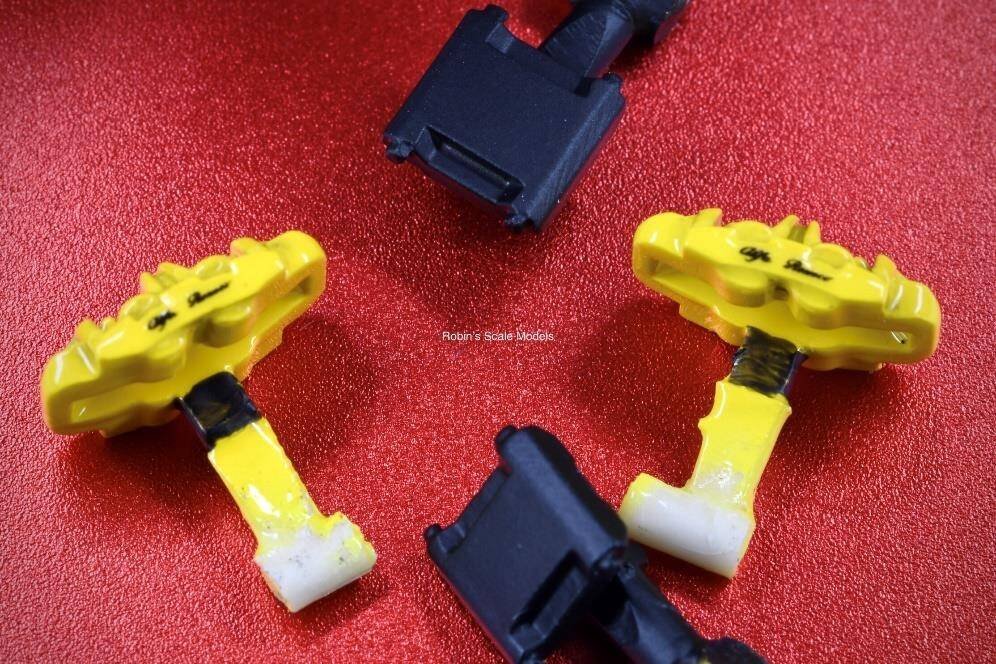
Front Calipers
Front callipers complete with detail painting and the Alfa Romeo decals provided by Alpha Model in the kit.
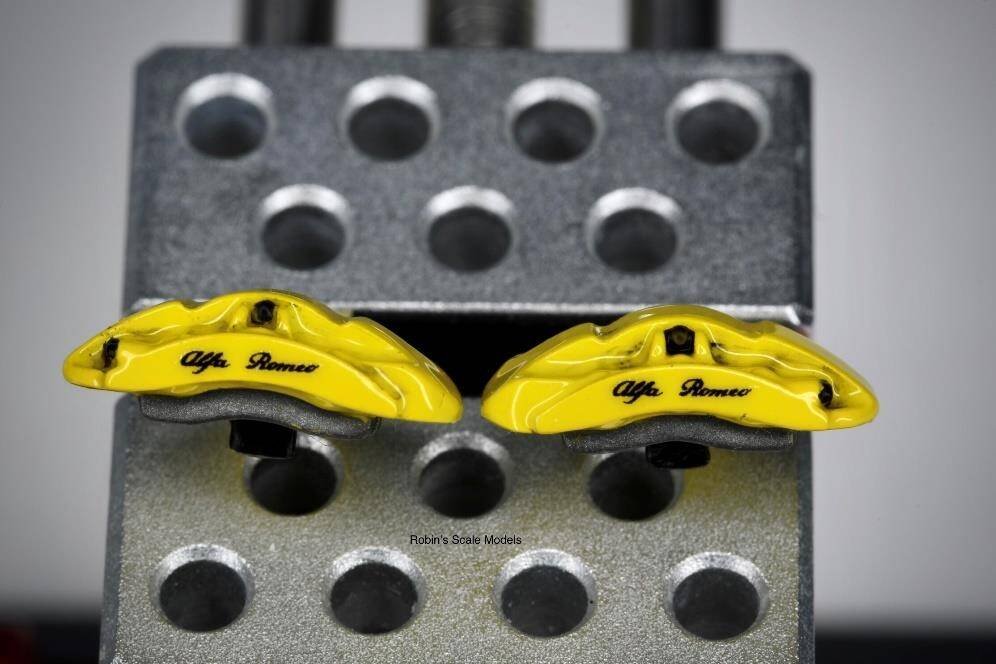
And the rear callipers. Note that the smaller brake callipers need to be painted black to be accurate. I was going to paint them Brembo yellow until I rechecked my reference picture.
Brake Disc Detail
Again, I checked my reference picture… I needed to use a couple of different metallic colours to represent the different pieces that make up the brake discs.
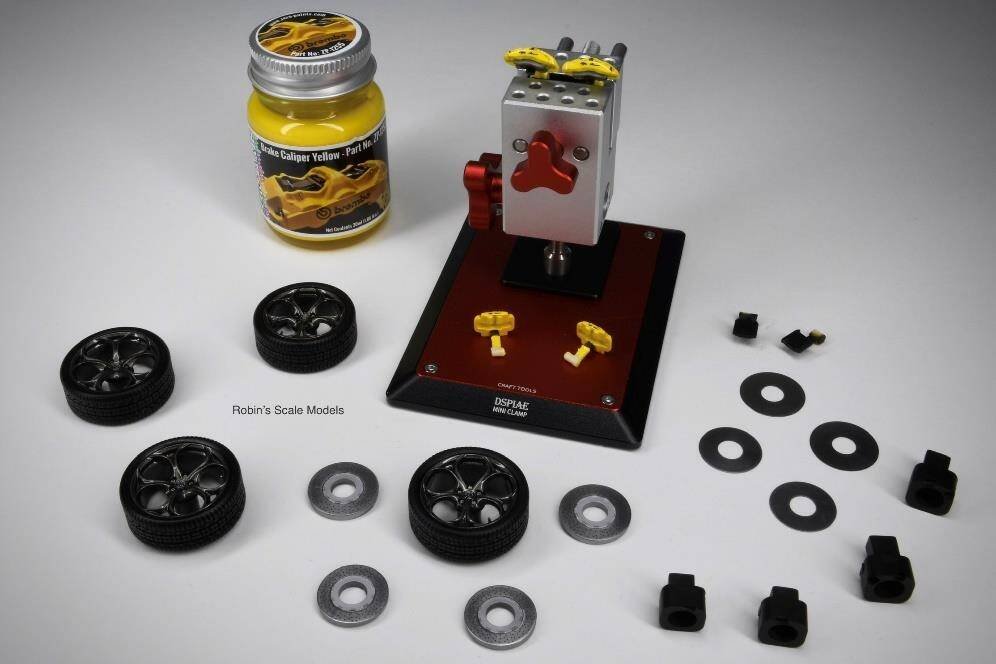
A job well done. I was really happy with the end result. My four completed wheel assemblies.
Advanced Creators
Alfa Romeo Giulia Quadrifoglio 制作指南
Alpha Model AM02-0029 · Build by Robin Witt
Interior: Seats
Deepening panel lines, applying carbon fibre decals, painting black leather with red stitching, and creating an Alcantara effect with micro bubbles.
Deepening the Seat Panel Lines
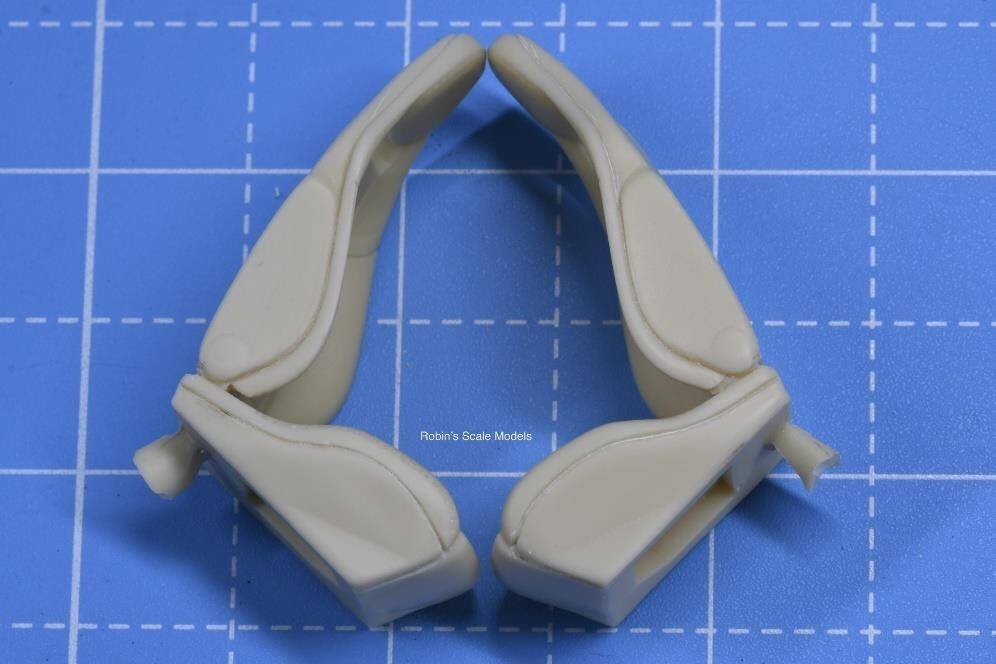
Next I moved to the interior of the car. I decided to open up the demarcation line between the seat material and the carbon fibre back. This would help emphasize the appearance of the seat, with its carbon back plate.
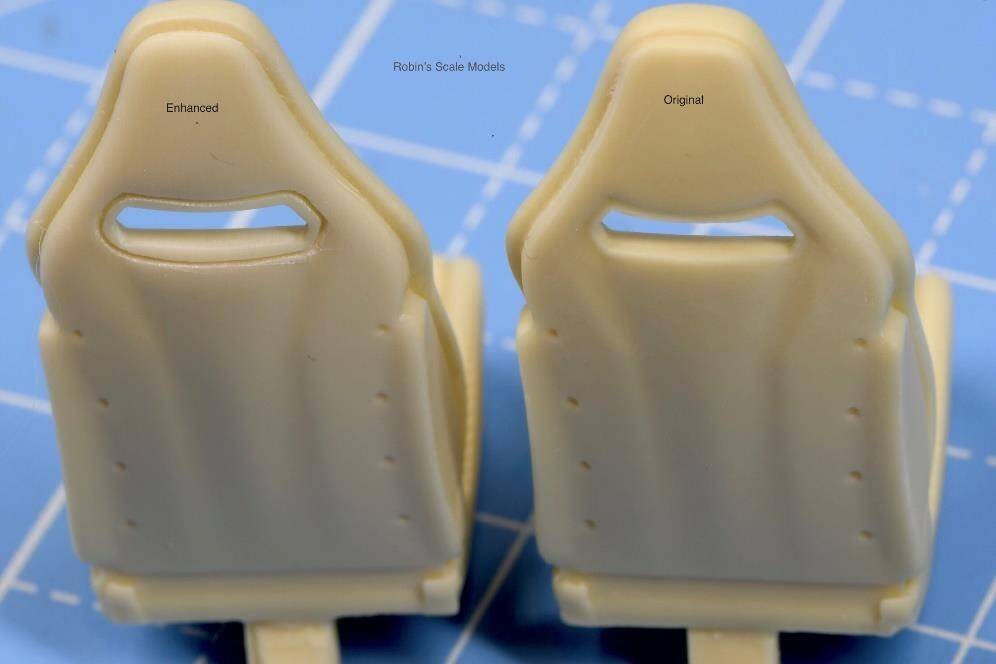
My reference showed that the base of the seat should have a carbon panel. Alpha Model had missed this in their casting of the seat base. Now, of course this will not be seen in the completed model, however I took the decision to represent it in any case and marked and scribed my own line.
Step 1 — Scribing
Carefully scribing along the molded demarcation line to open it up more using a 0.25mm scriber. And scribing along the top too. This work really is worth the effort.
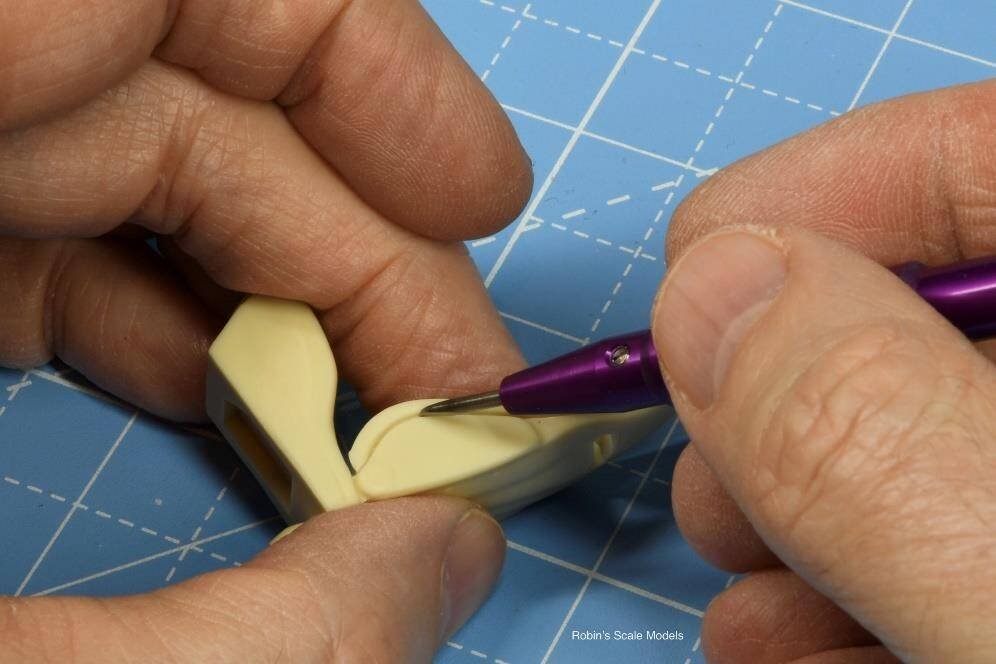
With the base, I needed to give myself a line to work to as it wasn't molded. I created the line using flexible masking tape and then cut the line a couple of times with a 0.15mm scriber before moving on to the 0.25mm scriber to finish off.
Step 2 — Carbon Fibre Decal Templates
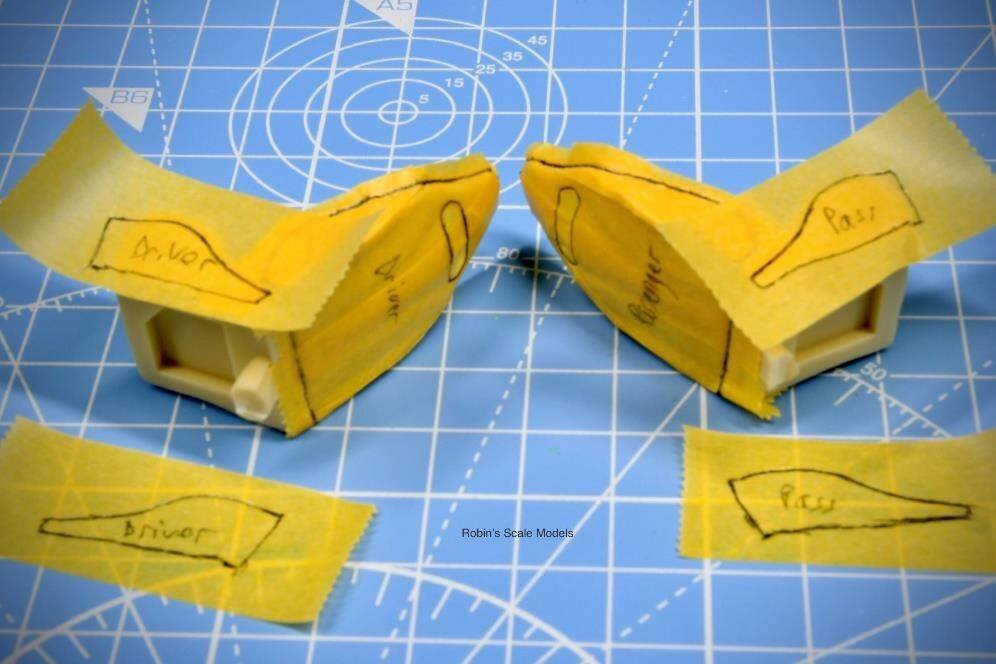
All scribing work complete, ready to start creating templates for the carbon fibre decal. Templates for carbon fibre decal using masking tape.
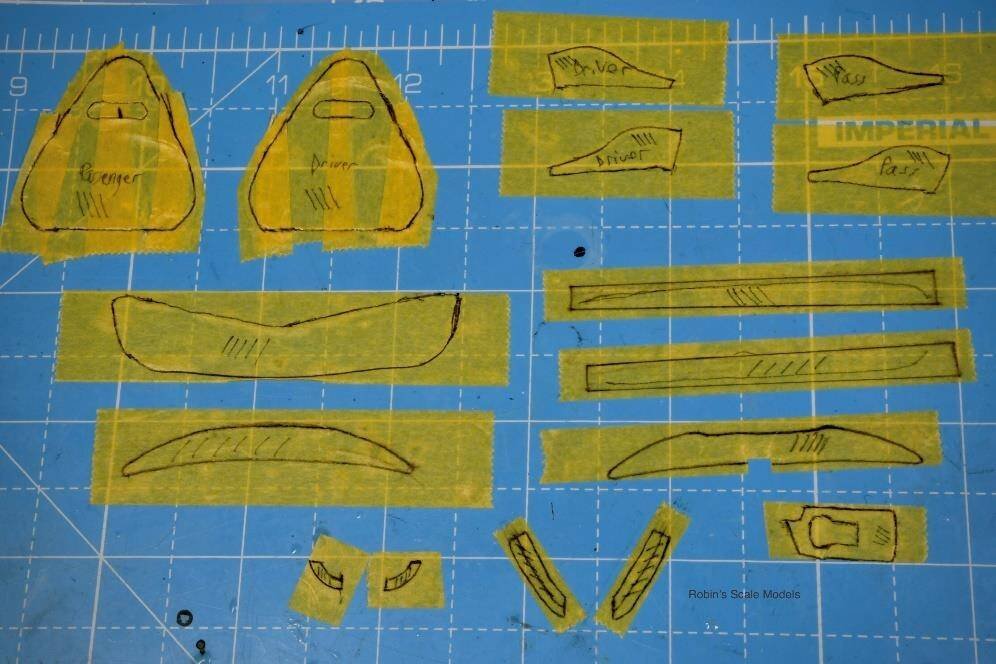
Carbon Fibre Decals for Car Body Parts
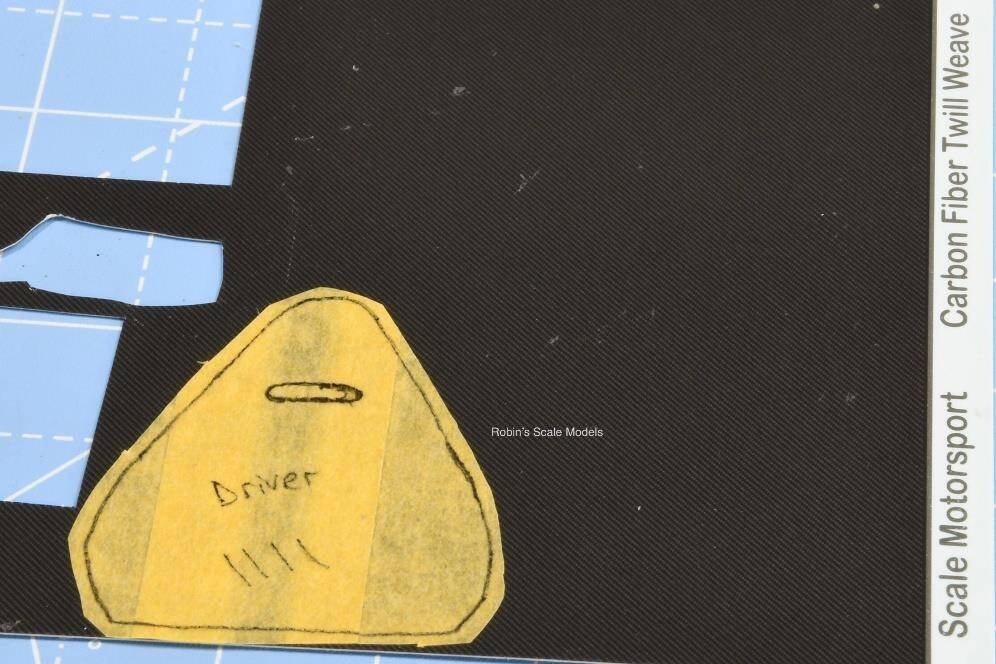
I also created carbon templates for various parts of the car as per my reference photographs. I draw lines on the masking tape carbon templates so that, once I cut the decals to the template guide, I know that the decal will have the diagonal lines placed in the right direction.
Completed Carbon Parts
Completed carbon backs after some careful carbon decal manipulation. And now completed carbon bases as well. All carbon items complete.
Step 3 — Painting the Seats
Starting on the seats, I painted them using Tamiya's Rubber Black. I feel that, with the rubber black and then a semi matt clearcoat, you get a great representation of black leather. Alpha Model has molded the stitch pattern for the seats. You get indents to represent the stitching. I was looking to get red stitches as per my reference photos. I dabbed My Color acrylic red into the indents and then tidied up using acrylic thinner.
After a semi-matt clear, this represented black leather seats with red stitching. My reference car had black Alcantara material on the seats pads. I did this later.
Step 4 — Alcantara Effect
Now to start on the Alcantara finish for the seat pads. I masked off all areas where the final surface was black leather or carbon fibre. I then hand painted the area for Alcantara with black enamel paint (which would stay sticky for a while) and then sprinkled on micro bubbles (basically a glass fibre dust).
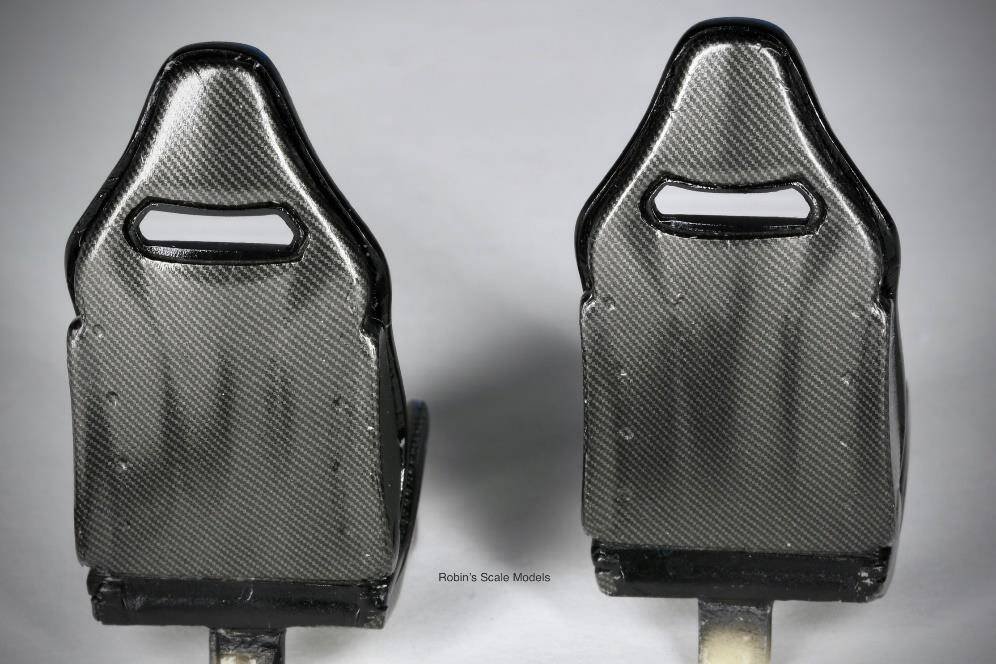
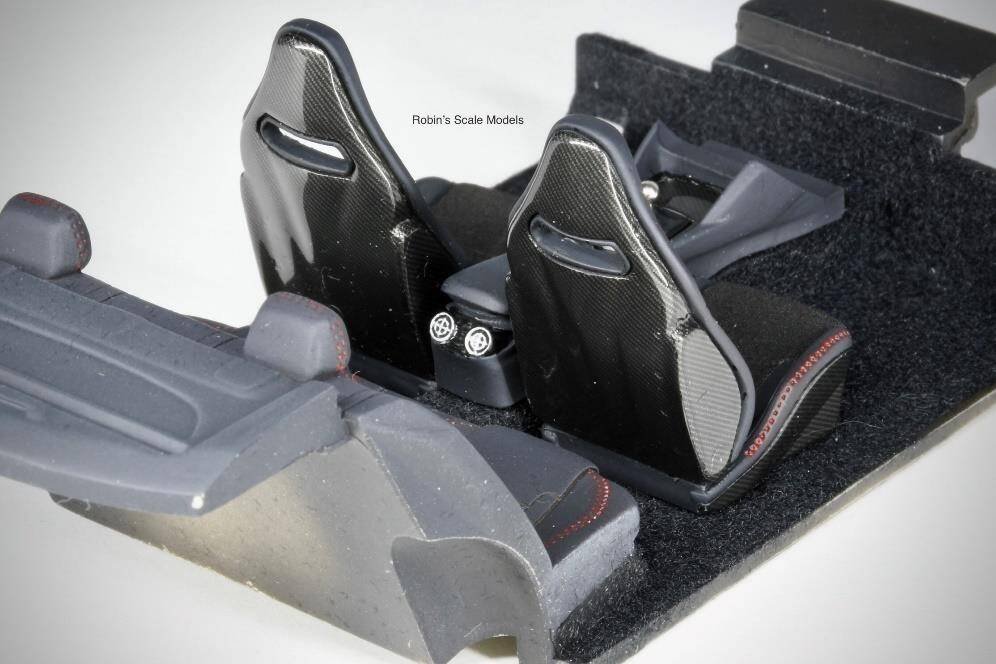
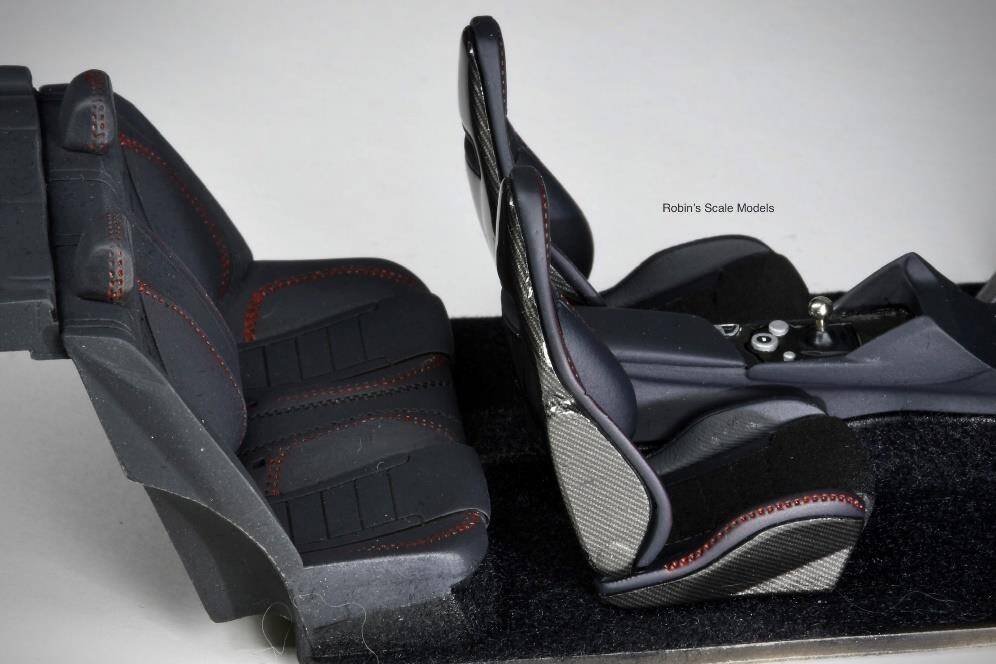
This is the finish after dusting on the micro bubbles. Front seats now complete having had the Alcantara area sprayed with Zero Paints Textured Black.
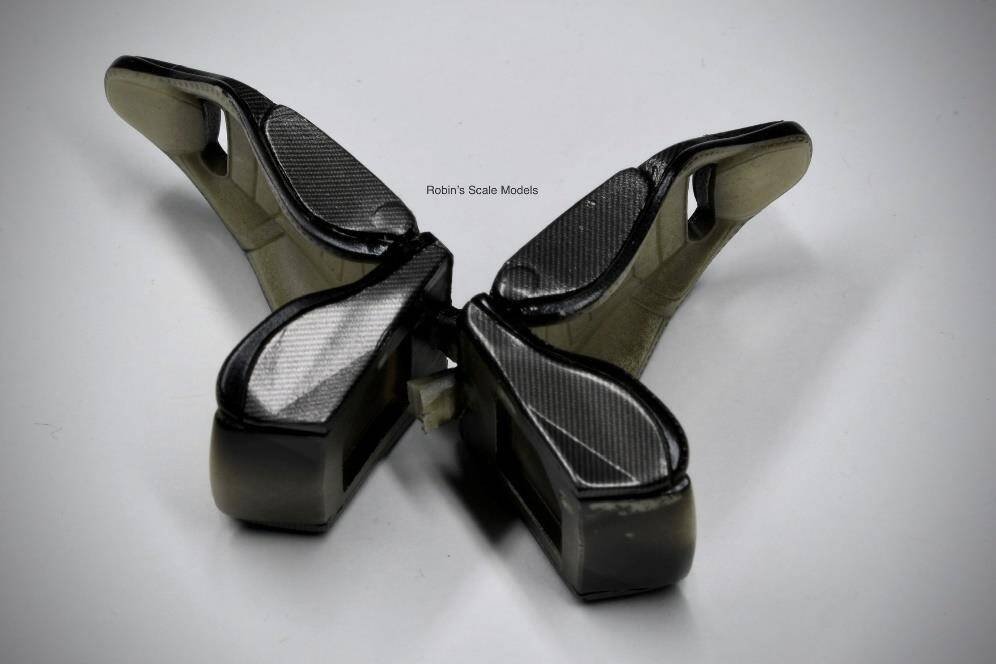
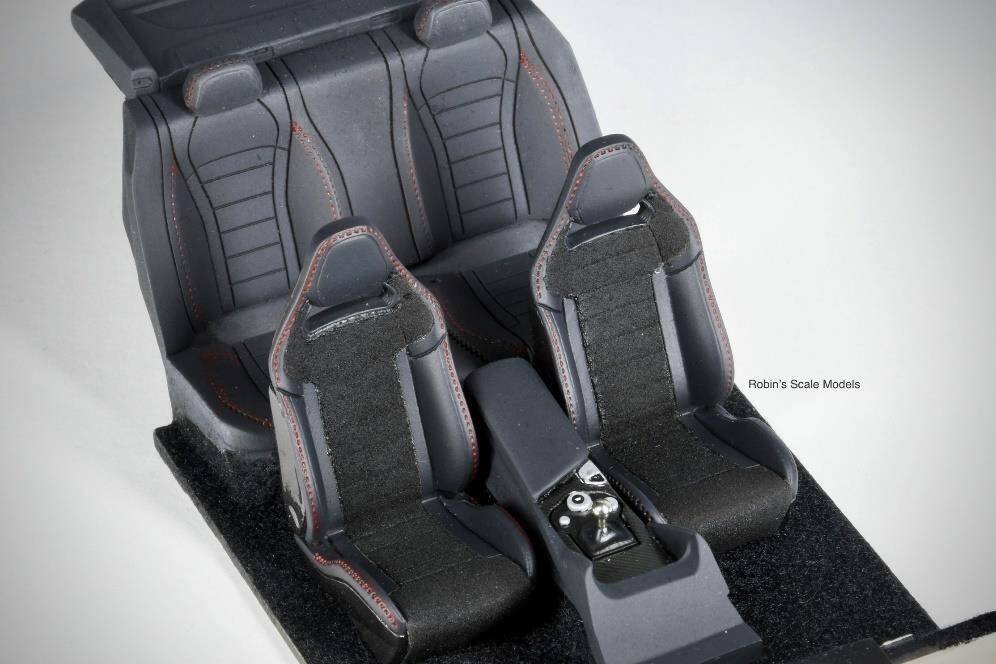
Sharing different angles of the front seats with their carbon fibre seat backs and bases, along with black leather, black Alcantara and of course the red stitching.
Advanced Creators
Alfa Romeo Giulia Quadrifoglio
Alpha Model AM02-0029 · Build by Robin Witt
Interior: Dashboard
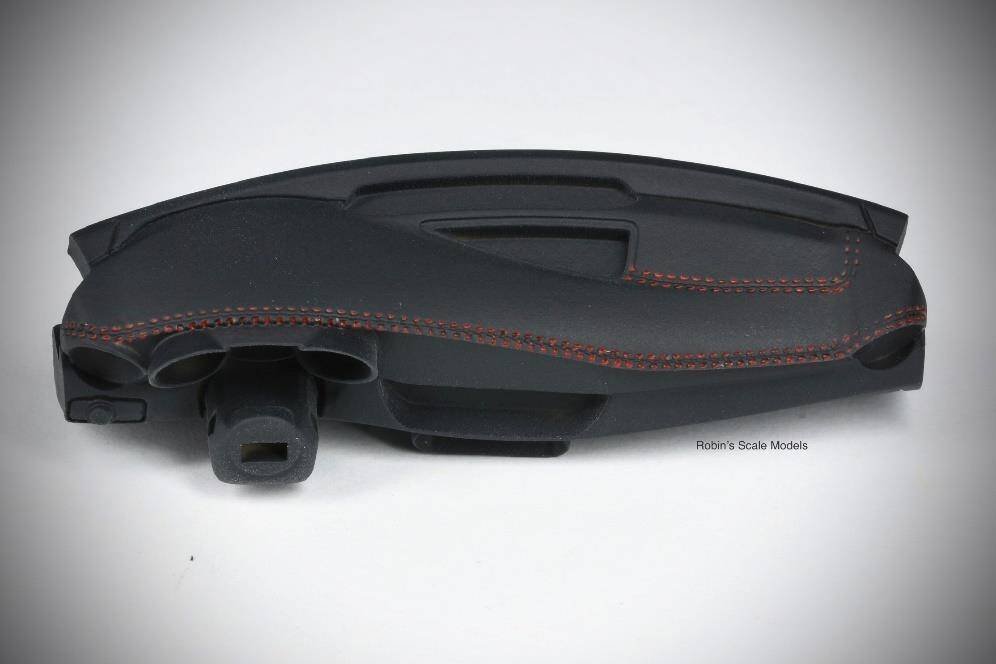
The dashboard was given the same black leather and red stitching treatment as the seats.
The dashboard was given the same treatment as the seats — Tamiya Rubber Black for the black leather effect, followed by red stitching applied to the molded indentations, and finally sealed with a semi-matt clearcoat.
Interior: Door Cards
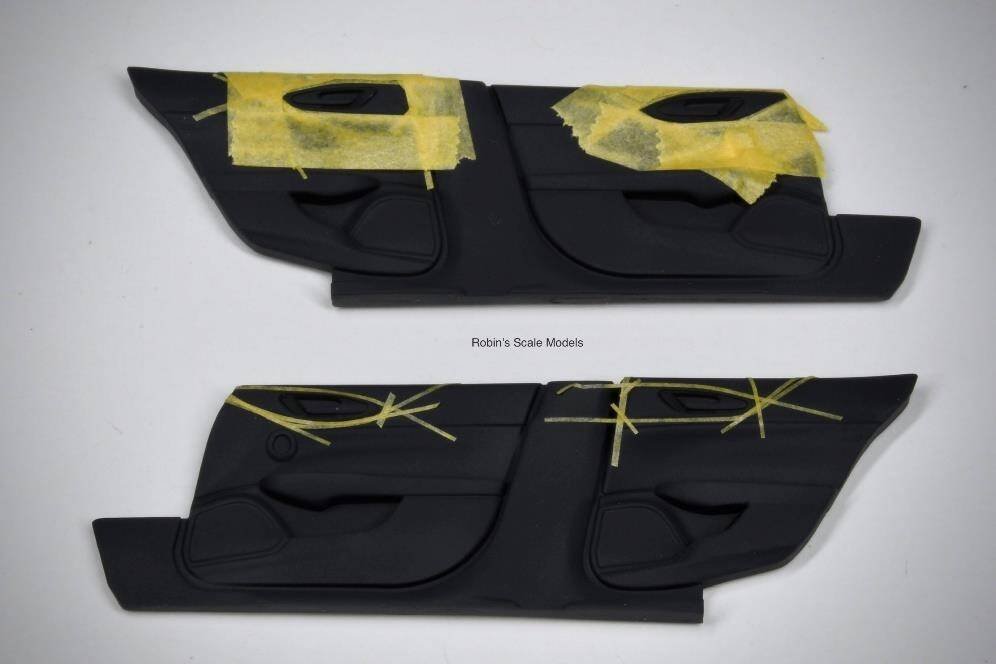
Black leather, gloss black details, speaker covers, and brushed aluminium effects on the door cards.
Painting & Masking
I had already painted the black leather effect on the door cards. Here I was masking up to spray these parts gloss black. I then added the speaker covers and painted the various areas that represented brushed aluminium.
All Interior Parts Ready
Here we have all of the interior pieces ready to assemble into the car body. The detailing provided by Alpha Model for the inside is great.
The rear seats have now been treated to Alcantara finish as per my reference pictures. This piece is now ready to assemble into the body shell too. Again, lovely interior detailing provided by Alpha Model.
Final Assembly
After nearly two months of painting, sub-assembly work and lots of detailing, all that's left now is basically an assembly job.
After nearly two months of painting, sub-assembly work and lots of detailing, all that's left now is basically an assembly job.
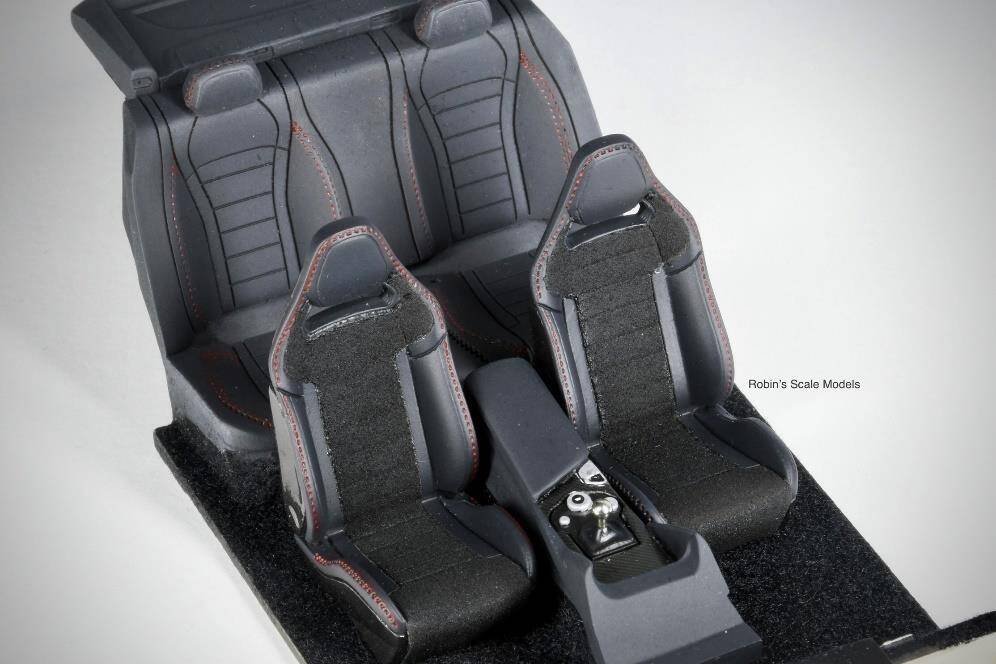
Step 1 — Dashboard & Door Panels
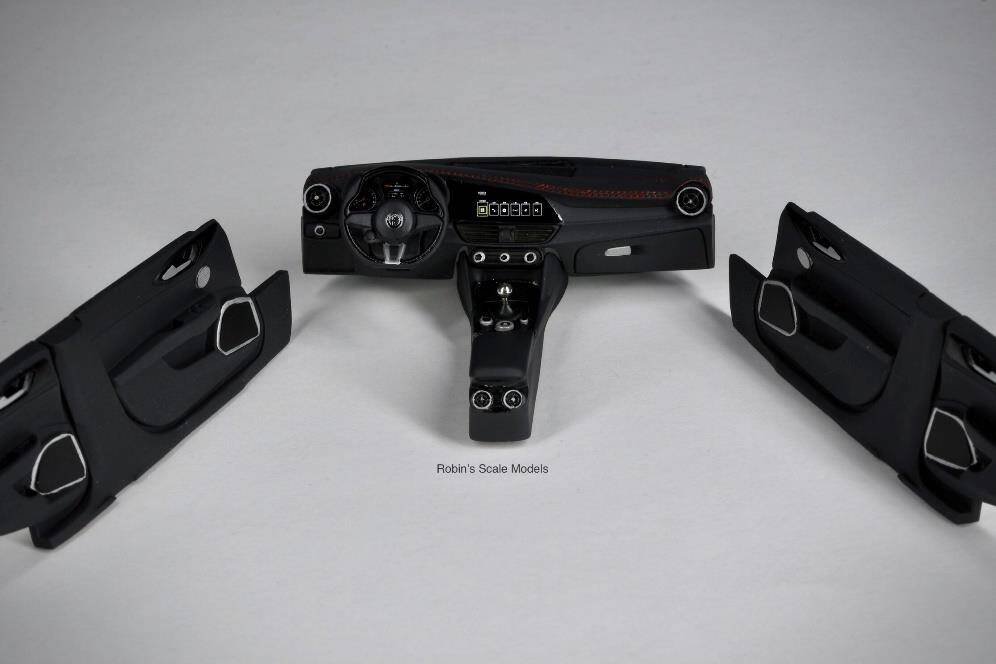
The dashboard and door panels have been glued into the body shell. Next up is the grills, lights and carbon pieces.
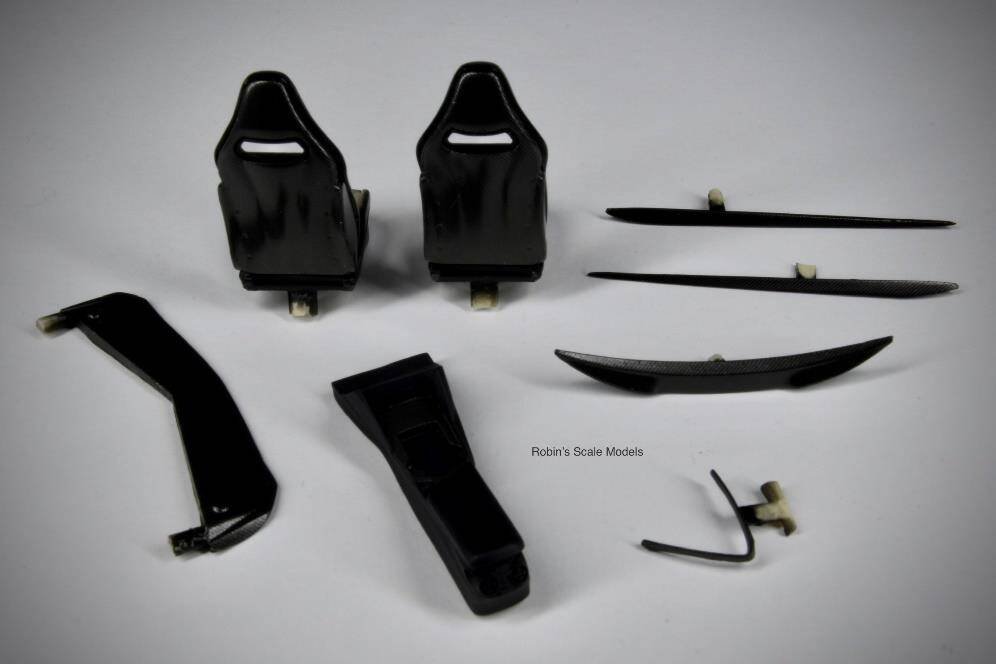
Step 2 — Grills, Lights & Carbon Pieces
The majority of parts are now on. Fiddly parts remain such as the windows and window wipers.
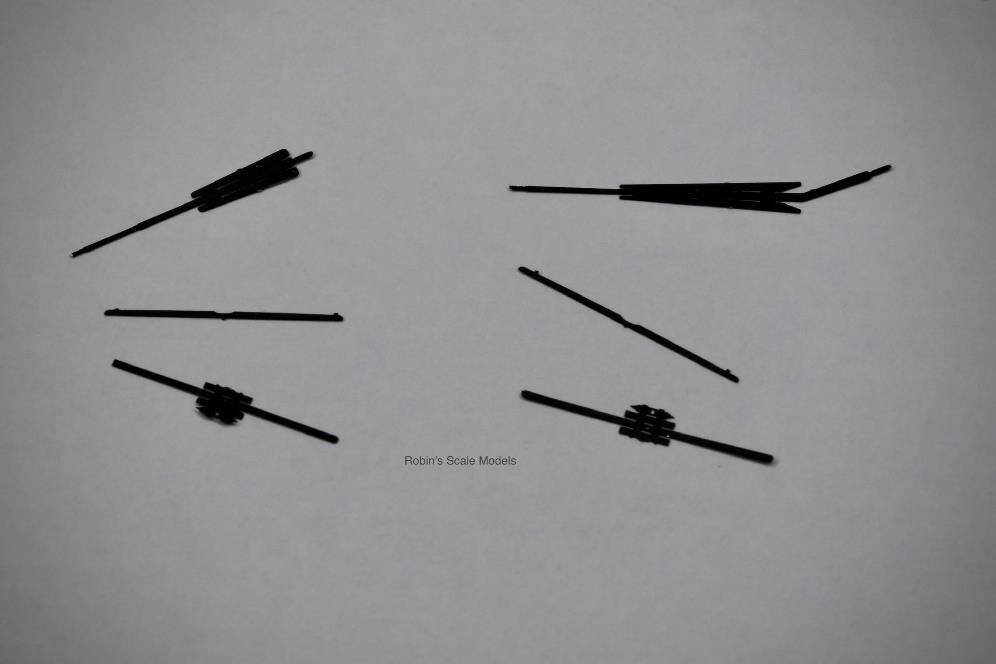
Step 3 — Windscreen Wipers
The etch wipers are a bit of a fiddle to get them to work but take your time and follow the picture instructions. They are really fine, lovely and crisp once completed. It really does pay you to take your time with these. Also, make sure that you look at your reference photographs before making the wipers up. Do they wipe from the left or right, or indeed both ways.
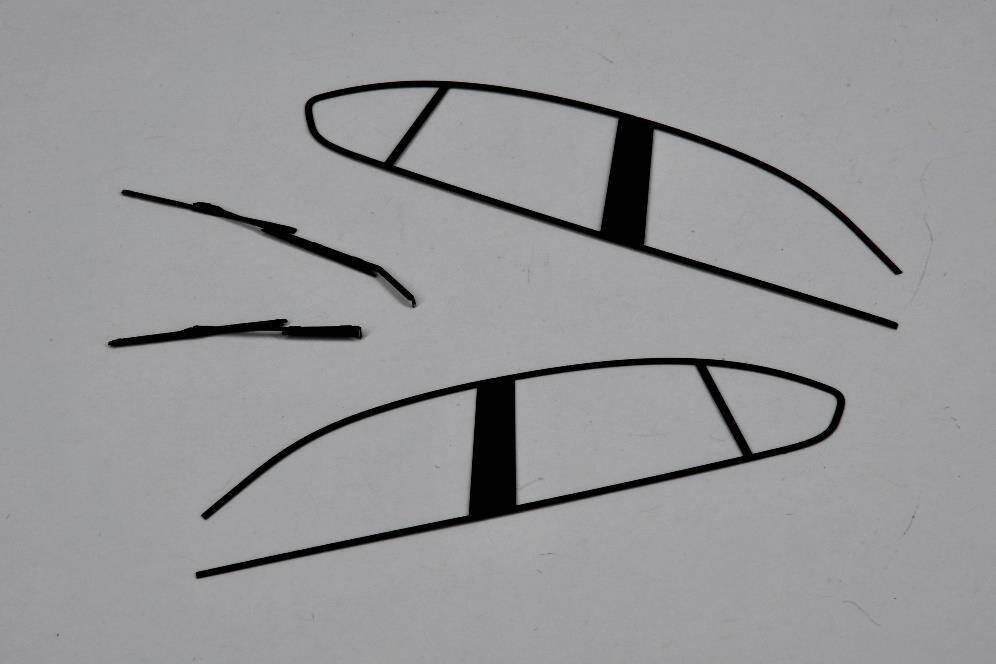
Completed windscreen wipers and side window frames ready for mounting onto the car.
The Completed Car
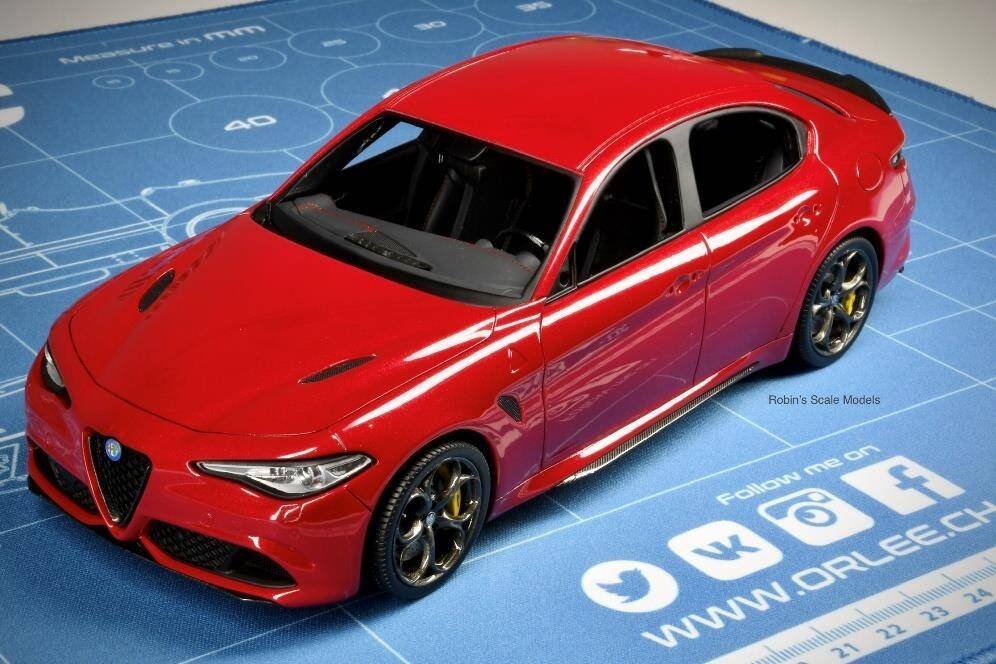
And finally the completed car. I really enjoyed building the Alfa Romeo Giulia. The build experience of an Alpha Model kit is excellent. I really do recommend that, if you haven't yet managed to get the opportunity to build one, you should.
Advanced Creators
Alfa Romeo Giulia Quadrifoglio
Alpha Model AM02-0029 · Build by Robin Witt
Completed Photos
Completed Photos Gallery — Alfa Romeo Giulia Quadrifoglio built by Robin Witt.
The Finished Giulia Quadrifoglio
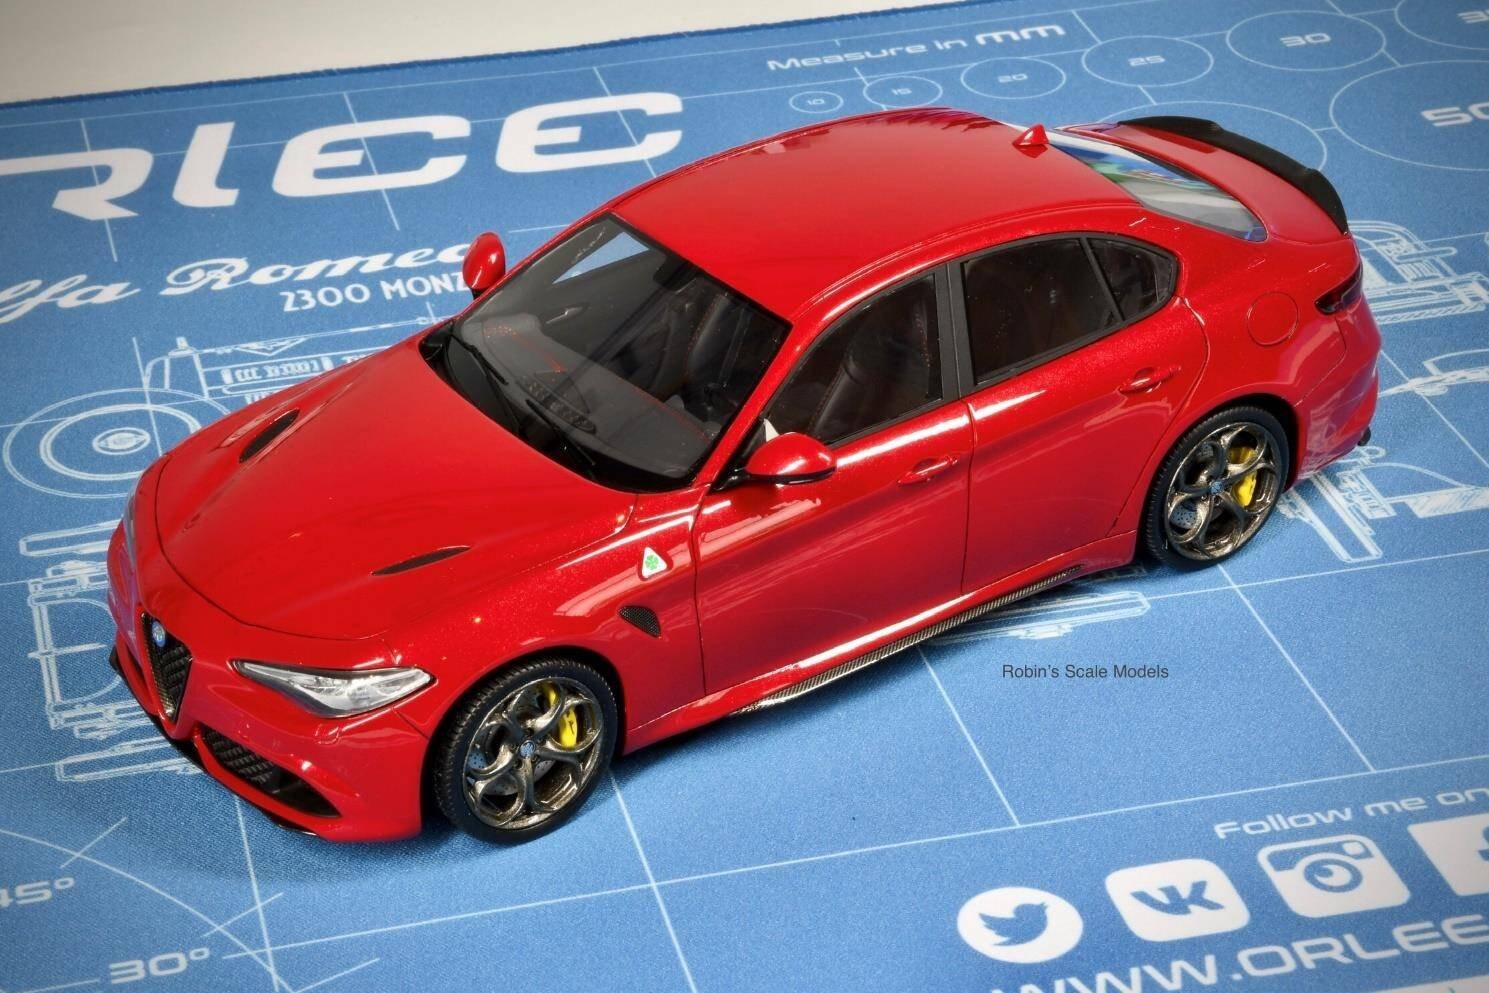
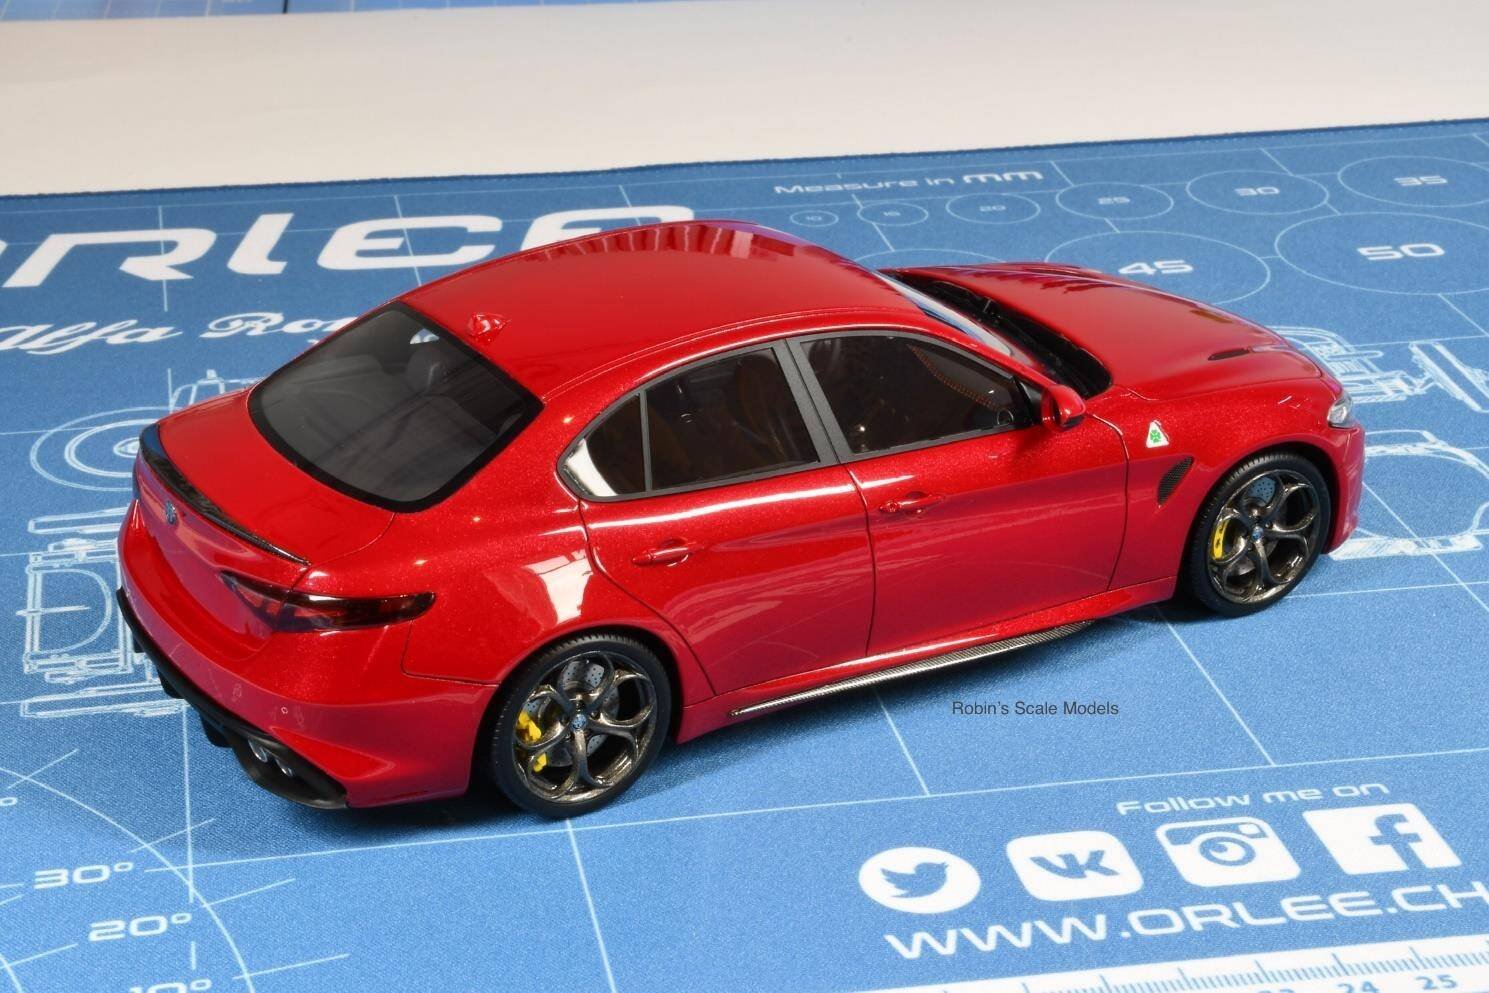
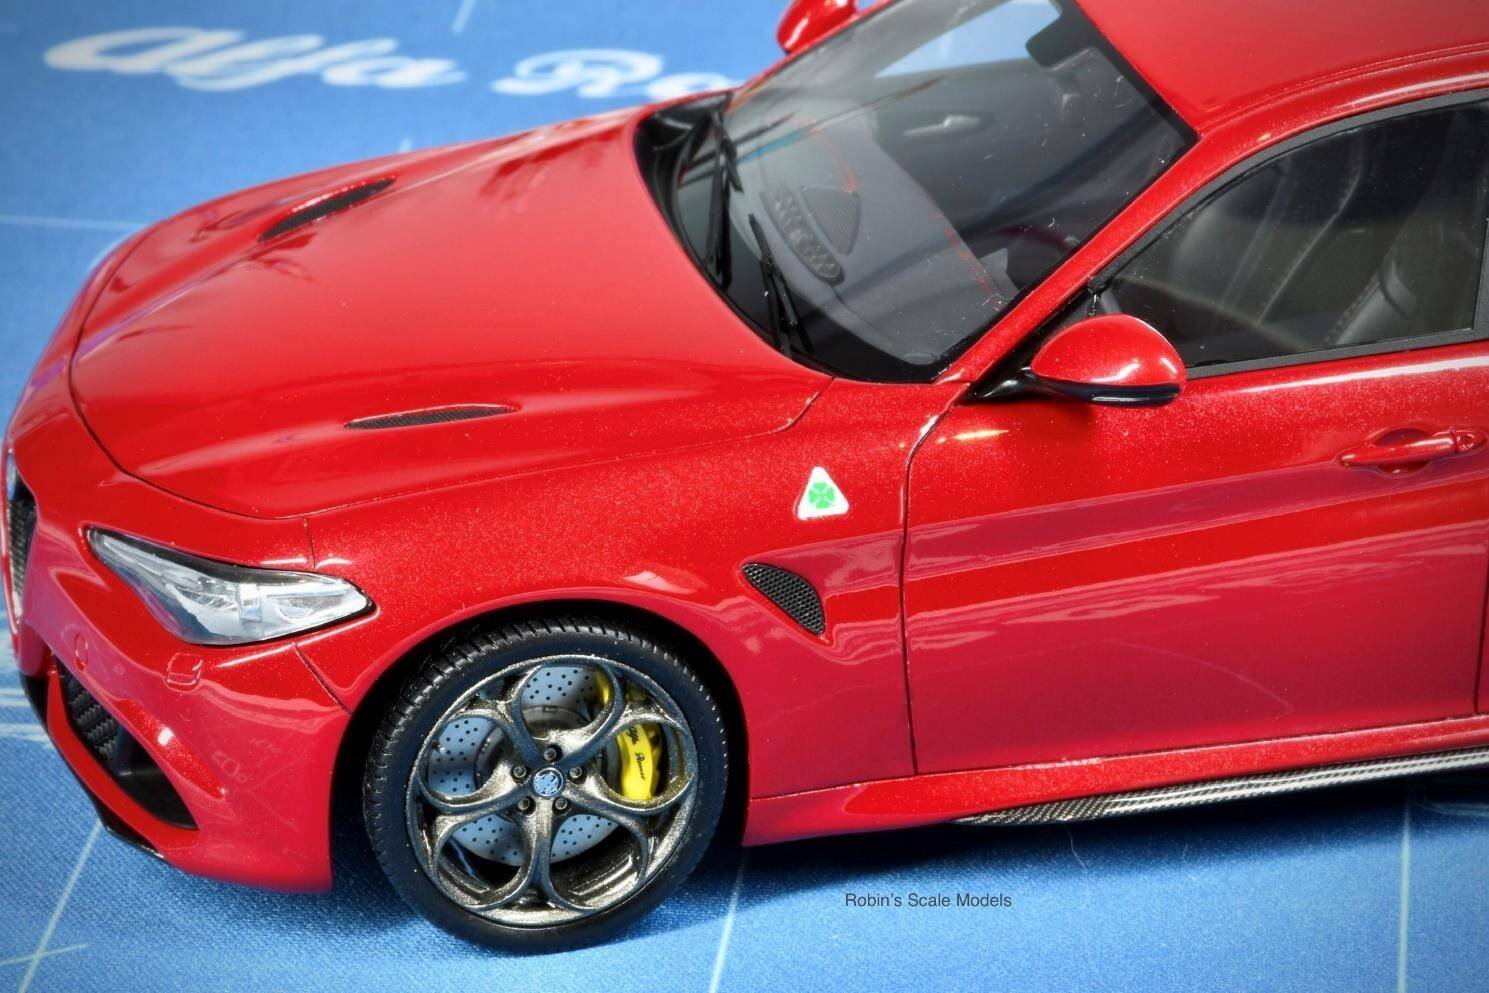
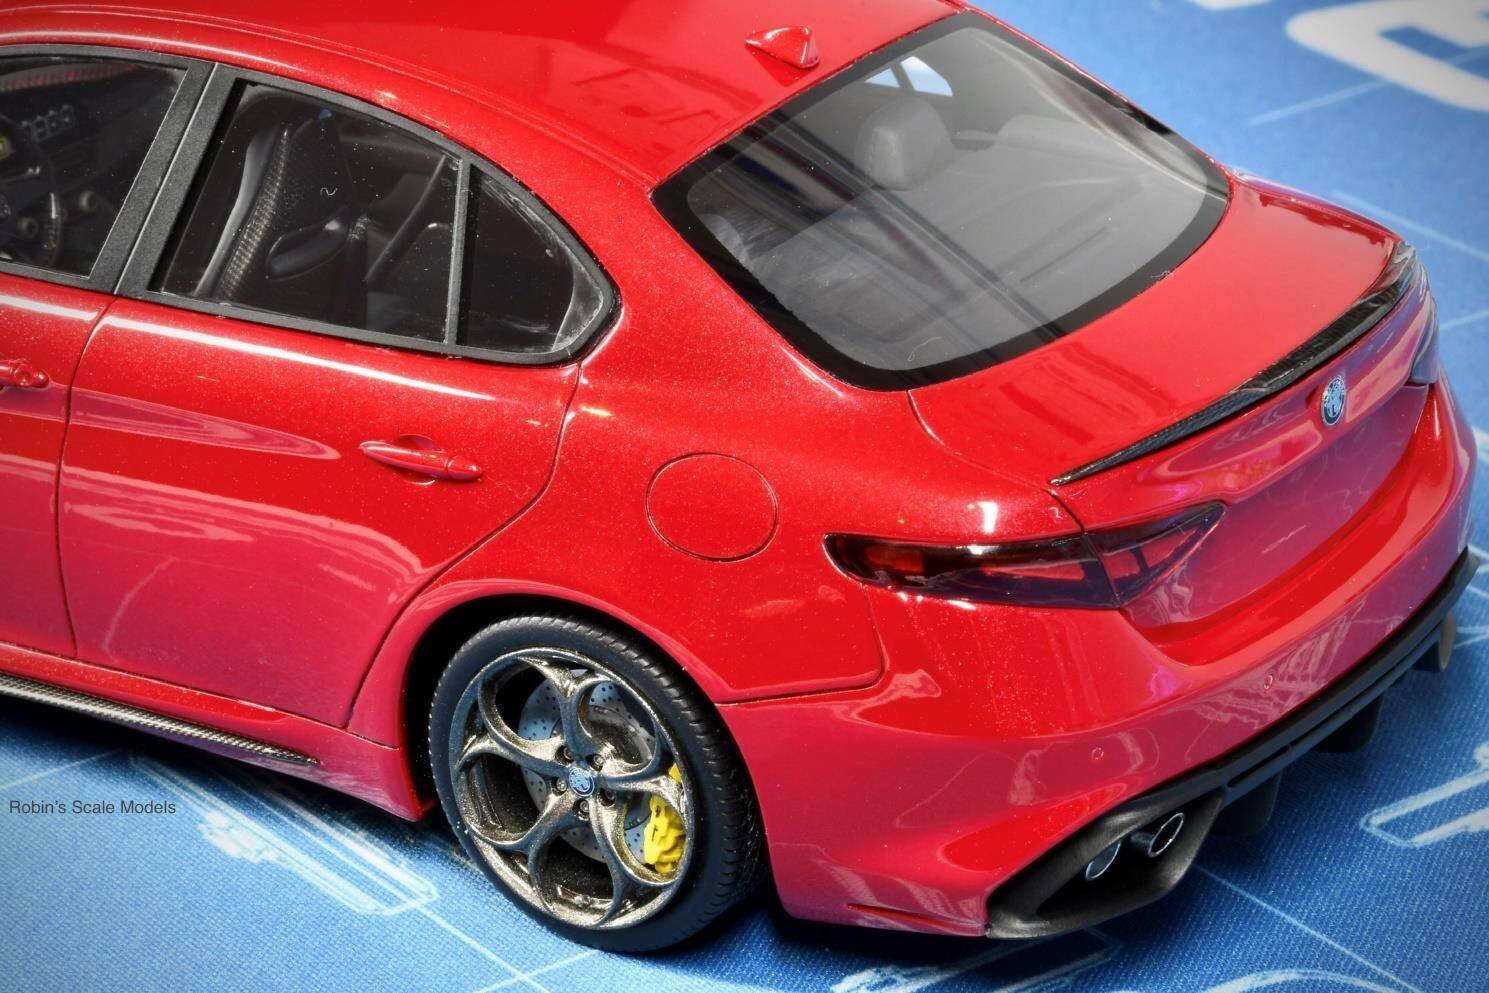
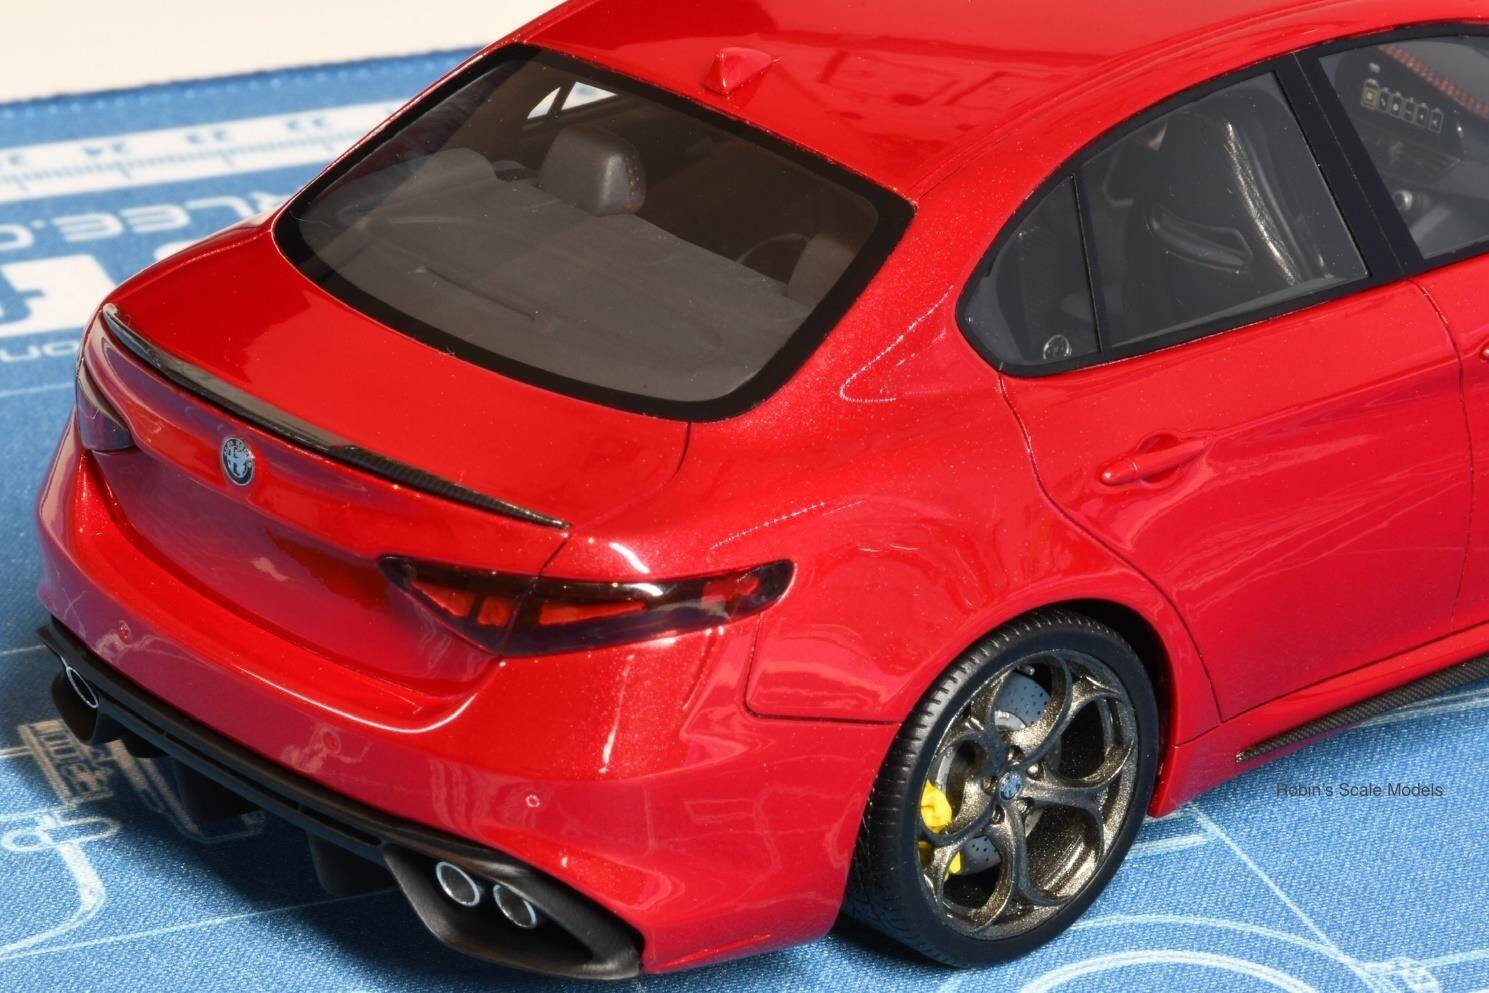
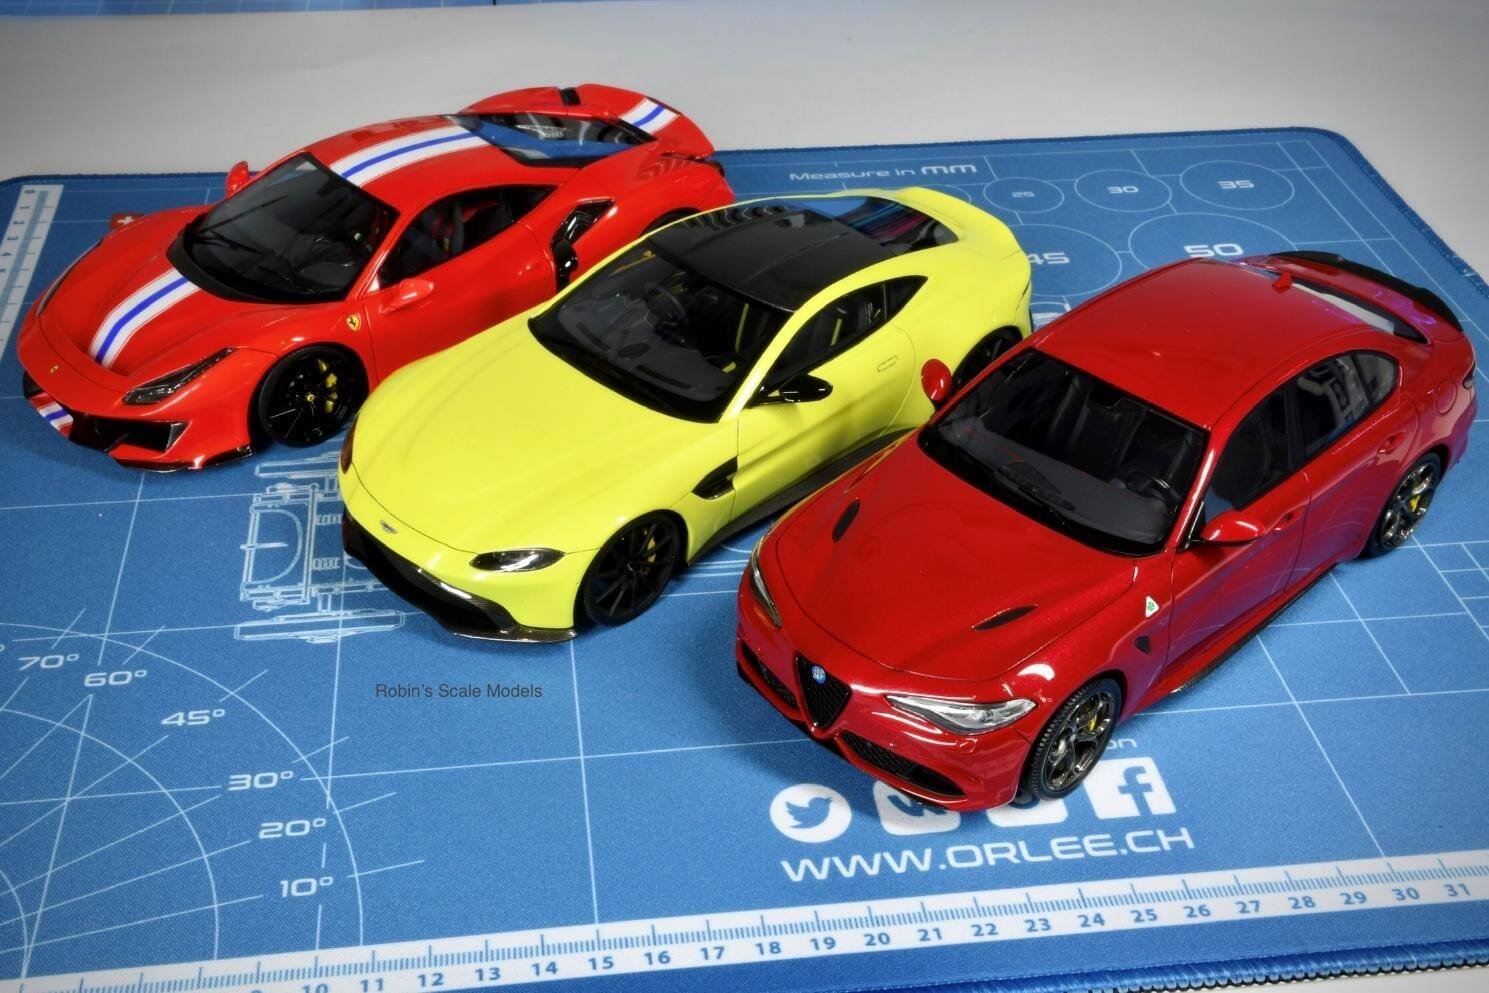
And that wraps up this build of the Alpha Model 1/24 Alfa Romeo Giulia Quadrifoglio! From a blue box to a fully detailed Rosso Competizione beast — it's been a journey. Thank you for following along!
Special Thanks
This build was made possible with these amazing products:
- Alpha Model
- Zero Paints
- Tamiya
- Orlee Masking Tape
- UPol Degreaser
You can find Robin's Scale Models on Facebook for more build guides and inspiration.
Robin Witt
Robin's Scale Models