
 Advanced Creators
Ferrari 812 Competizione Build Guide — Part 1: Background Information & Technical Specs
Alpha Model AM02-0046 · Build by breakwong
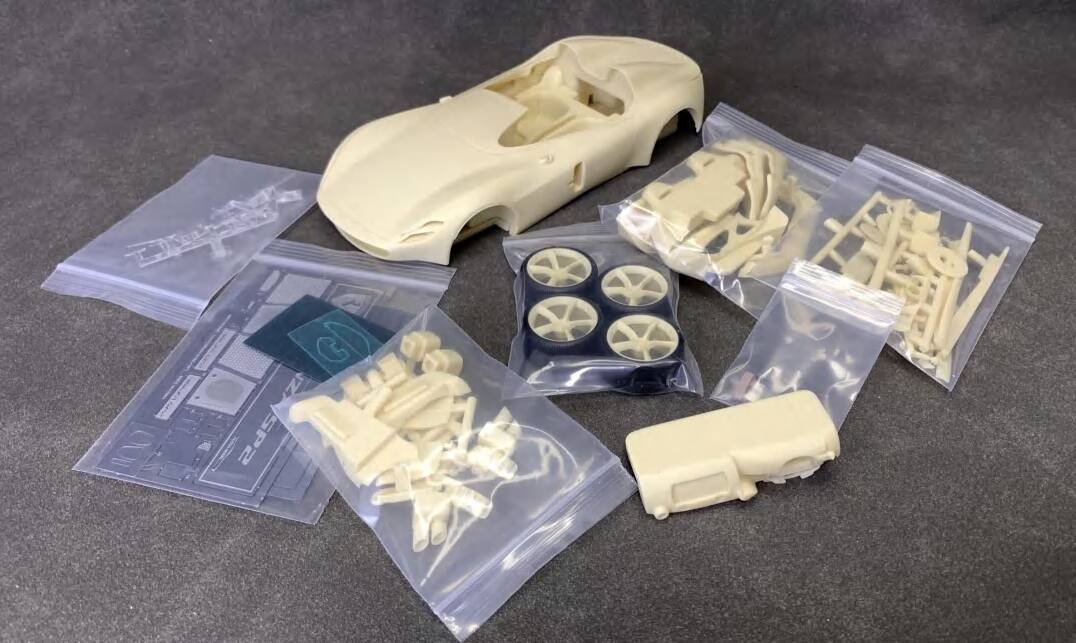
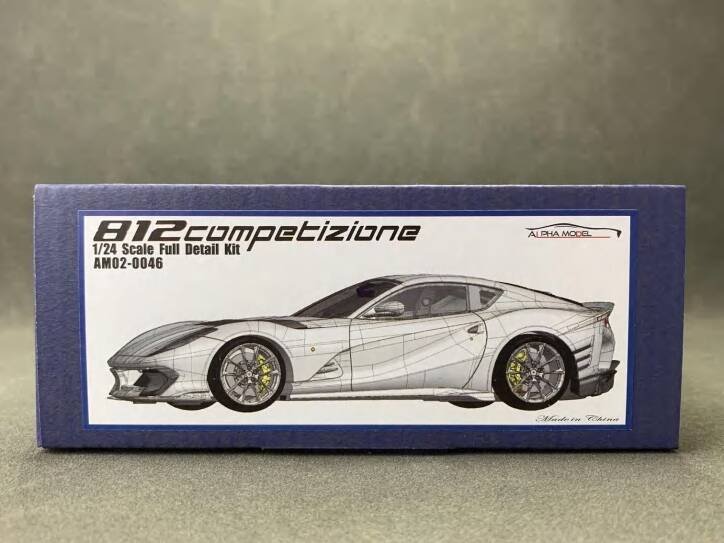
About the Ferrari 812 Competizione
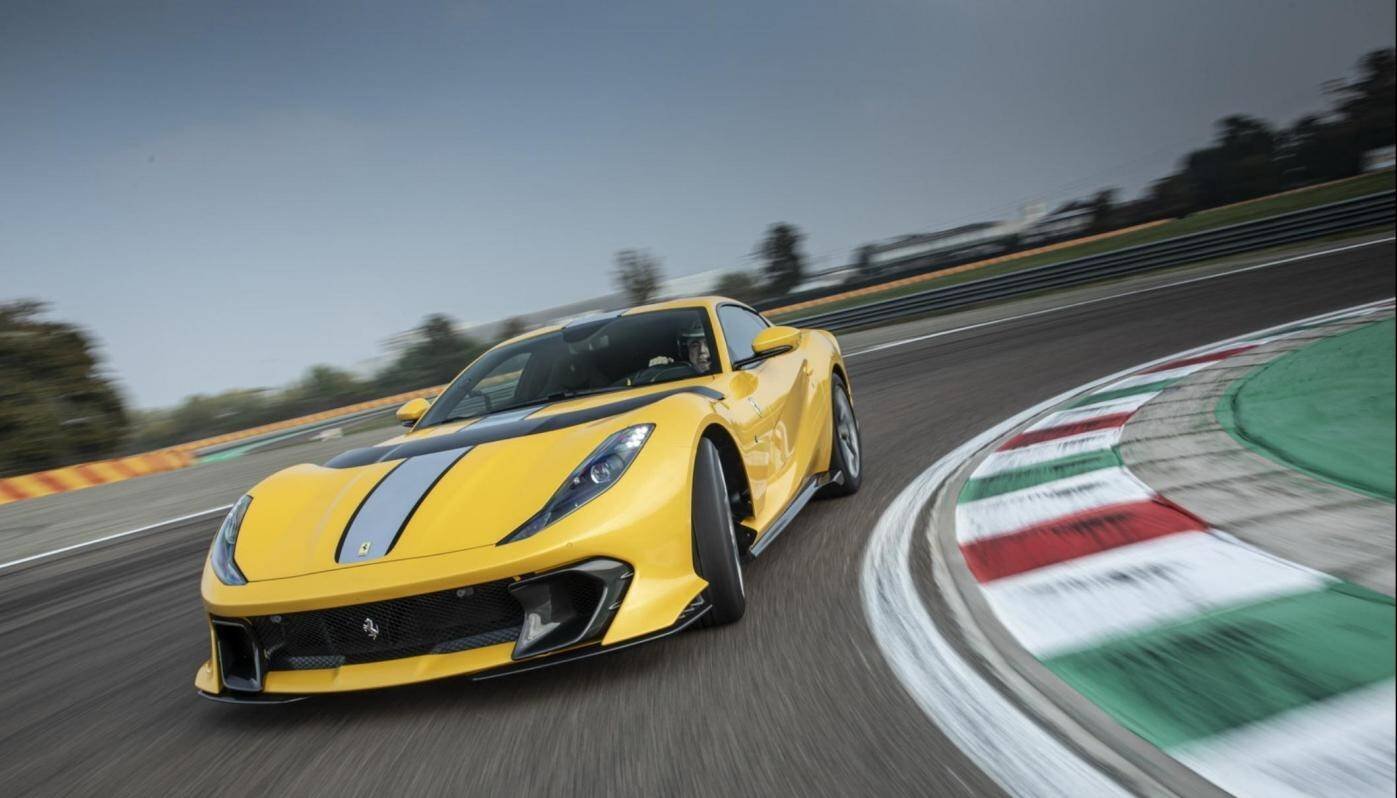
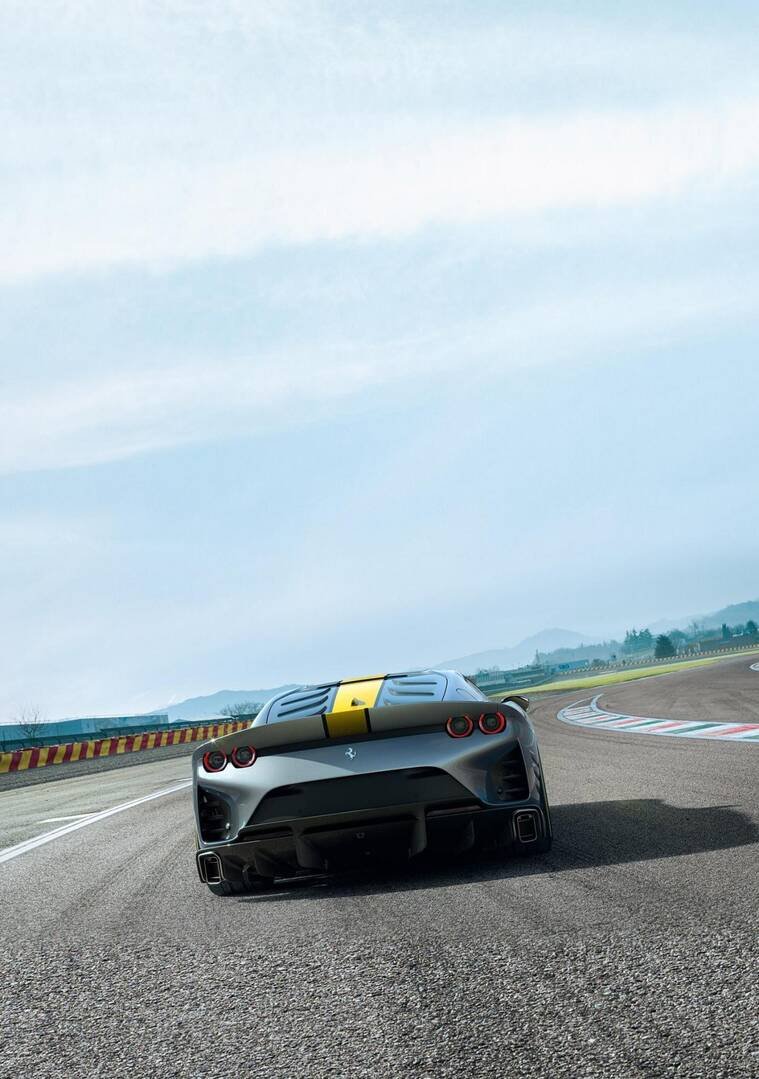
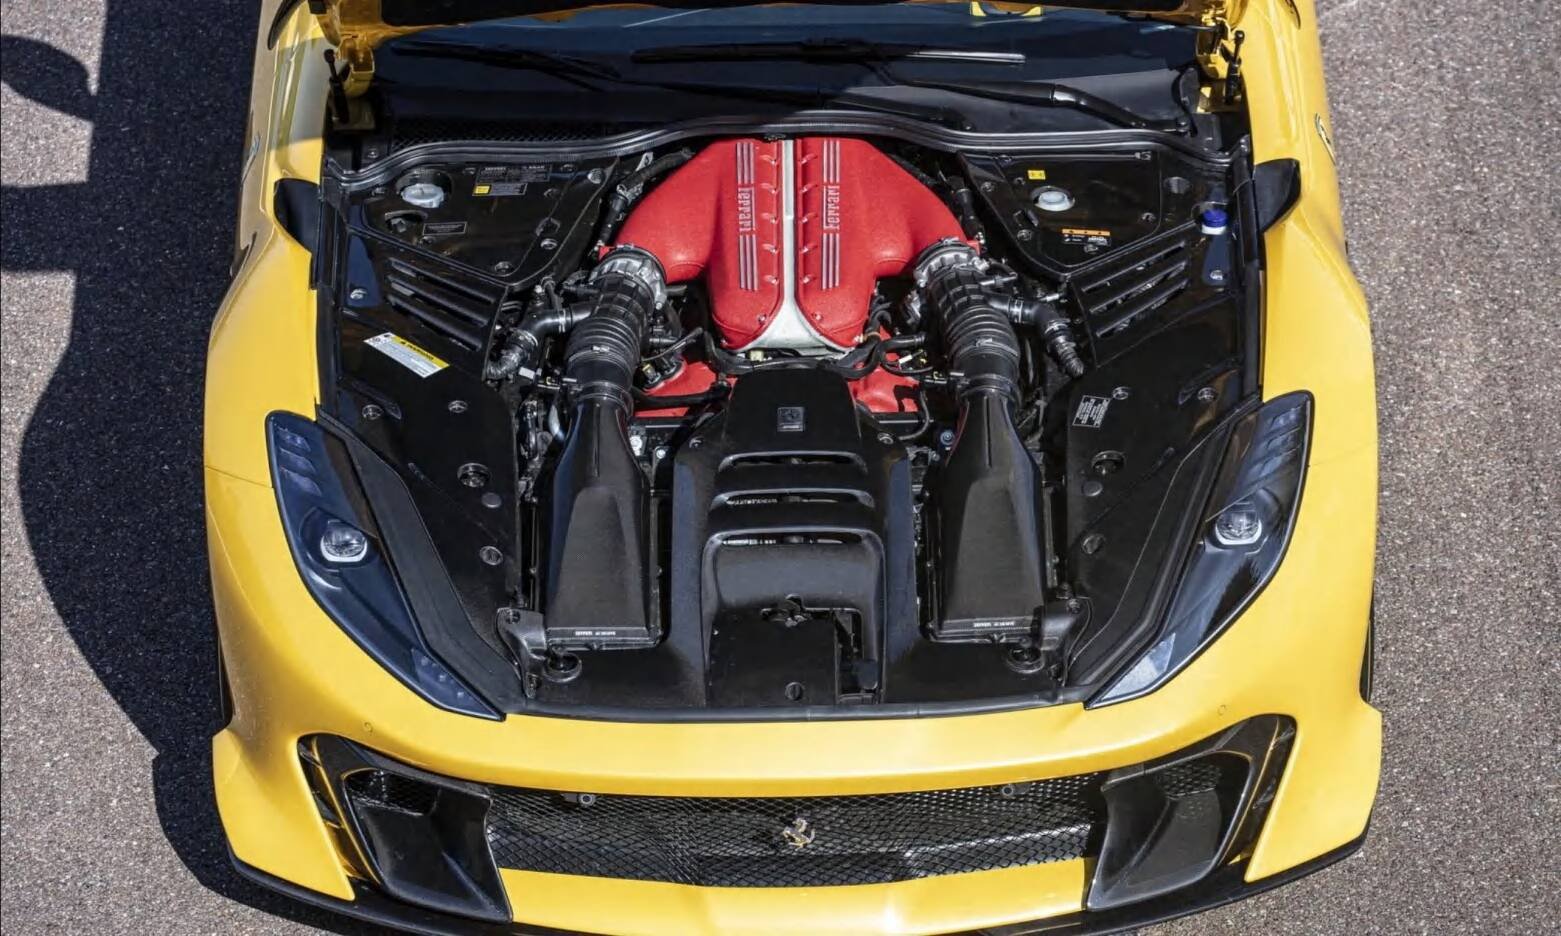
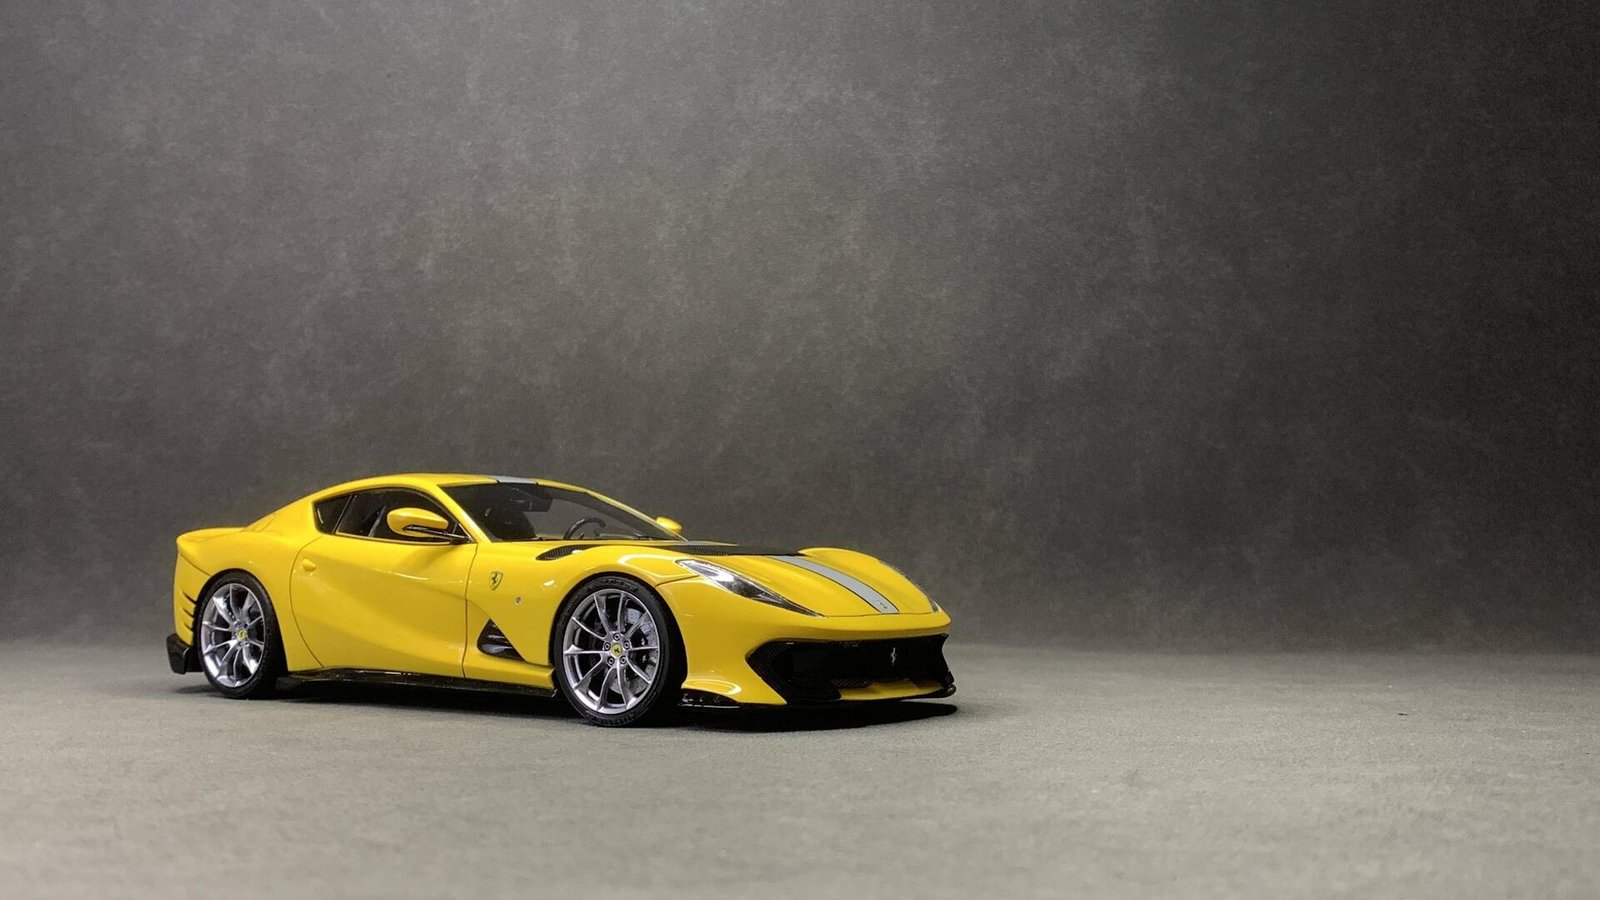
On May 5, 2021, Ferrari presented a limited production, track focused version of the 812 Superfast, called Competizione, this version being presented together with its drop-top variant, Competizione A (for Aperta, Ferrari's moniker for limited open top models, translating to "open" in Italian). Both versions have a more powerful version of the 6.5-litre V12, extensive aerodynamic upgrades and the introduction of an independent four-wheel steering system.
The upgraded engine is rated at 830 PS (610 kW; 819 hp) at 9,250 rpm and 692 N⋅m (510 lb⋅ft) of torque at 7,000 rpm, and is capable of a 9,500 rpm redline.
The 812 Competizione & Competizione A are the latest iterations of Ferrari's light weight limited edition front mid-engined V12 Berlinetta platform. They are the direct successors to the F12 TDF and 599 GTO. In total, only 999 Competizione and 599 Competizione A will be produced, and both are sold out.
As with other strictly limited models from Ferrari, these cars are allocated only to customers that meet certain criteria.
Technical Specifications
| Engine | 6.5 L F140 GA/HB V12 |
| Power output | 610 kW (819 hp; 830 PS) |
| Transmission | 7-speed Magna 7DCL750 dual-clutch |
| Class | Grand Tourer (s) |
| Body style | 2-door targa top |
| Layout | Front-mid engine, rear-wheel-drive |
| Related | Ferrari Monza SP |
| Wheelbase | 2,720 mm (107.1 in) |
| Length | 4,657 mm (183.3 in) |
| Width | 1,971 mm (77.6 in) |
| Height | 1,276 mm (50.2 in) |
| Kerb weight | 1,525 kg (3,362 lb) (dry) / 1,744 kg (3,845 lb) (with fluids) |

Next: Part 2 — Unboxing
Advanced Creators
Ferrari 812 Competizione Build Guide — Part 2: Unboxing
Alpha Model AM02-0046 · Build by breakwong
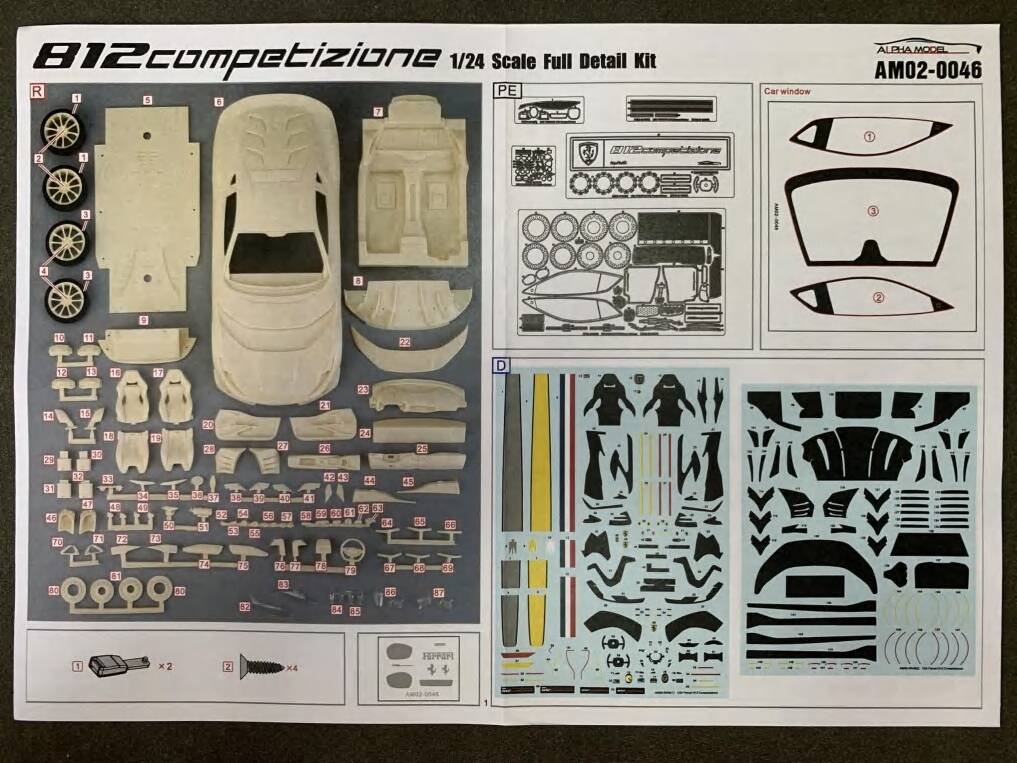
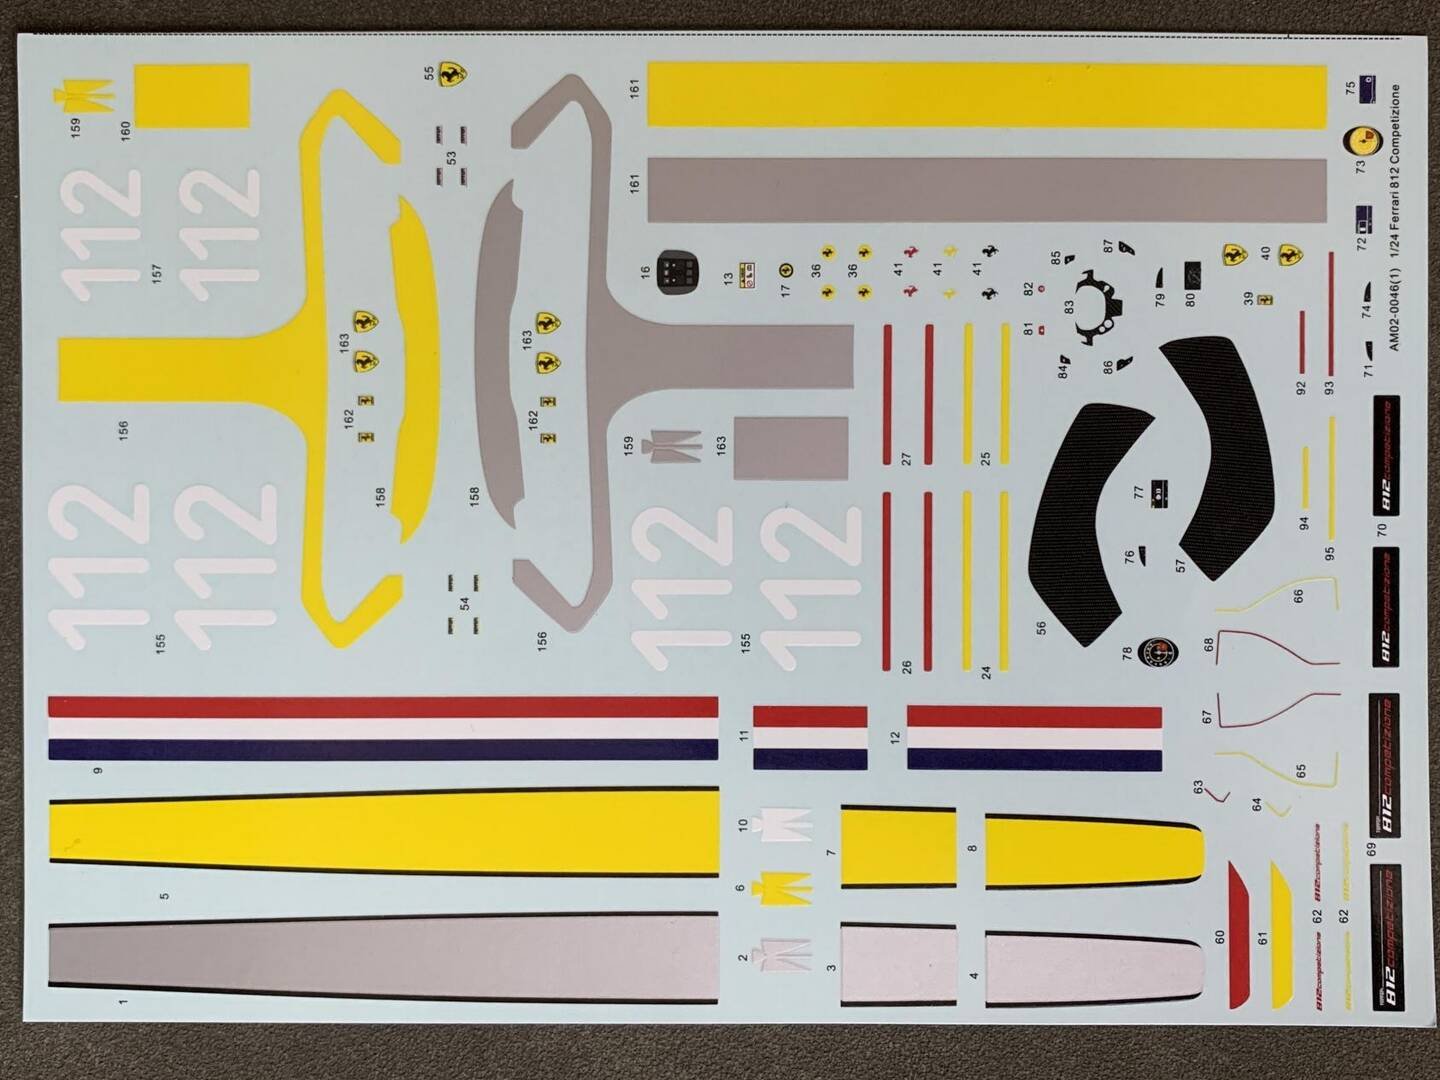
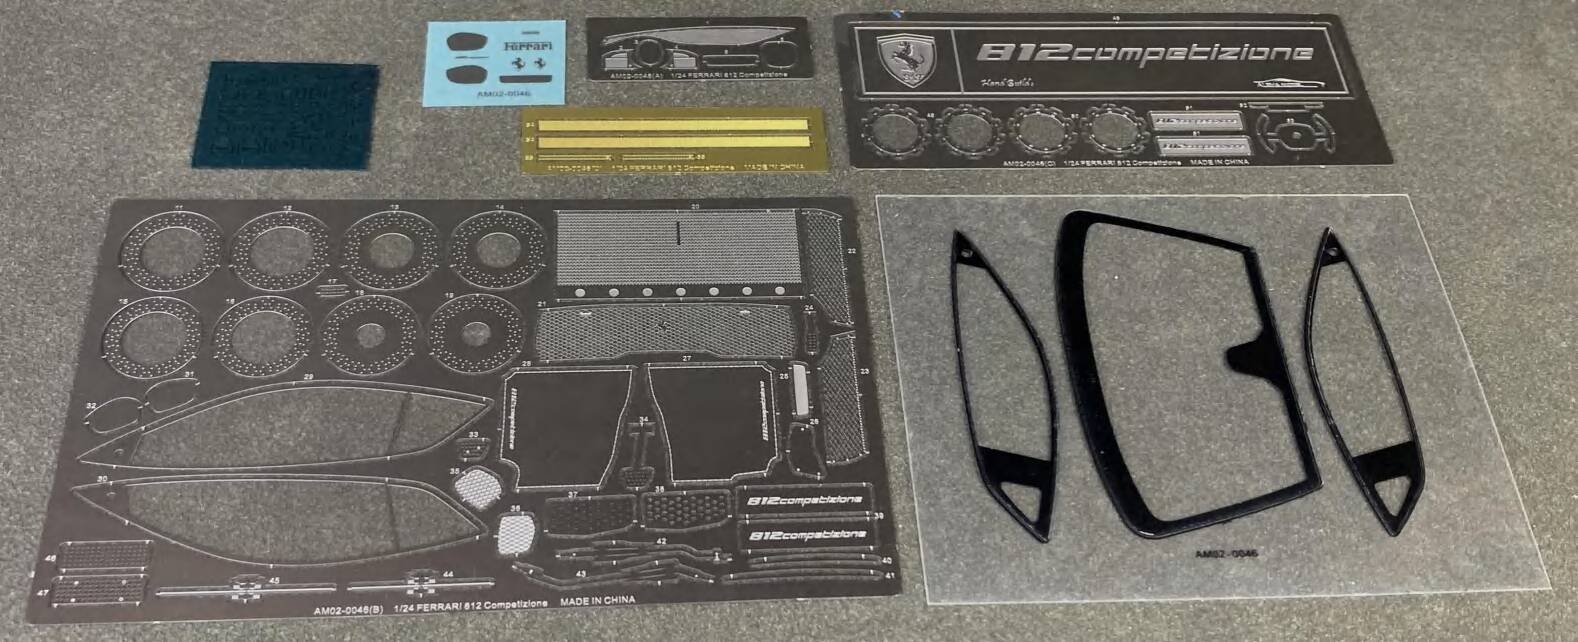
After opening the product package, take out all the parts bags and the car body. Since the product may be damaged during transportation by the logistics company, you should first check whether the parts are damaged. The A-pillars, brake calipers, rims and other small parts are more easily damaged. After confirming that the parts are not damaged, please check whether the etched sheet has any bending or damage and whether the water sticker has any stains. After confirming that all standard items are in good condition, you can start the preparation work for production.
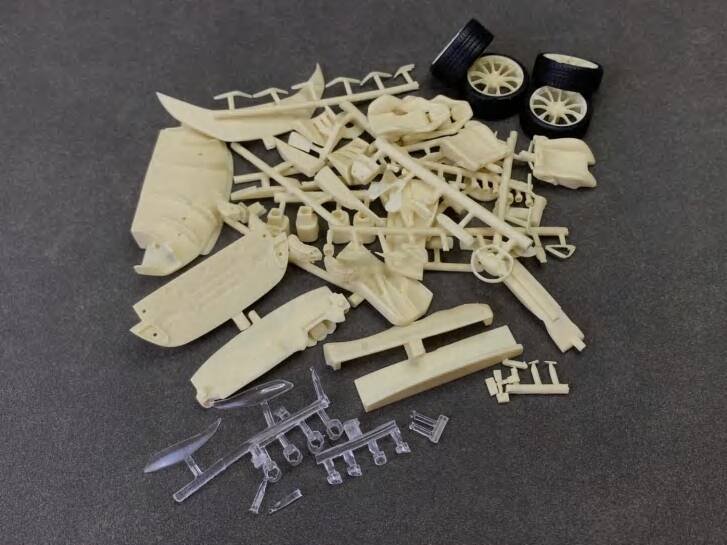
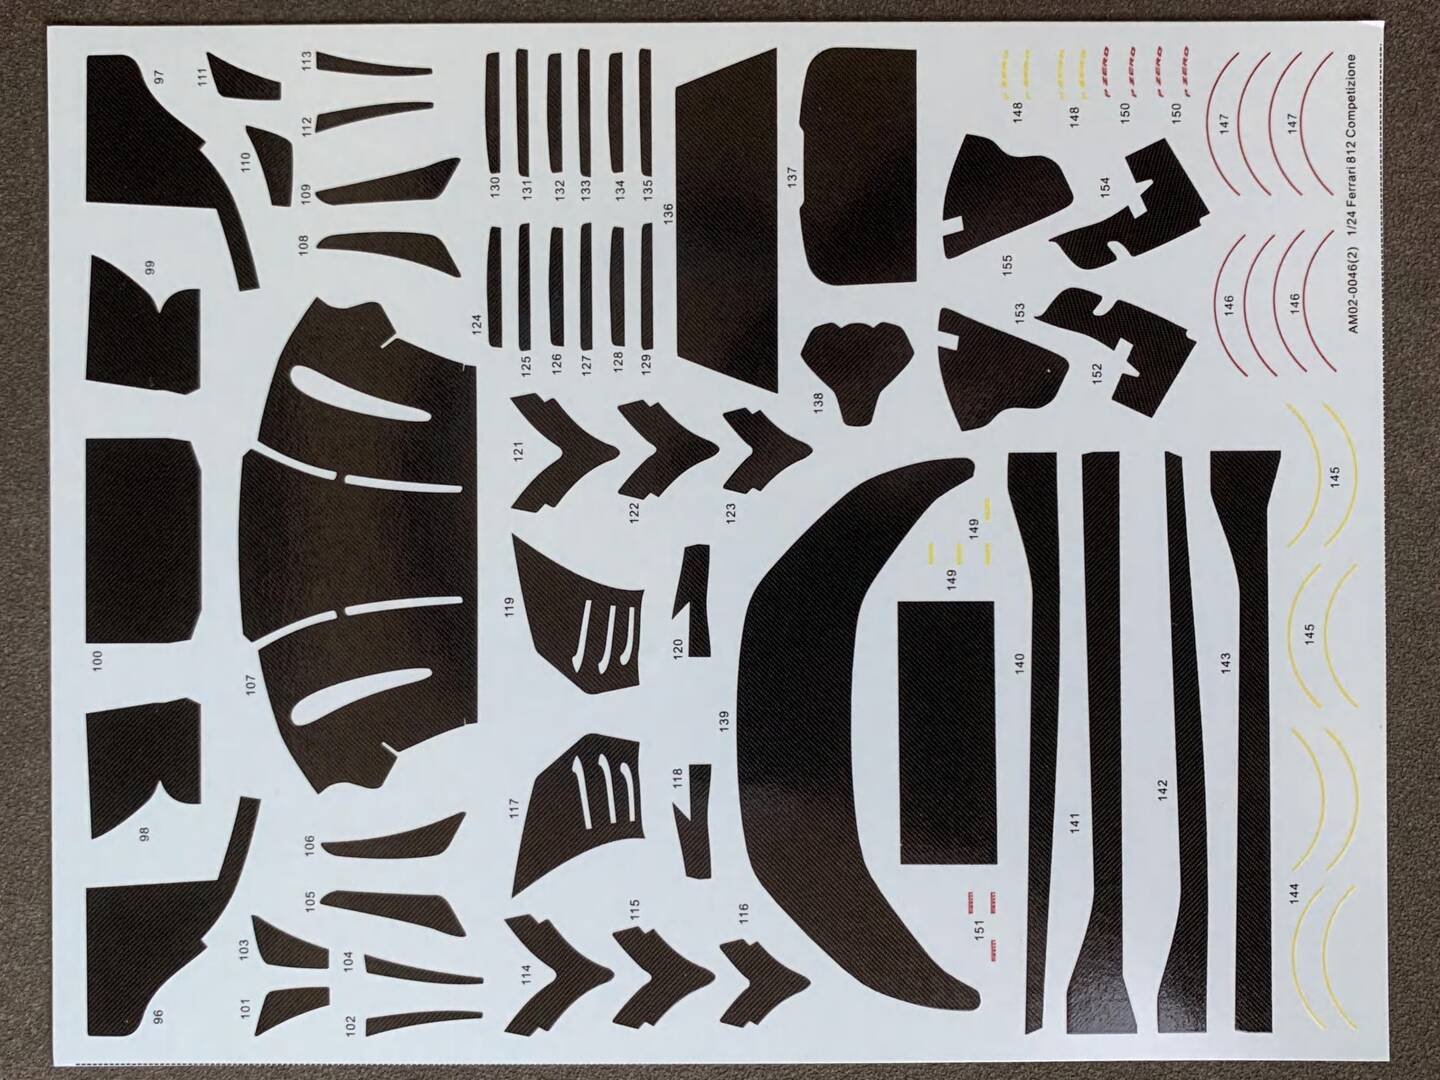
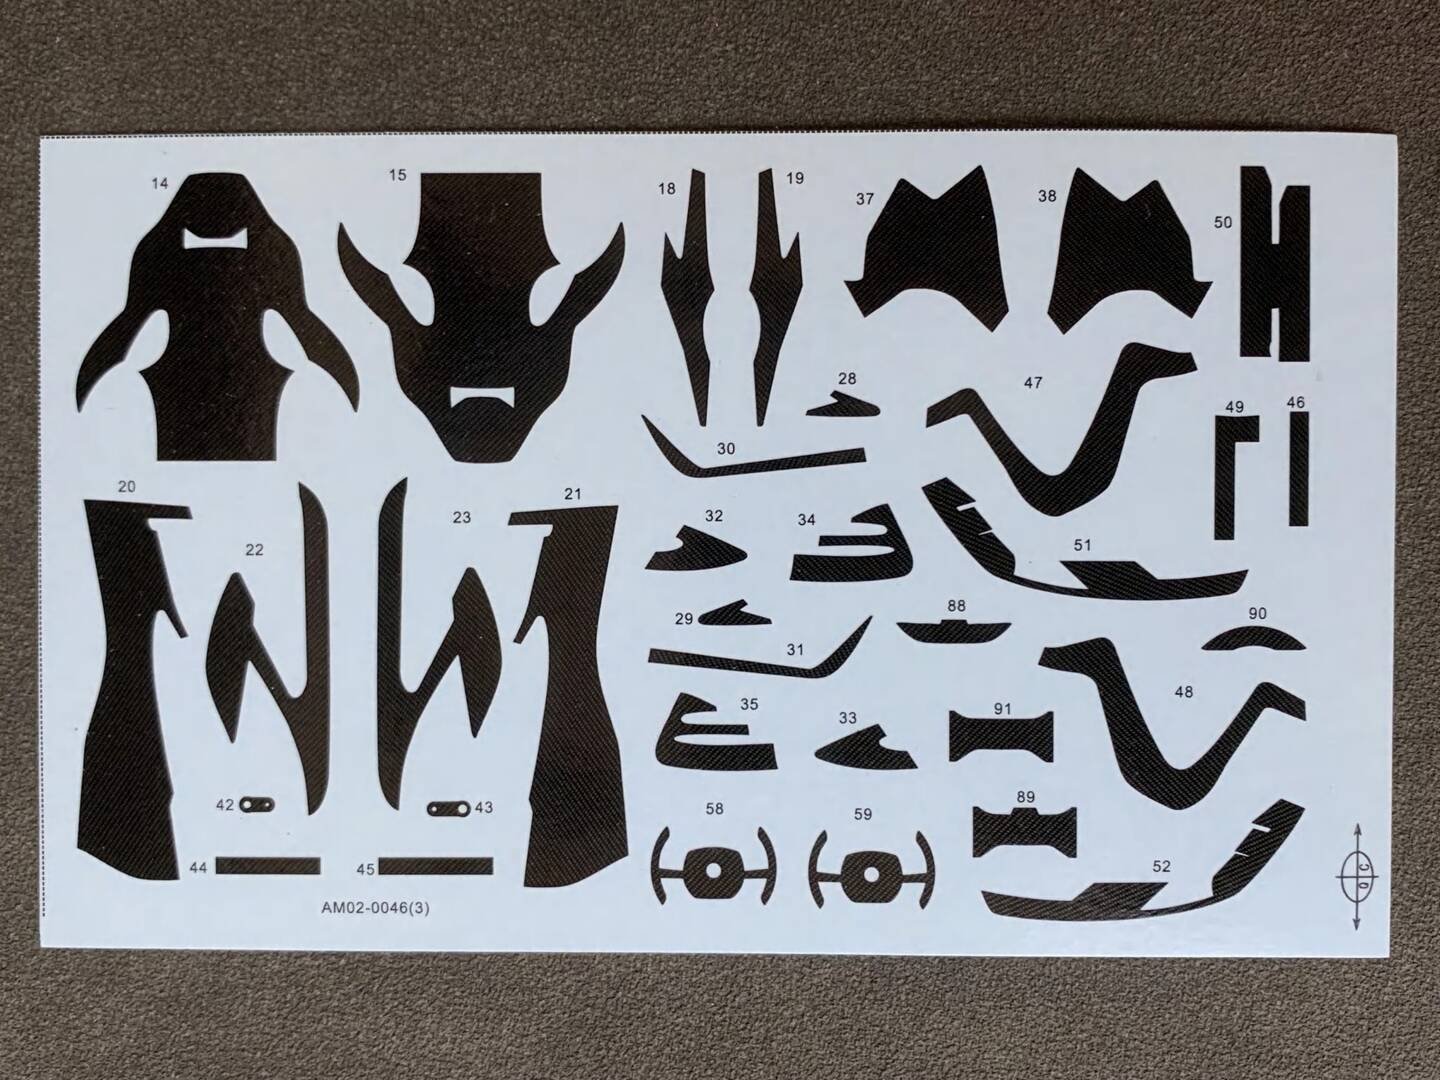
AlphaModel provides a wealth of carbon fiber decals on a large number of parts, including steering wheels, shift paddles, central control, instrument panel, rear diffuser, wind blades, etc., which are basically the same as the real car. In addition, the driver's and co-driver's foot pads, seat belts and other details in the cab are also supported by etched sheets, and a variety of different decals are provided according to different vehicle colors. I believe the effect will be amazing after production is completed.
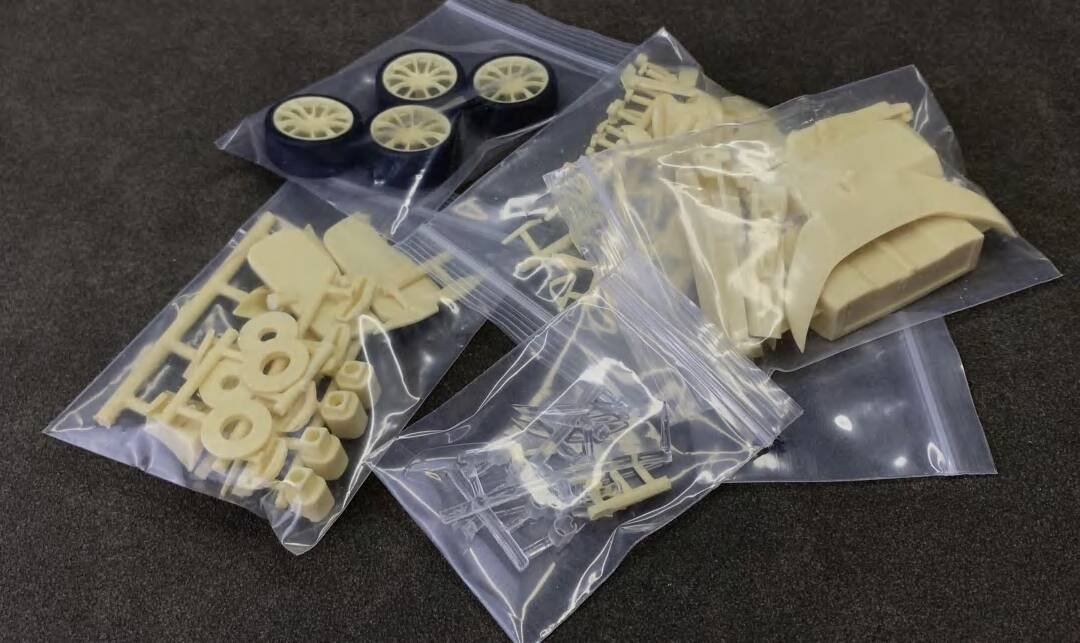
AlphaModel's products are precisely molded, especially in the production technology of the car shell, which is very mature. The car shell has a precise shape, a smooth surface without burrs and shrinkage, deep engraving lines, and sharp edges. These features greatly reduce the difficulty of production and are very suitable for novices. This product not only has traditional brake discs, interior decoration and other details, but also a complete engine for players to make. There are a large number of real car details on the Internet for everyone to refer to. After the production is completed, you can see the complete details of the engine through the hood window at the rear of the car.
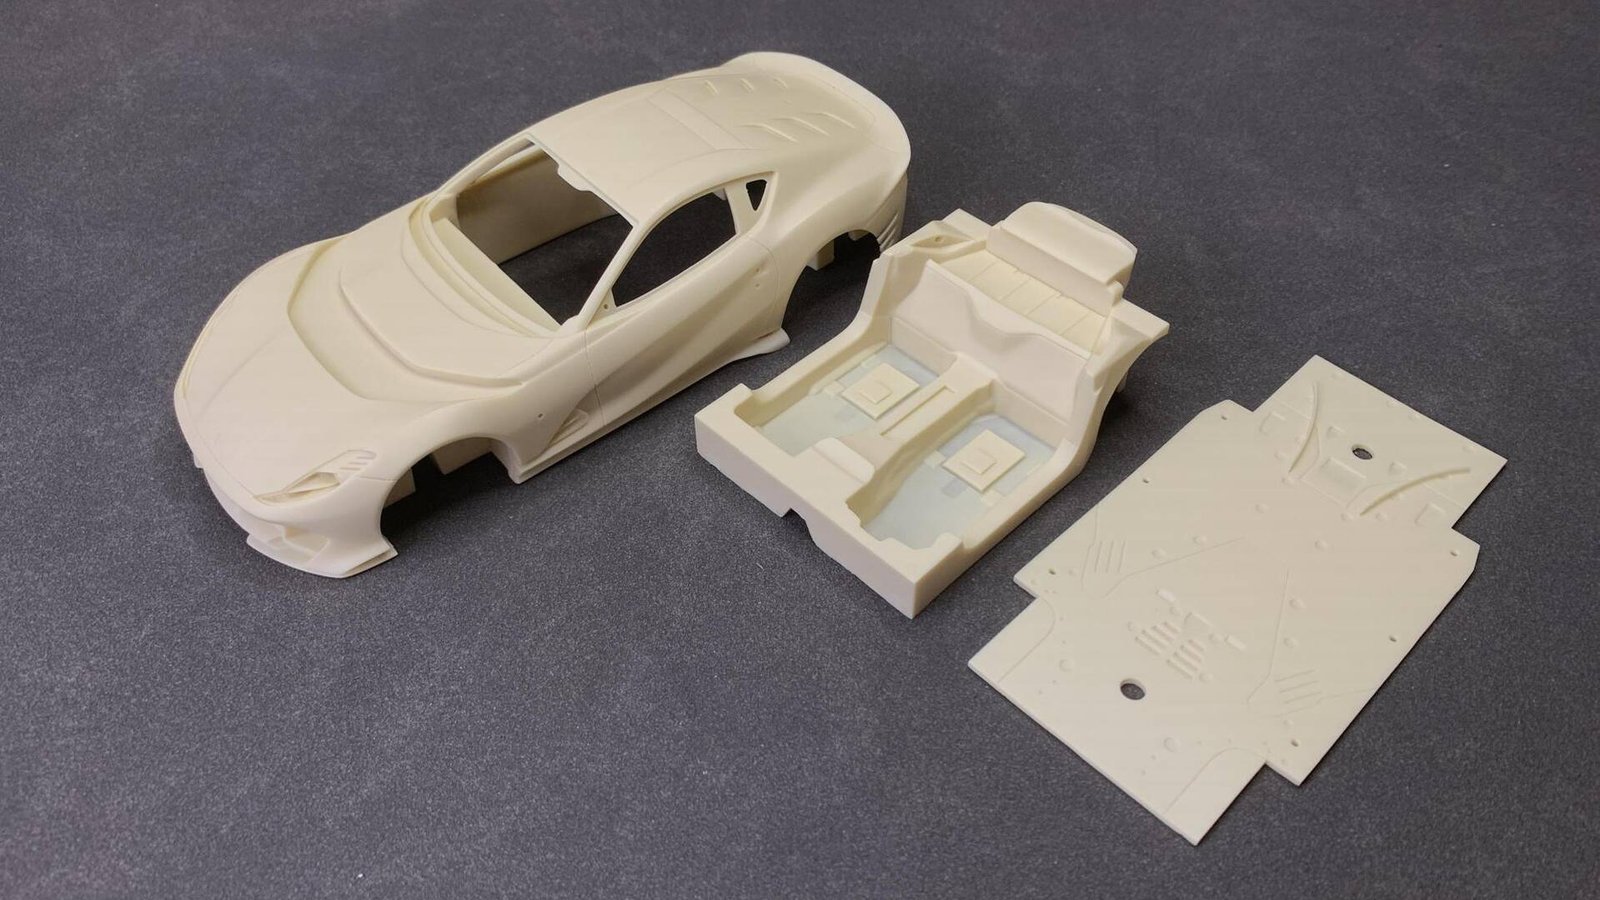
Each car has its own unique color scheme, and players can also color it according to their preferences. Before making it, you can refer to the photos of the real car and mark the color of each part in the product manual for easy use in the later coloring. In the process of making this car, we need to prepare some necessary tools in advance, such as: hook pen, paper sandpaper, sponge sandpaper, instant glue, tweezers, scoring knife, pen knife, etching sheet bending pliers, etc. With handy tools, the hand feeling is good, which can help players make high-quality static models more easily.
Use detergent or other resin cleaning liquid to clean all resin parts, because there is a layer of grease release agent on the surface of the workpiece. If it is not clear and directly sprayed with paint, fish eyes and paint will not adhere to cause discoloration. After cleaning, dry the water.
Next: Part 3 — Body Shell Treatment
Advanced Creators
Ferrari 812 Competizione Build Guide — Part 3: Body Shell Treatment
Alpha Model AM02-0046 · Build by breakwong
Sanding & Panel Line Deepening
First, observe the various parts of the car body. Generally, there will be some unevenness at the bottom of the side skirt. You can first use sandpaper to level it. After confirming that there is no problem of missing meat, use a 0.15mm diameter scoring knife to deepen the scoring. Although the scoring of the car body itself is relatively clear, we still need to deepen it manually again. This is to make it more three-dimensional after the production is completed, and you can consider not to seep the line, and use natural shadows to show the texture of the scoring position. When scoring, you need to pay attention to the strength from light to heavy. First, gently cut 2 knives along the scoring line, and then slowly apply pressure; at the position of the arc, you can use a curved hook knife to deepen the scoring.
If there is no hook knife, do not cut out of the boundary when using a straighthead scoring knife to deepen it, to avoid more trouble, and pay attention to the angle of the knife head, do not cut the curved scoring line into a straight line.
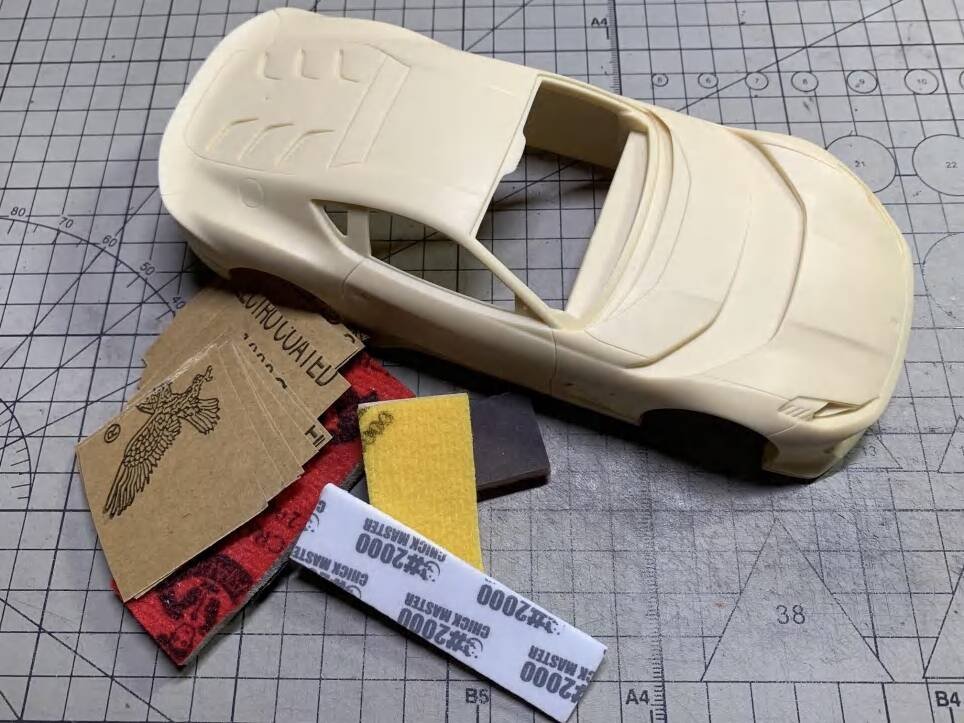
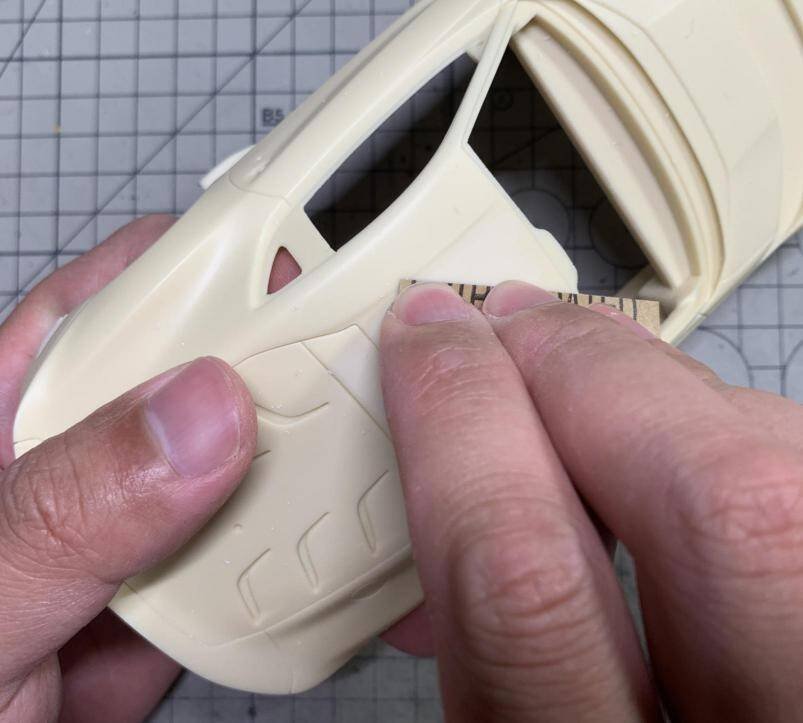
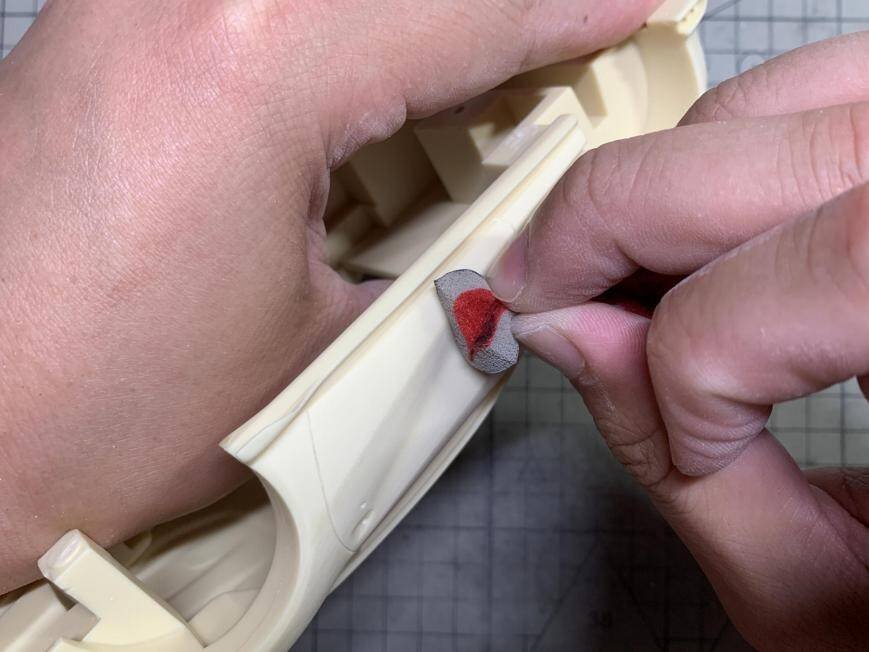
After deepening the lines, first use 800-grit paper to grind and level the entire car shell, which will increase the sharpness of the entire car, make the position of the engraved lines more obvious, and make the position of the large plane more flat, so that the effect of later spray painting and varnish will be better. During the grinding process, pay attention to the arc and protruding positions. Use light force to avoid grinding away complex details; after leveling, use 1000 and 1500 sandpapers to grind away the coarser scratches, and then use 1500 and 2000 sponge sandpapers to grind again. Use high-grit sandpaper to apply a little more force, so that it is easier to grind away the coarse scratches. Only when the surface of the workpiece is well treated, the effect after coloring will be better.
Pay attention to wearing a gas mask during the grinding process. Resin dust is toxic, so pay attention to protection.
Next: Part 4 — Car Shell Painting
Advanced Creators
Ferrari 812 Competizione Build Guide — Part 4: Car Shell Painting
Alpha Model AM02-0046 · Build by breakwong
Main Color — Yellow with Orange Tint
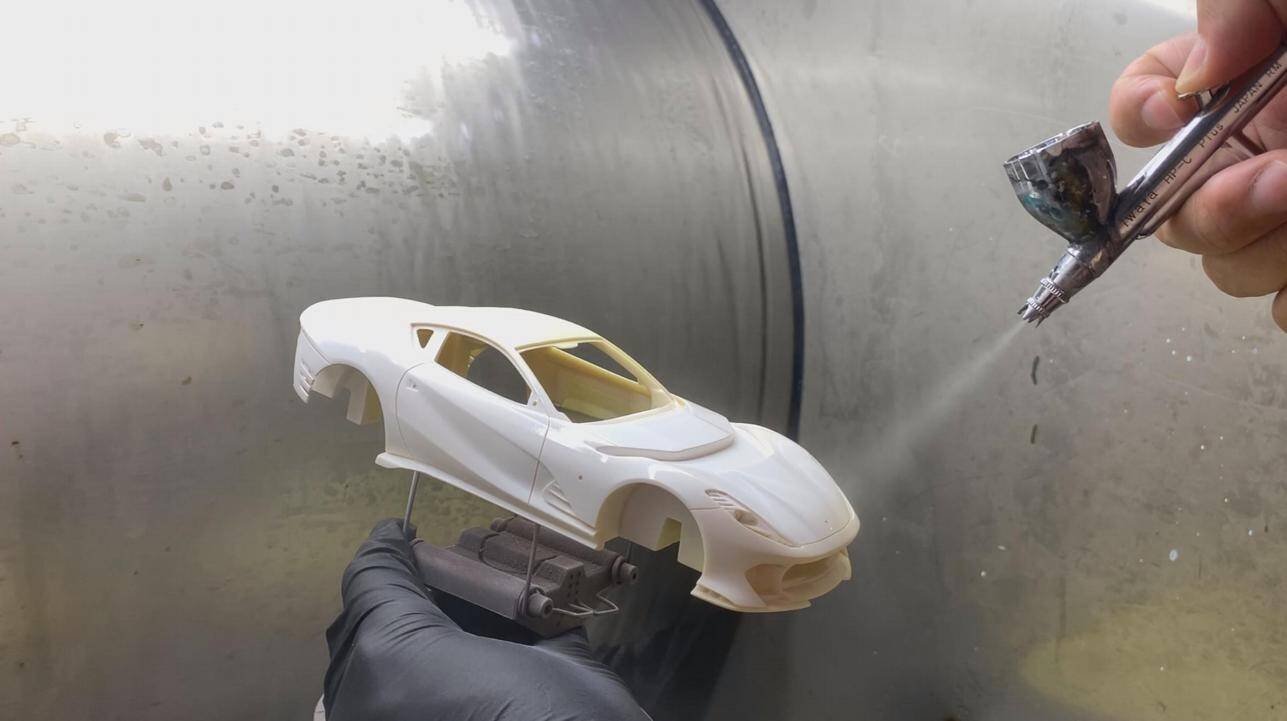
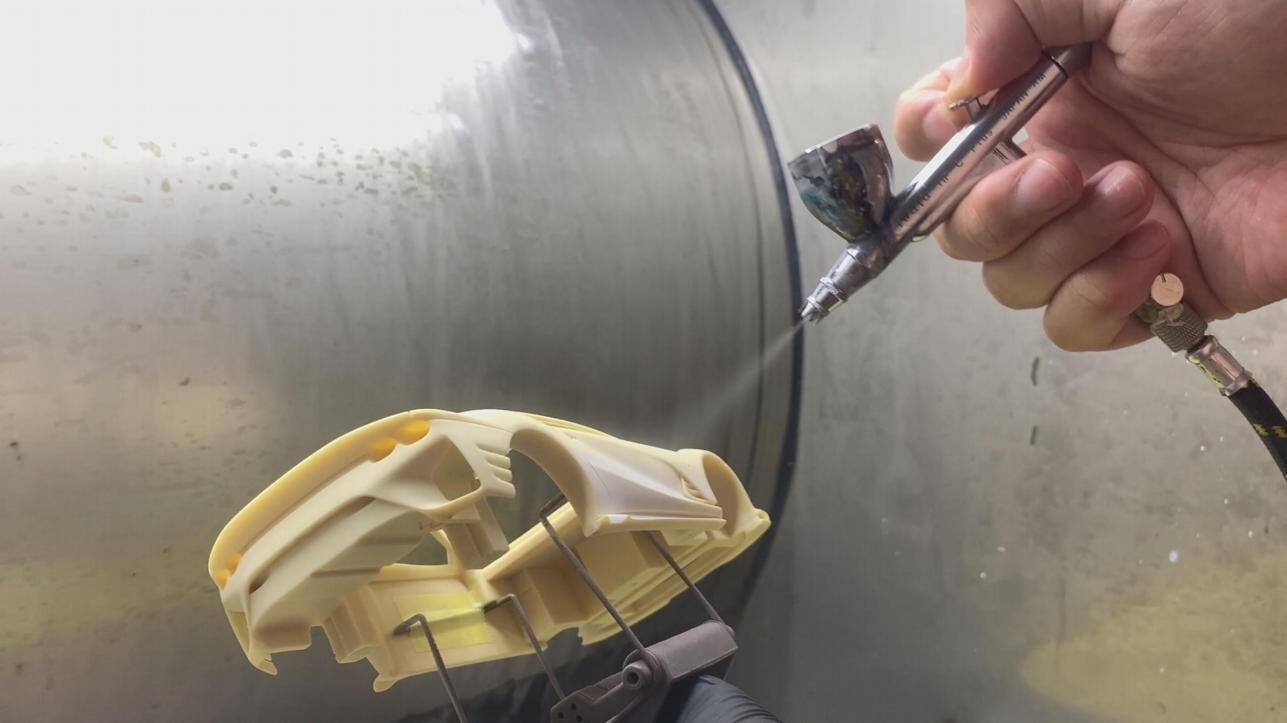
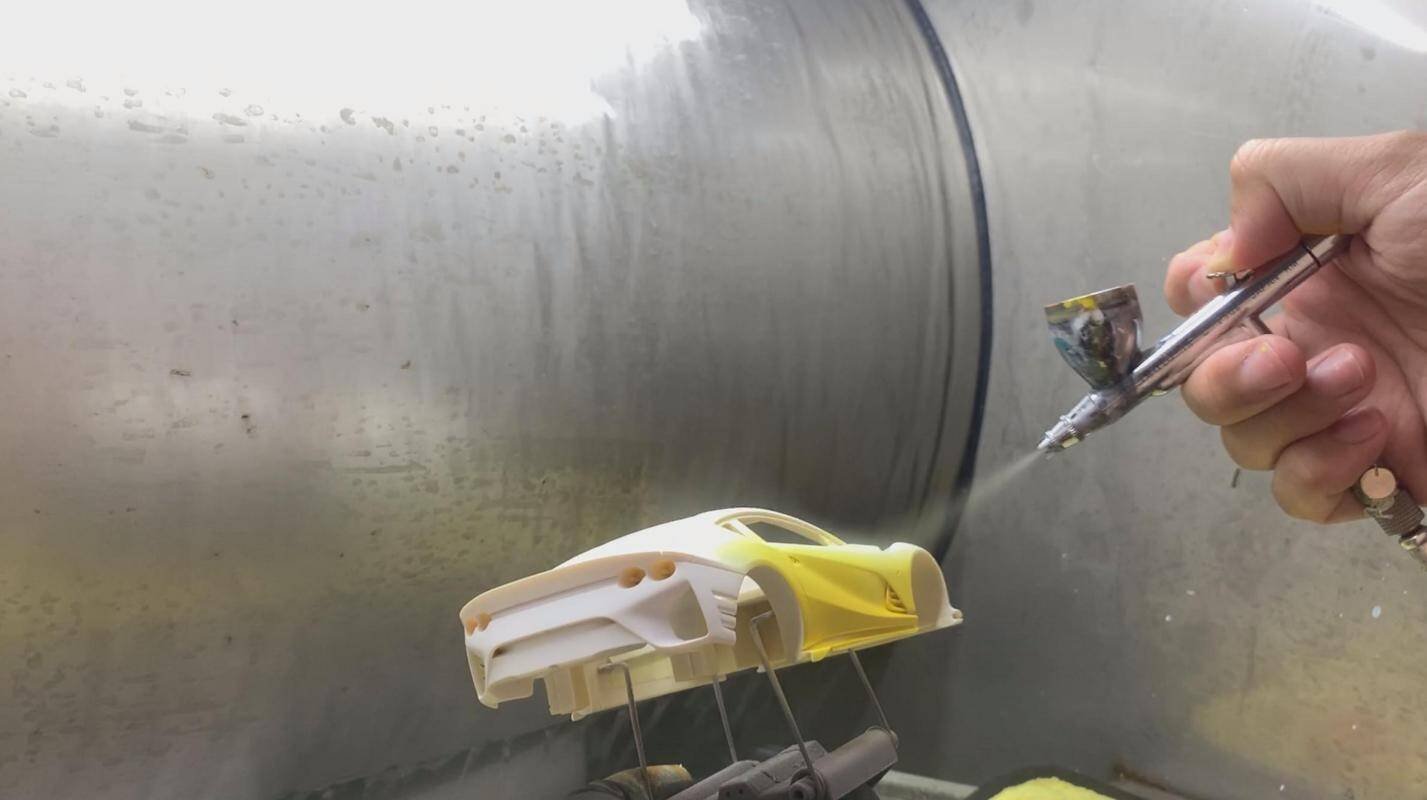
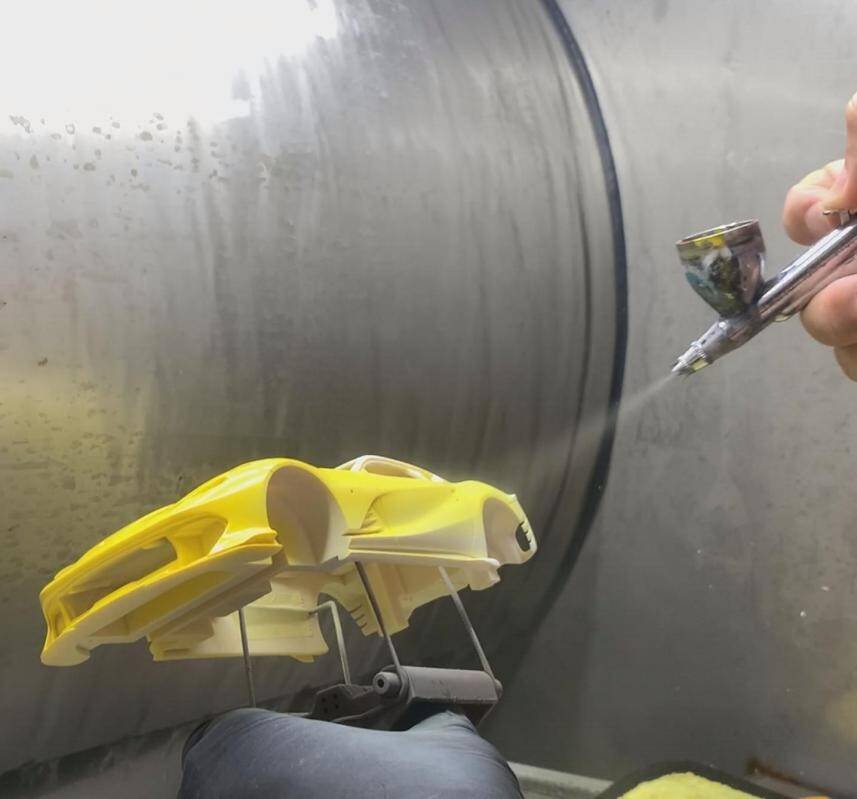
After cleaning the dust on the car body, first use a white putty specially designed for resin to prime it to increase the adhesion of the topcoat and unify the base color of the entire car. For the main color of the car body, I used Gunze original yellow (CR-3) and added a little orange (C59). Since orange is darker, only a little bit is needed. This will make the finished product look more three-dimensional and more saturated. Pay attention to observation during the spraying process, spray the paint evenly, and do not spray too thickly at one time, otherwise color shift will occur. If large particles of dust fall during the spraying process, stop spraying immediately. After the paint is dry, use No. 2000 sponge sandpaper to gently grind off the dust before spraying. When spraying, spray the paint layer by layer until the paint forms a relatively smooth surface. Be careful not to stay in the same position for too long to prevent problems such as paint hanging.
Masking for Black Parts
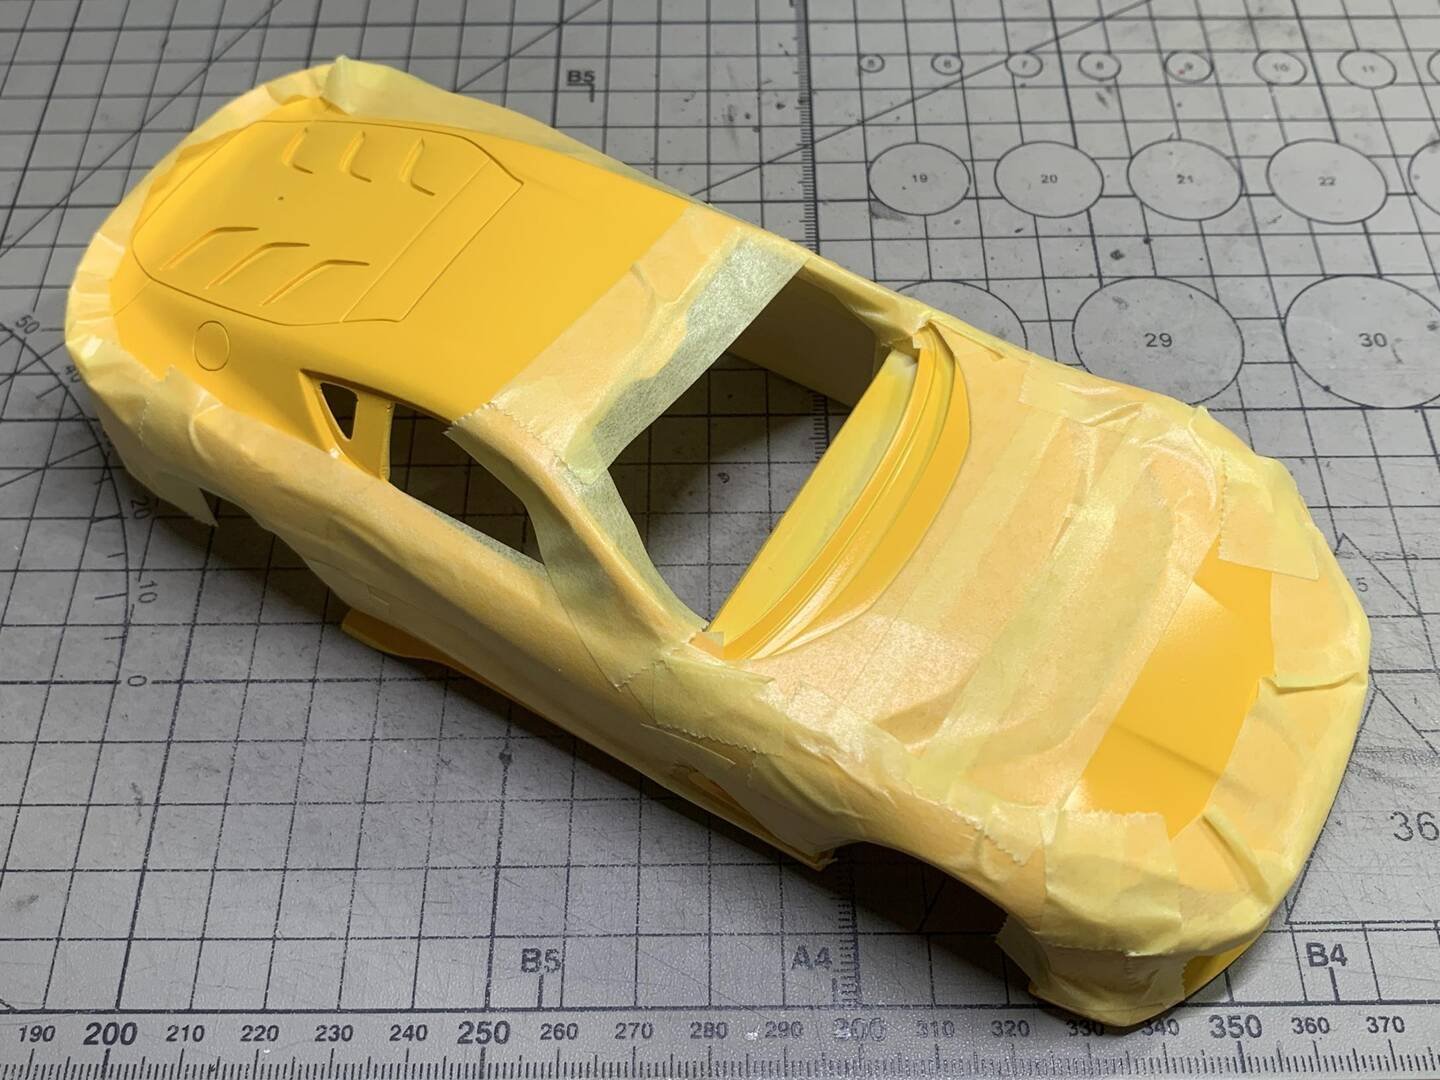
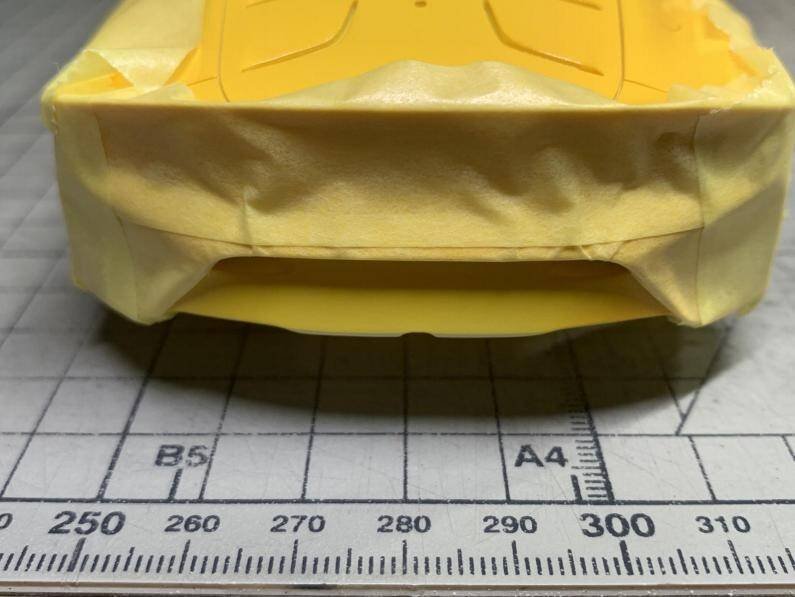
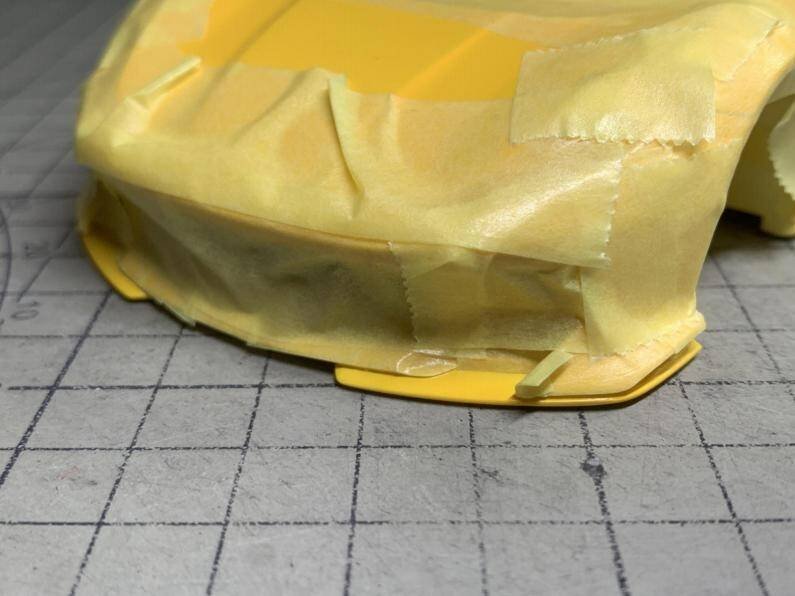
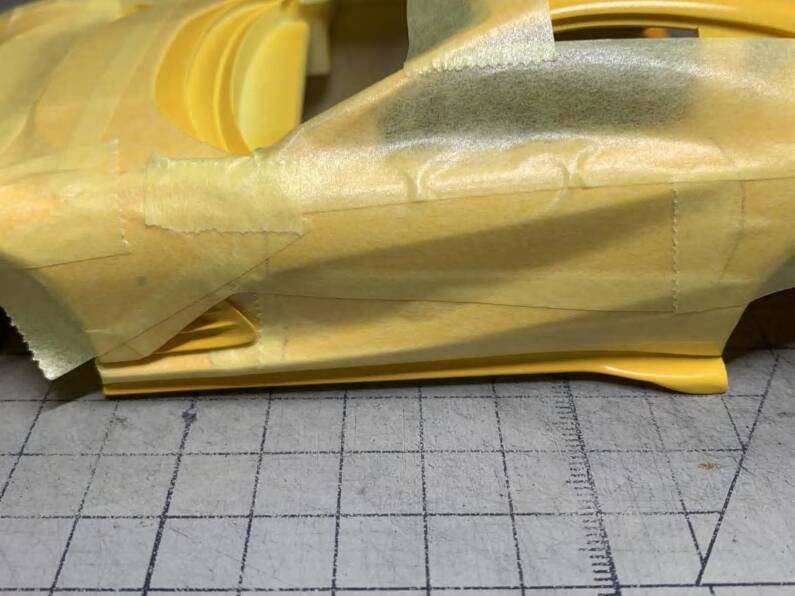
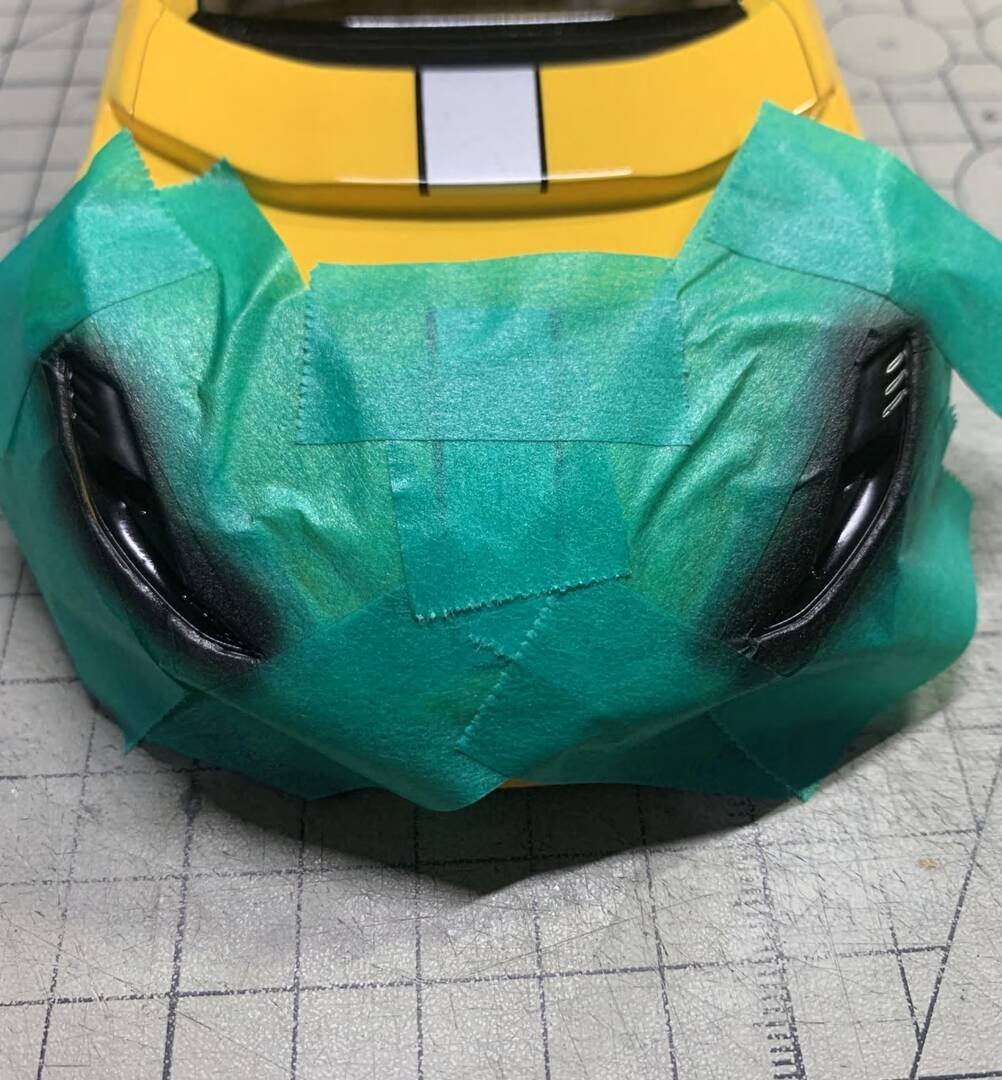
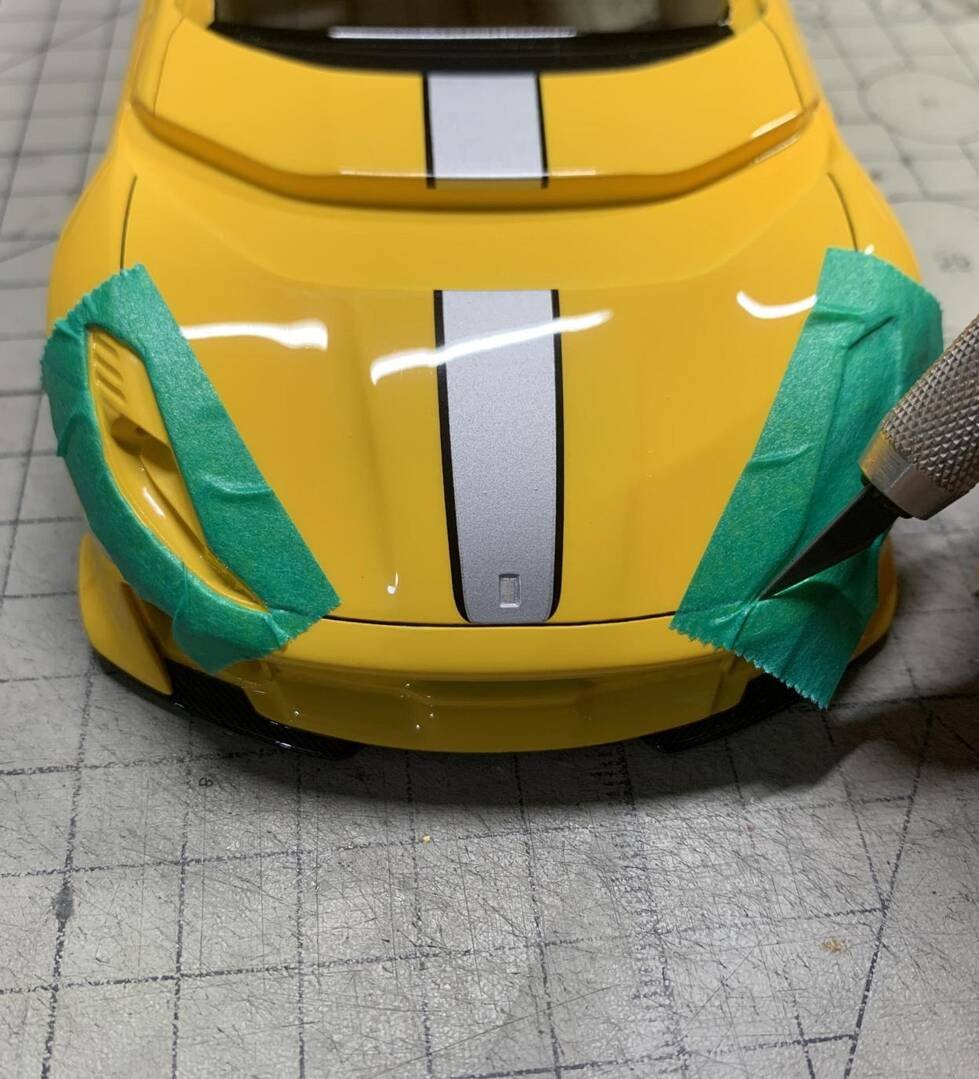
After the main paint is dry, the front shovel, hood, side skirts, side air guides, tail and rearview mirrors should be masked and colored. These positions are all black and will be affixed with carbon fiber water stickers, so a black base must be used. When masking, be careful not to miss every position that needs to be covered. In some positions with complex curves, you can use a pen knife to gently cut out the shape along the edge, but be careful not to damage the paint surface with the blade. When holding the masking paper with tweezers, be careful not to scratch the paint surface with the tip of the tweezers.
Next: Part 5 — Carbon Fiber Decals
Advanced Creators
Ferrari 812 Competizione Build Guide — Part 5: Carbon Fiber Decals
Alpha Model AM02-0046 · Build by breakwong
Applying Carbon Fiber Water Stickers
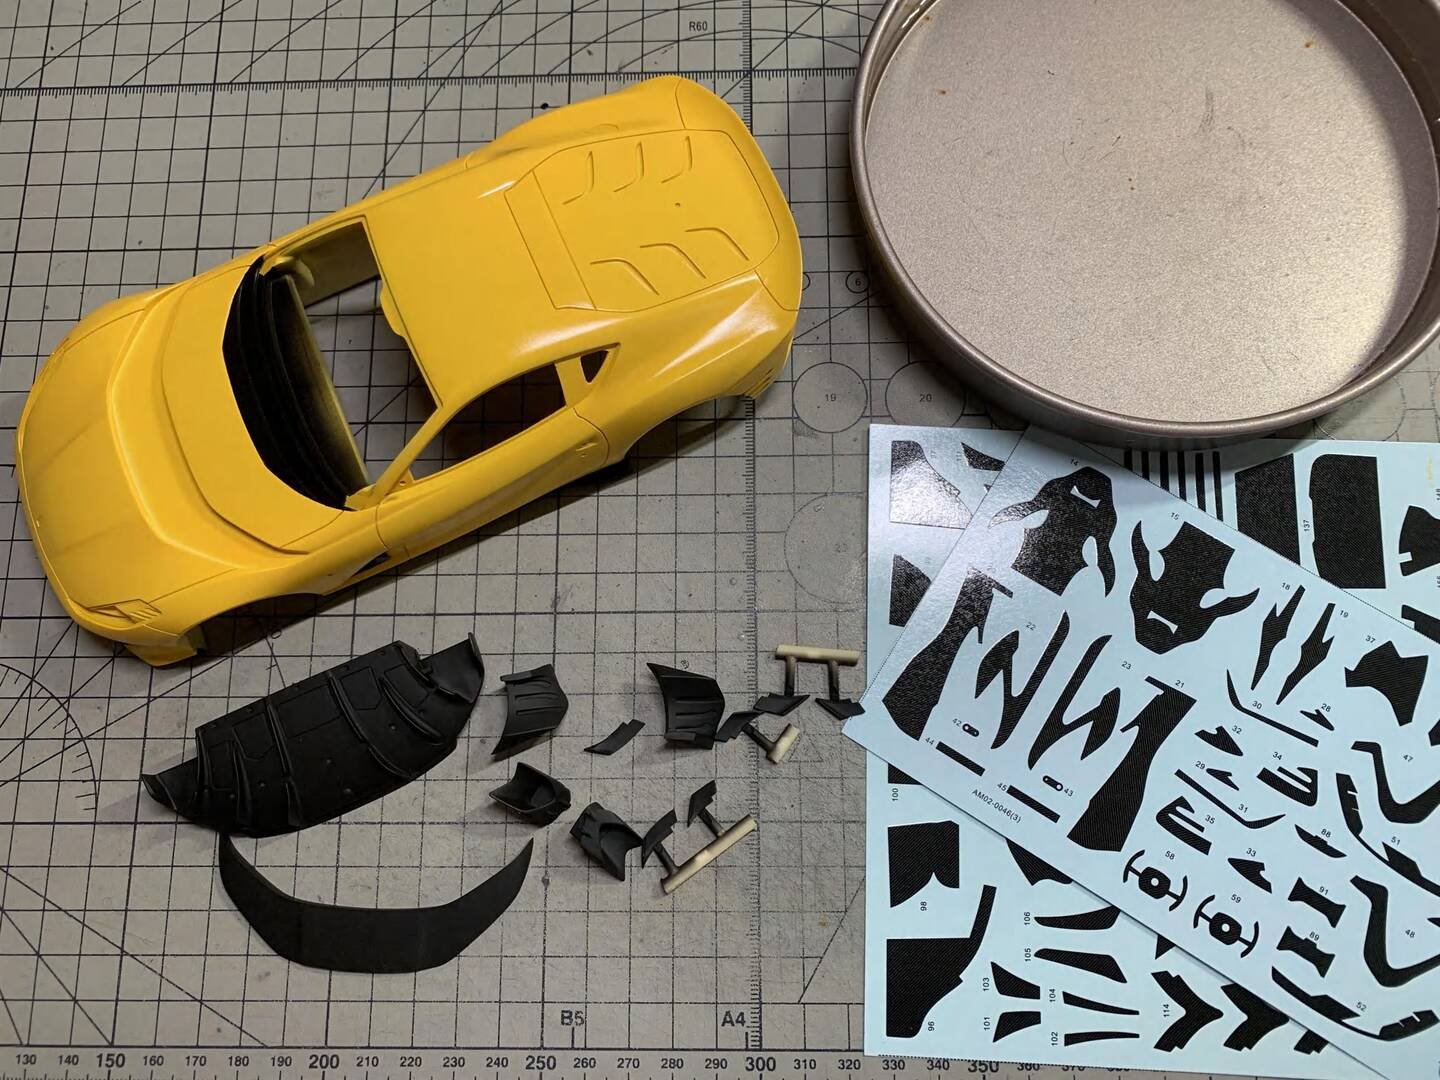
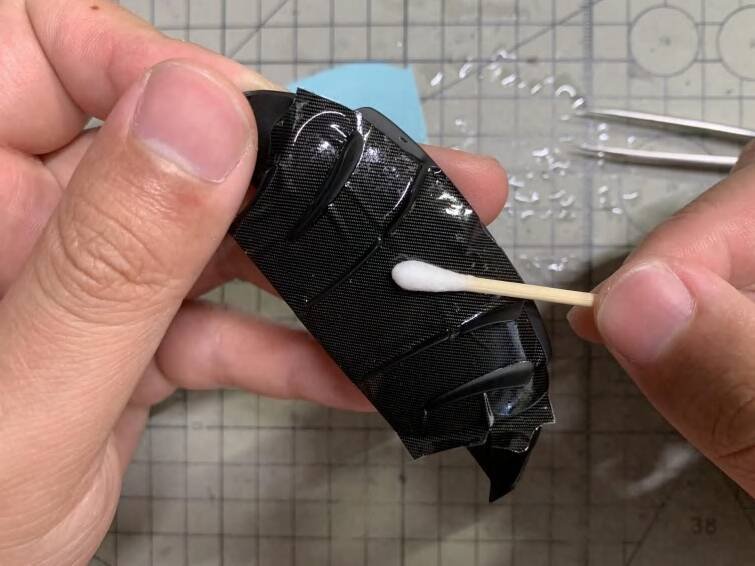
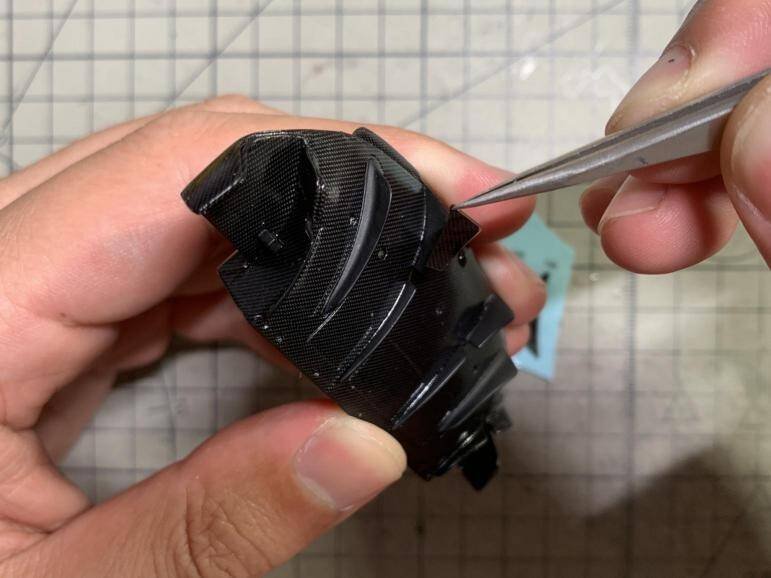
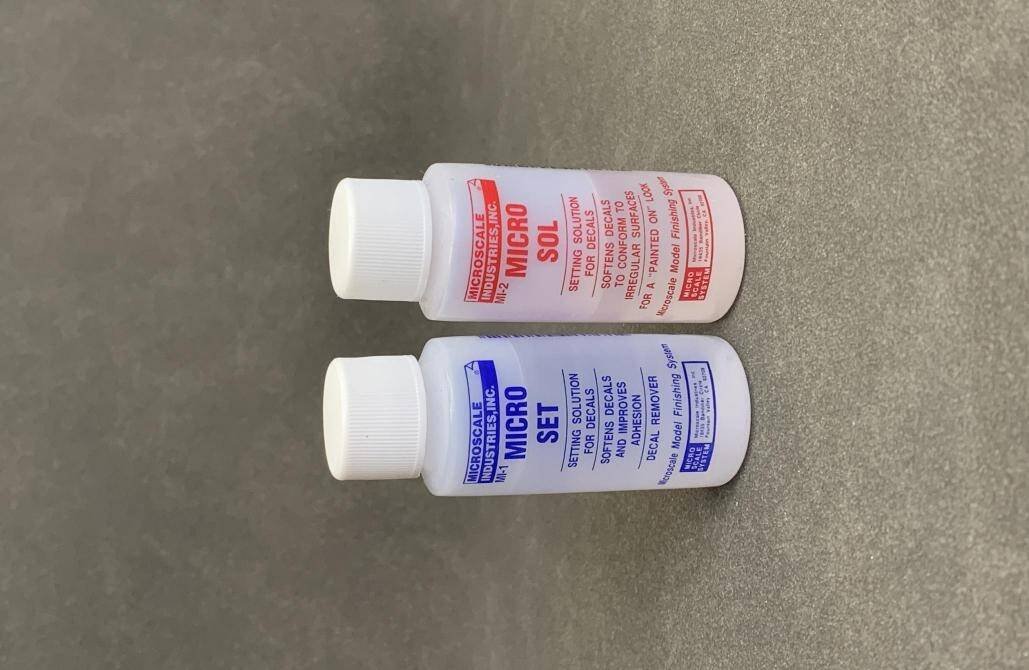
Microscale MI-1 and MI-2 can be used to assist in the bonding process of decals. MI-1 is a backing glue to increase the stickiness of decals. MI-2 is a softener. After applying the softener on complex curved surfaces, it can increase the adhesiveness. The ductility of the decal can better fit the parts. Since Alphamodel's decal is more sticky after being heated by a hot air gun, the position must be carefully adjusted before heating, and the water should be gently squeezed out with a cotton swab. Finally, use a hot air gun to heat and soften.
Pre-Varnish Preparation
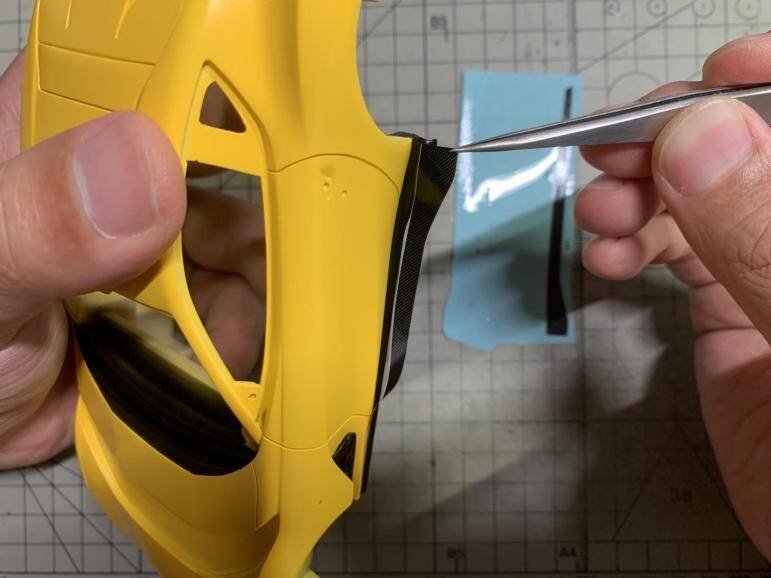
After applying the decals, spraying amino varnish to achieve a mirror surface will increase the beauty. Since the car is sprayed with metallic paint, you need to spray a thin layer of oily semi-glossy transparent paint to isolate it before spraying the varnish, otherwise the varnish will burn the paint and increase the particle size.
Final Carbon Fiber Decal Application
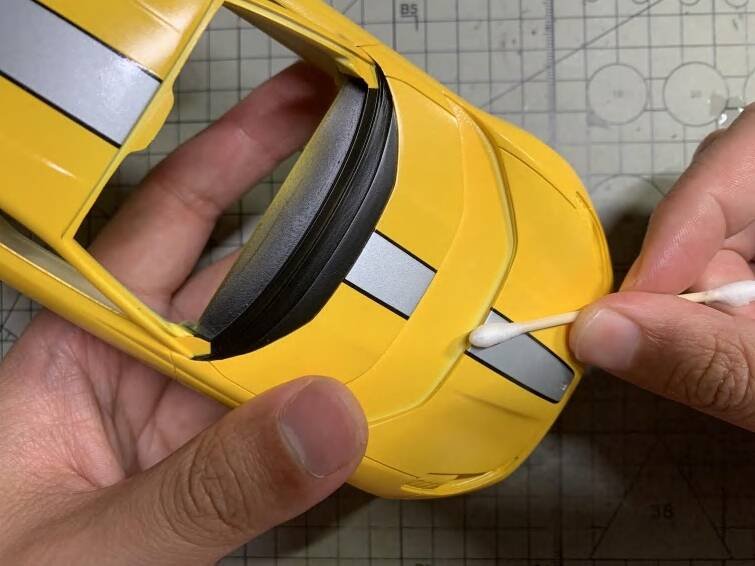
After attaching the carbon fiber decals to the car shell, wind deflector, diffuser and other parts, you can spray them with amino varnish to achieve a mirror reflection effect and enhance the overall texture.
Next: Part 6 — Headlights & Body Shell Varnish
Advanced Creators
Ferrari 812 Competizione Build Guide — Part 6: Headlights & Body Shell Varnish
Alpha Model AM02-0046 · Build by breakwong
Color Separation of Headlights
The headlight assembly requires precise color separation to replicate the multi-element LED design of the real 812 Competizione. Each section of the headlight unit needs to be carefully masked and painted in different colors to achieve the distinctive lighting signature.
Body Shell Varnish — Amino Clear Coat
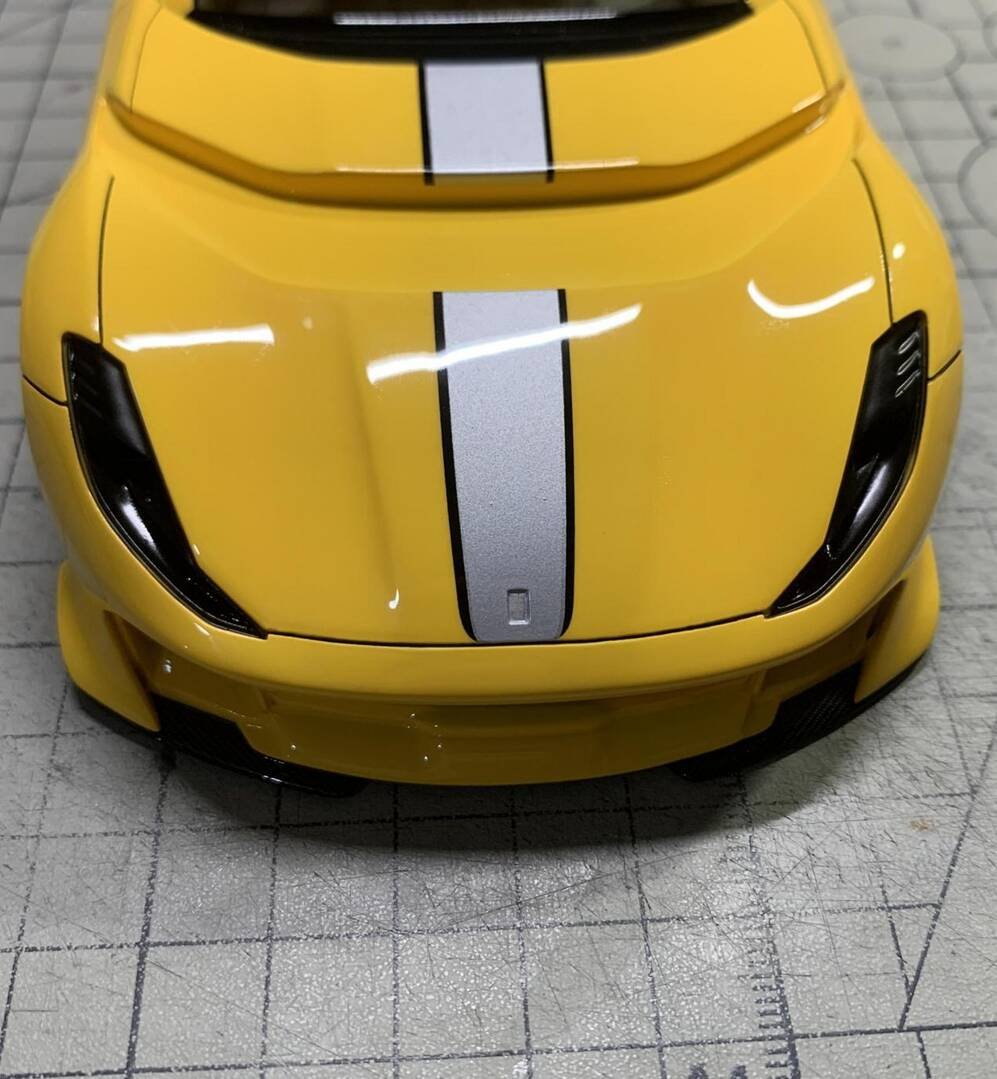
Amino varnish needs more observation during the spraying process. Spraying too much at one time will cause accumulation at the edges. If the engraved lines are shallow, the engraved lines will be filled up, thus losing the good texture. Especially on both sides of the engraved lines, more attention should be paid. Once the amount of paint output by the airbrush is large, it will cause accumulation of varnish at the edges of the plane. If there is no way to control it precisely, sandpaper and polishing paste can be used for grinding and polishing after it is completely dry. In general, in addition to maintaining the gloss and smoothness of the paint surface, the overall texture of the car body must also be guaranteed. The beauty of a model is not only reflected in its color or gloss, but is composed of a lot of details. It takes a lot of effort to carve out a good-looking and reasonable work.
Next: Part 7 — PE Building (Etching Parts)
Advanced Creators
Ferrari 812 Competizione Build Guide — Part 7: PE Building (Etching Parts, Foot Pads & Interior)
Alpha Model AM02-0046 · Build by breakwong
Etching Parts — Plate Spraying
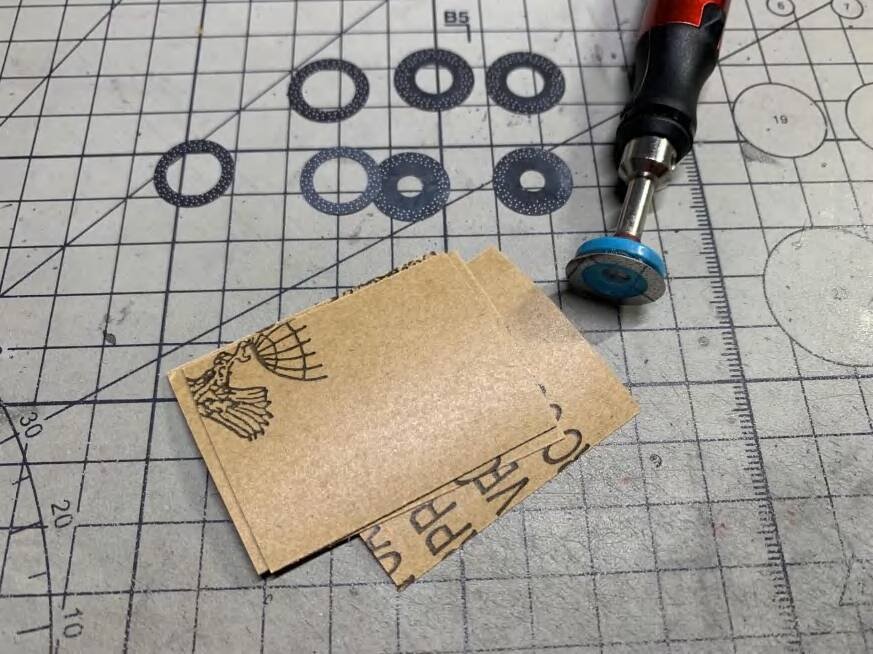
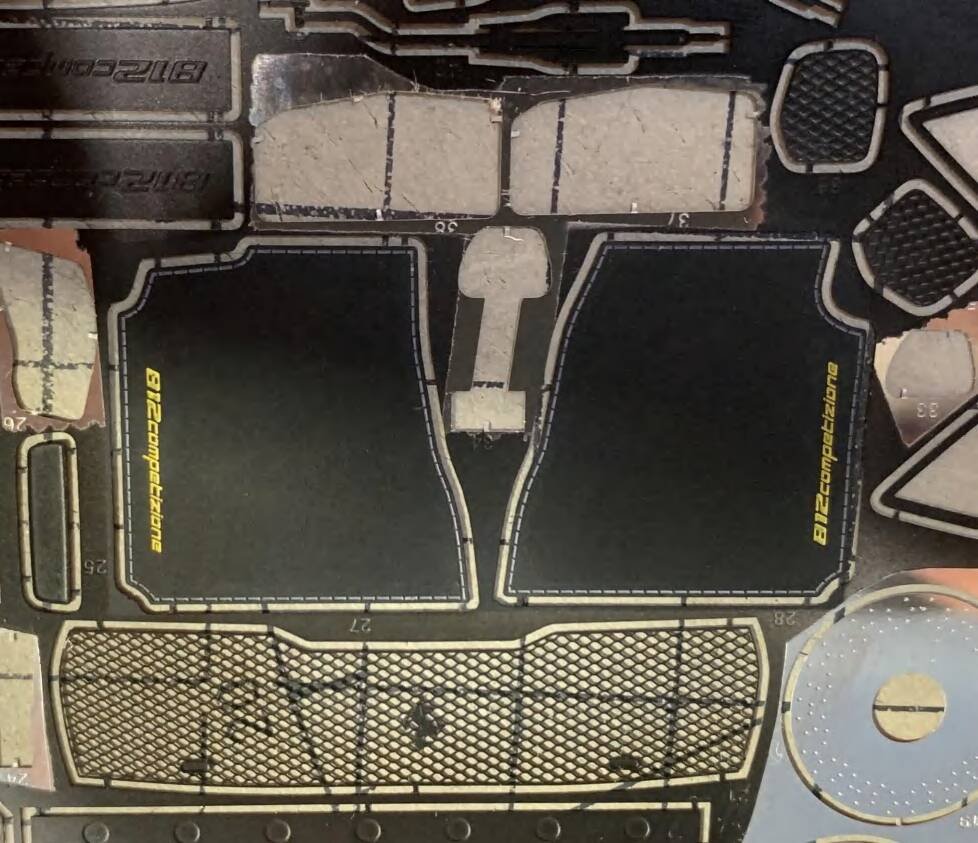
For the etching part, I chose plate spraying. First, cover the part that does not need to be colored with masking tape, and then use 800 sandpaper to polish the part that needs to be colored. Before coloring, use Gunze SF287 water putty for primer. Be careful not to spray too thinly when spraying. Use a spray pen for multi-layer sweeping spraying to allow paint particles to adhere to the surface of the parts layer by layer. Wait for it to dry and then spray the topcoat. I used Gunze C33 (matte black) for the cab foot pads, and C92 (semi-gloss black) for other parts. Some parts, such as shift paddles, need to be affixed with carbon fiber stickers, so they must be primed with black. As for the glossiness, there is no need to choose, because after the water stickers are affixed, a layer of transparent paint must be sprayed to unify the gloss.
Attaching Etching Parts to Resin Body
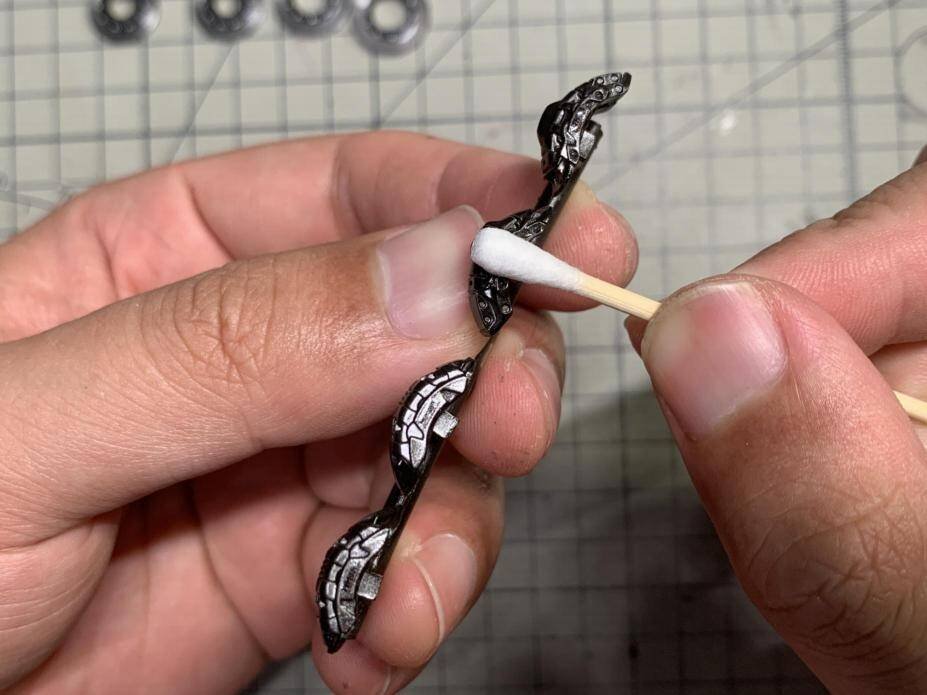
After the resin parts are colored, the etching sheet can be pasted on them. Use a toothpick to apply instant glue on the parts, and use tweezers and a glue pen to operate. Toothpick glue can prevent glue from overflowing due to excessive glue points. You can choose jelly or liquid glue. Liquid glue dries quickly, but because of its high fluidity, it may overflow when bonding small parts. Jelly glue dries slowly, but has poor fluidity. After the etching sheet is attached, it can be adjusted in a short time. After reaching a satisfactory level, wait for more than ten seconds to dry.
For some very small parts, Microscale MI-9 and MI-10 can be used for pasting. This type of glue can achieve the strength of fixing the parts. Once you encounter the problem of glue overflow, you can use a cotton swab dipped in water to wipe off the excess glue without leaving any traces.
Microscale Decal Assistance
Microscale MI-1 and MI-2 can be used to assist in the bonding process of carbon fiber water stickers. MI-1 is a backing adhesive that increases the stickiness of the water stickers, and MI-2 is a softener. After brushing the softener on complex curved surfaces, the ductility of the water stickers can be increased, allowing them to better fit the parts.
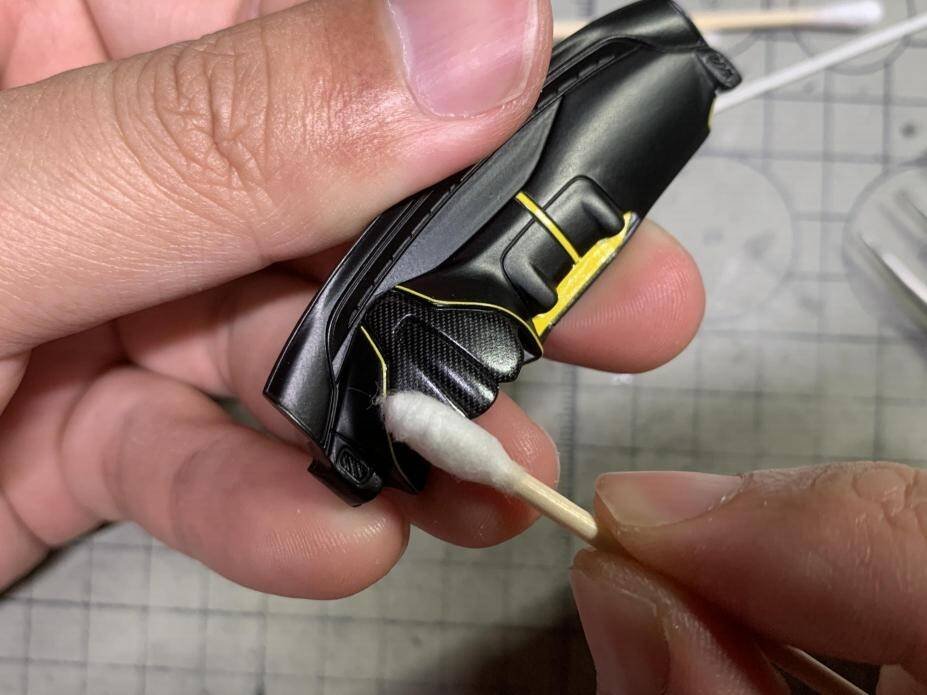
Foot Pad Detailing — Enamel Wash
The stitching lines and letter logos on the foot pads can be infiltrated with diluted Tamiya enamel paint. Be careful not to use too high a dilution ratio, so that the paint can just penetrate into the grooves. After waiting for it to dry, use a harder cotton swab dipped in a little Tamiya X-20 to wipe off the excess paint. In addition, when spraying the matte black of the foot pads, pay attention to the smoothness of the paint surface. You can wet spray multiple layers to allow the paint particles to fully level, but be careful not to let too much paint accumulate. The smoother the paint surface, the cleaner the enamel paint can be wiped off.
Next: Part 8 — Wheel Building & Interior Parts
Advanced Creators
Ferrari 812 Competizione Build Guide — Part 8: Wheel Building & Interior Parts
Alpha Model AM02-0046 · Build by breakwong
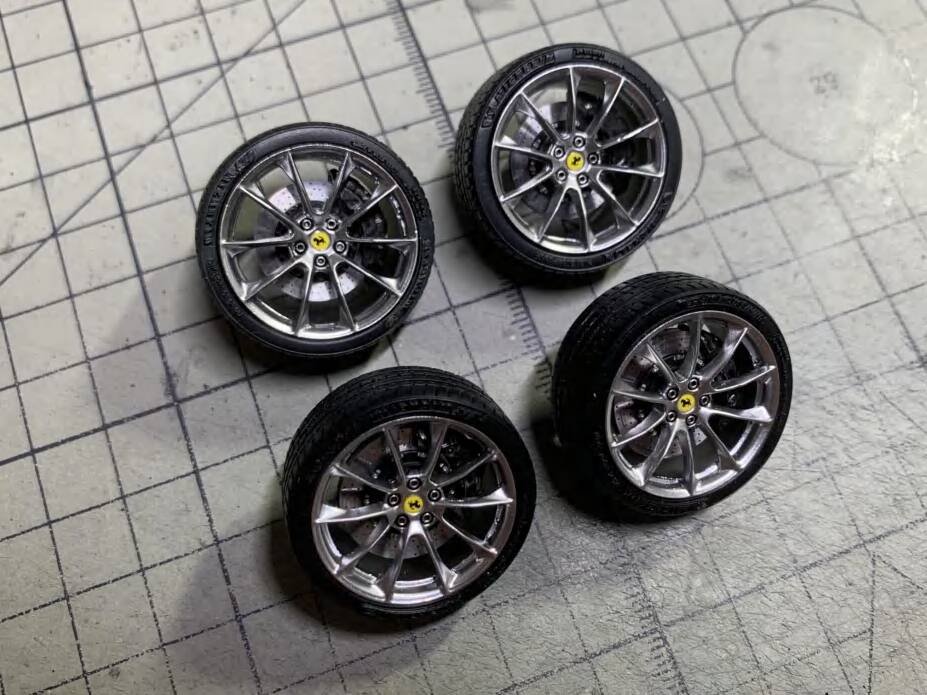
Wheel & Brake Disc Assembly
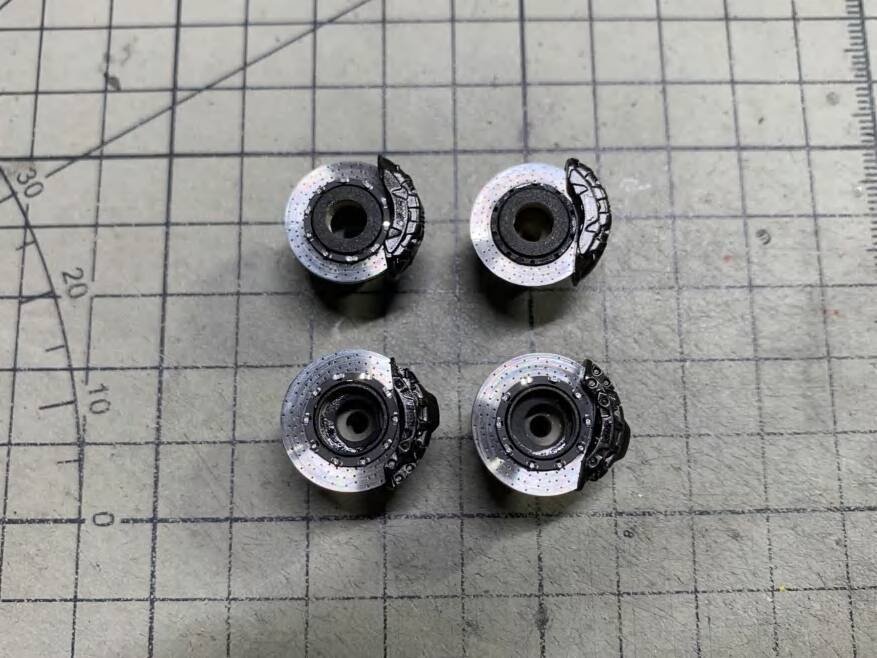
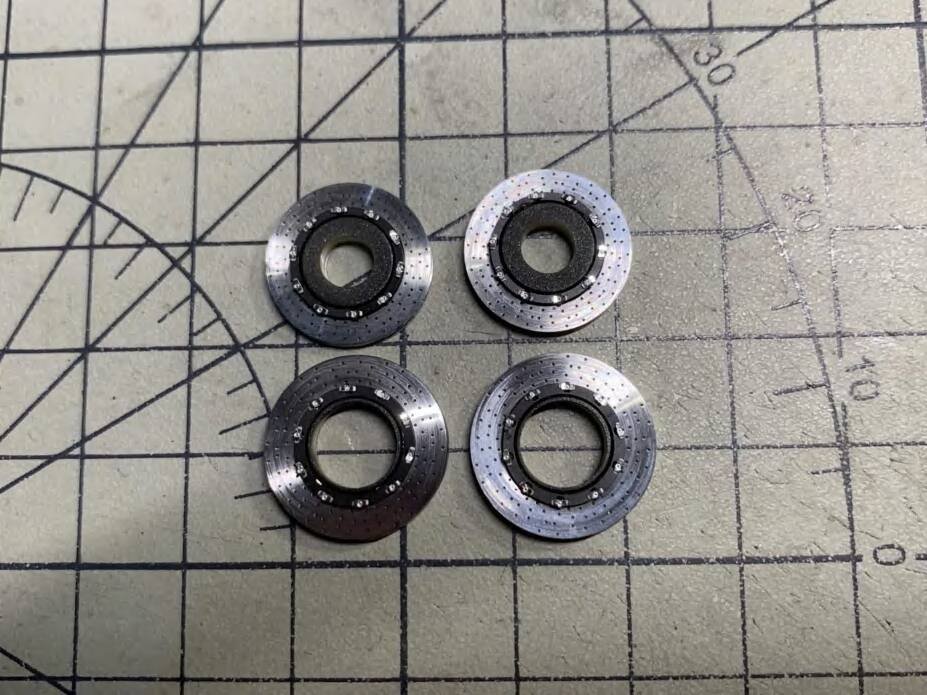
Be careful not to rub off the paint on the etched sheet of the brake disc lock during the bending process. You can directly use tweezers to hold it and fold it 180 degrees.
Since the main part of the brake disc directly uses its original metal texture, it can be polished with a hand-held electric grinder and 400 sandpaper. The grinding marks are used to simulate the texture after the brake pad is worn.
After the disc is assembled, use Tamiya black penetrant to wash it, mainly to dye the heat dissipation vents to enhance the texture.
For the wheel hub, I used Finisher's FX-10 bright chrome. Its extremely fine paint particles attached to the workpiece do not show any metal particles at all, and it looks particularly smooth after drying.
Interior Parts Building
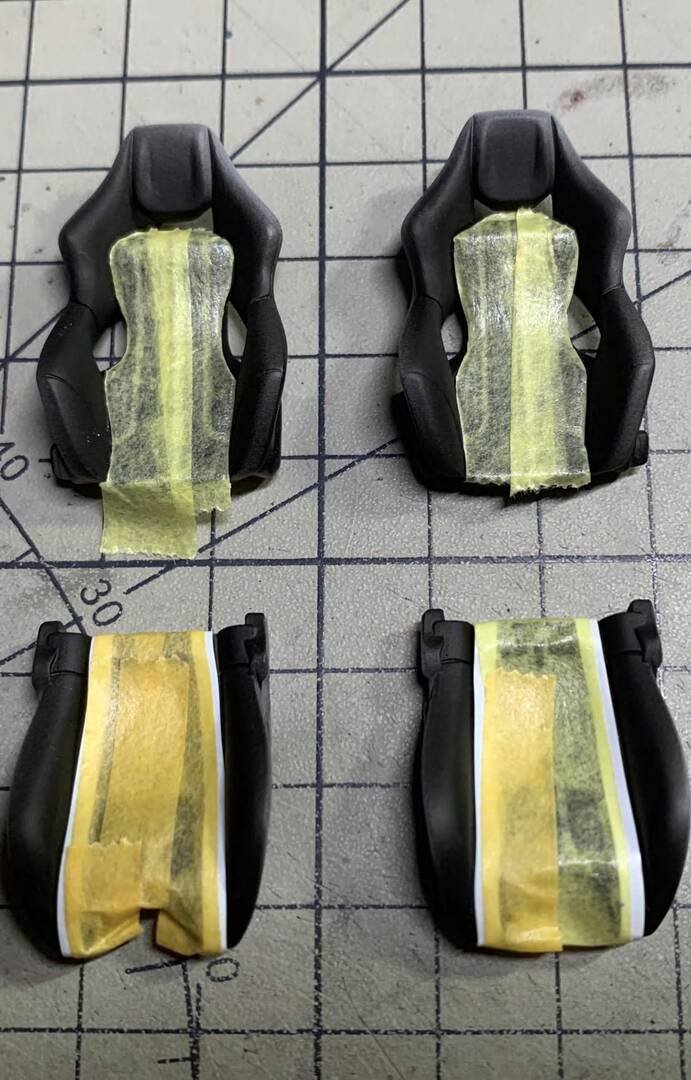
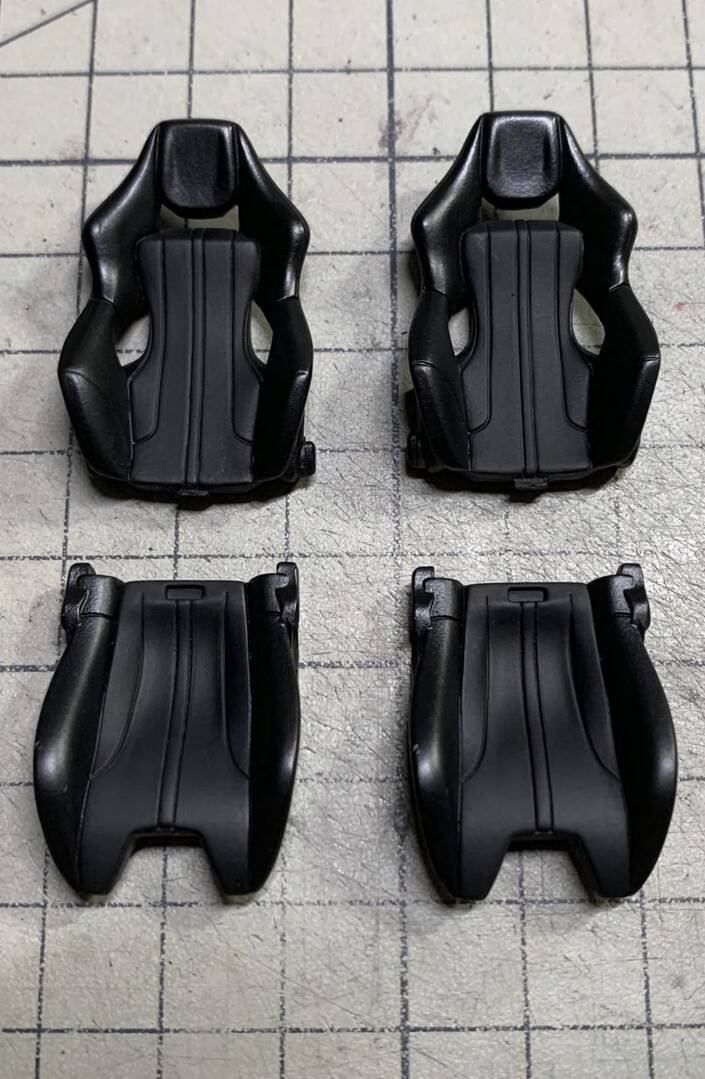
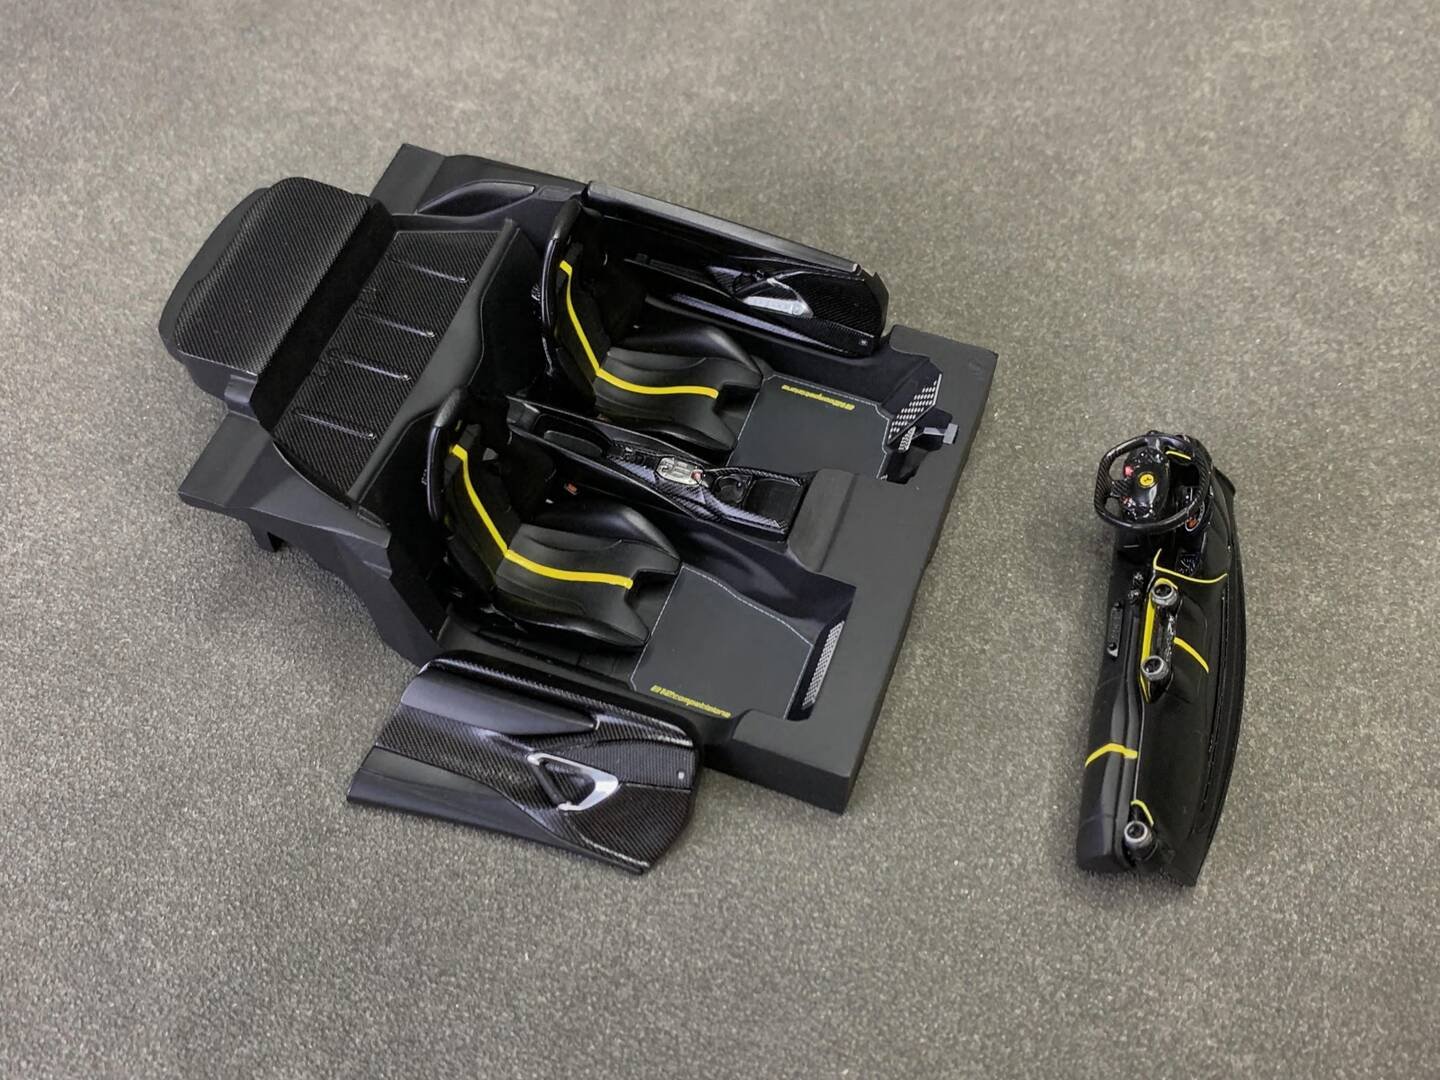
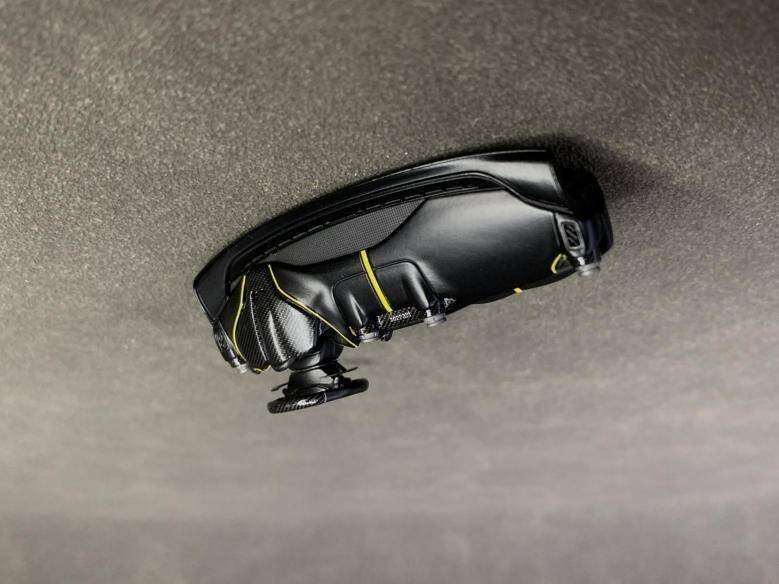
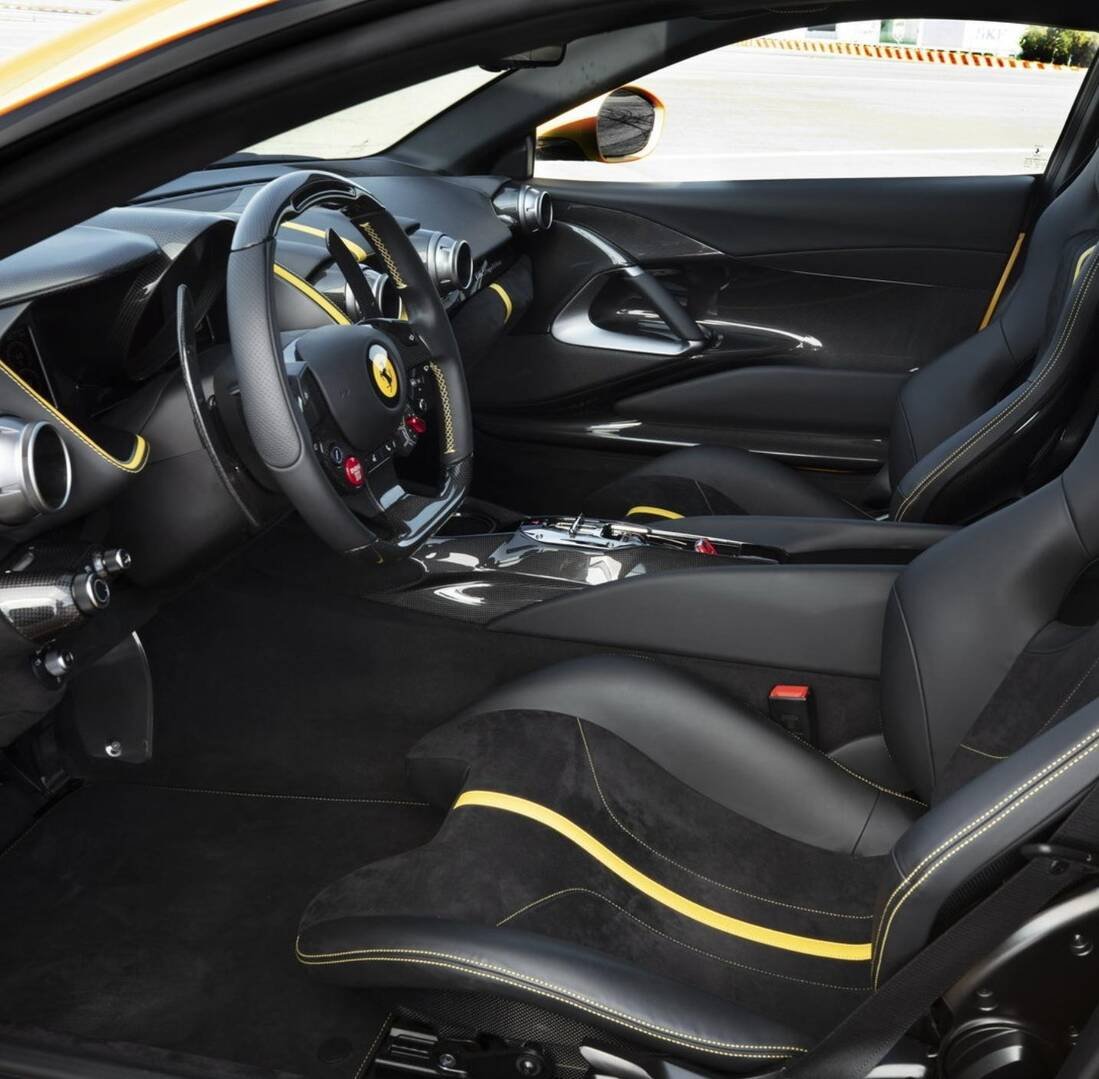
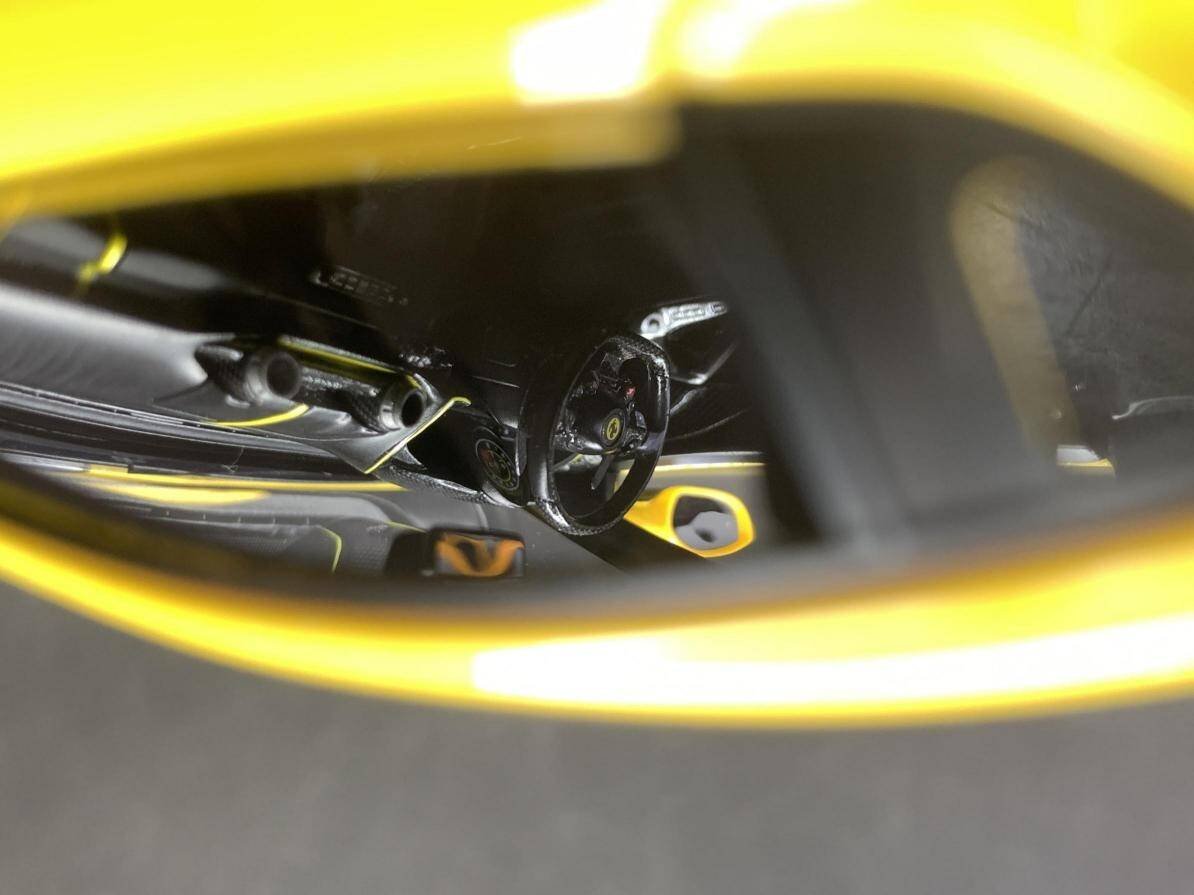
The interior includes detailed seats, dashboard, center console, steering wheel and other components. Each piece needs careful painting, decal application and assembly. The etched seat belts, carbon fiber steering wheel decals, and instrument panel stickers add a high level of realism to the cabin.
Next: Part 9 — Wiper Production & Final Assembly
Advanced Creators
Ferrari 812 Competizione Build Guide — Part 9: Wiper Production & Final Assembly
Alpha Model AM02-0046 · Build by breakwong
Wiper Production
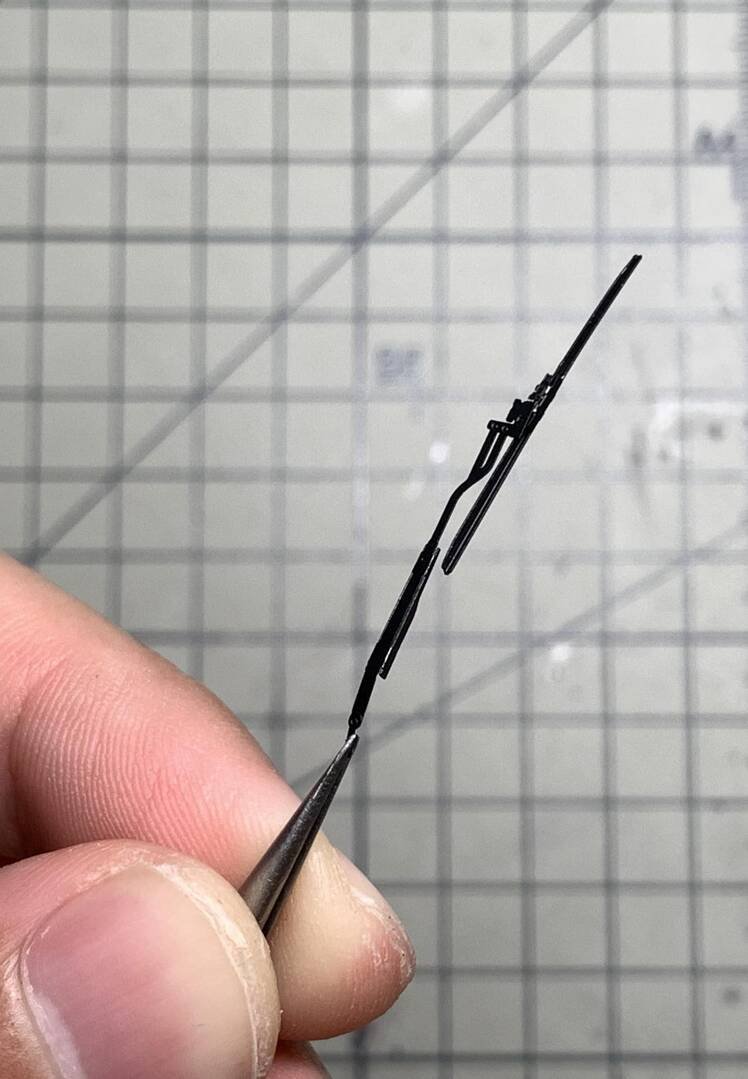
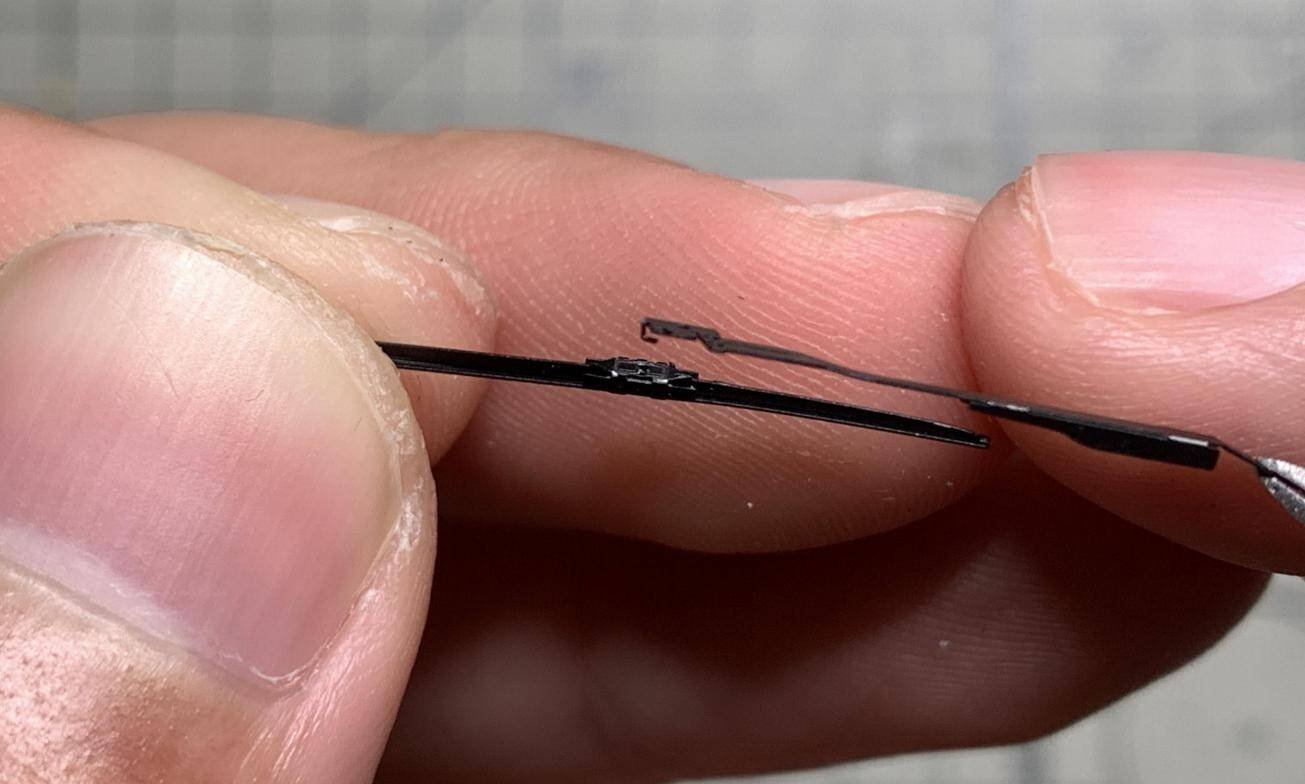
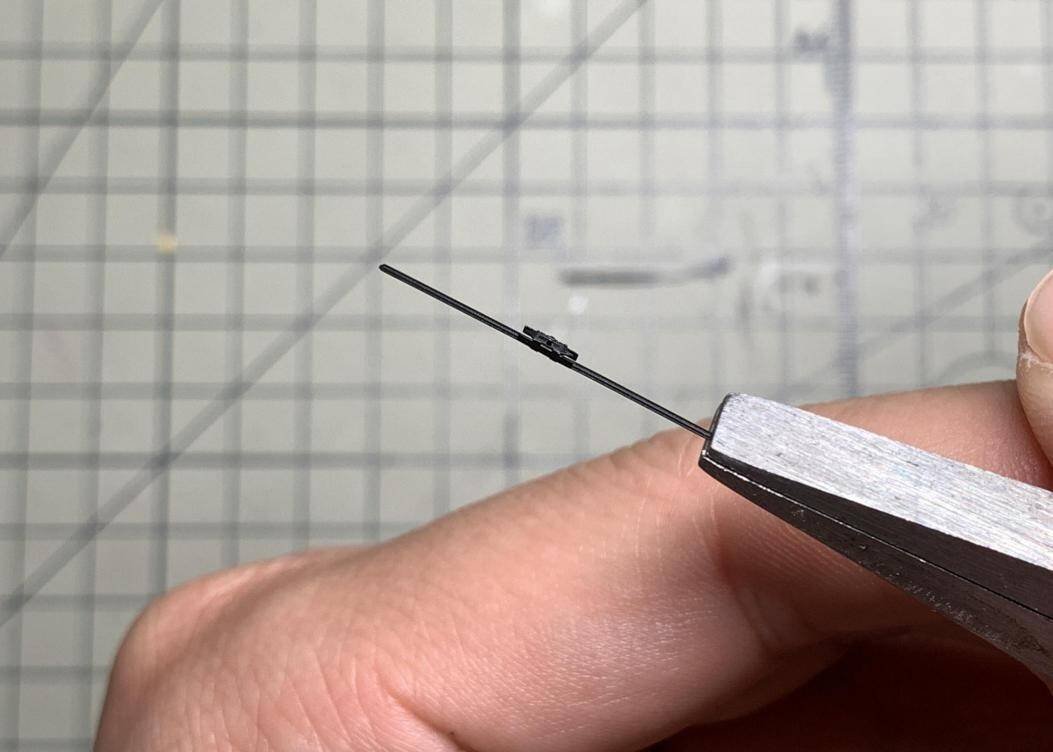
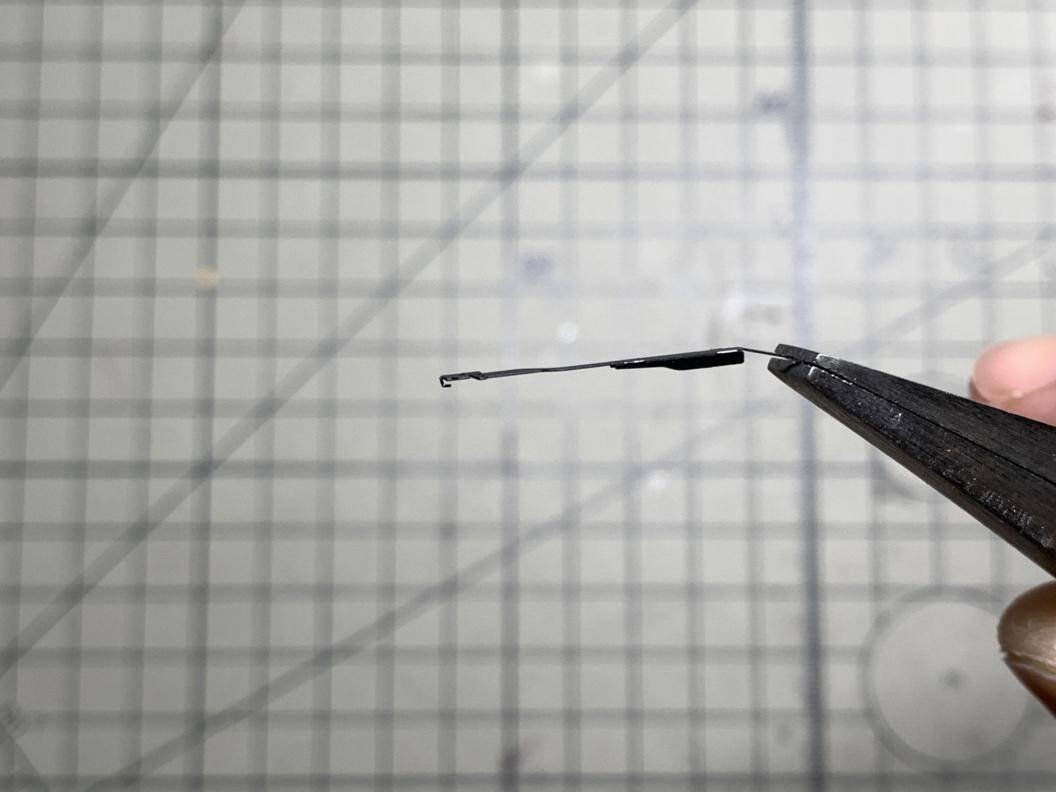
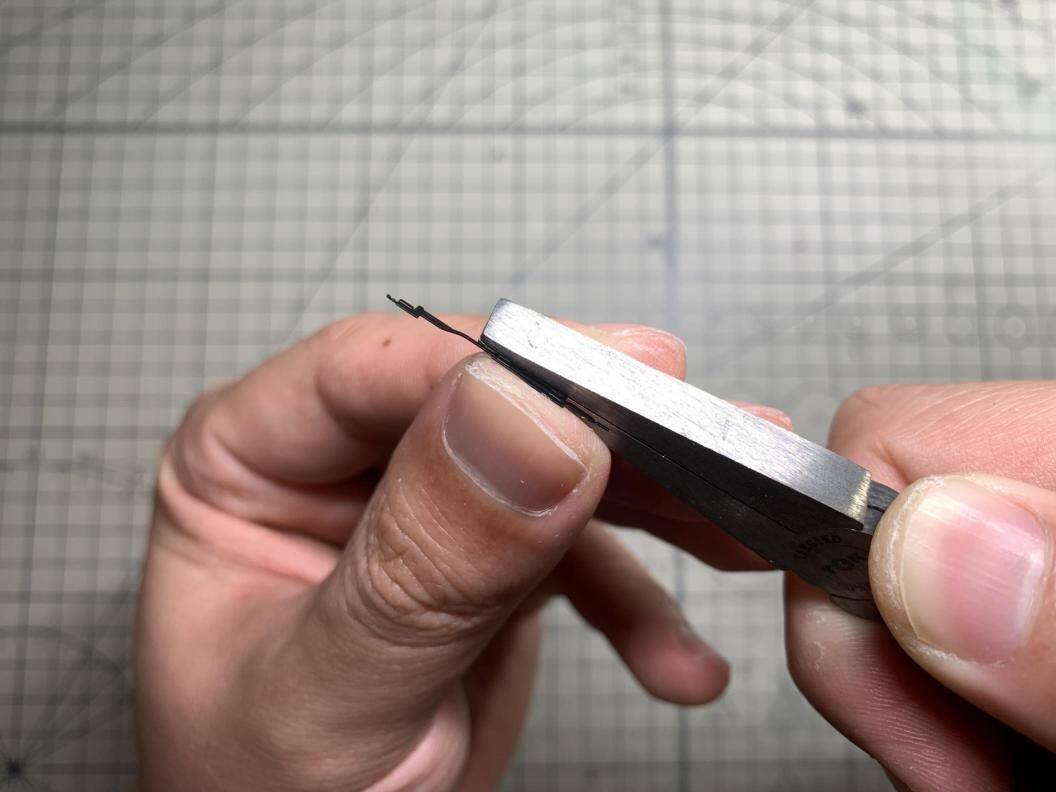
The wiper assembly requires careful handling of the etched bracket and blade. Pass the wiper blade through the square hole of the water hanging bracket and fix it in the center. Then pass the buckle of the swing arm head through the hole in the middle of the wiper bracket to complete the assembly.
Final Assembly
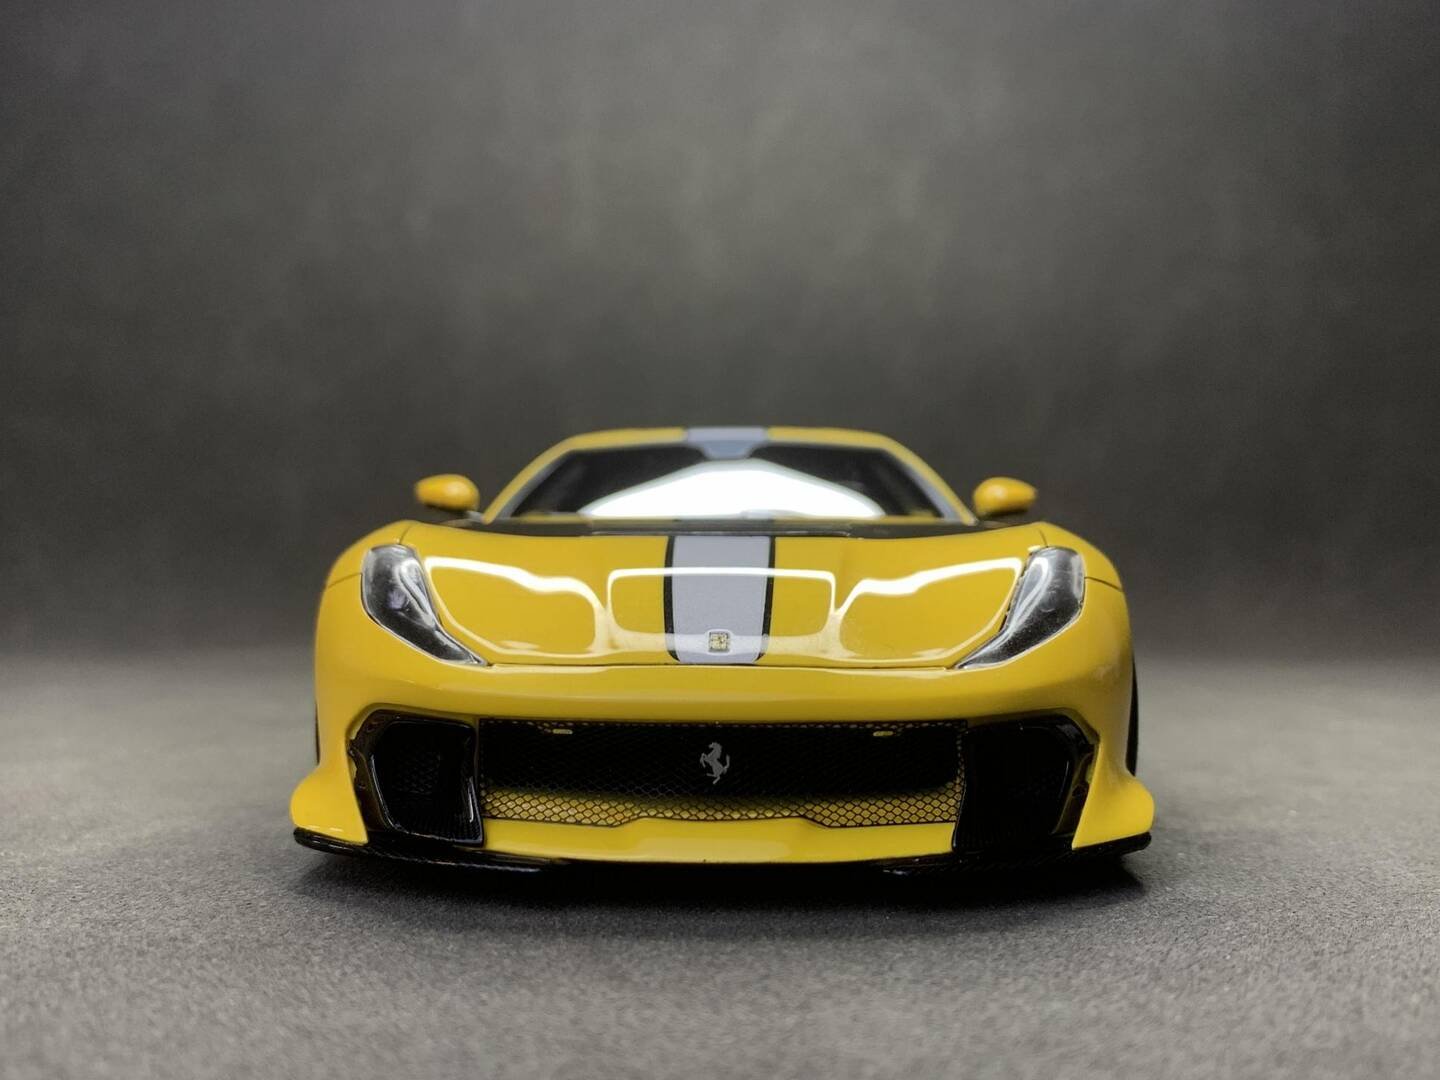
The air intake grille at the bottom of the front of the car needs to be compared in advance and bent at a small angle. Alphamodel is accurate in mold opening, and you only need to compare the slots. When dispensing glue, it is recommended to use jelly-like instant glue for bonding. Pay attention to the amount of glue control; because the headlights do not have black edges to cover the blemishes, the glue can use colorless and transparent UV glue. Even if there is a trace amount of glue overflow, it will not be visible. Wait for the position to be adjusted and then use the ultraviolet light to solidify.
Next: Part 10 — Exhibition & Showcase
Advanced Creators
Ferrari 812 Competizione Build Guide — Part 10: Exhibition & Showcase
Alpha Model AM02-0046 · Build by breakwong
Completed Build — Gallery
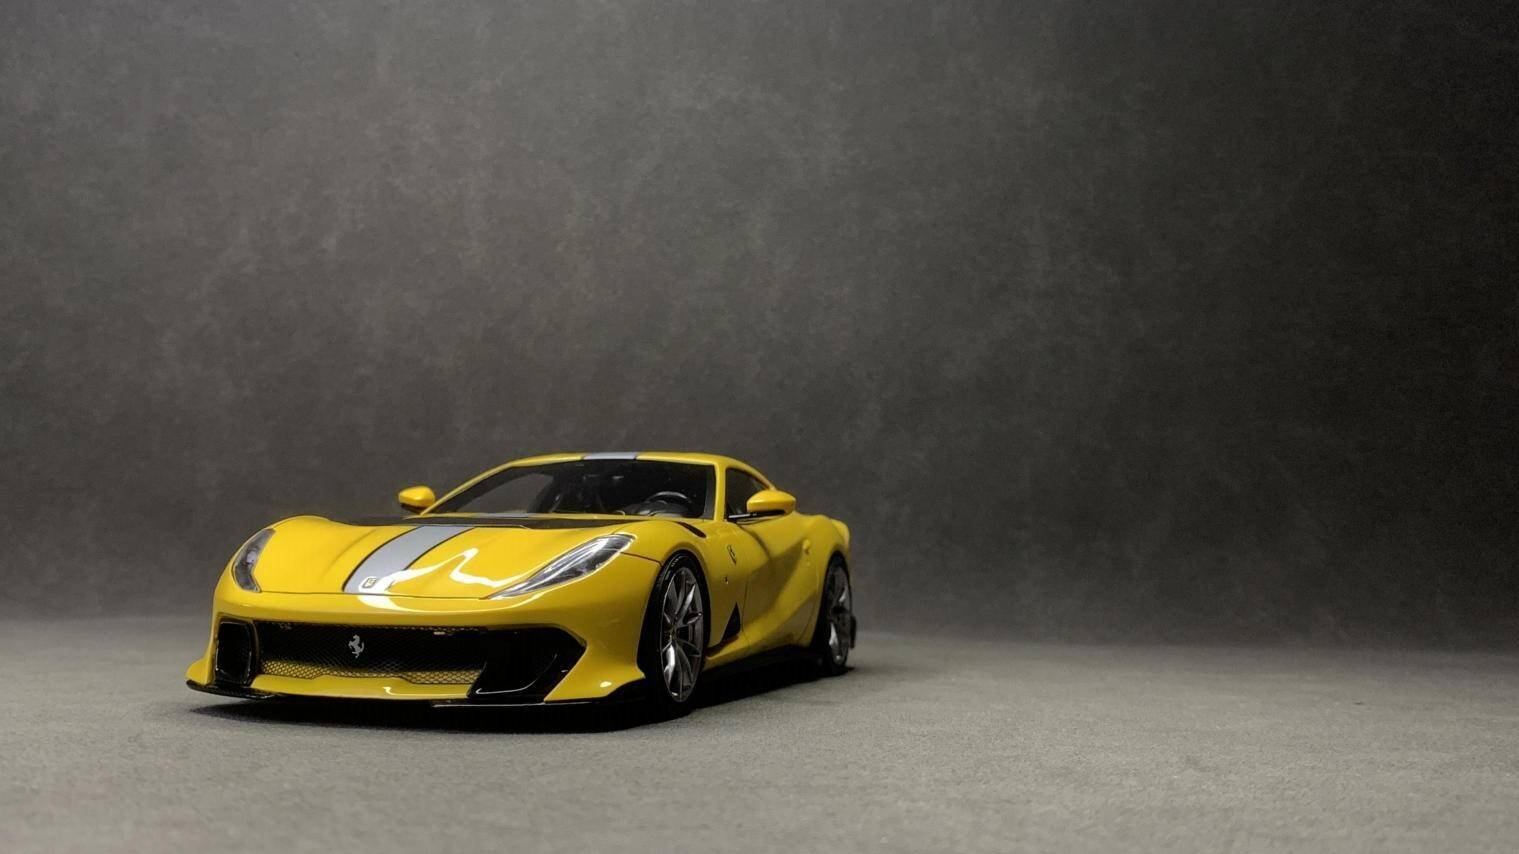
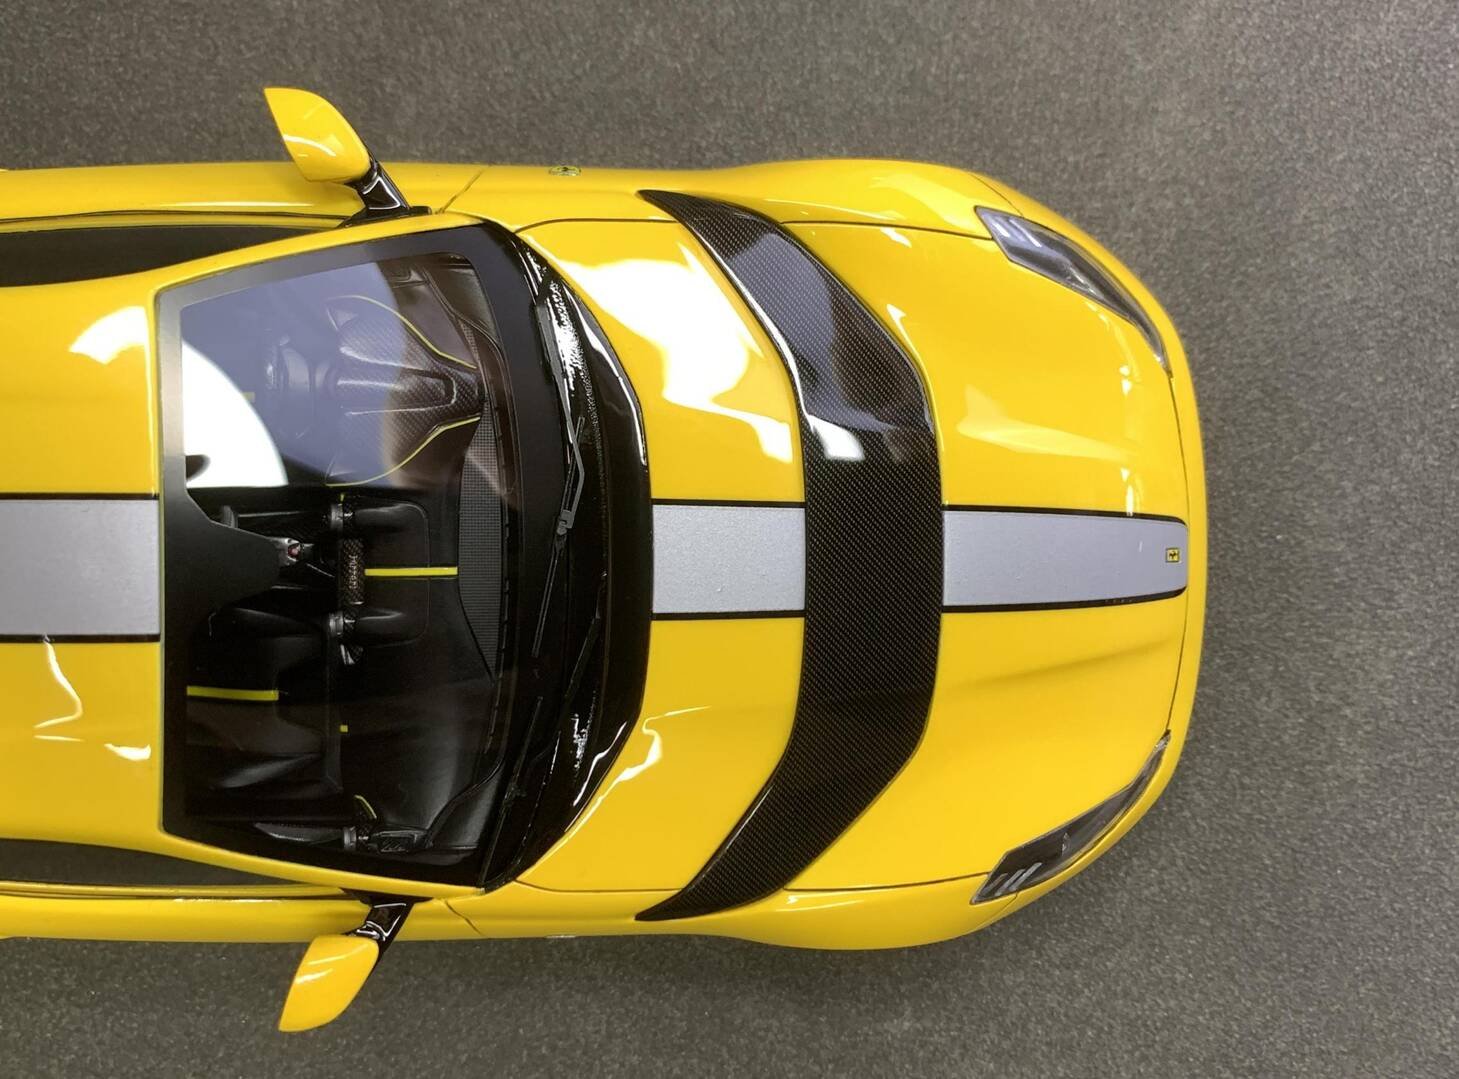
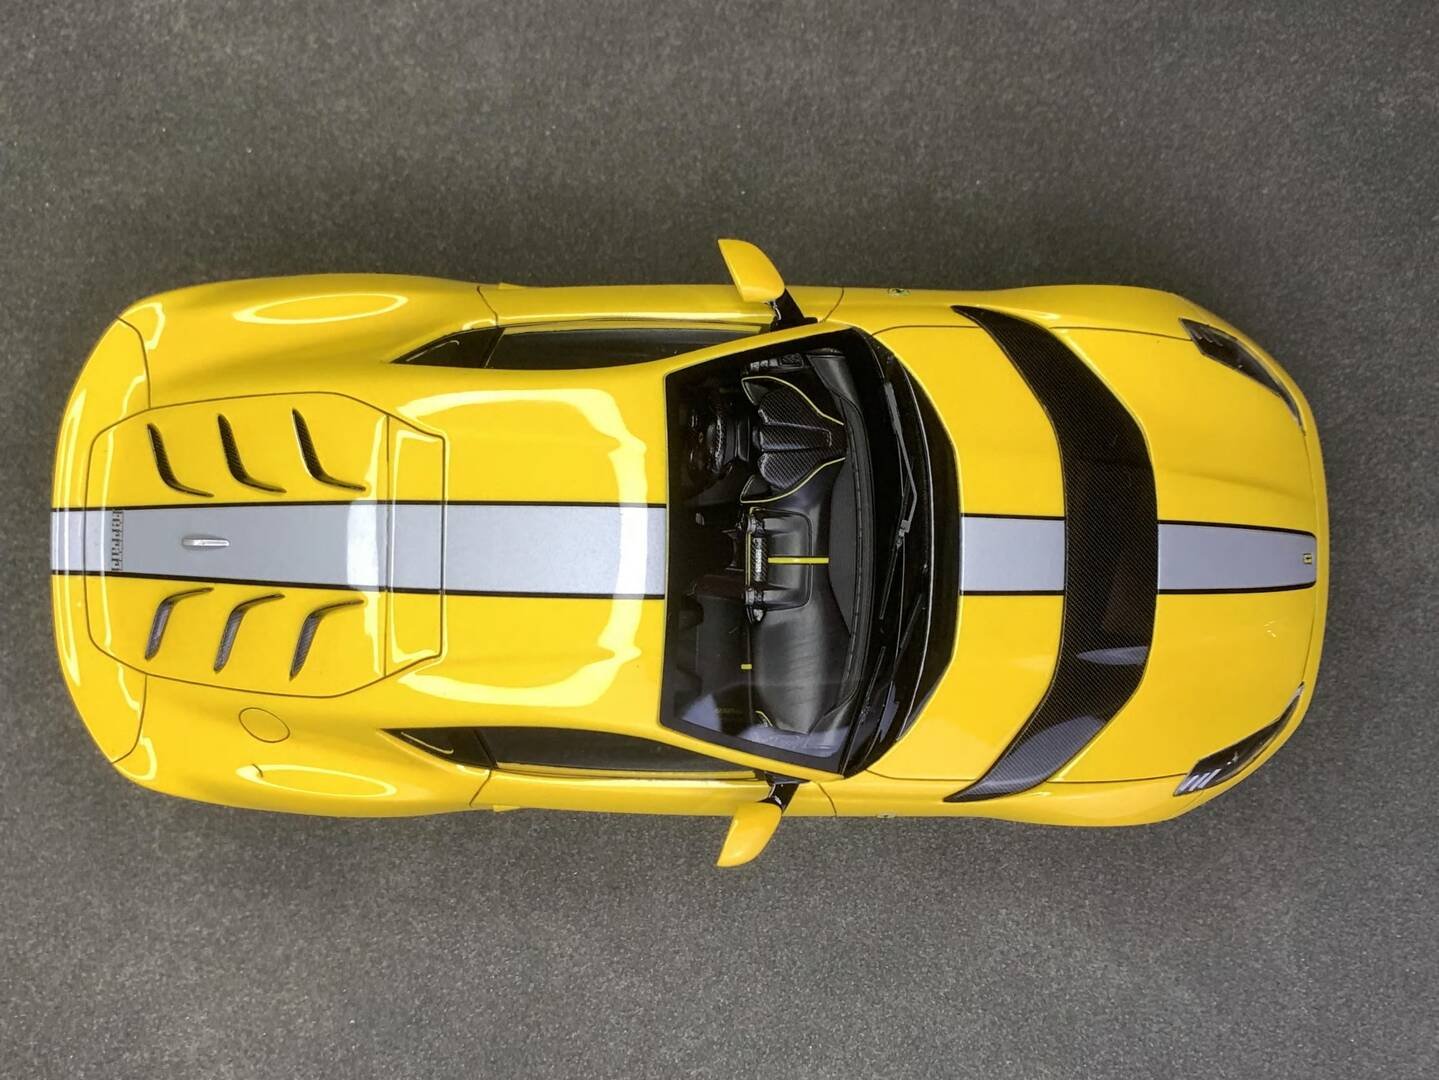
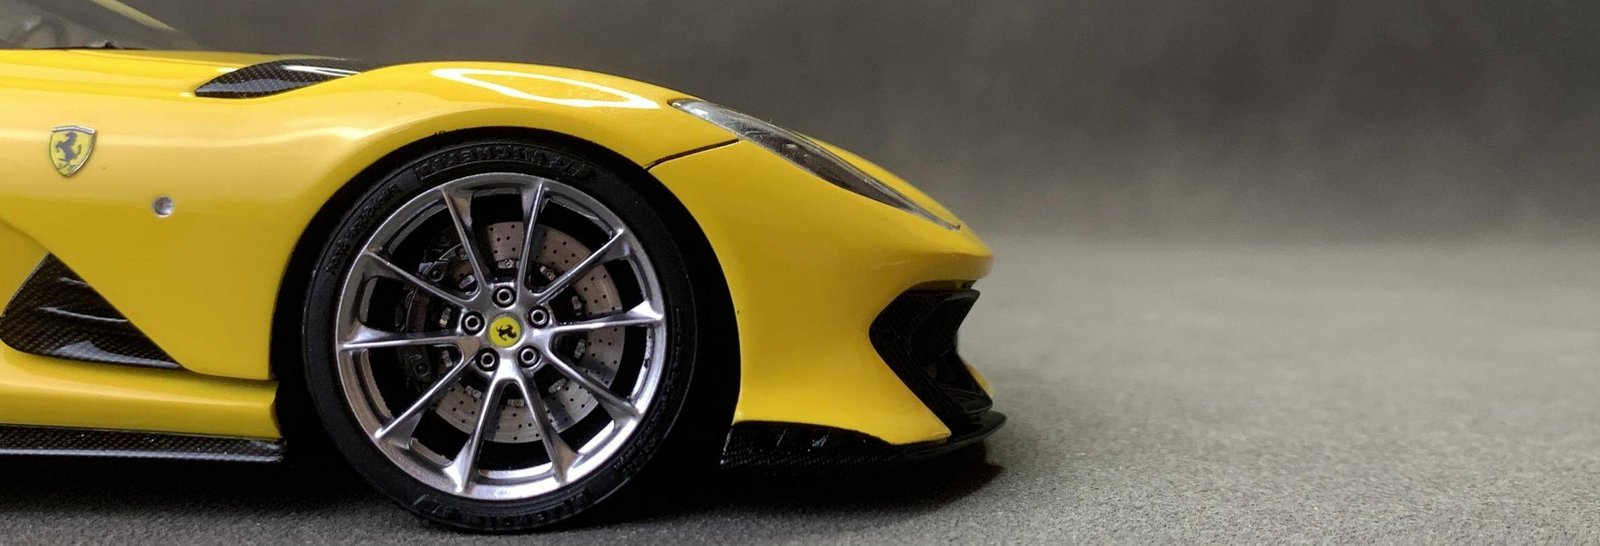
The Ferrari 812 Competizione model is now complete. This 1/24 scale full detail kit by AlphaModel captures the essence of one of Ferrari's most exclusive limited-edition models. From the meticulously applied carbon fiber decals to the hand-painted yellow body with orange tint, every detail has been carefully crafted to replicate the real car's stunning presence.
Build Summary
This build demonstrates the full potential of the AlphaModel AM02-0046 kit. Key highlights include:
- Custom mixed yellow-orange main color for enhanced dimensionality
- Carbon fiber water stickers on front splitter, hood, side skirts, air guides, rear diffuser and mirrors
- Amino varnish mirror finish on the complete body shell
- Etched parts for brake components, foot pads, seat belts and interior details
- Enamel wash technique for stitching lines and letter logos on foot pads
- Finisher's FX-10 bright chrome wheel hubs
- Detailed wiper assembly from etched parts
- UV glue headlight installation for invisible bonding
— End —