
 Advanced Creators
From Box to Beauty
A Ferrari F1 SF23 Build — Chapter 1: Background
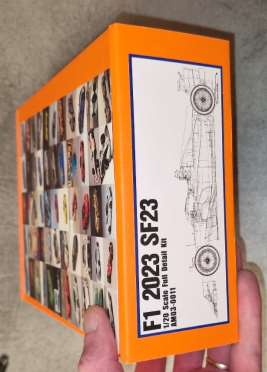
Before we touch a single resin part, let's meet the car and the project that inspired this build — a 1/20 scale full-detail kit of the Ferrari SF-23, reference AM03-0011, produced by Alpha Model, and the story behind PJ's piece — "Vamos!!"
The Car Behind the Build
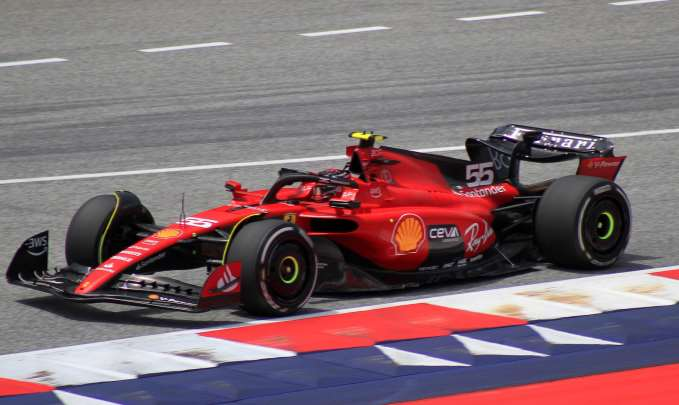
The SF-23 was built by Scuderia Ferrari for the 2023 F1 World Championship. It was driven by Charles Leclerc and Carlos Sainz, where they collected 406 championship points and finished 3rd in the Constructors' Championship. It was the only non-Red Bull car that could secure a win during the 2023 season.
Technical Specifications
| Chassis | Carbon-fibre composite with survival cell and honeycomb structure |
| Suspension (front) | Double wishbone push-rod |
| Suspension (rear) | Double wishbone pull-rod |
| Engine | Ferrari 066/10 — 1.6 L direct-injection V6 turbo, rev-limited to 15,000 RPM |
| Layout | Mid-mounted, rear-wheel drive |
| Electric Motor | Kinetic and thermal energy recovery systems (MGU-K / MGU-H) |
| Brakes | Brembo |
| Tyres | Pirelli P Zero (Dry / Slick) |
| Fuel | Shell V-Power Nitro+ Racing 95 RON unleaded 90% / Shell V-Power Ethanol E10 10% |
| Lubricants | Shell Helix Ultra / Pennzoil Ultra Platinum (United States races only) |
The Inspiration — "Vamos!!"
The idea for this assembly rooted in my love for Spa-Francorchamps, and the wonderful time Carlos gave us during his time at Ferrari. It is in his honour that I called this piece Vamos!!
To say it in the wonderful language of the Scuderia: Questo non è un addio ma solo un arrivederci!! ("This is not a goodbye but only a see you later.")
To say it in Carlos Sainz's words: Smooooooth operator!
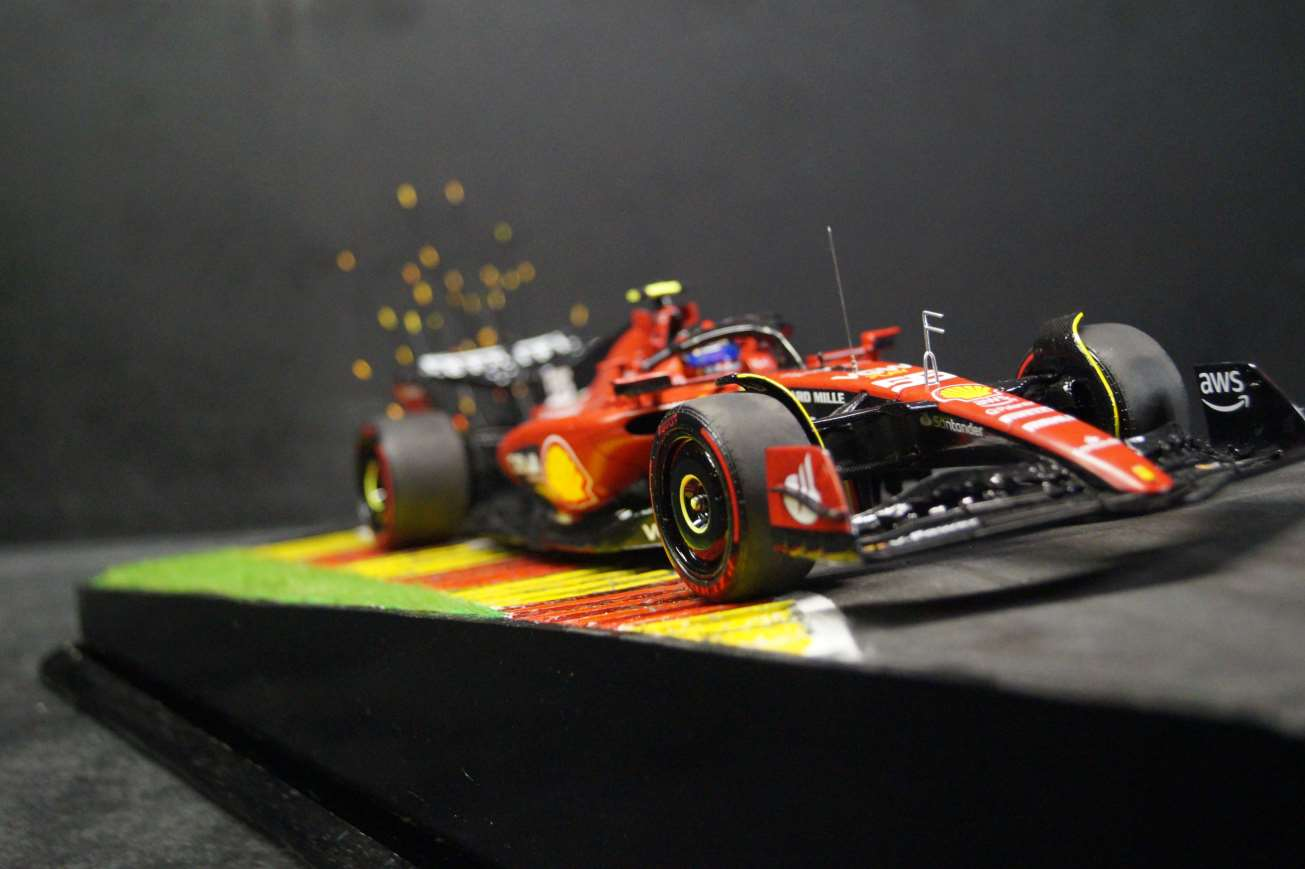
A car, a corner, a driver, a piece. Up next: Chapter 2: Unboxing & First Impressions.
— Build by PJ's Scaleworks
Advanced Creators
From Box to Beauty
A Ferrari F1 SF23 Build — Chapter 2: Unboxing & First Impressions
One of the best parts of building is opening the box and admiring all the pieces that will soon be built. The first time you see the SF-23 kit laid out, you immediately understand why this is one of Alpha Model's flagship releases.
Step 1 — A Small Test Fit First
A small test fit of the body is always advised before starting, to capture any major works before you start painting. I dry-fit the main body halves, the engine cover, and the sidepods to make sure the joints sit well before any paint goes near them.
Step 2 — Unboxing
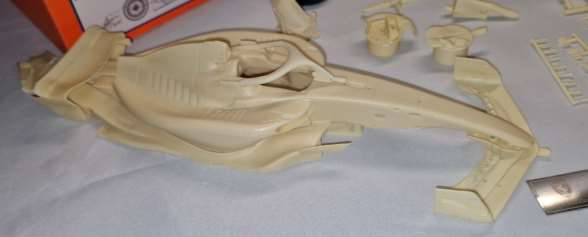
Since Alpha Model uses very fine and delicate castings, it is wise to do a thorough inspection of all the components. In my kit, the rear hub and spoiler attachment was damaged — but even though customer service offered a replacement, I was able to fix the damage using some super glue and sanding. Once all the content is checked and okay, you can start the preparations.

Step 3 — Why Alpha Model's SF-23 Stands Out
By the close collaboration they have with renowned brands, Alpha Model is able to capture the forms and details of the car as no other. Where the castings are too small to be made, they provide 3D-printed parts or photo-etch pieces.
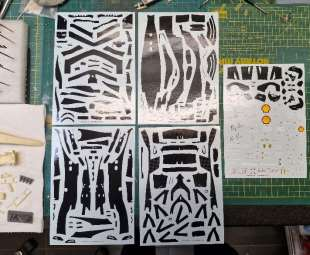
And since the SF-23 is mostly made of carbon, they have 5 sheets of pre-cut carbon decals to go all around the car. Apart from the five carbon sheets, there is also an extra decal sheet — that allows you to build whatever version you want.
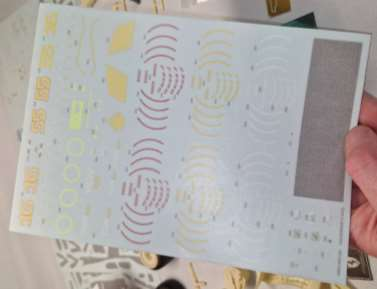
The quality is undeniable. Even a damaged part, with CA and a little sanding, salvages cleanly — which is a real testament to the cast resin quality.
Up next: Chapter 3: Preparation Stage — Inspection, Sanding & Scribing.
— Build by PJ's Scaleworks
Advanced Creators
From Box to Beauty
A Ferrari F1 SF23 Build — Chapter 3: Preparation Stage
When I start the preparation stage, the first thing I do is a close-up inspection of all the parts and compare them to the subject that they need to represent. This is the moment to remove any moulding artefacts and prepare the surface for paint.
Step 1 — Close-Up Inspection of Every Part
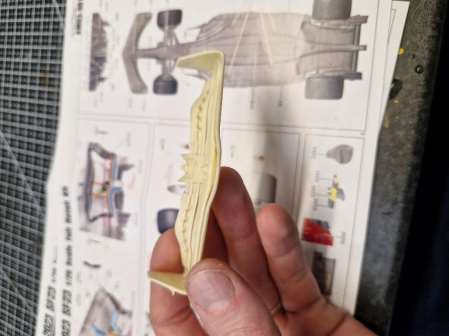
For instance, in the SF-23, when looking at the front and rear spoilers, they were cast as one piece — where as the actual SF-23 has gaps between the spoilers to let air pass through. I repeat this for all the parts and remove all the things that don't belong on the car.
Step 2 — Sanding for Primer Adhesion
Also, make sure to lightly sand all the larger areas to make sure the primer adheres well in the next steps. I prefer to use Trizact 3000 sponges — the sponge makes sure you're not sanding too hard and lose some of the details.
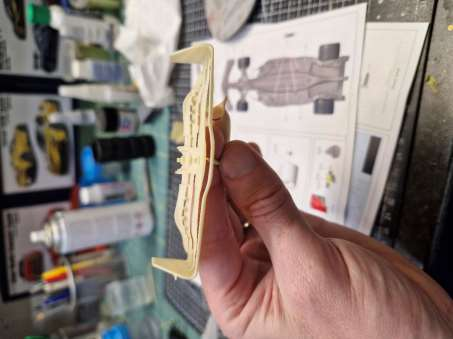
I find it best to do this clean-up as a first step, since this is a messy step that creates a lot of small pieces and dust that you don't want on your desk when going into painting and assembling mode.
Step 3 — Deepening the Panel Lines
For the body itself, I use the Tamiya panel scriber to deepen the panel lines. This creates a natural shadow falling in the panel lines and gives the car a realistic look. Using different size scribers even enhances the realistic look of your project.
Tip: When scribing resin, do it before wash. Once primer is on the resin, scribing tears the primer rather than cutting cleanly.
Up next: Chapter 4: Wash, Wash, Wash!!
— Build by PJ's Scaleworks
Advanced Creators
From Box to Beauty
A Ferrari F1 SF23 Build — Chapter 4: Wash, Wash, Wash!!
Probably the most important step in the building process is the wash stage. The smoother your resin comes out, the more important this step becomes. Skip the wash and your paint will fish-eye and never cure properly.
Step 1 — Warm Soapy Water
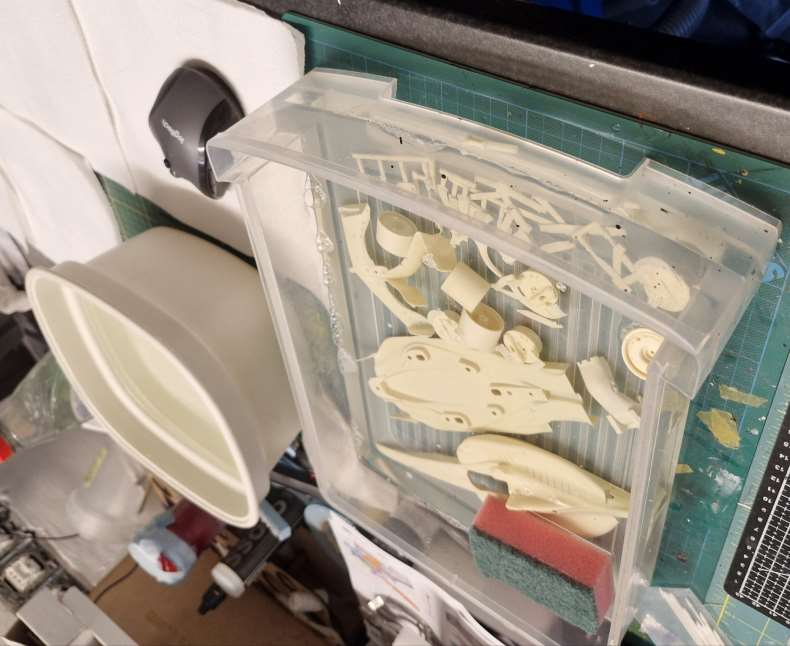
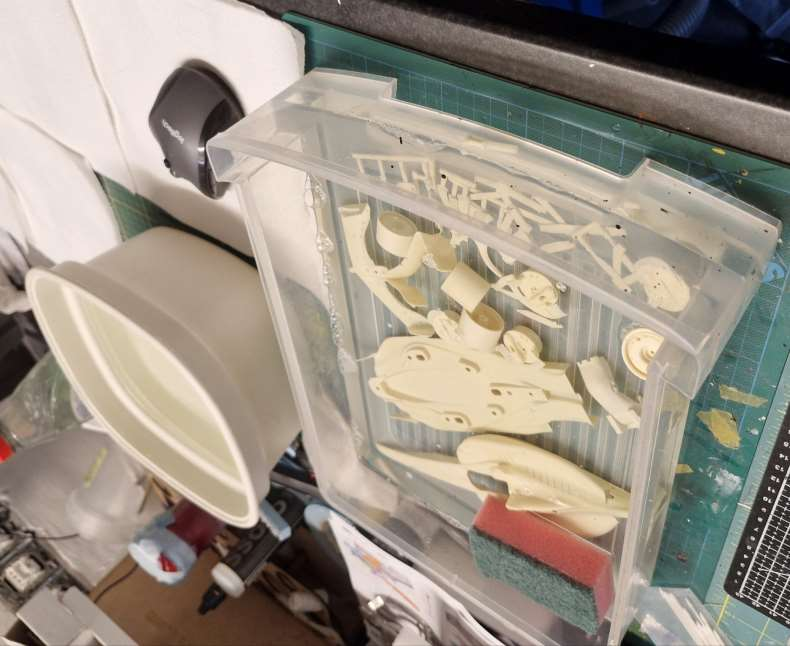
When working with cast resin pieces, and after sanding everything down, the wash stage is critical. Just some lukewarm water with a few drops of detergent is mostly enough to clear any greasy areas.
Step 2 — Scrubbing
I use a simple sponge (not the rough part) to wipe as much as possible away, and an old toothbrush to be able to get into the smaller areas.
Step 3 — Drying & Storing
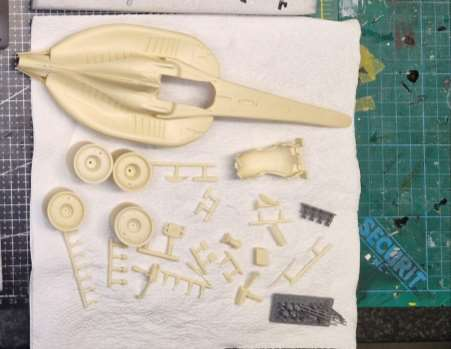
Afterwards, I use some kitchen paper to leave them to dry. When drying, I also have some dust-free boxes to store them in. This ensures that there is no dust getting back on the already-cleaned parts.
Step 4 — The Final Wipe
When dry (mostly 24-48 hours later), you can use a damp cloth made damp with some cellulose thinner to wipe away any of the residues still left behind by the water. This step is what separates a good primer job from a great one.
Tip: The cellulose thinner wipe is the key. Water alone leaves a thin film of surfactant residue; the thinner dissolves and lifts that film. Try it — your primer will stick like it's never stuck before.
All parts are washed, dried, and ready. Up next: Chapter 5: Assembly Stage — Carbon Mania.
— Build by PJ's Scaleworks
Advanced Creators
From Box to Beauty
A Ferrari F1 SF23 Build — Chapter 5: Assembly Stage — Carbon Mania
As mentioned in the unboxing, the SF-23 is actually almost completely made up out of carbon. And so the next stage is an orgy of carbon decals — more than 200 pieces, each one placed by hand, each one aligned to its neighbouring weave direction.
Step 1 — Prime & Paint the Carbon Parts
So I first primed and painted all the pieces that will only consist out of carbon in Tamiya X-18 (semi-gloss black). This combines well with the carbon colour, and the semi-matte feel of the paint really grips on the decals helping them to stay better in place.
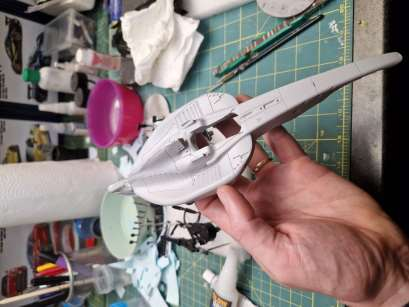
Step 2 — The Carbon Decal Workstation
To bring this process to a good end (there are more than 200 carbon decals to be applied), I use bottled water, a pencil dedicated to decals, some cotton swabs, and a hair dryer. Since they are templated decals, they are perfectly shaped to go on the car.
Step 3 — Application Technique
I noticed that using warm water makes the decals too soft to be handled, so I soak them for 10 seconds, put them on kitchen paper, and then on the model. When I'm happy with the position, I use the hairdryer to soften the decal. That makes them conform to all the shapes underneath.
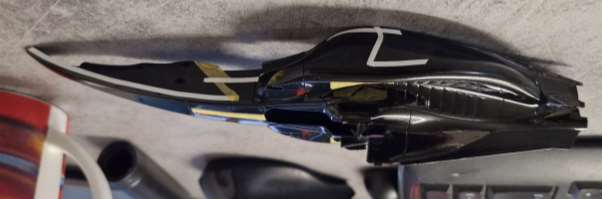
Step 4 — Clear Coating the Carbon
When done, they were all clear-coated. The clear coat locks the decals under a unifying sheen and matches the satin look of real autoclaved carbon.
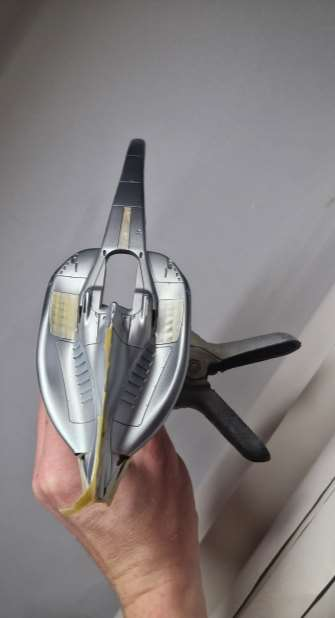
Tip: The 10-second soak is the secret. Long enough for the decal to release from its backing, short enough that the decal stays firm enough to position with tweezers. Once on the model, the heat from the dryer does the conforming.
Carbon mania is finished. The model is starting to look like the real SF-23, panel by panel. Up next: Chapter 6: Body Shell — Three-Part Approach.
— Build by PJ's Scaleworks
Advanced Creators
From Box to Beauty
A Ferrari F1 SF23 Build — Chapter 6: Body Shell — The Three-Part Approach
The way I approached this body shell is not my standard way of working, but needs some explanation as to why and how I did it. The SF-23 body consists of different parts, with areas that are carbon (which are naturally shiny by the resin used to make the carbon) and areas that are painted in the matte-red SF-23 colour (Pantone 185C) — and that combination caused an interesting challenge.
The Setup — Why Masking on Matte Red Is a Headache
You can imagine the headache this caused. Doing the paint in a particular order eliminated the need to use masking tape on a matte red body, and limited the height differences between the different paint layers.
Part One — The Steps
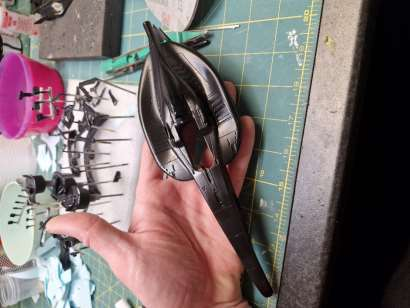
- Painting the body with Tamiya Fine Grey Primer.
- Apply Tamiya X-18 (semi-gloss black) over the entire body.
- Apply all the carbon decals in their correct positions.
- Clear-coat the complete body in Strelt Blister 2K Gloss.
- Wait a week for full cure.
- Mask off all the carbon-decal-coated areas.
The Problem Solved — Part Two
The biggest challenge you have with this approach is that black really isn't a good base colour to use for red. I tested some approaches on plastic spoons — this is what a hobby-modeller's lunchbox looks like — and this one made the fit.
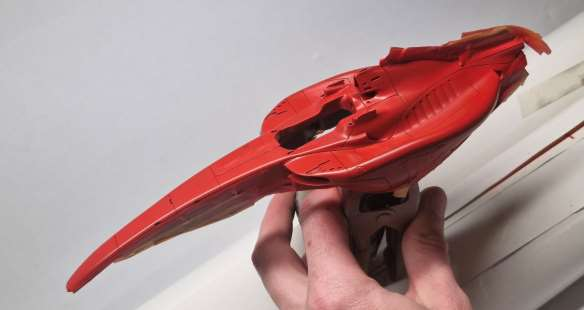
I used Alclad Aluminium on top of the black, and then used the Pantone 185C red on top of the Alclad. And the red popped out as expected.
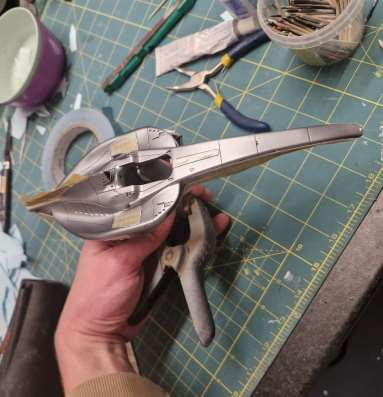
Part Three — The Reveal
After waiting for about 3 days, I was able to peel the masking tape off the carbon decals. And now you can see that the process paid off. The different shines are achieved.

So then you can apply all the other decals.
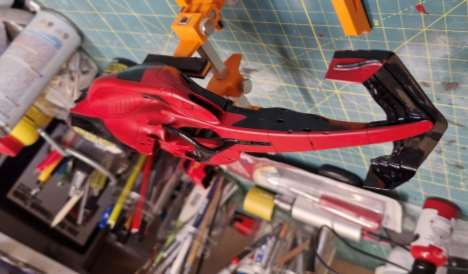
Why this works: By putting the carbon decals down first, masking only the carbon with tape, and then painting the red directly onto the (unmasked) areas, the red paint doesn't have to fight against masking-tape adhesion on a matte surface. The result is a perfect inter-material line, with no risk of peel-up or bleed.
Body is done. Up next: Chapter 7: Extras — Diorama, Driver Figure & Base.
— Build by PJ's Scaleworks
Advanced Creators
From Box to Beauty
A Ferrari F1 SF23 Build — Chapter 7: Extras — Diorama, Driver & Base
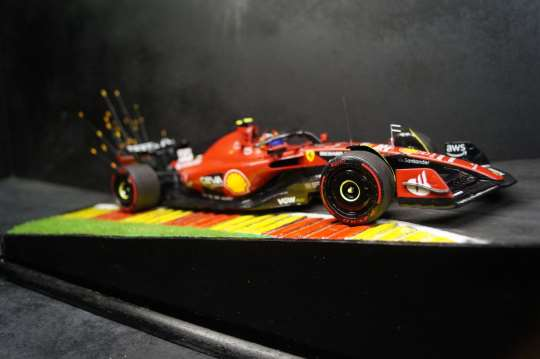
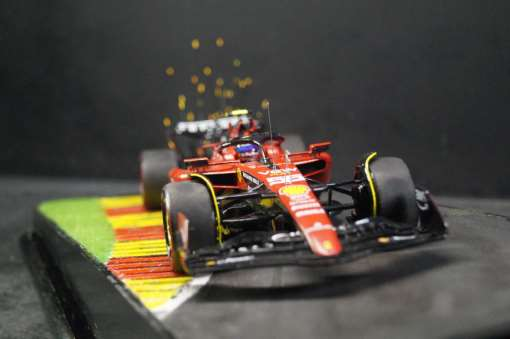
When starting this model I had a clear plan in mind of what I wanted to do. Since Spa-Francorchamps is my favourite race track, I knew I had to build it on the track. But you can't have a car driving on the track without the driver and the track.
Step 1 — The Driver Figure
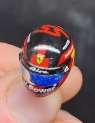
I scaled and printed an F1 driver figure including HANS and helmet. Since the helmet was the most visible and not included in the kit, there was a lot of trying to find the best way to go. This was done by a lot of masking, some detail painting, and a holographic foil for the visor.
And finally, some decals from the spare parts box gave it the Carlos Sainz name on the visor strip and the helmet.
Step 2 — The Spa-Francorchamps Base
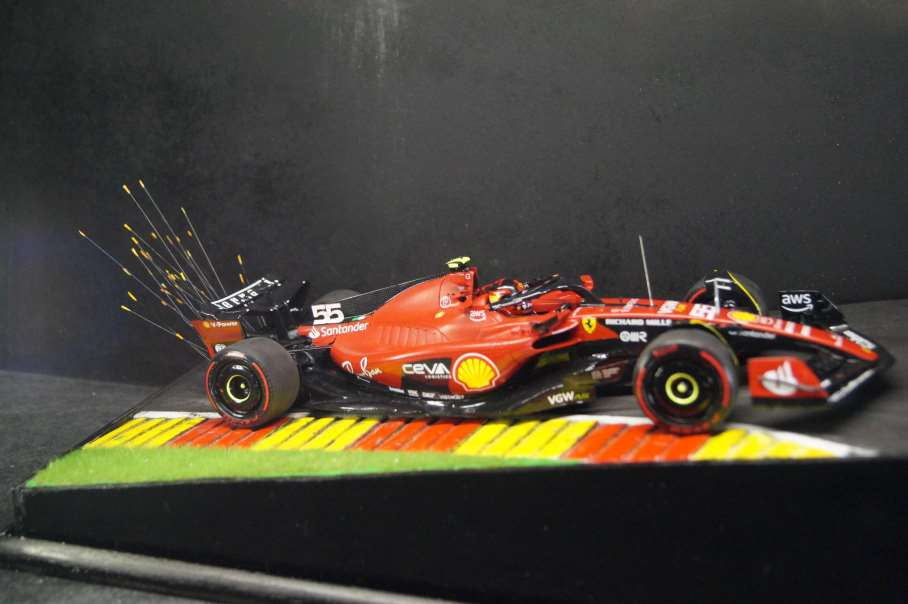
For the base, I started with some plywood and worked out the idea I had sitting in my mind for a while. Tarmac was made with AK Terrains Asphalt. The kerbstones were designed and printed by myself based on photo material I had from visiting Spa.
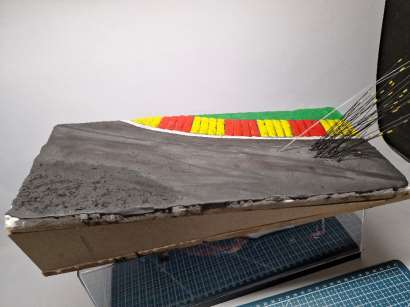
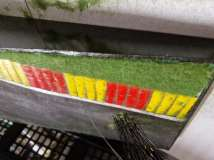
Grass was applied with a static applicator to give a realistic look, and some small daisies were also printed to be placed in the grass.
Step 3 — The Sparks!
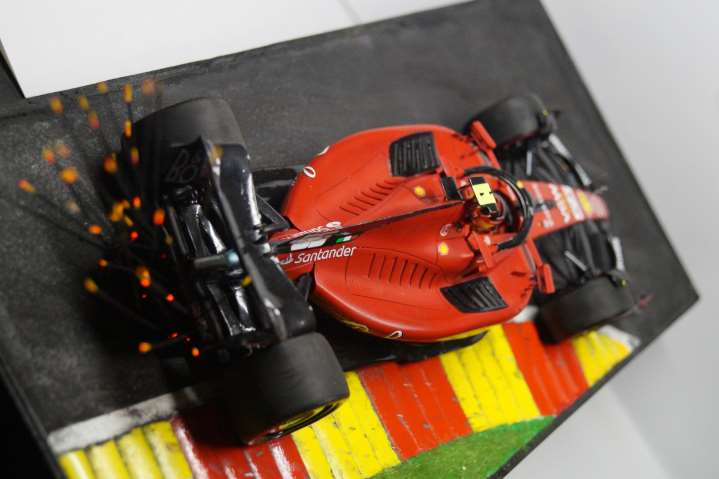
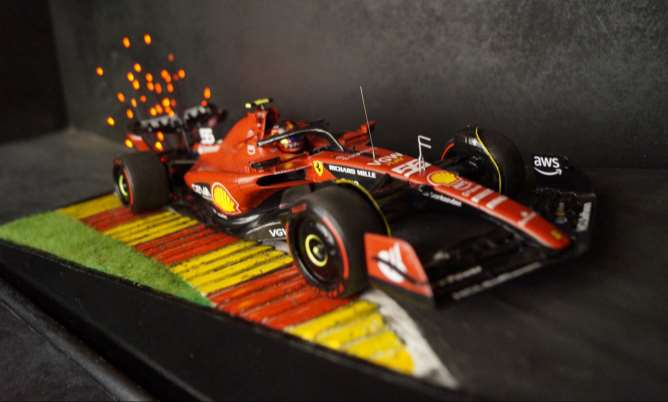
The stuff you see coming out of the back of the plate is glass-fibre that will be used to give the sparking effect F1 cars have in this specific corner (the famous Eau Rouge sparks of an F1 car at full chat).
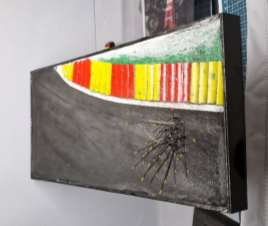
Step 4 — The Base Frame & Display Case
The base was finished around with black-painted plywood, and a baseplate will be added so the home-made plastic case can fit over it.
A car, a corner, a driver. The model has gone from a kit to a piece. Vamos! Up next: Chapter 8: Final Assembly & Showcase.
— Build by PJ's Scaleworks
Advanced Creators
From Box to Beauty
A Ferrari F1 SF23 Build — Chapter 8: Final Assembly & Showcase
Now that all components are prepared, we can start the final assembly. Then the car gets placed on its Spa corner, the camera comes out, and we see if the piece came together the way we hoped.
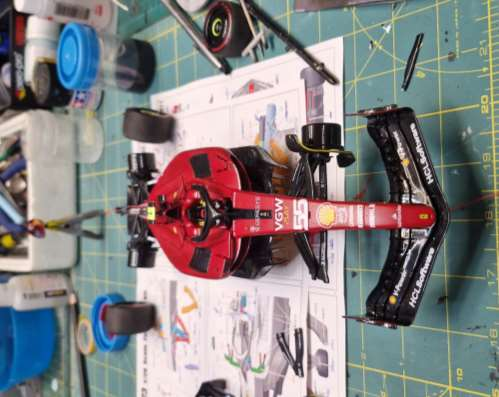
Step 1 — Suspension Installation
First, we install the suspension. Since this one was going on the base in a high-speed corner, I had to make sure the back was slightly lower than the standard position because of the downforce in the corner. This was done by applying some pressure when the glue was drying.
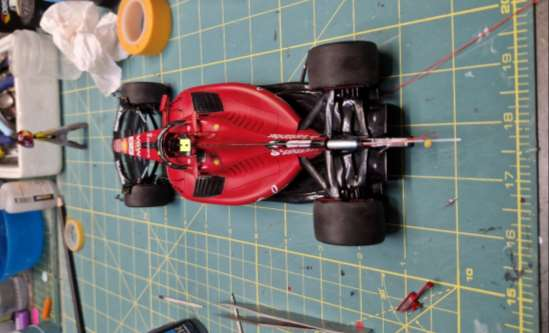
Step 2 — Tyres On
After which I could install the tyres. Not documented, but the tyres were sanded to give a used look, and clear-coated at the sidewalls (since those have a natural sheen of new rubber when fresh, and a satin finish when worn).
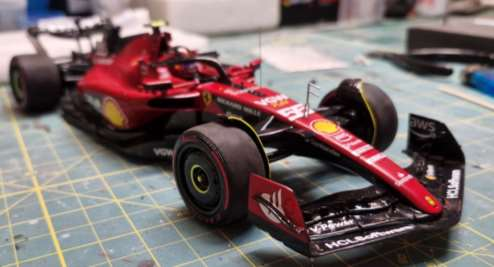
Step 3 — Antennas, Driver & Final Touches
All that was left to do was to install the antennas and Carlos's head — and we could move on to place it on the base and take some better photos of the end stage.
— Showcase —
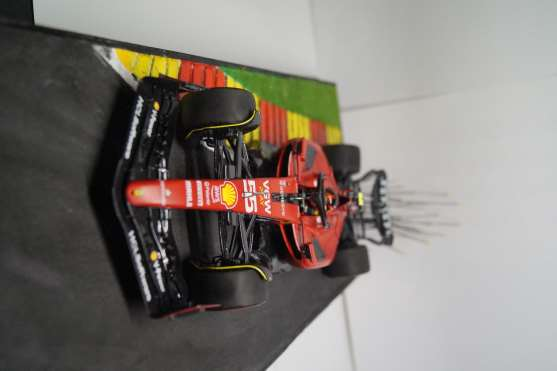
A Final Reflection
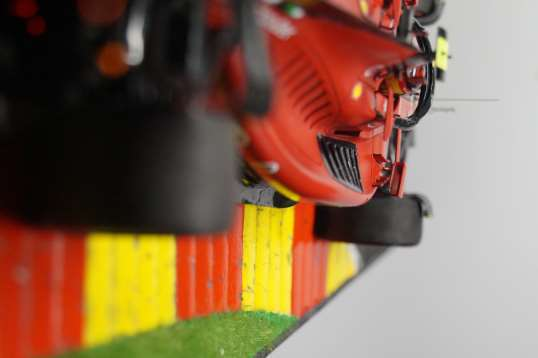
The idea for this assembly rooted in my love for Spa, and the wonderful time Carlos gave us during his time at Ferrari. I tried capturing the moment every photographer likes to capture right in front of the camera — and thus capturing the action in that moment.
Acknowledgements:
- Le Petit Matos for the stand that helped when applying the decals.
- A lot of visitors at the hobby shows last year who showed interest and helped me on some dilemmas during the build.
- And of course, Alpha Model for providing such a high-quality product of a wonderful subject.
Questo non è un addio ma solo un arrivederci!! Smooooooth operator!
About the Builder
- Kit: Alpha Model 1/20 Ferrari SF23 (AM03-0011)
- Build & Documentation by: PJ's Scaleworks
- Contact:
- Facebook: https://www.facebook.com/pieterjan.vermeire.50/
- Instagram: @pjsscaleworks
- Email: pjsscaleworks@hotmail.com
Thanks,
PJ's Scaleworks