
 Advanced Creators
From Box to Beauty
A Lamborghini Urus Build — Chapter 1: Background
Before we dive into the build, let's take a moment to meet the star of this project — a 1/24 scale full detail kit of the Lamborghini Urus, reference AM02-0021, produced by Alpha Model.
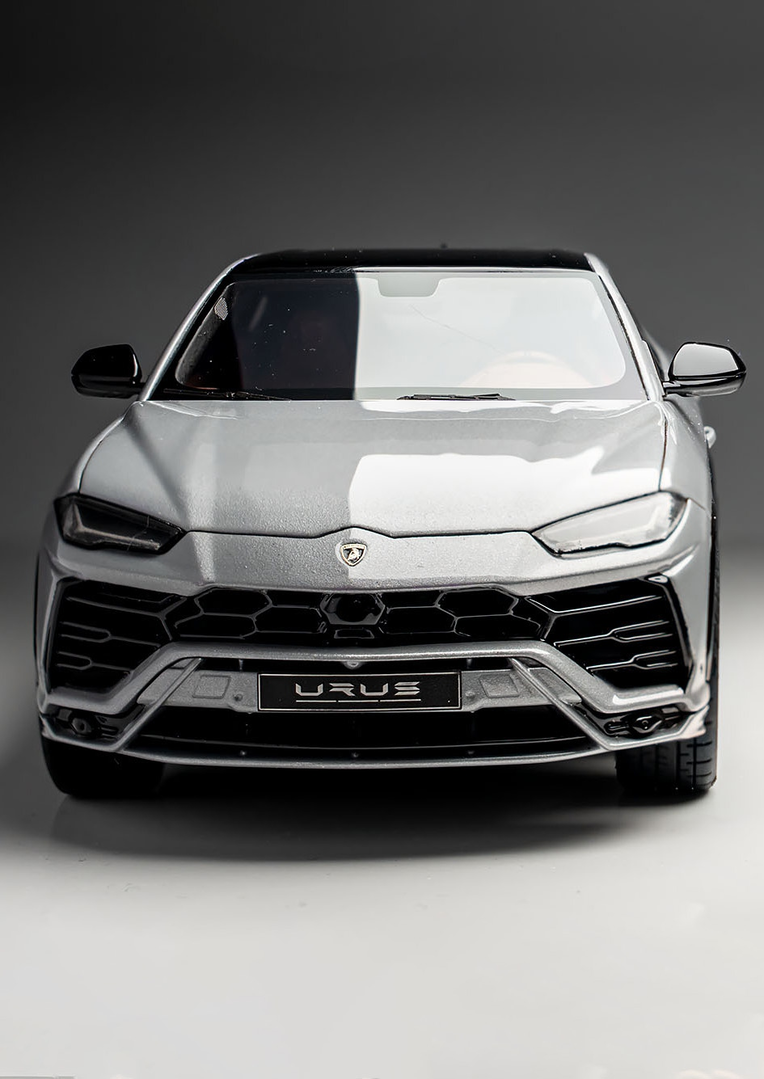
The Real Car Behind the Kit
The Lamborghini Urus is a luxury TSUV manufactured by Italian automobile manufacturer Lamborghini. It was introduced in December 2017 as a 2018 model year production vehicle. The Urus is the first Lamborghini SUV and five-door vehicle in the modern era, and the second SUV in the brand's history after the LM002, which was produced between 1986 and 1993.
Built on the Volkswagen Group MLB Evo platform, the Urus shares many components with other Volkswagen Group luxury SUVs, such as the Audi Q7, Bentley Bentayga, Porsche Cayenne, and Volkswagen Touareg. With a top speed of 305 km/h (190 mph), the Urus is considered as one of the fastest production SUVs in the world.
The name comes from the urus, the ancestor of modern domestic cattle, also known as the aurochs.
Technical Specs
| Engine | 4.0 L FSI Twin-Turbo V8 |
| Power Output | 478 kW (650 PS) |
| Transmission | 8-speed ZF 8HP automatic |
| Wheelbase | 3,002 mm |
| Length | 5,113 mm |
| Width | 2,017 mm |
| Height | 1,638 mm |
| Kerb Weight | 2,200 kg (base, dry) |
Now that we know the beast we're about to recreate, it's time to crack open the box and see what Alpha Model has prepared for us. Stay tuned for Chapter 2: Unboxing!
— mG Car Scale Model Works
Build by Matej Grofelnik
Advanced Creators
From Box to Beauty
A Lamborghini Urus Build — Chapter 2: Unboxing
It's time to start the next ALPHA Model project. This time I chose the performance SUV from Lamborghini. In this chapter, we'll check what is hiding inside the classic blue box from Alpha Models.
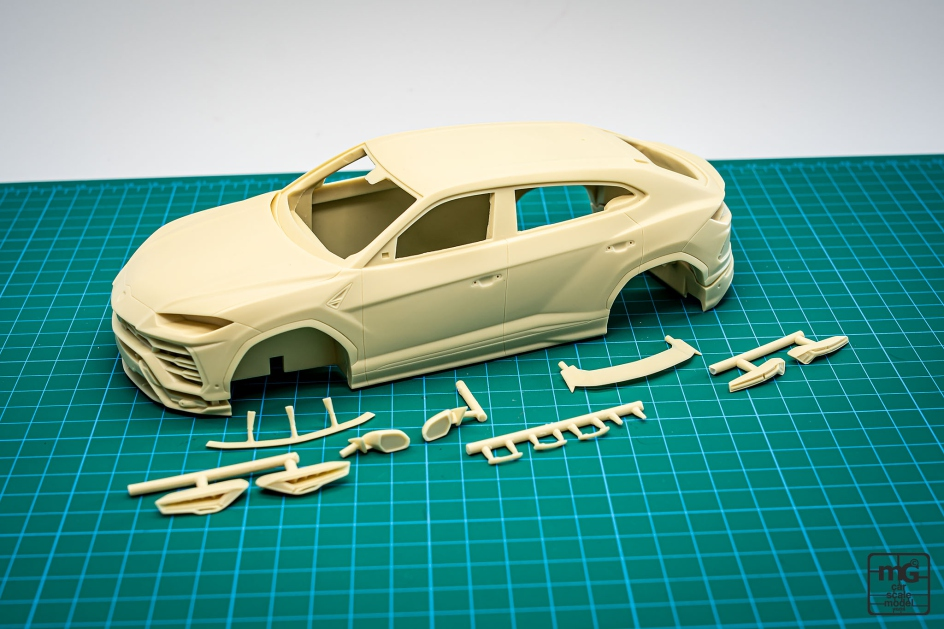
What's Inside the Box
In the box there is everything you need to make an amazing model out of it. Like always with ALPHA Model, they include resin parts, very high quality PE parts and some amazing decals.
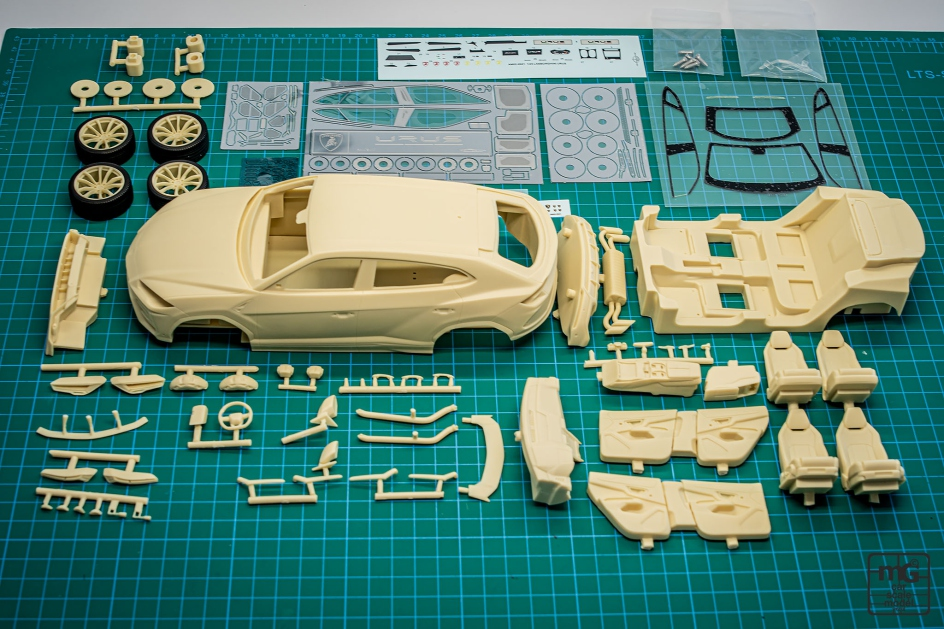
All the resin parts are perfectly casted with no errors — the details on the resin parts are amazing. For the interior this time ALPHA Model included the more sporty 4-seater option.
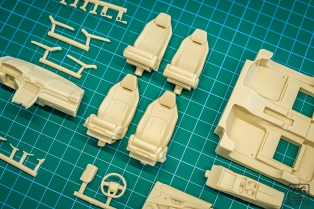
Photo-Etched Parts
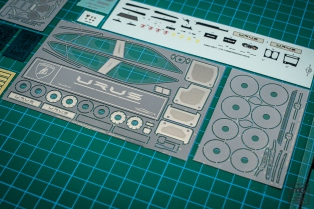
As it goes for the PE parts, they include some meshes, brake discs, metal inlays for brake calipers, some headlight and rear light detail, and also the floor mats.
Decals
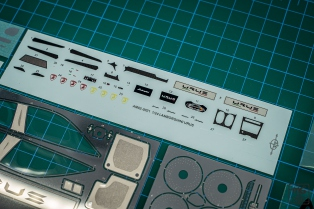
This time, due to the nature of the car, there are not a lot of decals — but ALPHA Model still included all the emblems and some interior carbon fiber details.
A Personal Touch
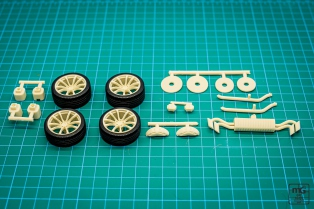
Since I want to add some personal touch to the model, the otherwise really nice wheels and tires included in the kit will get replaced. For this, friends at Geronimoworks prepared some amazing custom-made 3D printed rims and tires.
So make sure to follow me to also see what kind of special paint our friends from Spekter Žalec will prepare for the Urus. Up next: Chapter 3: Preparing the Resin Parts!
— mG Car Scale Model Works
Build by Matej Grofelnik
Advanced Creators
From Box to Beauty
A Lamborghini Urus Build — Chapter 3: Preparing the Resin Parts
Here is the next post of the ALPHA Model Lamborghini Urus. This time I will show you how to prepare the resin parts for priming, painting and clear coating.
Step 1 — Cleaning
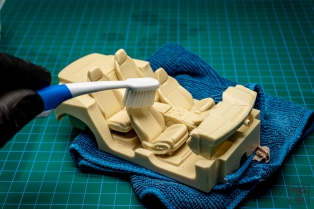
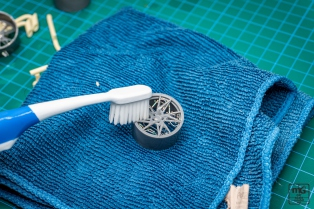
To begin, all the parts are cleaned with warm water and some dishwashing liquid in order to dissolve some possible silicone leftovers from the moulding process. To help reach the tight gaps, different toothbrushes were used. Also during the cleaning process I gave a quick bath to the Geronimoworks wheels and tyres.
Step 2 — Deepening the Panel Gaps
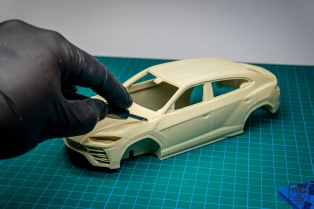
After cleaning all the parts, it is time for deepening the panel gaps on the otherwise amazing body. To do so, some special hook knifes from Dspiae in widths 0.1 mm and 0.2 mm were used.
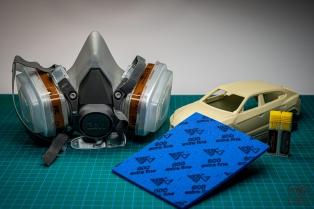
⚠️ Safety Warning: At this point I would like to warn you that the resin particles are extremely unhealthy. So while scribing or sanding them before some paint is applied, always use a good mask and do this in a well-ventilated area. I use this 3M mask with a filter and a particle pre-filter when working with resin or when painting the models, and the mask was supplied by Spekter Žalec.
Step 3 — Cleaning Again
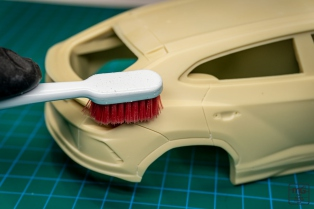
After all the panels are scribed, a quick clean with a toothbrush is made to make sure no residues are left in the panel gaps.
Step 4 — Sanding
The final step for today will be sanding the parts. All parts including the body were sanded with some #800 grit sanding sponge in order to make sure the surface is nice and even before applying paint or primer.
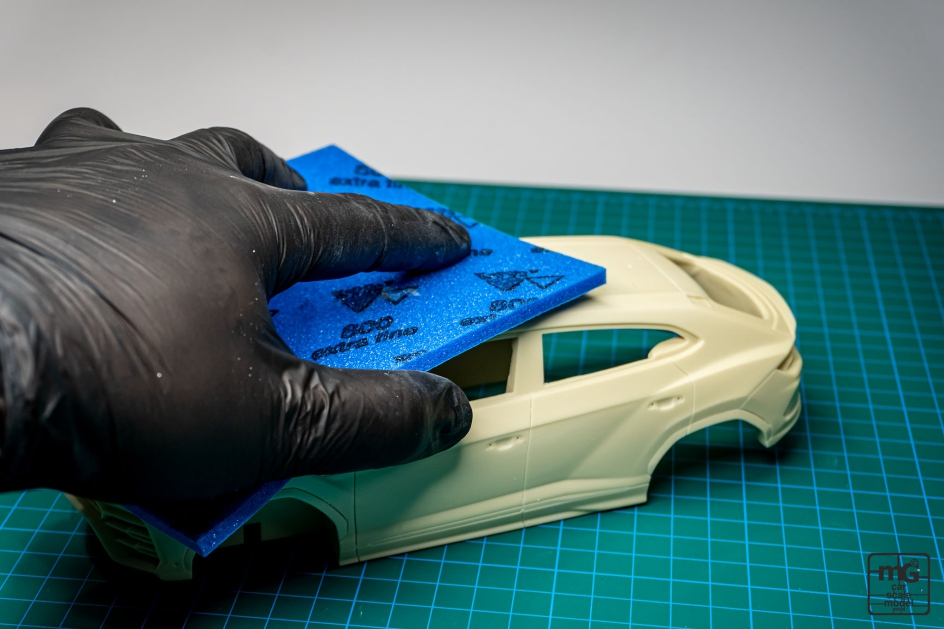
All parts are now clean, scribed and sanded. Next stop: Chapter 4: Painting the Interior — chocolate brown and black with red seat belts, here we come!
— mG Car Scale Model Works
Build by Matej Grofelnik
Advanced Creators
From Box to Beauty
A Lamborghini Urus Build — Chapter 4: Interior
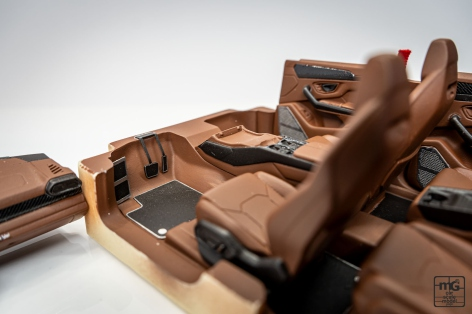
As promised last week, I will show you the interior color combination today. For this I chose to go with chocolate brown and black with red seat belts and head logos.
Painting the Interior
In order to achieve the right color, I have used the AMMO by Mig Jimenez Figures waterborne paint in the shade of F.532 (Red Brown), which was supplied by Back To Basics.
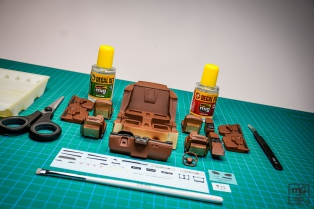
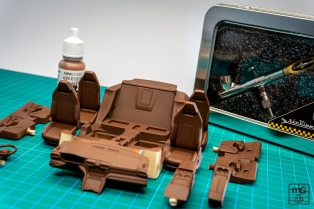
This was my second time using the Figures line paint from AMMO, and I must say I am impressed with it. It has nice coverage, and the finish is just right in the shine to simulate leather.
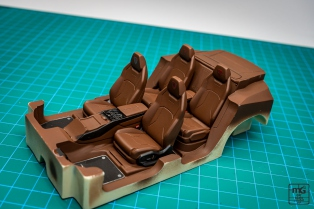
Adding the Black Details
After the paint has cured, I masked all the areas up and painted the details with AMMO by Mig Jimenez Satin Black paint. This time I chose not to make any flocking, since I want to make a full leather interior, so also the tub was painted with AMMO paint.
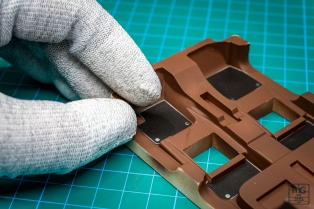
To give some contrast, the PE floor mats were painted in satin black and the edges sanded off to reveal the raw metal.
Applying the Decals
As mentioned last time, this time we will have a look at the detailing — mostly applying decals to the dashboard — and assembling the interior.
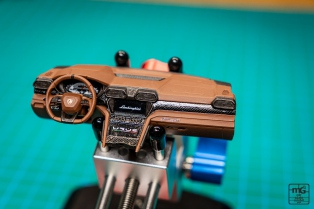
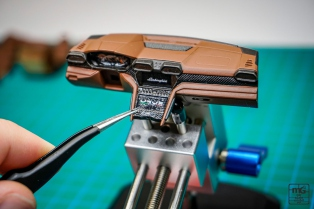
To begin, all the decals were cut apart, then one by one applied to their correct positions and fixed with use of some Decal Set & Decal Fix solutions, as well as with the Decal brush no.3. All these accessories are from AMMO by Mig Jimenez and were supplied by Back To Basics.
Final Interior Assembly
After all the decals were attached, the seats, red seat belts and center consoles were glued in place. PE pedals were also painted and glued in their final position. The steering wheel and column were also attached to the dashboard at this stage.
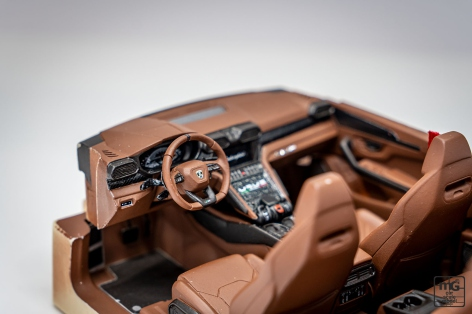
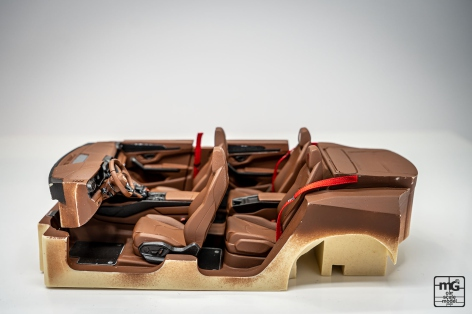
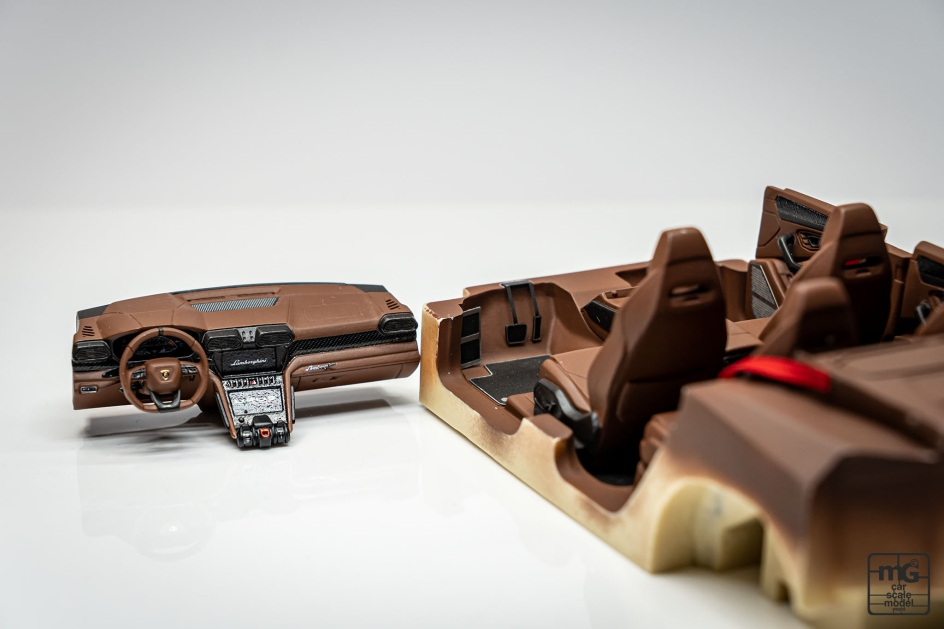
Here it is — the two-tone Brown-Black interior of my Lamborghini Urus. As usual with Alpha Model kits, the interior is only assembled together to make pictures. After the photoshoot, it got disassembled and will be finally assembled at final assembly in order to get the tub inside of the car body. The fit is great, and the details are as expected with Alpha Model kits. Up next: Chapter 5: Wheels and Brakes!
— mG Car Scale Model Works
Build by Matej Grofelnik
Advanced Creators
From Box to Beauty
A Lamborghini Urus Build — Chapter 5: Wheels and Brakes
The Urus build is getting closer to the end, and since the color of the body is unique, the same had to be done for the wheels.
Custom Wheels from Geronimoworks
The stock wheels and tires from Alpha Model are nice and correct in size, but I wanted to further enhance my model. And to do this, I contacted my friends at Geronimoworks and asked for their help.
Since they usually don't make wheels and tires in so big dimensions, they offered to make a special set for the Urus.
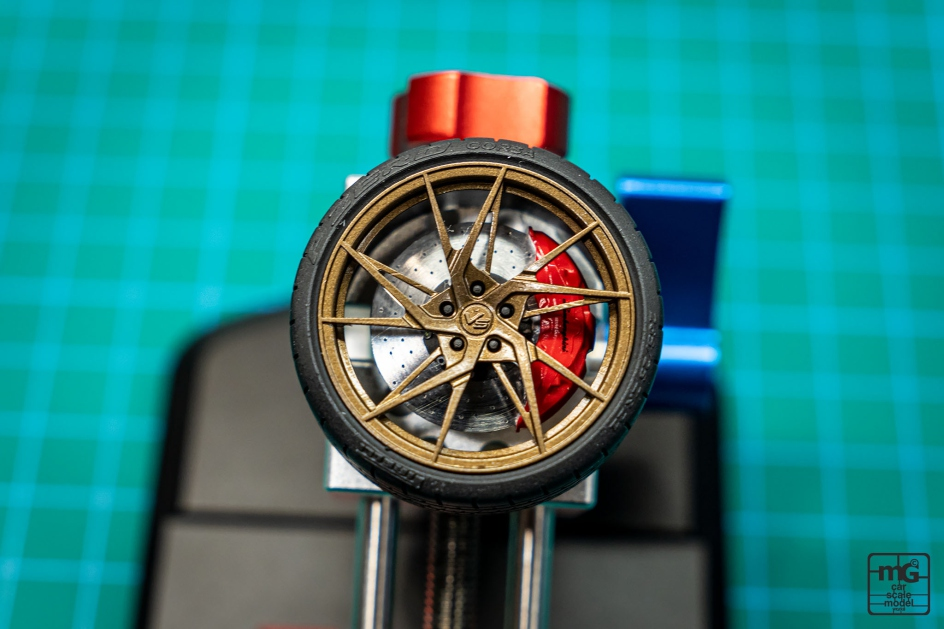
And the set is amazing. The details on both the tires and the rims are outstanding — the precision of the print is out of this world, and the end result is simply amazing.
Painting the Rims
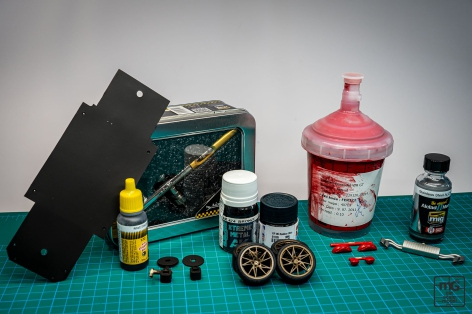
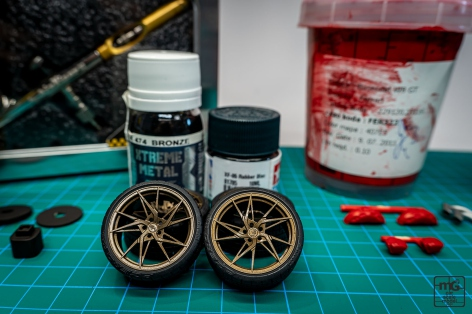
As it goes for the colors, for the rims I chose the AK-Interactive Extreme Metal Bronze, which I laid directly on the printed rims without any primers or base coats. The sets from Geronimoworks come pre-cleaned with 90% IPA, so no chance of any silicones on them.
Painting the Tires
For the 3D printed solid tires, I took the Tamiya XF-65 Rubber Black paint, which perfectly mimics the rubber color.
Painting the Brake Calipers
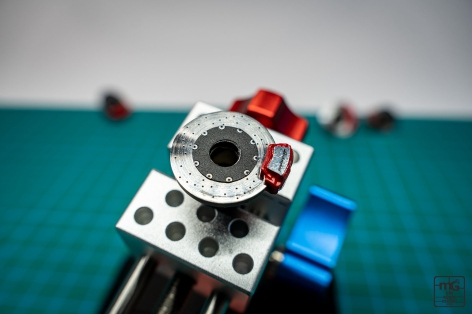
In order to get some contrast to the whole kit, the calipers were painted with Rosso Corsa paint supplied by Spekter Žalec • Specialist za barve Št. 1.
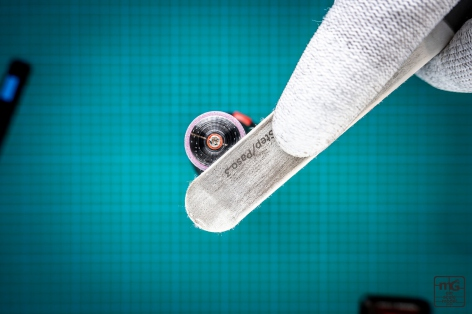
To add realism to the disc brakes, they were sanded with the help of a rotary tool and a nail file.
Exhaust
As for the exhaust, it was painted with AMMO by Mig Jimenez Alclad Stainless Steel paint.
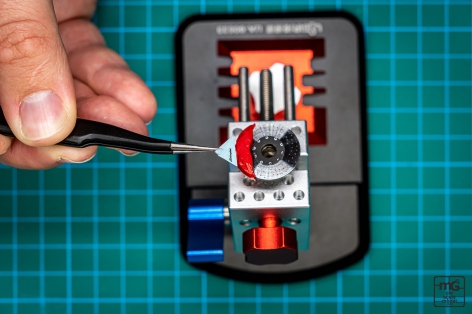
Putting It All Together
At the end, the decals were put on the calipers, the tires mounted on rims, and the wheels put on the brakes.
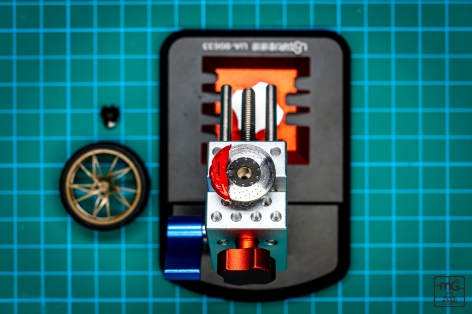
Everything seen today was painted using the Air Cobra airbrush supplied by Back To Basics. Up next: Chapter 6: Car Body — the moment we've all been waiting for: the special Pearl Nardo Grey paint from Spekter Žalec!
— mG Car Scale Model Works
Build by Matej Grofelnik
color: #666;">Build by Matej Grofelnik
Advanced Creators
From Box to Beauty
A Lamborghini Urus Build — Chapter 6: Car Body
Since there were quite a few questions on what the color combination on the Urus will be, I have decided to show you the progress on the body this time.
Step 1 — White Primer
After all the parts were sanded, scribed and cleaned, it is time to paint the body. To start off, this time the AMMO by Mig Jimenez ONE Shot White primer supplied by Back To Basics was applied in order to make a nice base for the special color.
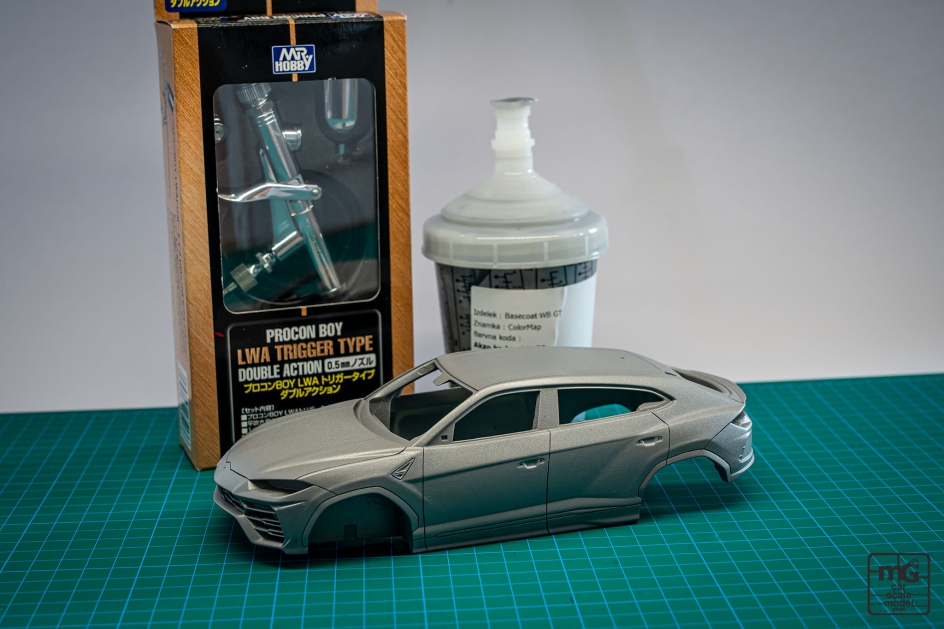
Step 2 — Pearl Nardo Grey
After the primer has dried, it is time to apply the color. This time I went a bit out of my usual way of making models of cars that actually exist or can be configured, and chose a very special paint.
The waterborne paint for this model was prepared by color specialists from Spekter Žalec • Specialist za barve Št. 1. It is based on regular ColorMap from Akzo Nobel, but some scaled-down crystals were used when preparing the paint.
At the end I like to call it Pearl Nardo Grey — when it is dark, the paint looks almost like a normal Nardo Grey, and once it gets exposed to sunlight, the pearls appear and give that special pop to the model.
Step 3 — Two-Tone Black
And to go a step further, I chose to paint the roof, side mirrors and some trim parts in black to get the nice two-tone effect I envisioned for this model.
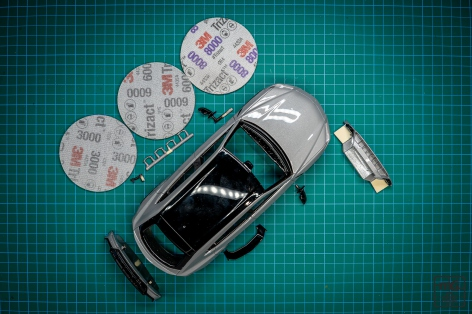
Step 4 — Clear Coat & Polishing
After all the pieces were painted and clear coated, I left the body for a couple of days to cure.
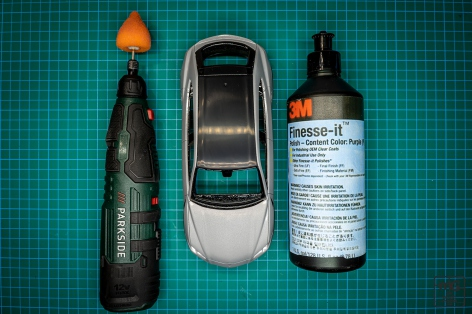
After that, it was sanded, clear coated again, polished with the use of 3M Trizact 3000, 6000 and 8000 grit sponges, and buffed using a middle polishing pad and the 3M Finesse-it Purple polishing liquid. All 3M products were also supplied by Spekter Žalec • Specialist za barve Št. 1.
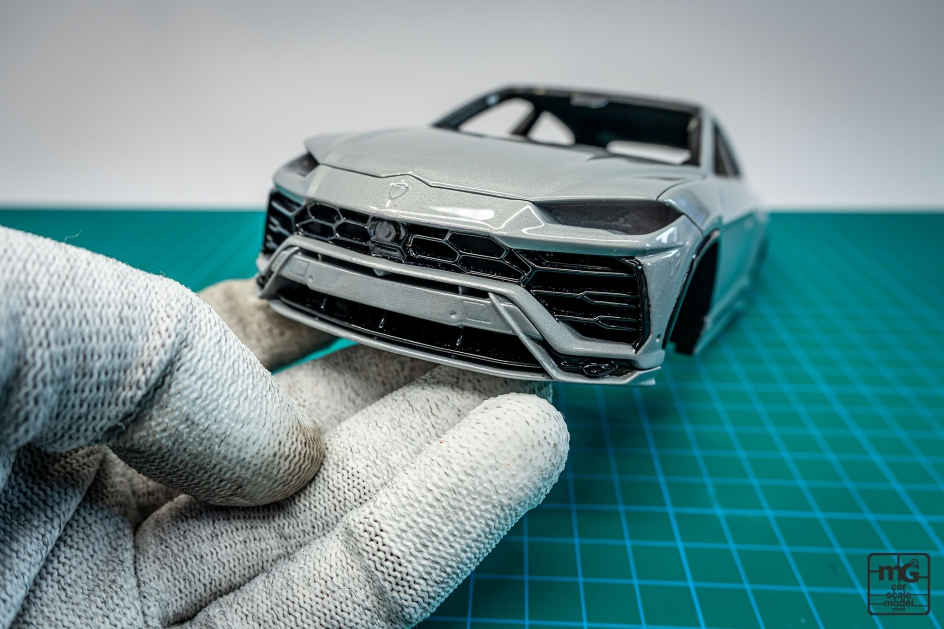
The body is now flawless — ready to meet its interior. Up next: Chapter 7: Final Assembly & Showcase — the final chapter!
— mG Car Scale Model Works
Build by Matej Grofelnik
Advanced Creators
From Box to Beauty
A Lamborghini Urus Build — Chapter 7: Final Assembly & Showcase
This time the final assembly will indeed be only assembly. All the parts were painted and prepared in advance, so let's get this Urus put together.
Step 1 — Interior Goes In
To start the assembly, first the door cards were installed, followed by the dashboard.
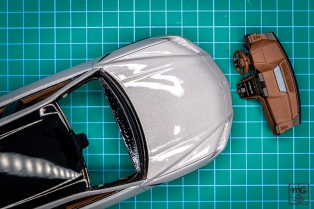
Step 2 — Splitters, Exhaust & License Plates
Once all the interior parts were on/in the body, it was time to assemble the front and rear splitter, where the exhaust and the license plates were mounted.
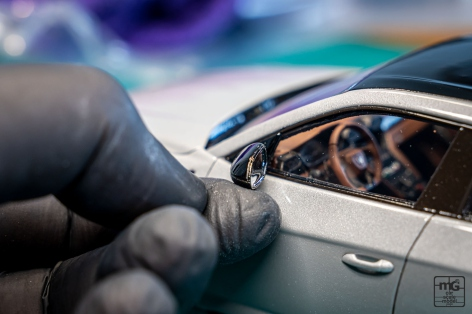
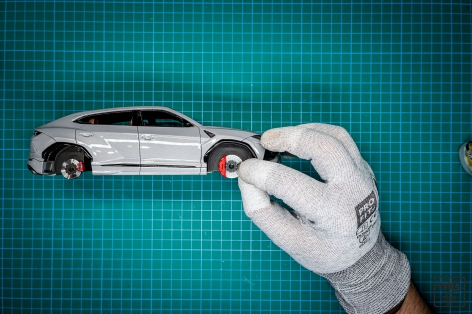
Step 3 — Brakes & Custom Wheels
After that, I have mounted the brakes and the previously presented special wheels from Geronimoworks.
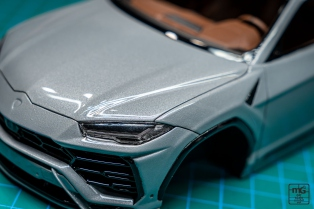
Step 4 — Lights
After the car was able to stand on its own, it was time to mount the head and tail lights.
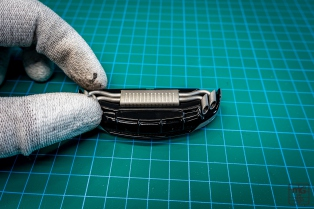
Step 5 — Windows & PE Trims
The windows fit nicely and have PE trims on the front and on the side.
Step 6 — Final Details
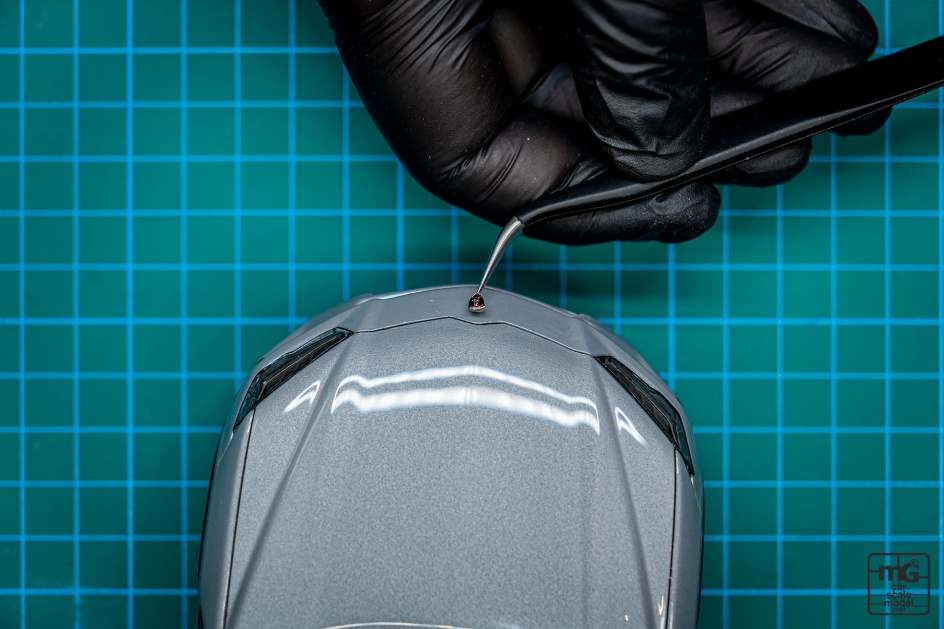
To finish the model, some must-have details were added, such as mirrors, door handles, windshield wipers and the shark fin GPS antenna on the roof.
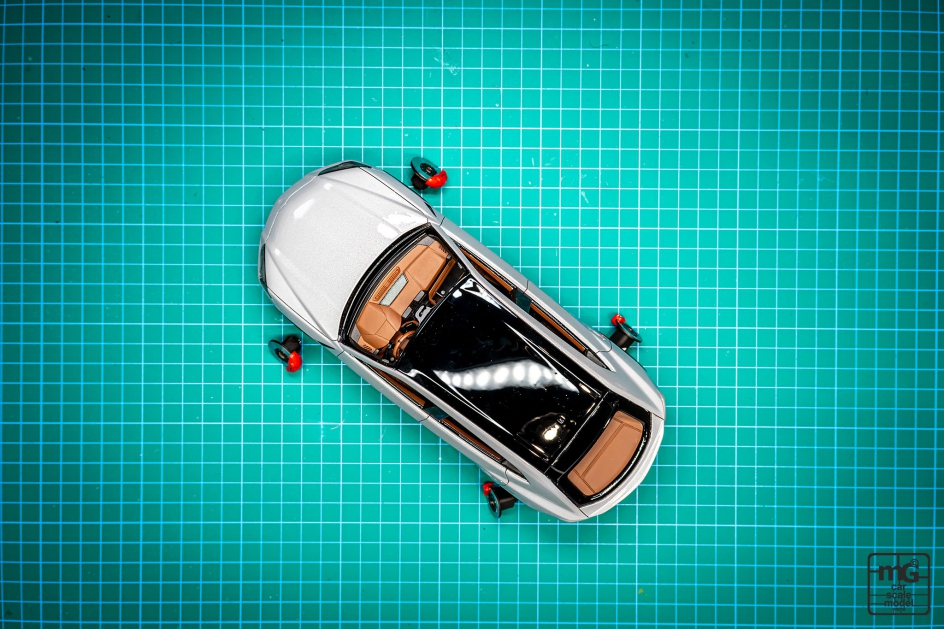
As always, for the final touch, the Lamborghini emblems were glued in place.
— The Finished Urus —
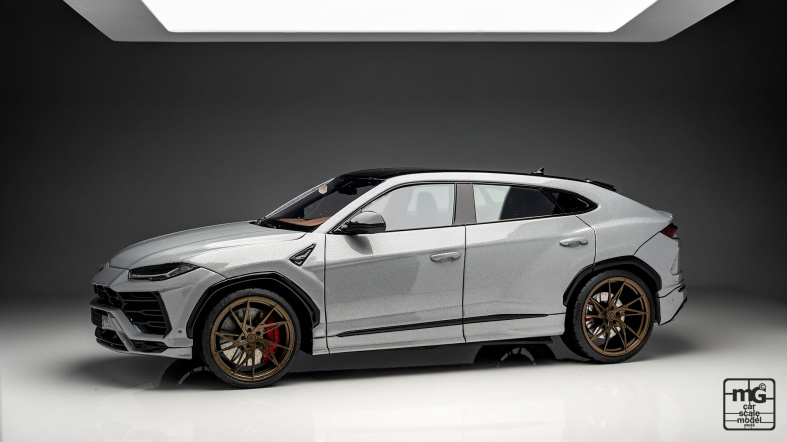
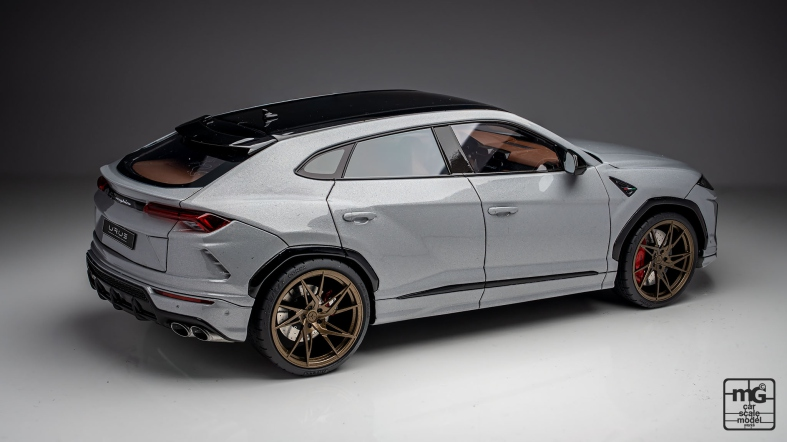
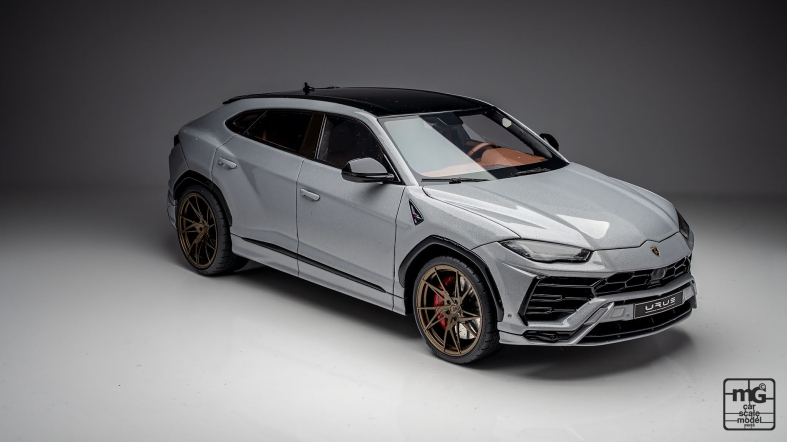
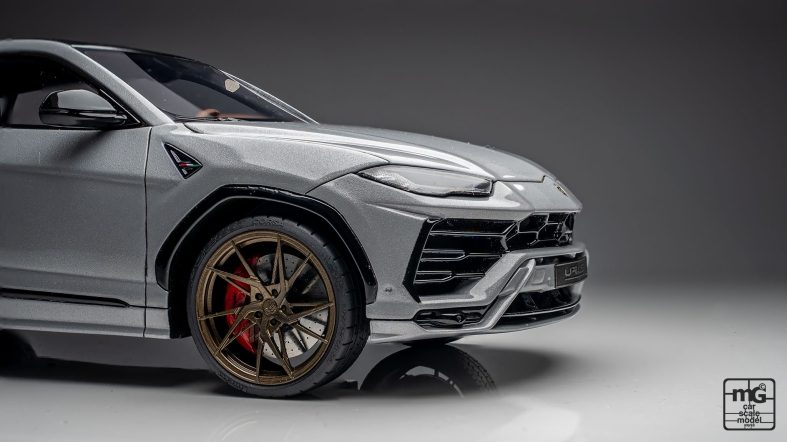
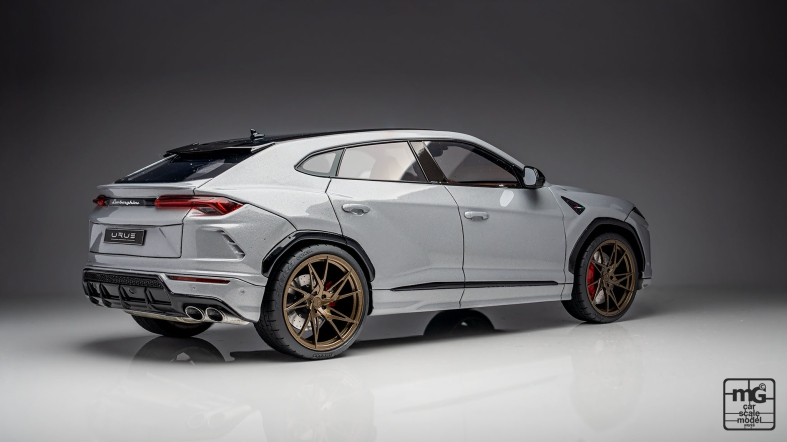

And that wraps up this 7-chapter build of the Alpha Model 1/24 Lamborghini Urus! From a blue box to a fully detailed Pearl Nardo Grey beast — it's been a journey. Thank you for following along!
Special Thanks
This project wouldn't be possible without some amazing companies which helped throughout the build:
- Hobby Design / Alpha Model
- Modellisto.at
- Spekter Žalec
- miniatures.si
- AMMO by Mig Jimenez
- caranduser.com
You can find details about all the mentioned companies with scanning the QR-code next to their logo.

For my other projects, scan the QR-code with all my social media accounts linked to it, and leave a comment and a like if you find something interesting. If you want to follow my work, do not forget to subscribe to my accounts.

Thanks,
Matej Grofelnik
mG Car Scale Model Works

