
 Advanced Creators
Honda Civic Mugen RR :Preparation
Alpha Model AM02-0065 · Build by joey_in_scale
Step 1: Preparation
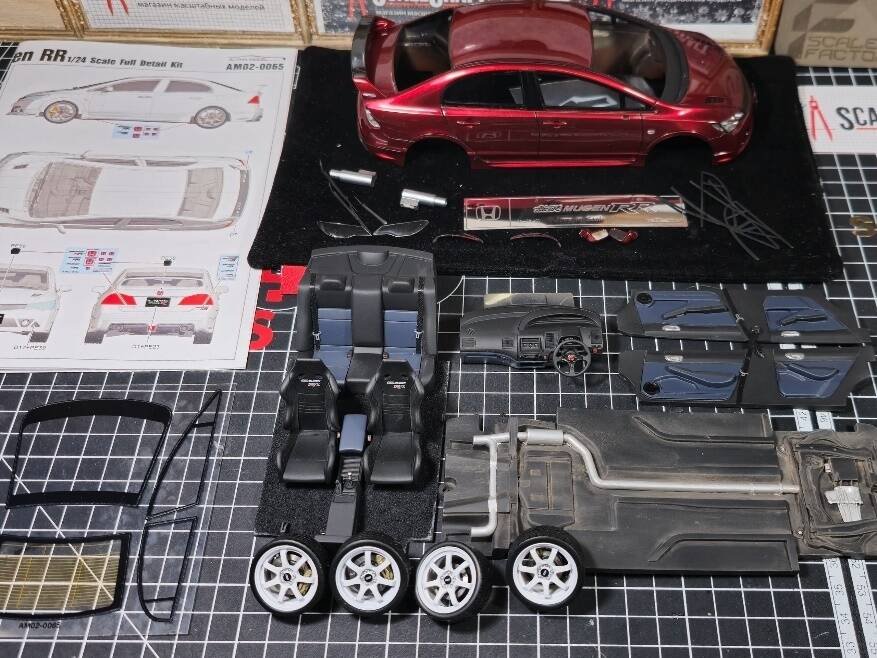
I have to admit, as someone who's always had a soft spot for the legendary Honda Civic Mugen RR, opening this Alpha Model kit was like Christmas morning all over again. The sheer quality of what's packed into this box is mind-blowing — from the beautifully molded resin parts that capture every aggressive line of this iconic hot hatch, to the precision-cut PE sheets that will bring those fine details to life.
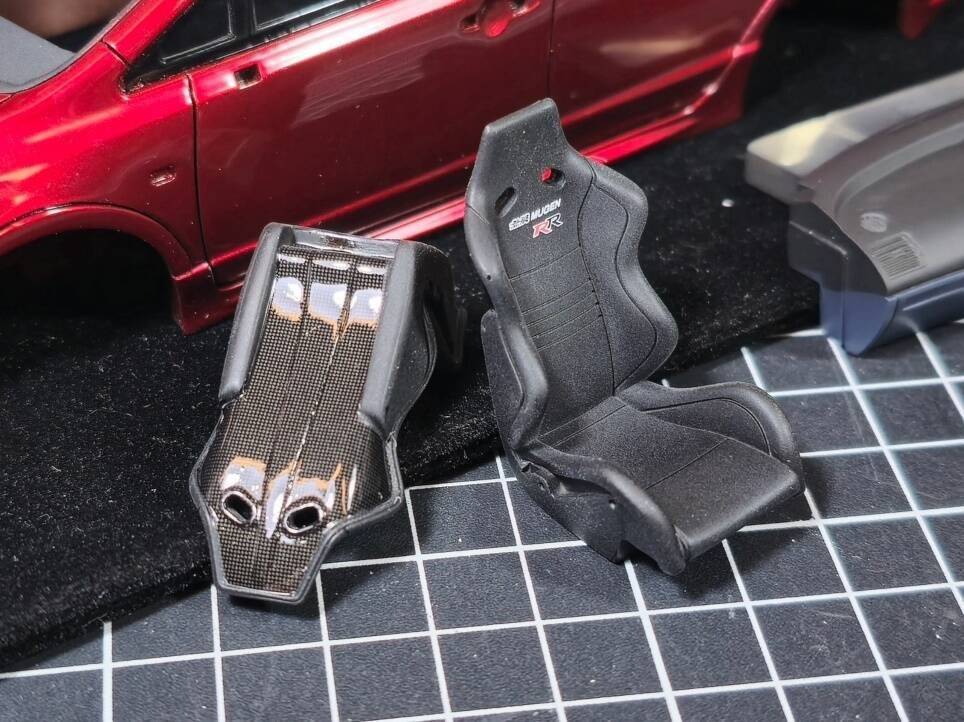
The transparent resin pieces for the optical elements are crystal clear, and I'm already envisioning how stunning those carbon fiber components will look along the spoiler and seats. This is exactly the kind of kit that reminds me why I fell in love with this hobby in the first place.
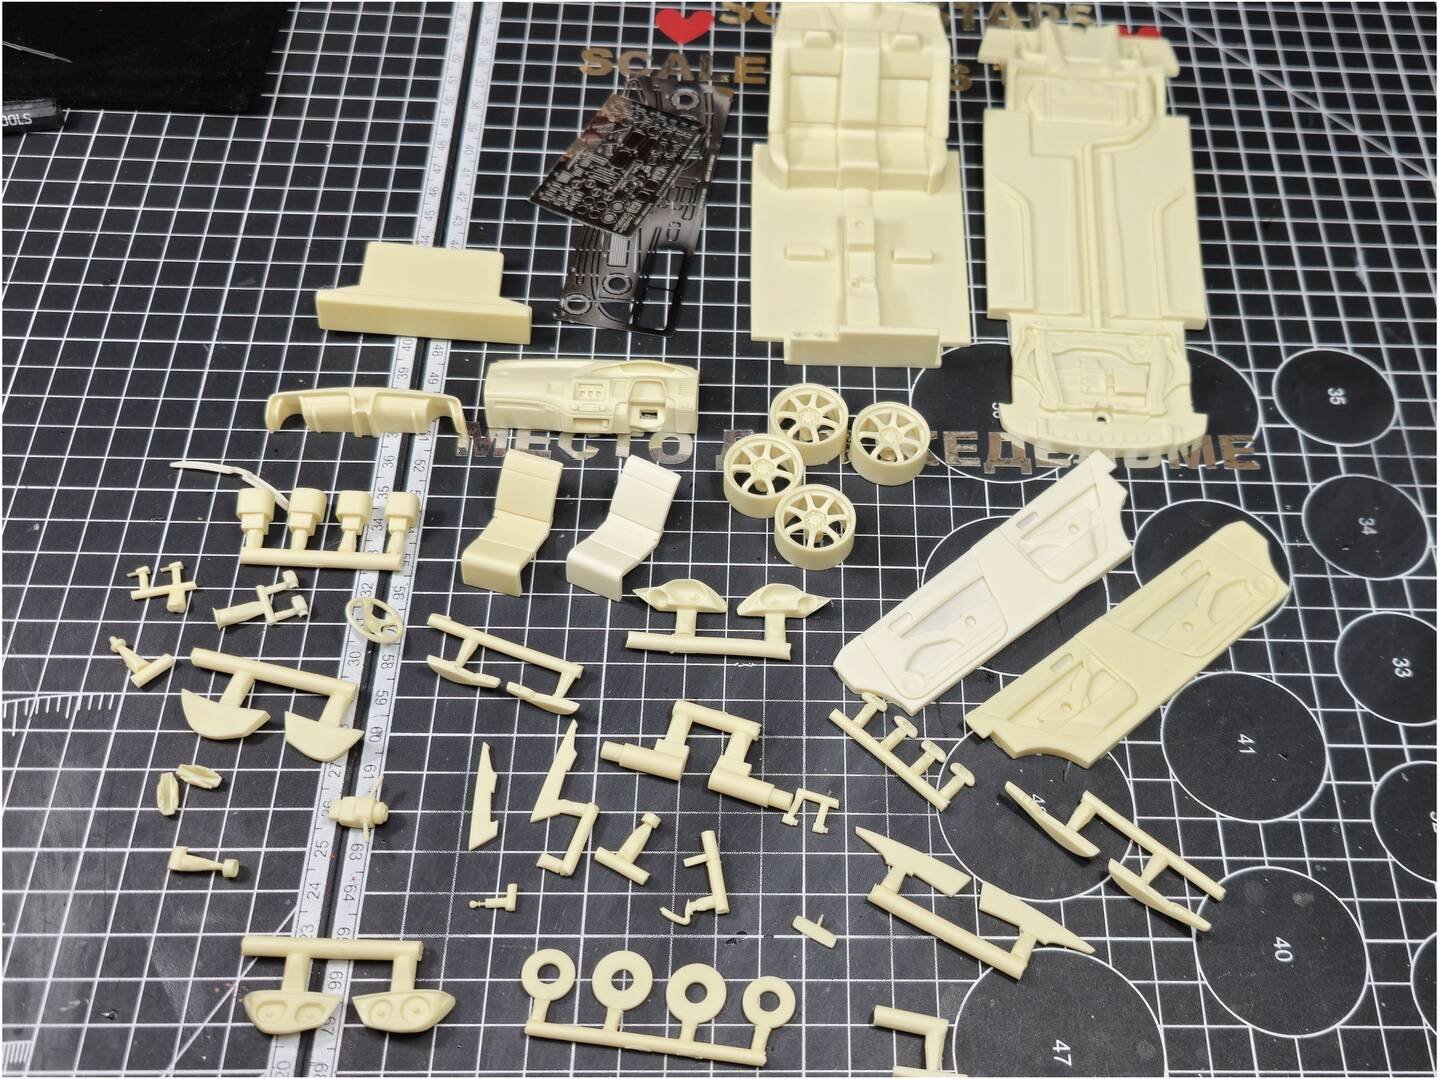
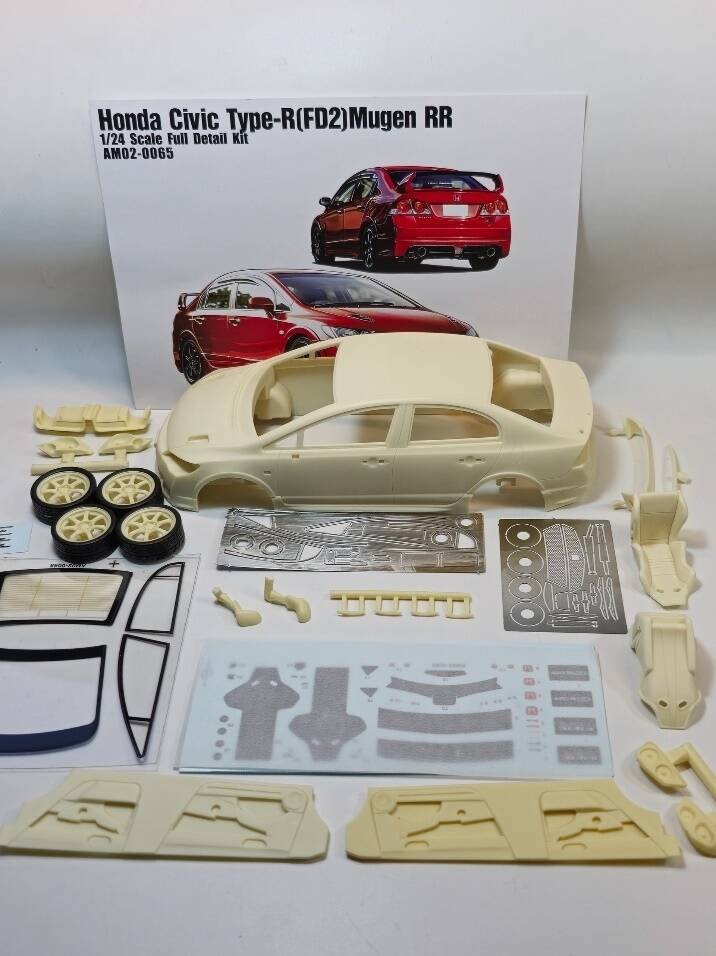
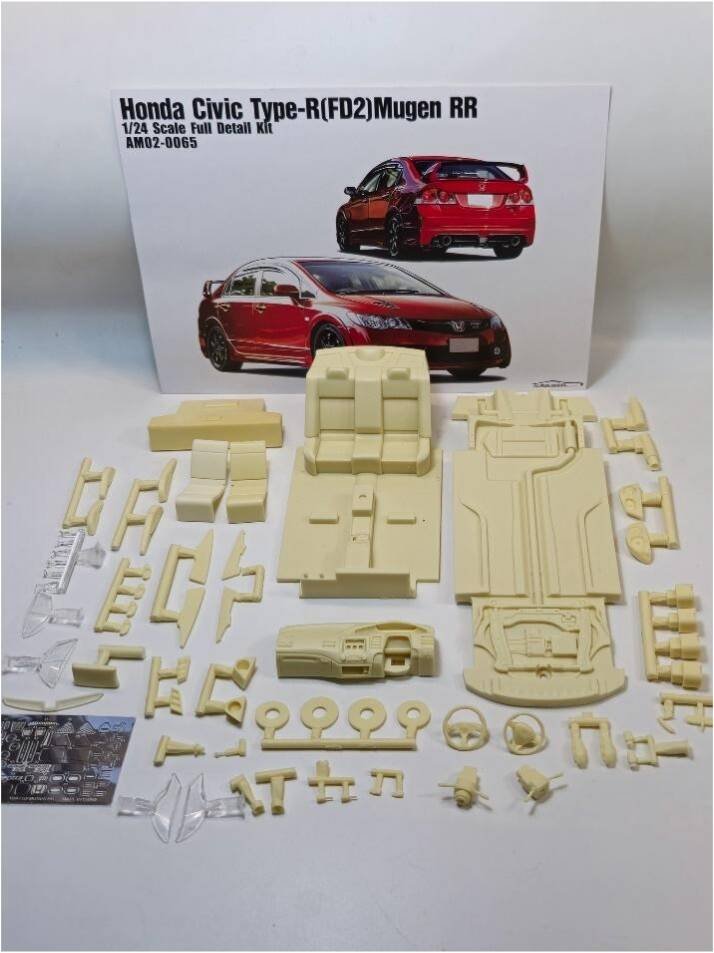
Lots of decal options to choose from, and I found myself just marvelling at the amazing detail throughout.
PRE BUILD CHECKLIST
✓ Check all parts are present and accounted for
✓ Look carefully at the detail and remove all the drool that follows
Adjustments
Advanced Creators
Honda Civic Mugen RR :Adjustments
Alpha Model AM02-0065 · Build by joey_in_scale
Step 2: Adjustments
I always like to start with the body and any details that are going to need that glossy clear coat finish — it just makes sense to get the foundation right first.
Now comes the fun part — using a 0.2mm engraving knife to carefully scribe all those body lines. This is where patience really pays off, so take your time and don't rush it.
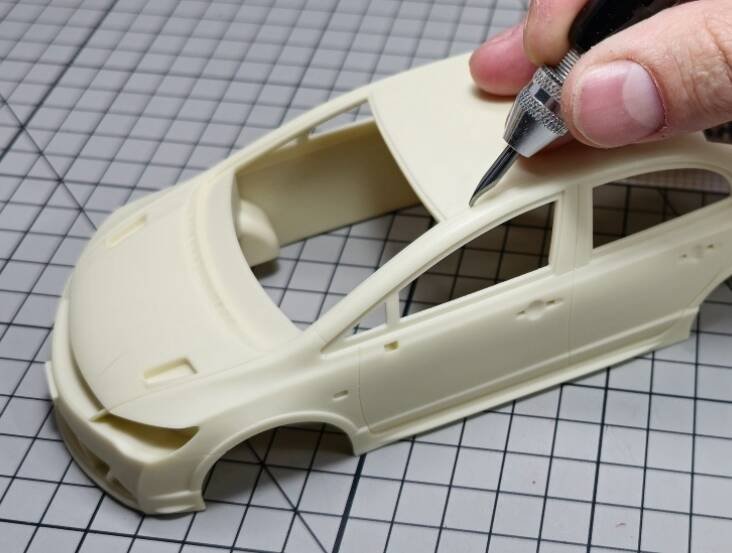
Here's something I learned the hard way: don't forget about all those little moldings! I make sure to scribe around them too because it makes masking so much easier later on. Trust me, you'll thank yourself when it comes time to paint.
The key here is to work methodically and support the part while you're scribing. These body panels can be delicate, so a gentle touch goes a long way.
Once I've finished engraving all the lines, I give the entire body a good sanding with a 3M fine abrasive sponge. If you don't have one of those handy, regular 800-grit sandpaper works just fine too — just keep it consistent and smooth.
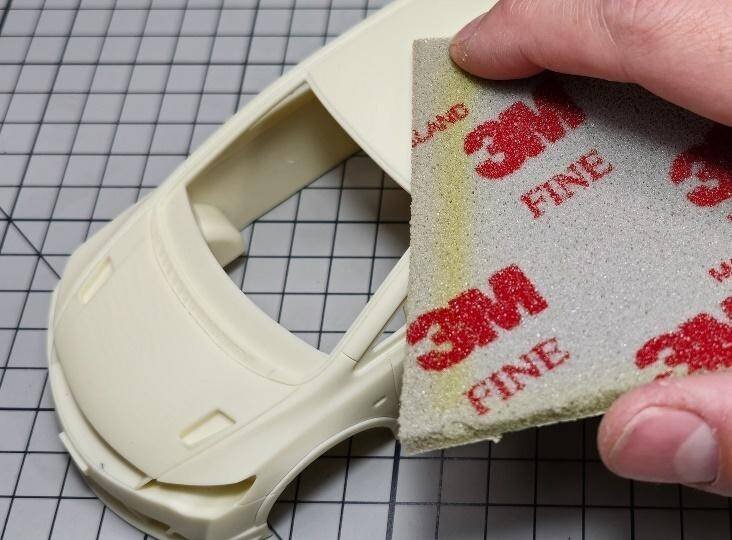
Much cleaner lines and a better foundation for the paint work ahead.
Cleaning
All parts get soaked and cleaned in soapy water, then scrubbed gently with a toothbrush and left to dry. This removes any mold release agent and ensures proper paint adhesion.
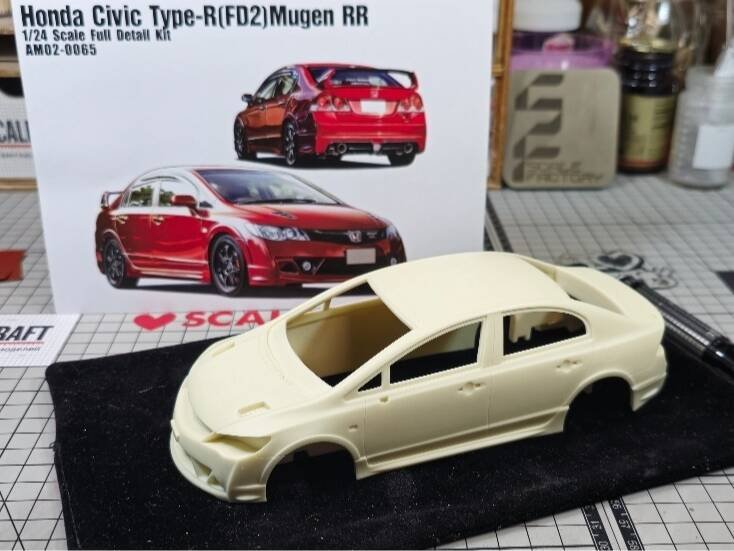
CLEANUP CHECKLIST
✓ All parts soaked and cleaned in soapy water
✓ Scrubbed gently with a toothbrush and left to dry
✓ Using 0.2mm engraving knife, scribe all body lines
✓ Don't forget about all moldings! Scribe around them for easier masking
✓ After engraving all lines, sand all body with 3M fine abrasive sponge
Priming & Painting
Advanced Creators
Honda Civic Mugen RR :Priming & Painting
Alpha Model AM02-0065 · Build by joey_in_scale
Step 3: Priming
Once the adjustments are complete, it's time for a thorough cleaning — I wash all the parts with isopropyl alcohol because we absolutely need to degrease that resin. Any oils or residue left behind will cause headaches later when the paint doesn't want to stick properly.
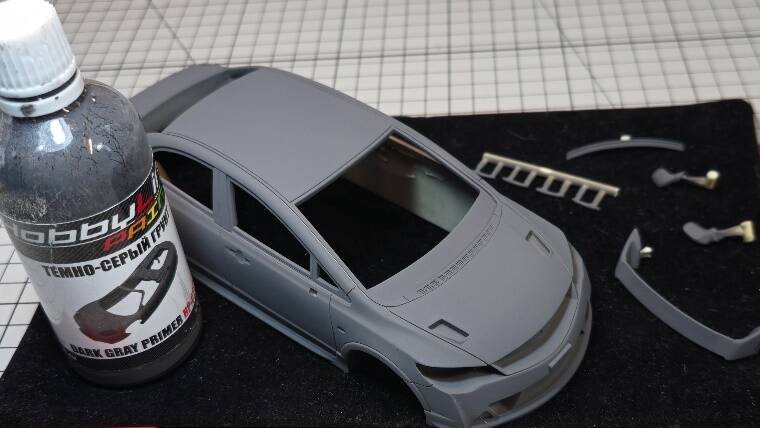
For this particular model, I chose a dark grey primer, and here's why — I'm planning a metallic finish and I need that gloss black base to really make those metallic colors pop. The dark grey gives me the perfect foundation to build that glossy black layer on top.
Before I start spraying though, I give the entire body another gentle sanding with a 3M microfine abrasive sponge. If you don't have one of those, sandpaper in the 1200–1500 grit range works just as well — just keep it light and even.
Step 4: Painting
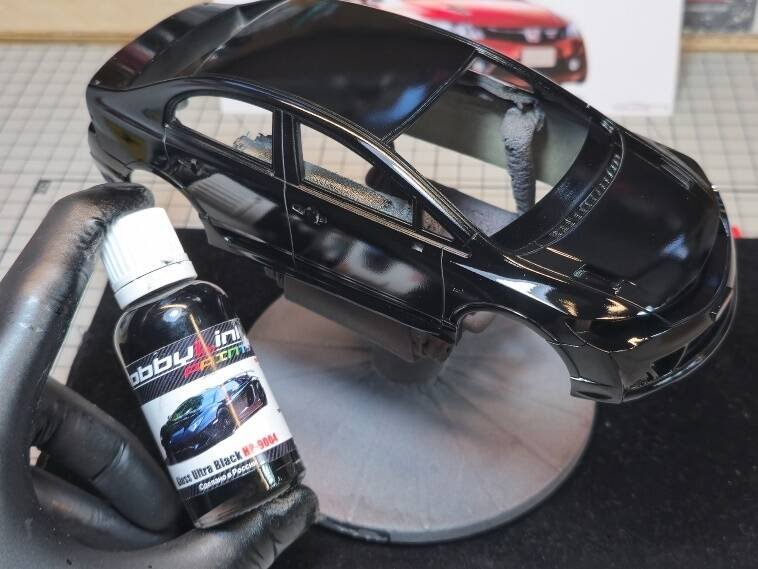
Now comes the painting itself. I lay down my gloss black base in 2 thin, even layers. Here's a crucial tip: once you've applied this gloss black, resist the temptation to touch or handle the model. I know it's tempting to check your work, but those fingerprints will show through your metallic topcoat and you'll kick yourself later.
Let each coat cure properly and build up that perfect mirror-like base — your metallic finish will thank you for it.
PAINTING CHECKLIST
✓ Make sure body and primer are dust-free and smooth
✓ Spray in a dust-free area; wipe kit with static-free brush and a tack cloth
✓ Always use protective equipment when spraying
✓ Leave kit for a while for the paint to cure properly
✓ Sand out imperfections with as light a grit as you can
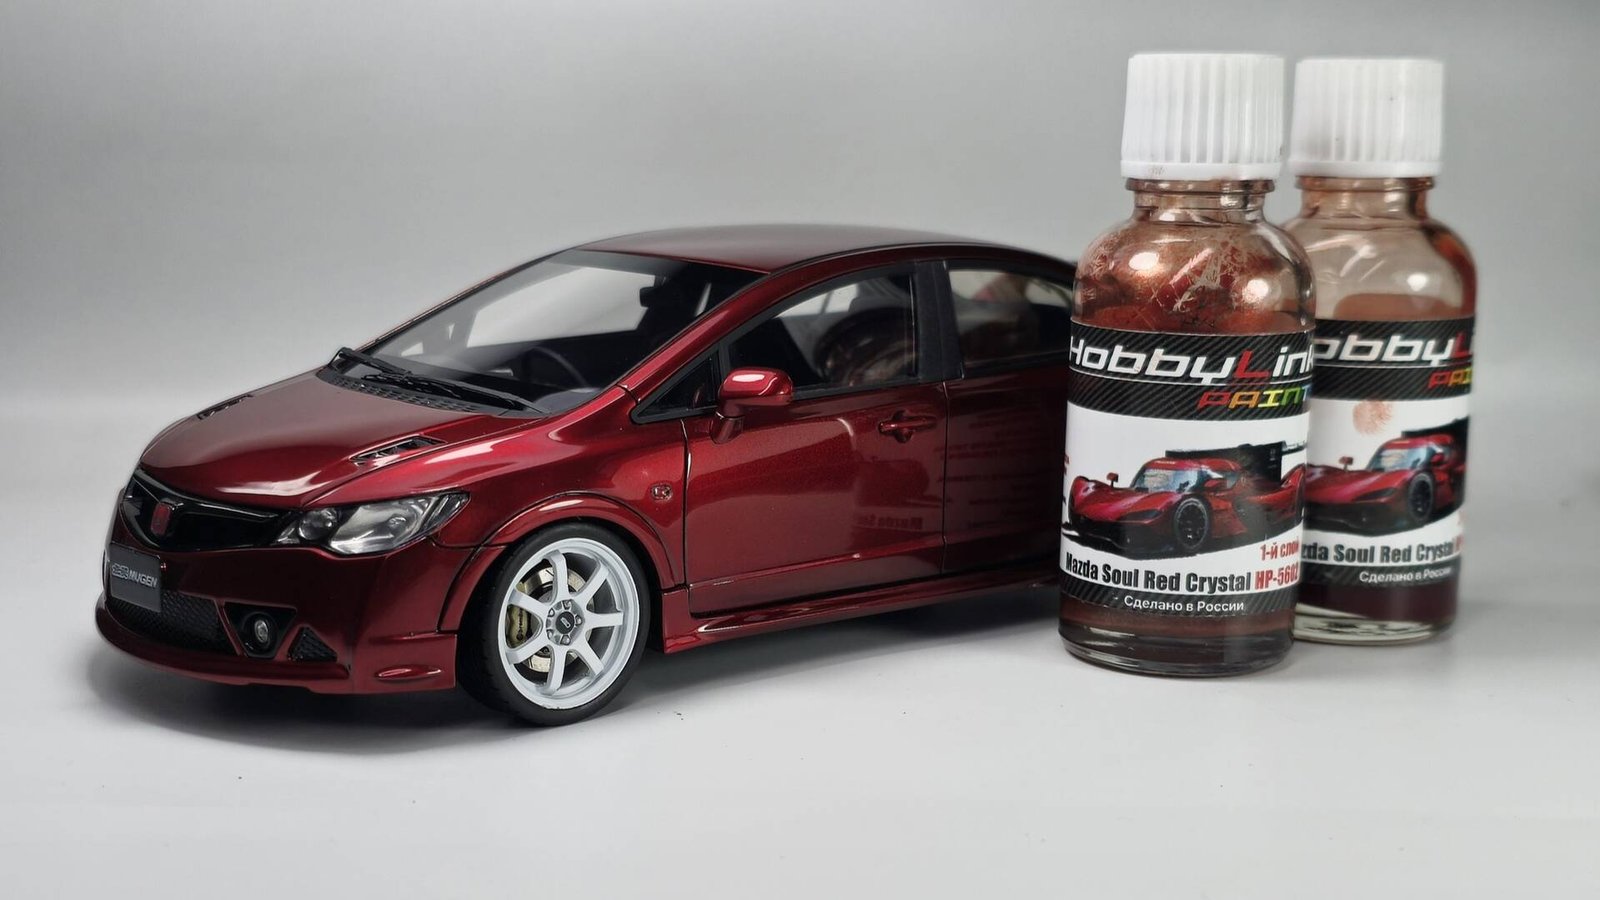
Now here's where I made an interesting choice: the real Civic Type R only comes in one red color, but I decided to go with Mazda's Crystal Red paint instead. Why? Because that crystal finish just has this incredible depth and pop that really makes the model stand out under different lighting conditions.
For the painting process, I start with the first color component and apply it in 2–3 semi-wet layers. The key here is building up that base gradually — don't rush it. Before I started though, I made sure to carefully mask all the elements that will be black in the final finish. Trust me, taking the time to mask properly now saves you hours of touch-up work later.
Once that base has had time to set up nicely, I come back with the second component and lay down one good wet coat. This is where the magic happens — you'll see that crystal effect really start to come alive.
After everything has cured properly, I carefully remove all the masks and it's time for decals. For all Alpha Model decals, I swear by Tamiya Mark Fit Super Strong — it's absolutely perfect for getting those decals to snuggle down into all the panel lines and details. The Alpha Model decals are top quality, but this stuff just makes them perform even better.
The crystal red really transforms this model — definitely worth the extra effort over the standard color.
Clear Coat & Polishing
Advanced Creators
Honda Civic Mugen RR :Clear Coat & Polishing
Alpha Model AM02-0065 · Build by joey_in_scale
Step 5: Clear Coat
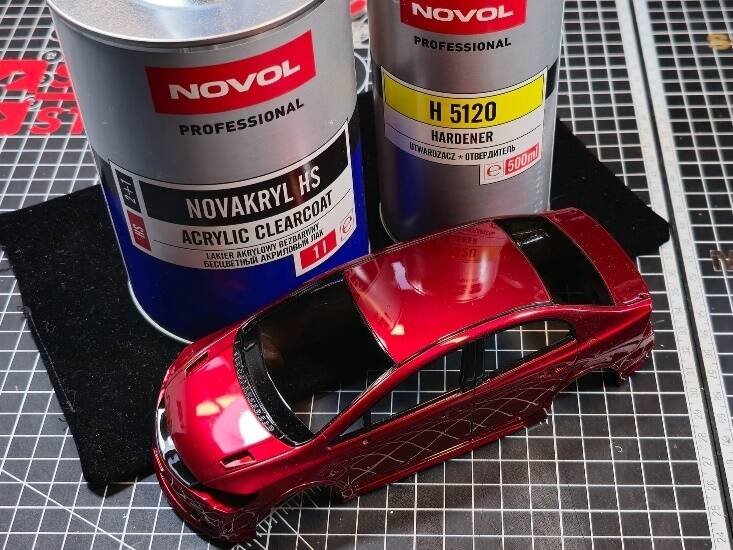
For the final clear coat, I'm using Novol's gloss 2K HS clear — and let me tell you, this stuff is absolutely fantastic. It's a professional-grade automotive clear that gives you that deep, mirror-like finish that really makes all your hard work shine.
The application technique is crucial here. I start with a nice dry first layer — not too heavy, just enough to give the paint something to bite onto. This initial coat acts as a foundation and helps prevent any potential reactions with the base color.
After exactly 5 minutes (I actually set a timer for this), I come back with one good wet layer. This is where you want to be confident but not greedy — lay it down smooth and even, building up that glass-like depth. The wet coat is what gives you that final showroom finish.
Now here's the part that tests your patience: you need to wait a full 2 days for the clear to complete its shrinkage process. I know it's tempting to start handling the model or moving on to the next step, but trust me on this one. That clear coat is still moving and settling during this time, and if you rush it, you might end up with imperfections or adhesion issues later.
Step 6: Polishing
Now we come to what I consider the absolute most important step in the whole process — polishing! This is where a good model becomes a truly stunning piece, so don't rush this part.
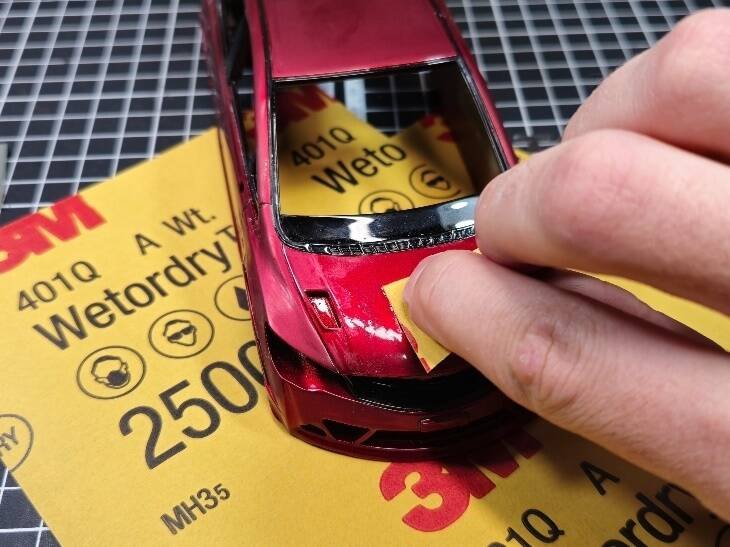
First things first, we need to level out our surface. You'll notice these little "rollers" or orange peel texture near all the panel lines — these have got to go. I use 2500-grit sandpaper to carefully remove them, working methodically around every single line. It's tedious work, but the difference it makes is incredible.
Once I've dealt with all those rollers, I sand the entire body with 2500-grit sandpaper, and here's the key — always use water! Dry sanding at this stage will just create more scratches and undo all your hard work. The water acts as a lubricant and keeps everything smooth.
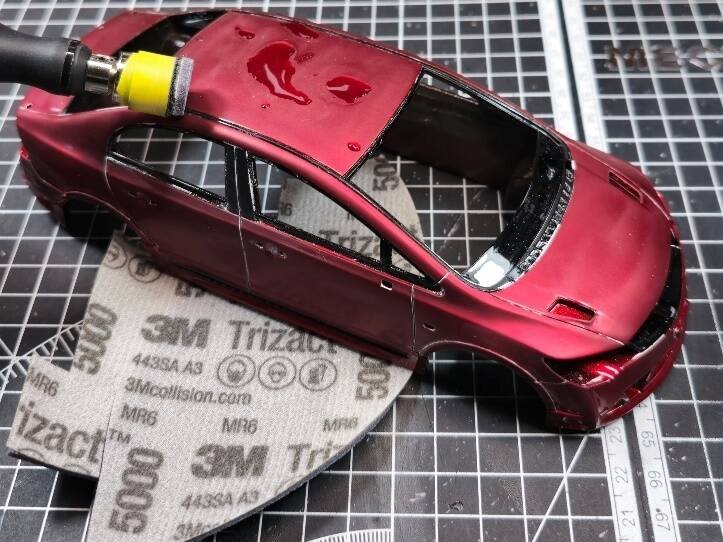
Next, I switch to my Dspiae drill setup and continue with 3M Trizact discs — first 3000, then 5000 grit. Again, water is absolutely crucial here — don't even think about running these dry or you'll regret it.
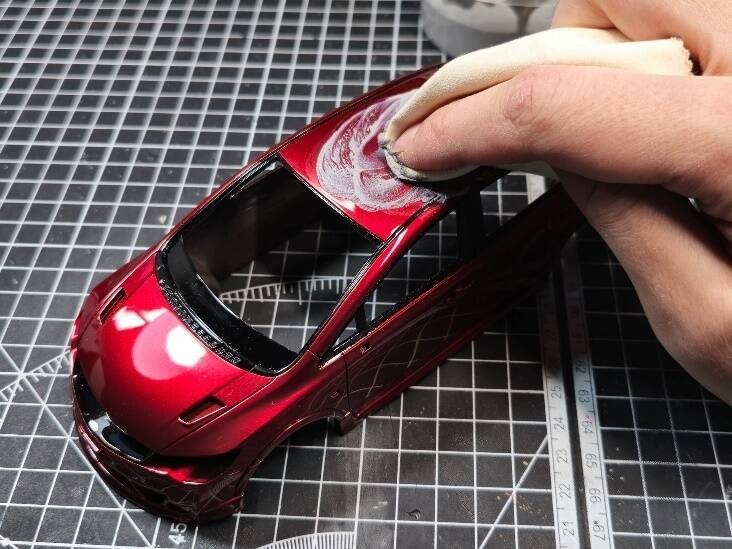
Now comes the paste work, and I swear by Menzerna polishing compounds for this. I start with their 400 compound to remove the finest scratches, then progress through 3000 and finally 3800. Each step builds on the last, creating that mirror finish that makes people do a double-take.
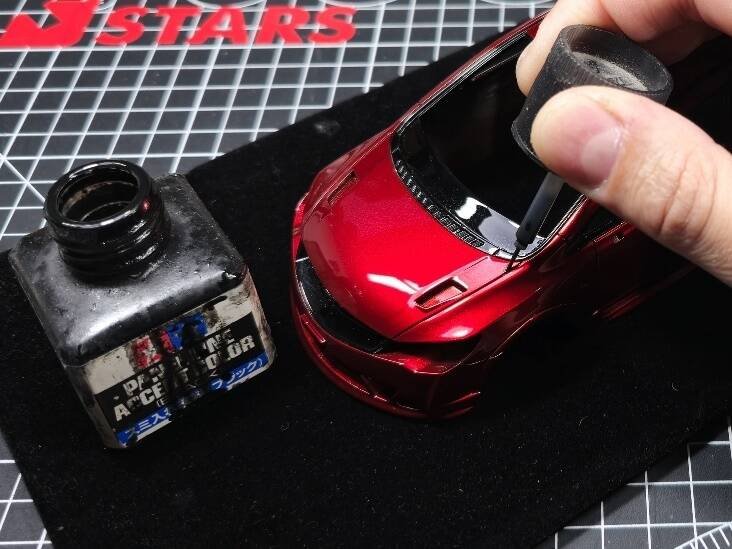
And here's the polishing result — that mirror-like finish makes all the work worthwhile!
I wash the model one more time to remove any polishing compound residue from the panel lines.
Now for the accent work — I use a panel line accent color for the panel lines. This really brings the model to life and adds that professional definition.
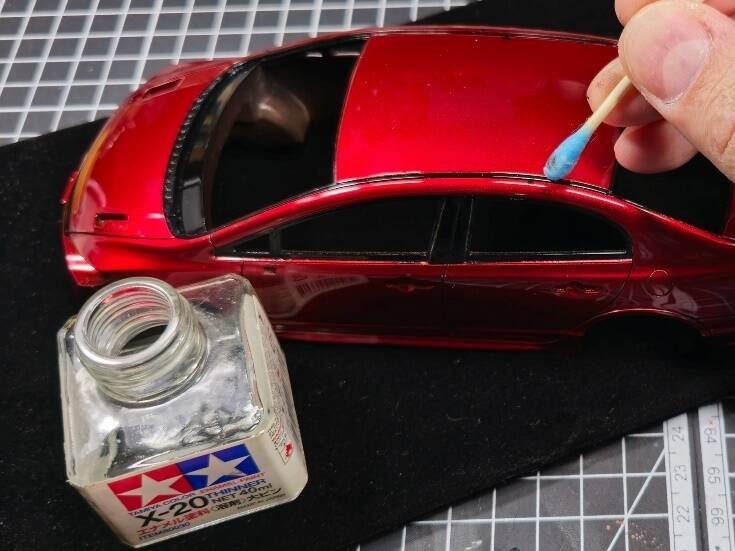
For cleanup, I use Tamiya X-20 thinner to remove any excess that strayed outside the lines. Just dab it on a cotton swab and carefully wipe away the overspray. The X-20 is gentle on the clear coat but effective for cleanup.
Interior & Detailing
Advanced Creators
Honda Civic Mugen RR :Interior & Detailing
Alpha Model AM02-0065 · Build by joey_in_scale
Step 7: Interior & Detailing
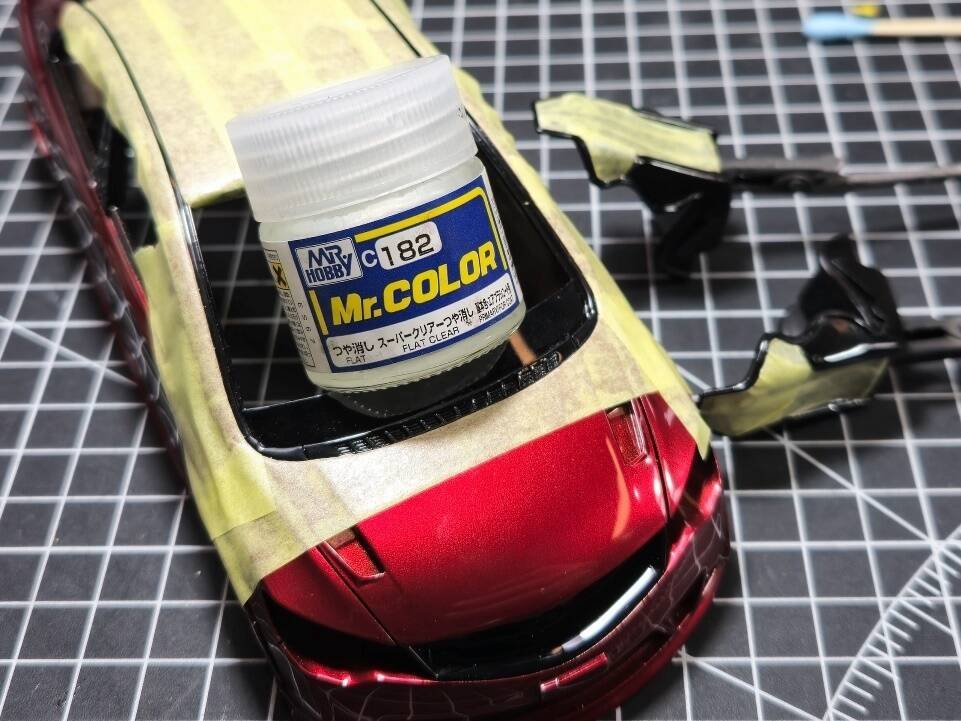
Now it's time to add those realistic flat elements that really sell the scale effect. I start by carefully masking the body areas that need that flat, non-reflective finish — things like window seals, door handles, and trim pieces.
For this, I use Mr. Hobby C182 flat clear in 1–2 dry layers. This stuff is perfect because it gives you that authentic matte finish without being too aggressive or thick. Keep those coats light — you want to kill the gloss without building up texture.
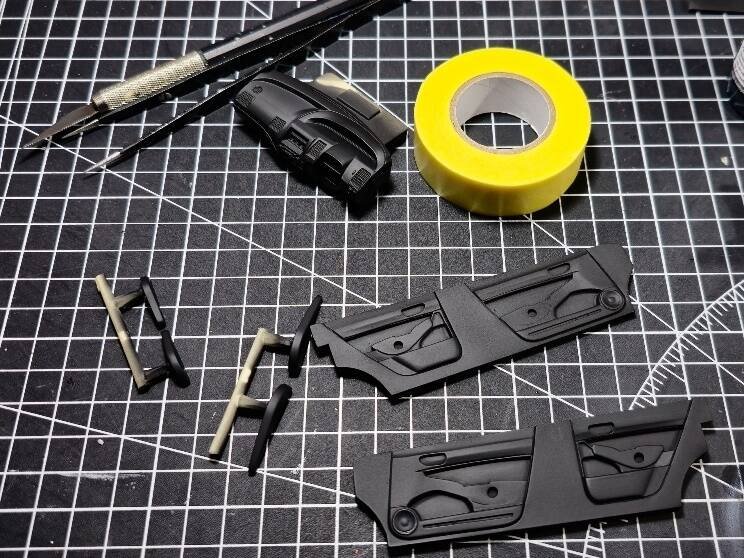
While that's curing, I prepare all the other parts using the same process as the main body — primer, base color, clear coat, and polish where needed. Then I mask the areas that need different finishes.
Flock Carpet
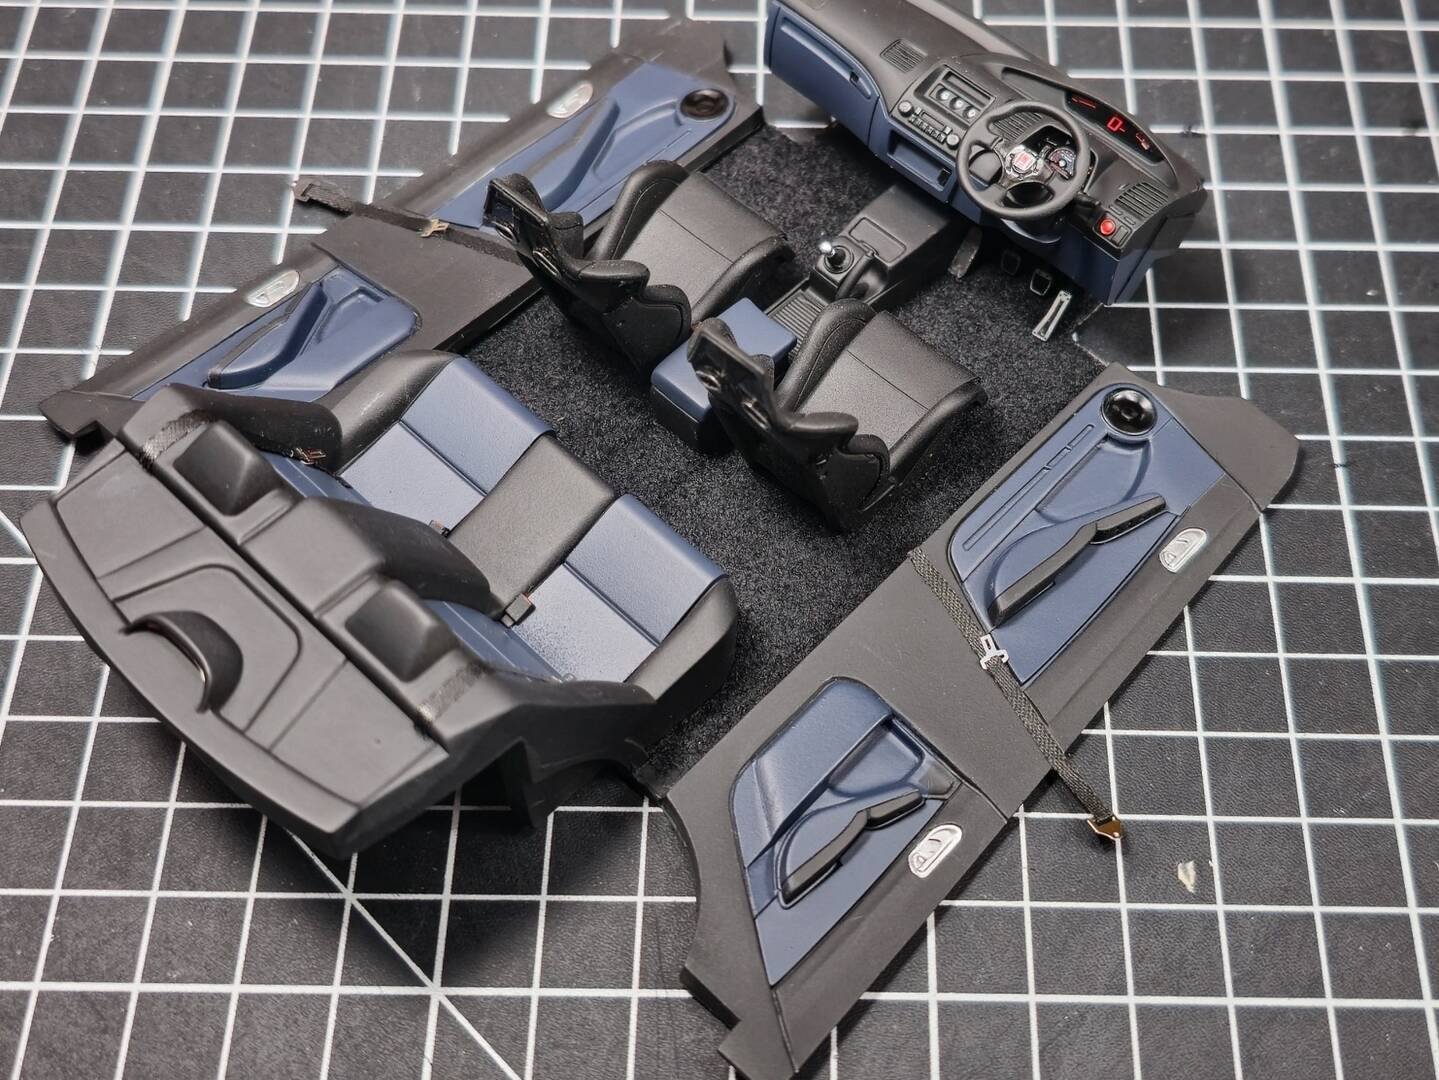
Here's a fun technique for the interior carpets — I use flock powder with a fine sieve to get that realistic carpet texture. The key is using PVA glue as your base; it dries clear and holds the flock perfectly. Just brush on the glue, sieve the flock over it, and tap off the excess.
Time to start assembly! And here's the finished interior — that flock carpet technique really makes a difference, doesn't it?
Brake Discs
Pro tip for realistic brakes: paint them flat black first, then use a piece of grill screen with 600-grit sandpaper wrapped around it. This creates that perfect cross-hatched texture you see on real brake discs. It's such a simple trick but the effect is spot-on.
Once the brakes and rims are painted and detailed, I assemble them together.
Rear Lights
For the rear lights, here's another neat trick: I use aluminum duct tape and carefully score it with a model knife to create that realistic reflector texture. Then I mask the clear elements and hit them with red clear for that deep, translucent look.
Everything's ready for final assembly now!
Finished Build
Advanced Creators
Honda Civic Mugen RR :Finished Build
Alpha Model AM02-0065 · Build by joey_in_scale
The Finished Build
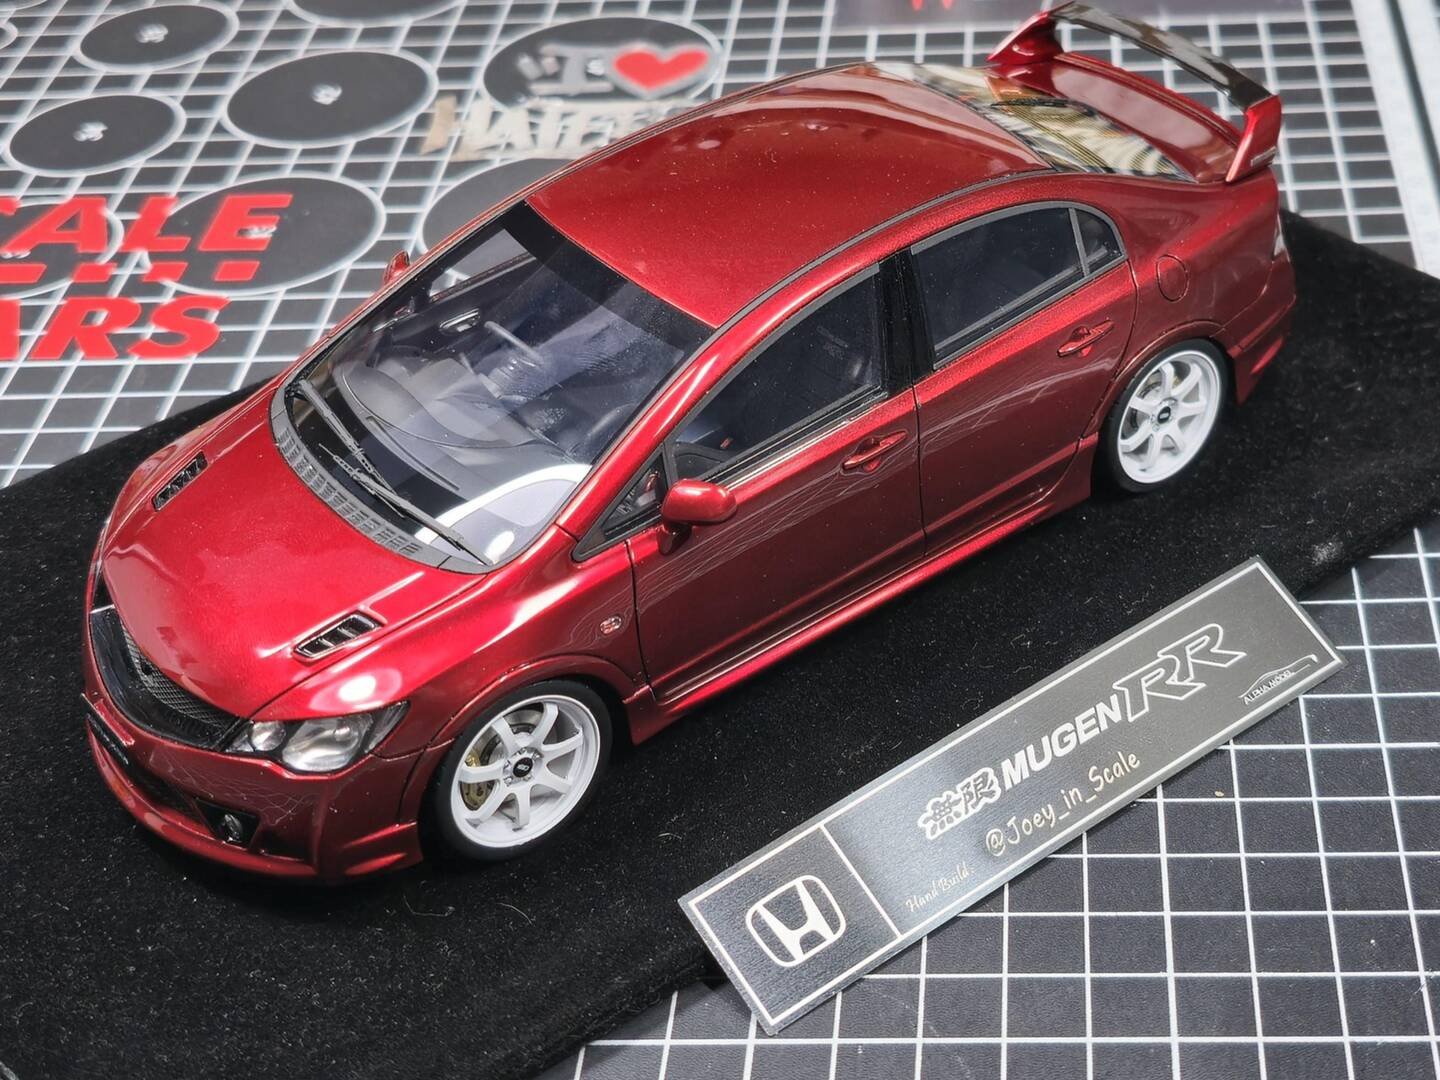
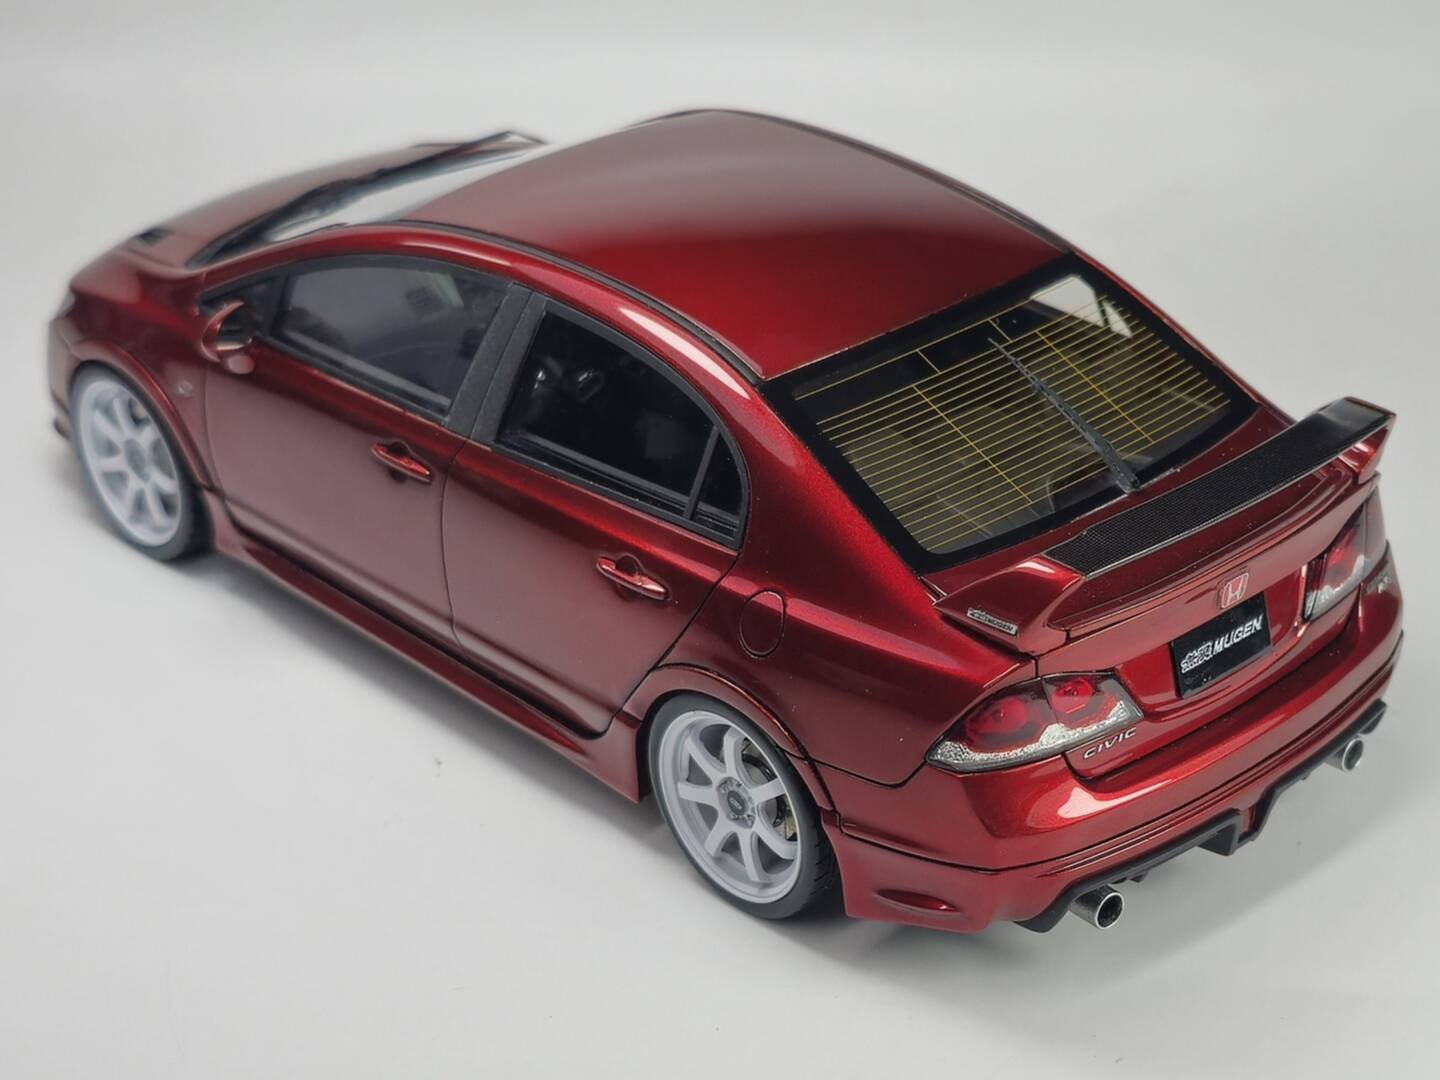
After all the prep work, painting, polishing, and detailing, the Honda Civic Mugen RR is finally complete. Every step — from the careful scribing of panel lines to the final mirror polish — has come together to create a model that truly captures the aggressive spirit of this iconic hot hatch.
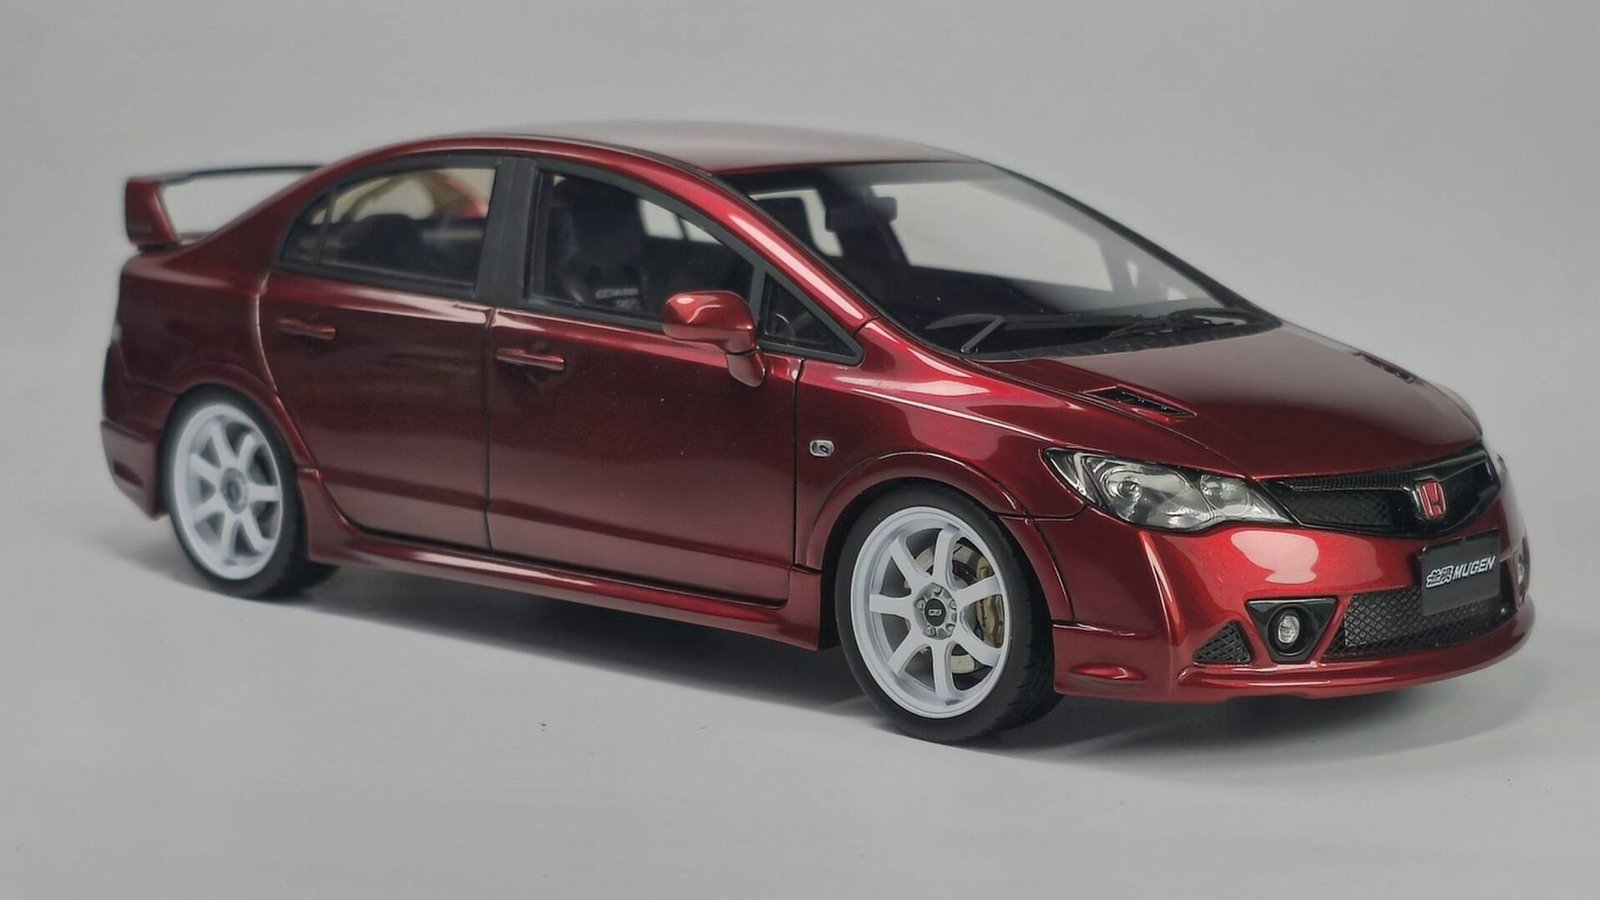
The Mazda Crystal Red paint choice really paid off. Under different lighting conditions, the color shifts and reveals layers of depth that a standard red simply can't match. The Novol 2K clear coat, wet-sanded and polished through to 3M Trizact 5000 and Menzerna compounds, delivers a glass-like finish that reflects the world around it.
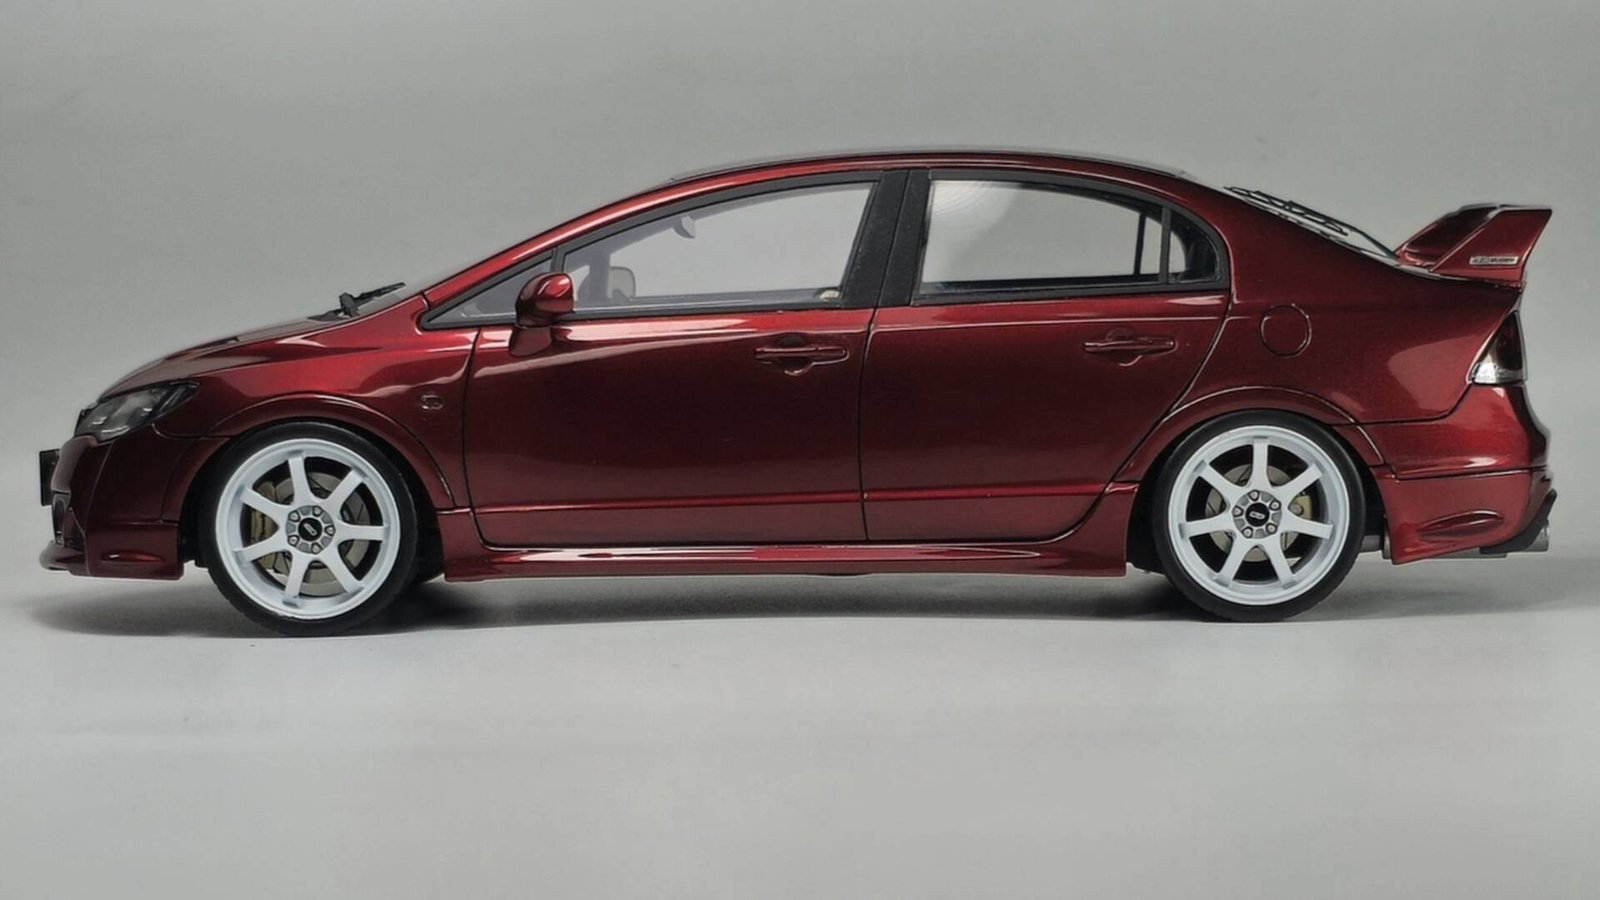
The carbon fiber details on the spoiler and seats add that motorsport edge, while the flocked carpet and photo-etched details bring the interior to life. The cross-hatched brake discs visible behind the wheels and the aluminum-tape reflector texture in the rear lights are the little touches that make this build special.
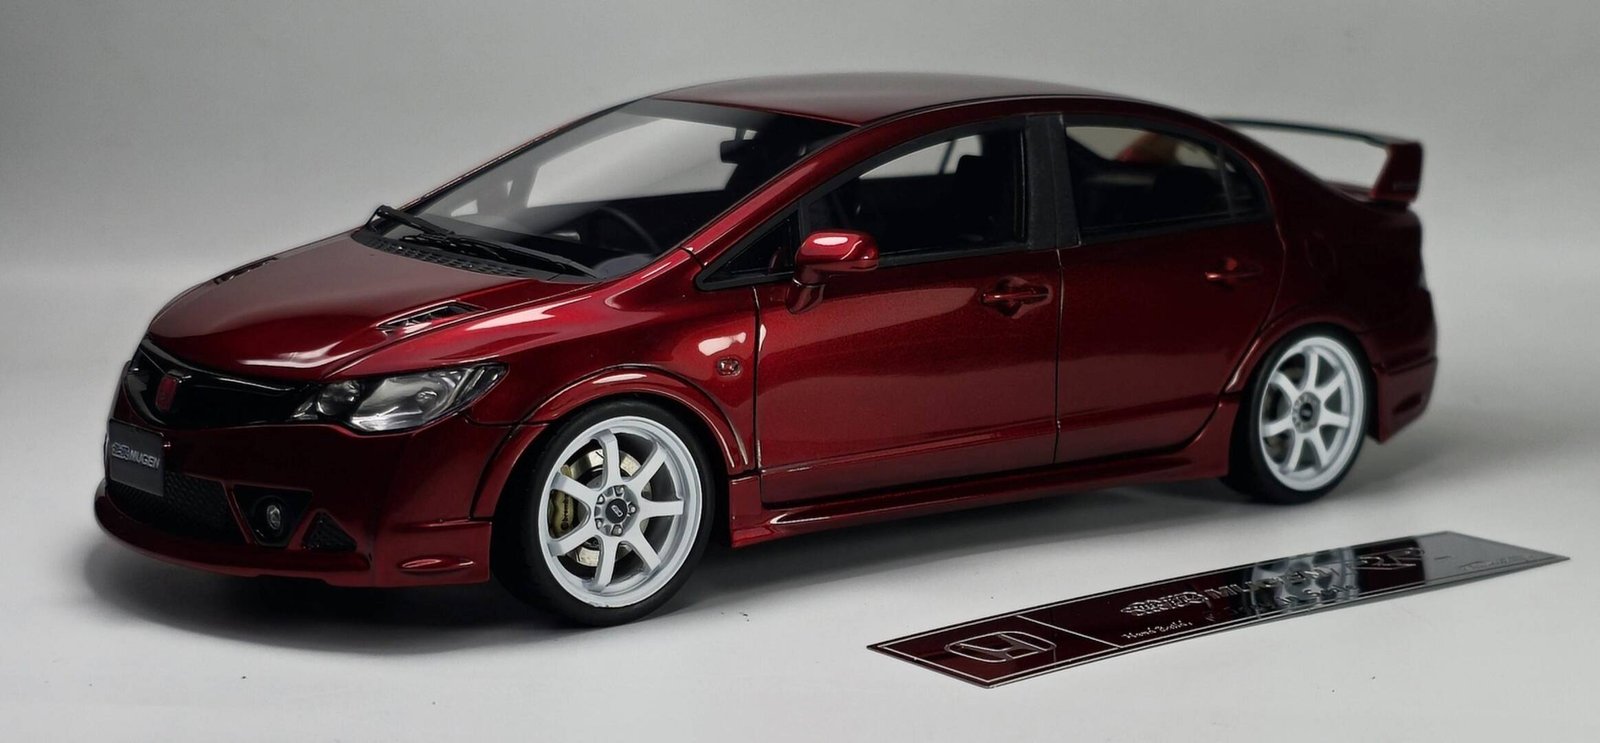
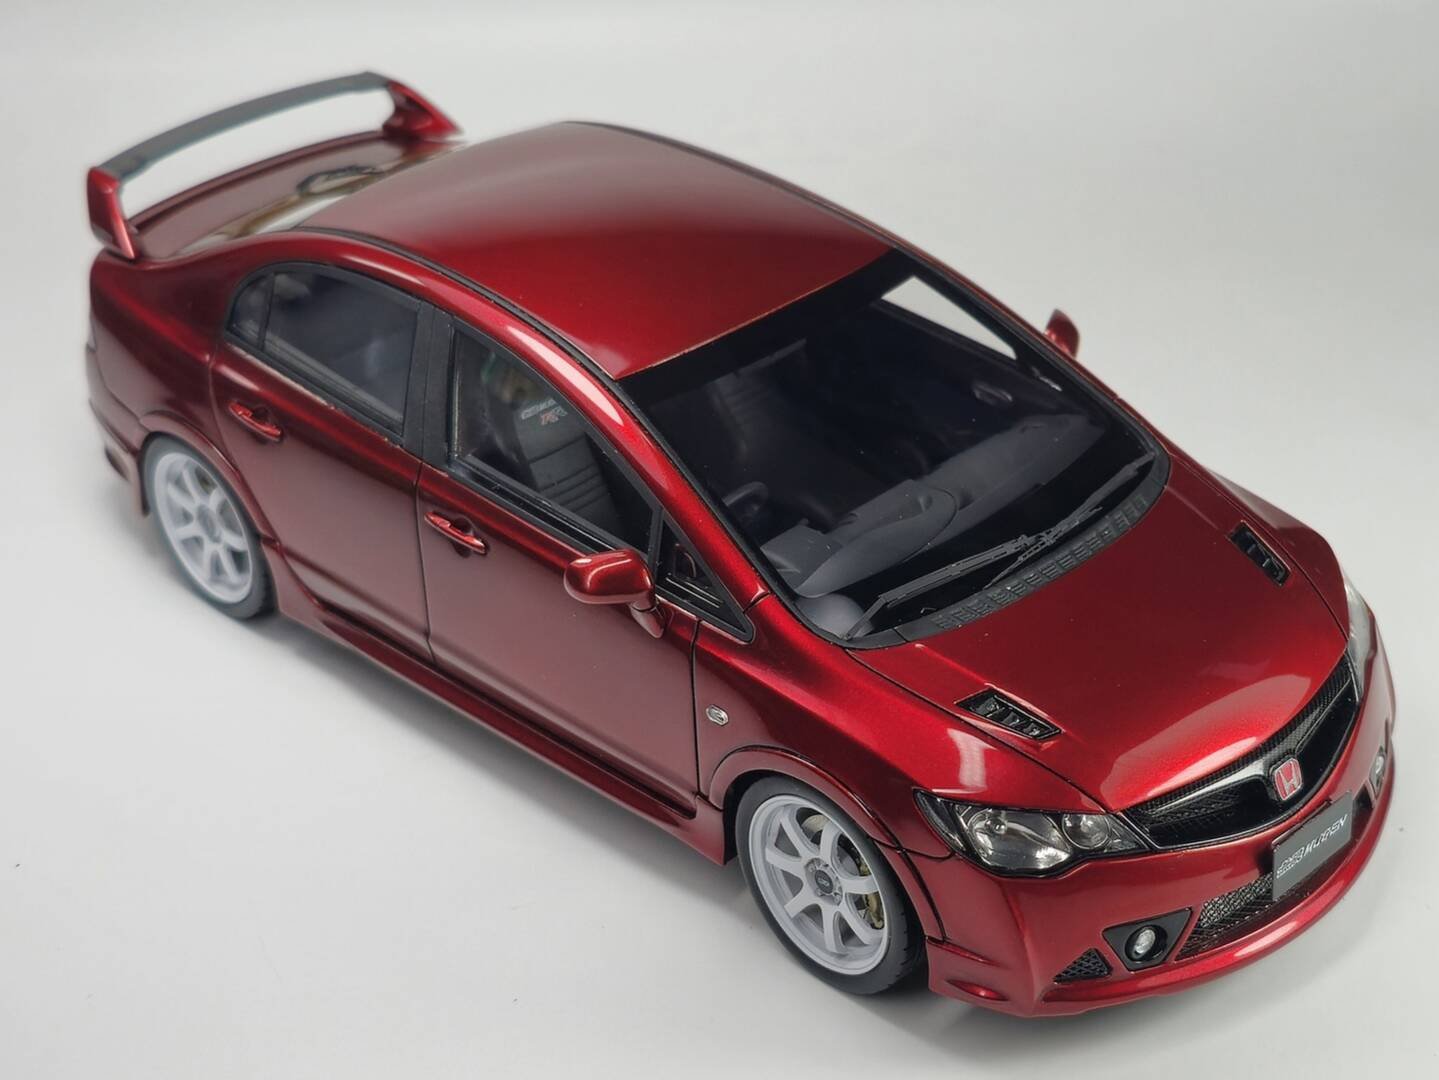
A huge thanks to Alpha Model for giving me the opportunity to build this incredible kit. The quality of the resin, PE, and decals made this build an absolute pleasure from start to finish.
If you're building this kit yourself, take your time, enjoy each step, and don't be afraid to try those little extra techniques — they make all the difference. Happy building!