
 Advanced Creators
Aston Martin Valkyrie Build Feature (Break Wong) — Part 1: The Hypercar, the Kit & What's Inside the Box
Alpha Model AM02-0102 · Build by Break Wong
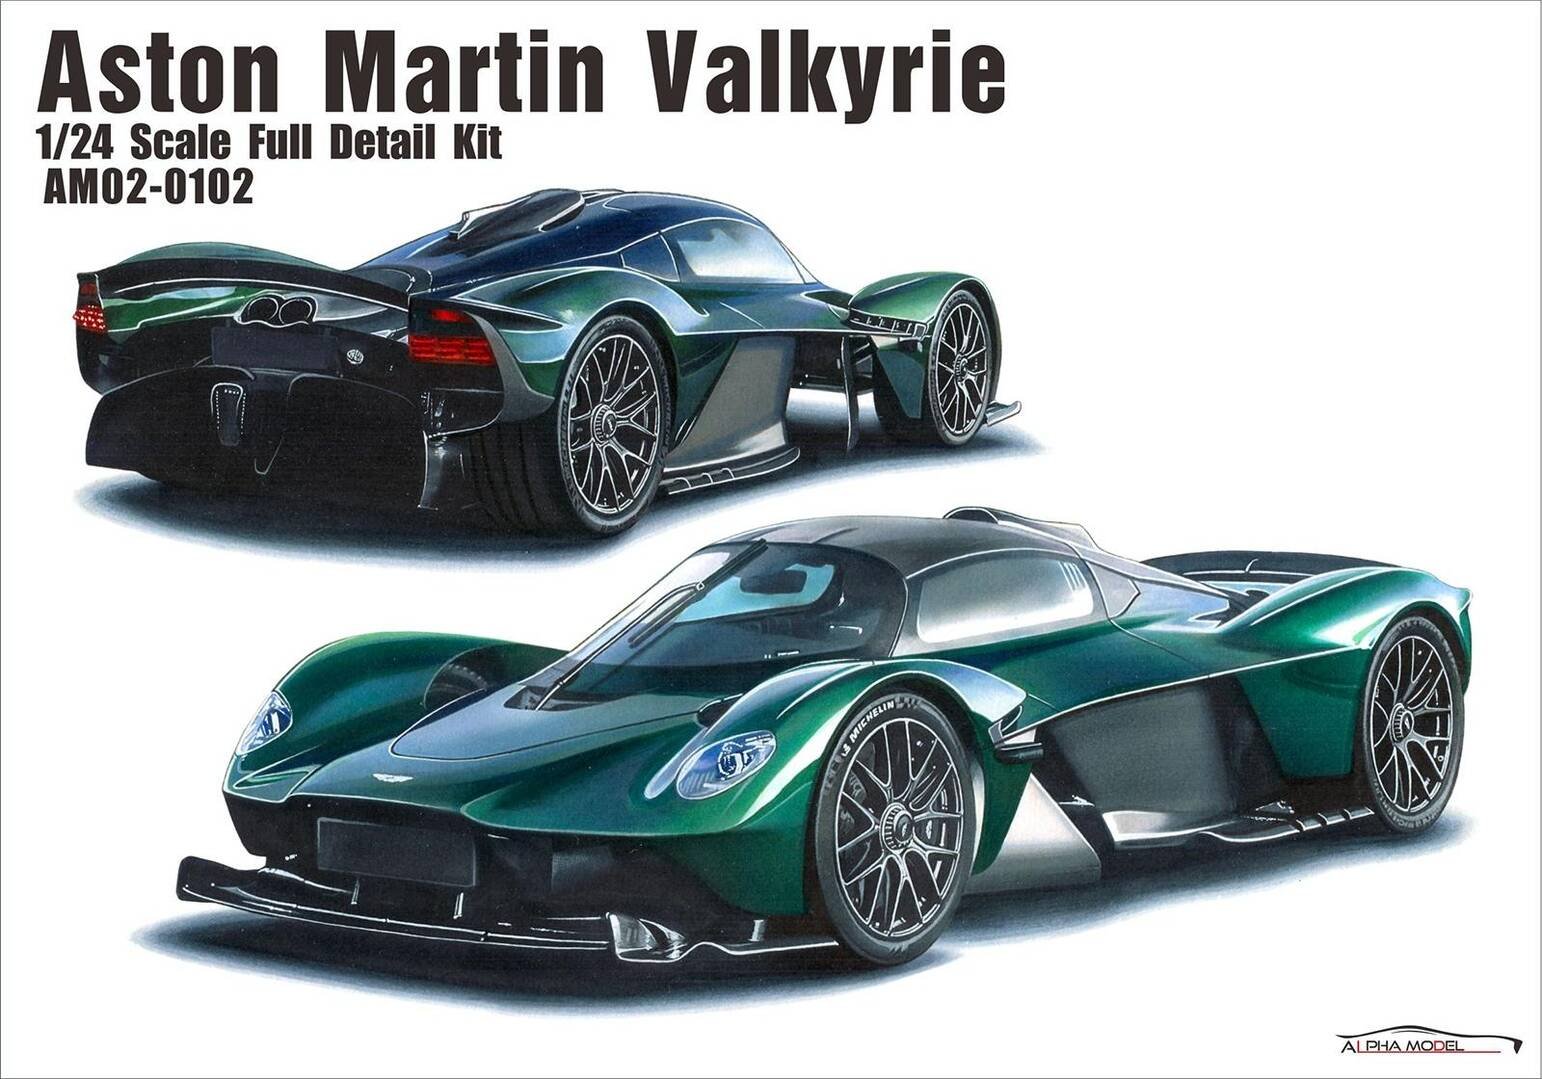
Meet the Aston Martin Valkyrie
Before we open a single box, it is worth understanding just what Break Wong agreed to recreate in 1/24 scale. The Aston Martin Valkyrie is not a conventional supercar — it is a road-legal hypercar developed jointly by Aston Martin and Red Bull Advanced Technologies, with Adrian Newey's Formula 1 design philosophy visible in every surface. The target was uncompromising: a car built around its driver and its aero, with no styling line that did not first have a job to do.
At its heart sits a naturally aspirated 6.5-litre Cosworth V12 — one of the most powerful atmospheric engines ever fitted to a road car — paired with a Rimac-supplied hybrid system for a combined output of around 1,160 PS. With a target dry weight barely above a tonne, the power-to-weight ratio is in genuine race-car territory. The teardrop cockpit, the underfloor Venturi tunnels, the exposed wishbones and the near-absence of a conventional top surface all exist to manage airflow. Recreating that density of engineering in miniature is exactly the kind of challenge Alpha Model's full-detail resin range is designed for.
AM02-0102 at a Glance
| Subject | Aston Martin Valkyrie |
| Kit | Alpha Model AM02-0102, Full Detail Kit |
| Scale | 1/24 |
| Type | High-detail multi-media resin kit |
| Builder | Break Wong |
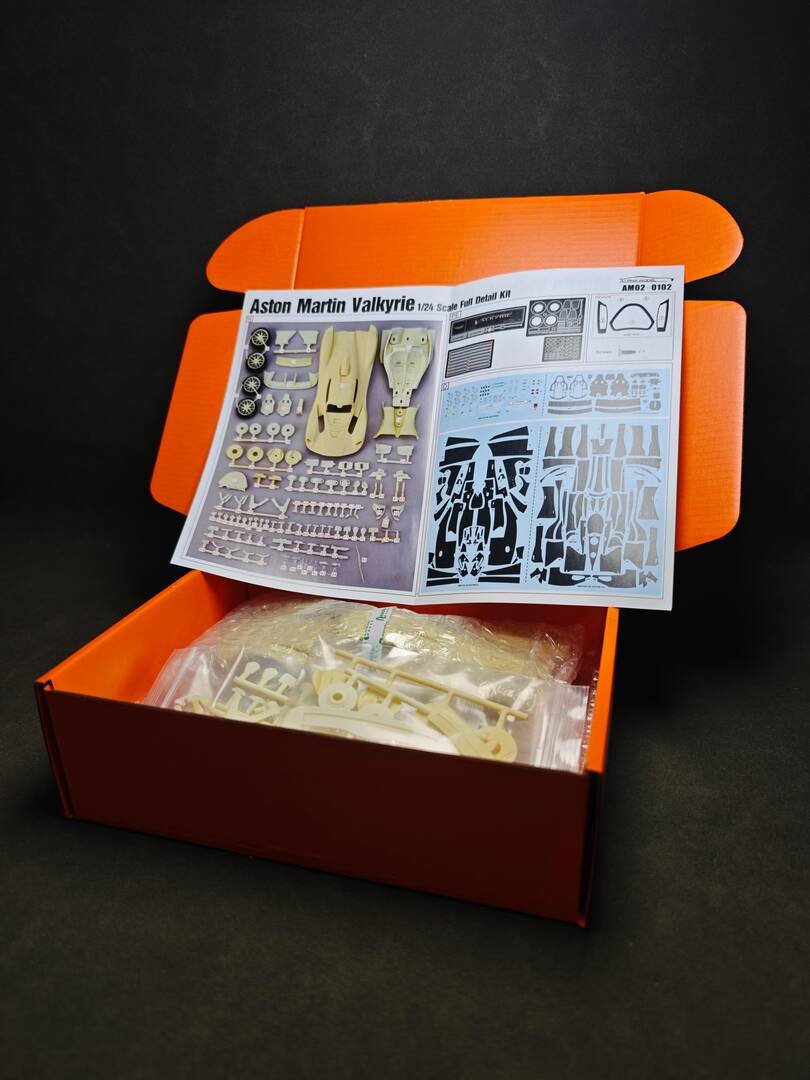
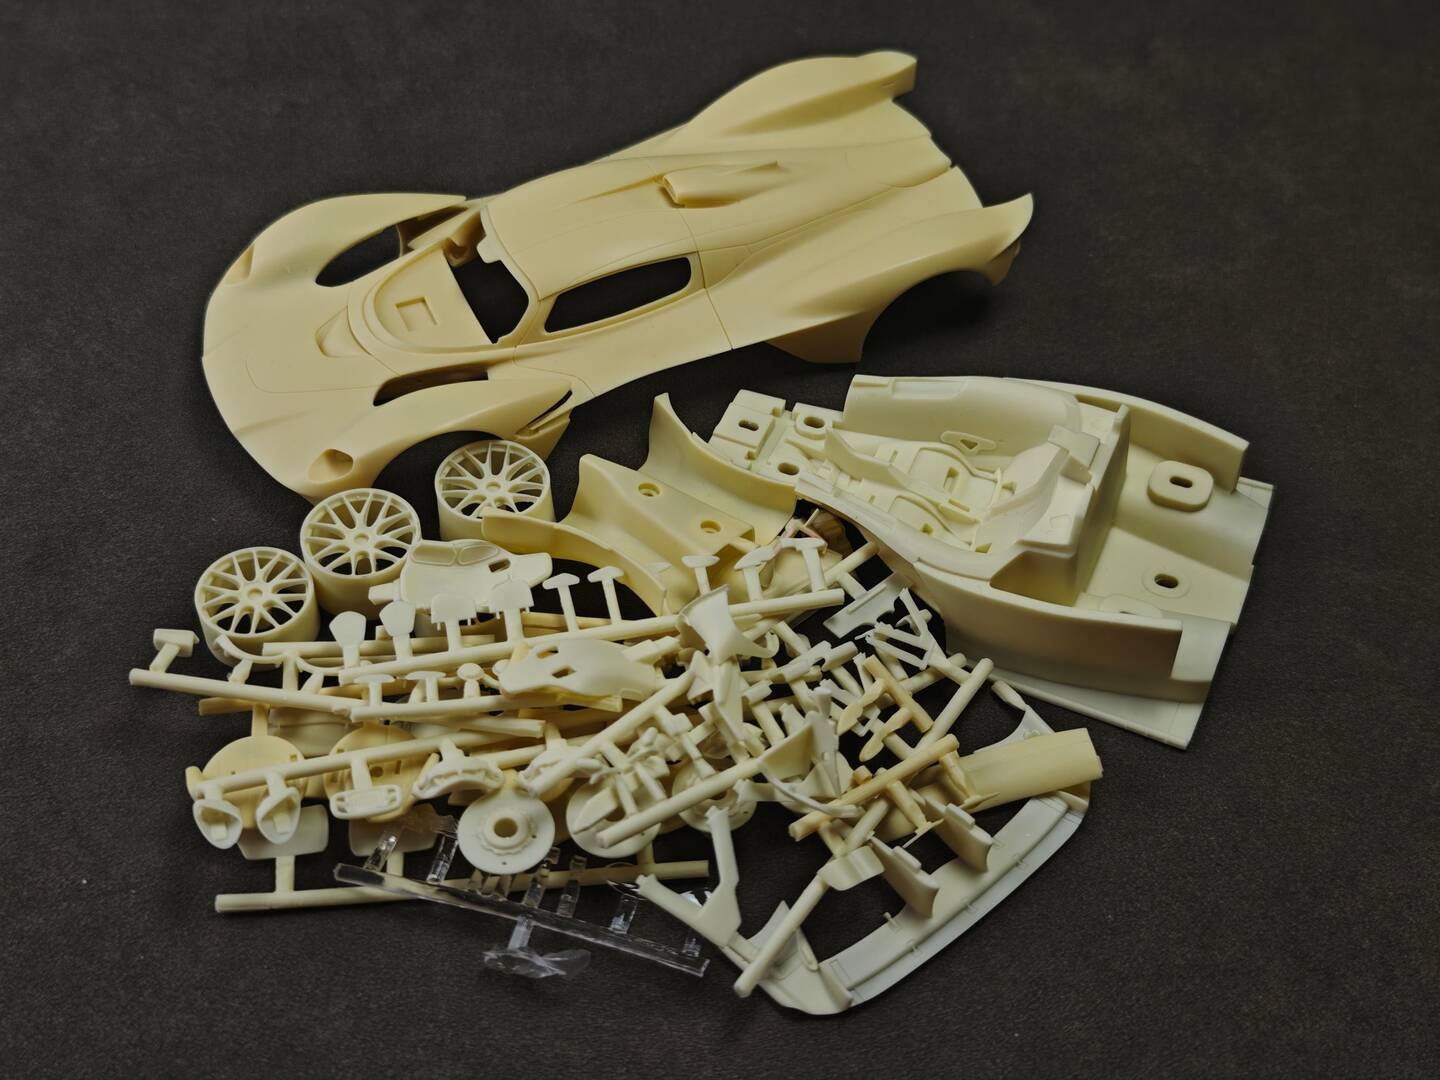
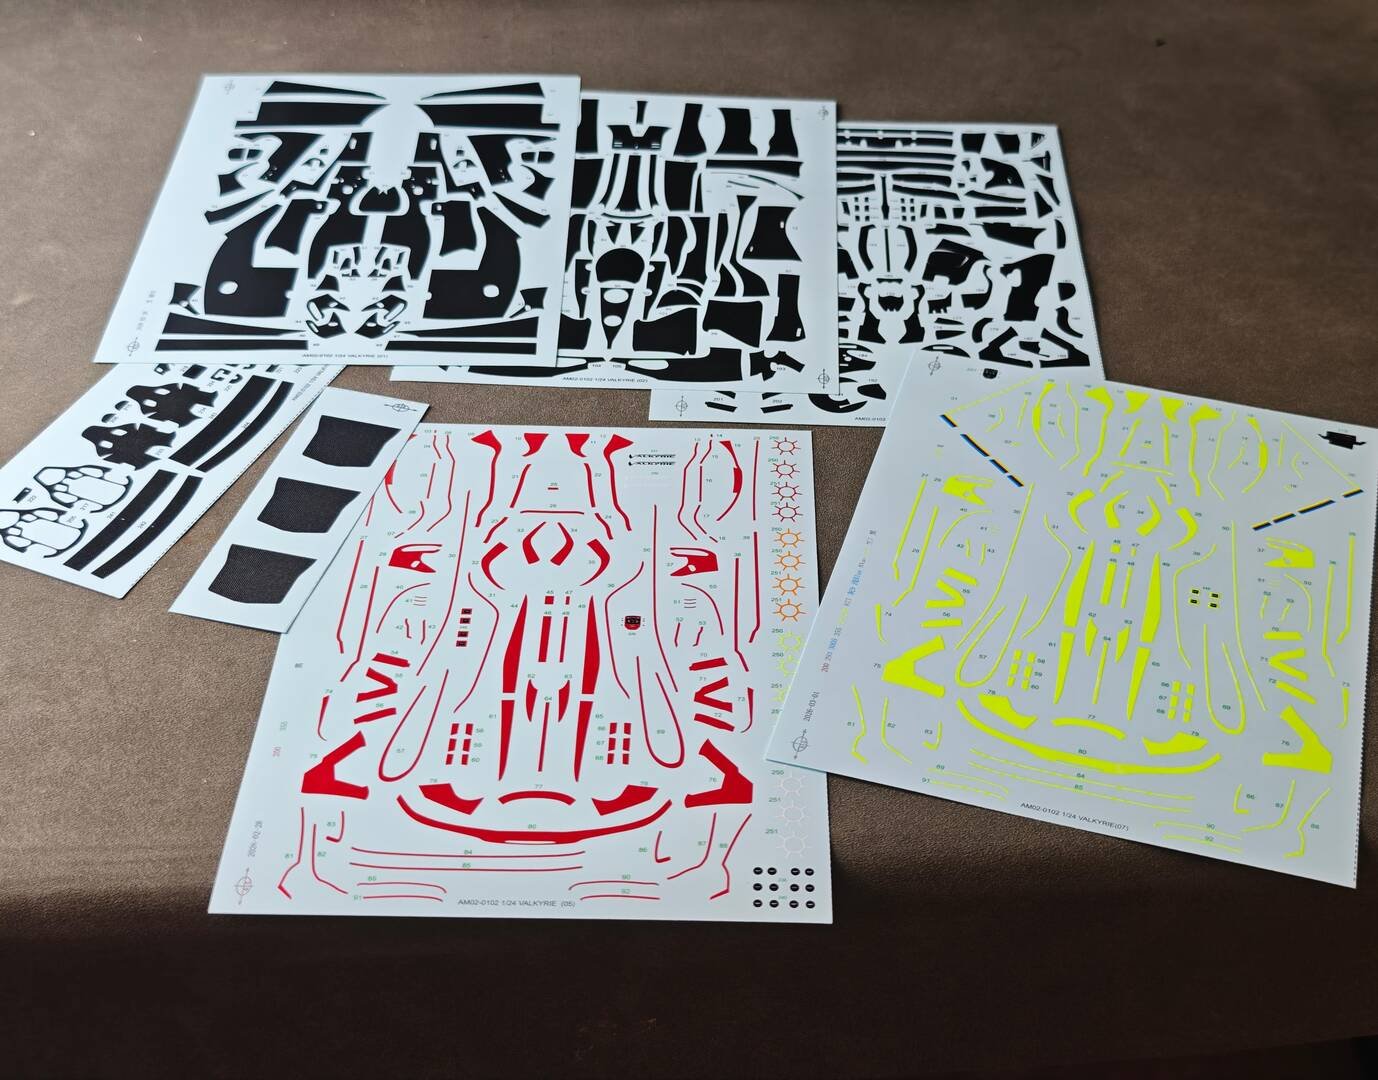
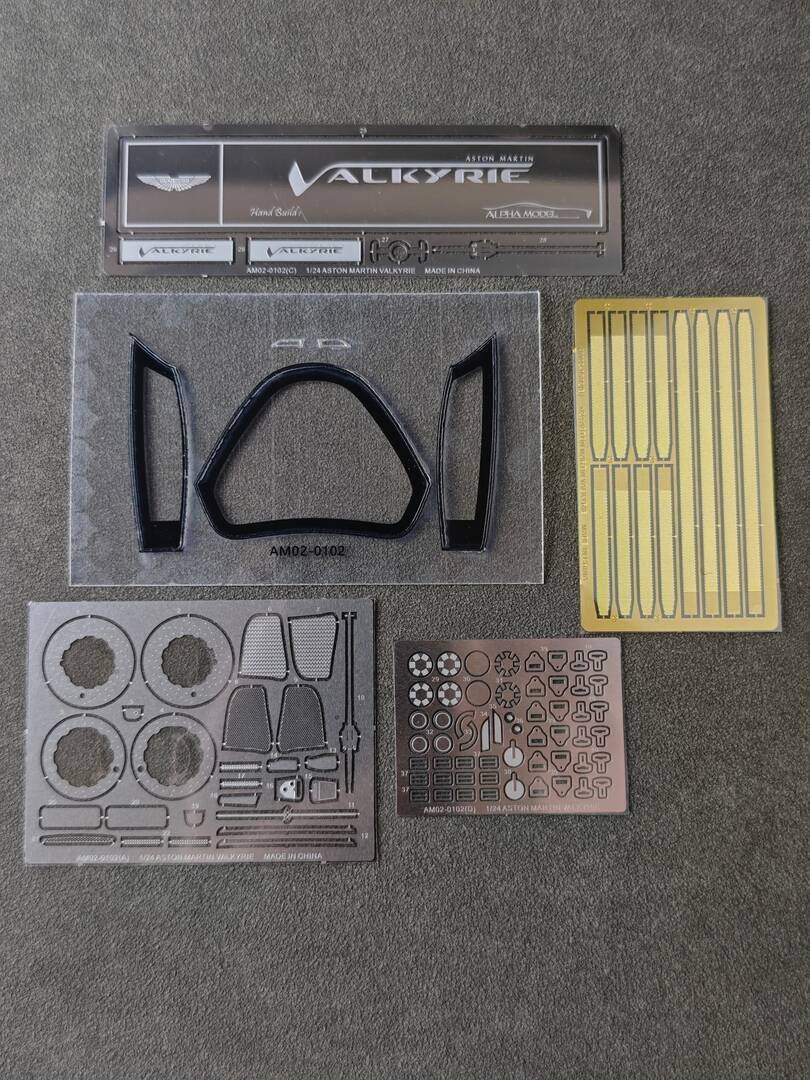
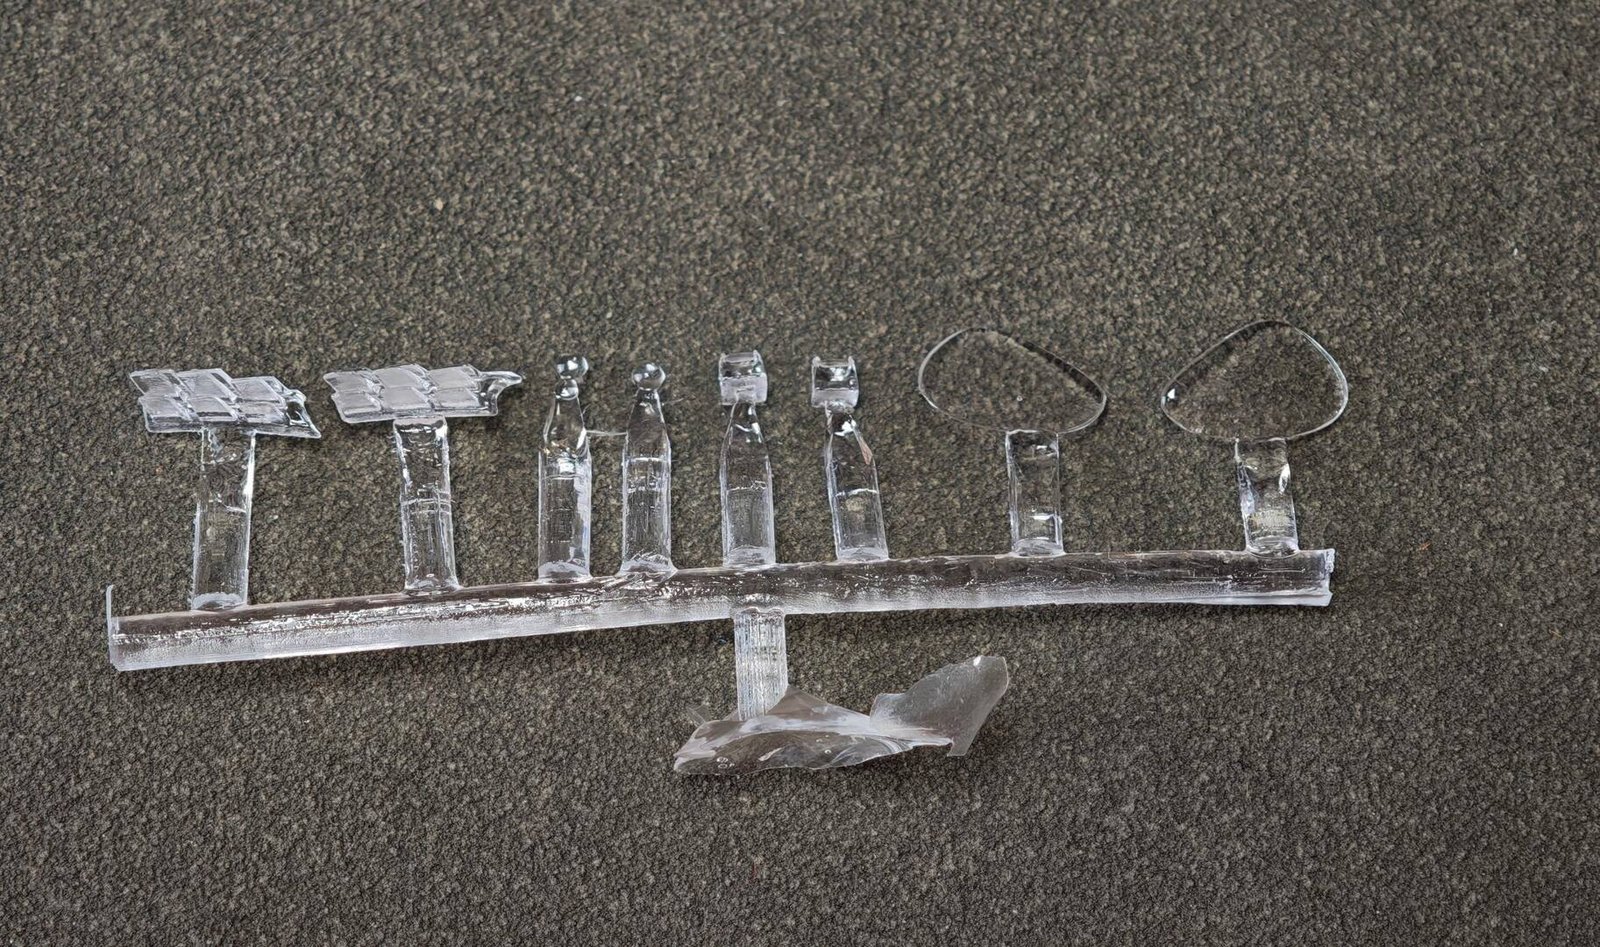
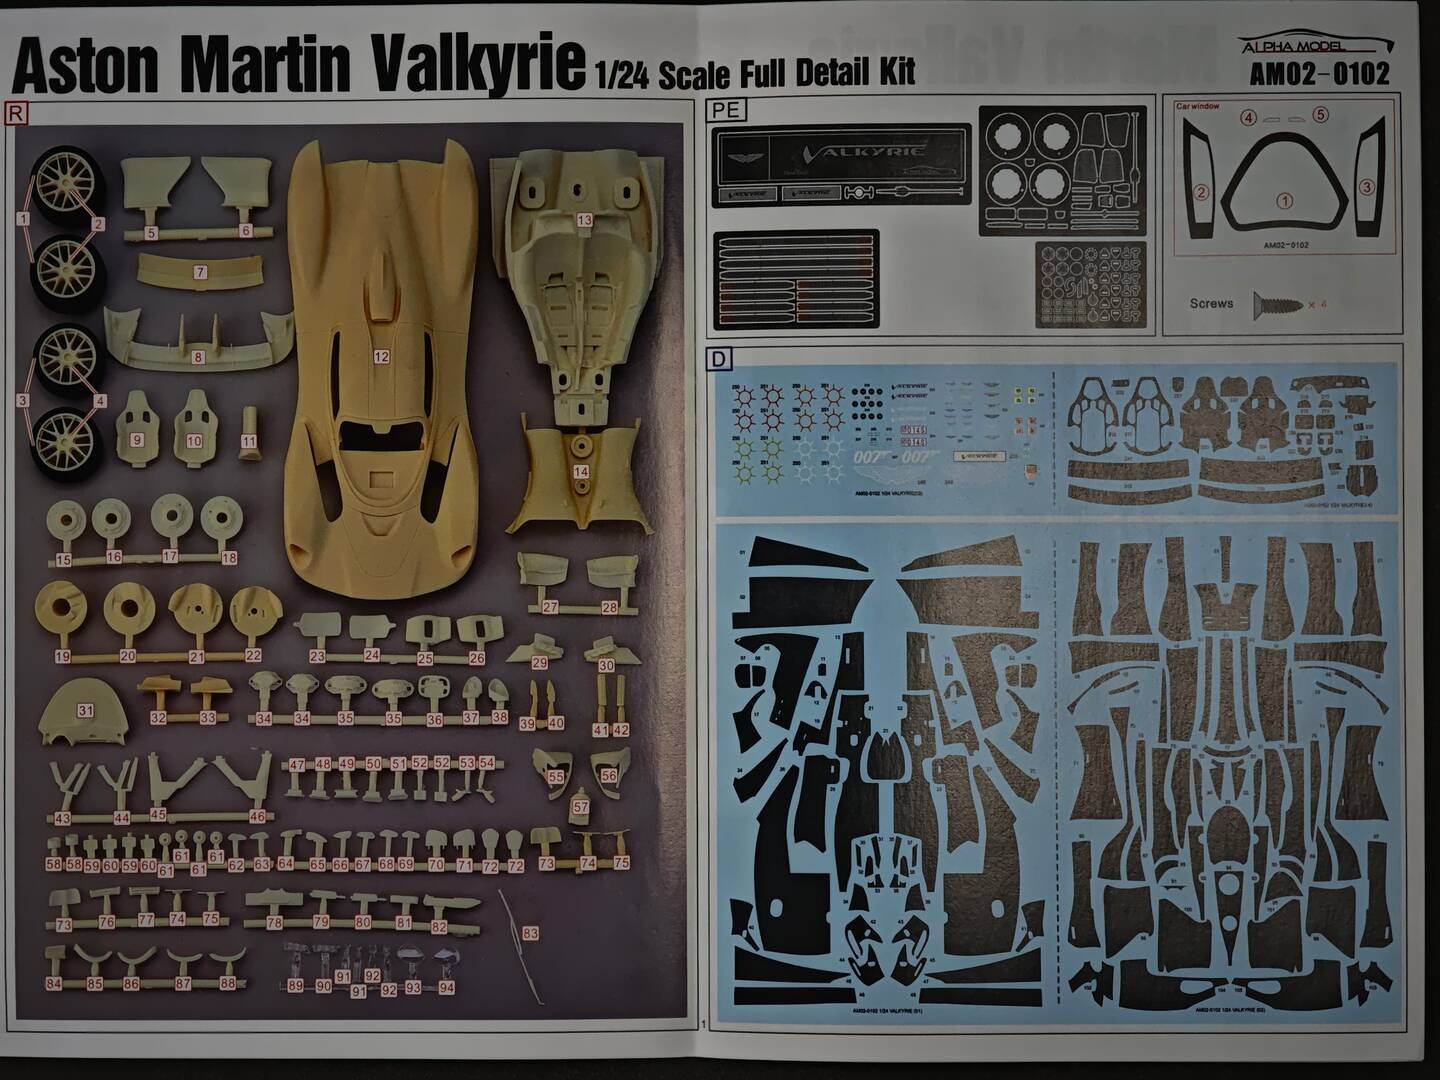
| Feature contents | Resin parts (R series), photo-etched parts (PE), carbon and detail decal sheets (D / CD), clear parts (F), turned-metal components (K), machined parts (M) |
As a full-detail release, AM02-0102 models the car the way it is actually built: a separate structural tub and floor, a fully detailed cockpit with harnesses, vented ceramic brake discs with locking rings, multi-part aero surfaces, and an extensive decal programme that reproduces the Valkyrie's exposed carbon weave in multiple areas. The build guide Break produced runs to 88 pages, and this forum series follows it in order.
Choosing the Colour
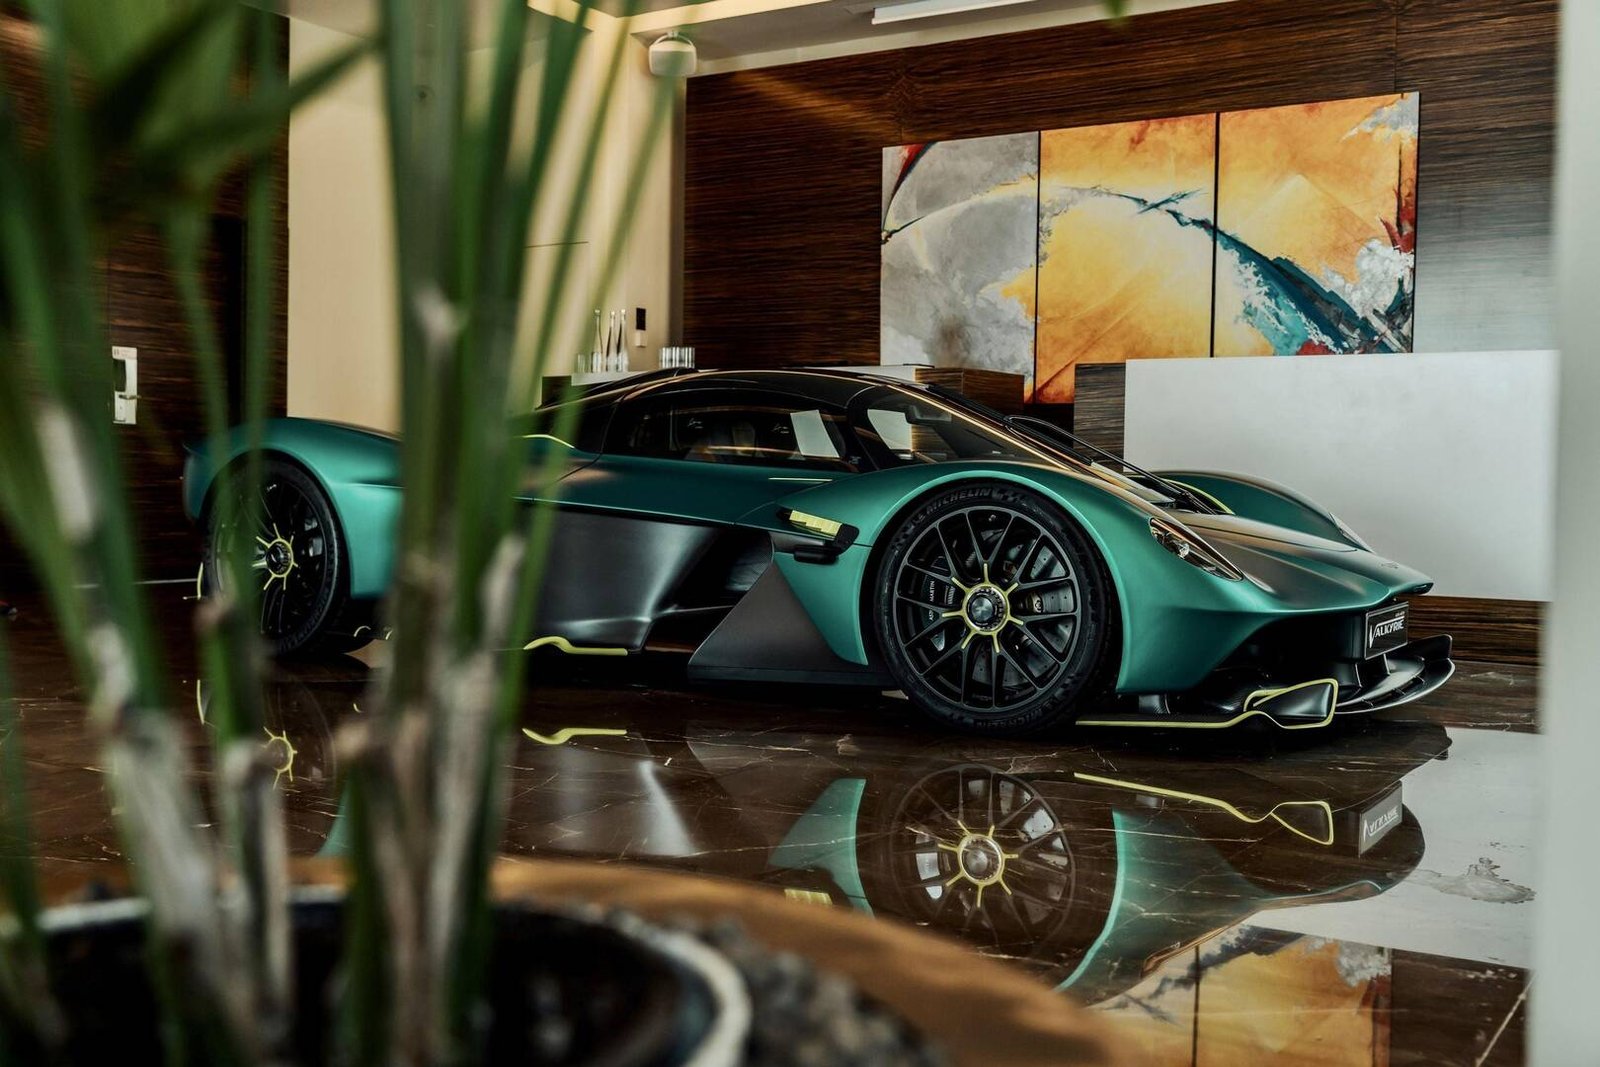
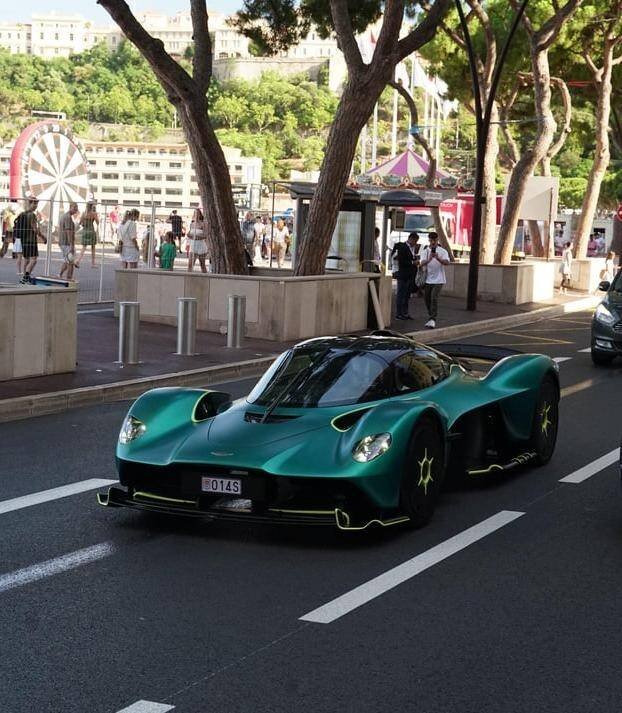
The finished car is finished in a luminous Aston Martin Racing Green / teal with satin-black aero sections and lime accents on the diffuser trim, harness pads and wheel centre-locks. The guide opens with the full factory palette, because the same kit can be built in everything from subdued black to bold heritage colours.
Reading the Part Labels
Throughout the guide, parts carry short codes that are worth learning up front: R numbers are resin components, PE numbers are photo-etched metal, D and CD numbers are waterslide decals (carbon weave and detail markings), F marks clear parts, while K and M denote turned-metal and machined items such as the wheel hubs and centre-lock hardware. Yellow labels in the photos indicate decal placement, teal labels the underlying part.
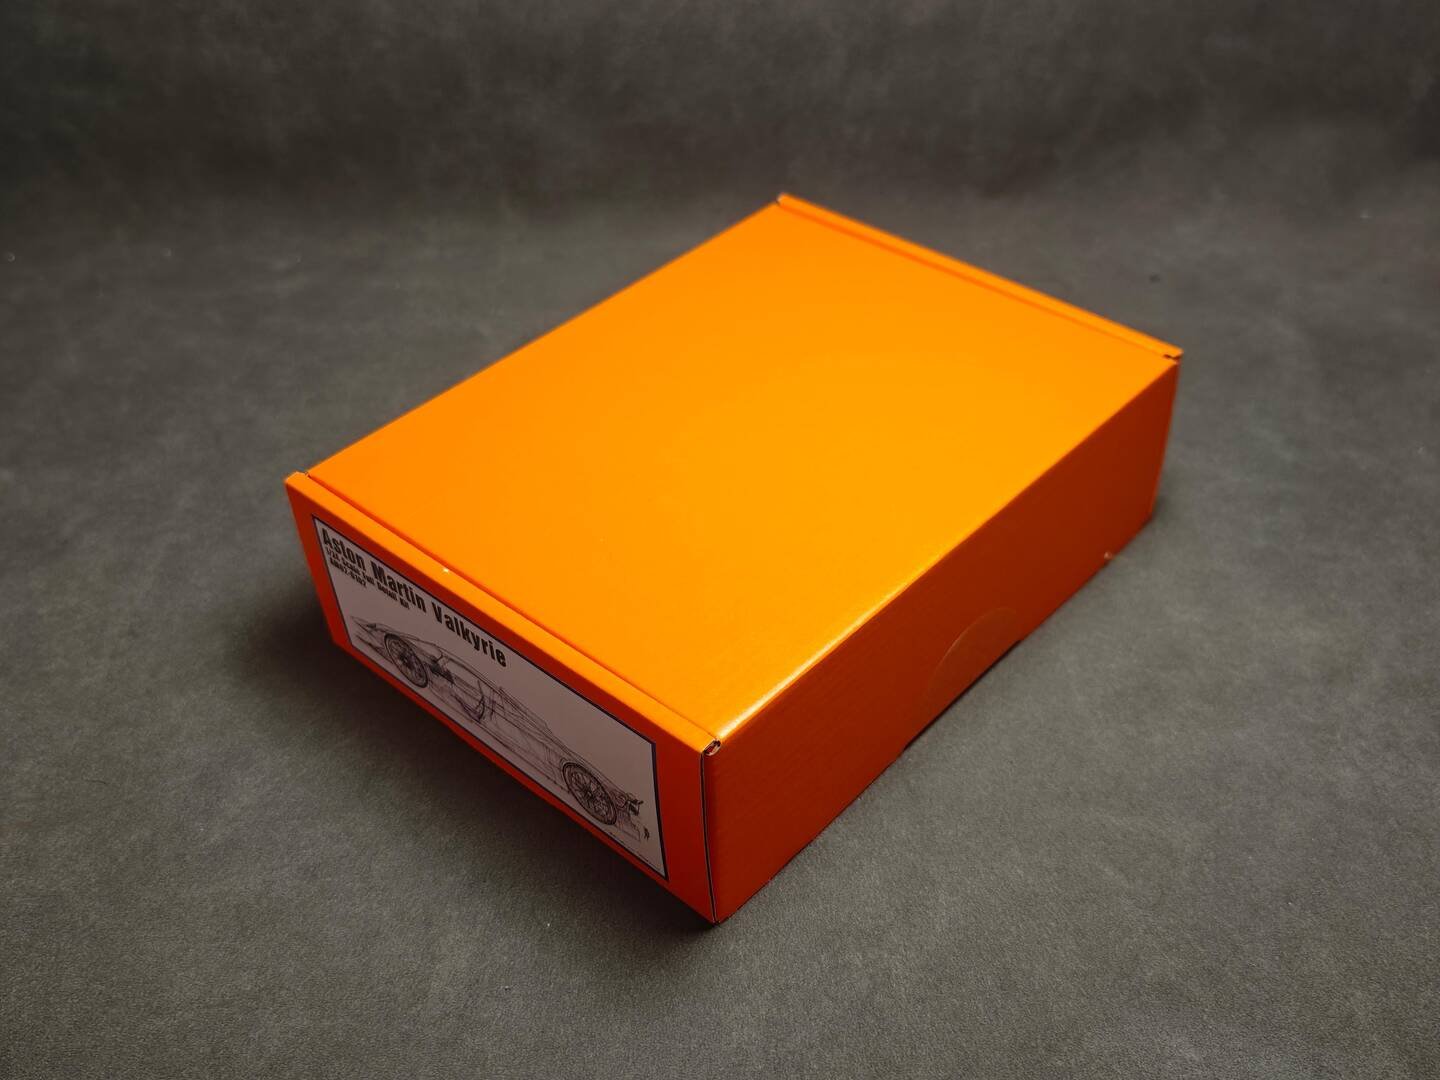
The very first job, before any glue or paint, is the one every experienced modeller knows: count everything, inspect every resin casting under good light, and report anything missing or damaged to the retailer in time. With a kit of this complexity, a missed bubble or a short-shipped PE fret is far easier to fix on day one than at final assembly.
Next time, Break begins work on the single most visible component of the whole build — the body shell — with primer, panel-line rescribing and a disciplined sanding routine.
Next: Part 2 — Body Shell Prep: Primer, Panel Lines & Surfacer
Advanced Creators
Aston Martin Valkyrie Build Feature (Break Wong) — Part 2: Body Shell Prep — Primer, Panel Lines, Surfacer & Pre-Masking
Alpha Model AM02-0102 · Build by Break Wong
Chapter 2 of Break Wong's build guide deals with the single most visible component in the whole project: the one-piece Valkyrie body shell. The bare resin casting arrives clean and well-tooled — accurate shape, smooth surfaces, no flash — but every surface is still a long way from the glassy teal-and-carbon finish seen on the real car. The chapter is a patient sequence of priming, rescribing, sanding, re-priming and masking. Nothing here is glamorous; everything here decides the final result.
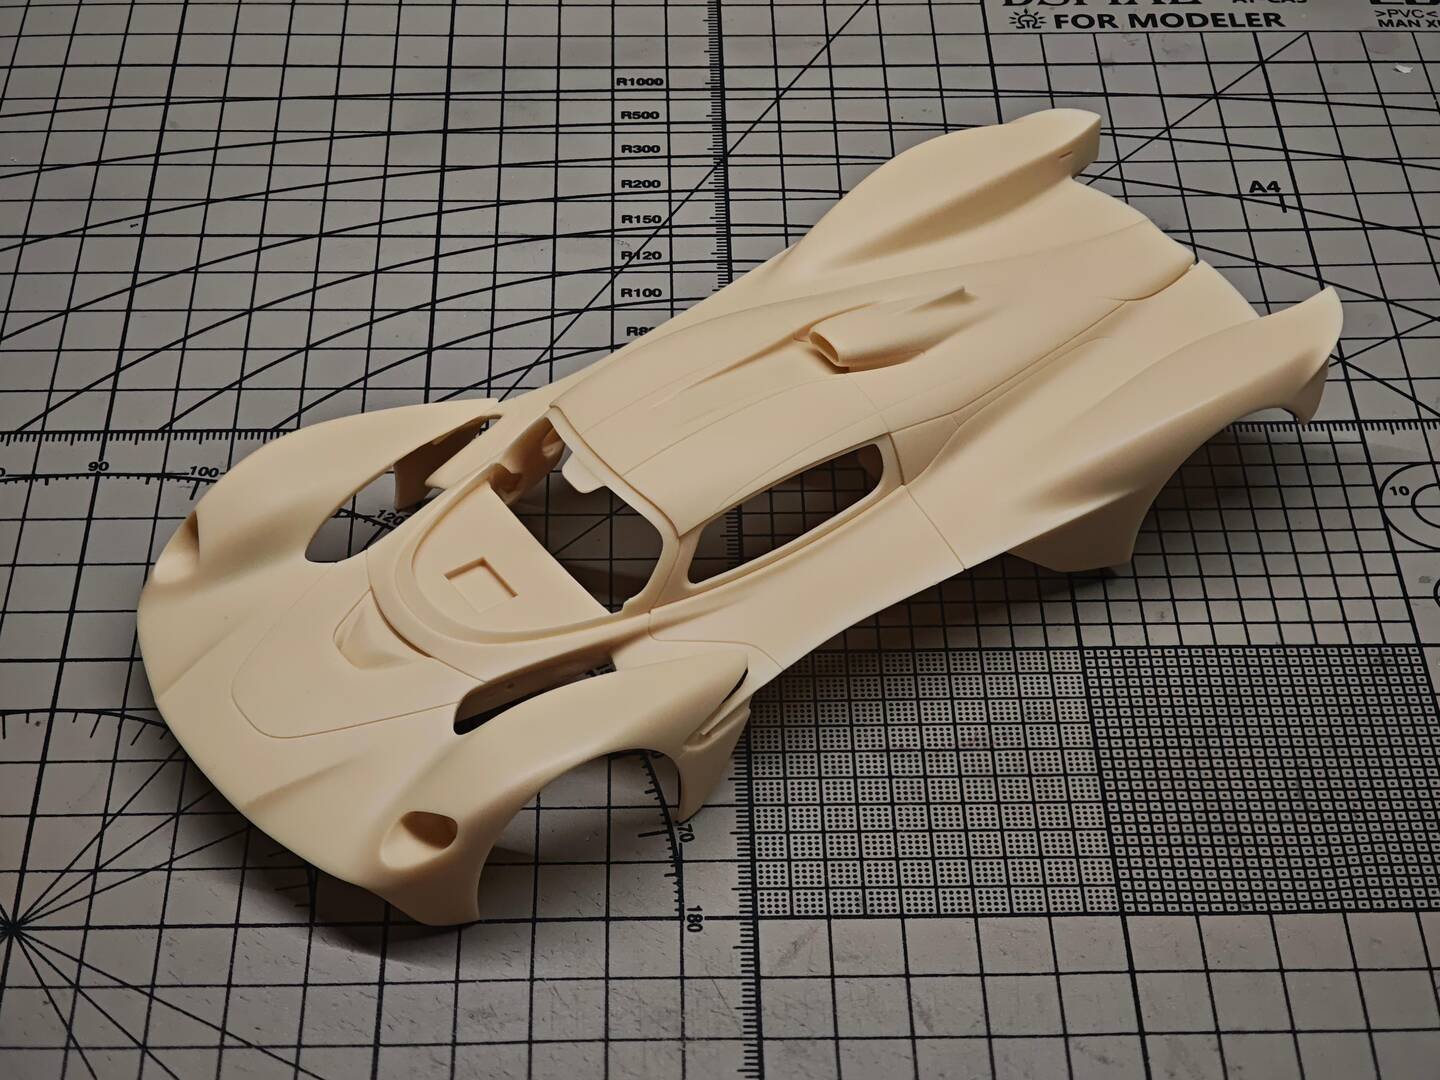
Step 1 — A thin grey guide coat
After washing the parts to remove mould-release grease, the shell gets a thin coat of grey primer. In Break's own words: "spray a thin coat of grey primer on the body shell to reveal flaws and aid in sanding. Apply just enough to cover the bare resin; applying it too thickly will slow down drying and make sanding difficult." The light coat maps low spots and gives the scriber an even surface to track.
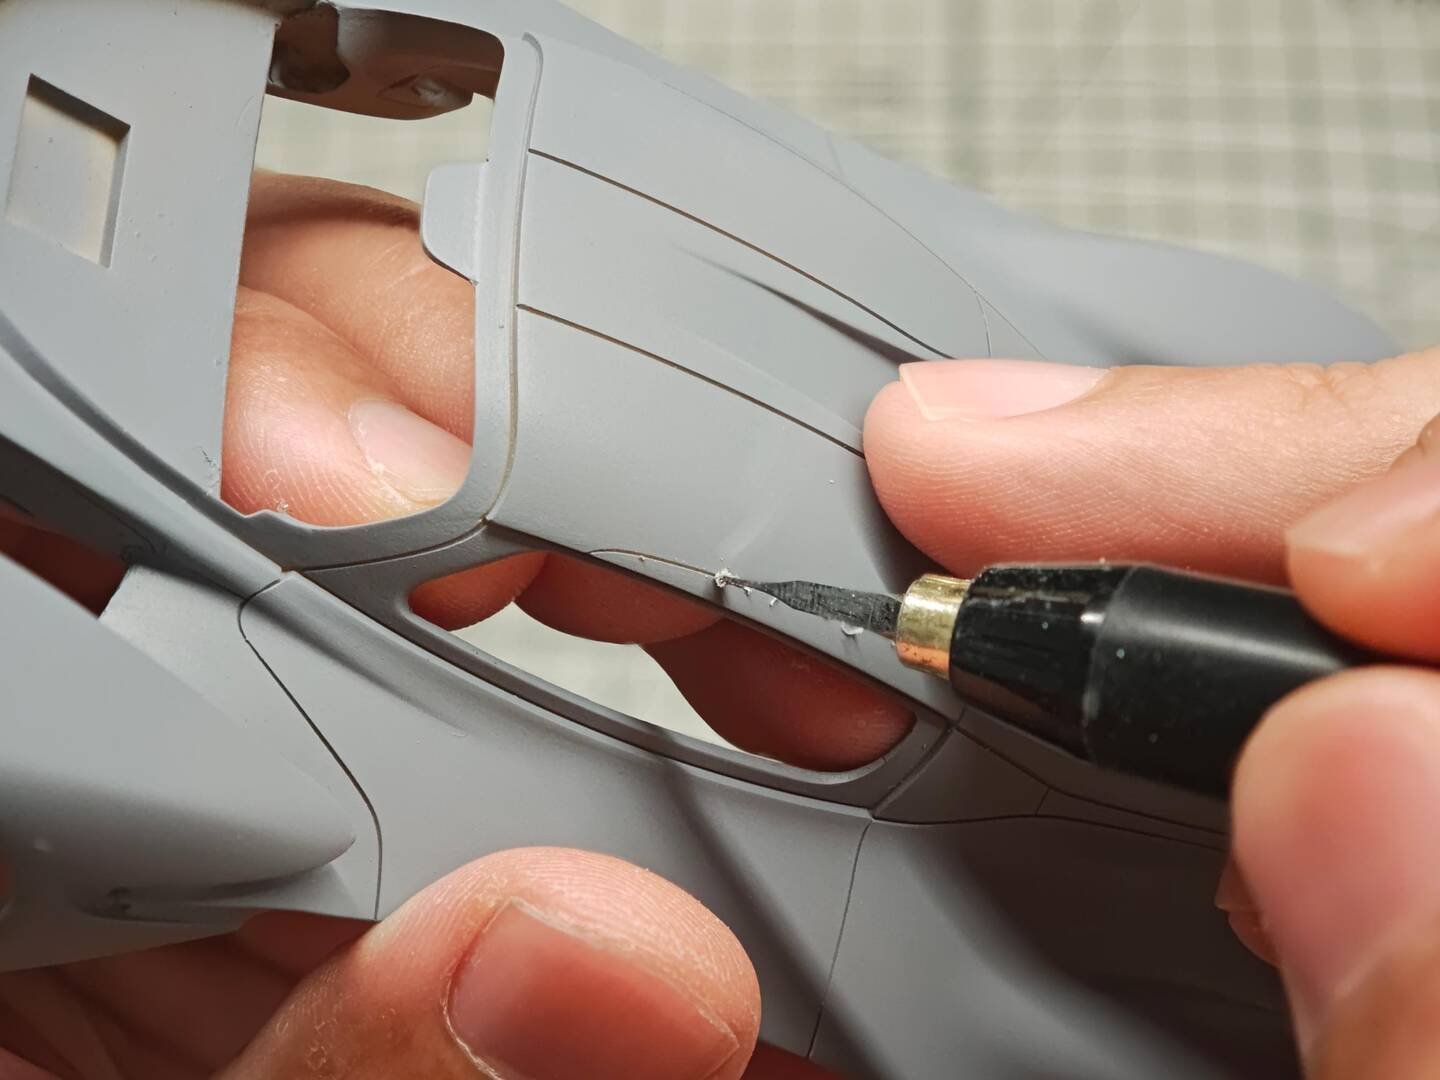
Step 2 — Deepen the panel lines with a 0.15 mm scriber
Although the moulded panel separations are already crisp, Break deepens every channel with a 0.15 mm scriber. Pressure increases gradually over several light passes rather than one cut; a curved scriber handles the Valkyrie's many flowing lines, while the straight tool is reserved for short geometric sections. Done well, this adds real three-dimensional depth and even allows panel-line washes to be skipped later, because the channels create natural shadow on their own.
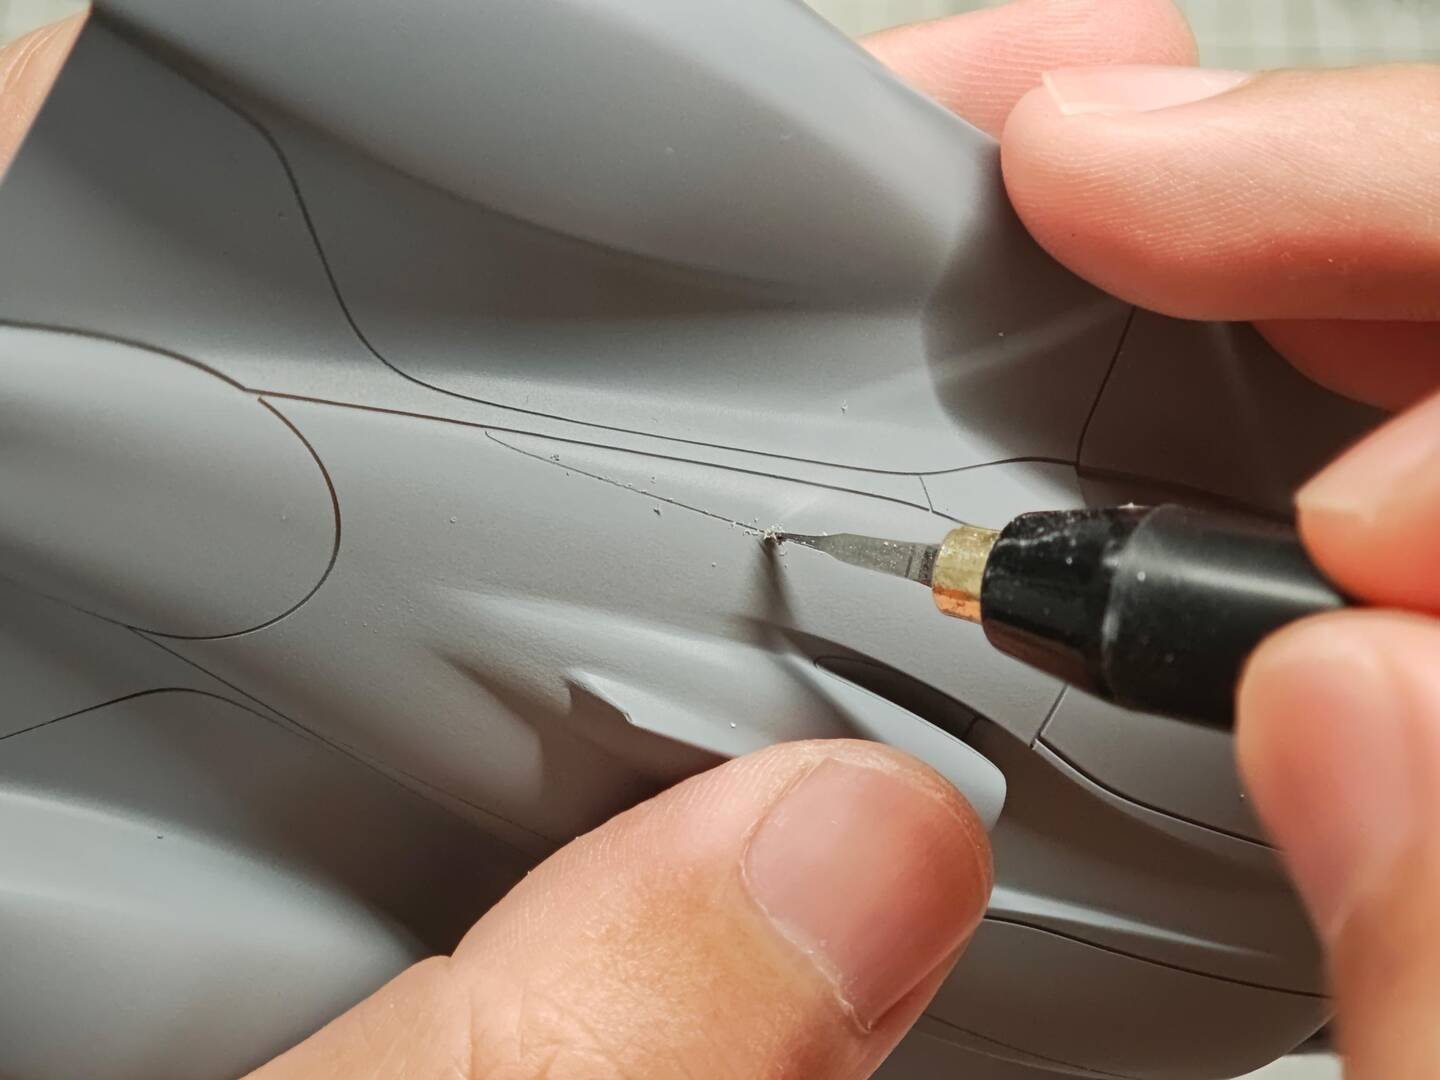
Step 3 — Level with paper, finish with sponge
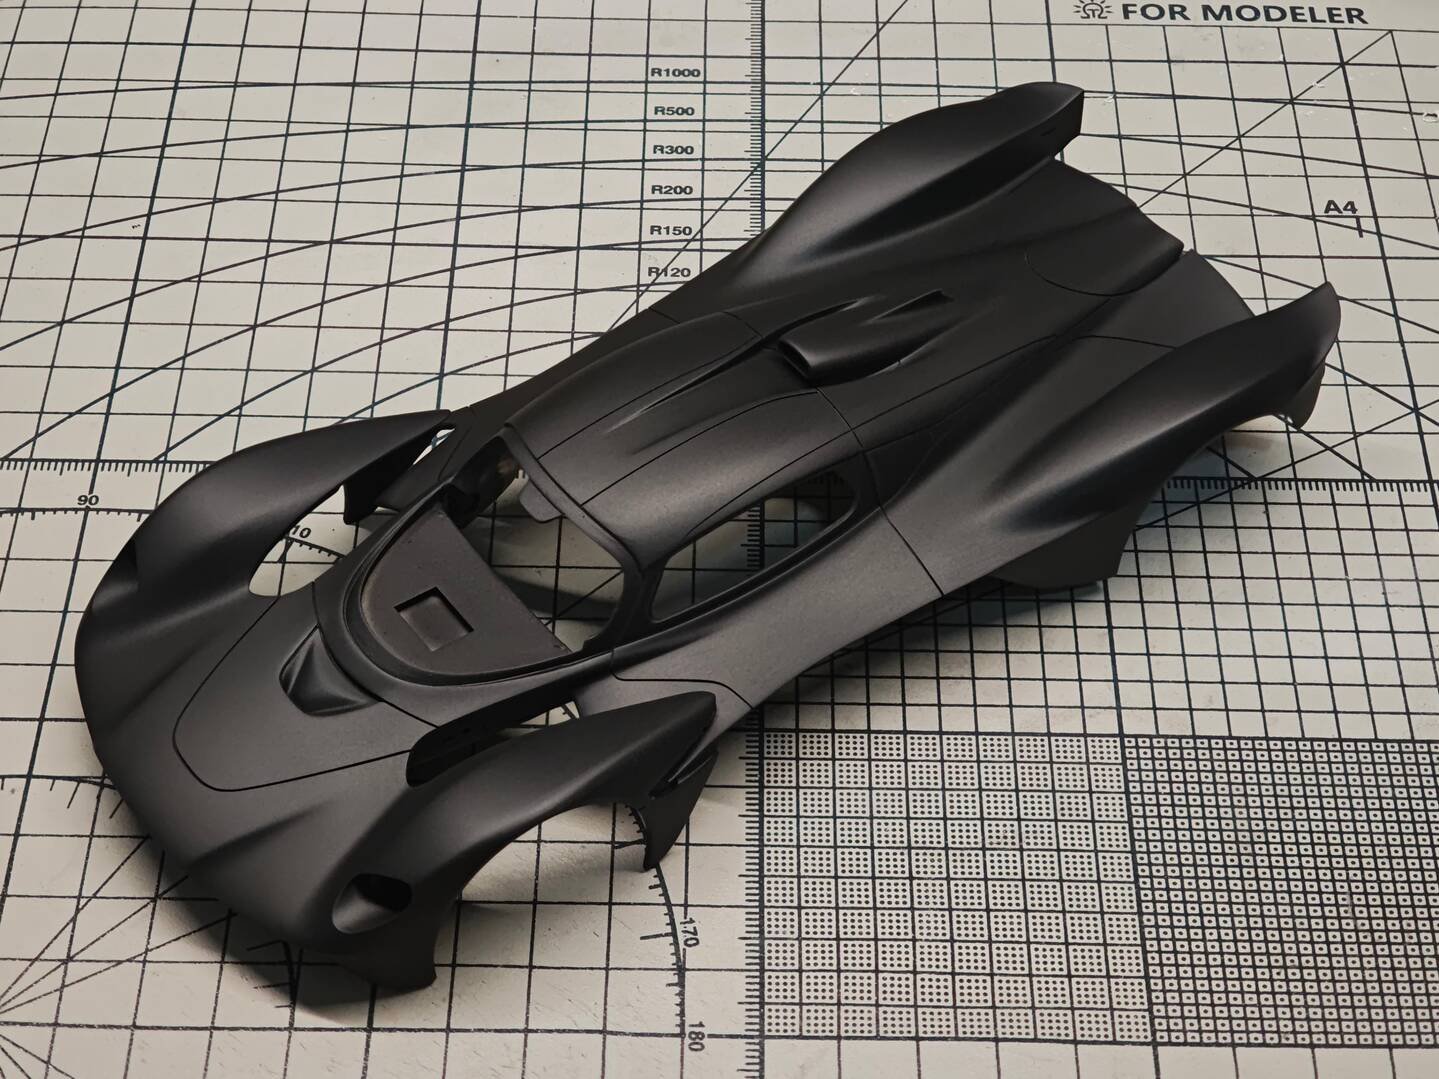
Scribing raises a tiny burr along every channel. The whole shell is first levelled with regular sandpaper, then gone over repeatedly with a fine-grit sanding sponge to erase the coarse paper scratches. Once the sanding is complete, another light primer coat goes on to reveal any flaws still hiding under the surface. The cutting-mat photo shows the shell at this check stage, with subtle tone differences marking the areas that still need work.
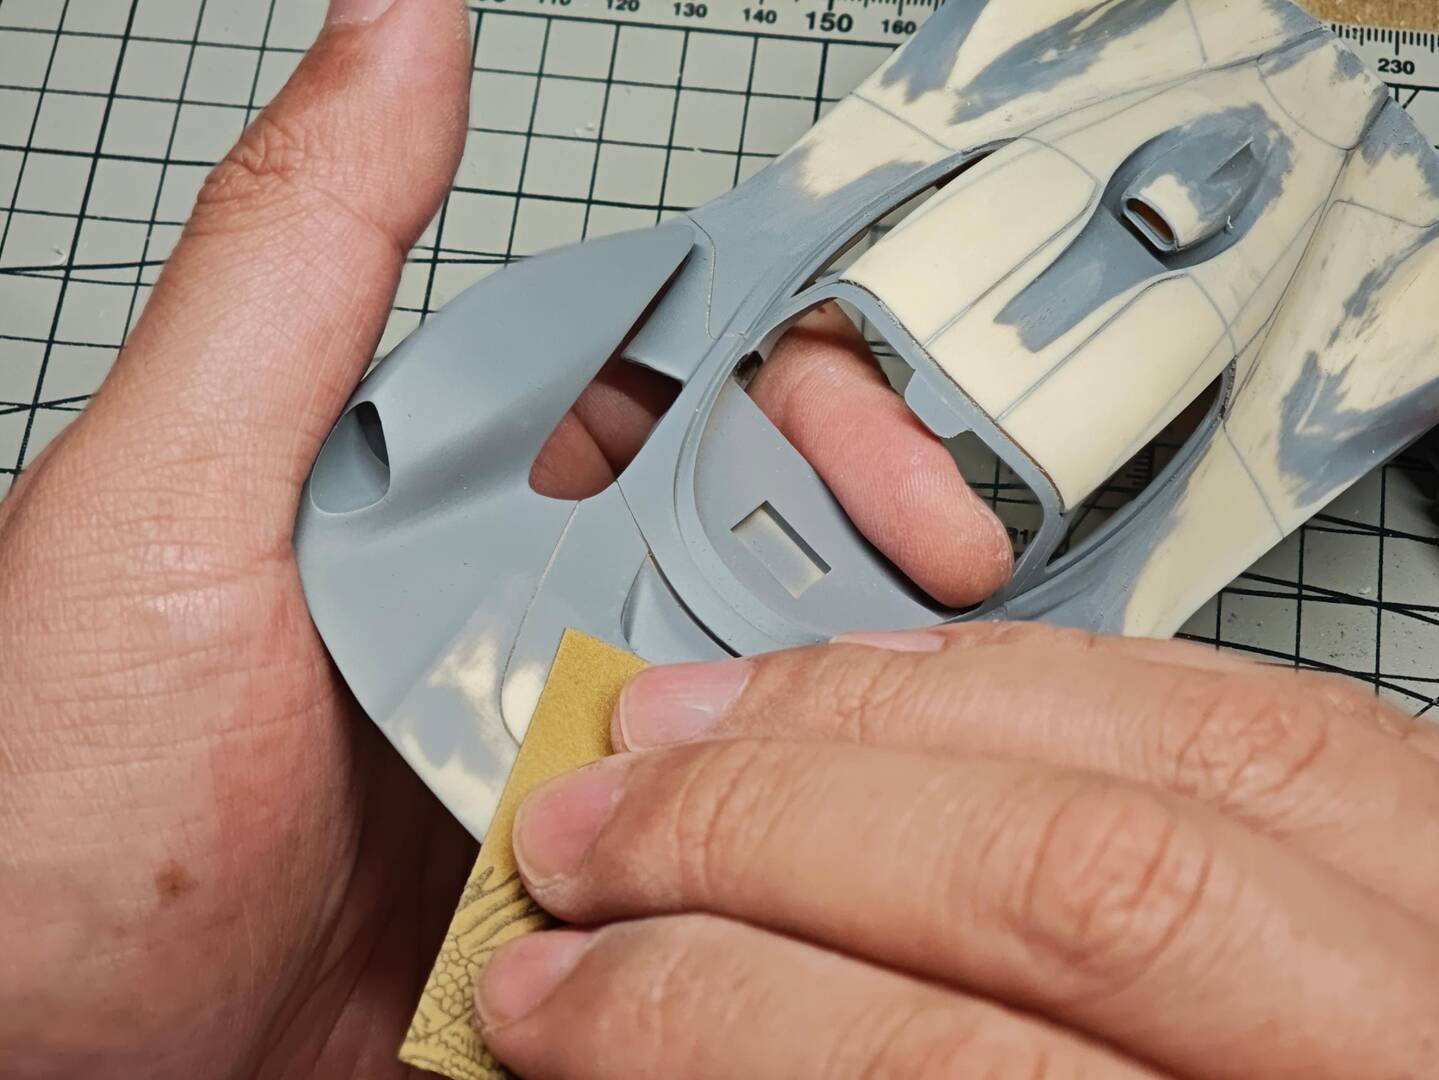
Step 4 — Black primer over everything, inside and out
The shell — including its inside — is then sprayed black for a uniform base. Break specifies what to do when a dust nib lands in the fresh coat: wait until fully dry, sand it flat with 2000-grit paper and respray; after the final inspection, minor specks can be lightly buffed with a 3000-grit sanding sponge. Dark primer also pre-shades the deep aero tunnels and gives the upcoming custom colour the exact dark underlayer it was tested on.
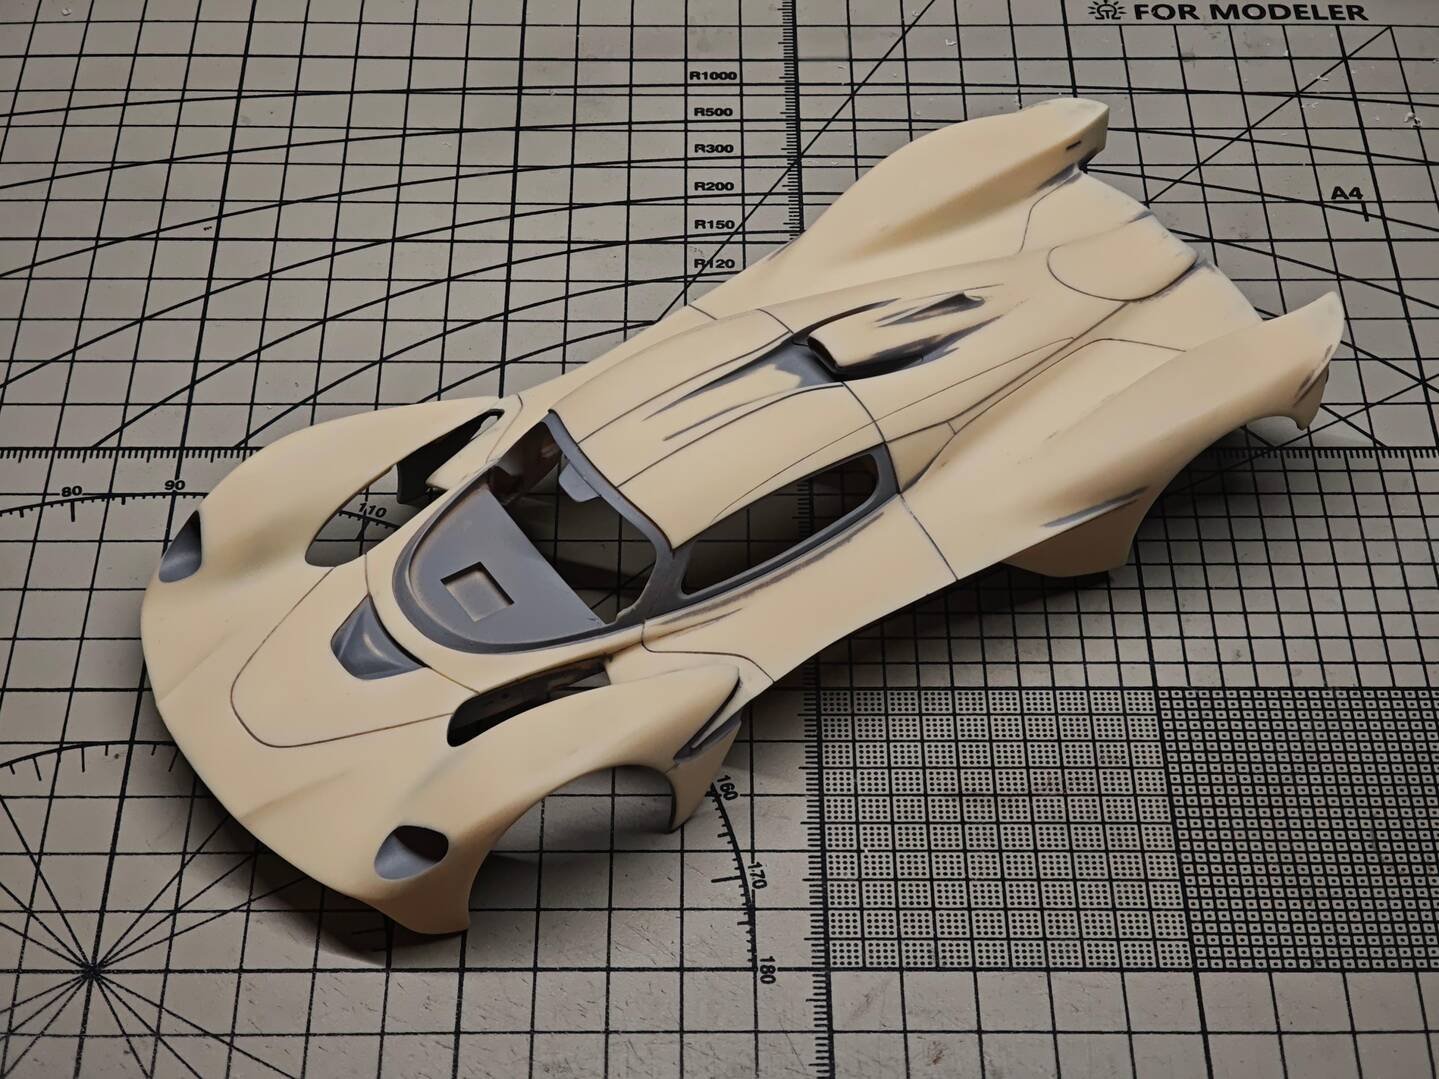
Step 5 — Pre-mask before the main colour
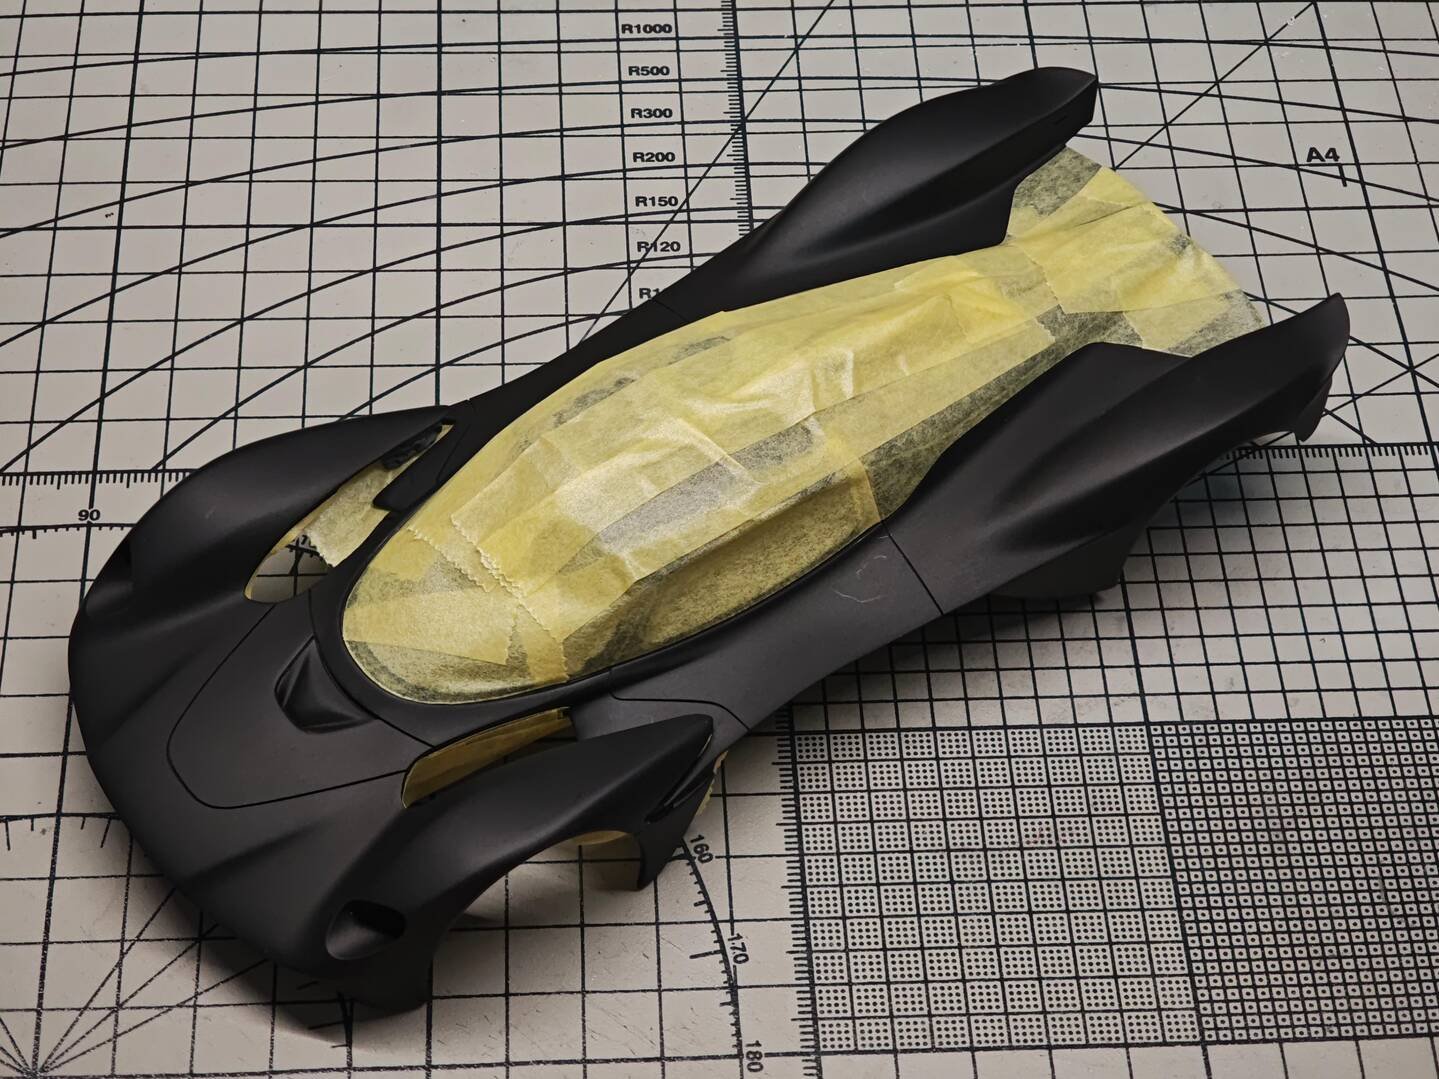
Before a drop of teal goes on, every zone that will end up black or carbon-fibre is masked: a large central spine along the cockpit and rear deck, and — separately — the chassis parts that receive carbon decals later. Masking the black zones first means the green coats can be applied as one continuous, unbroken film without later tape edges crossing the finished colour.
Why this order matters
- Wash → thin grey primer gives a flaw-revealing guide coat without burying detail.
- Scribe after priming, never on raw resin — the primed surface tracks the blade cleanly.
- Paper then sponge removes shape defects and sanding scratches in two stages.
- Black primer inside and out unifies the base and protects recesses with natural shadow.
- Mask black/carbon zones first so the custom green can be sprayed in one clean pass.
The shell at this point is matte black with yellow paper running down its spine — not pretty, but perfectly prepped. Next, Break mixes and tests the signature colour of the build.
Next: Part 3 — The Custom Teal Paint: Colour Mixing, Spraying & Masking
Advanced Creators
Aston Martin Valkyrie Build Feature (Break Wong) — Part 3: The Custom Teal Paint — Colour Mixing, Spraying & Masking
Alpha Model AM02-0102 · Build by Break Wong
The Valkyrie launch car wears one of the most recognisable modern hypercar colours: a luminous, slightly metallic teal-green — Aston's racing green reimagined for the hybrid era — set against satin-black aero sections with fluorescent lime accents. It is not an off-the-shelf bottle colour, so the first job of the painting chapter is to develop the blend, and the second is to spray it in thin, disciplined layers over the masked, black-primed shell.
The recipe: green, yellow, blue — and a little silver
Break documents the mix in the guide. Start with gloss green (Mr. Color C6) as the base, then add small touches of yellow and blue in alternating amounts until the shade moves from pure green into the teal/turquoise territory of the real car. A little silver is then mixed in to reproduce the factory pearlescent effect — a subtle metallic flake that shifts with the light rather than a loud candy sparkle.
| Component | Role |
|---|---|
| Mr. Color C6 Gloss Green | Base colour |
| Yellow (small additions) | Brightens and lifts toward the launch shade |
| Blue (small additions) | Shifts the green into teal / turquoise |
| Silver (small addition) | Simulates the real car's pearlescent metallic finish |
Test on a black spoon, not white card
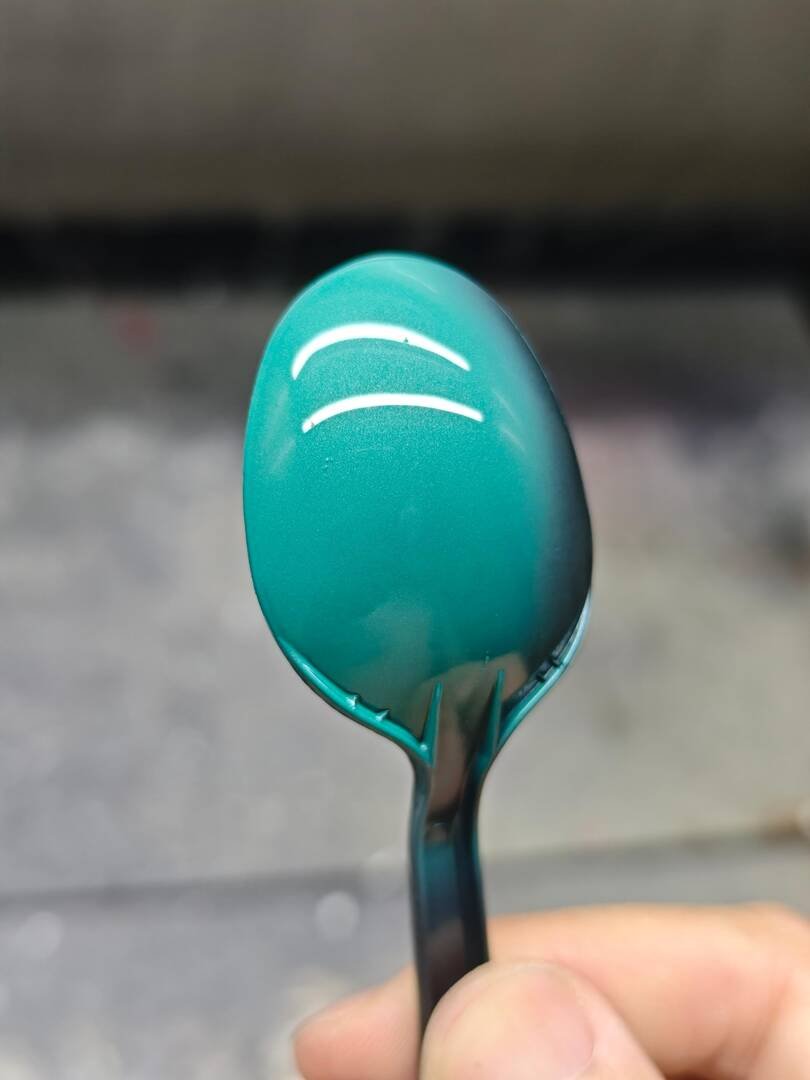
The mix is test-sprayed onto a black plastic spoon for a reason: the body shell already wears black primer, and a colour read over white paper would look completely different. The dark spoon shows exactly how the metallic teal will behave on the model — darker in shadow, brighter across the highlights — before a single coat touches the body.
Multiple thin coats, constant rotation
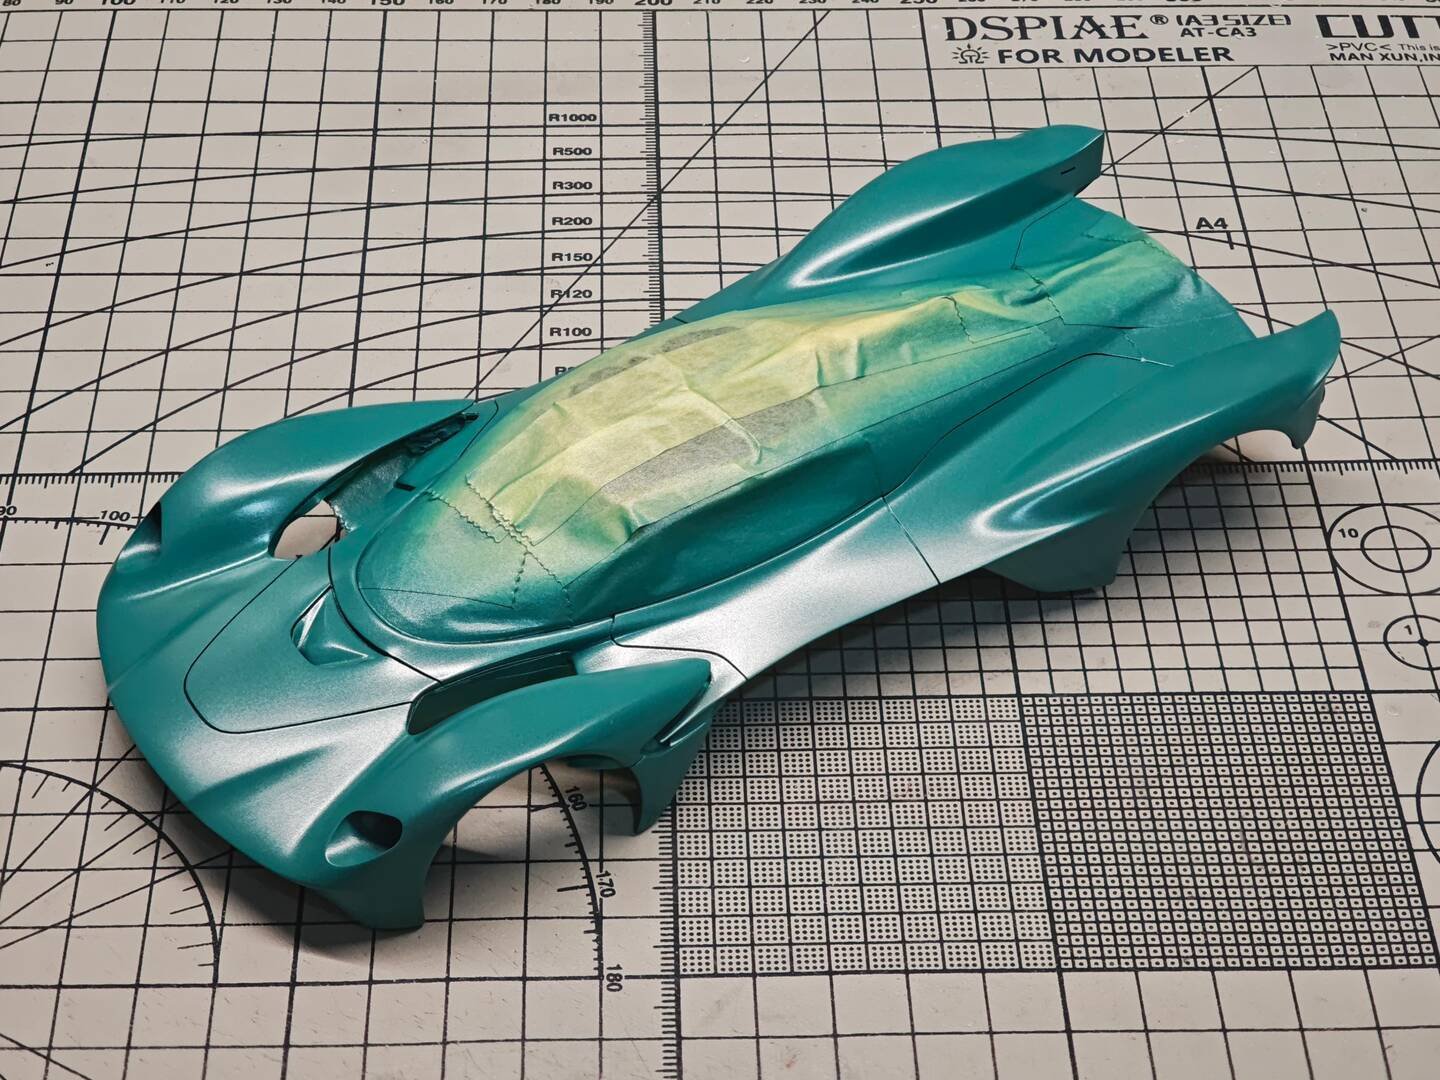
With the yellow masking still protecting the central black spine, the custom green goes on in mist coats. The guide is emphatic about technique: "use multiple thin coats until the base primer is completely covered. Ensure an even application across the entire body. Do not rush, and avoid paint buildup in any single spot. Frequently check all angles during the process to ensure there are no color variations." On surfaces this sculptural, every run, dry edge or uneven overlap is visible the moment the light crosses it, so the shell is rotated continuously between passes.
The masked spine revealed
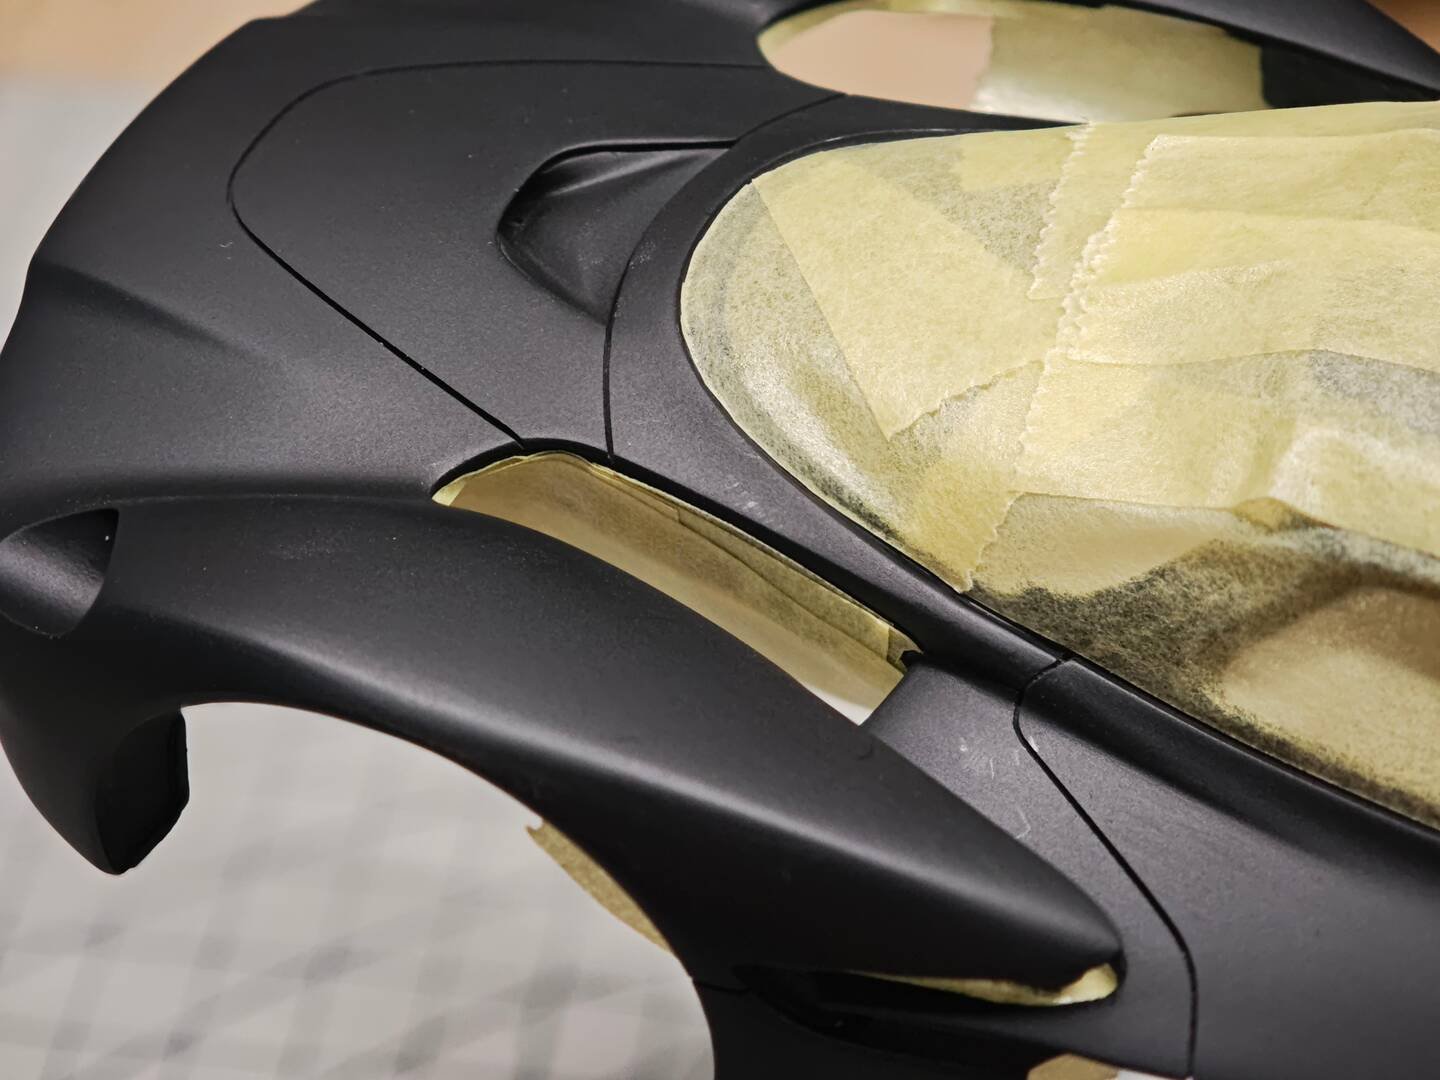
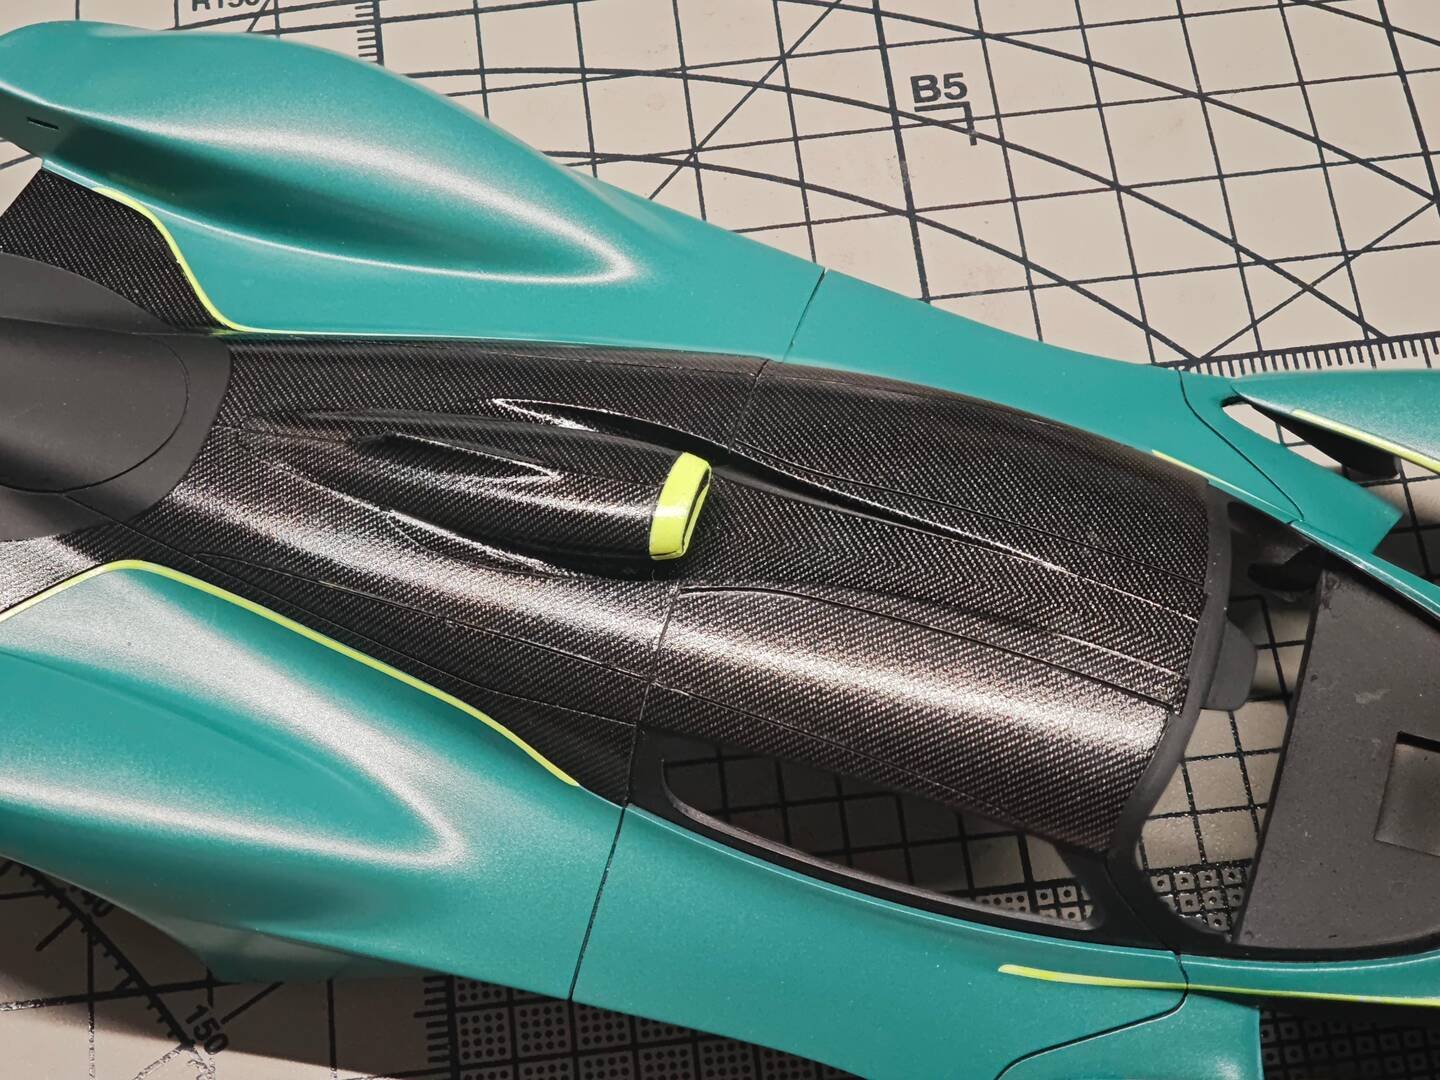
Once the teal has flashed off, the masking comes away from the central cockpit-and-deck spine, exposing the original black primer in one clean, continuous zone. Boundaries land exactly where the tape followed the panel separation, so there is no touch-up needed between the two colours.
Cleanliness before decals
The black areas are about to receive carbon-fibre waterslides, which makes this a critical inspection moment. The guide warns: "After removing the masking tape, carefully inspect the black areas for dust particles or debris. Any impurities left on the surface will prevent the decals from setting smoothly and ruin their adhesion." Any nib is levelled with 2000-grit paper and the surface tack-clothed before water goes anywhere near it.
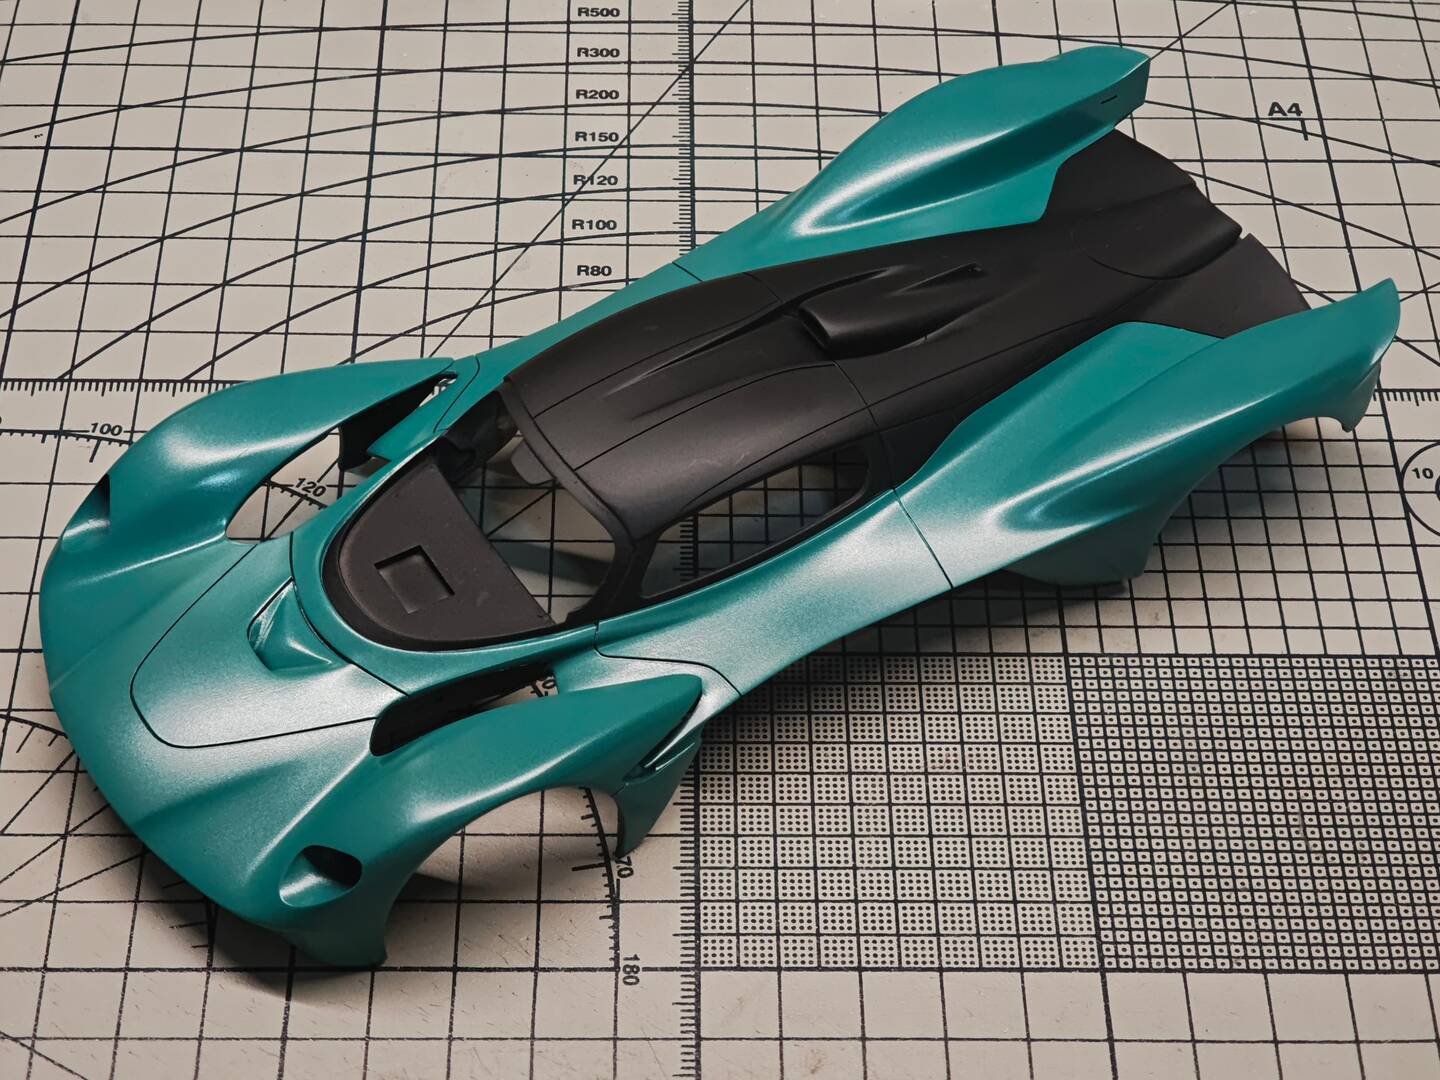
What this stage delivers
- A documented, repeatable custom mix built on Mr. Color C6 rather than a guessed single bottle
- A colour validated on the same black base the body actually wears
- An even pearl-teal film built from multiple thin coats with no buildup or mottling
- A crisp, pre-masked black spine ready to accept the carbon decals
The shell now has its colour identity. In the next part, the build moves to the material that defines the Valkyrie: the extensive carbon-fibre waterslide programme across the body, followed by the professional 2K clear coat and a full cut-and-polish.
Next: Part 4 — Carbon Decals, 2K Clear Coat & Cut-and-Polish
Advanced Creators
Aston Martin Valkyrie Build Feature (Break Wong) — Part 4: Body Carbon Decals, 2K Clear and Polishing
Alpha Model AM02-0102 · Build by Break Wong
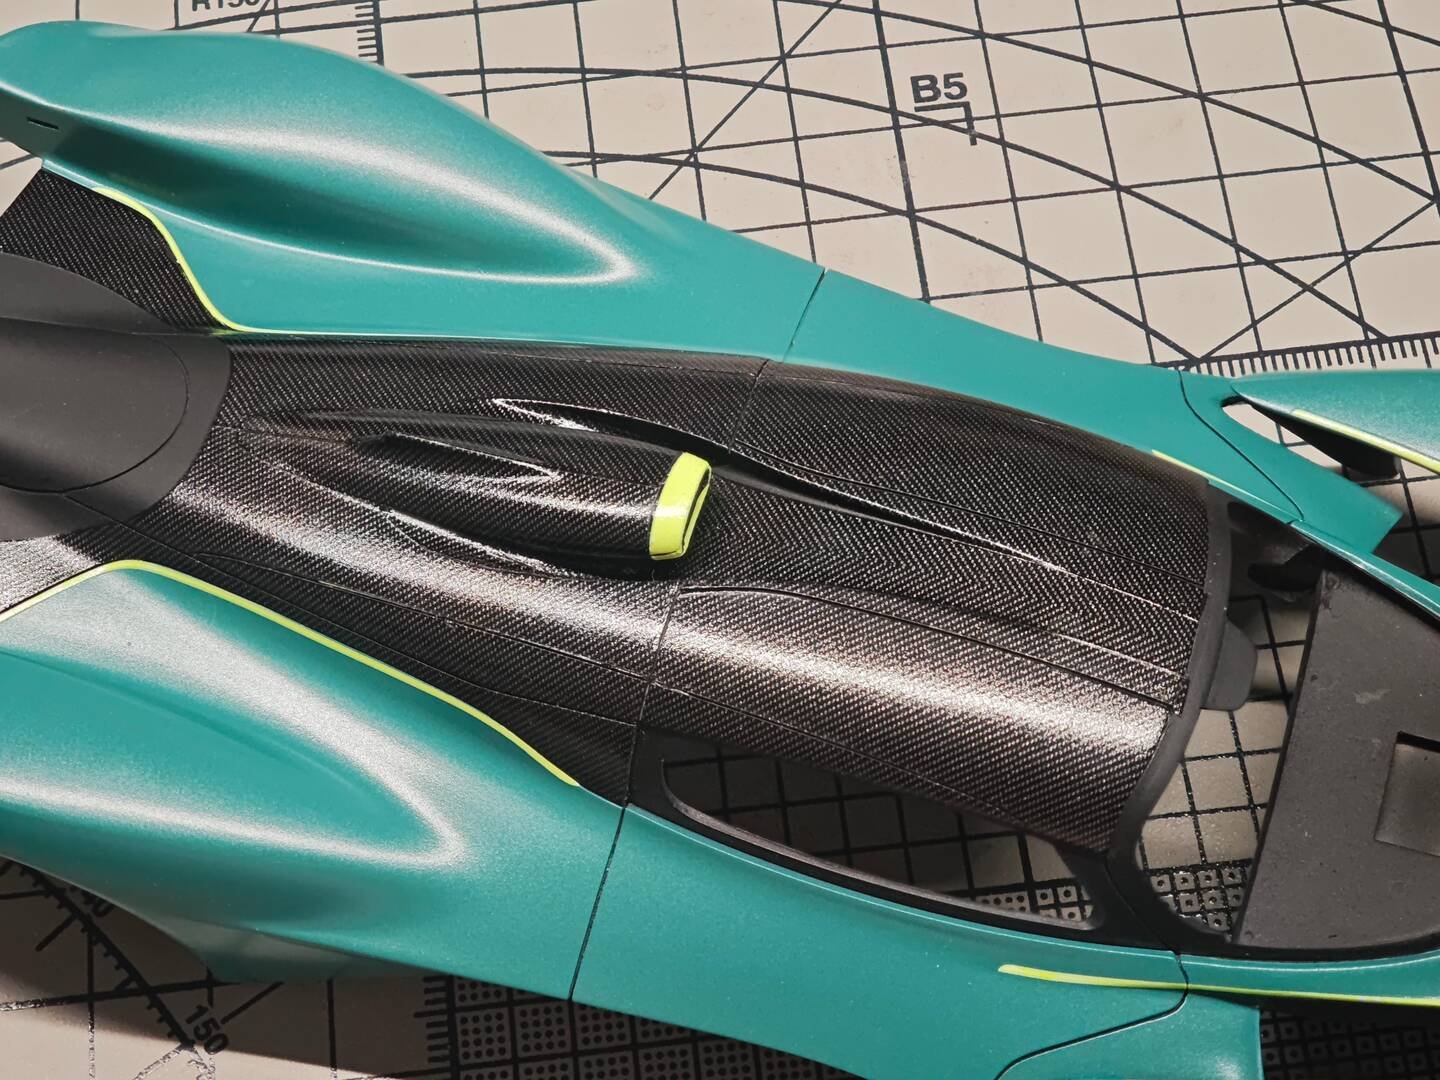
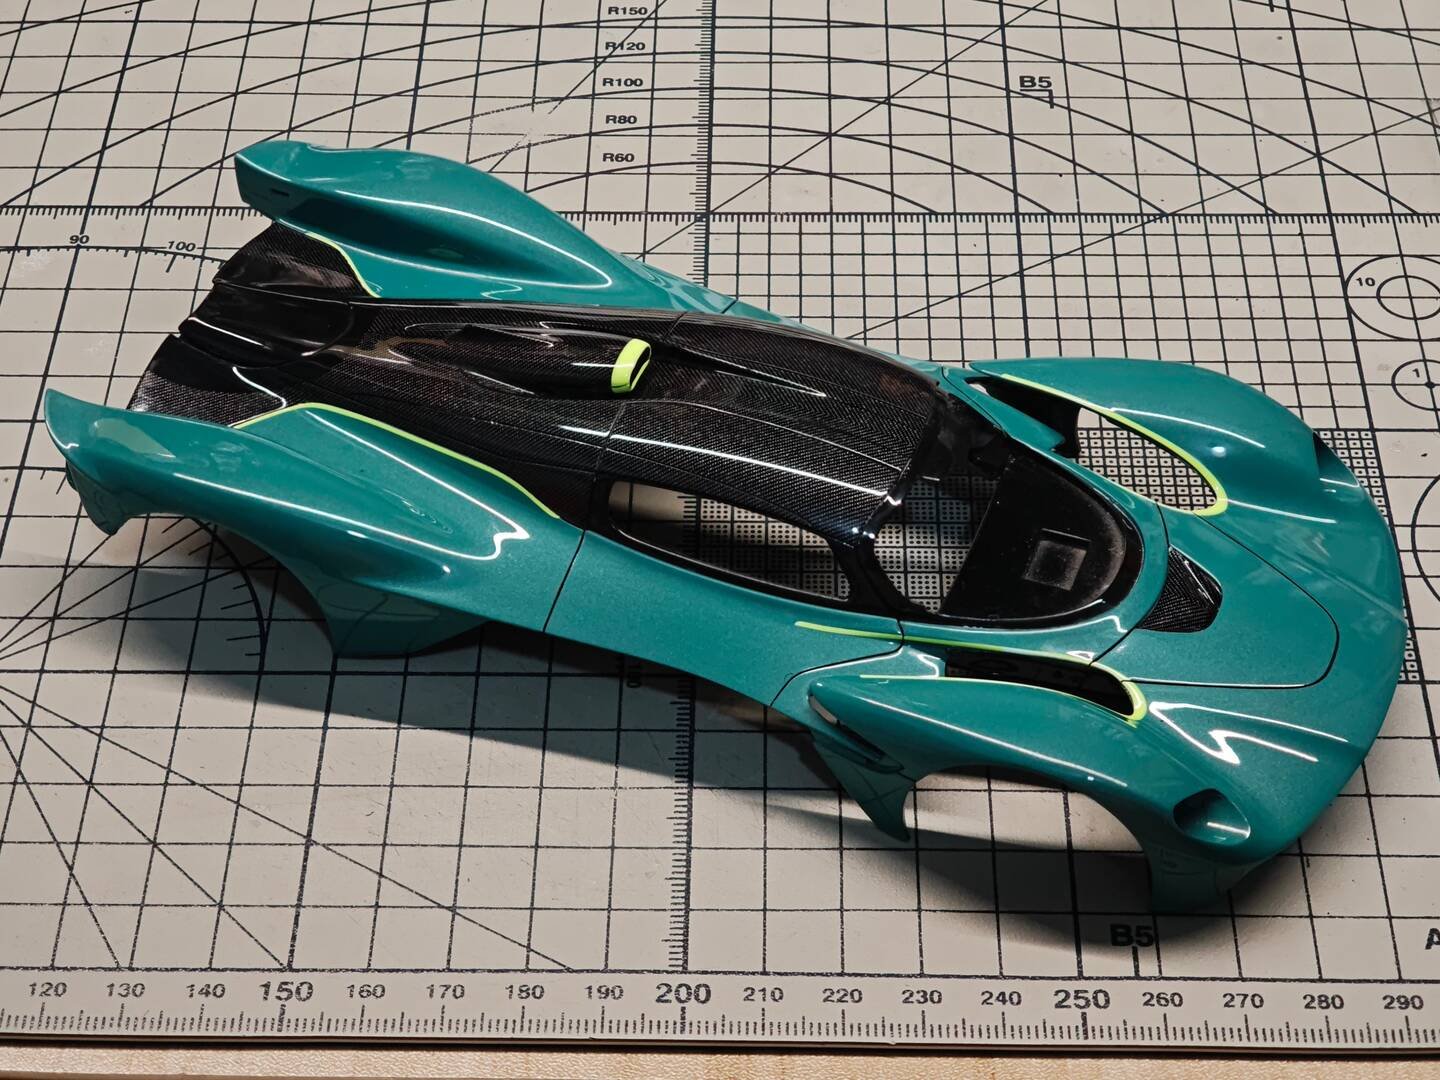
With the metallic-teal body painted and the central spine masked off in black primer, the Valkyrie reaches its most demanding finish step: covering the huge black zones of the tub and deck with carbon-fibre waterslides. On the real car these areas are exposed structural carbon, and Break Wong treats them to the same gloss-clear, polish-then-respray trick he used on the Porsche GT3 R build. Here is how the shell goes from matte black primer to mirror-finish carbon and lacquer.
The decal sheets
The Alpha Model kit supplies two large sheets of pre-cut carbon decals, their panels numbered to match the assembly manual. The pieces range from broad deck sections down to tiny side-vent and cockpit-trim slivers, so sorting them before wetting anything saves a lot of scrambling later.
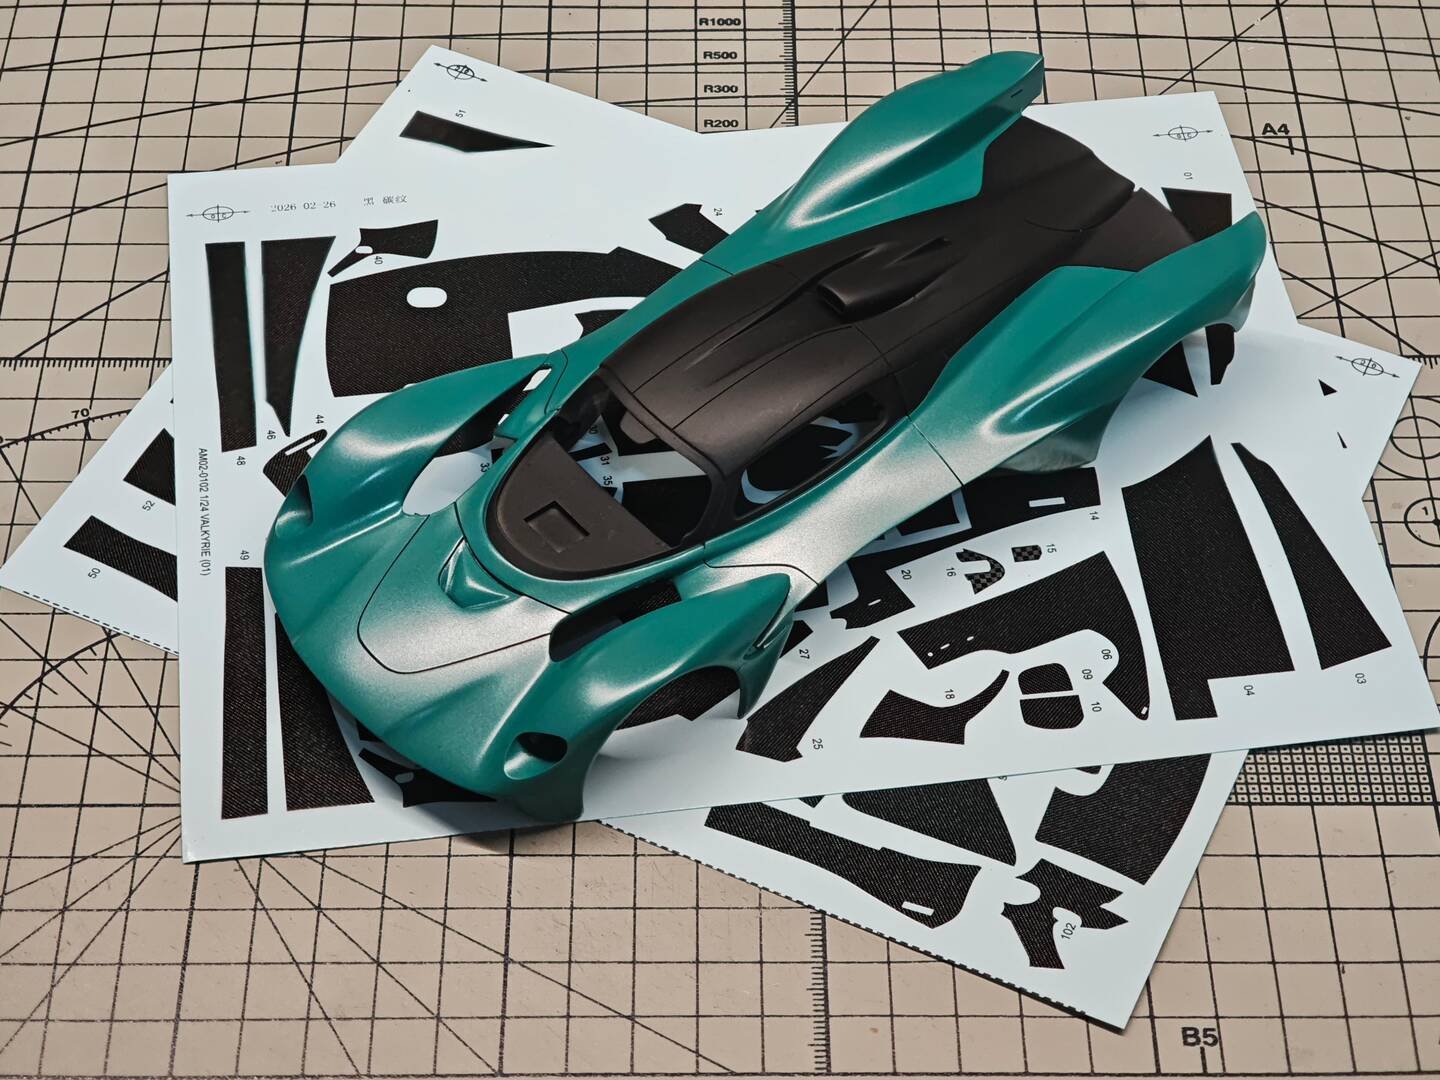
Applying the body carbon, one compound curve at a time
The carbon sheets go over the black-primed central tub following the instruction-manual numbering. Marking solution and softener are used to coax each decal into the deep channels around the cockpit, the keel and the side pods; air and water are squeegeed out from the centre outward so nothing is trapped under the film. Where one carbon sheet meets another, the weave direction is kept consistent so the panels read as a single continuous structure.
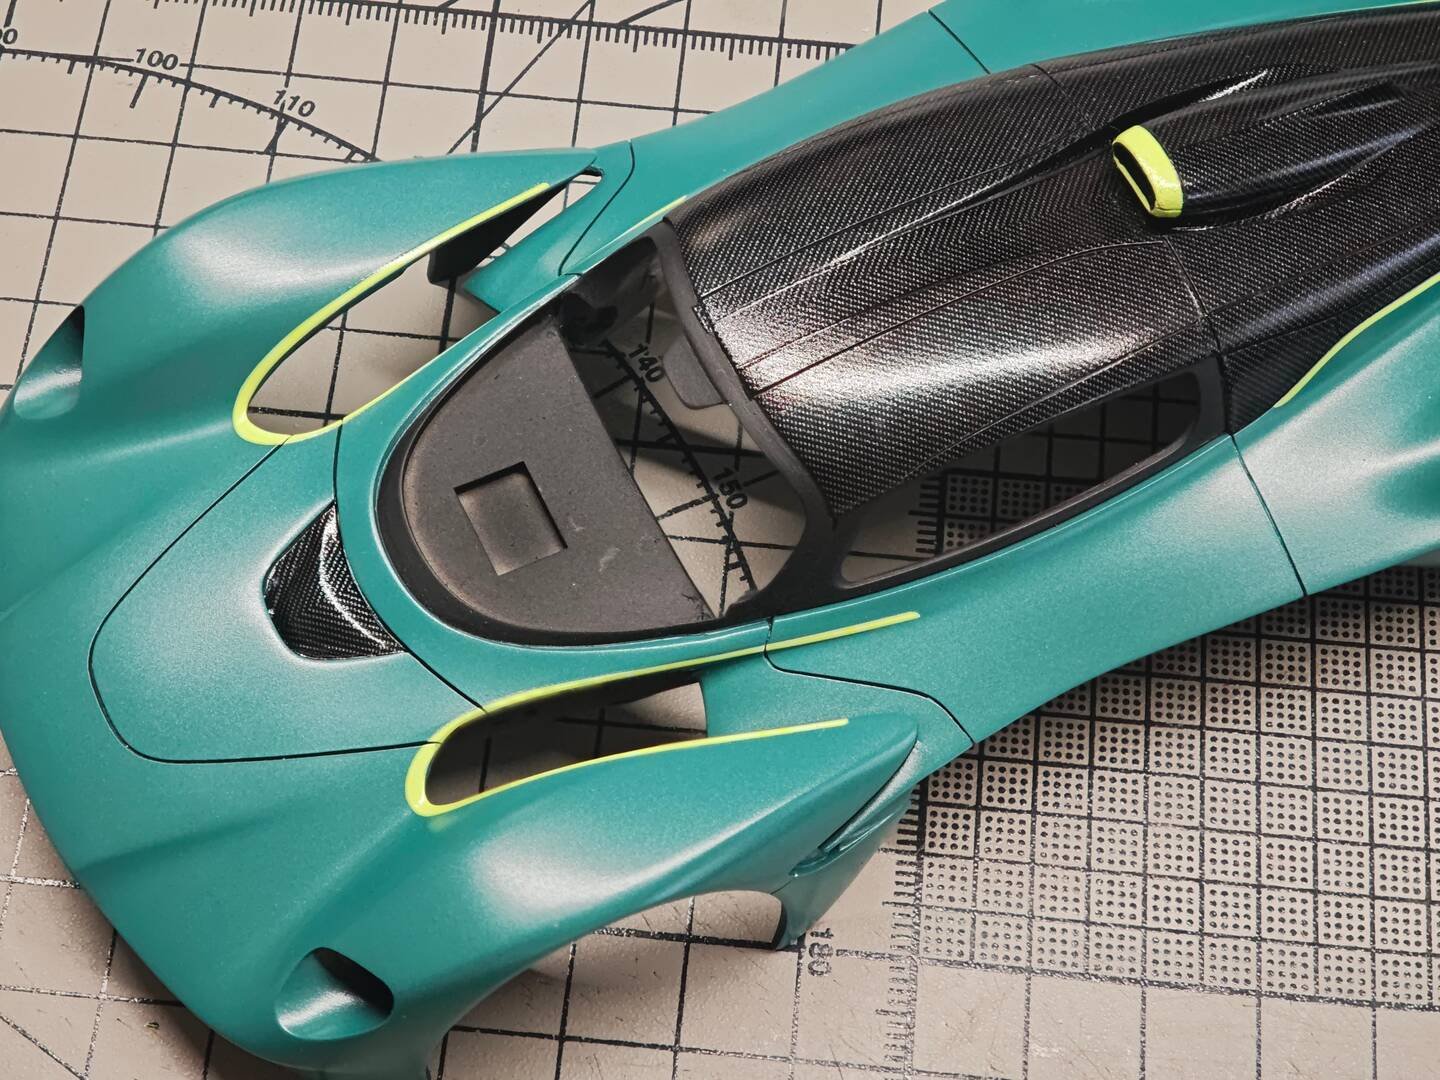
A builder's decision: airbrushed black instead of decals
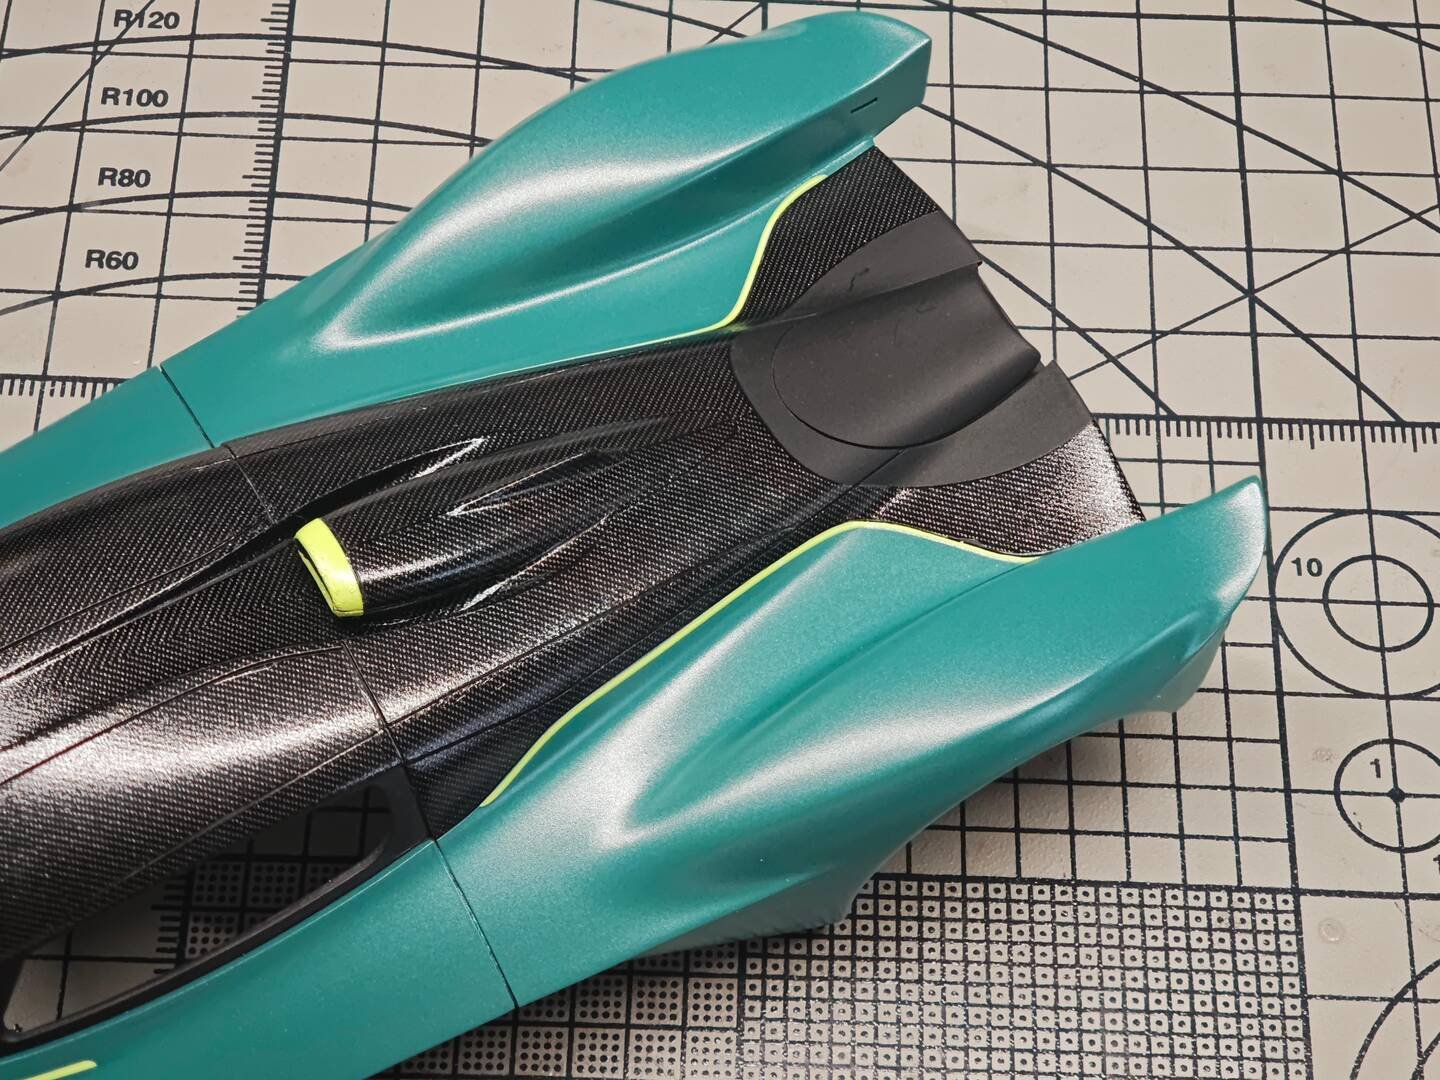
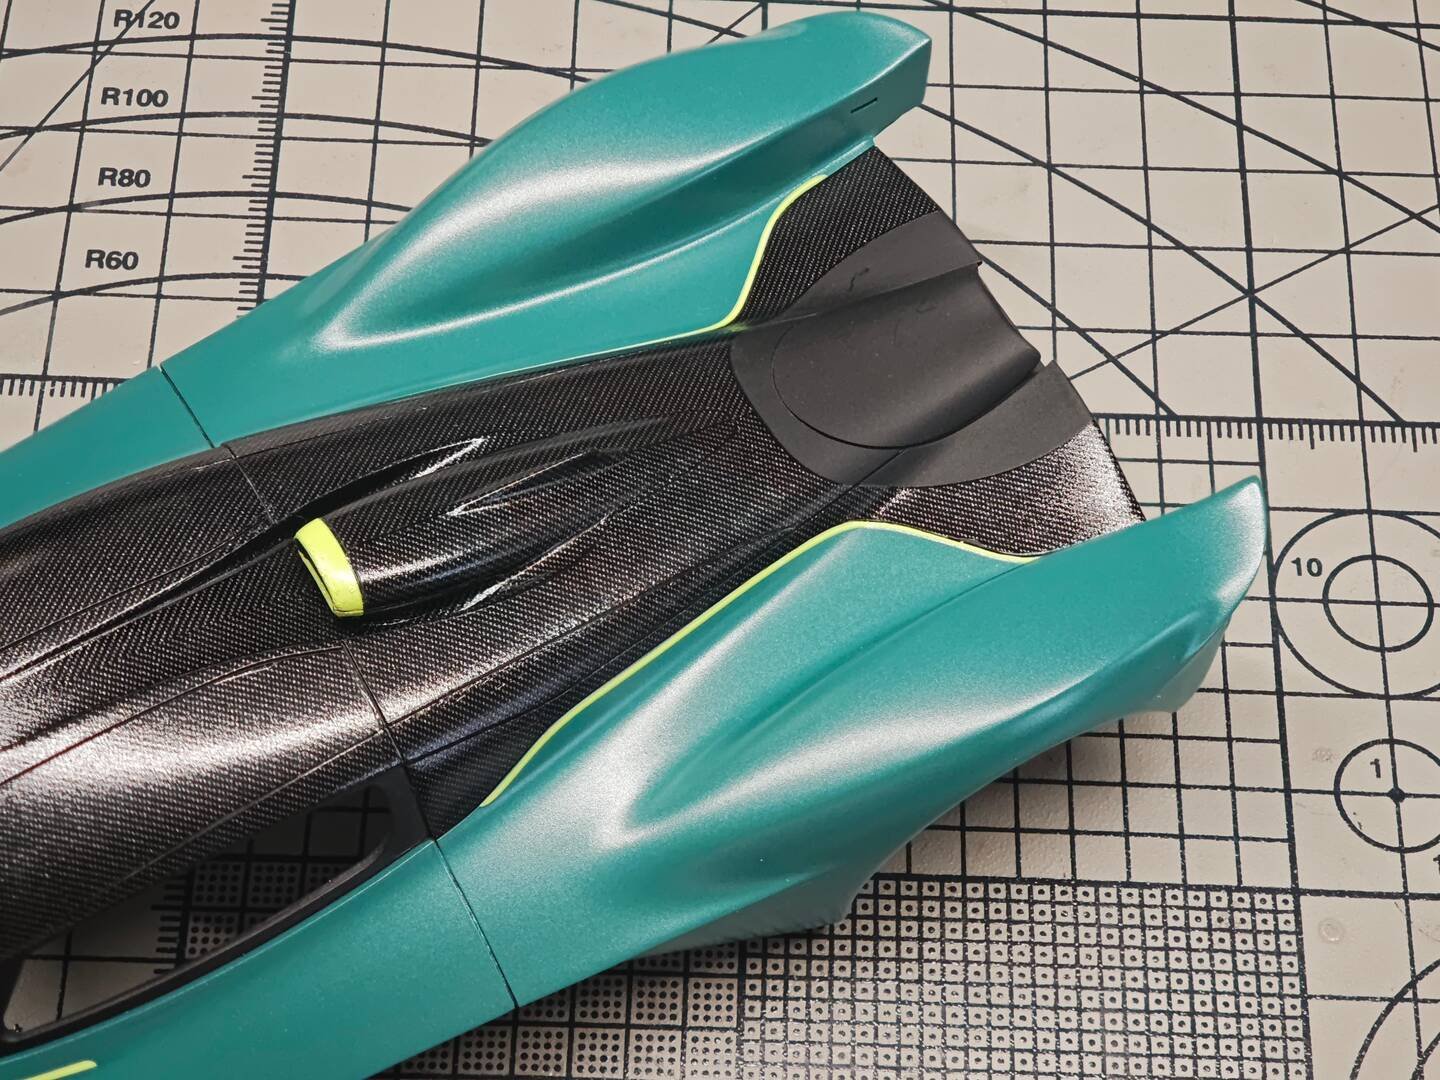
Break deviates from the instructions on one section. Rather than use waterslides D86 through D90 on the smooth, curved rear fairing, he masks the shape and airbrushes the black after the clear coat is laid down. His note is direct: "Instead of applying water-slide decals D86 through D90, I chose to mask and airbrush the black areas after applying the clear coat; the result looks better than using decals." On that uninterrupted curve, sprayed paint settles with zero silvering and no film edge — a judgment call worth studying.
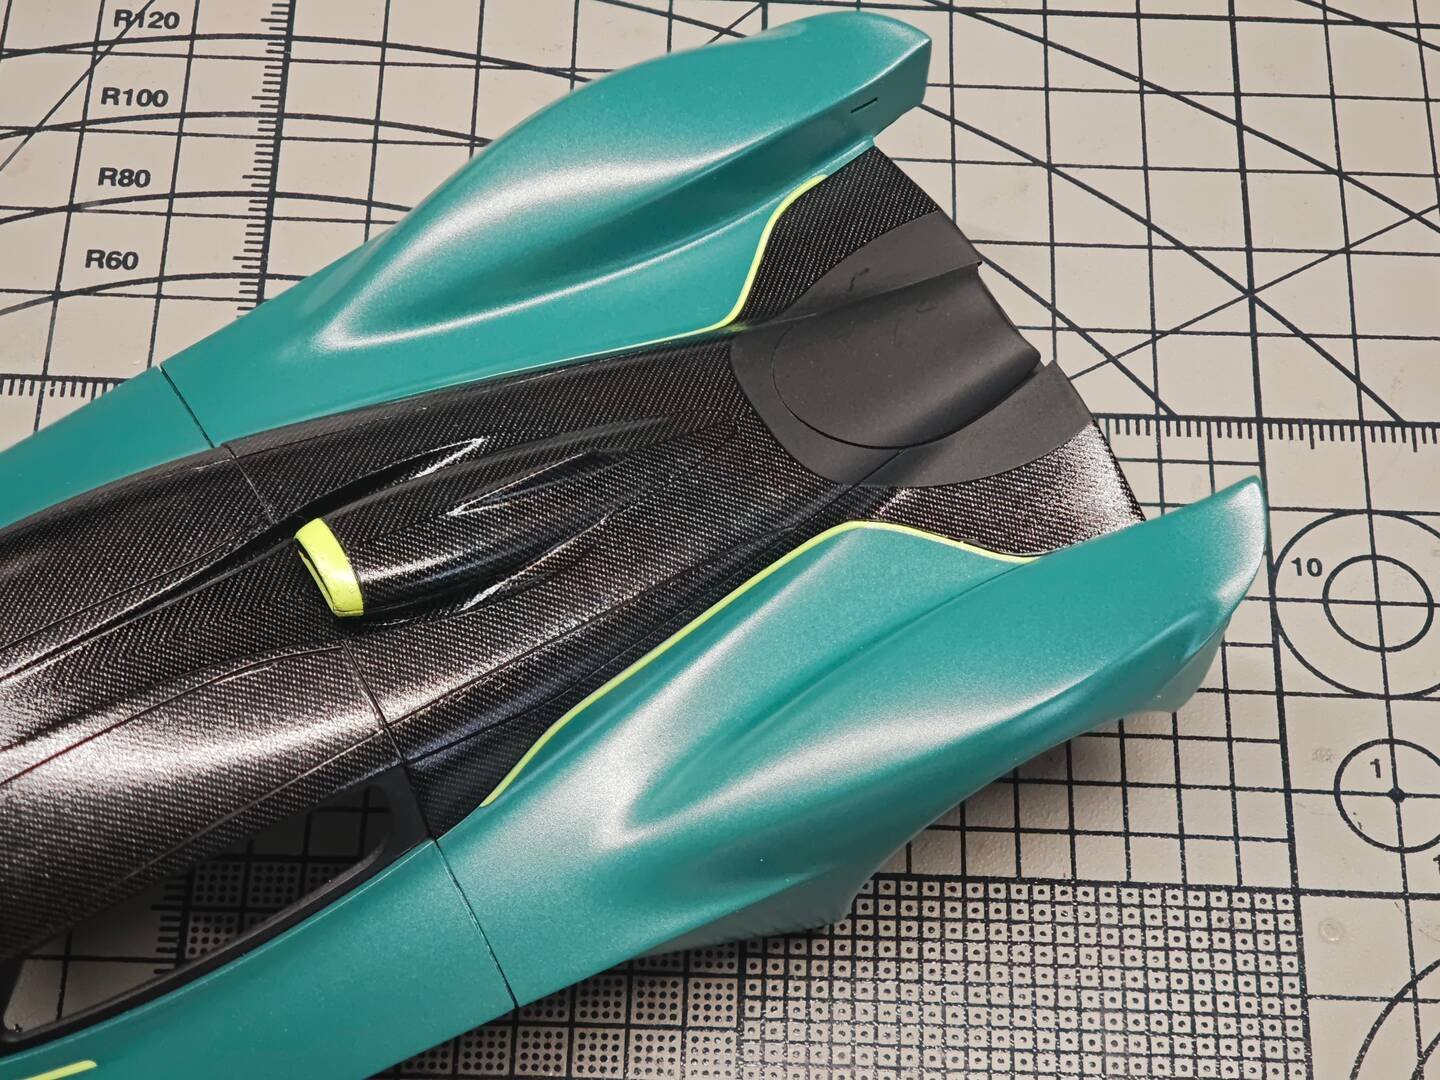
Completing the deck carbon
The remaining deck and side-channel decals follow the same routine — set, soften, squeegee, then leave flat until the carrier film is fully settled. The labels across this section track panels D76, D79, CD36, D83, D84, D74, D70 and D63 around the engine-cover spine and the teal body cutlines, with the lime-green pinstripe decals tracing the seams between paint and carbon.
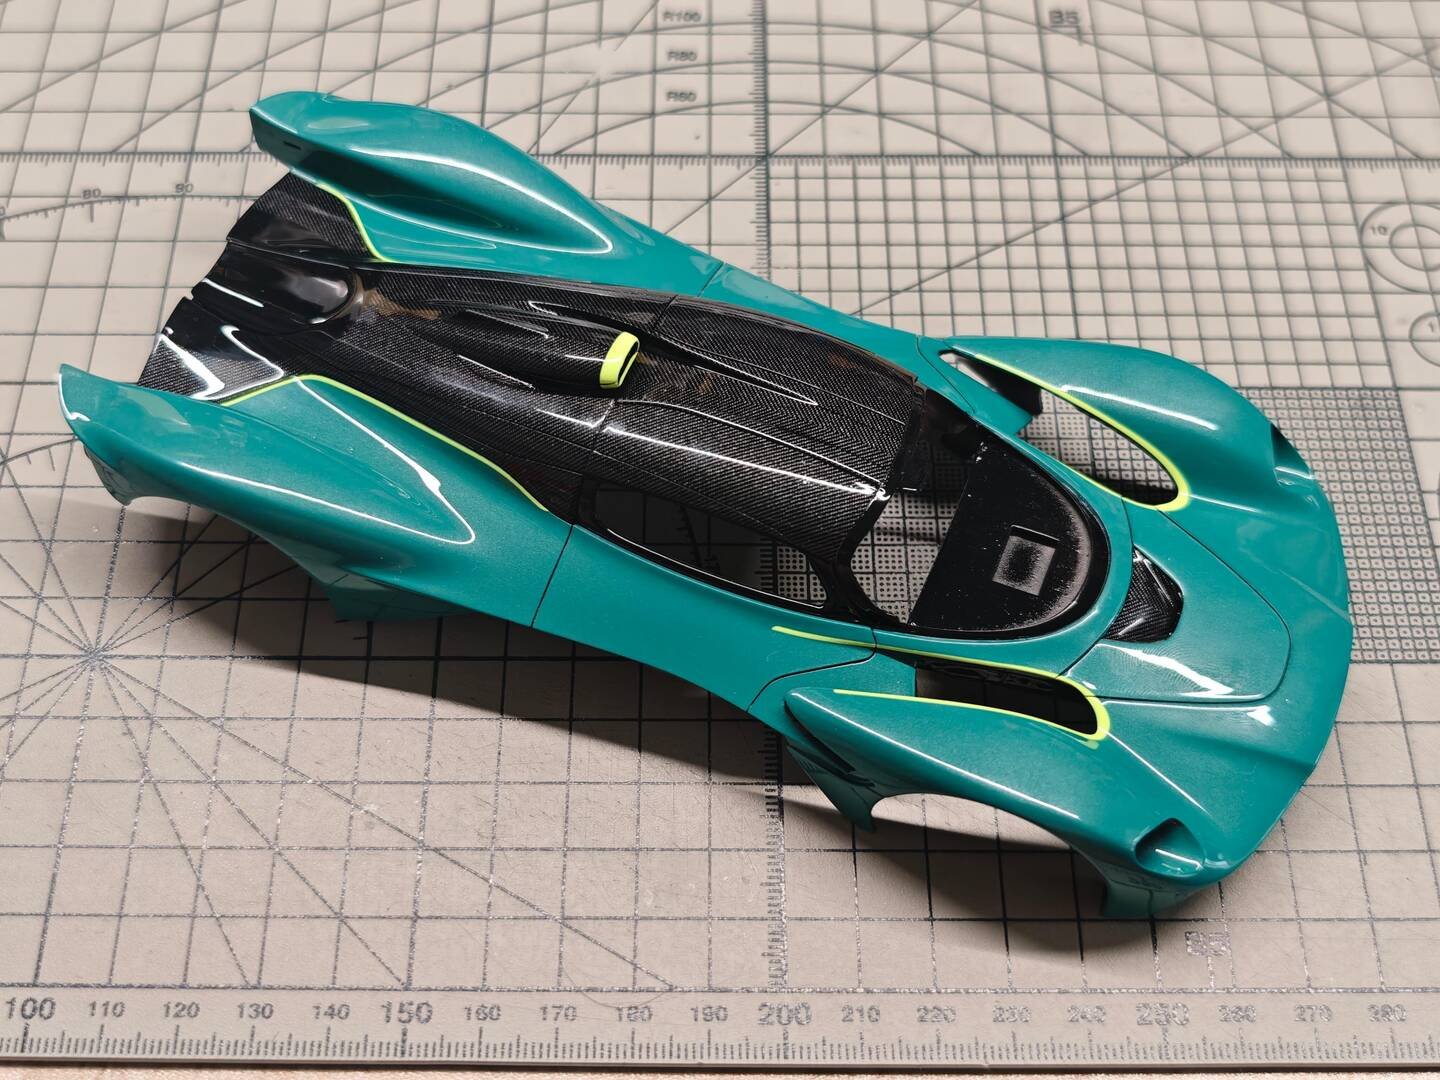
2K clear coat — the real-car finish
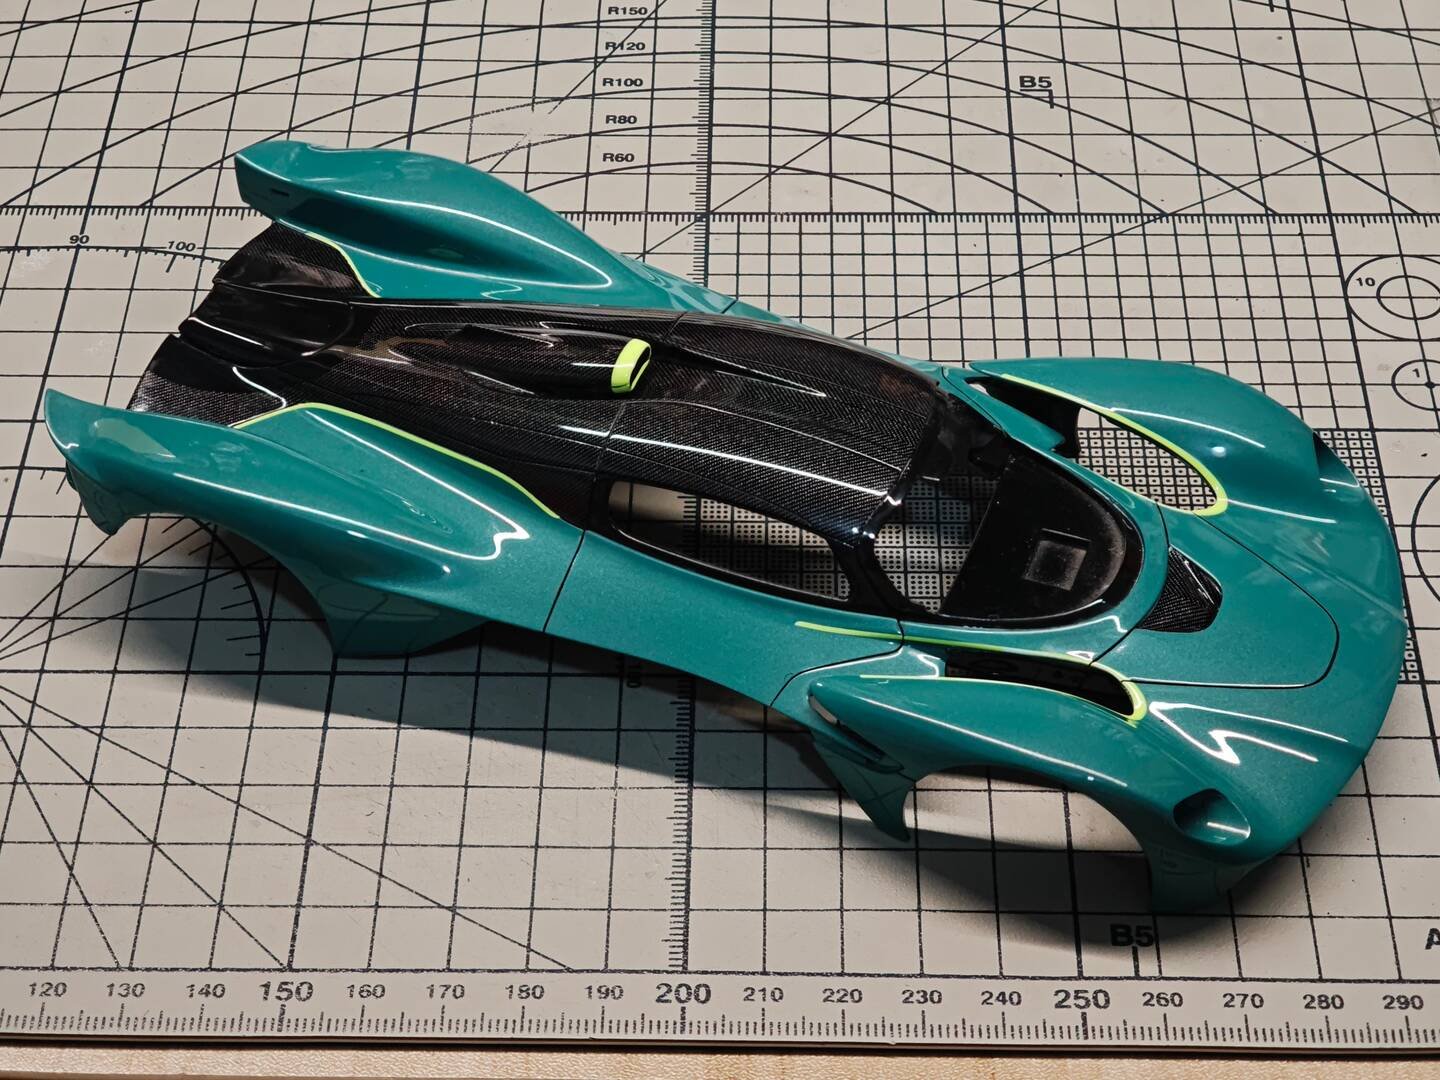
Once every carbon decal is down, the whole body is sealed under a two-component clear. The guide specifies a professional automotive product — BASF Glasurit 335 2K clear — applied with a 0.5 mm airbrush at 2.0–2.5 bar (29–36 psi), 3–4 wet coats with a 15-minute flash between each, then a full 5–7 days to cure before any polishing. 2K is harder and far more solvent-resistant than hobby lacquer; it locks every decal edge flat, buries the carbon film under real depth and gives the painted panels a showroom gloss you cannot achieve with thinner clears.
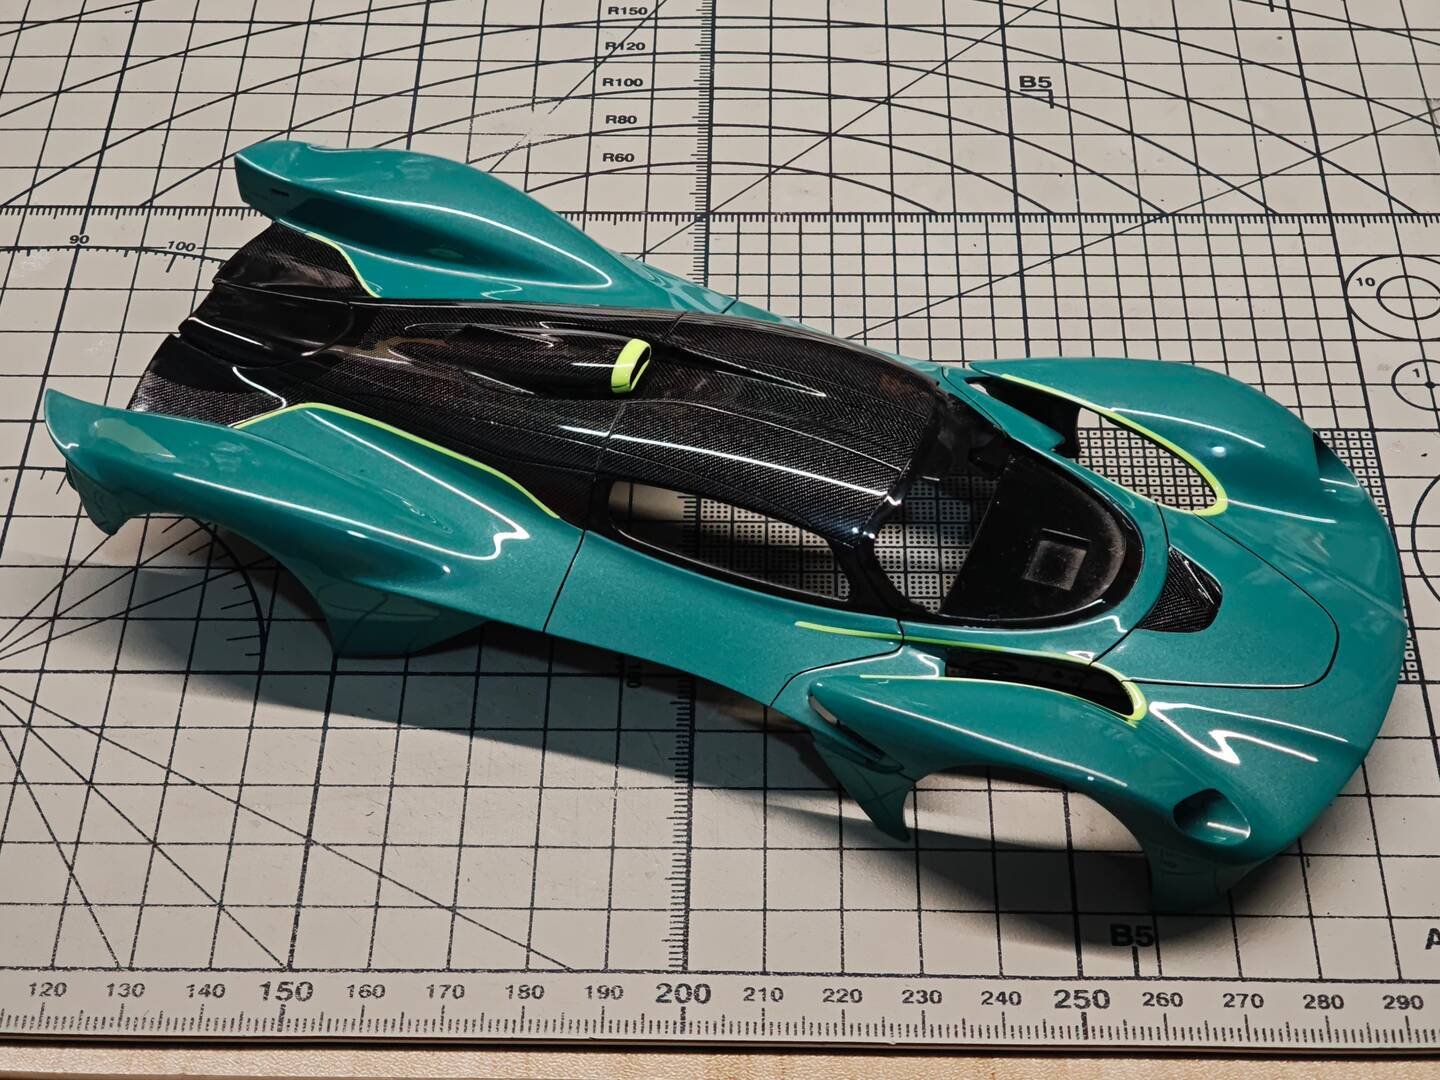
Sand, level and polish — sharpening the shape
After the cure, Break levels the clear with fine wet-and-dry paper and works back up through polishes. As the guide notes, "the process of sanding, leveling, and polishing removes a portion of the clear coat, giving the car body a sharper appearance." Panel lines are re-scribed where the coats rounded them, and the edge between carbon and teal comes out razor-sharp under the glass-like surface. The lime pinstripes glow beneath the gloss rather than sitting on top of it.
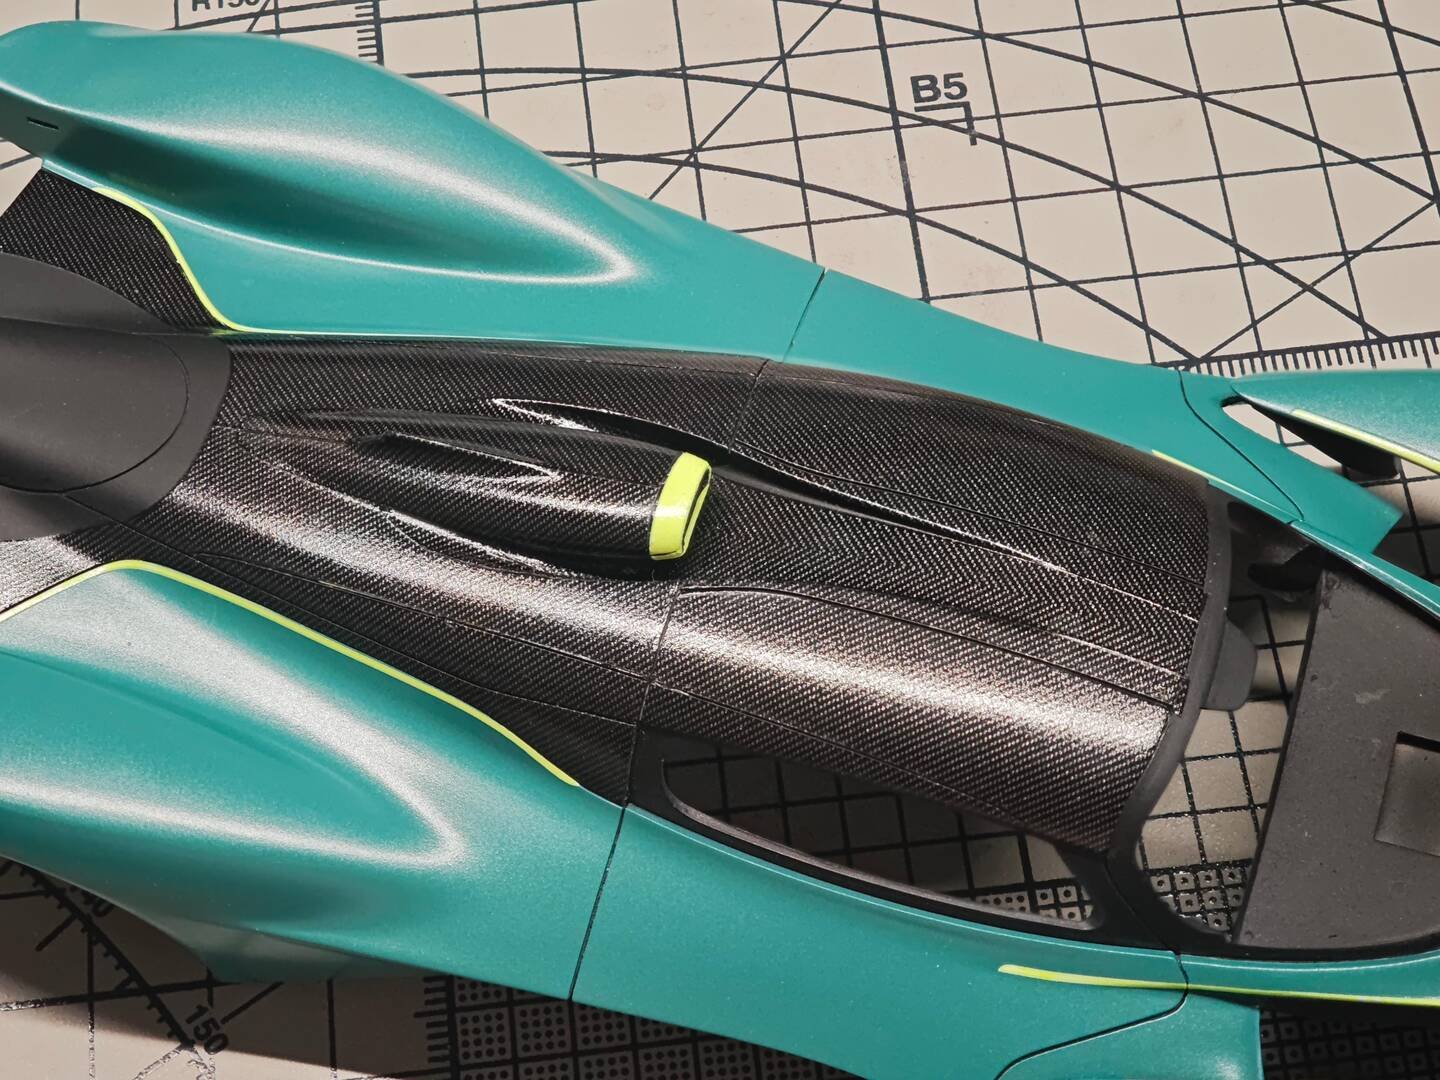
Back to the spray booth: the rear flat-black zones
The final body-finish operation is the mod mentioned earlier. The rear diffuser/fairing section is masked with flexible green curve-masking tape following the complex curves, then sprayed with Mr. Color C-33 Flat Black. Because the masking goes on over fully cured and polished clear, the edge pulls away perfectly clean, leaving a satin-black aero section framed by glossy teal and carbon — exactly the contrast of the real Valkyrie's rear end.
What this stage teaches
- Decal the black, spray the smooth: when a large, uninterrupted curve is called out as carbon or matte black, masking and airbrushing can beat a decal — Break skipped D86–D90 for exactly this reason.
- Black primer under carbon: it makes decal edges and any pinhole invisible, letting the weave read as real composite.
- 2K clear is worth the wait: Glasurit 335, 3–4 wet coats and 5–7 days of curing produce depth and hardness hobby clears cannot match.
- Polish with intent: levelling the coat is also how you sharpen panel lines and panel edges.
The body shell is now finished — glossy racing teal, exposed carbon, lime pinstripes and a matte-black rear all locked under polished clear. Next time we turn to the dozens of small trim and aero parts, which receive their own carbon treatment before anything goes together.
Next: Part 5 — Carbon for Small Parts: Wings, Ducts, Mirrors and Aero Trim
Advanced Creators
Aston Martin Valkyrie Build Feature (Break Wong) — Part 5: Carbon for the Small Parts — Underside, Mirrors, Ducts and Trim
Alpha Model AM02-0102 · Build by Break Wong
The body shell is finished, but a Valkyrie wears carbon almost everywhere else as well: the entire underside and diffuser, the mirror housings, the side-pod vanes, the winglets, the rear deck trim and dozens of tiny cockpit and aero parts. Before any assembly begins, Break works through the separate components and wraps each one in carbon decal. On pieces measured in millimetres, patience and sharp scissors matter more than anything else.
First, the underside
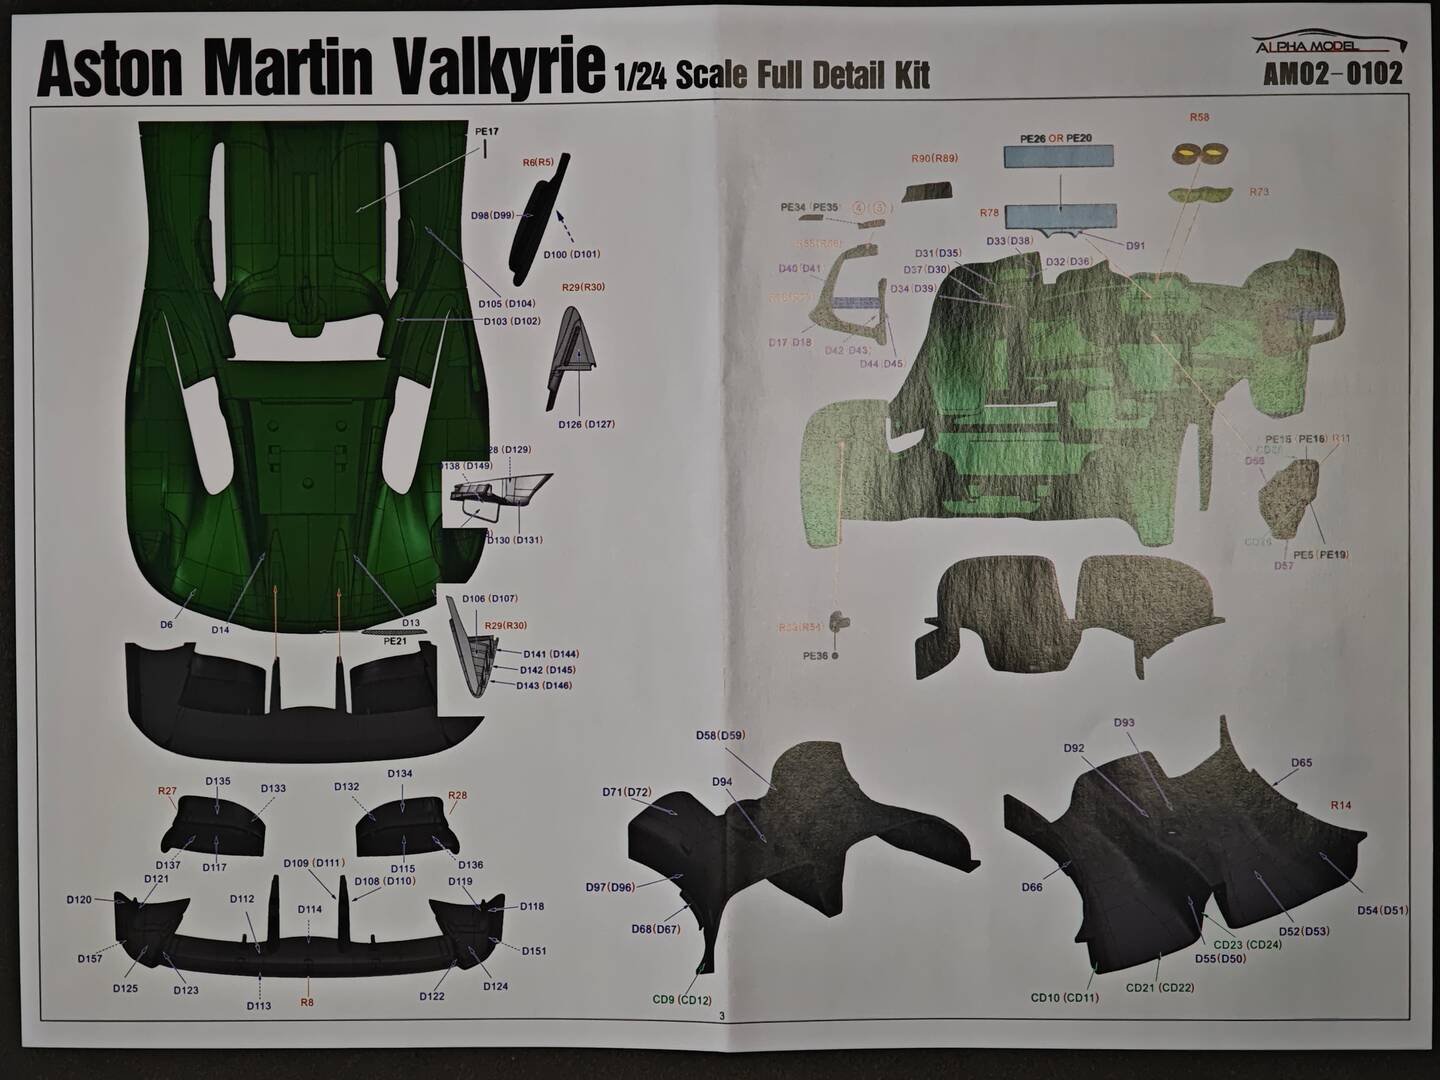
The big floor pan is treated from below. Its flat undertray, side channels and diffuser ramps all receive carbon sheet, with the black inner fender sections marked "C" in the manual left plain. Decals D102–D105 run down the central floor, while D5/D6 and D13/D14 cover the front undertray corners. Doing this while the floor is still a bare component — rather than after the car is together — means every wrap-around edge can be burnished flat from both sides.
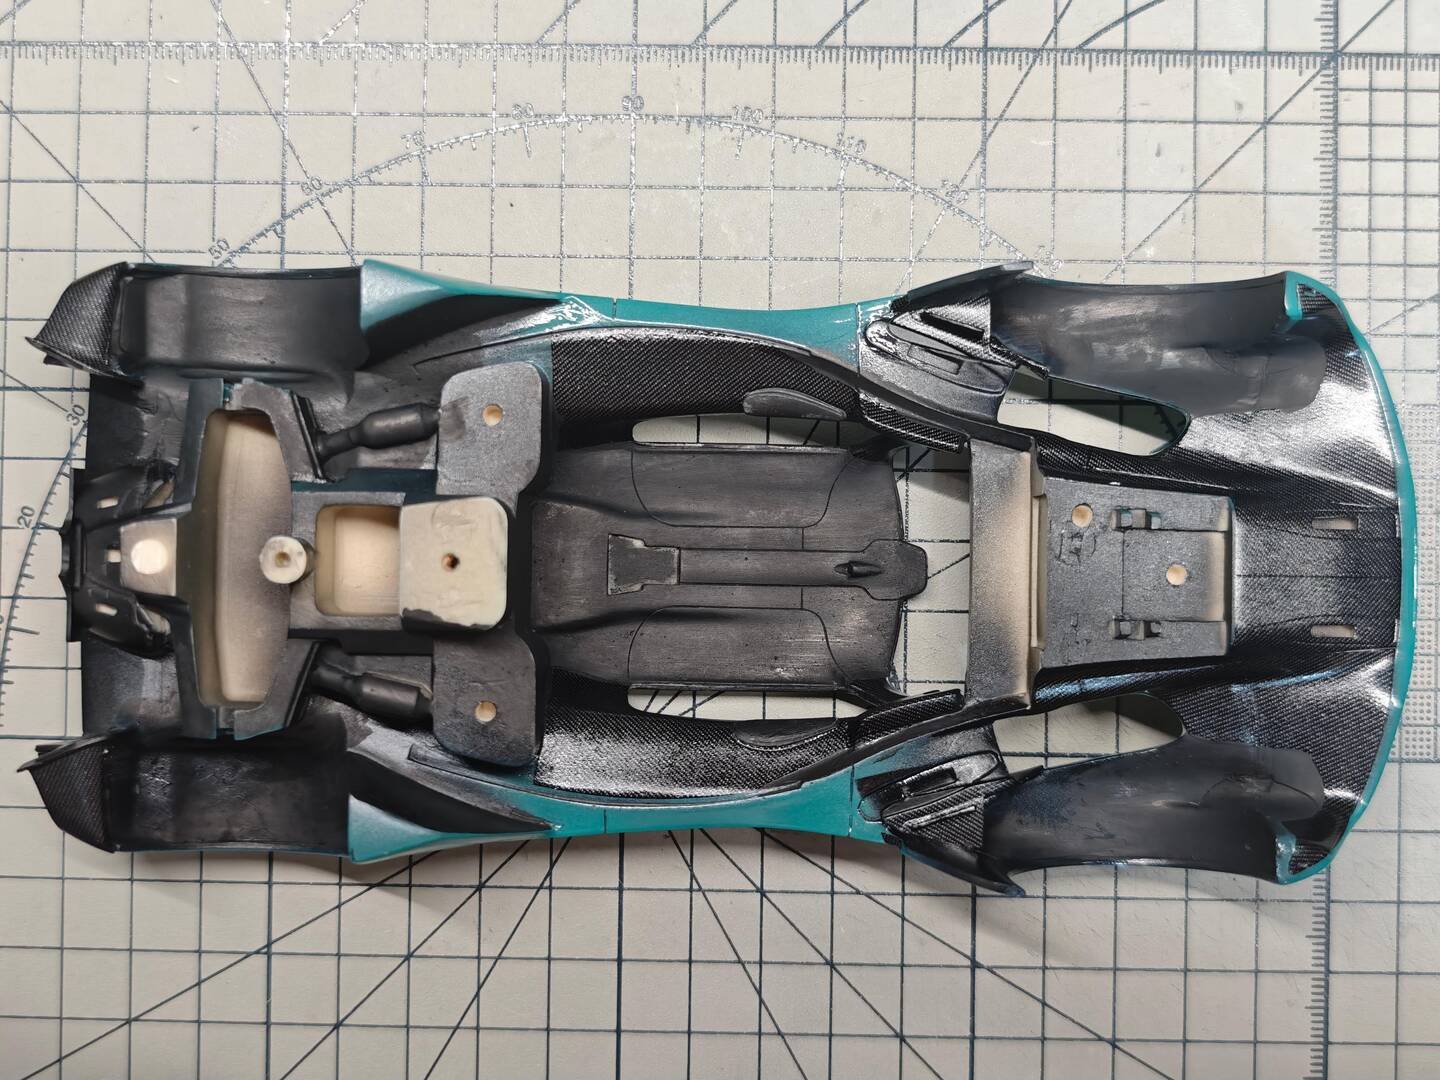
The finished rear fairing
Before moving to loose parts, a look back at the body shows the payoff from Part 4: the airbrushed flat-black rear fairing meets glossy carbon and teal with a razor edge, the lime pinstripe tracing their boundary. This is the standard every smaller part now has to match.
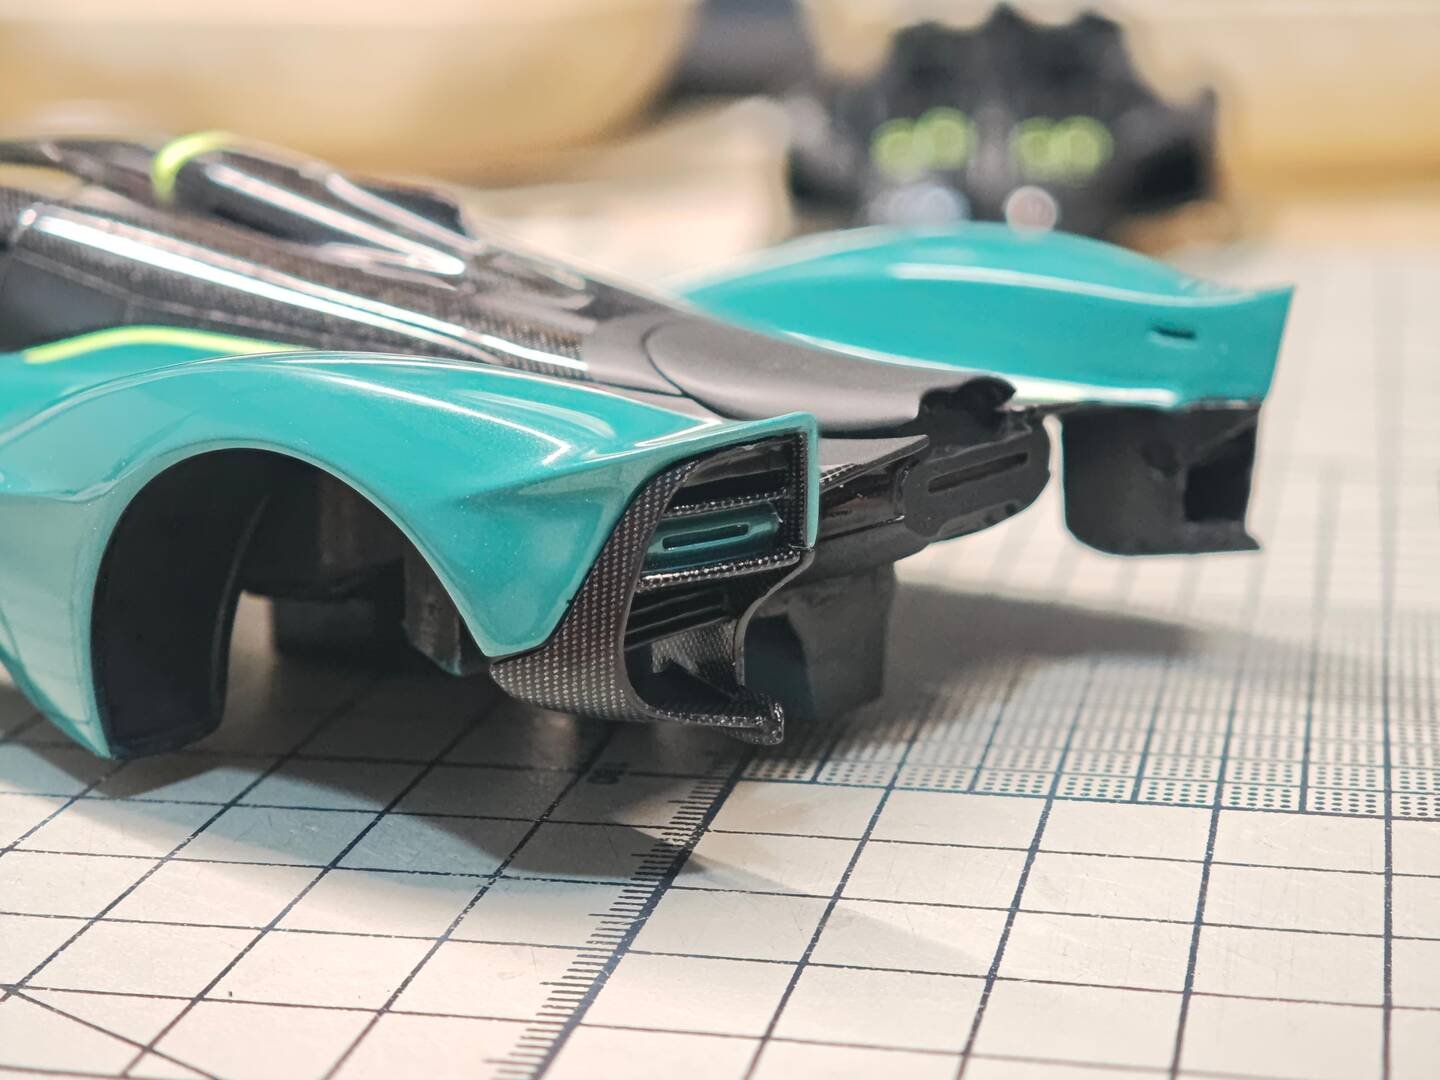
Mirror assemblies — carbon cages in two layers
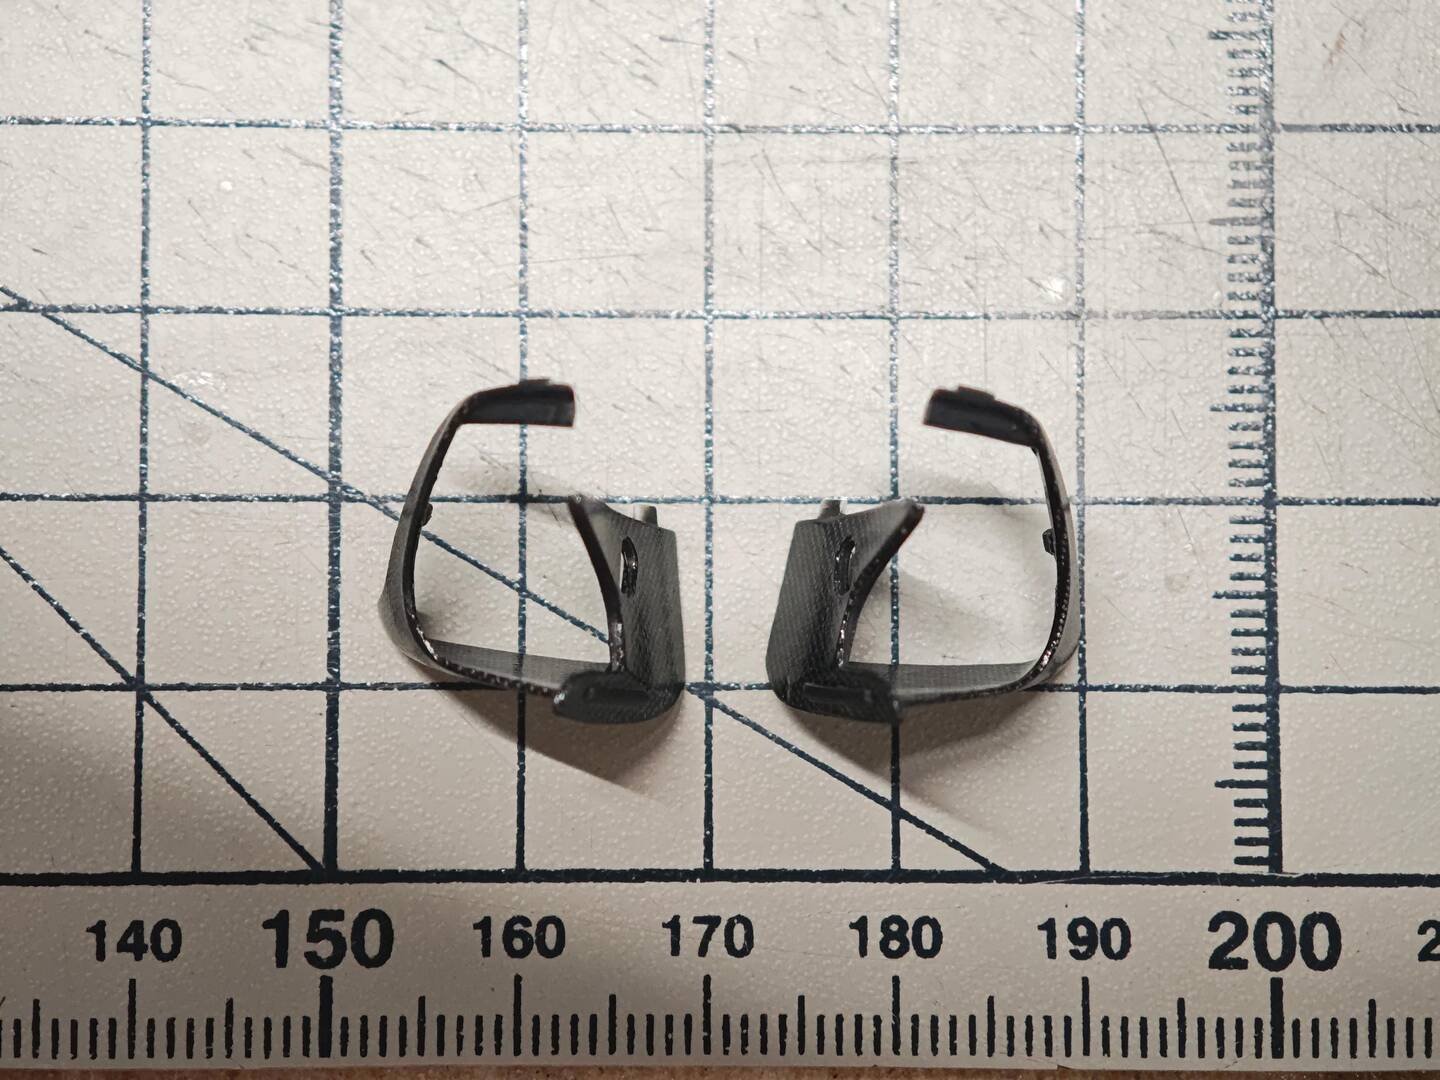
The Valkyrie's rear-view mirrors hang in elaborate open frames behind the front wheels, and the kit breaks each one into several tiny carbon-clad pieces. The inner fairing panels carry decals D17/D18 and D40/D41 on one side, D44/D45 on the other, with the frame halves marked R55 and R56.
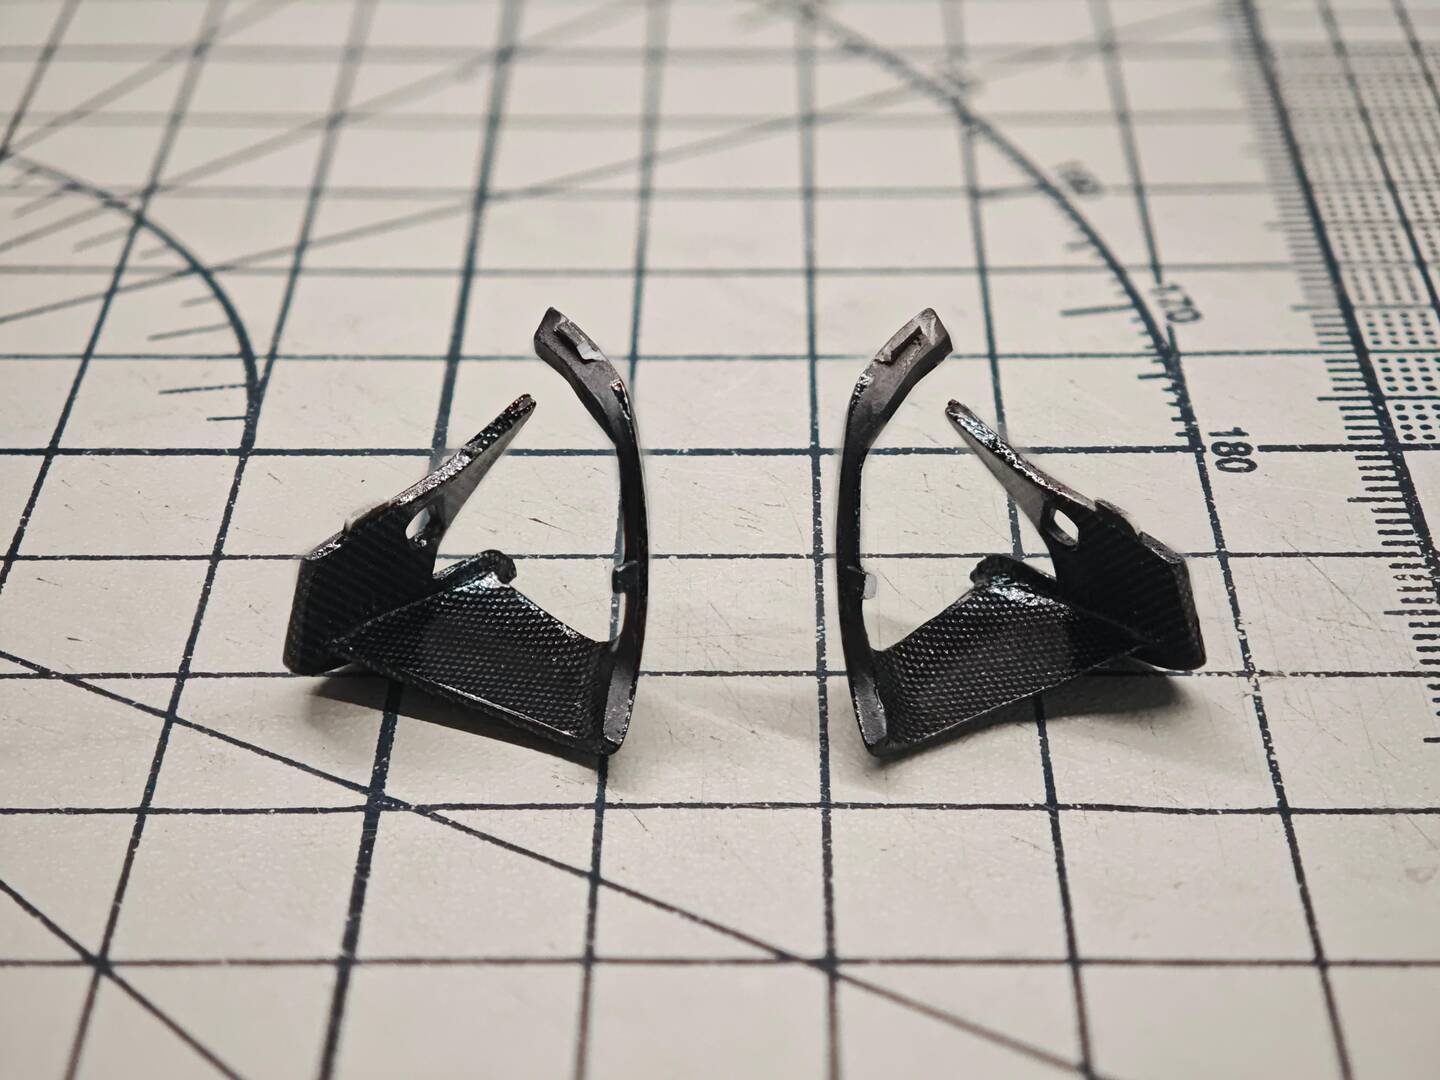
A second pair of angled vanes receives D42 (left) and D43 (right), again on the R55/R56 frames. Every piece is bent around compound curves, so softener is essential to stop the film from springing back.
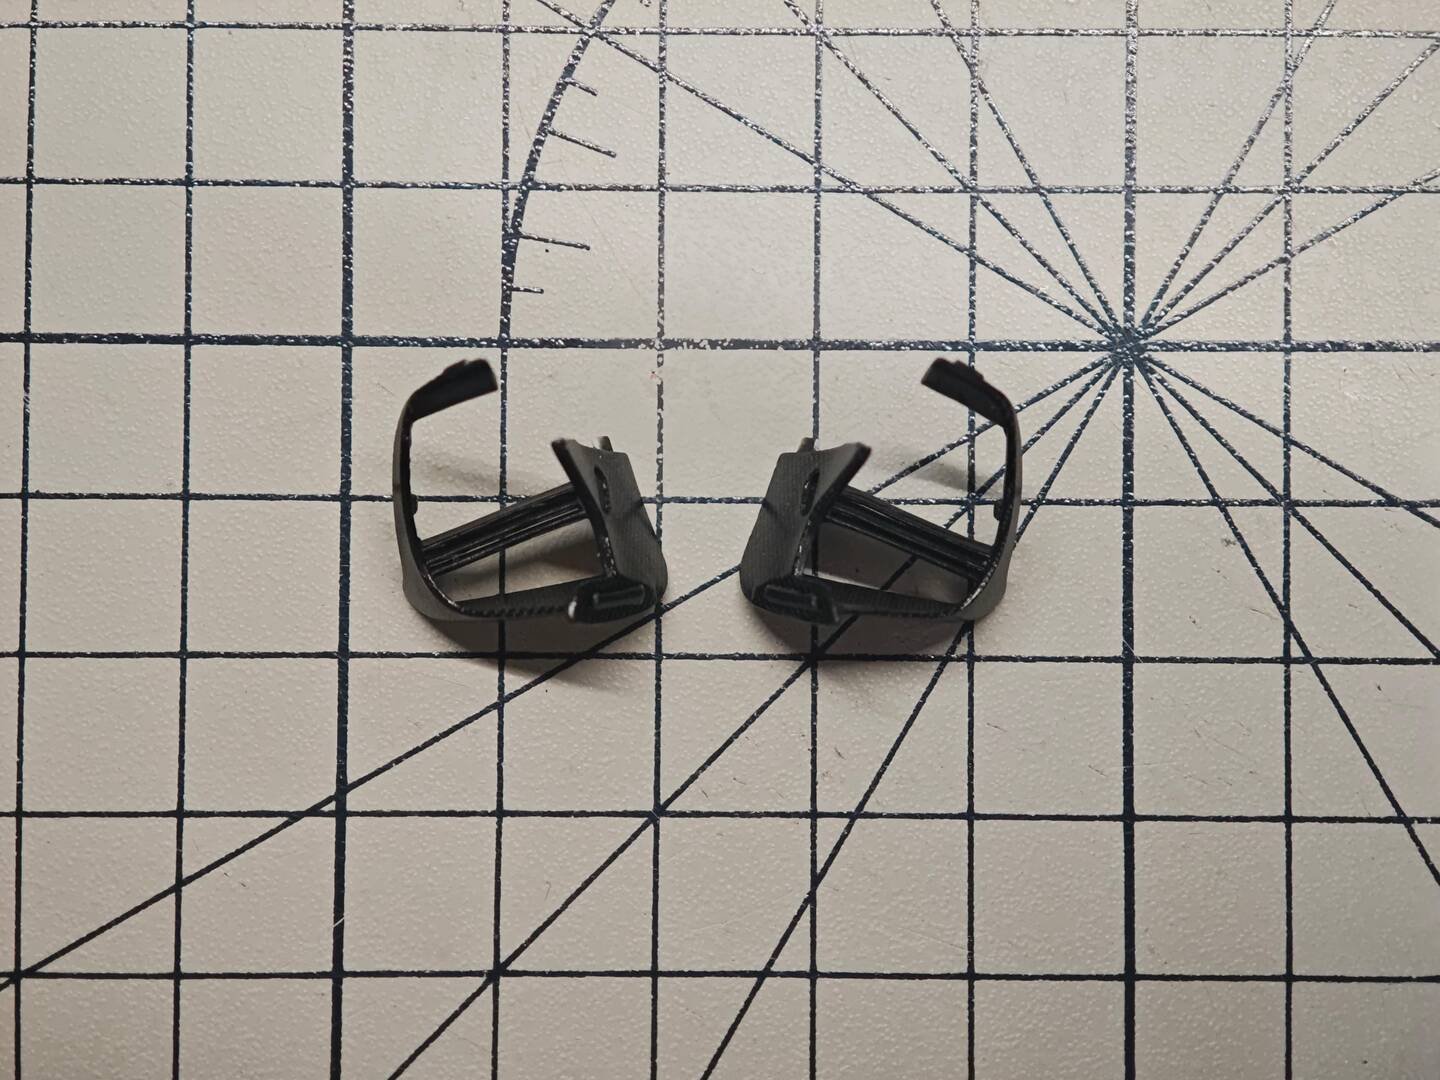
The outer frame hoops R76 and R77 are then carbon-wrapped as well, completing the cage that will eventually surround the mirror stalk.
Side-pod outlet vanes
The stacked louvres behind the front wheels are built up from a set of small vanes, each one a separate carbon decal: D30/D31, D32, D33 and D34 on one side (with the corresponding opposite-side numbers D35–D39 noted in parentheses on the sheet). They are shown test-fitted against the teal body to confirm alignment before glue appears.
Front and rear deck trim panels
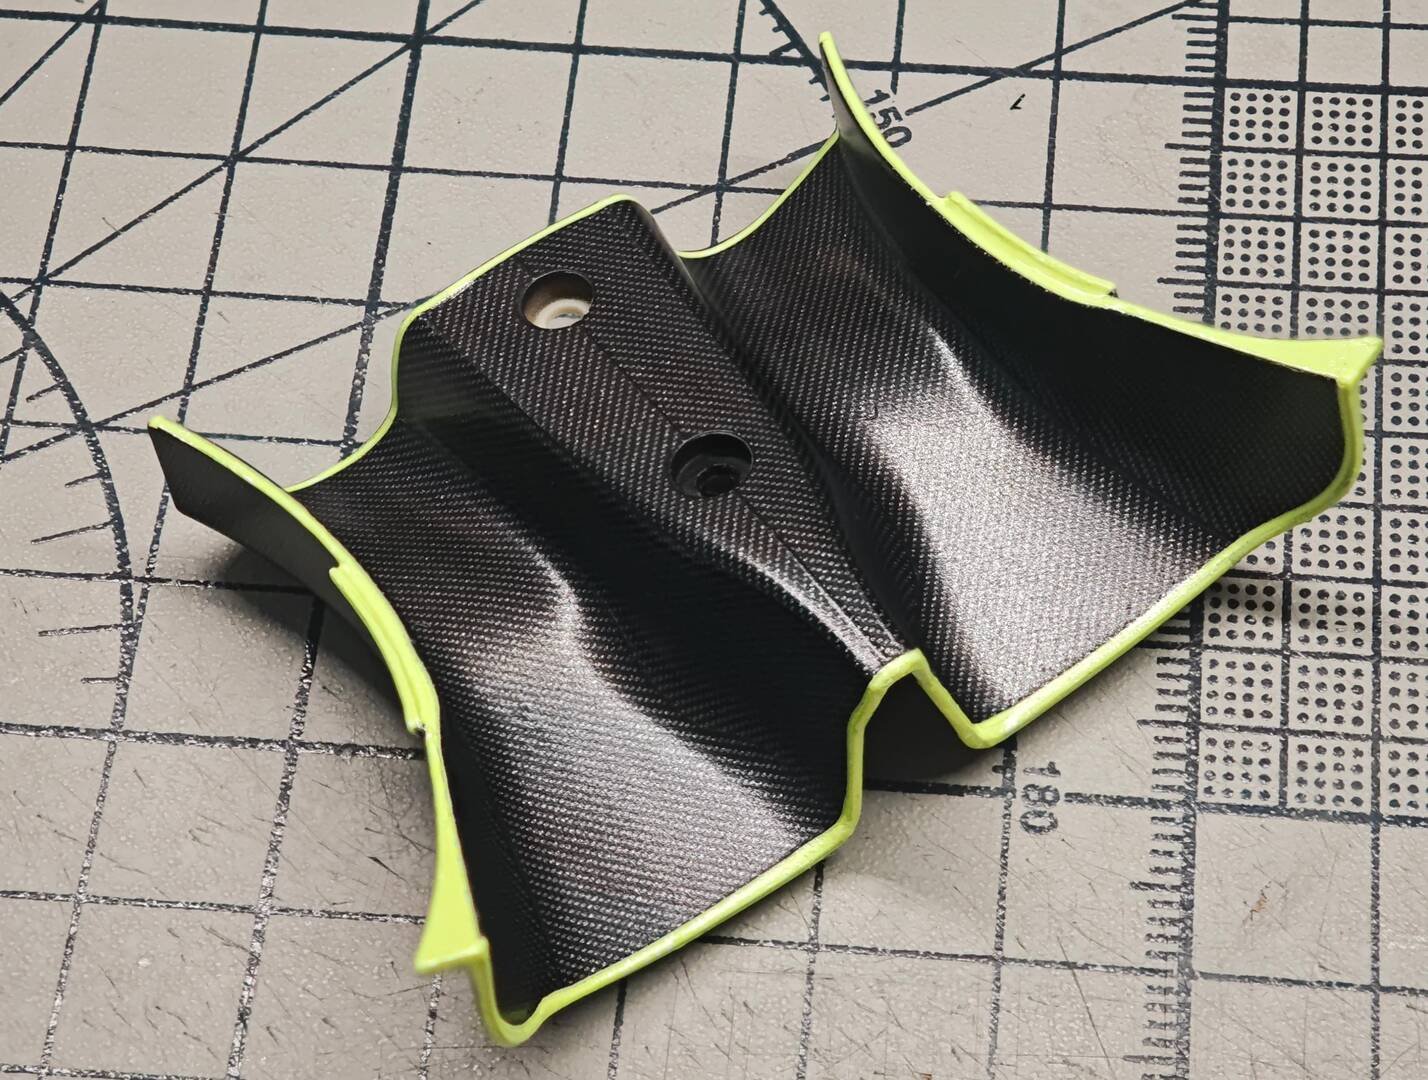
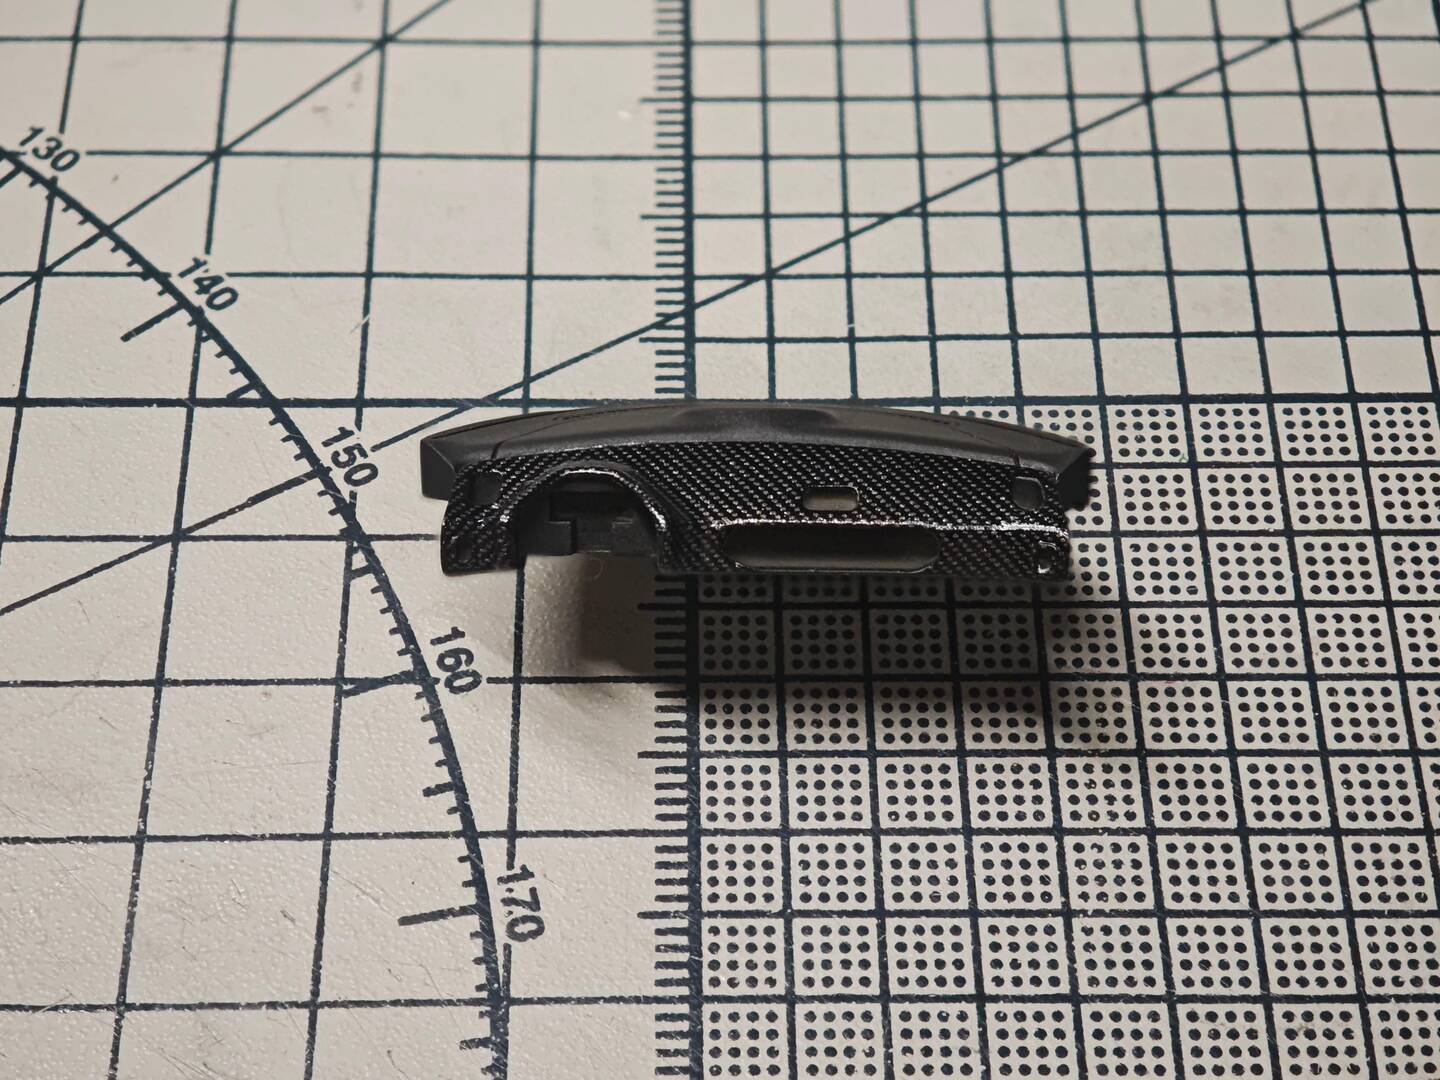
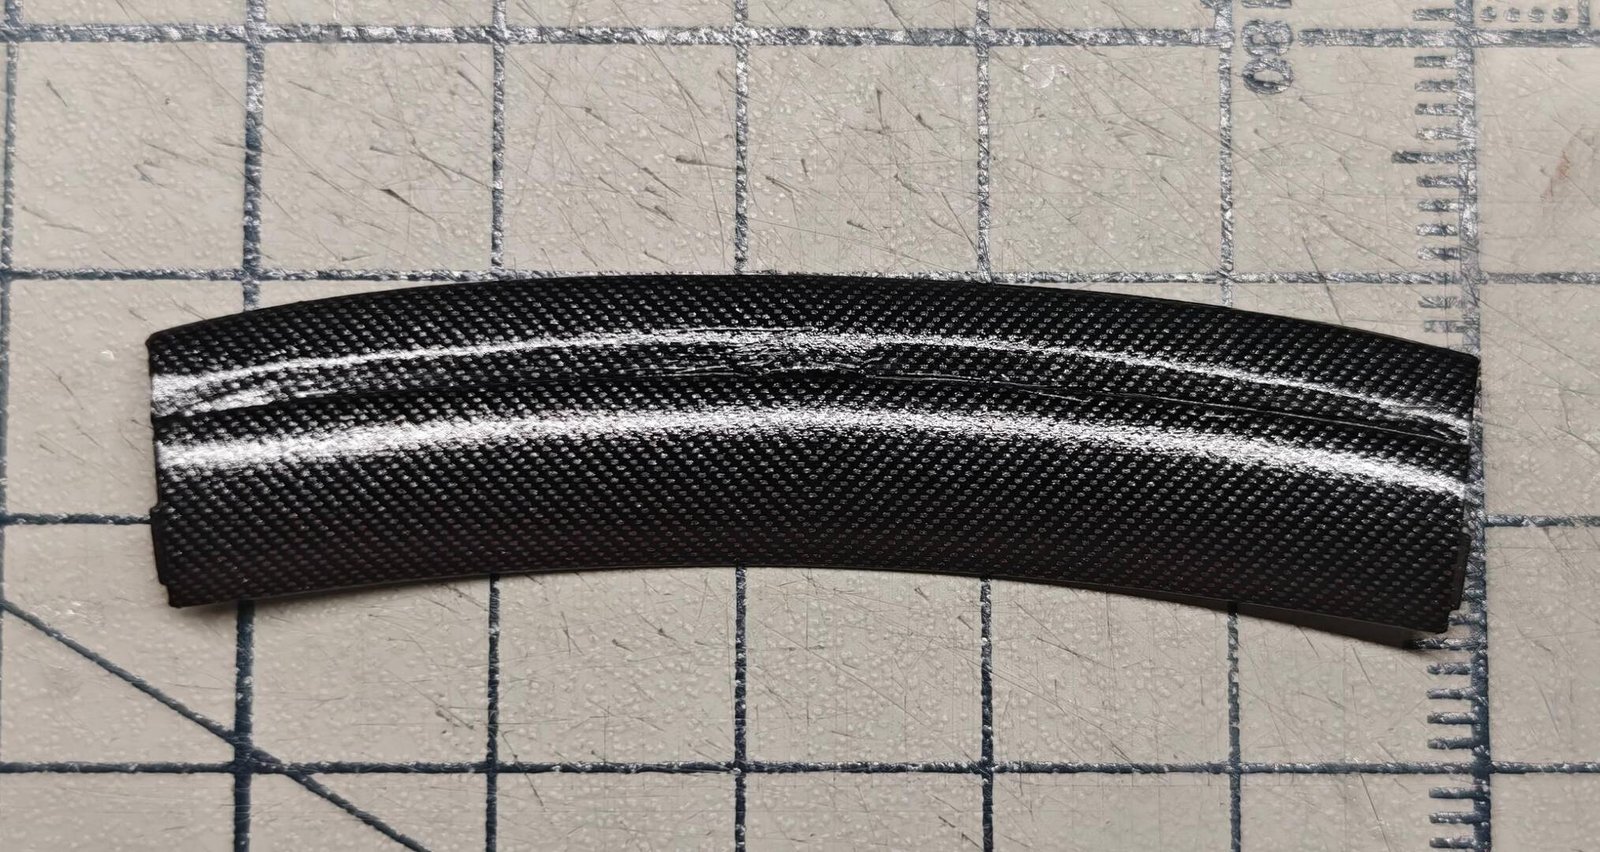
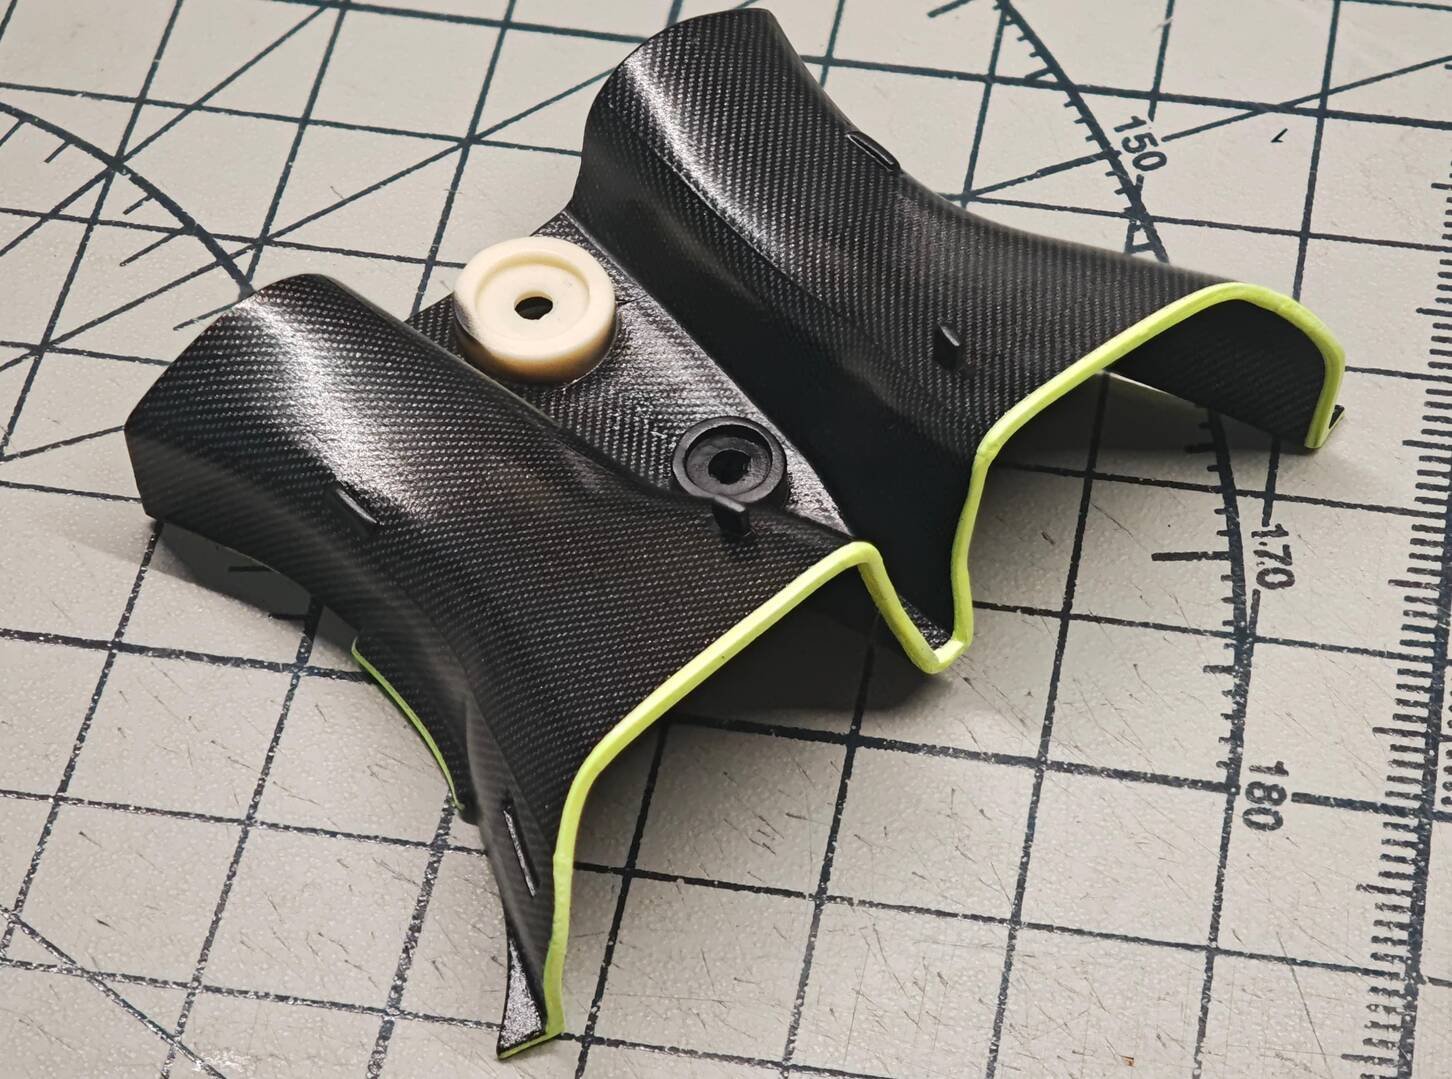
A large wavy interior panel — part of the rear deck/cockpit-surround structure — gets a full carbon skin with lime edge trim. D92 and D93 cover its broad faces, D52–D55 and D54(D51) fill the smaller facets, while CD2 and CD19 are the lime pinstripe decals that follow its edges; the part itself is R49.
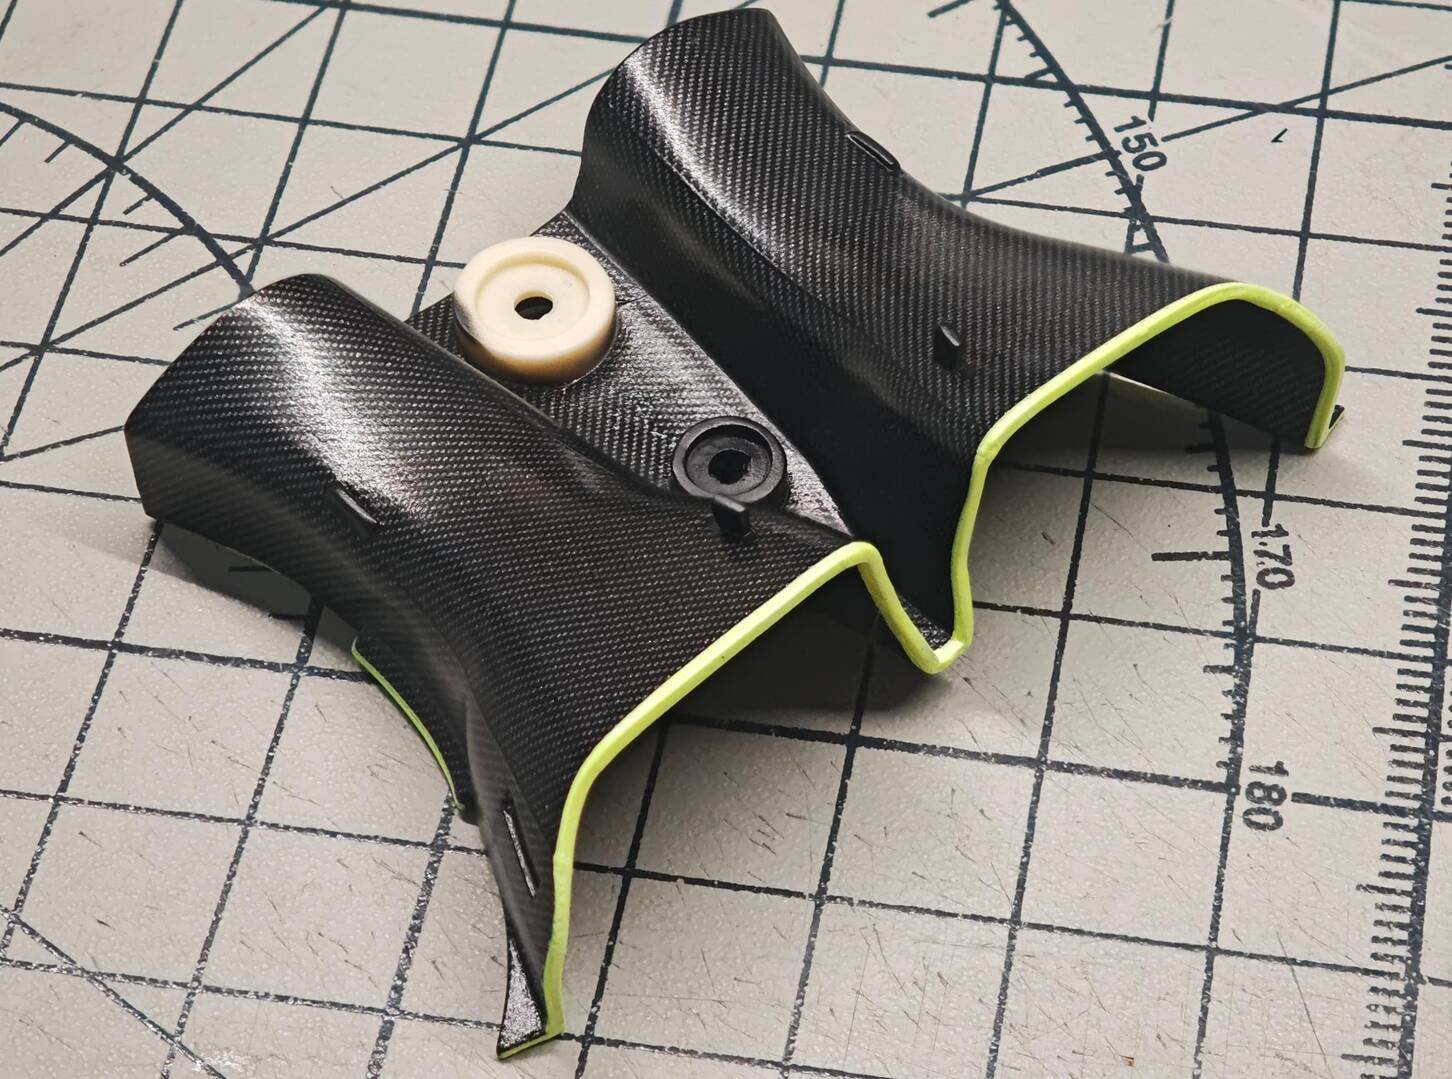
The matching bulkhead panel carries D71, D72 and D94 across its face, D97(D96) and D68(D67) on one side and D58(D59) on the other, with the same lime edge decal. The beige resin mounting bosses are left bare for later assembly.
Diffuser inserts and rear hardware
A long slotted carbon part destined for the rear diffuser area wears D56 and D57 on its faces (part R11). Beside it, a small finned pod carries PE15 on its face and PE5 on its lower panel — photo-etched carbon-effect plates rather than waterslides.
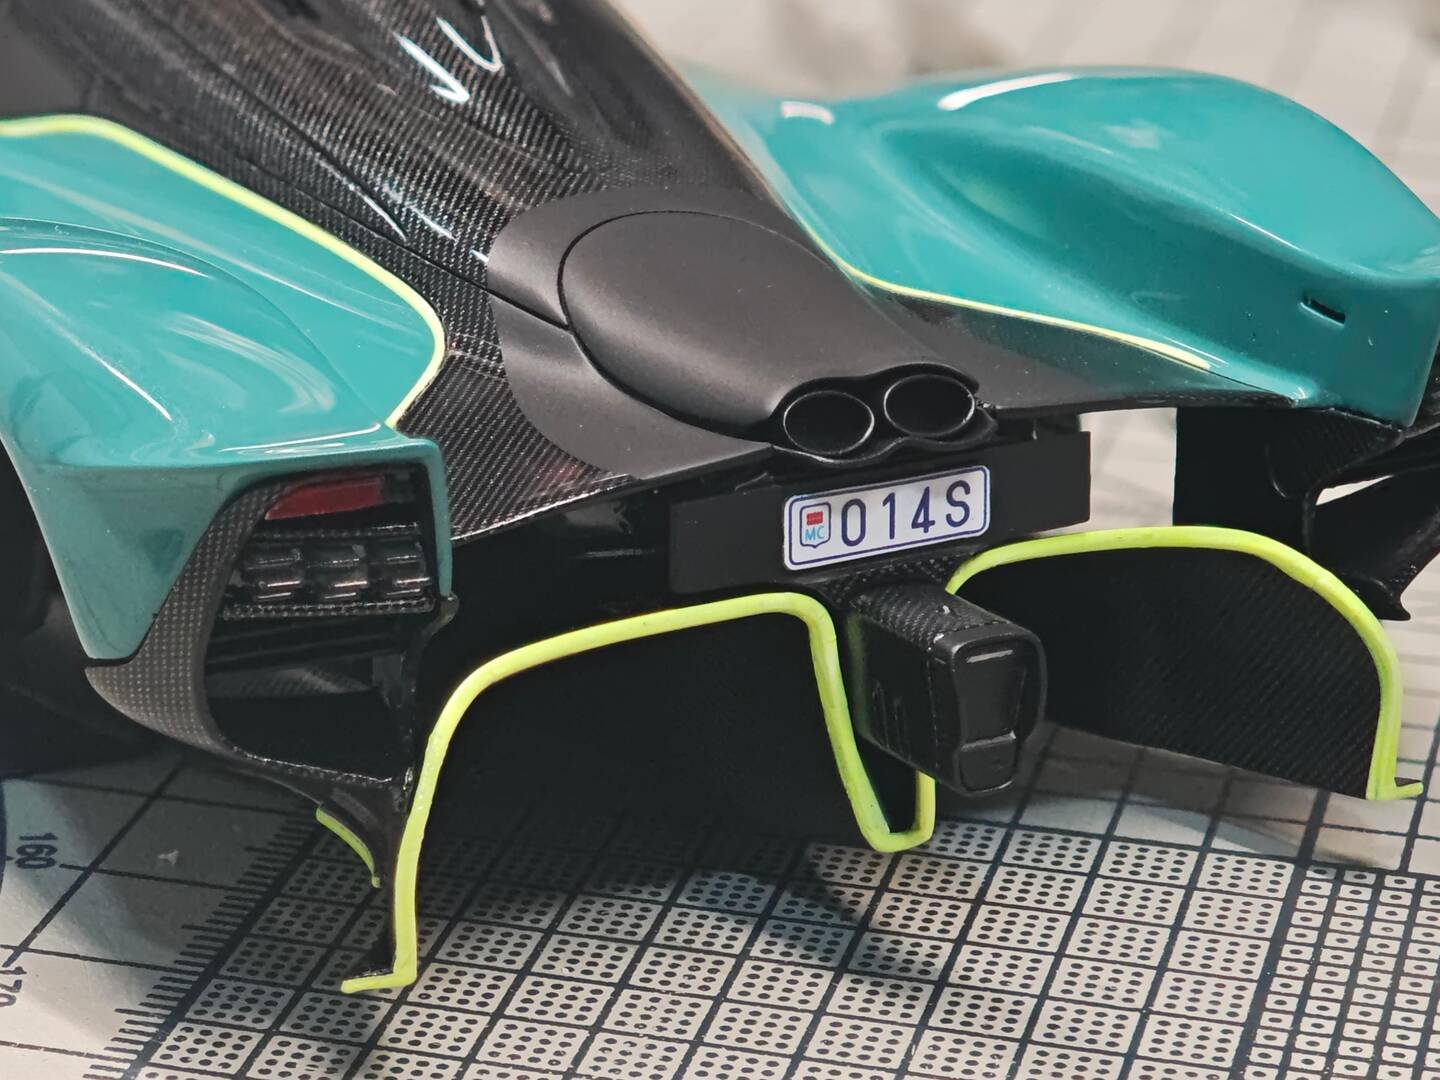
At the back of the car the details come together for a trial fit: the D91/R78 slat insert, the twin exhaust outlets R58, the "014S" number-plate decal D29, the red tail lamp D+PE34(PE35), the R90(R89) rear lamp block and the R14/R73 diffuser and rear-panel parts — all carbon, gloss black or photo-etched, awaiting final assembly.
Front aero and screen parts
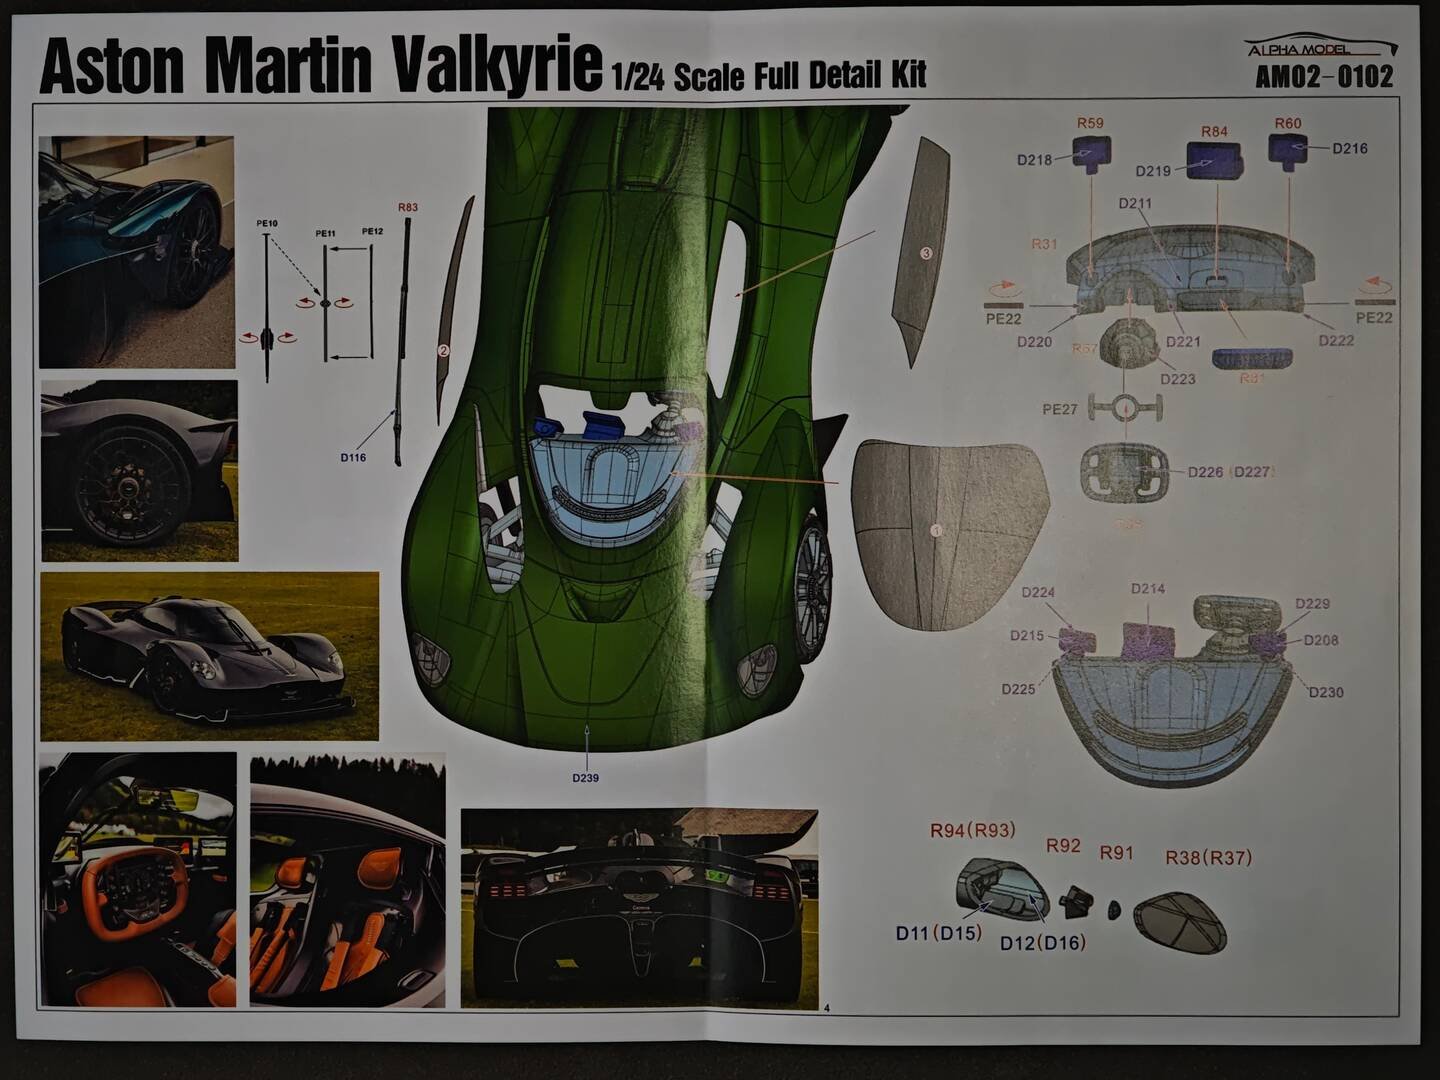
The front undertray crossmember (R31) receives D211 across its top face and D220–D222 around its recessed opening — a fragile piece handled off the car.
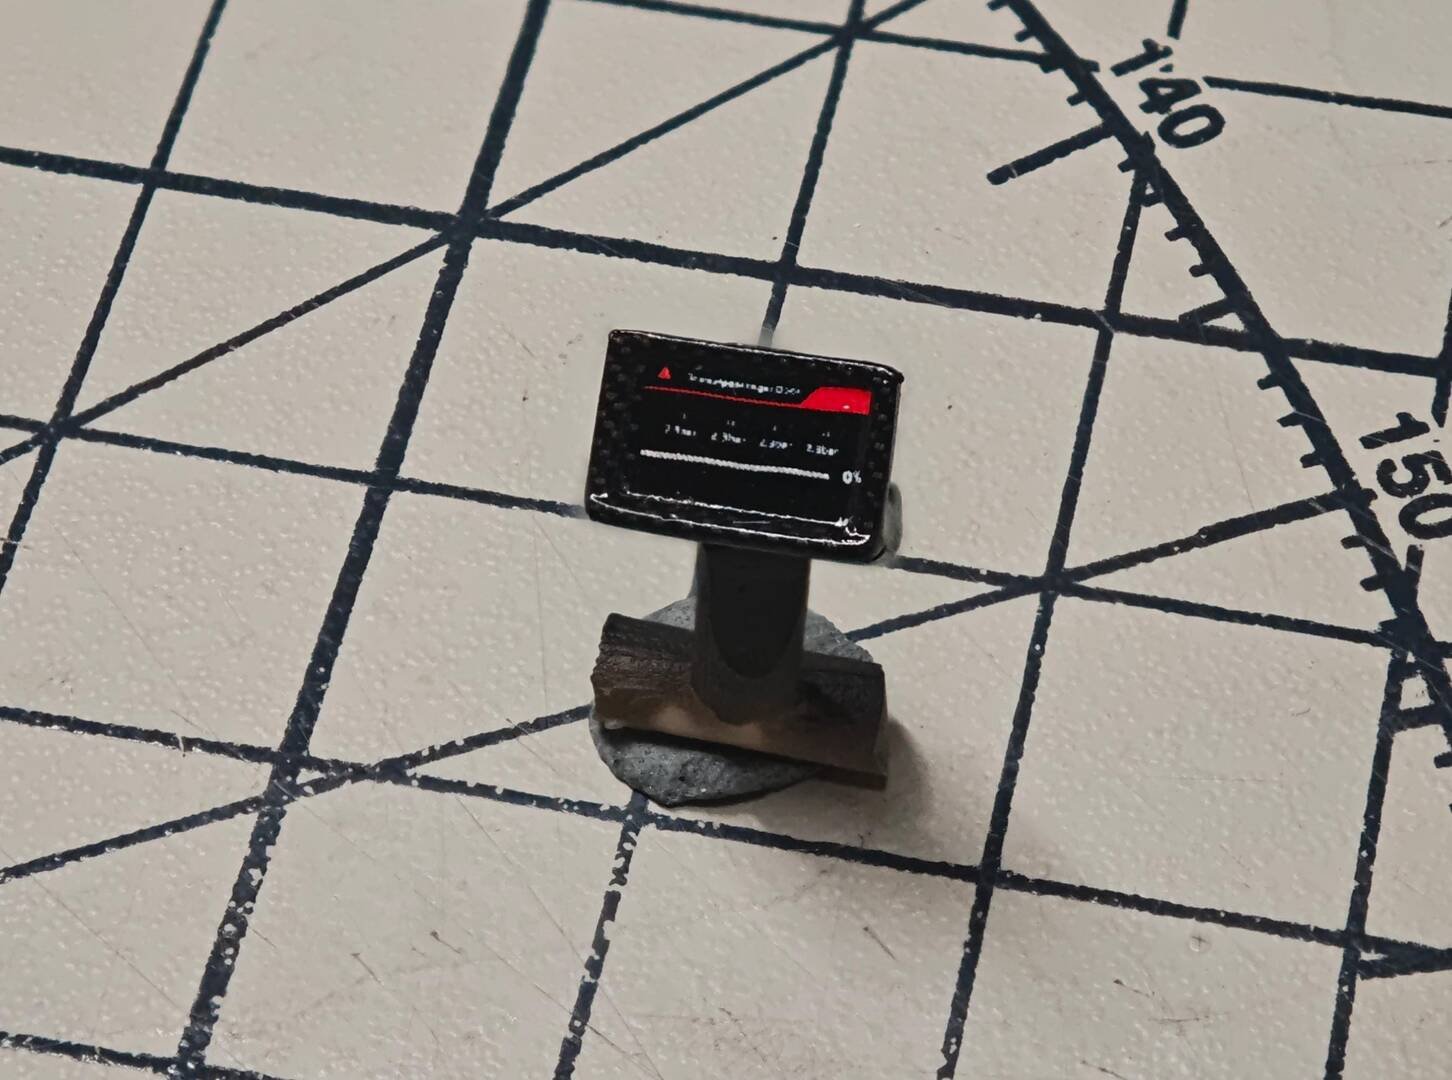
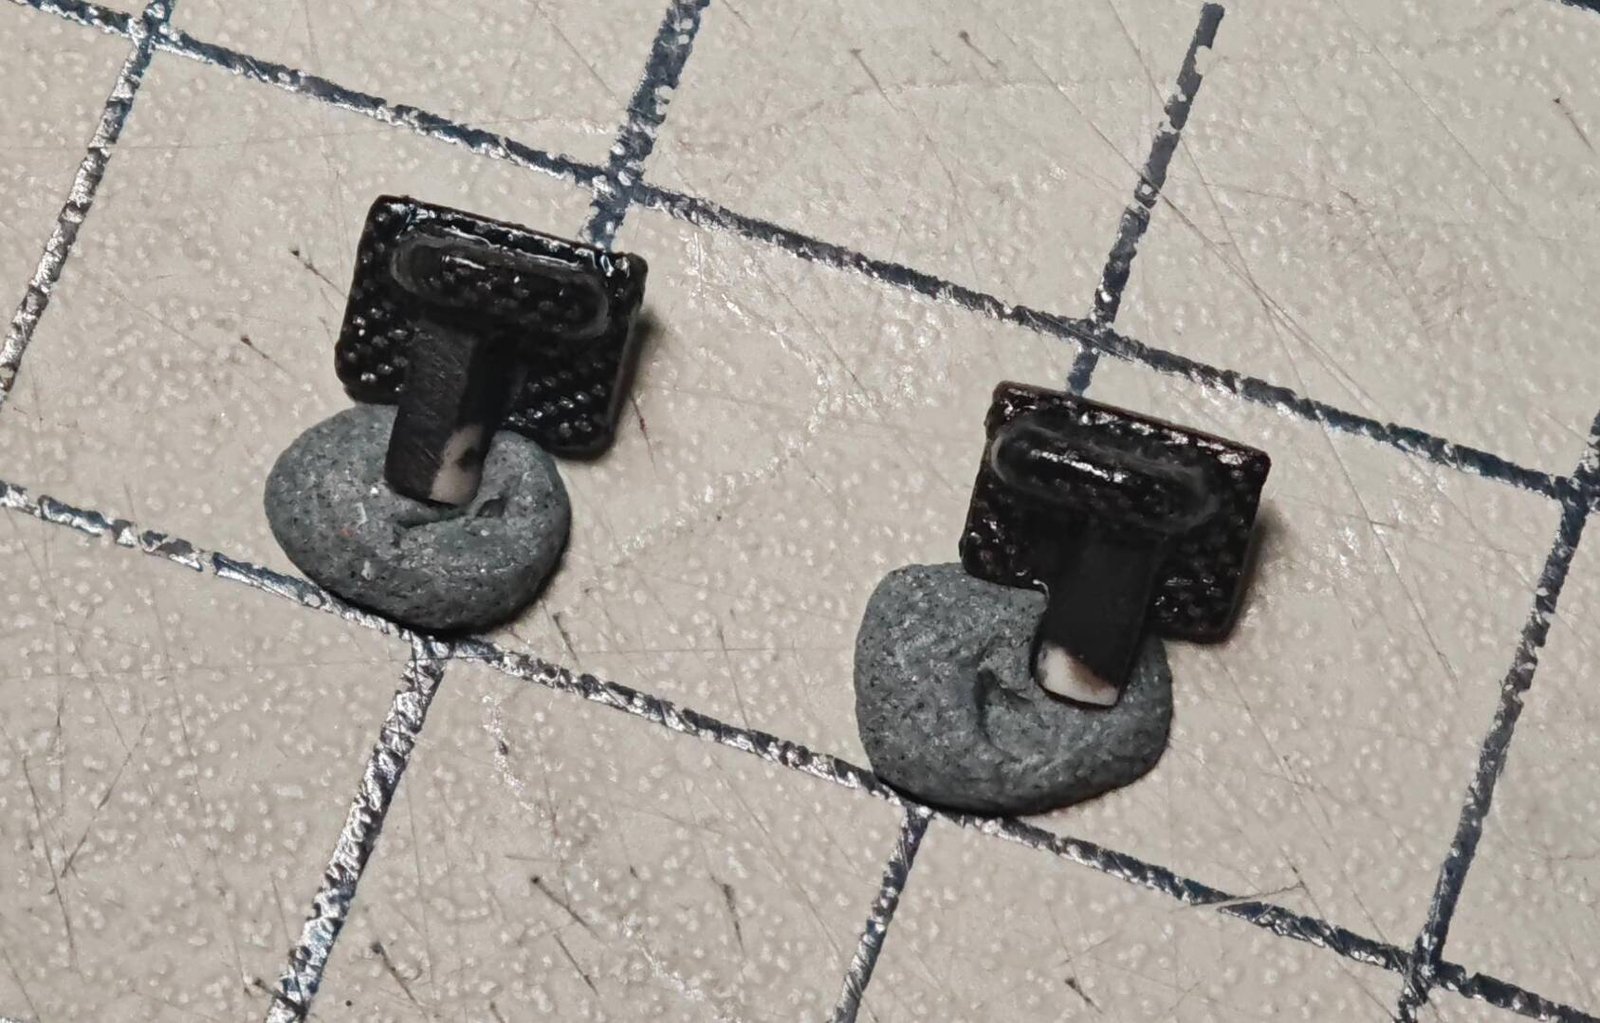
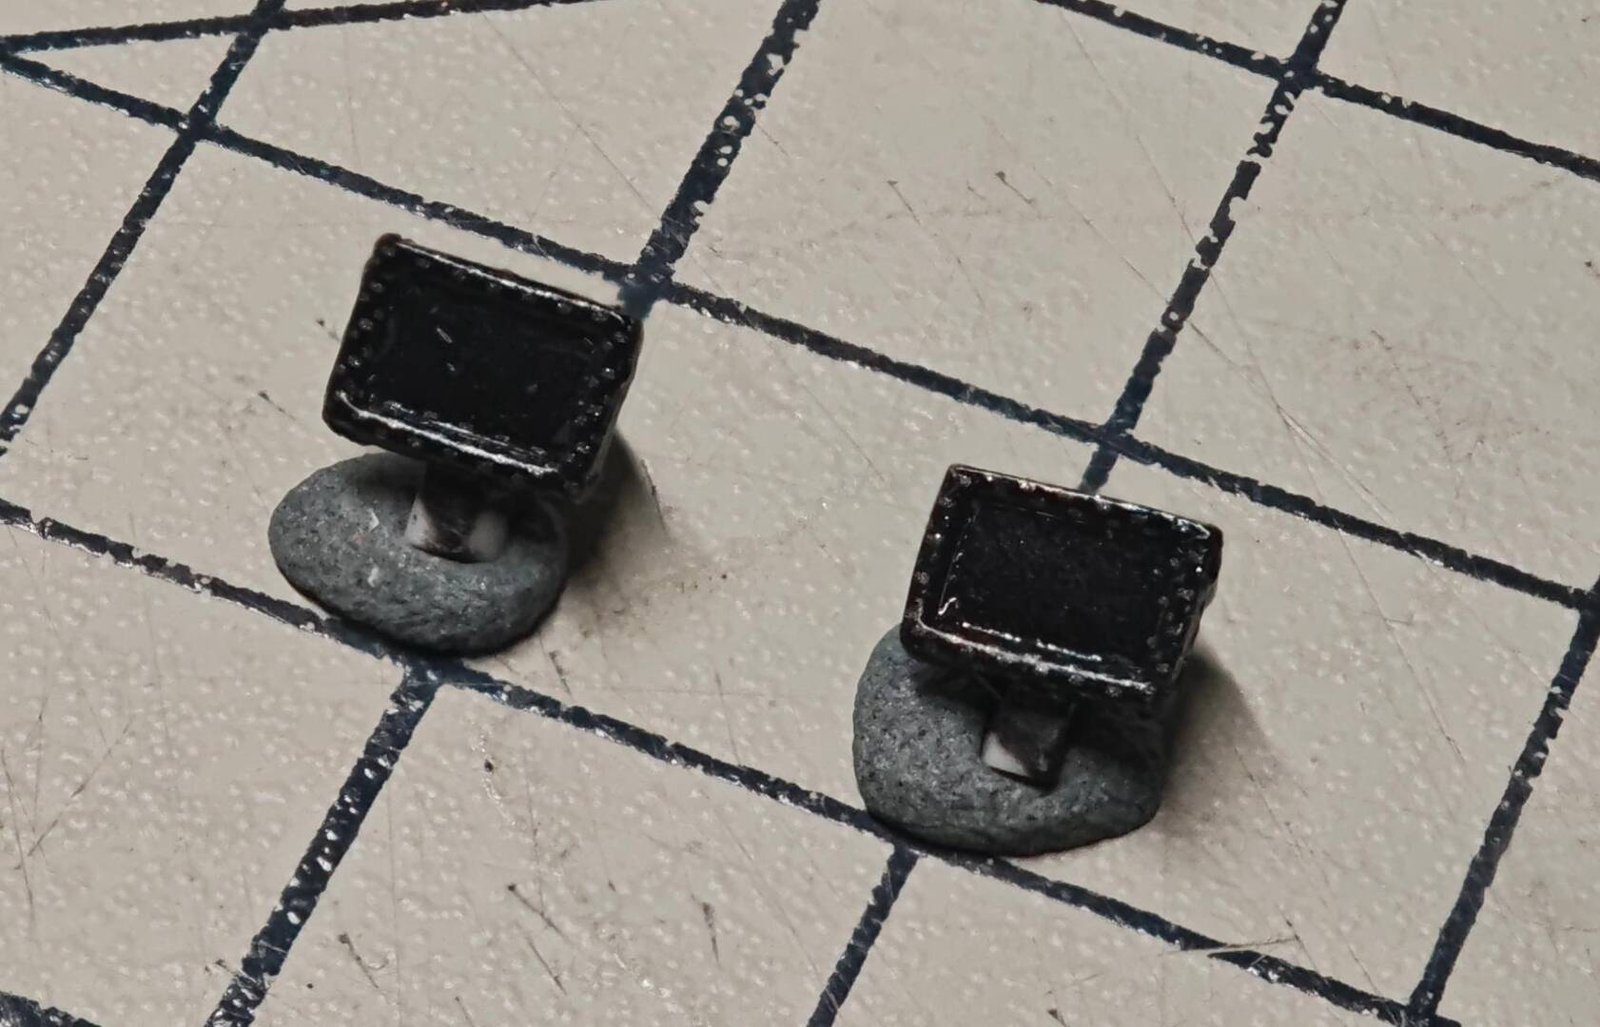
A contact-sheet page shows the smallest parts in batches: the dash/screen support piece R84 with its display decal D219; the two rear-view monitor housings R59/R60 with D218, D216, D229, D208, D225, D230, D215 and D224; and the carbon support blade D214 on R84. Blu-Tack blobs hold each part upright while the decals set.
Steering wheel, stalk and the central fin
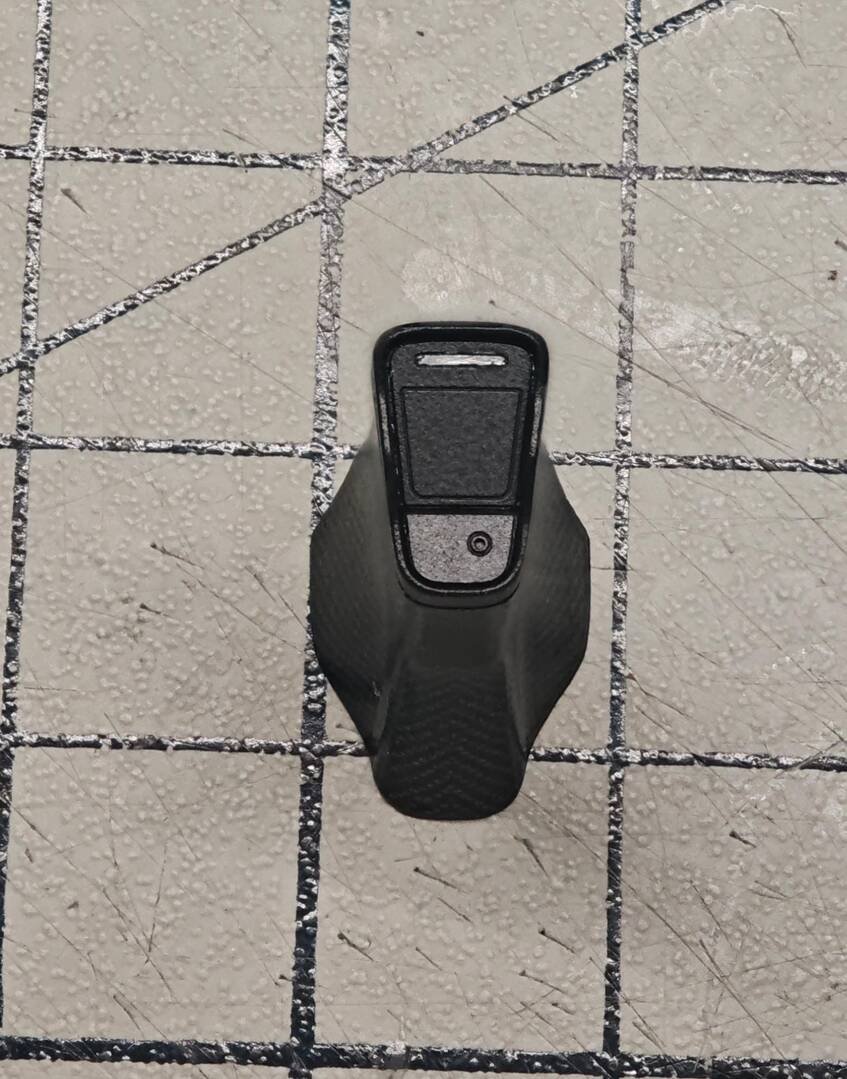
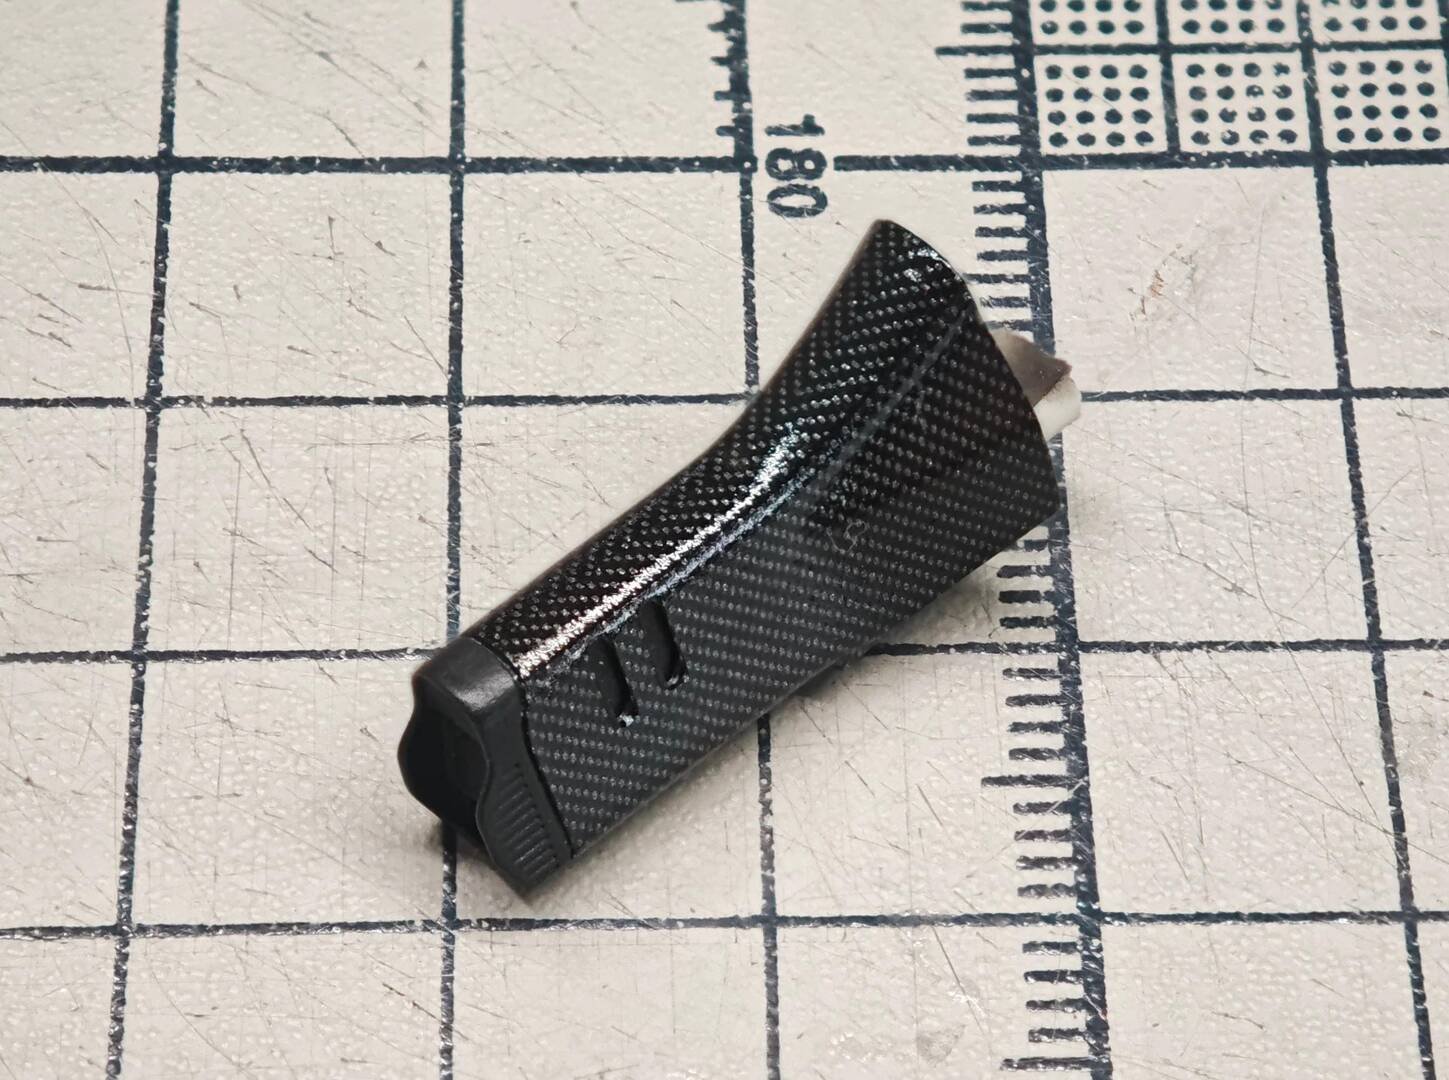
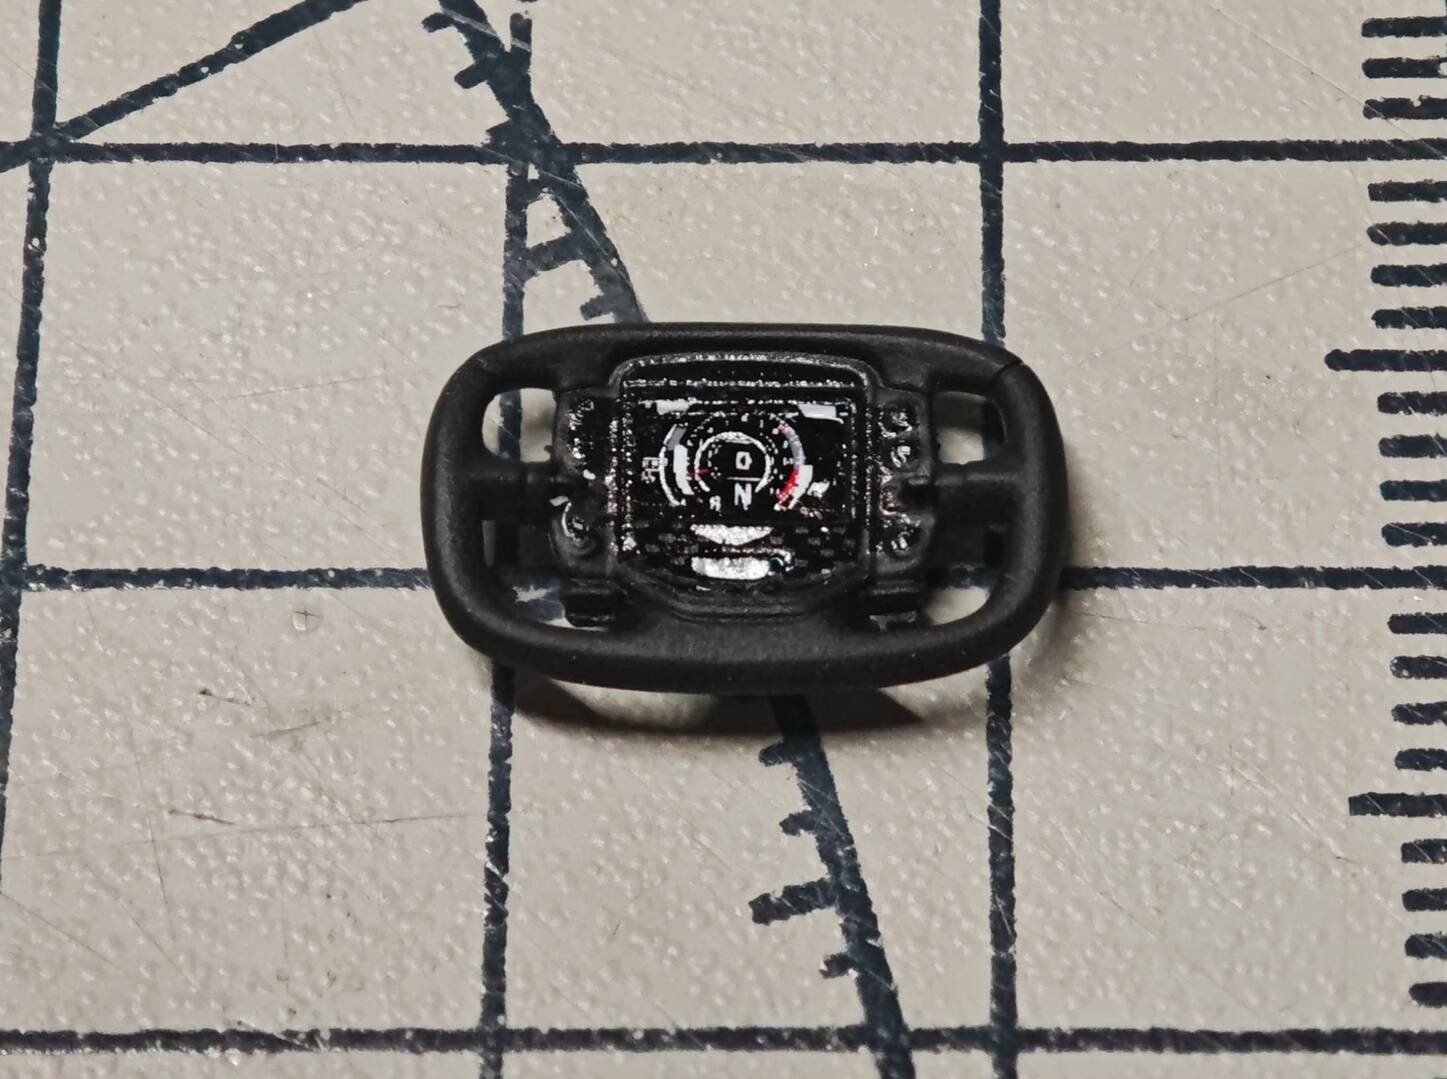
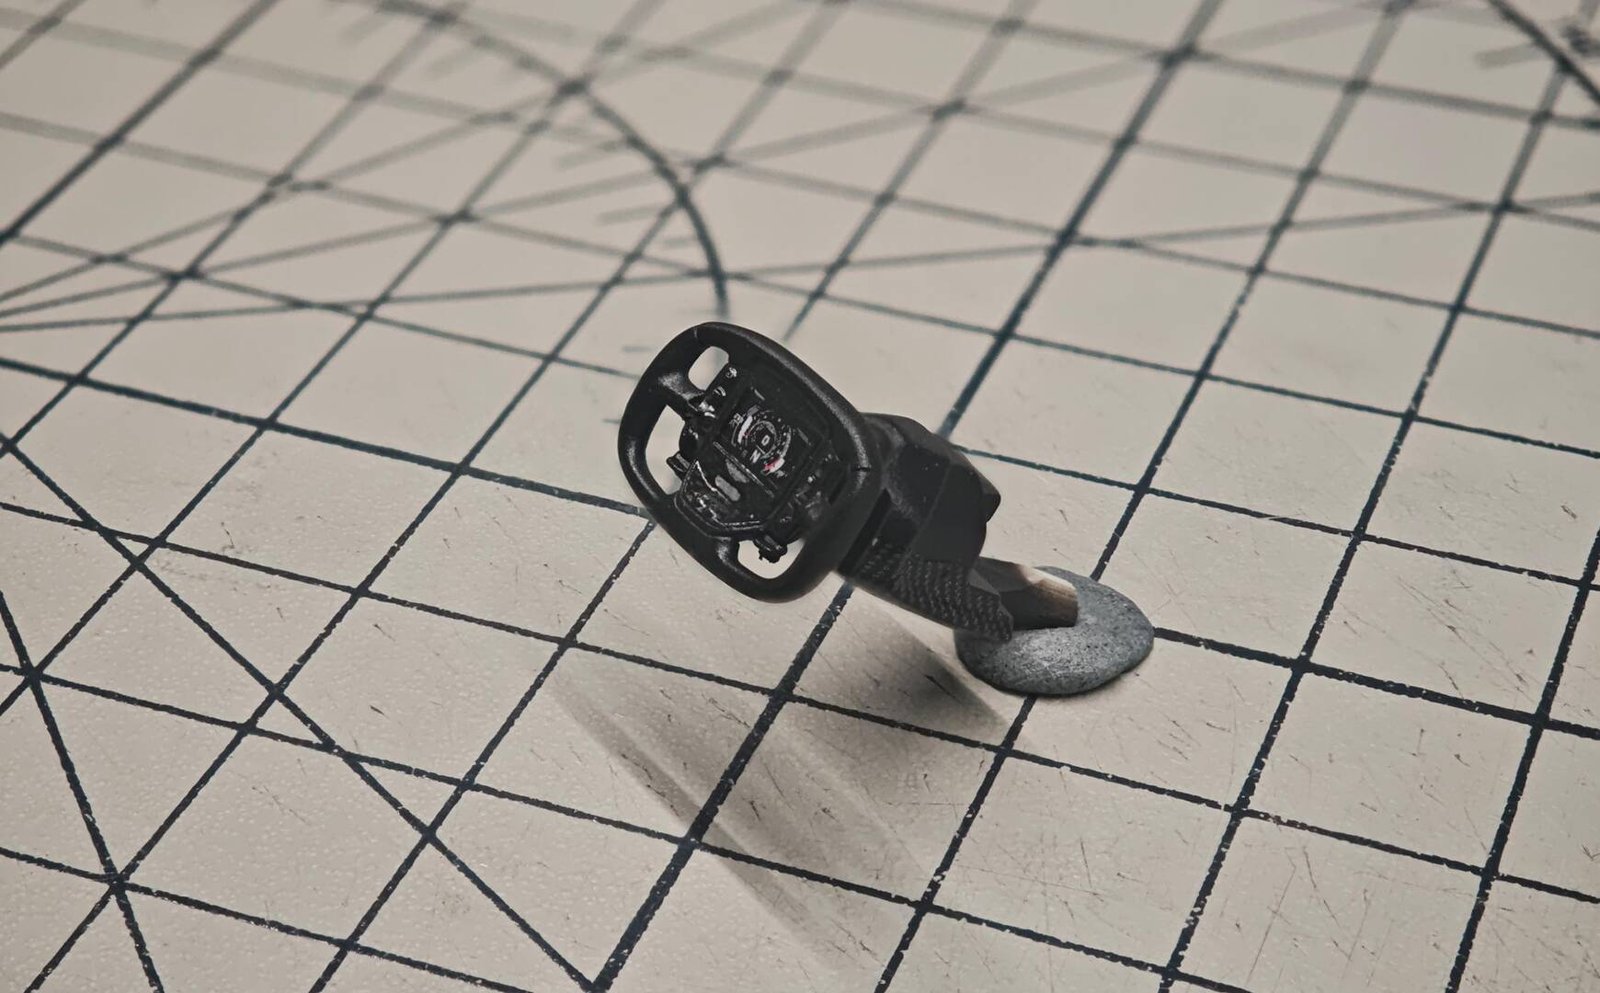
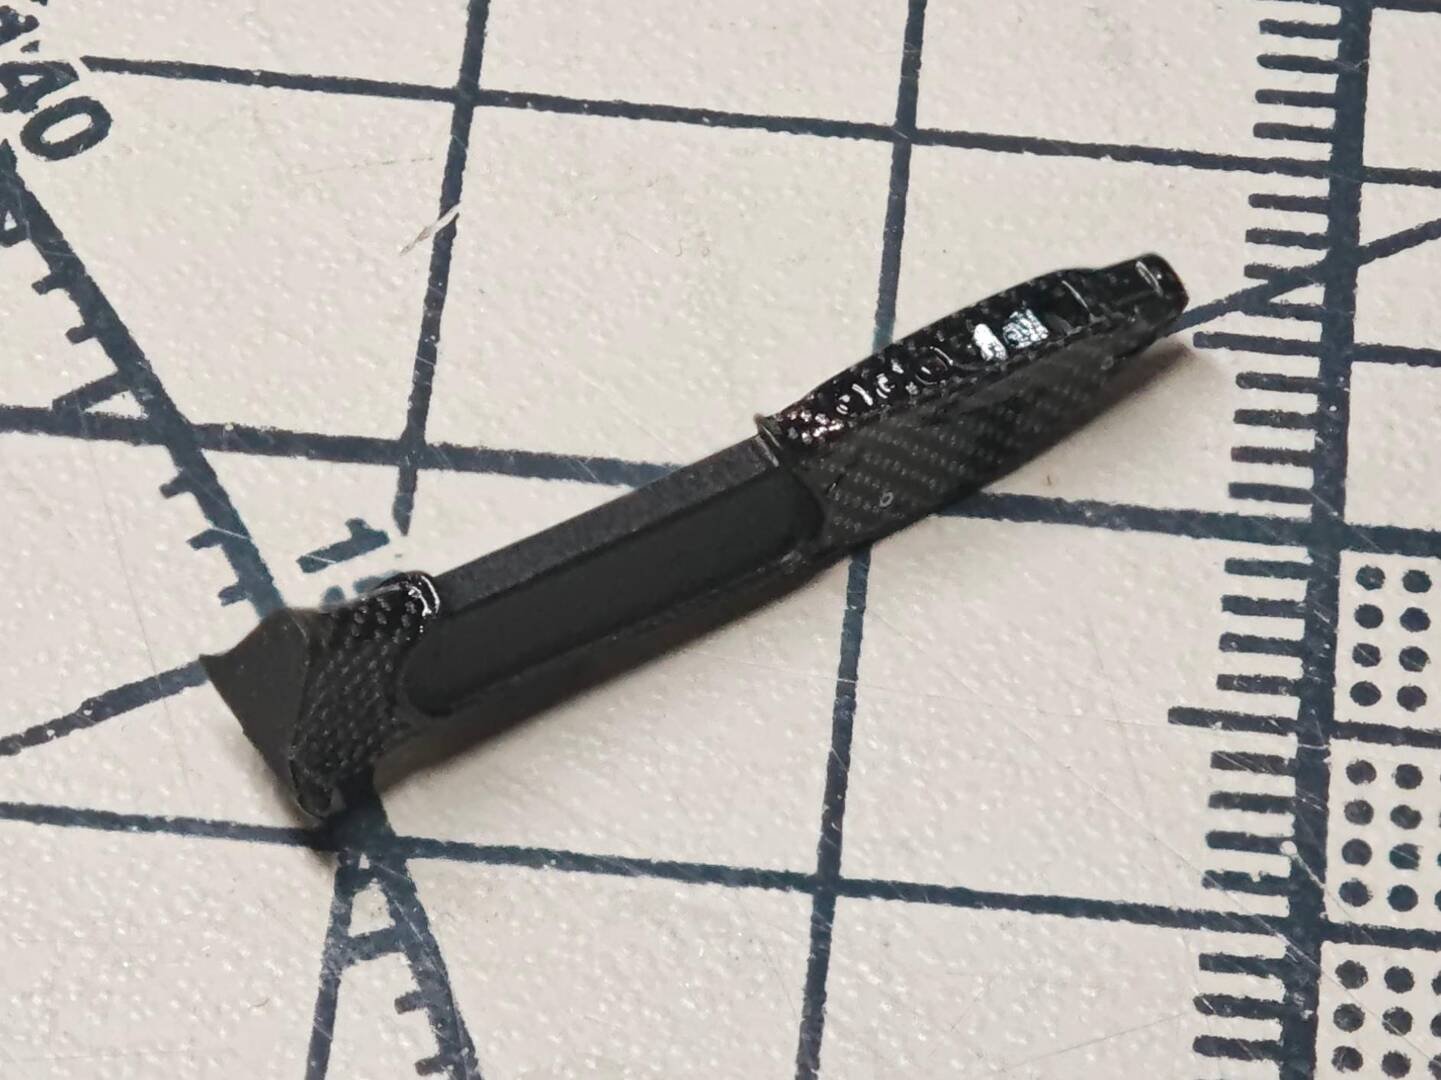
The Valkyrie's rectangular F1-style wheel (R36) is detailed with instrument decal D227, the tiny dial markings clearly legible even at this scale. The steering-column stalk and its carbon cover carry D223 over part R57, with PE27 marking the photo-etched clip detail. These are assembled off the car and set aside as complete sub-units.
Why decal everything before assembly
- Access: once the mirror cages, louvres and deck panels are glued in place, half their surfaces become unreachable. Every wrapped edge you see in the finished car was applied while the part was still loose.
- Consistent weave: batch-processing the parts lets the carbon direction be matched across neighbouring panels.
- Support system: small parts stuck into Blu-Tack putty can be handled without fingerprints and left to dry at any angle.
- Decal + PE mix: Break uses waterslides for large faces and photo-etched carbon plates (PE-numbered items) for tiny flat panels where film would fold awkwardly.
With the shell polished and the small parts carbon-wrapped, the project finally moves from finishing to construction. Next: the interior — carbon tub, seats, harnesses, the F1-style wheel and all those micro-screens.
Next: Part 6 — Interior Assembly: Carbon Tub, Seats, Harnesses and the F1 Cockpit
Advanced Creators
Aston Martin Valkyrie Build Feature (Break Wong) — Part 6: Interior Assembly — Carbon Tub, Seats, Screens & Harnesses
Alpha Model AM02-0102 · Build by Break Wong
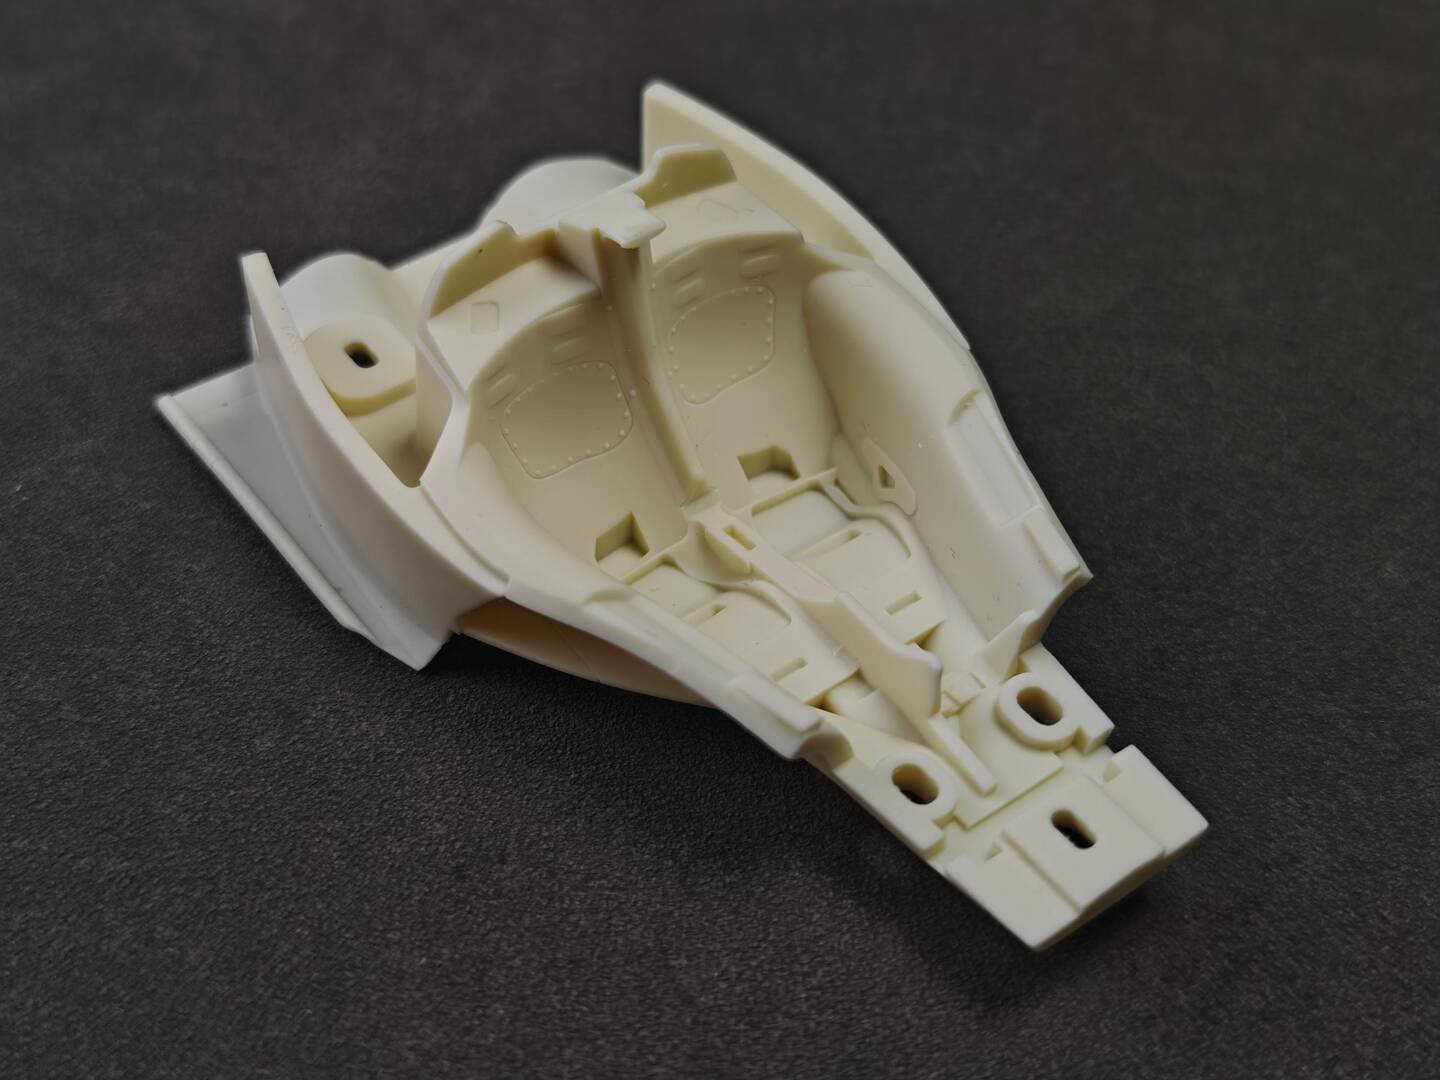
Chapter 3 of the build opens on a pile of cream-coloured resin castings — the monocoque tub, twin seat pans, dash structure and a forest of small brackets. On the real Valkyrie the cabin is essentially a carbon survival cell with two seats mounted almost directly to the tub and minimal trim between the occupants, so the kit follows suit: structure is visible everywhere, and almost every surface is meant to end up either bare carbon or matte black.
Driver's station first
Before the tub itself is dressed, the dashboard module R81 comes together off the car: the compact rectangular steering wheel with its printed controls, the folding instrument display with its screen-face decal, the two small camera-mirror screens, and a tiny photo-etched trim piece PE22 at the dash edge. Building it as a complete subassembly means the delicate screens never have to be handled while they are trapped inside the tub.
Dressing the tub
The monocoque tub R13 is one of the largest single carbon-decal jobs in the kit. Its interior is covered by a dense sequence of numbered weave pieces — D153, D154, D158, D163, D164, D165, D168, D169 and D170 across the twin seat recesses and rear bulkhead, D2 and D3 up the outer sills, D25 and D161 on the forward returns, with lime trim lines CD41 and CD53 marking the sill edges. Because the tub wraps around the seats, each decal has to be pressed deep into the footwell contours rather than left bridging across them.
The opposite side carries the mirror sequence: D150, D155 and D159 line the other seat bay, D1 and D4 run the outer wall, D24 covers the central spine, and CD42 and CD51 continue the accent lines. Cross-checking both sides before applying is how the weave direction stays symmetrical when the tub is viewed from above.
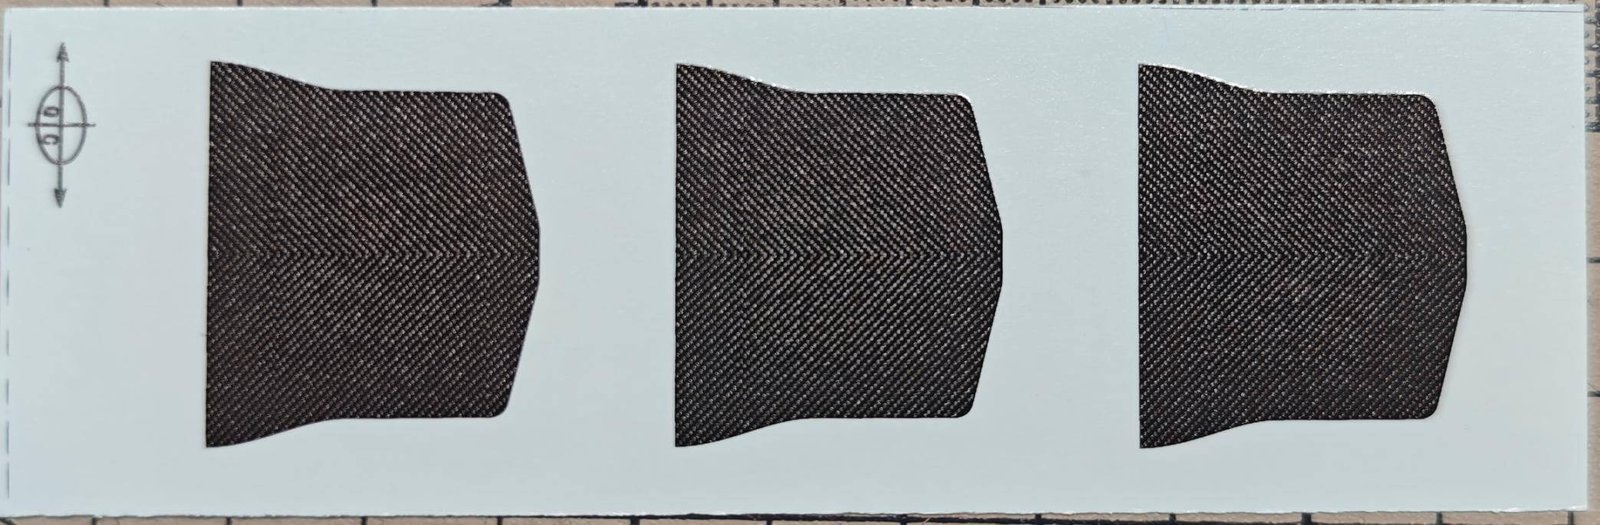
The lower tub / floor section receives its own set: D21, D22 and D23 down the central tunnel, D46, D47 and D49(D48) along the raised upper edges, and D28(D29) on the end return. The red-bordered inset shows three spare shaped weave pieces from the decal sheet kept as reference spares. The gloss-cleared carbon here will later sit in deep shadow between the seats, exactly as on the real car.
Seat shells
The two fixed-back bucket seats R9 and R10 are wrapped with D205(D207) over their outer structural shells, while the smooth central pad areas stay in soft matte black to represent the suede-style inserts. Separate C-marked side pieces R47(R51) and R48(R50) complete the side bolsters with their own carbon. They are thin, deeply bucketed castings — decal softener is needed in stages to pull the film down into the lumbar hollows.
A long narrow interior trim part R82 gets D162 and D172 carbon at each end with a matte-black centre section — one of several spine pieces that run between the seats.
Six-point harnesses
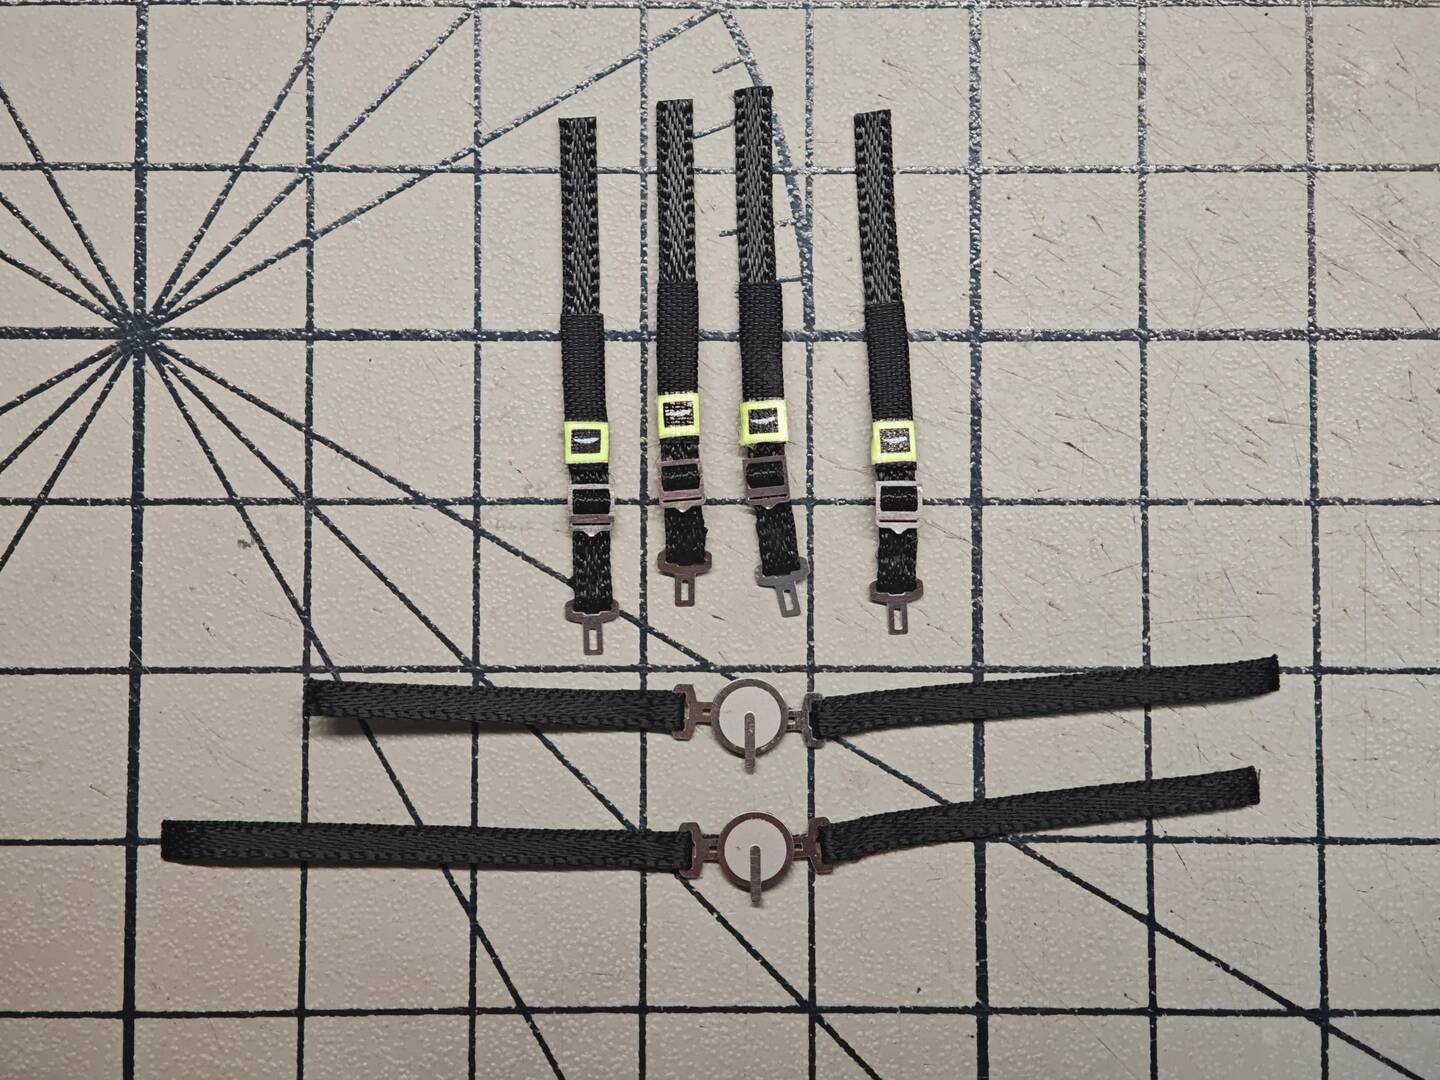
The harnesses are built from woven fabric straps with fine photo-etched buckles: four shoulder/lap straps with lime Aston Martin wing tags on their adjusters, and two long crotch-strap assemblies each centred on a round quick-release buckle. The fabric texture of the straps is worth noting — these are not decals but actual woven material, which reads correctly under close photography.
Installed, the full six-point layout transforms the tub: both seats R10 carry paired shoulder straps with lime tags, the release-buckle tongues sit low between the legs, the central carbon console D238 links the seats, and the inner side bolsters R62/R66 and R63/R67 frame each bucket with the rear centre structure R72 closing the view.
An oblique overview of the completed tub subassembly shows how the harnesses anchor at the narrow bulkhead end and how the photo-etched hardware is distributed: R49 and R69(R68) are the inner tub walls, R74(R75) the rear trims, R25 the floor pieces, and two clear-part fittings R39(F) with PE13(F) and PE14(F) occupy the mounting lugs of the tub extension.
The close-up of the seat shoulders shows carbon trim pieces R32+D152 and R33+D156 — the raised panels flanking the belt-anchor slots at the top of the tub, carrying the weave continuously from tub onto seat frame.
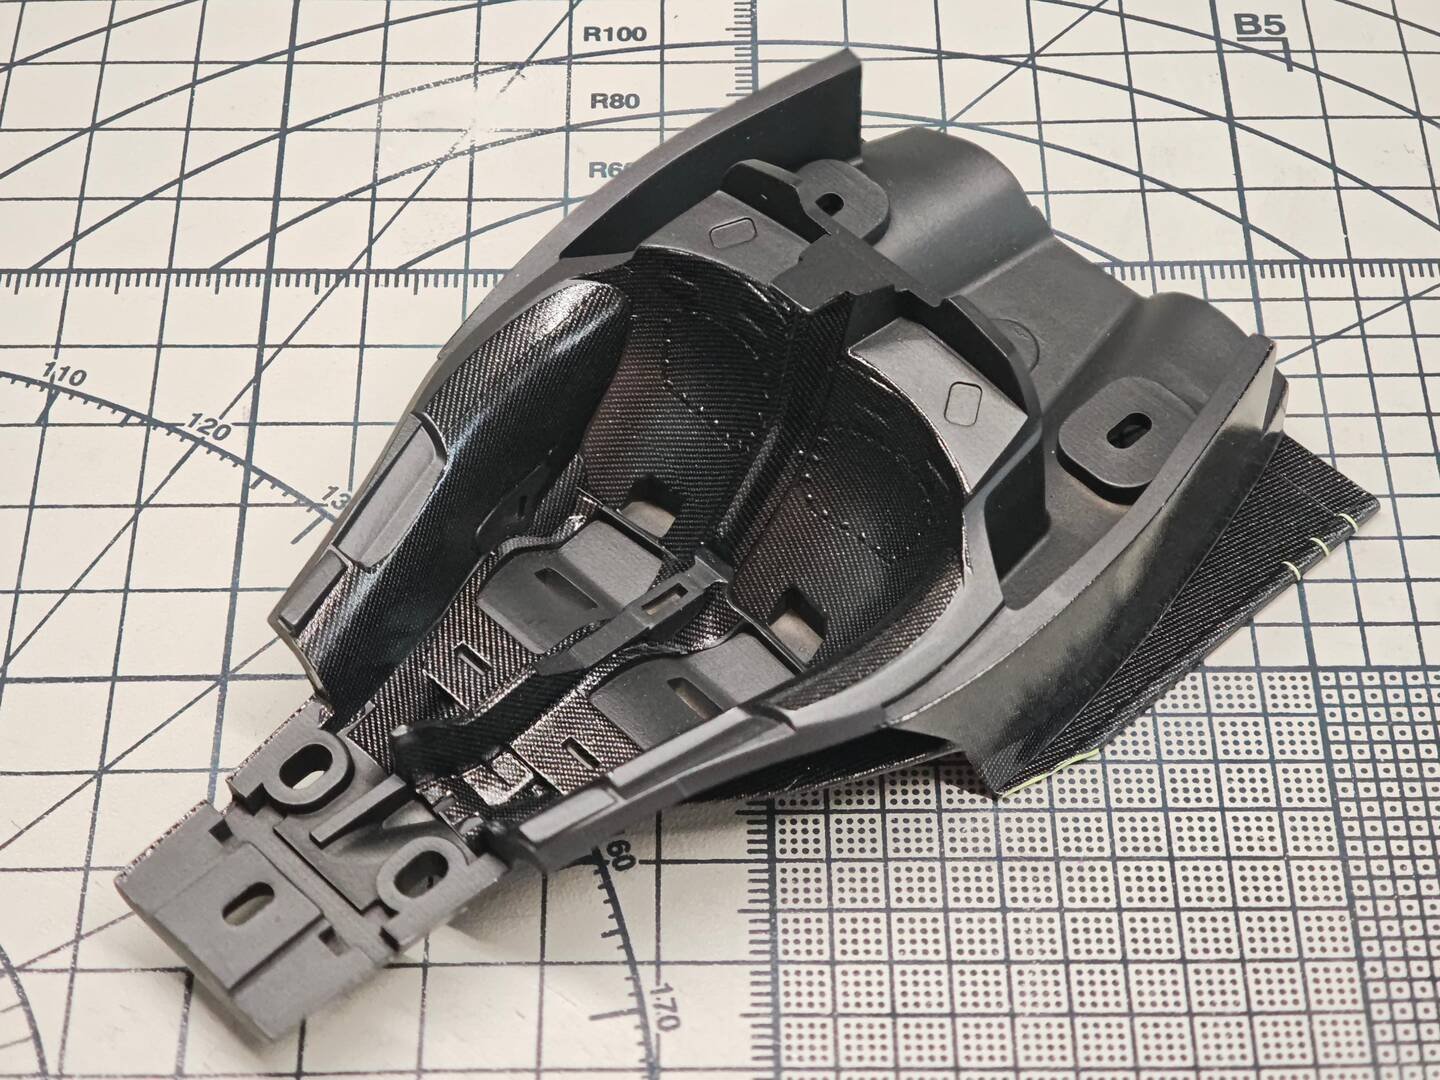
Speaker grilles & final tub closures
A shallow-depth side view of the tub leads into the next detail: the red-bordered inset shows two trapezoidal photo-etched mesh pieces, PE9(PE8)(F)+PE7(PE6)(F), which represent the speaker/vent grilles set into the tub flanks — fine perforation that only PE metal can reproduce.
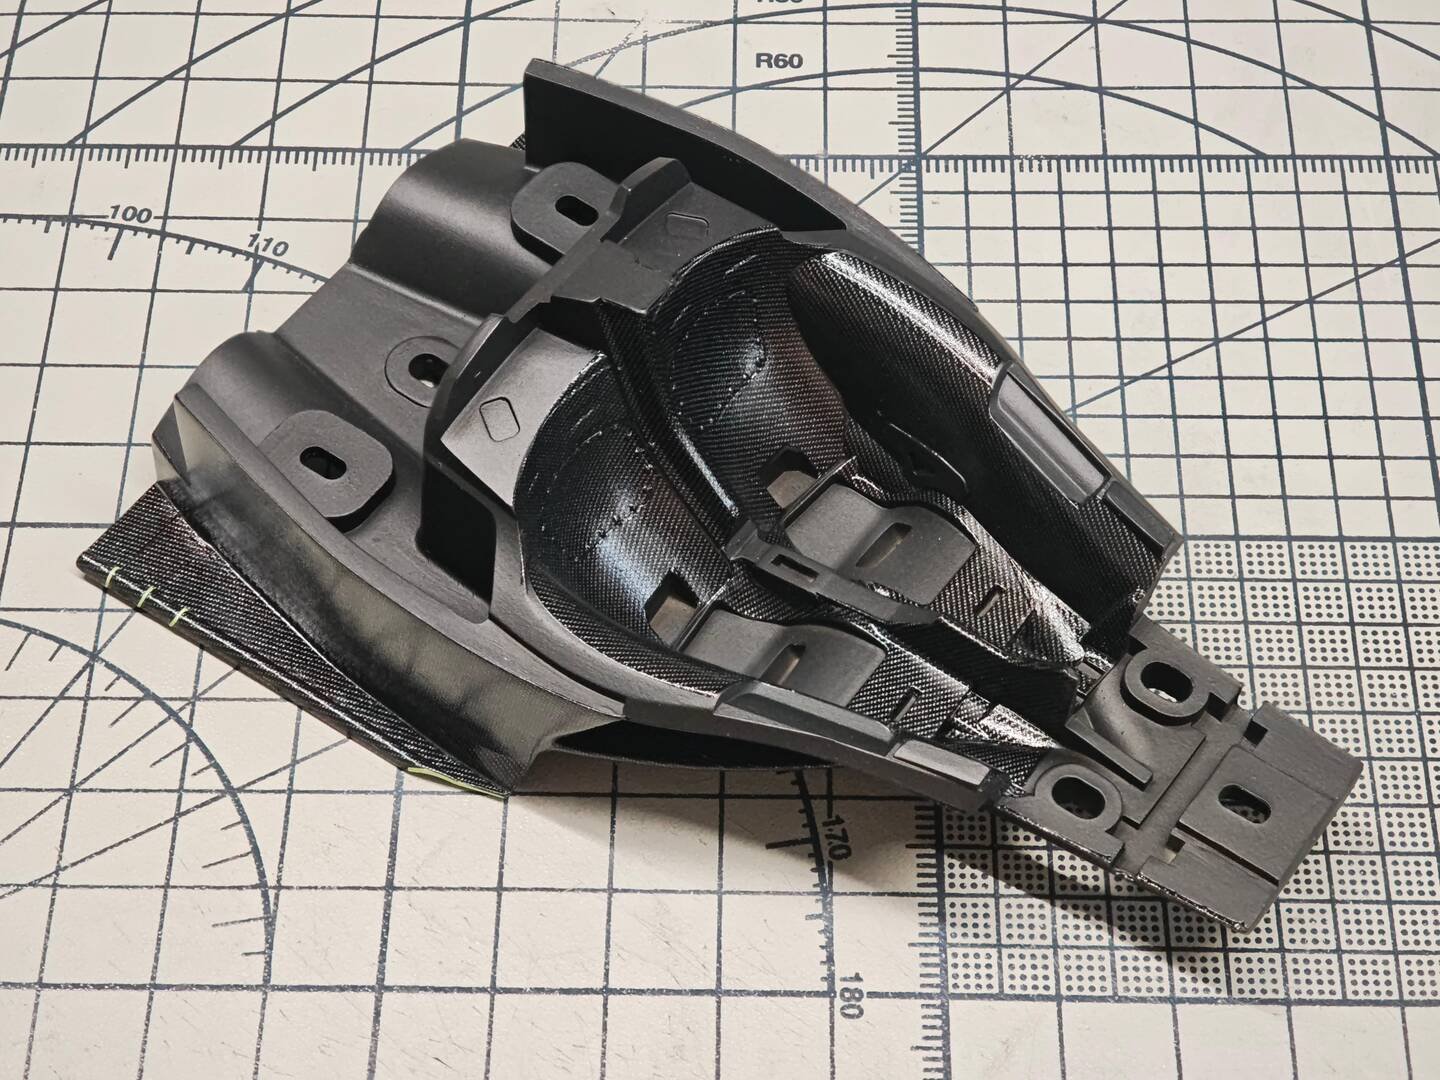
The guide includes a sequencing warning worth quoting directly: "Install R70 and R71 after fully assembling the interior components." These two small carbon trims (R71 with decal D8(D9), R70 with D10(D7)) cover rectangular access slots in the tub and would block the builder's reach if glued too early — a classic trap on dense interior builds.
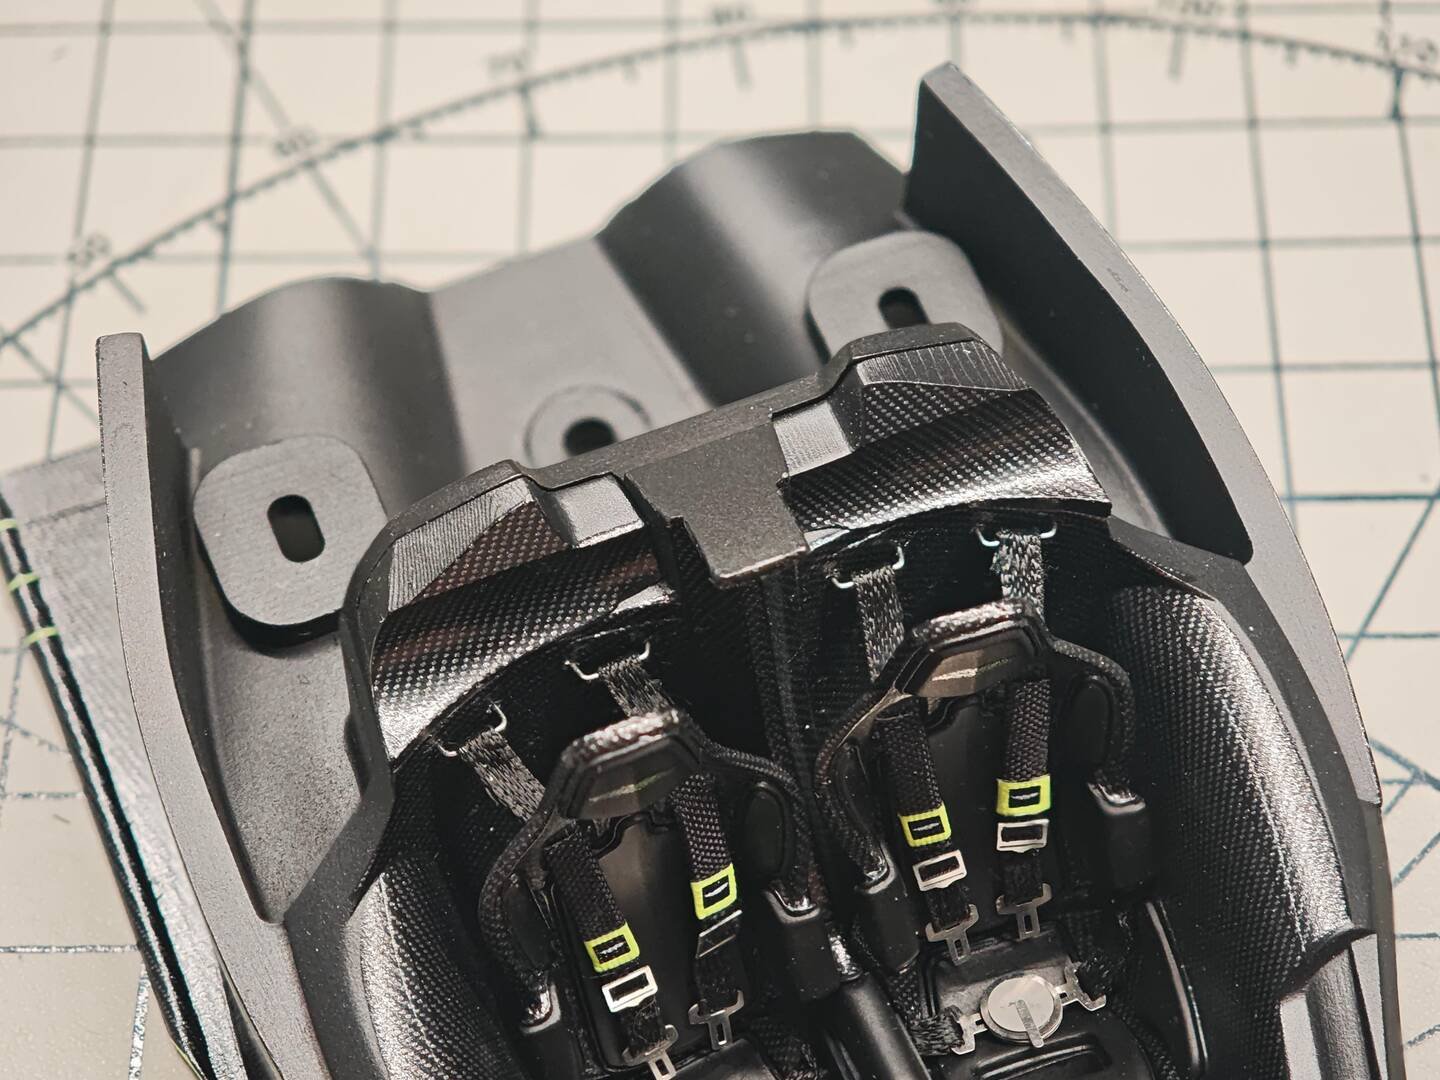
A finished overview of the interior subassembly shows how it all reads together: the two carbon bucket seats with their lime-tagged harnesses, the steering wheel set at the driving position, the carbon sills with lime edge lines, and the long mounting extension that will later locate the whole tub in the chassis — a complete teardrop cockpit ready to drop in.
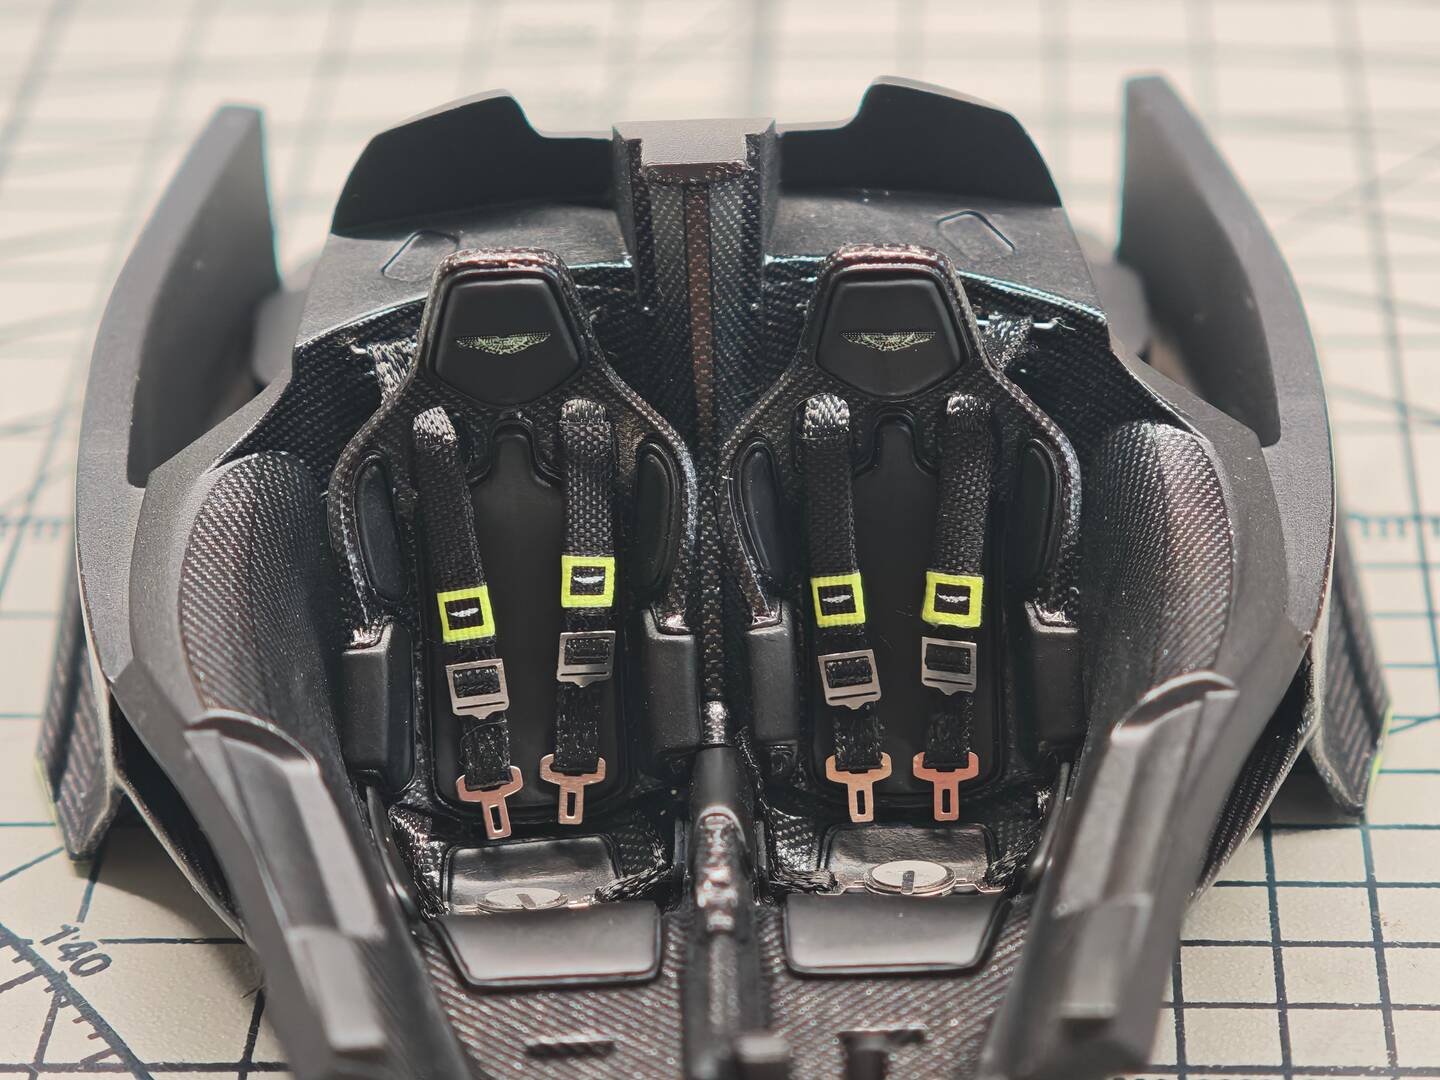
Interior checklist
- Dress and clear-coat the tub carbon before installing any harness hardware.
- Fabric straps plus PE buckles give the most realistic harness — handle with tweezers and thin CA, not thick gel glue.
- All screen faces and steering-wheel decals go on before the dash module enters the tub.
- Leave R70/R71 access covers for last.
- Keep matte-black pad inserts and gloss carbon distinct — that contrast is the whole visual texture of a Valkyrie cabin.
Next: wheels, tyres, brakes and suspension — Chapter 4, where the rolling chassis takes shape.
Next: Part 7 — Wheels, Brakes & Suspension Assembly
Advanced Creators
Aston Martin Valkyrie Build Feature (Break Wong) — Part 7: Wheels, Brakes, Tyres & Carbon Suspension Arms
Alpha Model AM02-0102 · Build by Break Wong
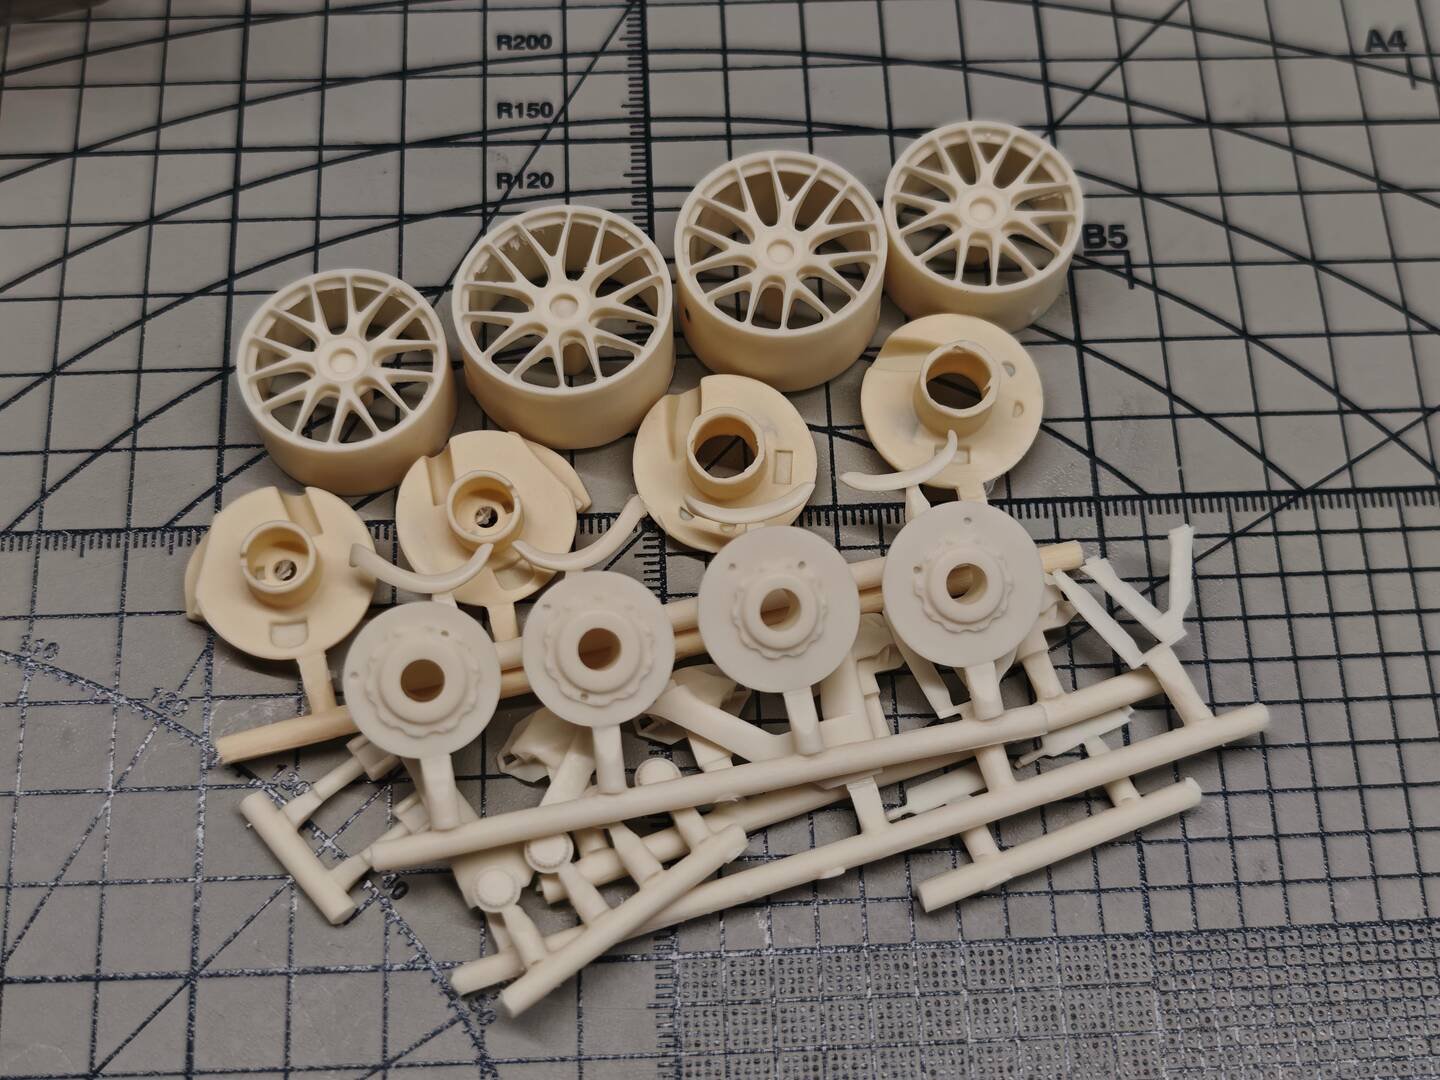
Chapter 4 turns to the running gear. The Valkyrie uses a centre-lock wheel with open multi-spokes — necessary to vent the massive carbon-ceramic discs — and the real car wears satin dark-finish rims with lime-accented lock rings shod with Michelin Pilot Sport Cup 2 R tyres. AM02-0102 reproduces the wheels, carbon-ceramic brake hardware and exposed wishbones as a mixture of resin, photo-etched metal and waterslides. The chapter title page shows the raw castings: four multi-spoke wheel barrels, four backing plates and a sprue of suspension components, all still in cream resin.
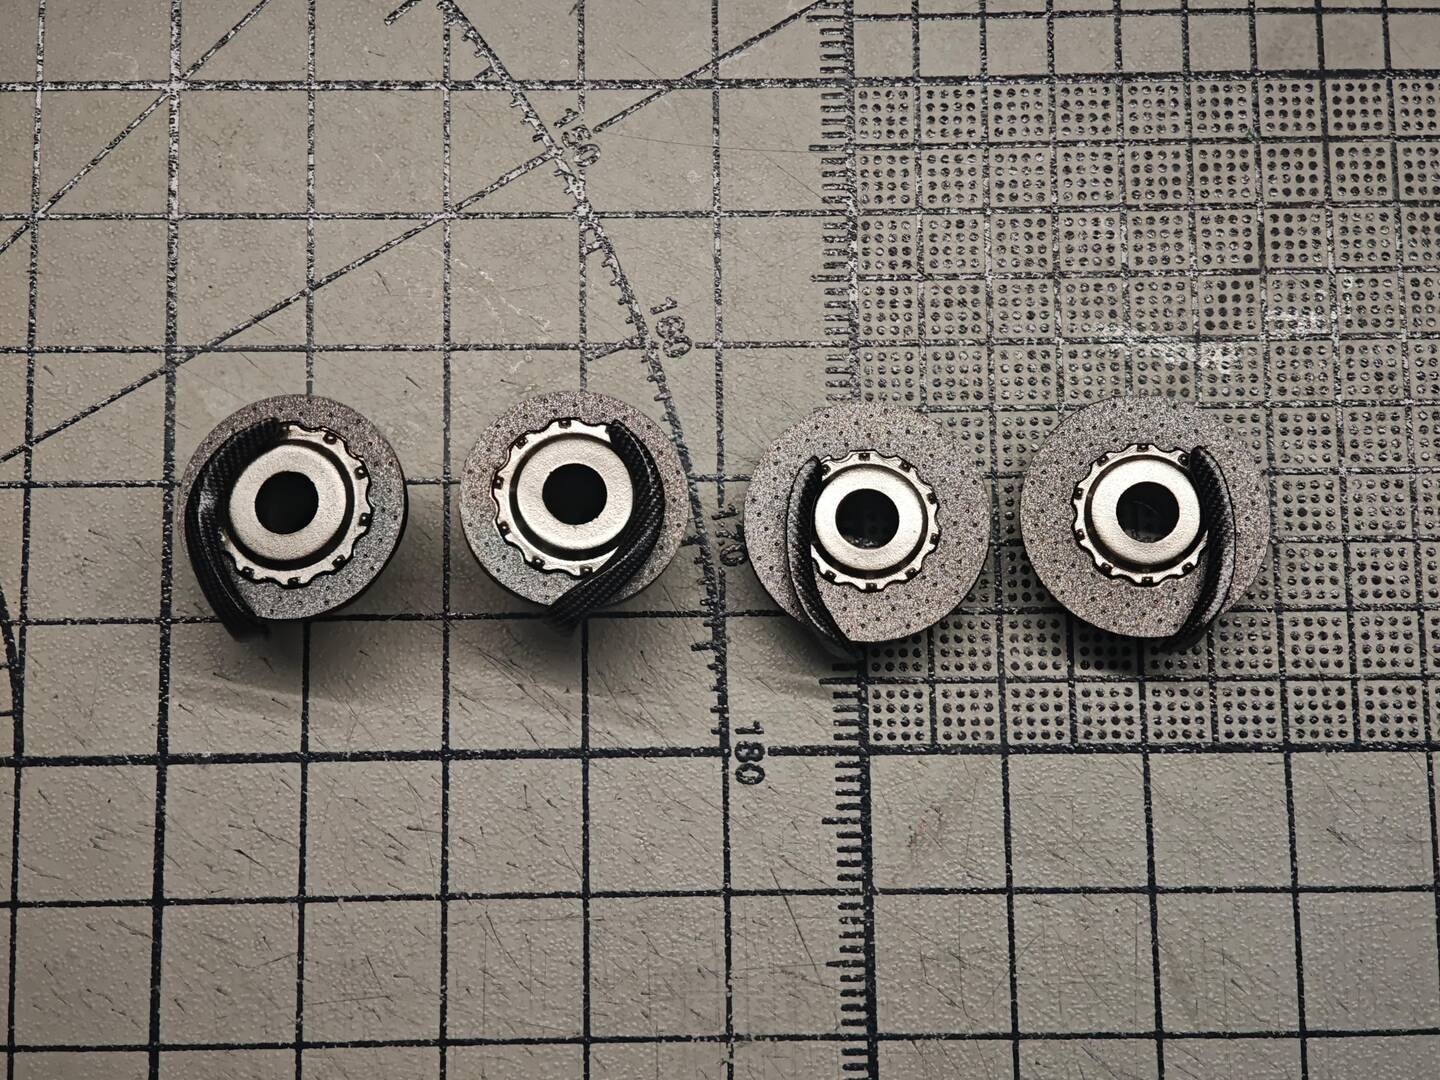
Brake discs: textured castings + PE bells
The four brake disc assemblies R15–R18 begin with cast discs given a rough, granular carbon-ceramic texture. Each centre hub ("bell") receives a serrated photo-etched ring PE1–PE4, which reproduces the machined drive teeth far more crisply than moulded resin. The C-marked carbon shrouds R85–R88 carry decals D180, D173, D179 and D174 around their curved edges to suggest the carbon cooling ducts that wrap the discs on the real car.
Wheel barrels — carbon inner faces
The inner faces of the four wheel barrels R19–R22 are covered with repeated D193 carbon decals — numerous small wedge-shaped pieces per wheel that follow the ribs and reinforcing bosses around the inner circumference (about fourteen cut pieces across the four barrels). These faces sit in deep shadow behind the spokes, which is exactly where the real car shows bare carbon; leaving them plain resin would be instantly visible through the open wheel design. The parts are decaled while still attached to their resin runner for easy handling.
Assembled discs with duct detail
A second view shows the four R35 brake carriers after detailing: textured discs, serrated PE centre bells and carbon-duct decals D206 on one pair and D207 on the other, now ready to be trapped behind the wheel faces.
】Wheels, tyres & the centre-lock detail
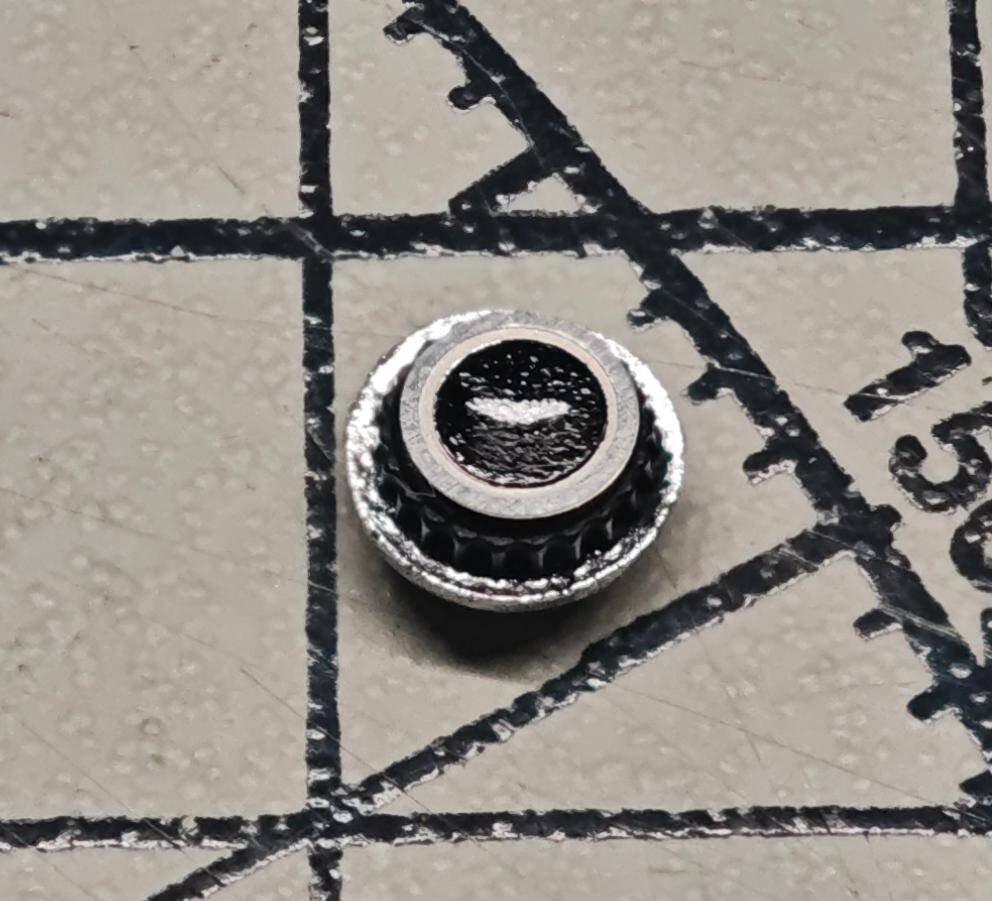
The finished wheels are mounted in their satin-black rubber tyres — the sidewalls carry moulded "MICHELIN PILOT SPORT CUP 2 R" lettering and size markings. The spokes are painted dark satin, and every hub carries the fluorescent lime centre-lock ring decal CD250. The red-bordered inset dissects the centre-lock stack: clear cover R61(F), the tiny "K" marked part, the photo-etched serrated ring PE32 and the printed logo-face decal D236, with R2(F) the clear hub face on the wheel and R1 the wheel/tyre itself.
The view from the other side confirms the work paid off: through each open-spoked wheel you can clearly see the textured carbon-ceramic disc, the serrated PE bell and the dark inner carbon barrel — a complete brake package visible instead of a blank plastic face.
Carbon suspension wishbones
The final image of the chapter covers the suspension arms: four wishbone assemblies R43, R44, R45 and R46, still on their runners, with every face wrapped in matching carbon decals — D190(D189), D198(D197), D200(D199), D196(D195) on the smaller front pair and D183(D181) and D186(D188) on the larger rear pair. The inset shows the two small link parts R79 and R80 with D201(D202) and D204(D203). On the Valkyrie the pushrod suspension is fully exposed through the wheel openings, so these arms are as prominent visually as the wheels themselves; Break decals them while still on the casting runners and removes them only at final assembly.
Running-gear takeaways
- Carbon-ceramic texture comes from the casting — preserve it with thin, matte paint rather than burying it.
- PE centre bells are the single biggest realism upgrade on the wheel assembly; seat them perfectly concentric.
- Decal the inner barrels and the suspension arms while the parts are still on their runners.
- The lime lock-ring decal ties the wheels to the lime accents elsewhere on the car — placement must be perfectly centred.
With the wheels banked, the next instalment covers chassis, drivetrain, lights and the staged final assembly.
Next: Part 8 — Final Assembly — Chassis, Drivetrain, Lights & Body Join
Advanced Creators
Aston Martin Valkyrie Build Feature (Break Wong) — Part 8: Final Assembly — Splitter, Lights, Winglets, Mirrors & Rear Wing
Alpha Model AM02-0102 · Build by Break Wong
After every subassembly is painted and decalled on its own, Chapter 5 is where the Valkyrie finally becomes a car. The chapter opener shows the satin-teal body with its black carbon canopy, cockpit and rear deck already set in place, sitting on the cutting mat among tweezers, loose black aero parts and resin runners still waiting to go on. The rule of final assembly is the same one the earlier chapters built toward: all the carbon and lime-accent work happens while parts are separate and easy to hold; this stage is mostly sequencing and alignment.
Front splitter — the biggest single carbon part
The curved one-piece front splitter R8 is the first major exterior fitting. Its complex underside carries a long sequence of carbon pieces — D108/D109 and D111/D110 on the two upright strakes, D121/D120 on the end fences, plus D112, D122, D123, D124, D125 and D118/D119 wrapping every rib and fence. Applied before installation, these pieces finish surfaces that would be impossible to reach once the splitter is against the body.
The finished splitter viewed from above shows D113 and D114 down the central floor, with D151 and D157 covering the two raised end fences — a continuous, correctly oriented weave across the whole leading edge.
Stacked nose winglet pairs
The Valkyrie's front corner aero is built up in stacked pairs. The inner canard pair R27/R28 receives D135/D134 on the upper faces and D117/D115 on the lower faces…
…and the matching outer pair carries D137/D136 on top and D133/D132 underneath. Because every face of these winglets is visible at ride height, one-sided detailing simply does not work.
The assembled splitter then gains its fluorescent accent lines: ten lime pinstripes CD81–CD90 trace the outer perimeter edges, the upright strakes and the winglet lips — the same accent colour family used on the harness tags and wheel lock rings.
Nose mesh & headlights
A small black photo-etched grille panel PE21 fits the slot in the nose-tip carbon floor, adding perforated mesh where the real car's front duct draws air.
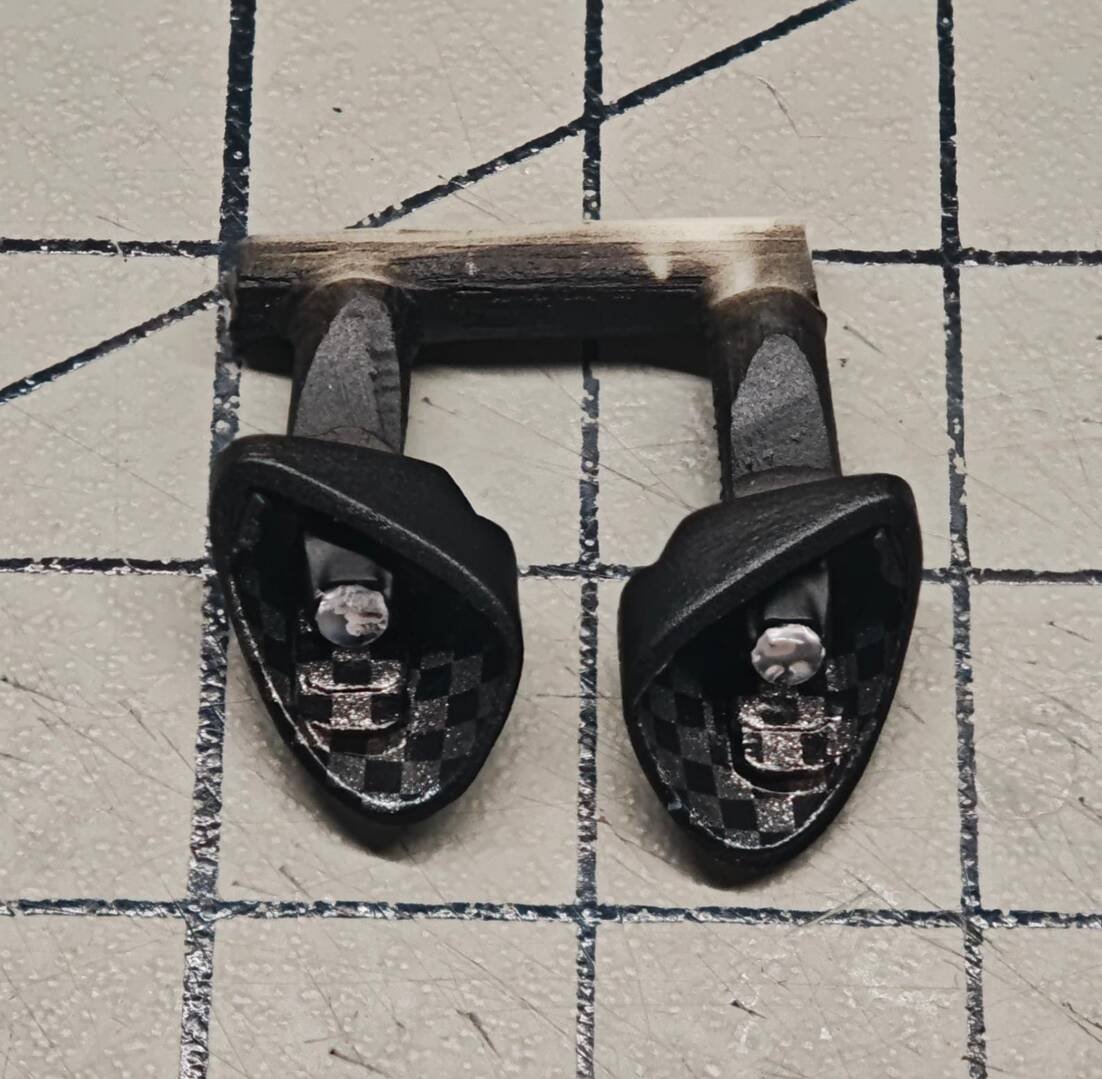
The headlight units are a showcase of small-part assembly: clear lenses R92 over black buckets R91, with projector housings R93/R94 and four tiny silver decals D11/D12 and D15/D16 for the reflector internals. The inset shows the two lamp assemblies before installation; the main shot shows the finished lamps sitting flush in the teal nose above the carbon splitter with its lime edge line.
Side aero, mirrors & roof intakes
The triangular side-fin / camera-mirror fairings R29/R30 are fully wrapped — D130/D131 on the large outer faces and D139, D141, D142, D143, D144, D145, D146 and D148 across the inner fins, feet and mounting faces (the pale masking tape seen in the shot protects areas during handling).
Two small vertical fin pairs carry the lime slat accents D106/D107 on their inner faces — three tiny fluorescent blades on each finlet, mounted at the front of the side pods.
The larger side-pod winglet pair follows the same all-faces treatment, with D126–D129 on the long lower blades and D138/D149 on the raised upper fins.
The roof-mounted scoop/fin pair R5/R6, still attached to a shared runner, gets D100/D98 and D101/D99 on its two glossy black faces.
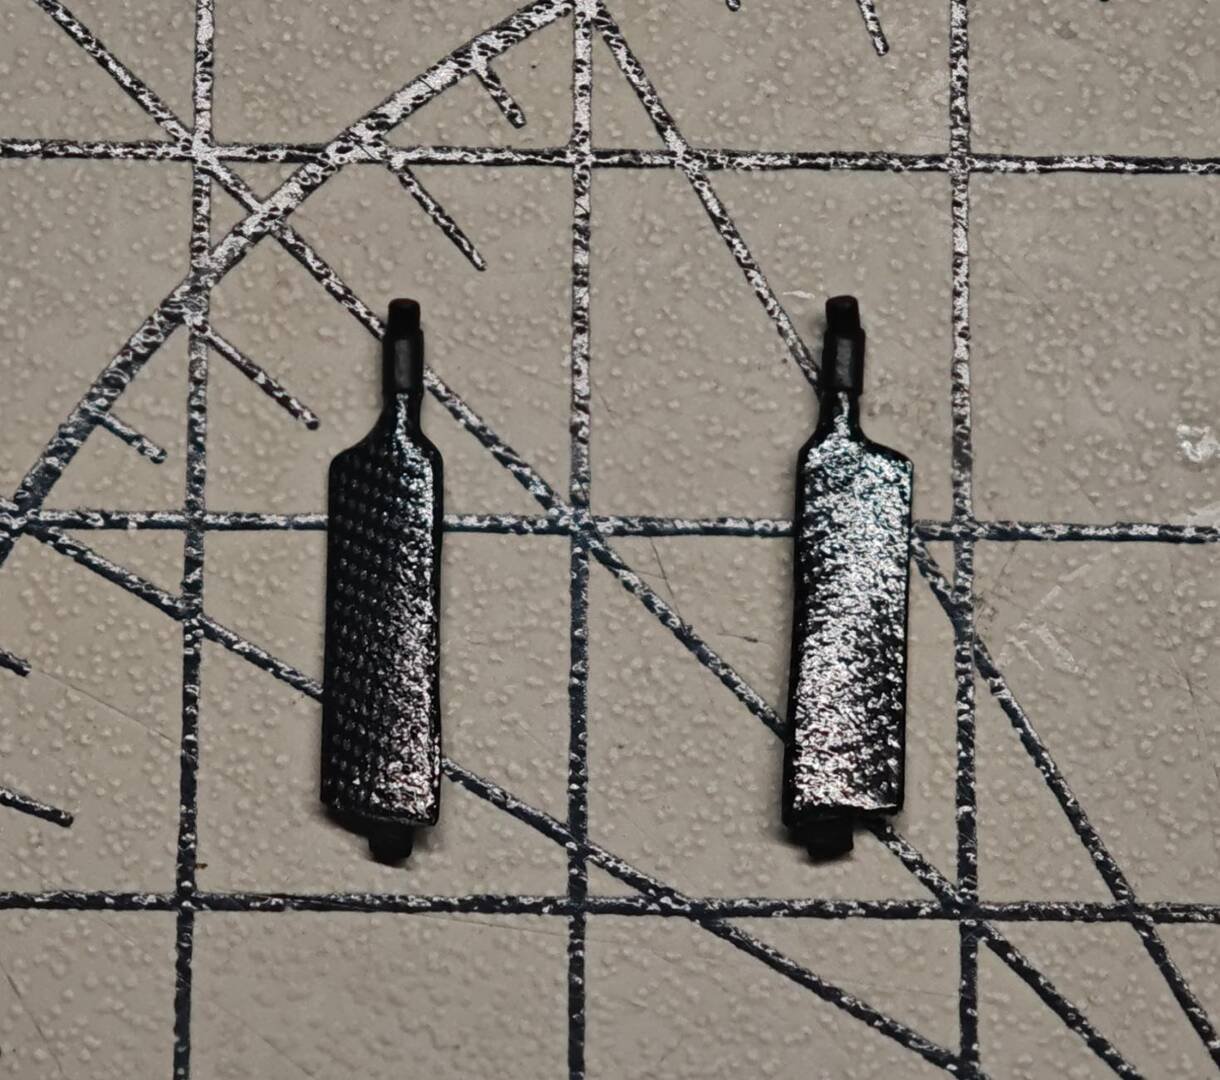
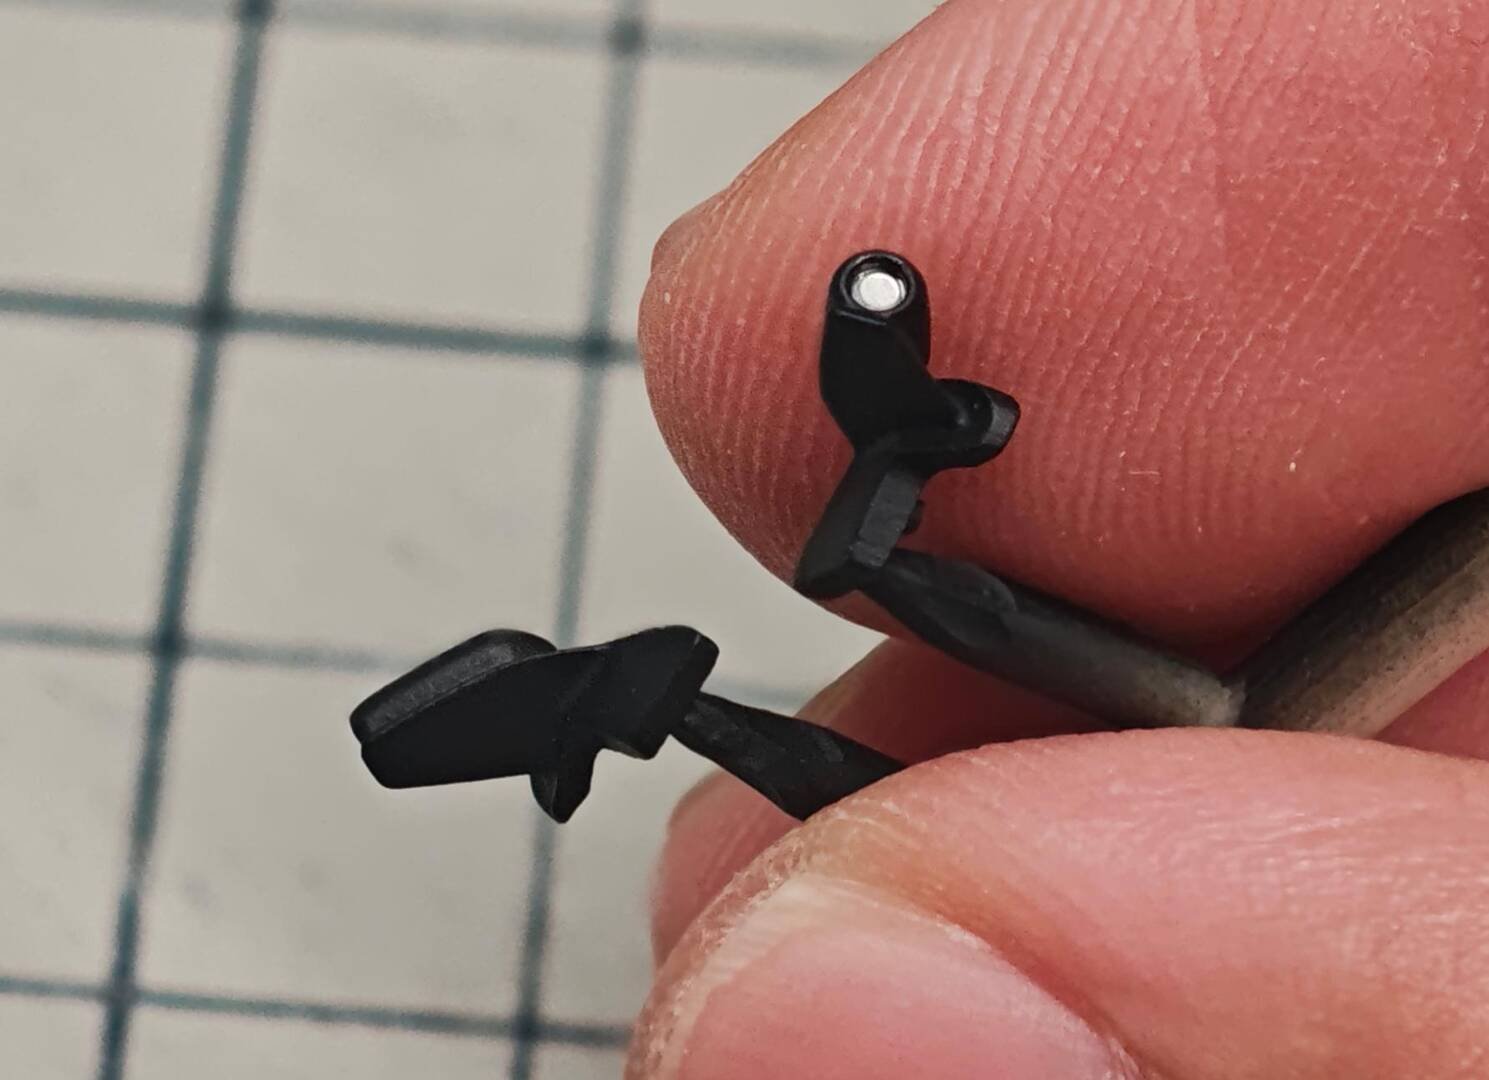
The tiny side-mirror stalks and camera lenses — R53/R54 with a PE36 lens face — are deliberately fitted last, shown against the finished teal door, carbon side skirt and the front wheel with its lime centre-lock ring: a small knock at this stage would mean repainting.
Rear wing & the slender blade
The rear wing blade R7 is dressed off-car and then mounted at the tail: D241 and D242 cover the visible face, PE33 marks the mounting point, and the inset labelled "Back" shows D243 and D244 covering the blade's rear/upper surfaces so the element reads as carbon from every angle in its raised position.
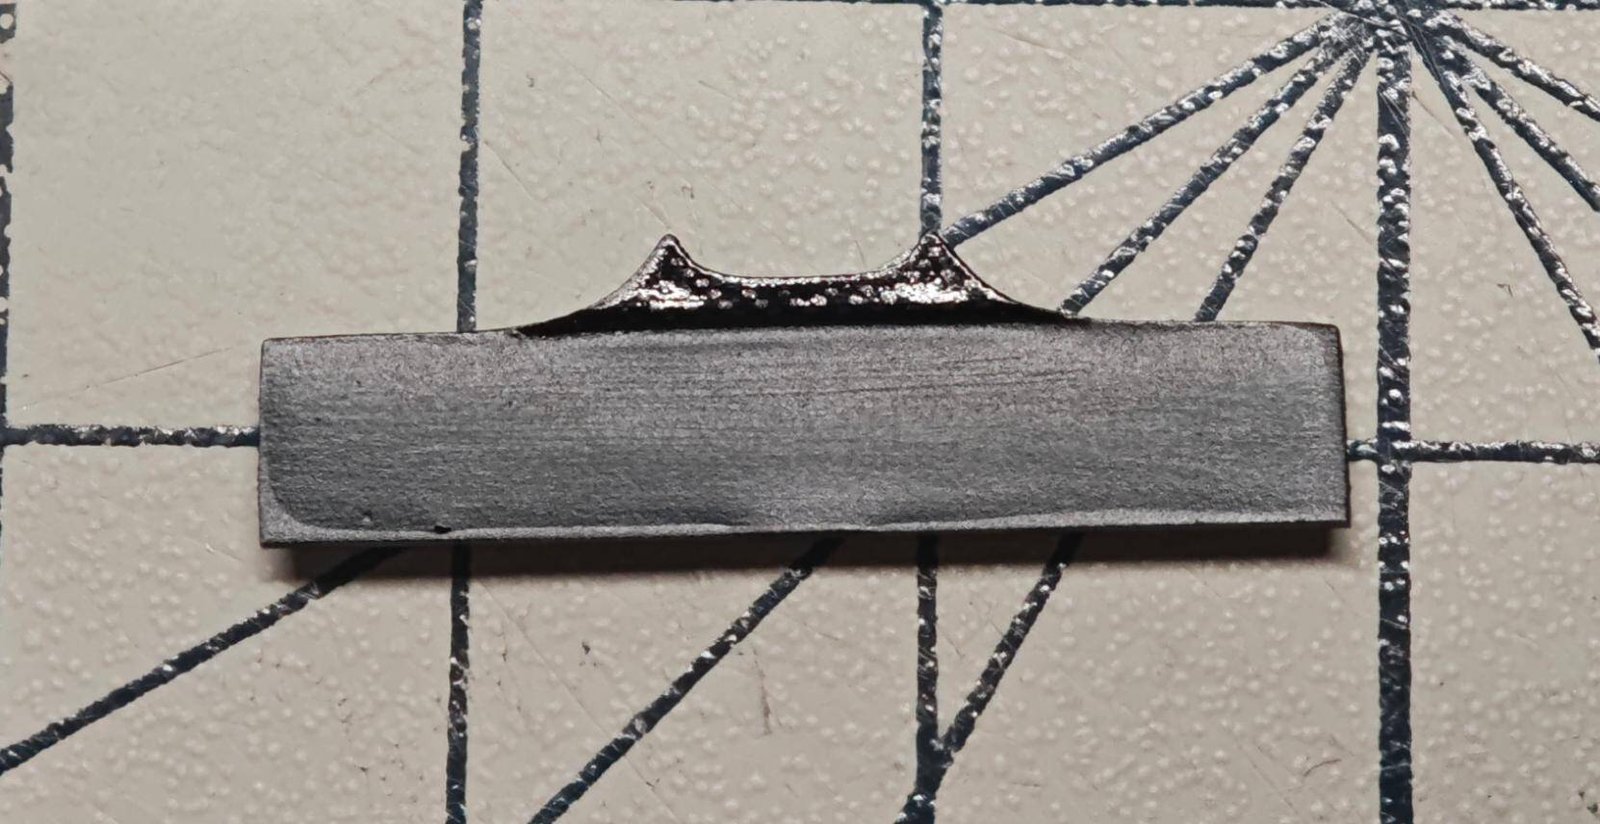
Finally, an extremely slender black R7 linkage strip — shown held in tweezers against the cutting mat — receives its fine D116 carbon stripe along the full length before being fitted to the rear deck mechanism.
Assembly lessons
- Keep every aero part on its runner while decaling; remove only at final fitting, exactly as the R5/R6 shot shows.
- Decal all faces of blades and winglets before installation — undersides and backs are fully visible at this car's low ride height.
- PE mesh and tiny lamp internals go in with minimal CA and a wet cocktail stick.
- Fit mirrors and delicate linkages last to avoid handling damage.
- Keep the lime accents restrained and continuous — they only work as a family if every line matches in width and tone.
Every component is now on the car. In the final instalment, Break's Valkyrie goes onto the turntable for the finished-model shoot.
Next: Part 9 — The Finished Model: Final Gallery
Advanced Creators
Aston Martin Valkyrie Build Feature (Break Wong) — Part 9: The Finished Model — Final Gallery
Alpha Model AM02-0102 · Build by Break Wong
Chapter 6 is the payoff. Off the cutting mat and onto a neutral studio sweep, Break's Valkyrie reads less like a scale model and more like a shrink-wrapped slice of the Geneva show stand. The satin Racing Green body, gloss-black visible carbon and that single lime accent family — harness tags, wheel lock rings, splitter and diffuser edges — finally work together as one design statement, just as they do on Aston Martin's own specification cars. This final instalment is a guided walk around the finished model.
Head-on: the F1 face
Straight ahead, the Valkyrie looks almost nothing like a conventional road car. The teal fenders hang over an entirely open centre section, the headlights sit low and wide at the outer edges, and the full-width carbon splitter carries twin lime strips under each tunnel. The roof-mounted intake ring provides the only spot of lime high up, visually tying nose and cockpit together.
Side profile: ground-effect sculpture
The pure side view is where the Valkyrie's formula-one-derived aero is most obvious. The teal upper body floats visually above a massive black carbon floor, the cockpit canopy is pushed forward between the front wheels, and the sidepod cutouts expose bare ground between wheels. Note the pin-thin lime lines running the full lower edge and over the rear fender — restraint is what keeps them elegant rather than gaudy.
Rear three-quarter: diffuser drama
From behind, the giant rear diffuser dominates: two huge Venturi tunnels framed by an unbroken lime U-shape, with the twin-exit exhaust (Valkyrie's exhaust exits from the top of the diffuser between the tail-lights) and the small EU-style plate "014S" above. The carbon rear wing blade sits almost invisible in black-on-black until the light catches its weave.
Wheel & brake detail
A low close-up of the front corner shows exactly why the running-gear chapter mattered: through the satin-black Y-spokes you can read the cast texture of the carbon-ceramic disc, the serrated PE centre bell, and the lime centre-lock ring with its small logo. The moulded Michelin sidewall lettering catches the light, and the carbon front winglet with its lime lip sits millimetres above the ground.
The opposite-side close-up shows the stacked lime DRL/indicator elements set into the front fender flank and the deep weave of the carbon floor blade — the camera sees these details at every normal viewing distance, so omitting them in the build is impossible to hide.
Square rear: symmetry & negative space
Directly from behind, the design is pure symmetry: teal fenders, red tail-light bars at each corner, the carbon wing spanning the width, twin exhausts in the centre, and the lime diffuser frame providing the outline. Most of the rear face is literally empty — open air tunnels — which is the whole point of the car's downforce philosophy and a test of how cleanly the model's floor edges were finished.
High front three-quarter
From the elevated front angle the canopy, front hatch and nose come together as one teal sculpture, with the carbon cockpit roof and engine cover breaking the surface. The teardrop plan shape — narrow at the nose, swelling around the wheels, tapering again at the tail — reads clearly, and the lime rings around the front hatch openings echo the splitter lines below.
Top-down nose & canopy
Looking straight down onto the front reveals the Aston Martin wings badge set into the nose, the small carbon vent panel behind it, the single wiper parked on the clear canopy, and the continuity of the lime pinstripe as it loops each front-hatch opening. The gloss carbon roof panel contrasts with the satin teal in both texture and sheen — a two-material look achieved entirely by paint and decal choices rather than different plastics.
Front-on elevated: the hypercar stare
The final elevated head-on frame compresses the whole design: teal fenders framing the open mouth, the twin hatch cutouts with lime outlines, the headlights pushed wide, and the black splitter with its neon edge. This is the view that best captures Adrian Newey's brief — maximum functional aero, minimum conventional decoration.
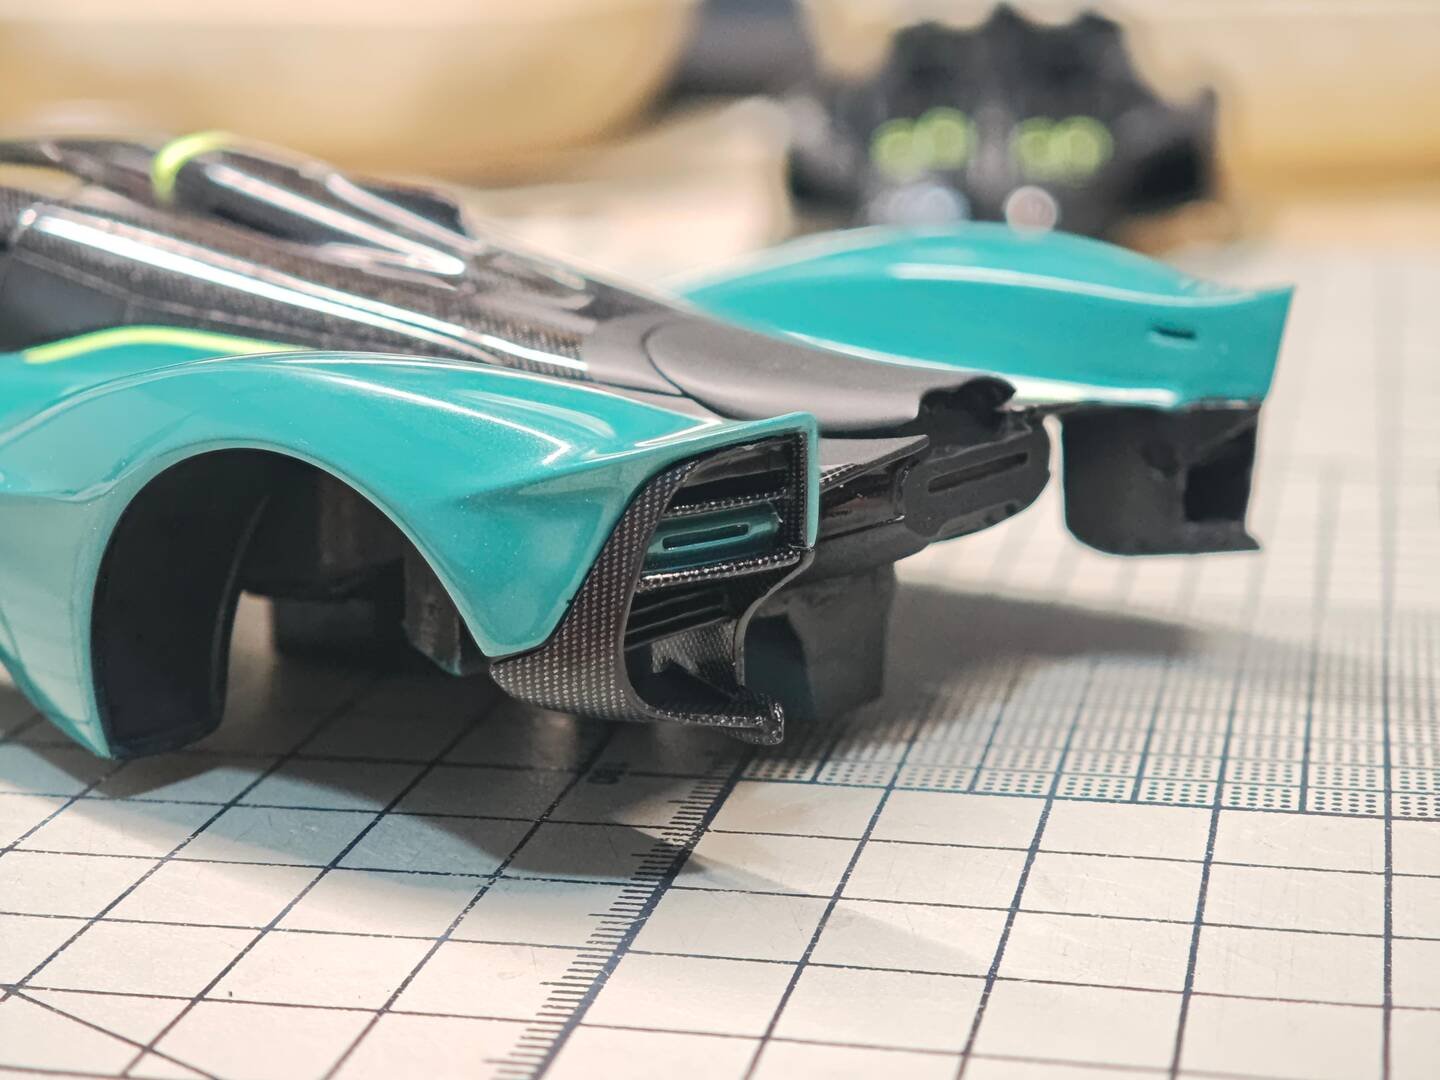
One last close-up over the nose highlights the clear-lens headlights with their internal projector decals, the raised carbon vent, and the thin panel gaps moulded into the teal surface — a reminder that the polished final look rests on dozens of small, patient steps: seam removal, masked paint, hundreds of carbon decals, 2K clear and careful assembly.
Build summary
| Item | Detail |
|---|---|
| Kit | Alpha Model AM02-0102 · Aston Martin Valkyrie · 1/24 high-detail resin kit |
| Builder | Break Wong |
| Body finish | Satin Racing Green (custom teal-green) over black primer; 2K clear coat (Glasurit-style system) with cut-and-polish |
| Carbon fibre | Several hundred segmented waterslide decals over Mr. Color C-33 flat black, gloss-cleared per section — body, tub, aero blades, wheels, suspension |
| Accent colour | Fluorescent lime pinstripes and lock rings (CD-series decals), matching harness tags |
| Brakes | Textured carbon-ceramic discs, photo-etched centre bells and caliper/mesh parts |
| Interior | Full carbon tub, twin fixed buckets, fabric six-point harnesses with PE buckles, three-screen dash |
Thanks for following the build from raw resin castings to these finished frames. If you take on the AM02-0102 yourself, Break's core advice across the series stays simple: prep every seam before paint, decal the carbon while parts are still separate and accessible, clear in patient layers, and never glue an access-covering part before the work behind it is finished. See you in the next Master Builders feature.
Series complete — thank you for viewing the Aston Martin Valkyrie build by Break Wong. Share your own Valkyrie builds in the forum!